
Onboard intouch users
The Self-Serve User Onboarding feature for the Intouch platform helps to streamline the process of adding and managing Intouch users. Using this you can efficiently onboard new users, assign permissions, and manage user access without relying on manual intervention from administrators.
This feature enables you to onboard users either individually or in bulk to Intouch with the following attributes:
- User role
- Entities to which the user has access
- User type
- Security/permission groups across modules to which the user has access
You can add the users using their e-mail addresses or using the bulk upload option. The difference between with email address and the bulk upload flow is, with the bulk upload, you can have different permissions mapped to different users.
Types of users
| Type of user | Access |
|---|---|
| Organisation owner - Brand POC/Administrator | A brand POC is a type of user who can add other users, and approve or reject the addition of users. |
| Standard user - Brand user | A brand user is a type of user in the system who cannot add new users or approve or reject existing users but they can configure or publish the campaigns according to their user permission. |
Permission and permission set
When you add a user you can provide them permission/access to certain entities such as organisations, org units, and stores and further can define further permissions for those entities. An organisation owner will have access/permissions to the entire resources and no permissions or permission sets are required.
Permission
Permissions represent authorization or what data and functionality a user has access to. A user can be assigned permission to access the entire organisation, or certain units or stores.
| Scope | Description |
|---|---|
| Organization | A user assigned to the org scope can be allowed to view/act on org-level data. |
| Concept or Org unit | If assigned a concept or org unit scope (if org unit is enabled), then the user can view/act on data of that org unit or concept. The org units the user can access need to be selected during the onboarding itself. |
| Store | A user assigned a store scope can view/act on store-level data only. The stores the user can access need to be selected during the onboarding itself. |
| Zones | A user assigned a store scope can view/act on zone-level data only. The zones the user can access need to be selected during the onboarding itself. |
Permission set
A permissions set (permissions bundle) is a collection of permissions that can be assigned to a user. For example, for a CSR using Member Care, various Member Care-related permissions are combined into a set or a group which can be assigned to a user. One or more permission sets can be assigned to a user. Individual permissions cannot be directly assigned to a user. The permissions sets are also called access groups and are defined in Organisation settings > Security & Audit > Access.
Accessing the portal
The portal is not available on Intouch and the URL to access the portal is shared internally with the access team. Contact the access team for the accessible link.
Adding users using their e-mail addresses
Perform the following:
Admin access required
You need to have admin (access to entire organization) access to add the users.
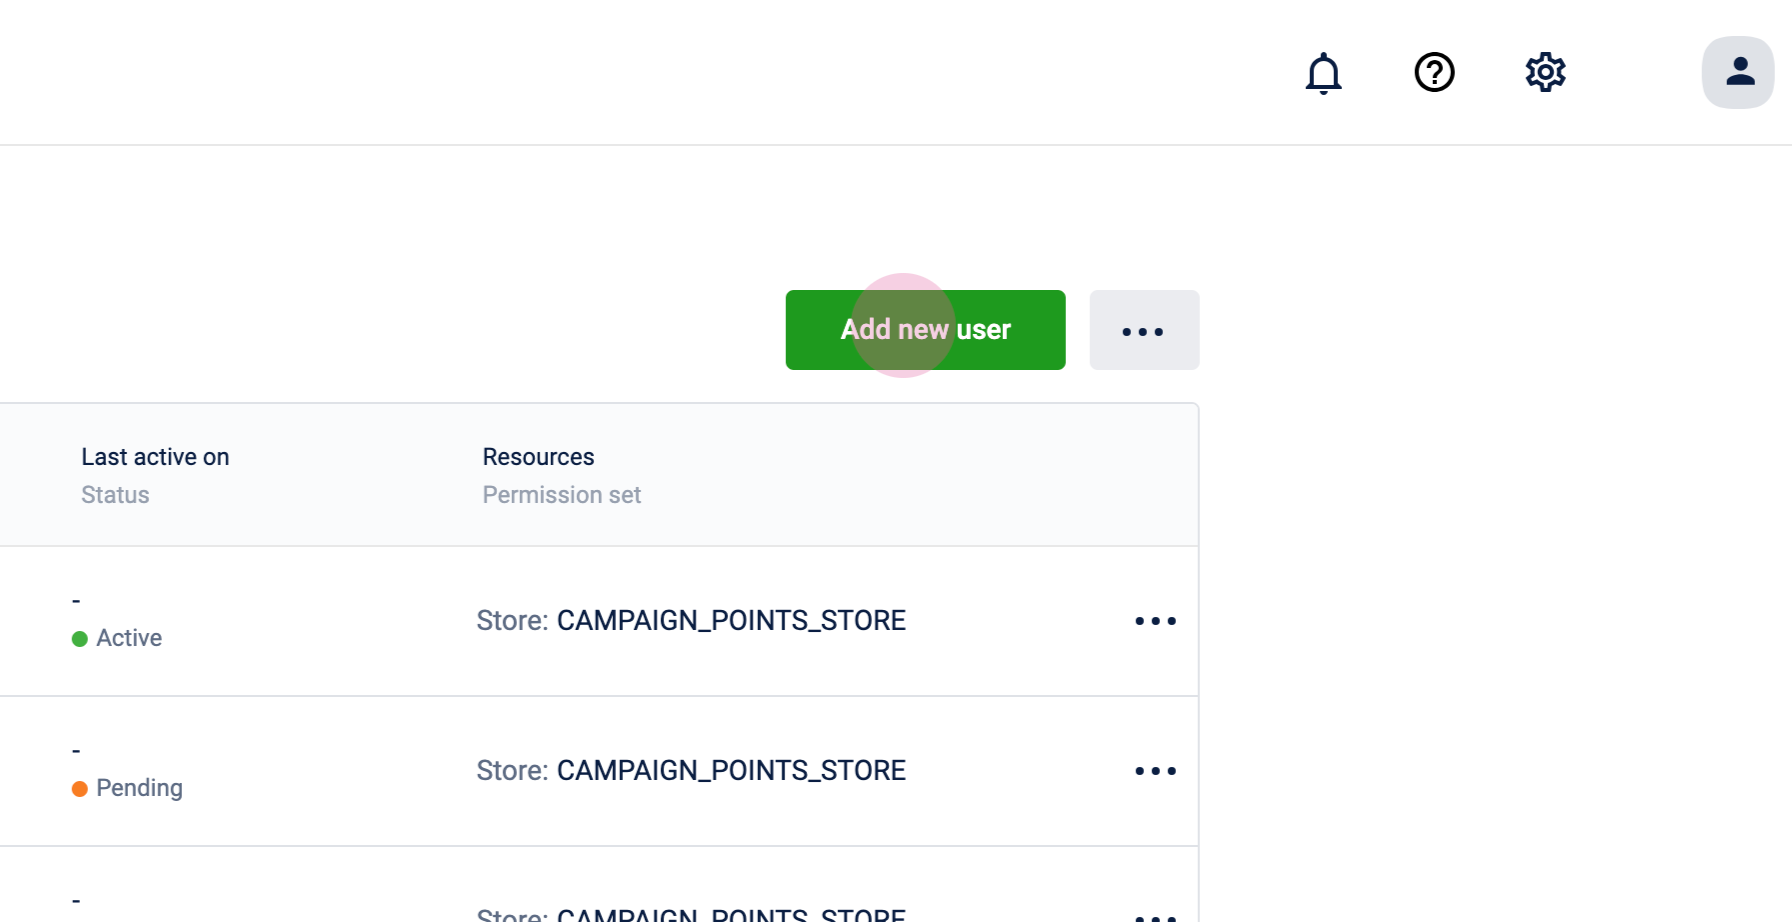
- Click Add new user.
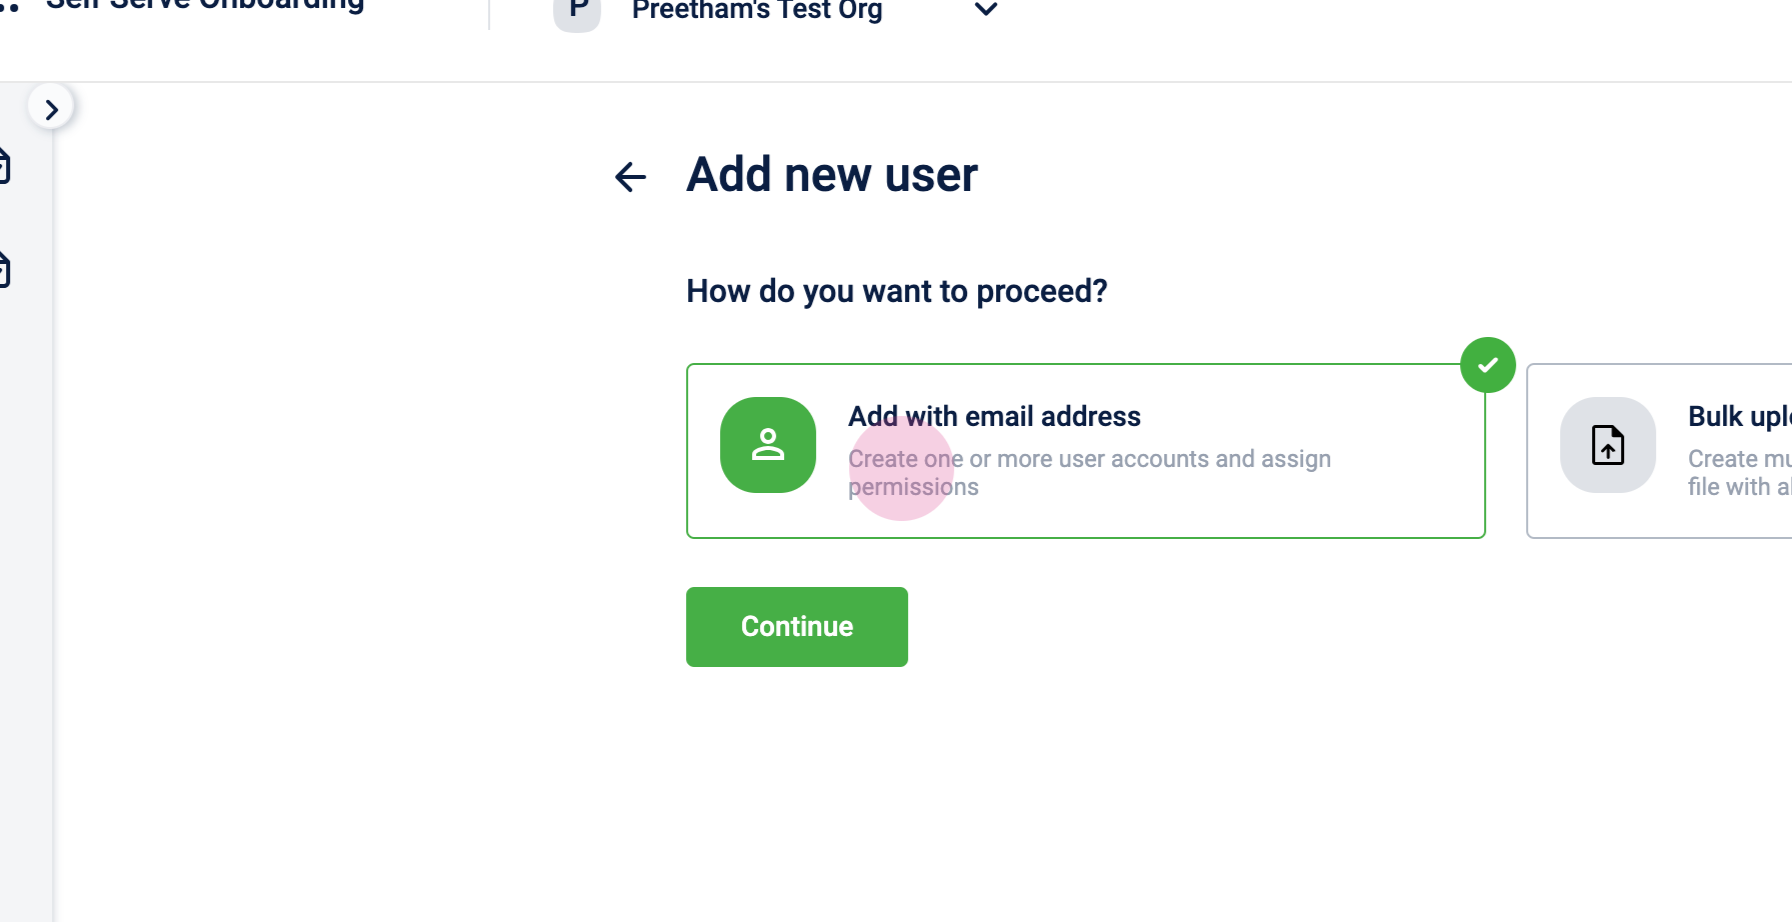
- Select Add with email addresses and click Continue. An error message will be displayed if an existing user is added.
- Enter the email addresses one by one in this text box and click Continue.
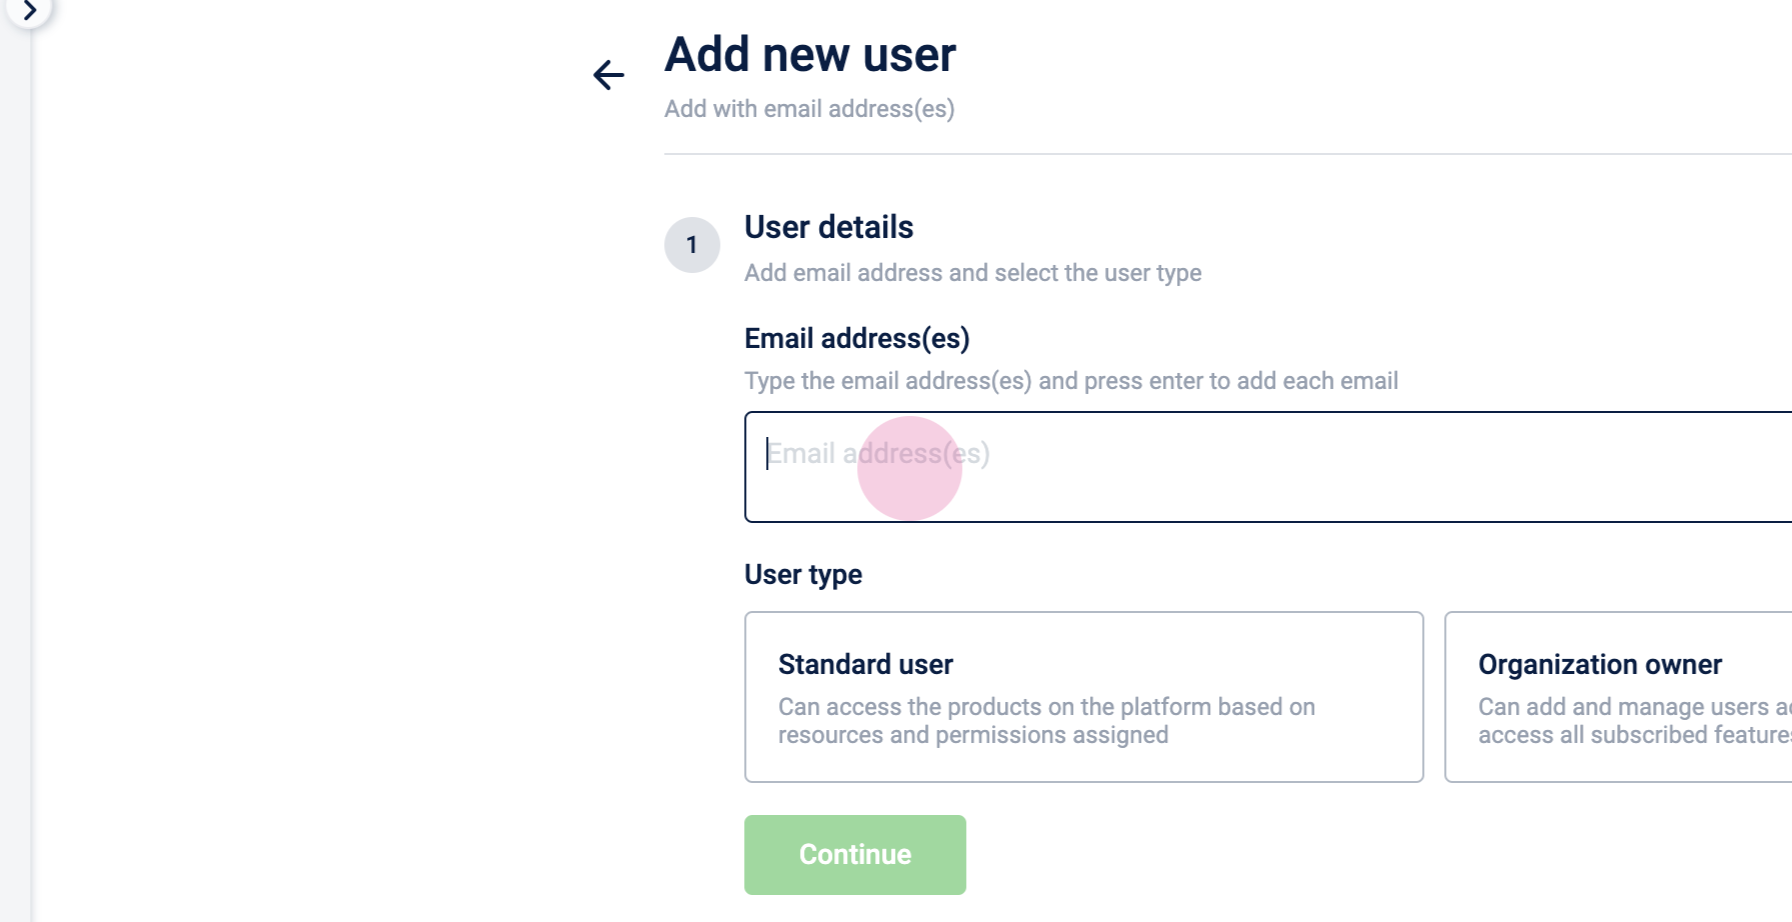
- Select the user type and click Continue.
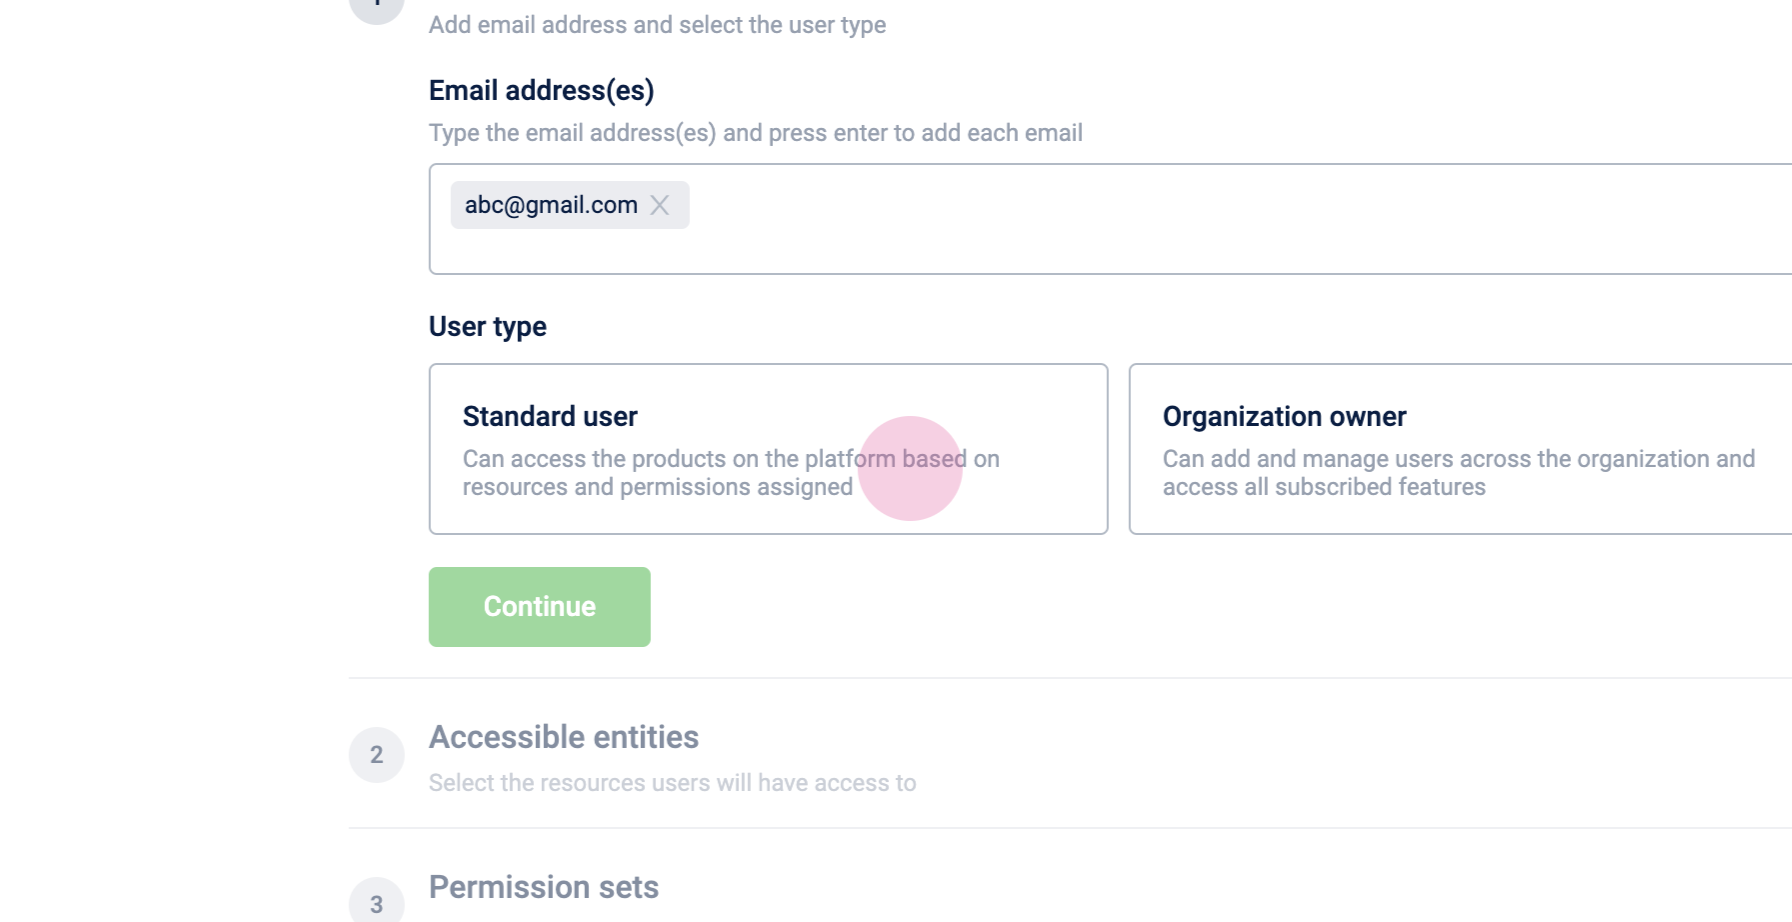
- (Applicable for Standard users) Select the entities to which you want to give access for those user(s) and click Continue. You can give access to the entire Organisation or certain Org units or Stores.
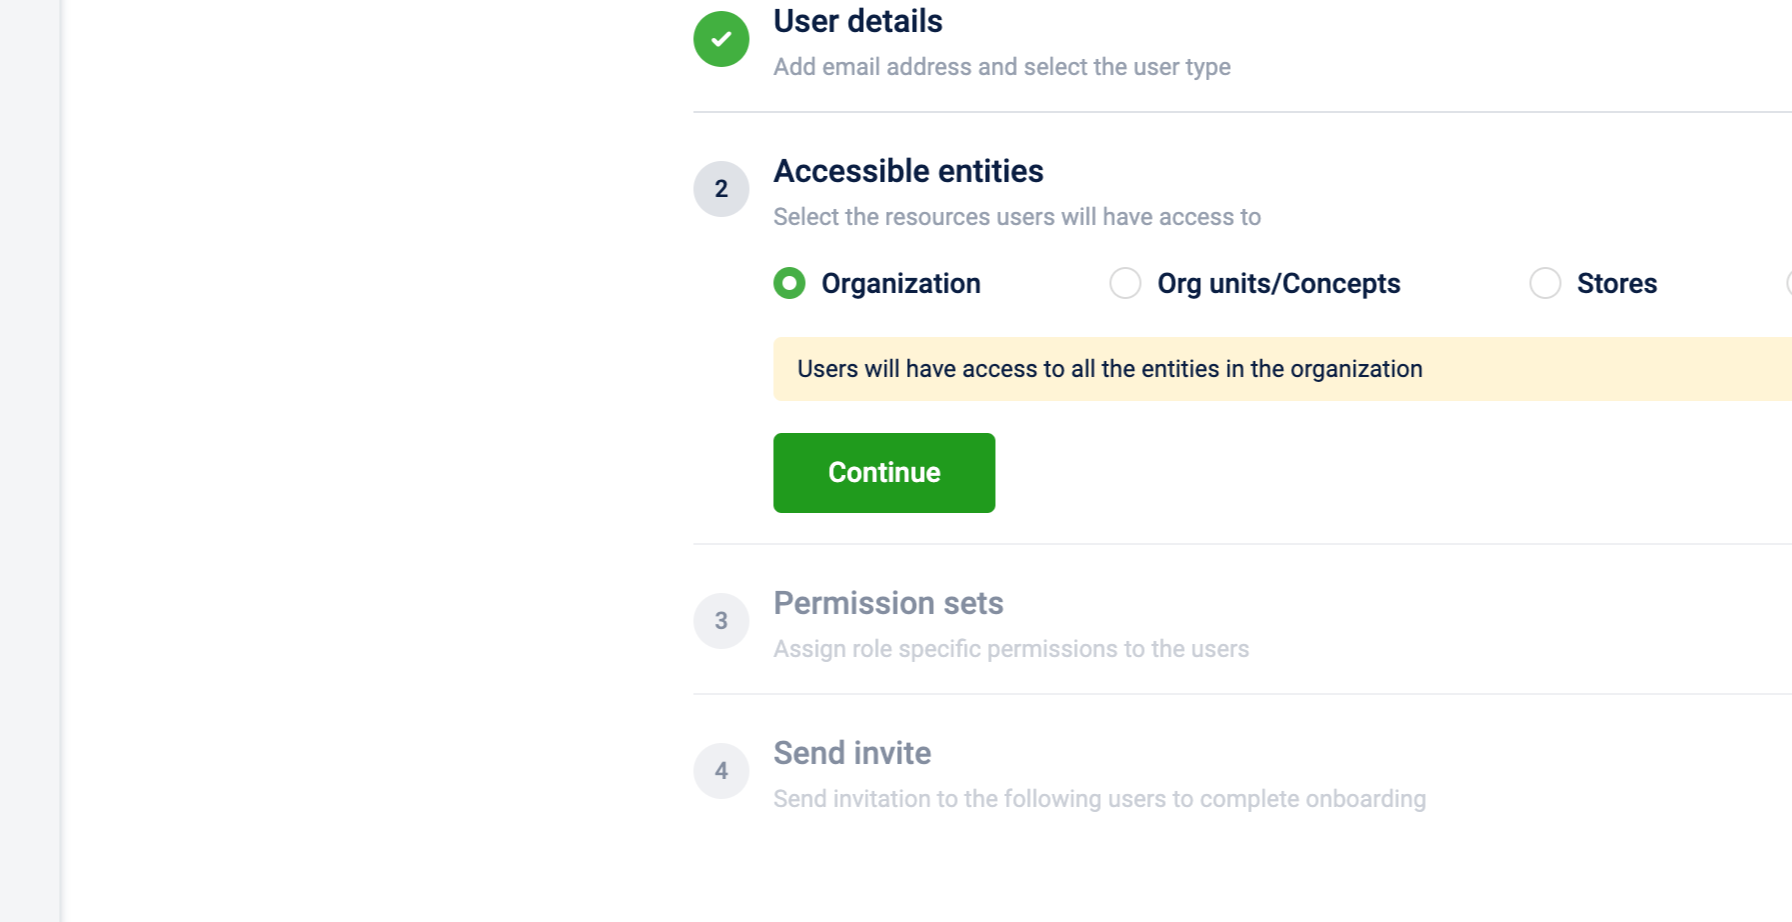
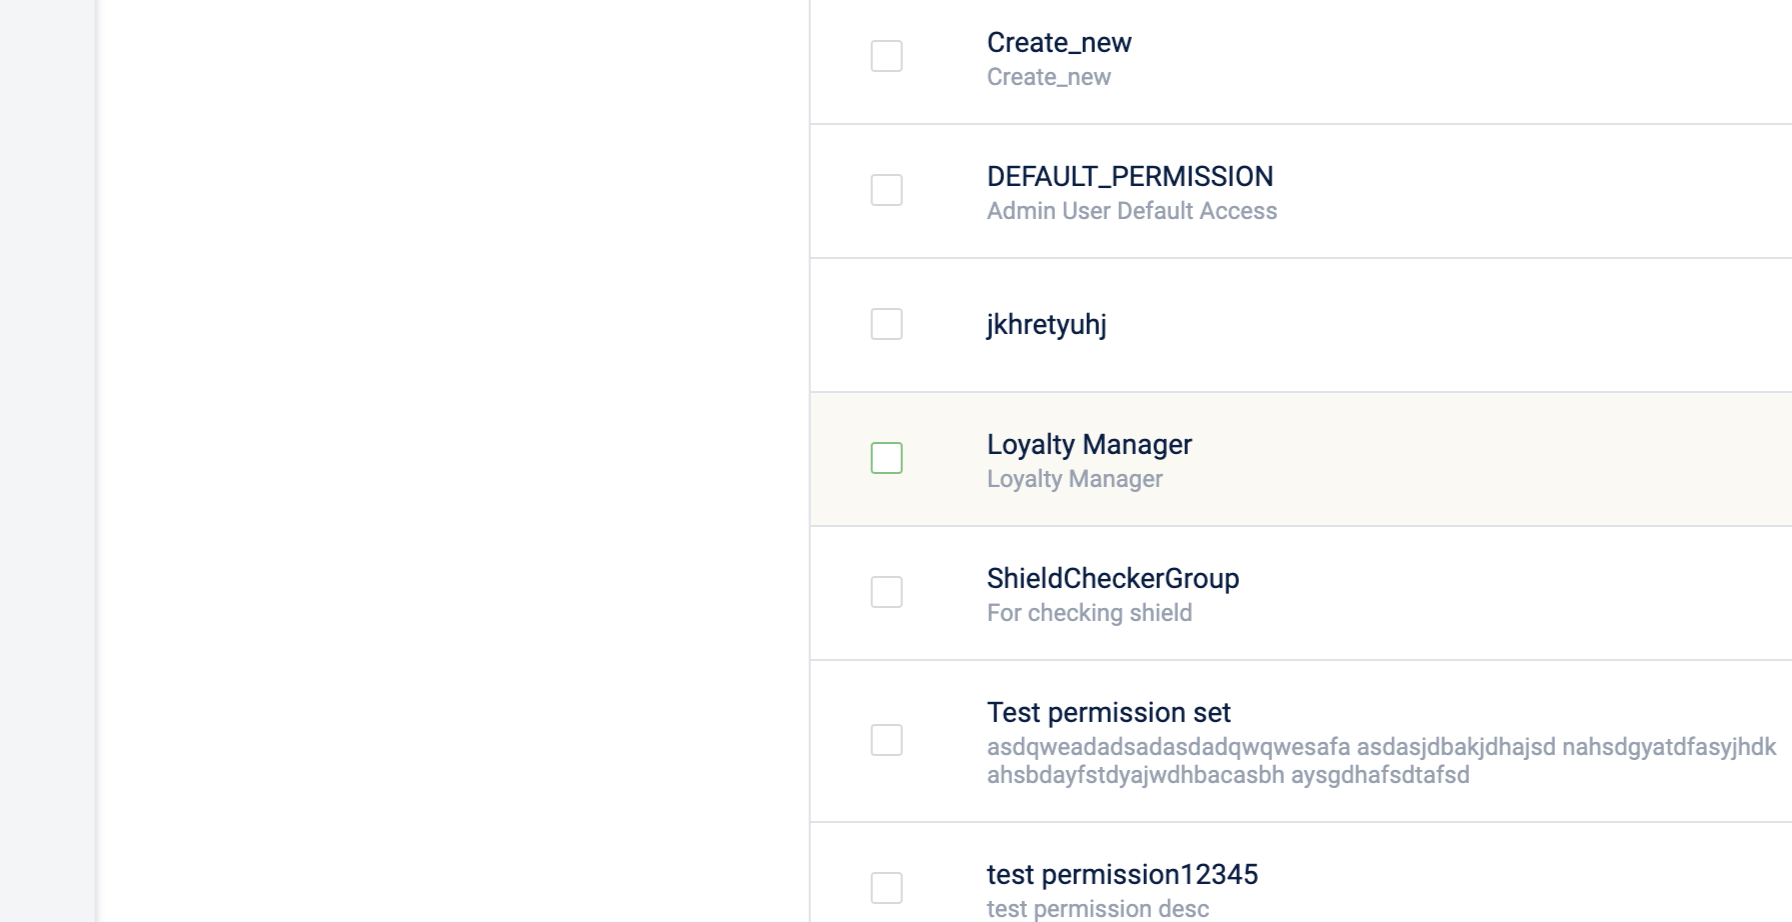
- (Applicable for Standard users) Choose the right permission set or you could also create a new permission set and click Continue.
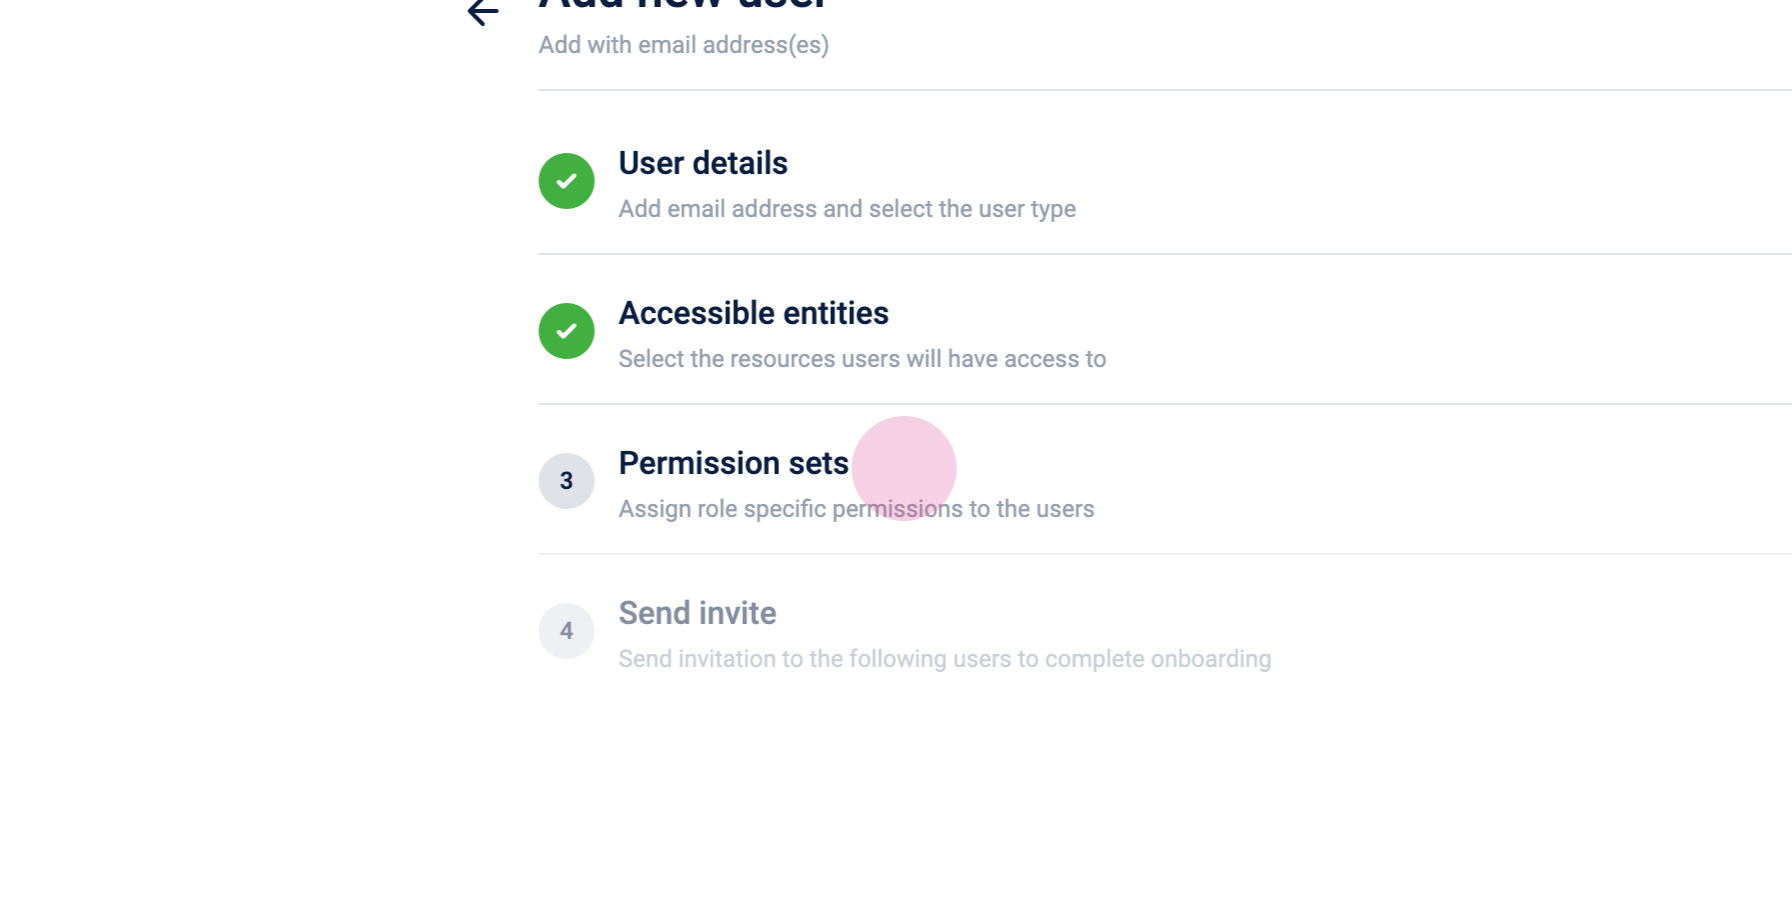
- Click Send invite.
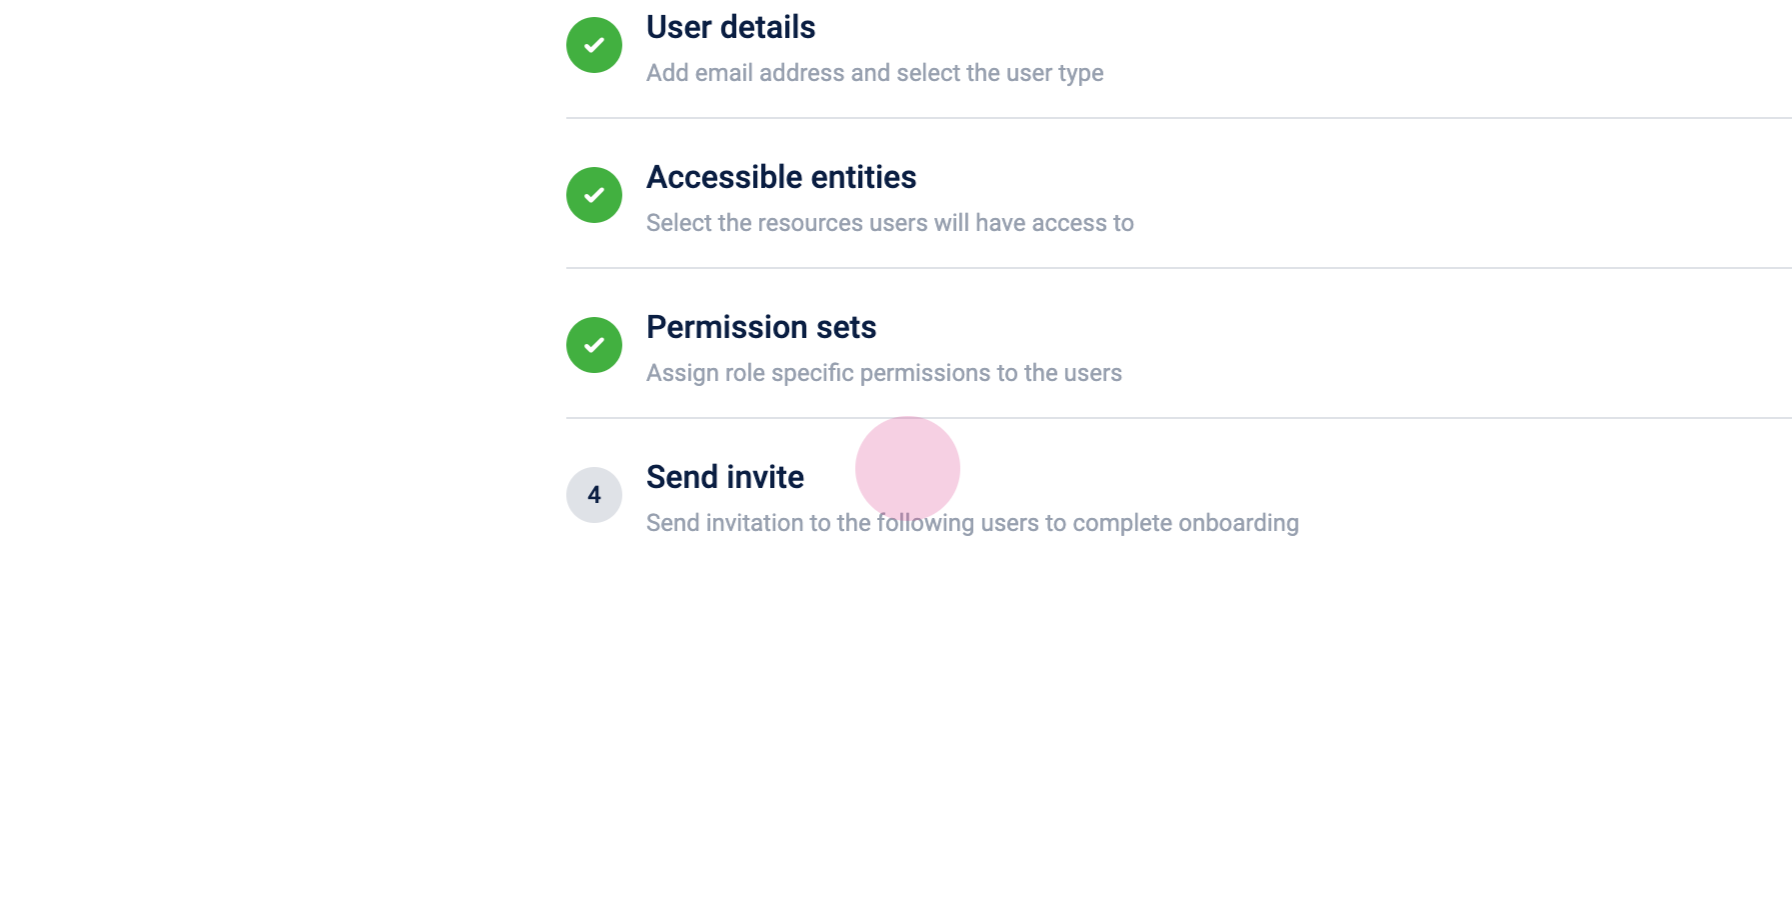
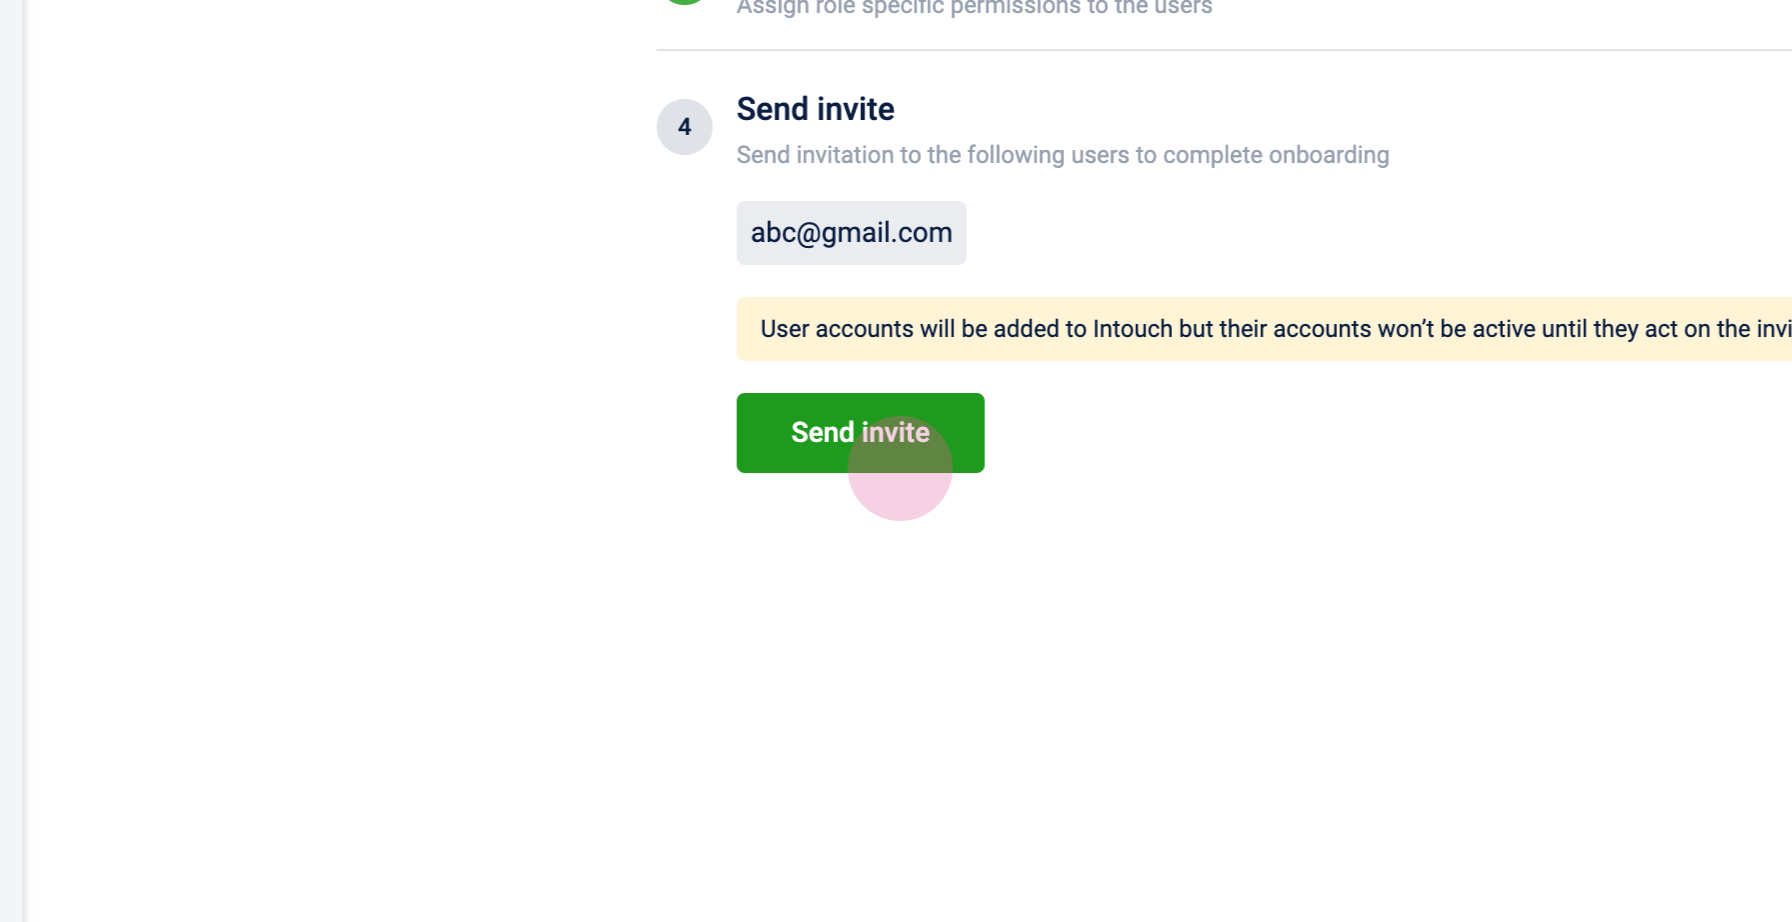
The users are added to Intouch and are activated once the users take action on the invitation they received in their emails.
Creating permission sets
To create permission sets, perform the following:
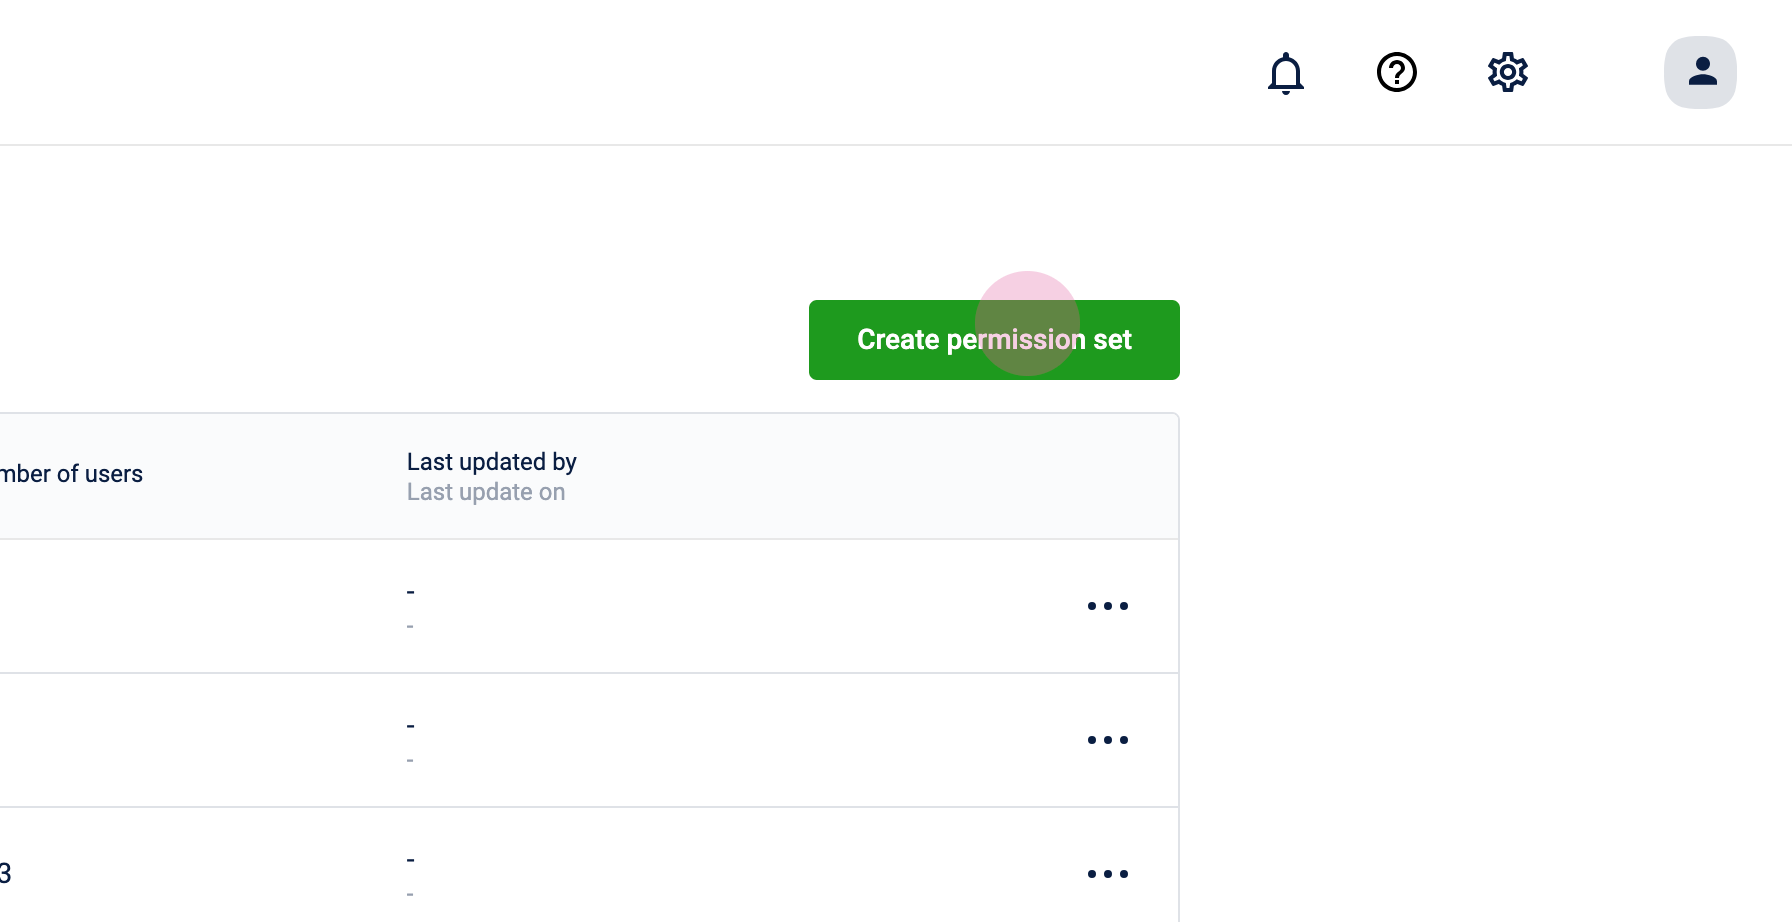
- Click Create permission set.
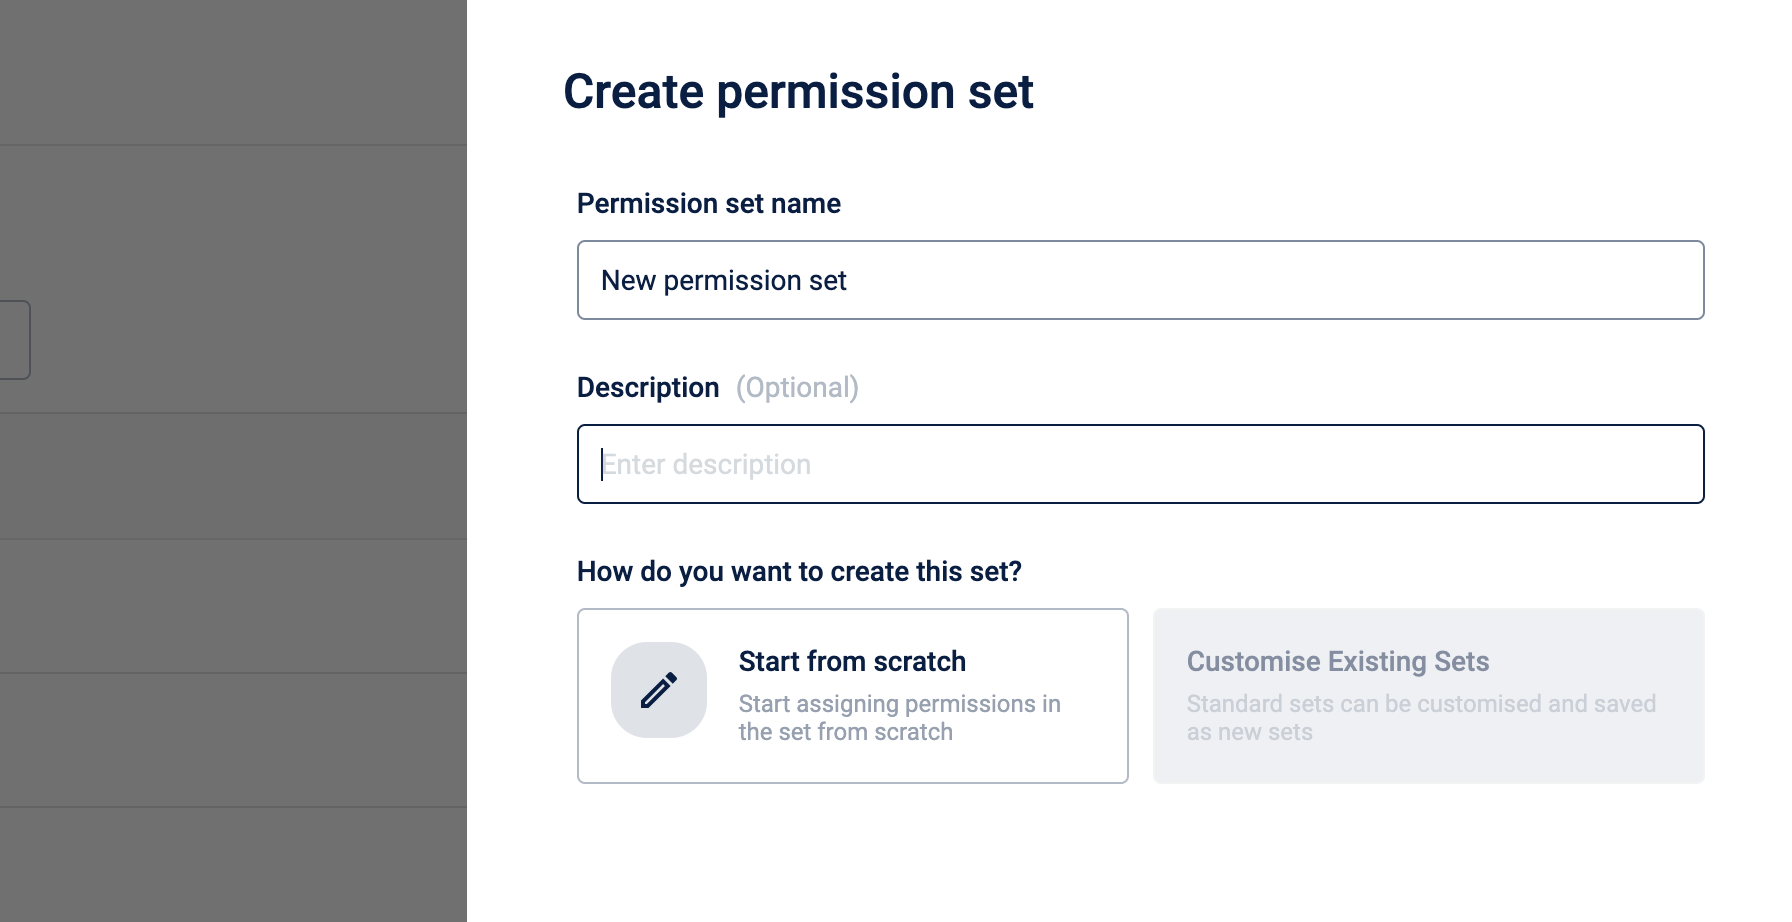
- Enter the Permission set name and Description for the permission set.
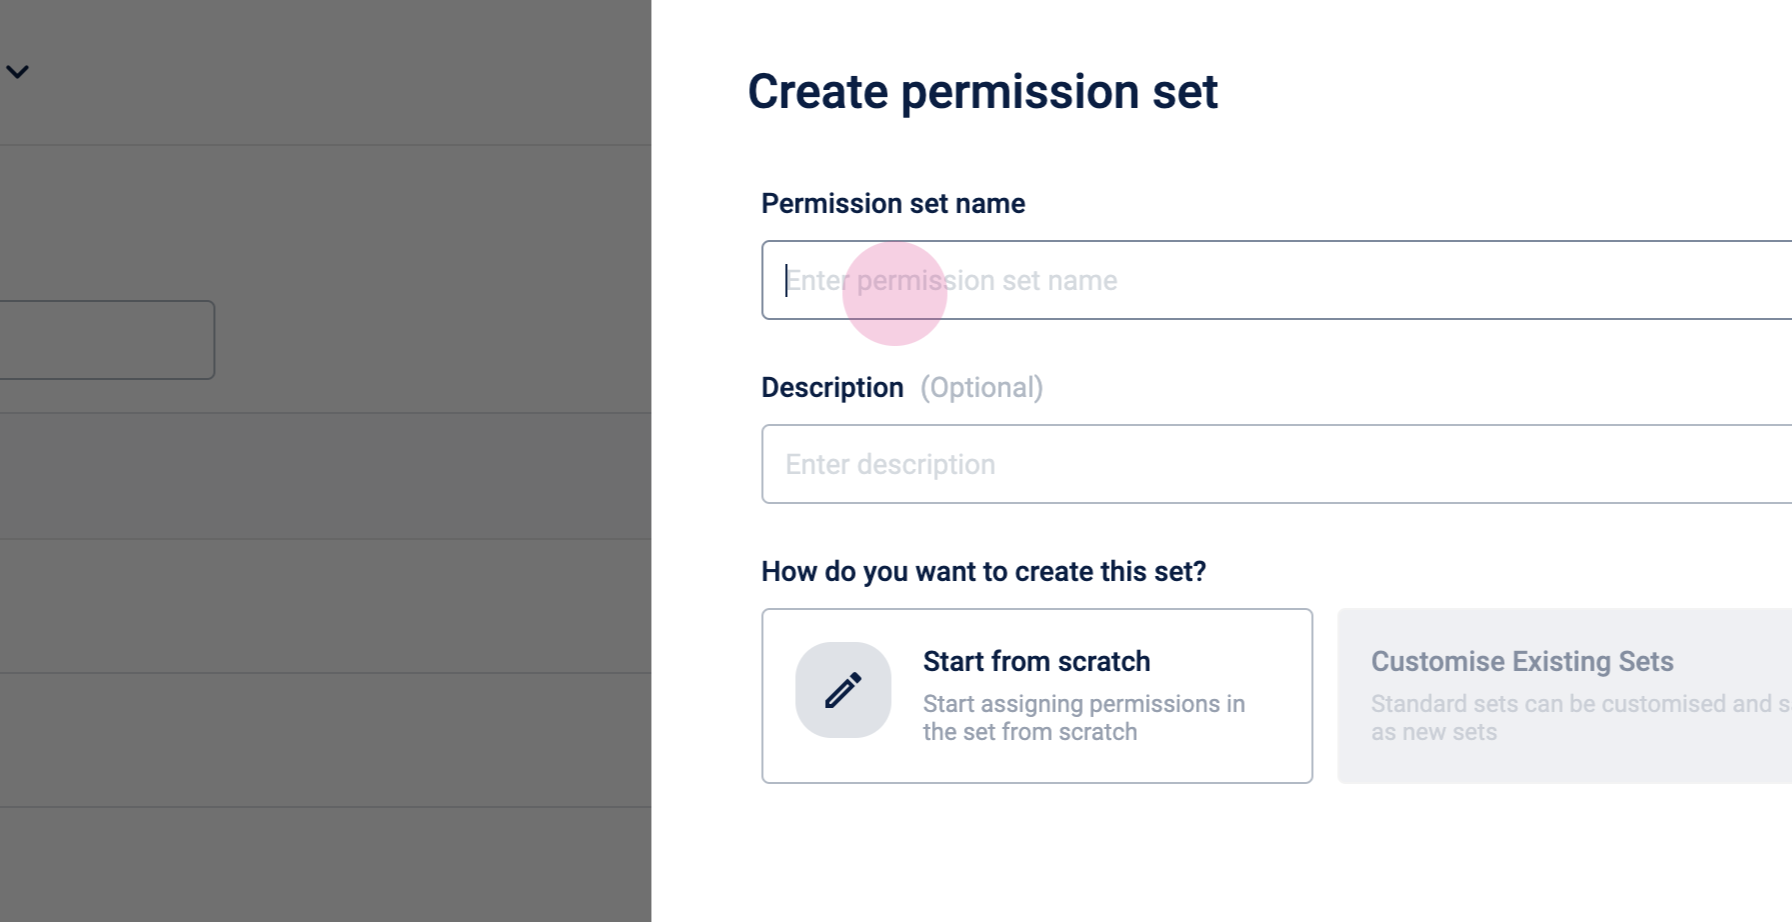
- Select Start from scratch and click Next.
- Select the relevant modules and assign the permissions.
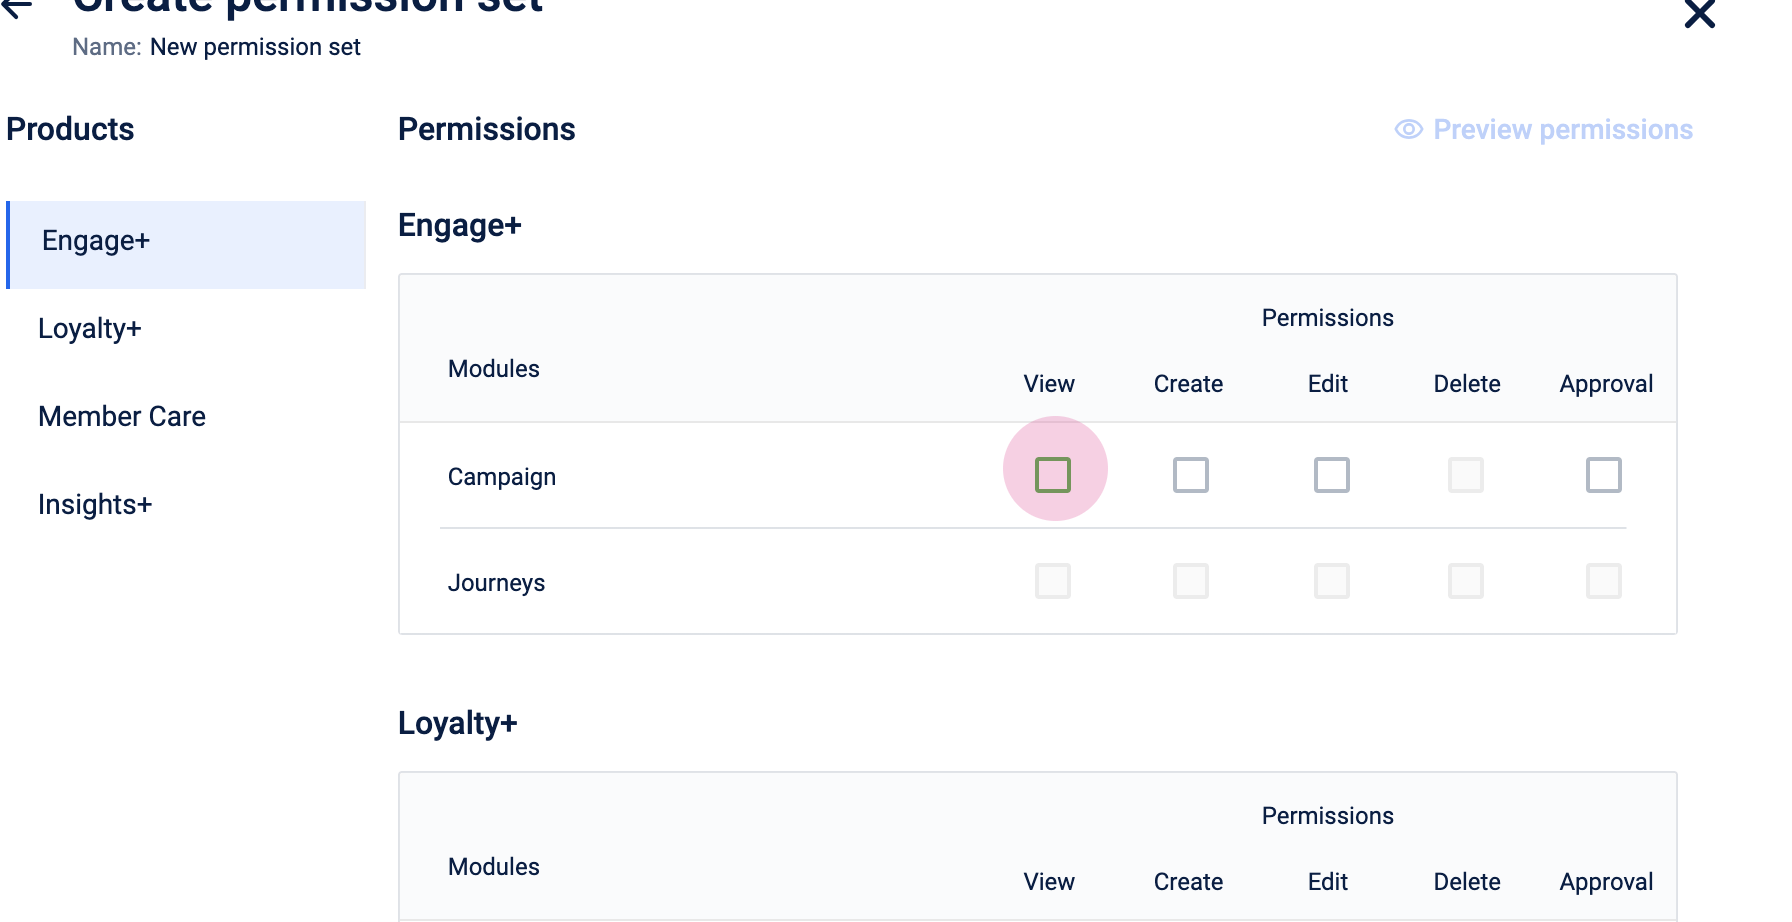

- Click Done. The new permission sets are created.
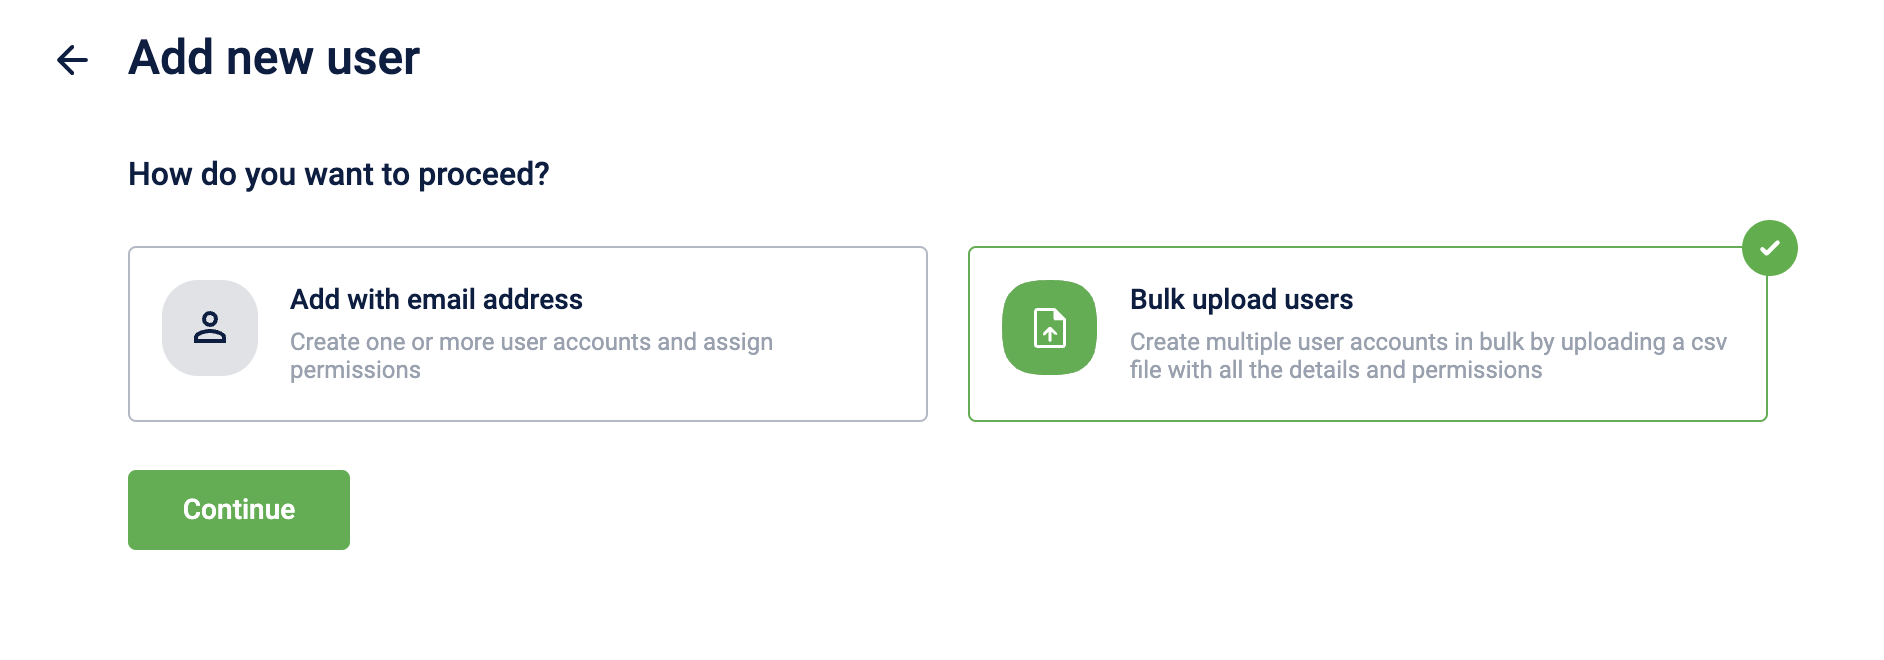
Adding users using the bulk upload flow
The difference between with email address and the bulk upload flow is, with the bulk upload, you can have different permissions mapped to different users.
To add the users in bulk, perform the following:
- Click Add new user.
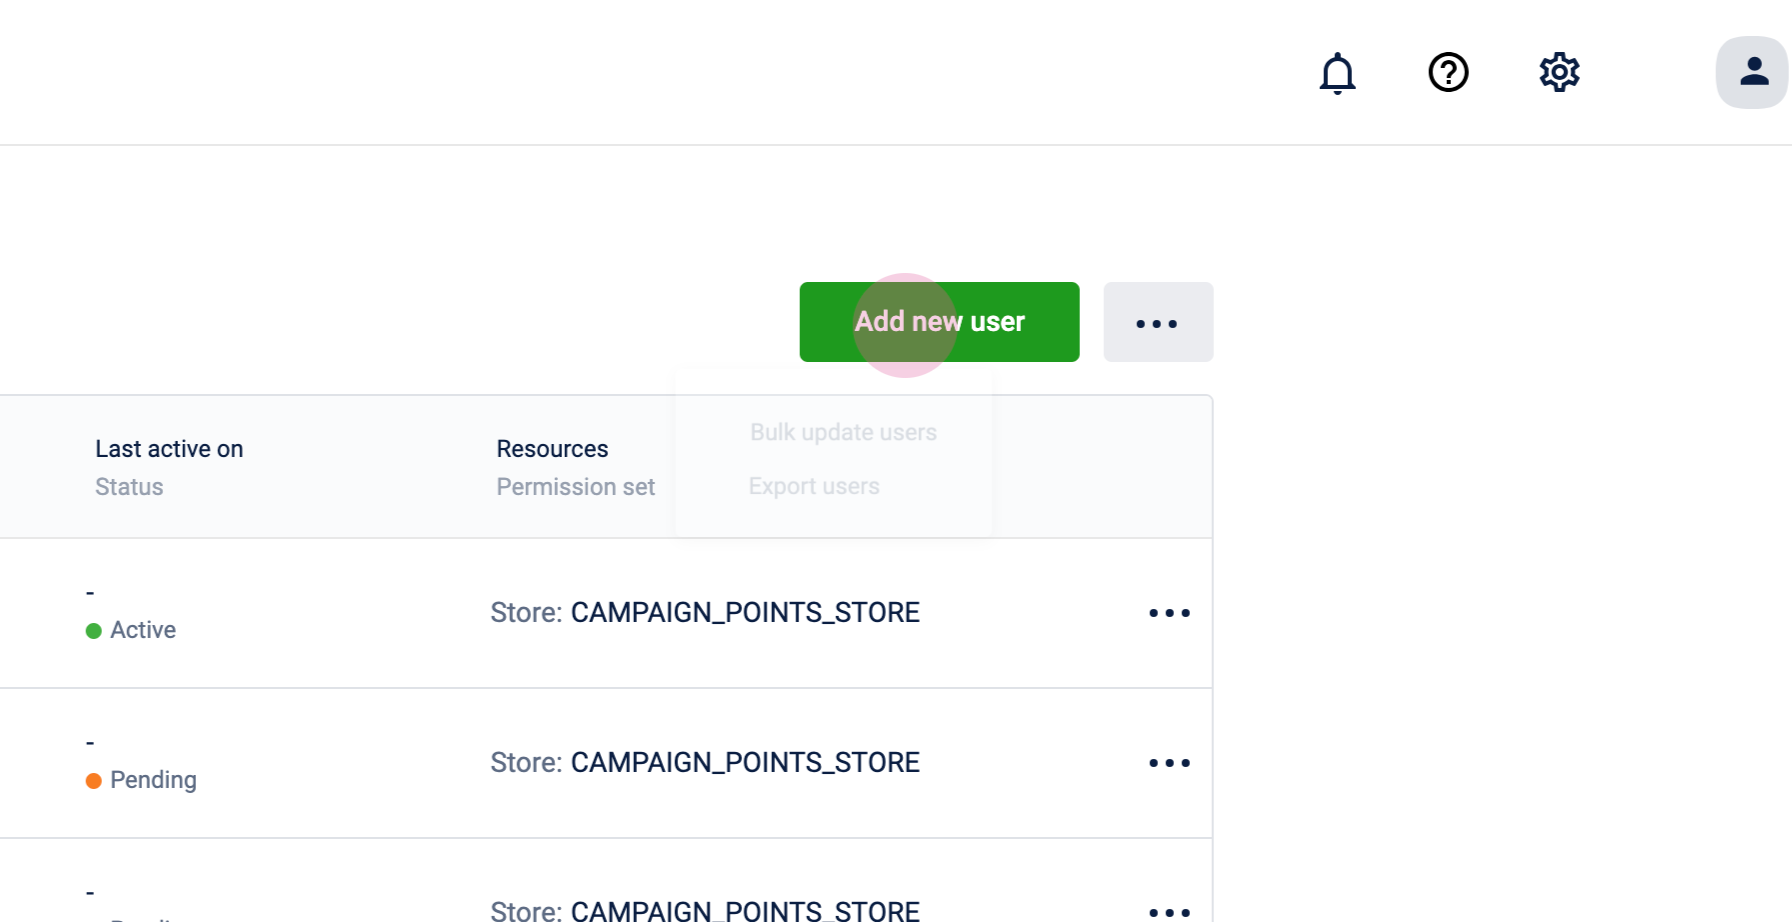
- Select the bulk upload option.
- Upload the CSV file. You can download the sample file, enter the values, and you can upload the same file. You can have multiple people on this list, and can also have different permissions for each person. So that way, you can customize permission for different users through this bulk upload flow.
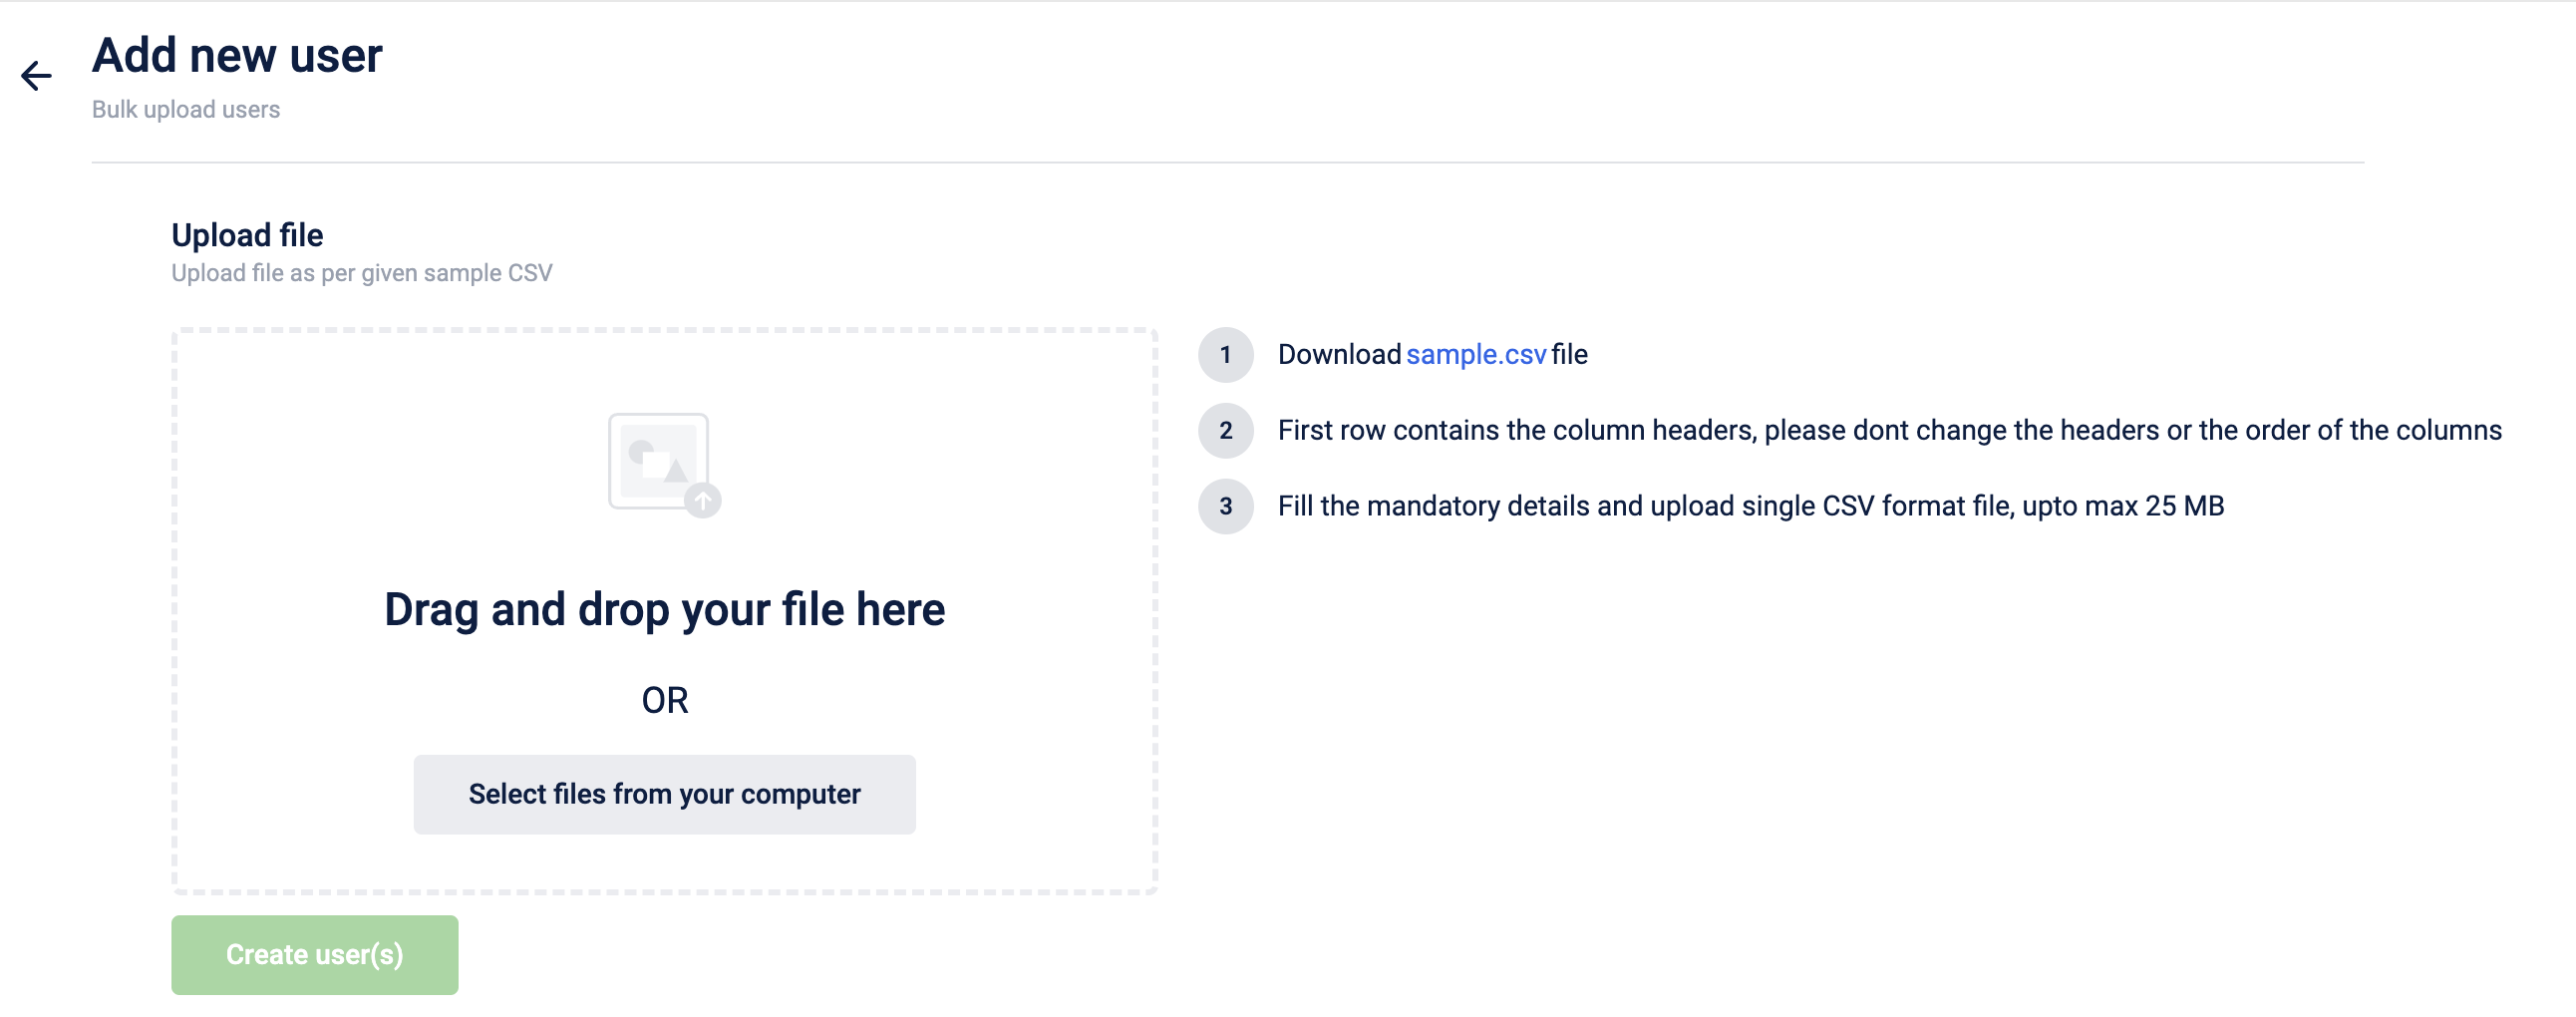
- Click Create user(s).
Editing and deleting a user
At present this feature is not supported and will be available in future updates.
Updated about 10 hours ago