
Barcode in email
This feature enables you to create a barcode that contains customer identifier information and can be used by customers for identification purposes. Customers can use this barcode at the POS to identify themselves and earn/claim loyalty benefits.
Note
- Barcode feature is not enabled by default. Create a JIRA ticket to the sustenance team to enable the feature.
- Barcode feature can be used both in Loyalty programs and on Engage+.
Prerequisties to enable barcode
-
To enable barcode generation, the following configurations must be enabled:
-
CONF_REGISTRATION_BARCODE_GEN_ENABLED: Set the value to 0 or 1. Default value: 0- False
-
CONF_BARCODE_VALUE_IDENTIFIER: Set the value to 0,1 or 2 to set the barcode identifier. You can set the identifier according to the information to embed in the barcode.
Value Description 0 Mobile number of the customer. 1 Email ID of the customer. 2 The external ID of the customer.
-
-
Raise a Jira ticket assigned to the Foundation team and enable bucket, namespace, and CDN URL support for the barcode service on the respective cluster where the organization is located.
Configuring barcode
Capillary supports six types of barcodes, given below:
- ITF
- PDF417
- EAN 13
- UPC A
- QR code
- CODE 128
Default barcode configuration
Field | Value |
|---|---|
Default barcode type | CODE_128 |
Image type | PNG |
Default barcode styles | |
|
|
|
|
|
|
|
|
|
|
|
|
| Field | Data Type | Description |
|---|---|---|
| default_barcode | String | Default barcode type that will be used if no barcode type is mentioned in the barcode service API. |
| showBarcodeText | Boolean | If set to true, the text will be displayed with config |
| imageHeight | Integer | Height of the image in pixels. |
| imageWidth | Integer | Width of the image in pixels. |
| imageWidthPadding | Integer | Padding around the width of the barcode image. This property is applicable when showBarcodeText is set to true. Not applicable for ITF barcode. |
| imageHeightPadding | Integer | padding around the length of the barcode image. This property is applicable when showBarcodeText is set to true. Not applicable for ITF barcode. |
| fontName | String | Name of the font. Not applicable for EAN 13, PDF417, QR Code, ITF barcode. |
| fontSize | String | Size of the font. Not applicable for ITF and QR code. |
To edit the default barcode configuration, create a JIRA ticket to the Capillary sustenance team.
Generating barcode
According to the configuration, during customer registration, the Customer Add API calls the barcode service and the barcode image is stored in the images table in the backend. If the identifier provided in the configuration is changed using customer identifier change API, a new barcode image is created and saved. You can retrieve the barcode image details using the GET customer details API.
Note
If you want to create a barcode for an existing user or regenerate a barcode, create a ticket to the Sustenance team.
To embed the barcode in the email creative, perform the following:
- Navigate to the Engage+ homepage, and select the campaign to send the email creative.
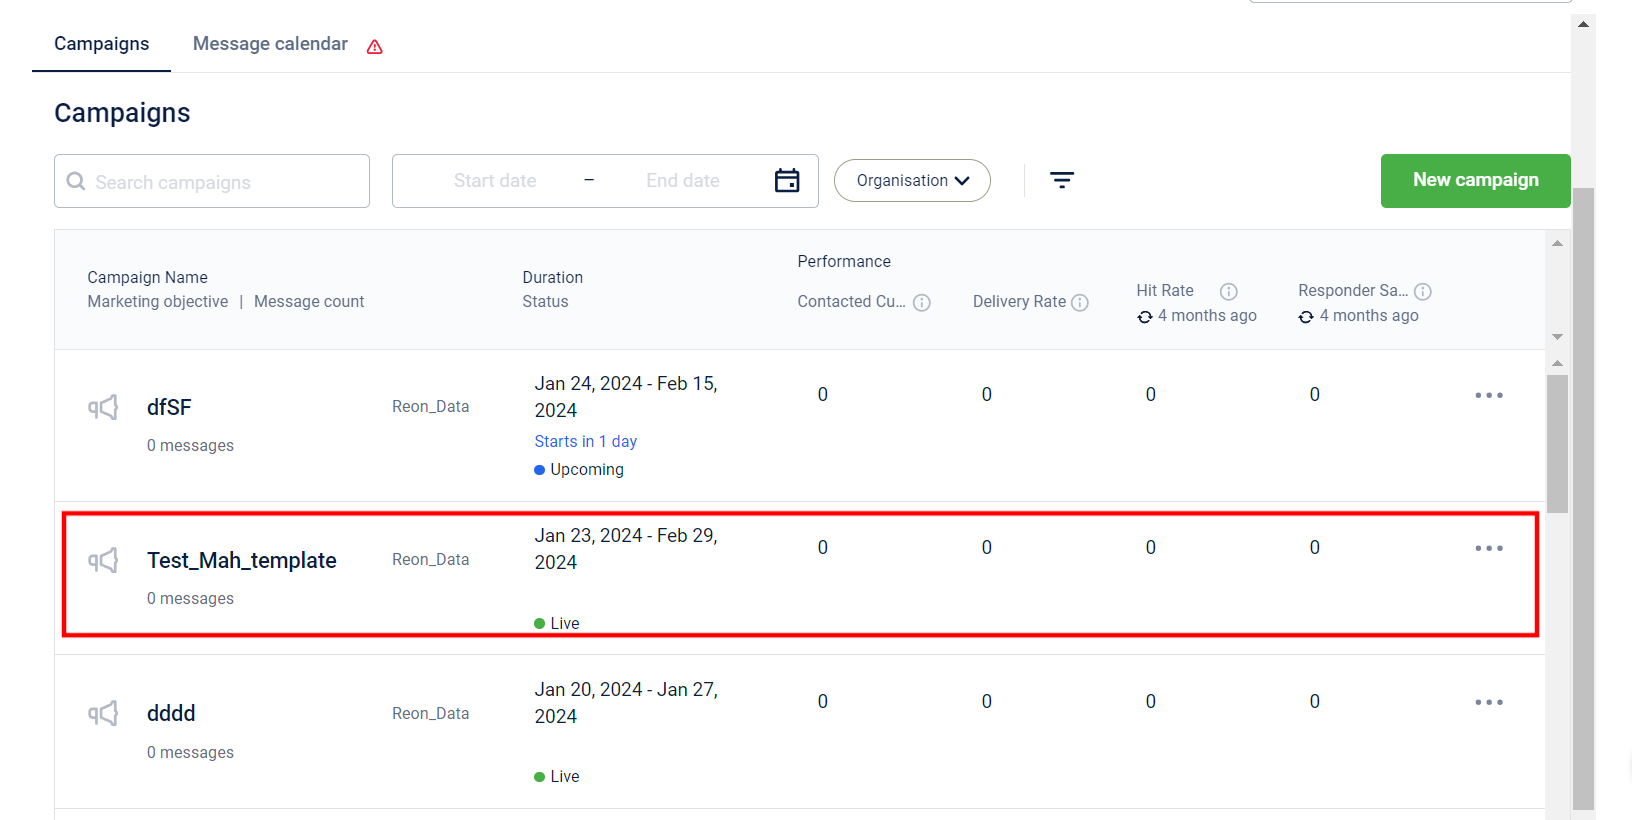
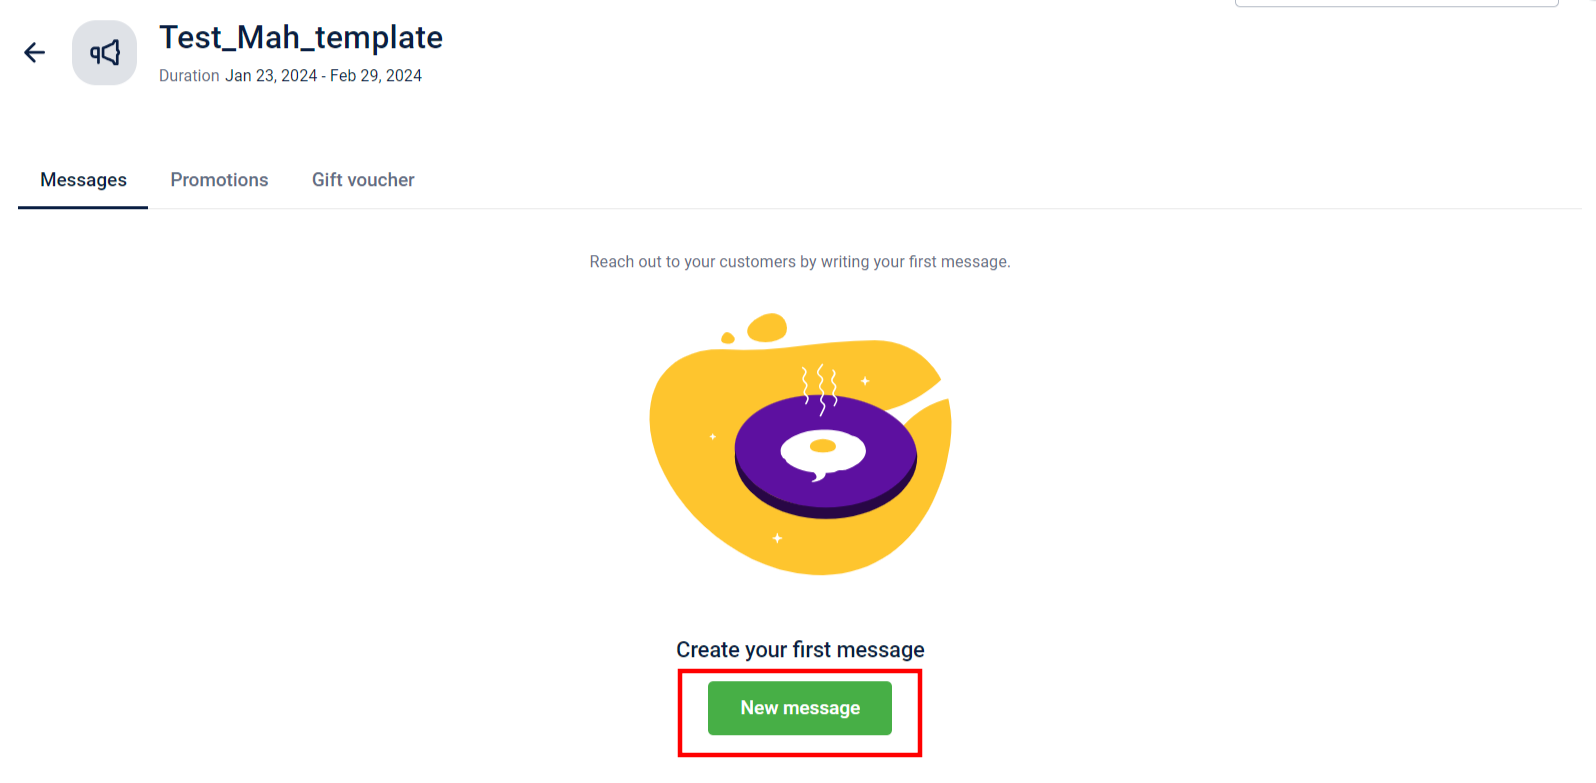
- Click New message to create a new email creative.
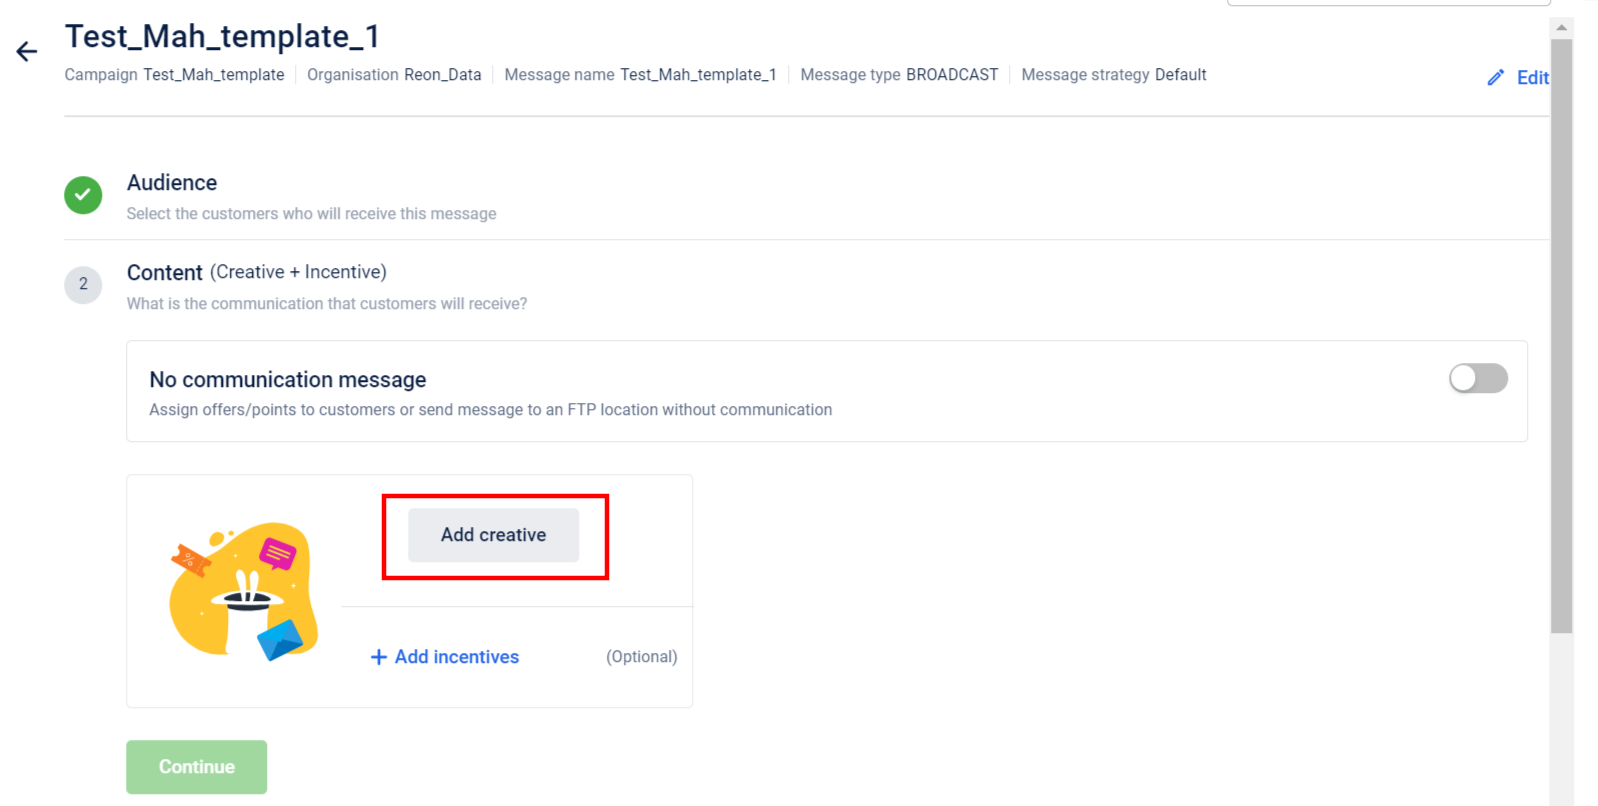
- In the Content block, click Add creative.
- Navigate to the Email tab and click Create new.
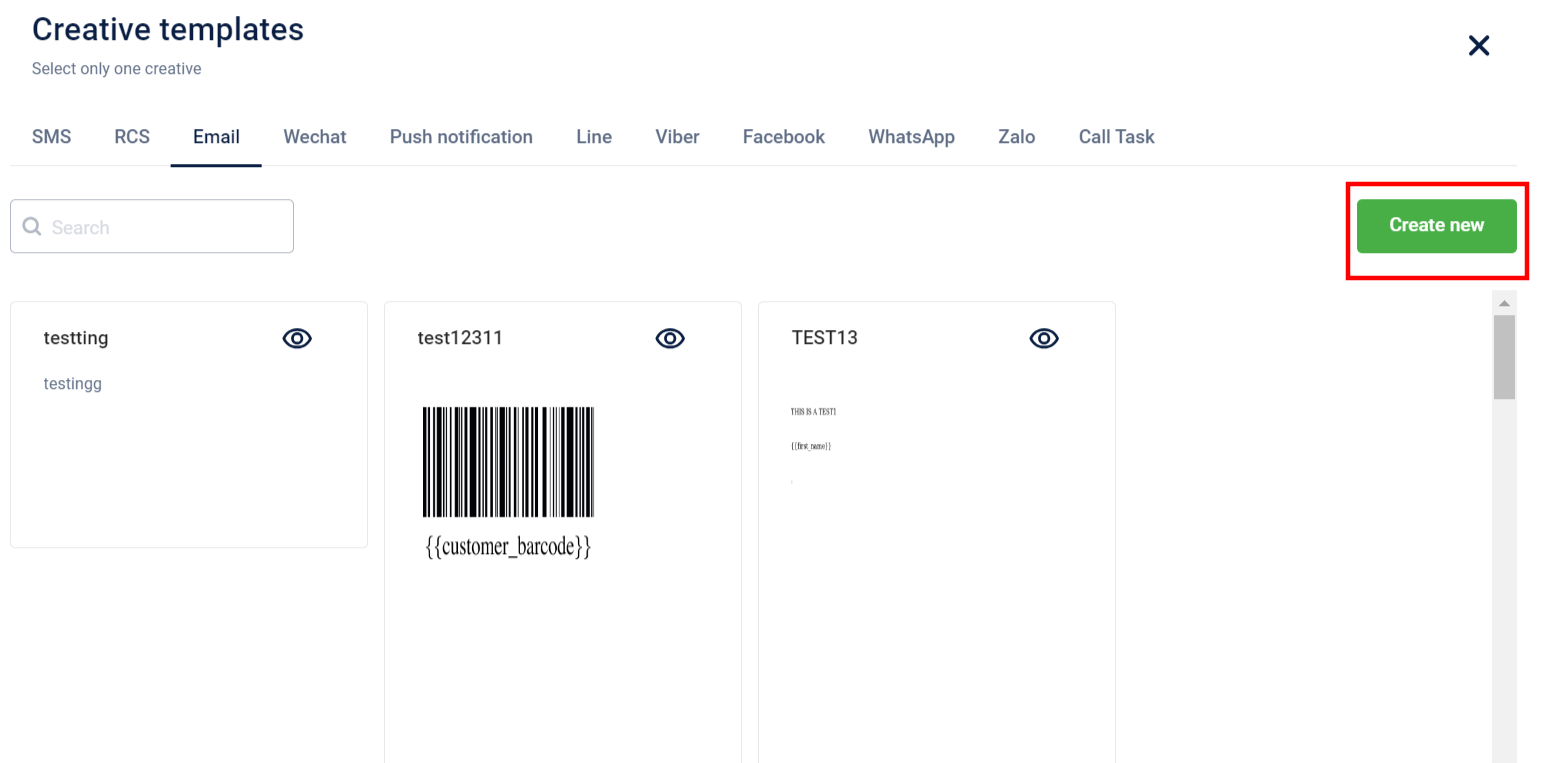
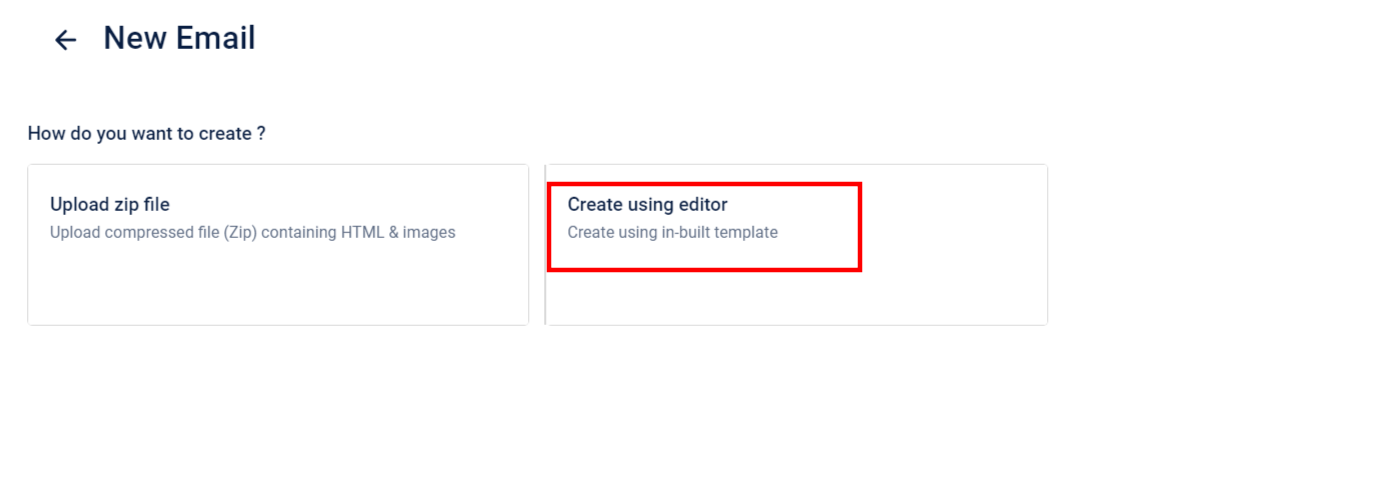
-
Click Create using editor and click Continue.
-
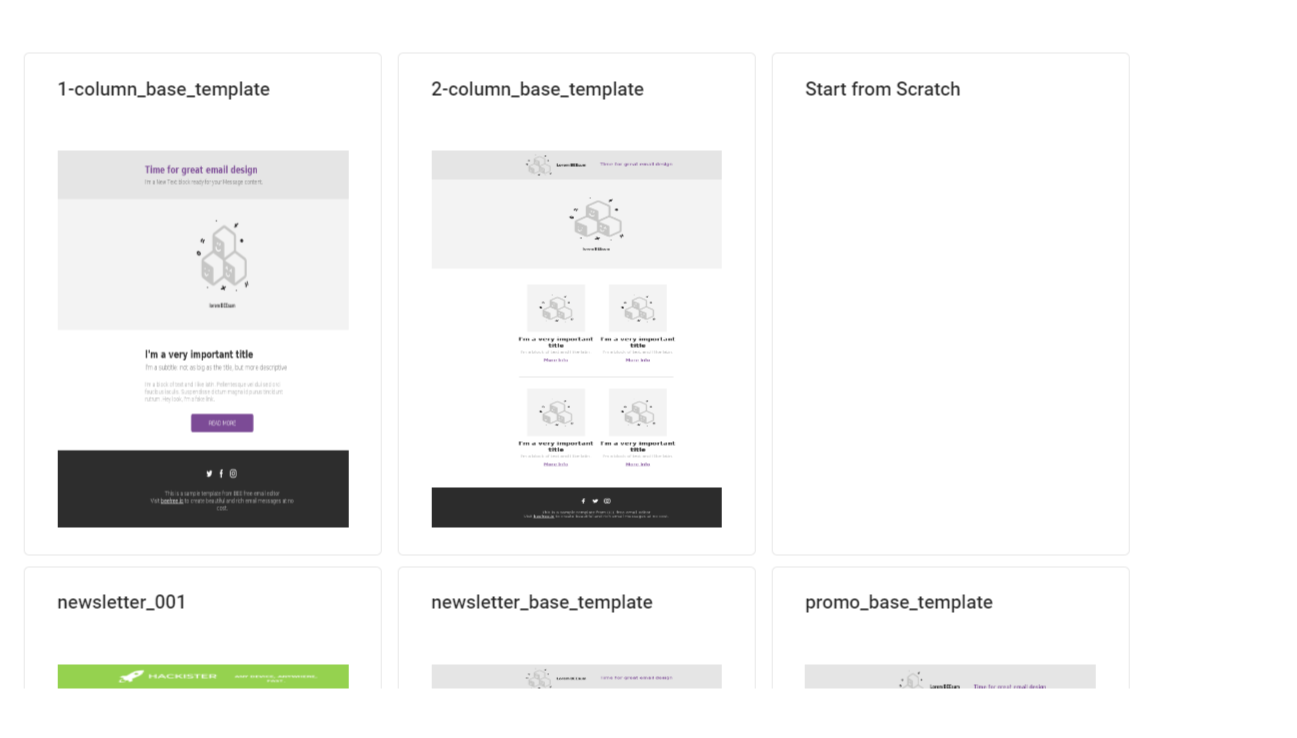
Select a template of your choice.
-
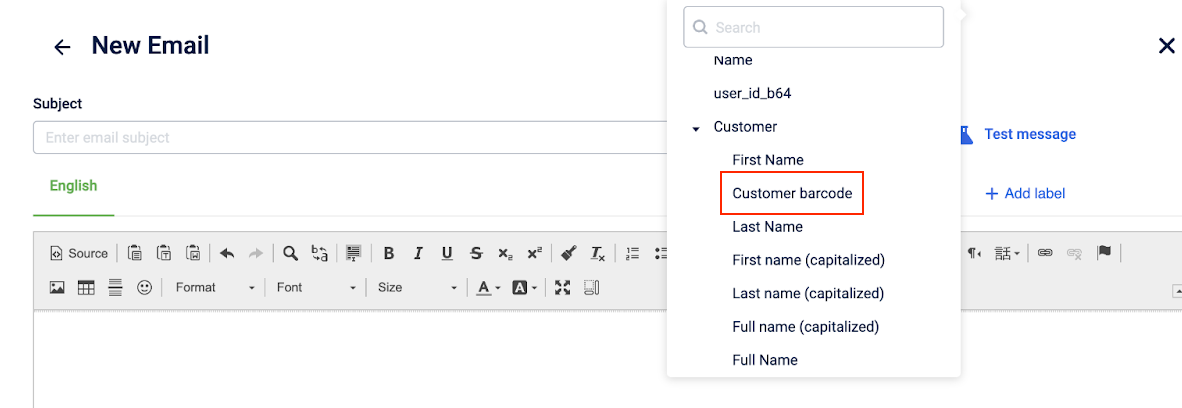
In the email body, click Add label and select Customer barcode label.
-
Embed the
{{customer_barcode}}tag in your email template.
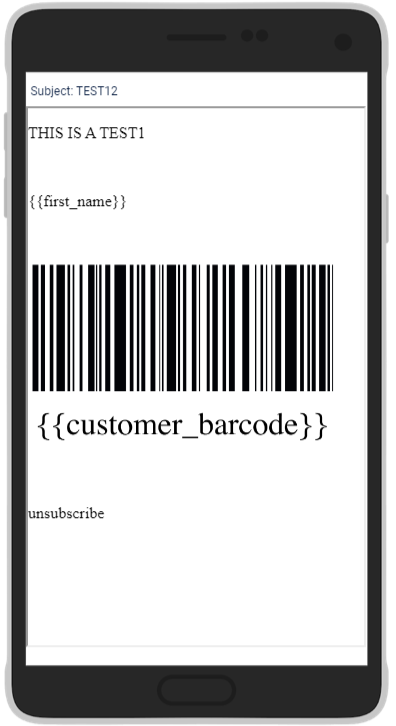
A barcode has been generated for the customer. A broken image is sent to the customer if a barcode fails to generate.
Updated 2 days ago