DIY Templates
Introduction
You can create custom Connect+ templates according to your specific requirements. The DIY template uses the Neo API extension to generate the necessary payload for API calls.
Example scenario
Consider a brand that wants to create rewards in bulk, including custom fields vendor details and specific status codes. The addition of custom field information is not part of the standard Add Reward Connect+ templates. However, with the DIY template, you can create a custom template that captures these additional fields, customising the rewards creation process according to their needs.
Key benefits
The key benefits of using DIY template creation are:
- Flexibility in template creation: The DIY template allows you to create templates based on your specific needs without requiring developer involvement.
- Reduced developer effort: The DIY template minimises developers' time and effort in creating new templates.
Creating a Template
Below is a flow chart indicating the steps involved in creating a Connect+ DIY template.
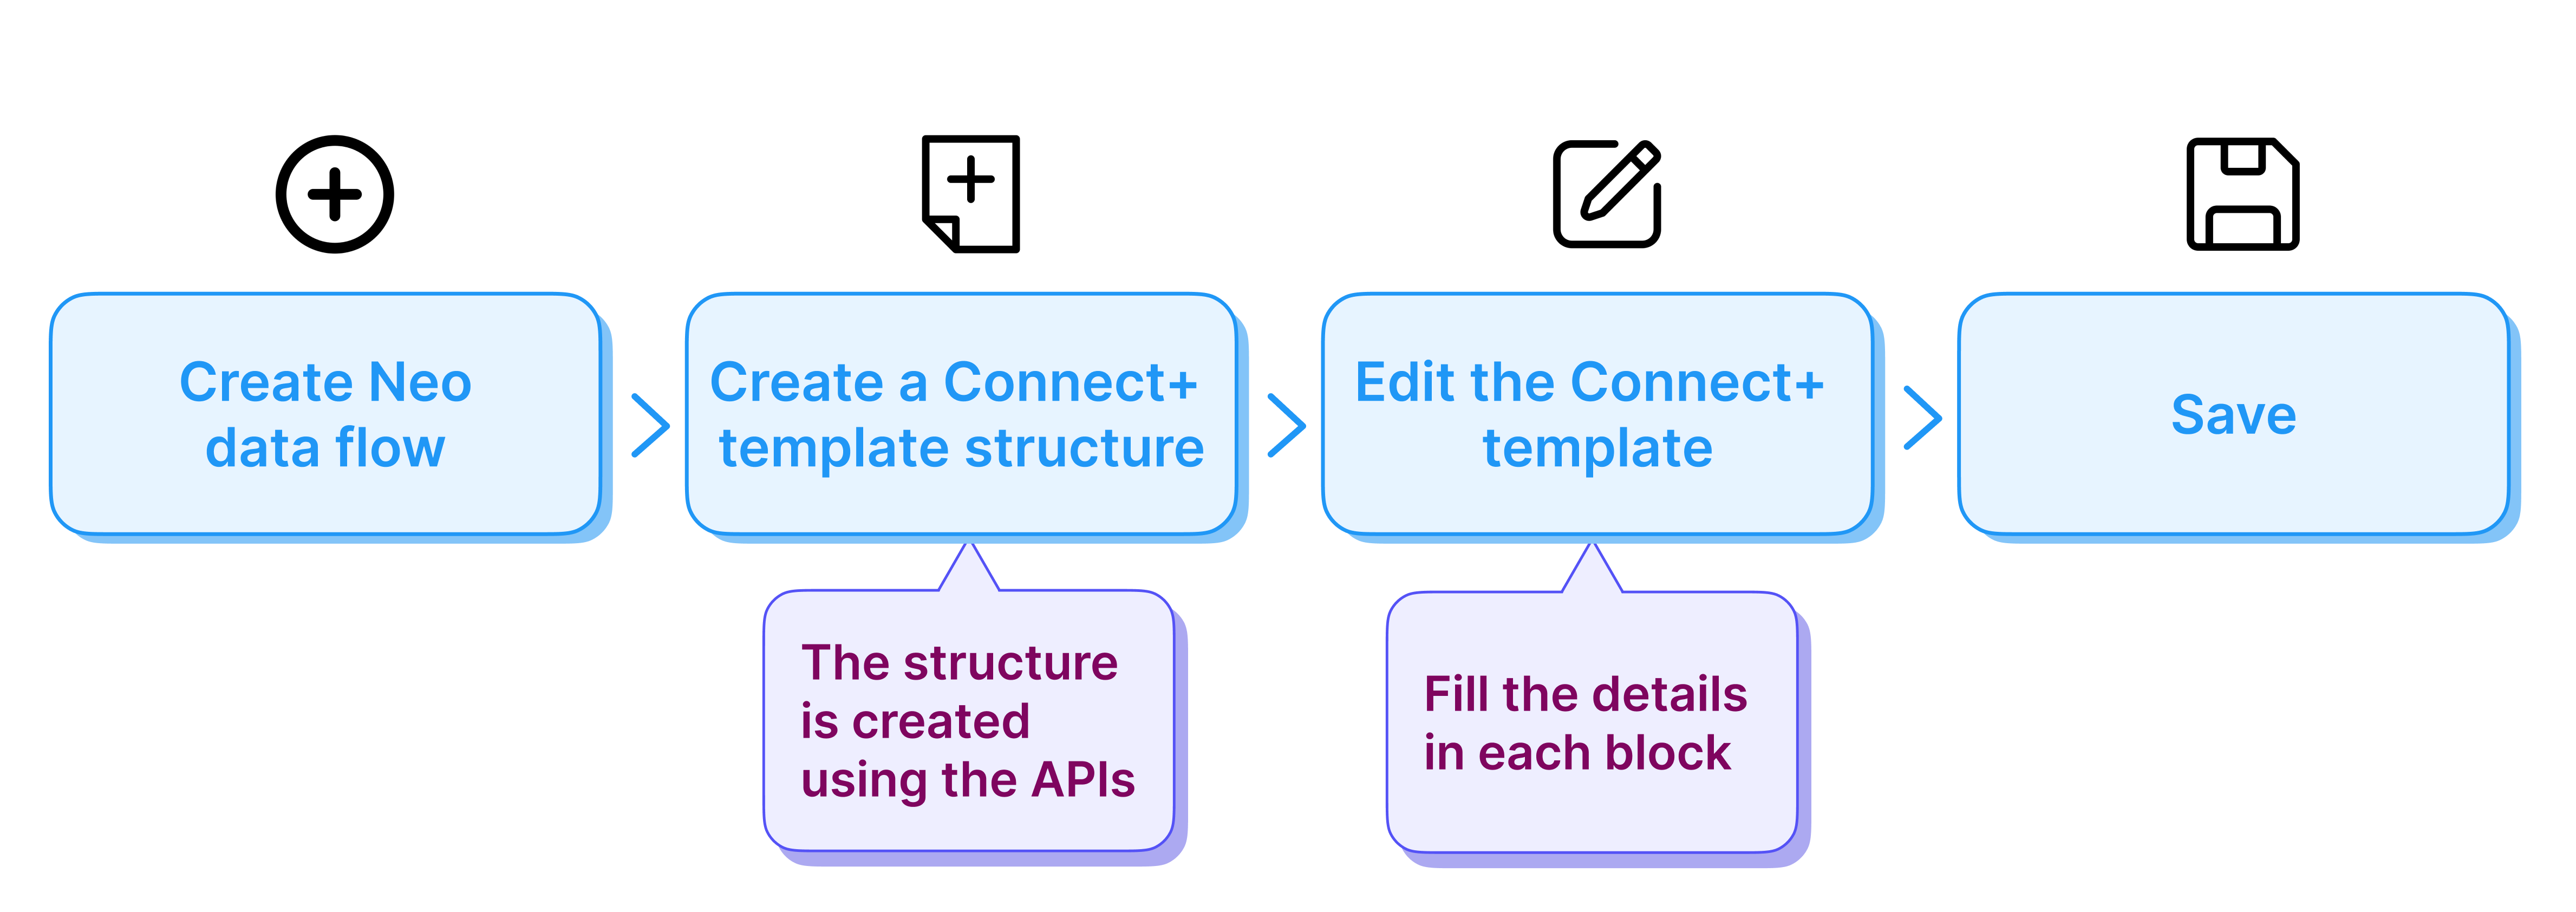
Pre-requisites
-
API tester tools like Postman or Talend
-
Authorisation credentials - Currently support Google authentication.
-
Active session of the Connect+ for the respective org - The API tester retrieves credentials from an open and active session of the Connect+ portal for the respective organisation. Therefore, the Connect+ portal must remain open in a browser, active, and not timed out.
-
Neo dataflow to create the payload from the JSON format available within the same organisation where you create the template.
-
APIs to create the template. The following APIs are required:
The following sections guide you through the steps in creating a Connect+ template.
Creating the structure for the template
To create the structure for the template,
- Open Connect+ UI using the URL https://{host_name}.connectplus.capillarytech.com/connect/ui}/connect/ui/ and select the organisation in which the template needs to be created.
This is required for authorisation. - Get the workspace ID] using the GET workspaces API.
- Retrieve the blocks supported for template creation using the Get Processor API.
- Create the structure of the template using the Create DIY template API.
The template structure is created with the specified blocks after the POST method executes successfully.
Editing and adding the template details
The DIY template created through the API starts without any pre-filled information. You need to manually populate the field values for each block. To edit the template,
-
Open
https://{host_name}.connectplus.capillarytech.com/connect/ui
and select the organisation where you created the template. -
In the search box, enter the name of the template.
-
On the search results, click on the More options menu, and select Edit to open the template.
-
Click the Connect-to-source block. This block specifies the credentials for the SFTP server where the source file is stored, along with the filename and file type. The fields in this block are the same as those in standard Connect+ templates. For more information on each field, refer to Connect to source.
-
Click Continue.
The screenshot below shows the values in the Connect-to-source block.
-
Click the Transform-Data block. This block converts data from the source file from CSV to JSON format. It organises the CSV file's data according to the headers and groups similar headers for efficient processing. The conversion is required as the APIs require data in JSON format to process the request. Use the table below to populate the field values.
Field Name Description File Type Choose the input file type from the drop-down. Currently, only CSV file type is supported. Alphabetical Sort Check this box to sort the files in alphanumeric order. Sort headers Sort the input file's contents based on the specified header. Grouping Limit(1-1000) Specifies the number of entries returned in the response for each group. Group By Group the input data by the specified headers. When processing bulk data, the entire file is read at once, but each record is processed individually, one at a time.
Example: Consider the examples below.
Example 1
Name1 - Jane, ID - 1, Mobile - 991
Name2 - Lisa, ID - 2, Mobile - 992
Name3 - Ann, ID - 3, Mobile - 993
Here, the data is not similar and no grouping is possible. Therefore, the data is sent in bulk to the Neo Transformer block, and each entry remains separate in the output.
The output of the Transformer-Data block is as shown below.[ { "name": "Jane", "id" : "1" , "mobile" : "991" } ] [ { "name": "Lisa", "id" : "2" , "mobile" : "992" } ] [{ "name": "Ann", "id" : "3" , "mobile" : "993" } ]
Example 2
Name1 - Jane, ID - 1, Mobile - 991
Name2 - Jane, ID - 2, Mobile - 992
Name3 - Jane, ID - 3, Mobile - 993
Here, all entries share the same Name so they are grouped by Name. This means the output data for the Neo Transformer block consolidates all records under a singlename
key, allowing the Neo Transformer to handle the data more efficiently in a structured group.
The output of the Transformer-Data block is as shown below.[ { "name": "Jane", "id" : "1" , "mobile" : "991" }, { "name": "Jane", "id" : "2" , "mobile" : "992" }, { "name": "Jane", "id" : "3" , "mobile" : "993" } ]
-
Click Continue.
The screenshot below shows the values in the Transform-Data block.
-
Click the Neo-Transformer block. This block generates the payload for the specified API. You configure the Neo dataflow used in the Neo transformer block within the Neo Extensions UI. The Neo dataflow must reside in the same workspace or organisation as the template. Refer to the table to fill in the fields.
Field Name Description Enter url Choose the desired Neo dataflow from the drop-down menu. Note: Only Neo dataflows tagged with connectplus
within the same organisation where you create the template appears in the drop-down list.Split Response Divide the response into smaller parts if it’s a bulk response. Authorization Authorisation used for Neo extensions. It is auto-populated. -
Click Continue.
The screenshot below displays the values in the Neo-Transformer block, which utilises the
CustomerAddTransformation
dataflow to generate a payload for creating a customer.
-
Click the Connect-to-Destination block. This block allows you to specify the details of the v2 API that will execute the data flow. It sends the transformed data to the destination for the API call.
Enter the necessary fields, including Client Key, Secret, API Endpoint, Method, and URL. For more details on each field, refer to Connect to Destination
The screenshot below shows the values in the Connect-to-Destination block, which calls the /v2/customers API to create customers after converting the CSV file to JSON and generating the payload.
- Click Continue.
- Click the Trigger block and set the interval for triggering the data flow. For more information refer to Trigger.
In this case, the trigger to create a customer using the CSV file and Neo transformation is scheduled to run every 5 minutes.
- Click Save and continue.
The template is created successfully.
Troubleshooting
Error | Reason |
---|---|
Unauthorised or Invalid credentials | Make sure you have the correct credentials and the Connect+ UI is open. |
Invalid Workspace ID | Workspace ID is incorrect. Verify the workspace ID by sending a GET request to the workspaces API. |
Invalid Block Type | blockType parameter is invalid. |
FAQs
- At what stage do you decide which API to call based on the contents of the CSV file?
Answer: No specific options are available. The Neo dataflow identifies the necessary information from the CSV file contents and creates the appropriate payload for the API call. - How does the Neo Transformer block handle the transformation of CVS data?
Answer: The Transformer block converts the CSV file into JSON format. The input to the Neo Transformer block is in the JSON format. - Where is the payload to call the API created?
Answer: The Neo Transformer block creates the API payload based on the URL selected within the block. - Where is the Neo dataflow available?
Answer: The Neo dataflow must be available in the same organisation as the template being created. - What happens if the first block is not a source block?
Answer: If the first block is not a source block, the template becomes unusable, as it lacks the information needed to fetch the source file. - Why do I need to open Connect+UI while running the APIs to create the template?
Answer: The API tester fetches the credentials from an open and active session of Connect+ UI opened for the respective organisation. - What types of files can the Transform-Data block handle?
Answer: Currently, the Transform-Data block only supports CSV file formats. If you have a different file type, you have to convert it to CSV before uploading.
Updated about 1 month ago