
Engagement Building Block
The engagement block contains different types of channels that can be used to engage with your customers. A marketer can add an engagement block (of a particular channel) and configure the content in that block (specific to that channel) to reach out to users.
The various engagement blocks available are:
- SMS
- M-push
- Zalo
- Line
- Viber
- Zalo
- RCS
Use Case
A brand wants to include customers whose transactional value is greater than $10,000 in the Journey and communicate the discounts that can be availed by these customers via SMS.
Adding engagement block
To add an engagement block,
-
Click on the engagement block.
-
In the Engagement name text box, enter a name for the engagement block.
-
Click Add creative.
-
Select an existing template or create a new template. For information on creating templates, see SMS Template, Email Template, M-Push Template, WhatsApp template, ZALO template, Line template, Viber template and RCS template. You can use the Channel Priority block to send the communication message based on the availability of the customer's communication channel. For more information, refer to the documentation on Channel Priority in Journey.
Note: In the case of email communication, ensure that the customer’s email ID is not marked as INVALID, as emails may be blocked for such addresses. You can override this by enabling email whitelisting in Engage settings, which allows emails to be sent to whitelisted addresses even if their status is INVALID.
-
Add the required content. To configure the content, refer to the respective Engagement Channel . While configuring the content, you can also add labels. For more information on supported labels, refer to Supported Labels for Engagement Channels.
Note: If you use personalization tags in your communication content, ensure that the corresponding values are available when the Journey is triggered. Missing values may prevent the communication from being sent.
-
Click Done.
-
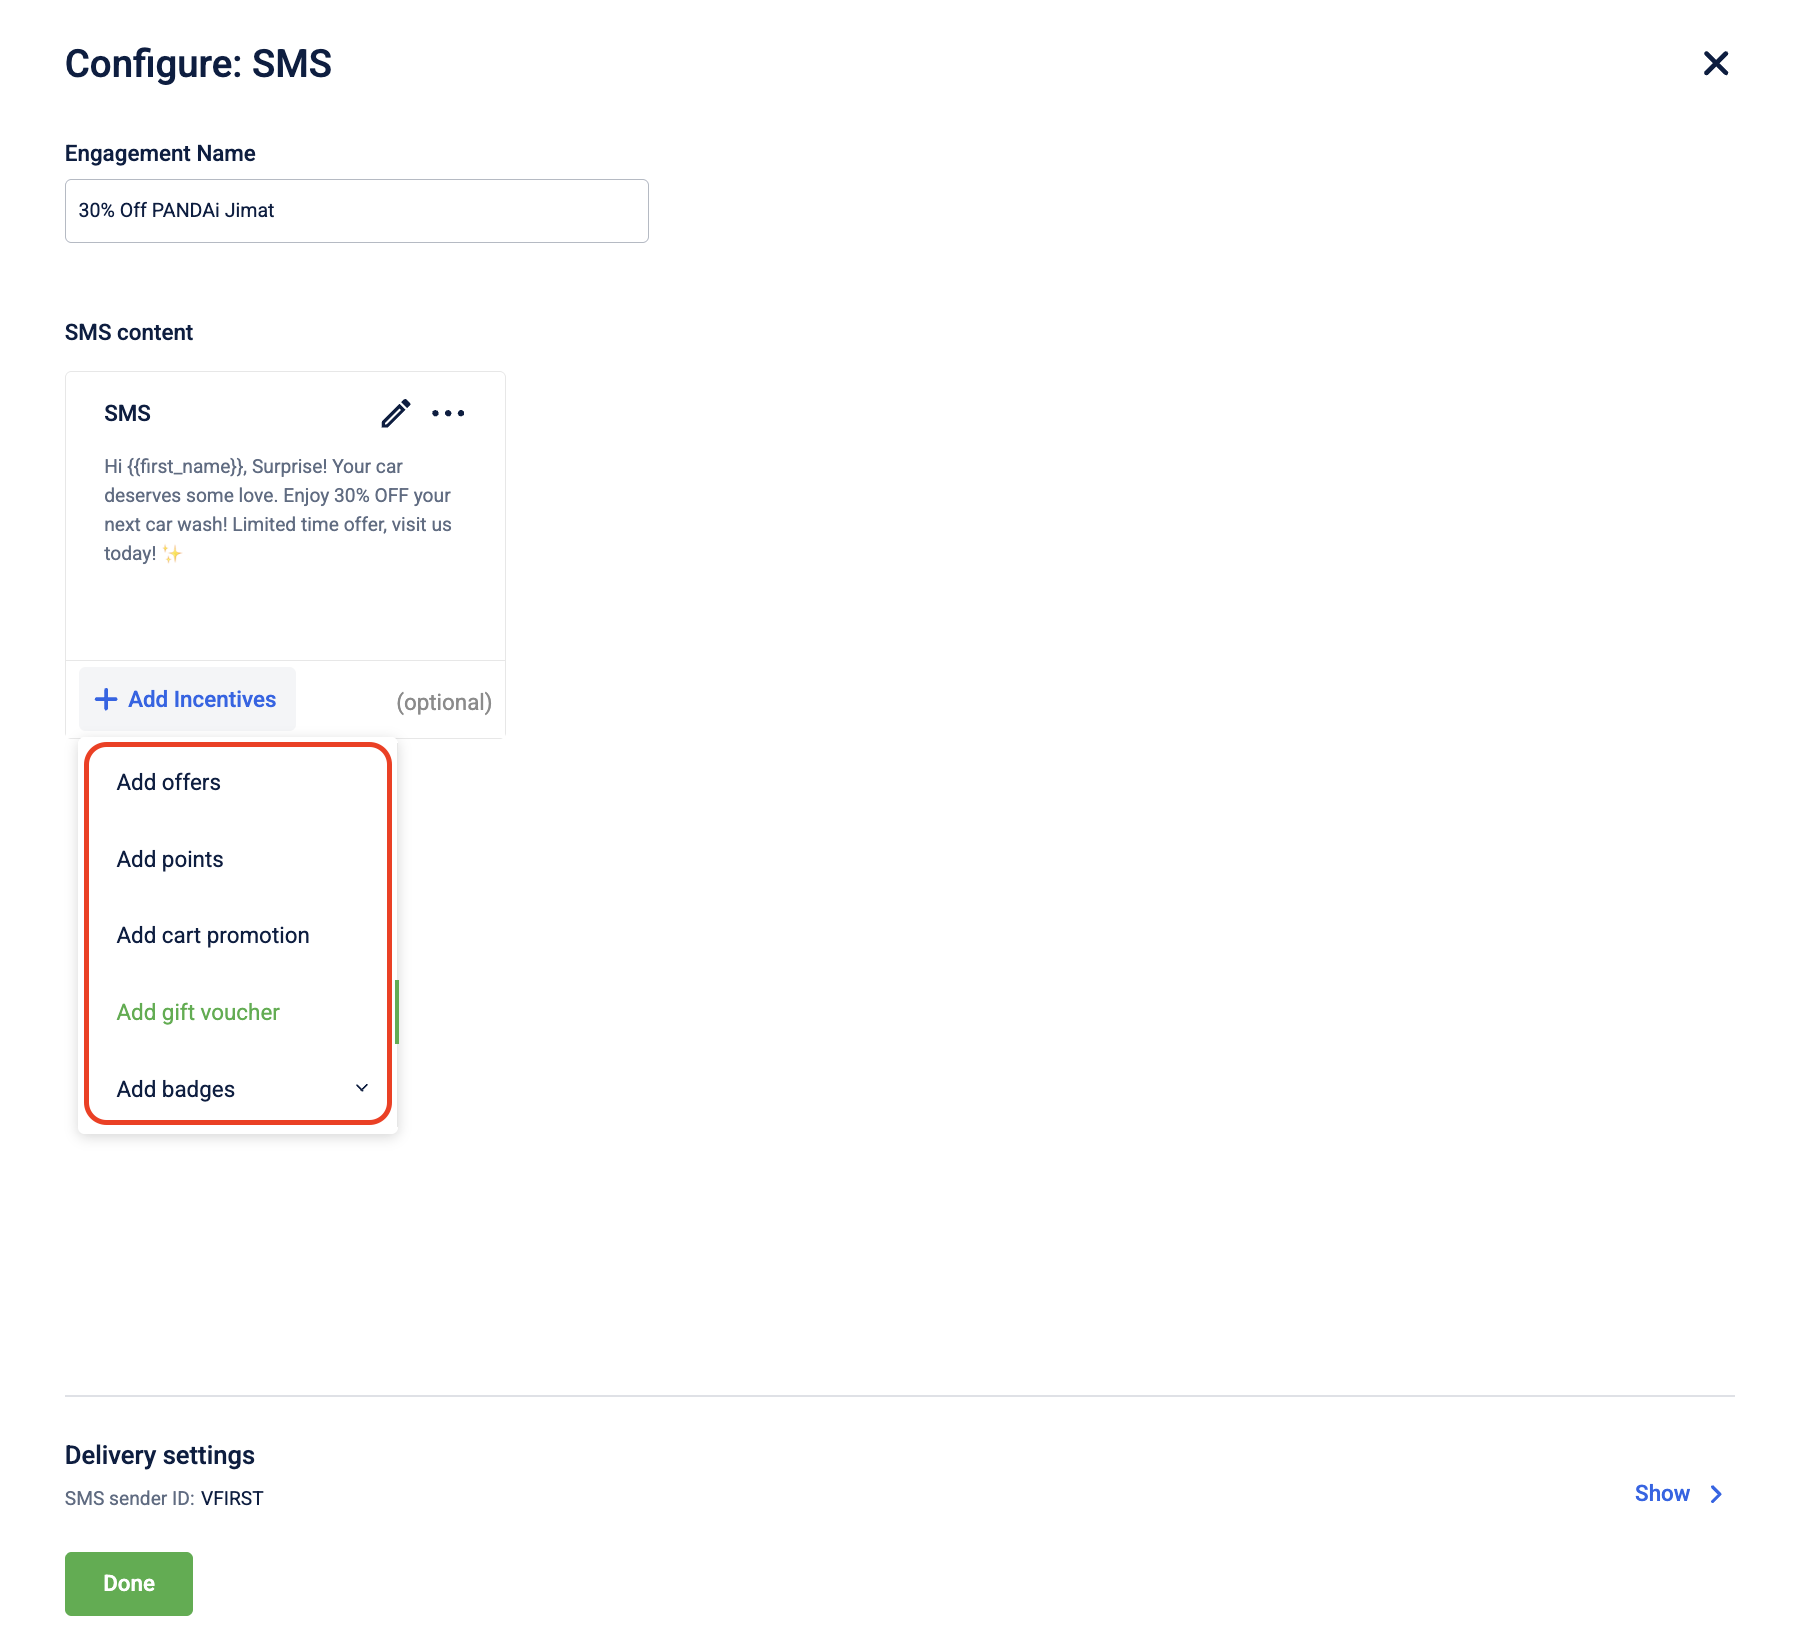
To add incentives along with the engagement message, click +Add incentives and add desired incentives. Currently offers, points, cart promotions, gift vouchers and badges are the Incentives supported in Journeys. For more information on how to add incentives, see Add incentives.
-
To remove or change incentives, click the three dots adjacent to the offers/points and click Remove/Change
<Incentive name>. -
To preview or remove the template added, click the three dots inside the template and click Preview/Remove.
-
In the Delivery settings, enter the delivery settings details. See Delivery settings.
NoteIf you use loyalty-related labels in a journey, adding an earning and expiring condition is mandatory.
For use cases where you only want to display points without issuing them:
- Create an earning and expiring condition with 0 points and 0-day expiry on Loyalty+.
- In the journey, add the respective incentive in the Creatives section of the Engagement block and attach this condition
This allows the journey to pass validation without allocating any points.
However, if you are using loyalty labels that only display a value or name such as points balance, slab name, or lifetime purchases, you do not need to configure an earning or expiry condition. The following labels fall into this category:
](https://docs.capillary, ch.com/docs/create-email-templ, e-#/), [M-Pus, Template](https://docs, apillarytech.com/do, /create-push-notific, ion-template#/), [WhatsApp, emplate](https://docs.c, illarytech.com/docs/crea, -whatsapp-template#/), [ZALO template, https://docs.capillarytech.com, ocs/create-zalo-templat, #/), [ Line template](htt, ://docs.capillarytech.com/docs/create, ine-template-#/), and [Viber template](, all //docs.capillaryte related tags.
For example: If you want to remind a customer how many points they need to renew their slab such as "You need 200 more points to renew your Gold membership!", you can use , refer to the [documen directly in your campaign message without configuring an earning or expiry condition.
For more information on these tags, refer to Supported Labels across Engage+.
Incentives in engagement message
You can add incentives such as offer, points and cart promotion details along with the engagement messages. To add, perform the following:
- Click on the engagement block.
- Click Add incentives.
- Select the desired option.
Note
Points, cart promotions, and gift vouchers must be pre-created before adding them as incentives in the message content. In contrast, offers and badges can be created during message creation, based on the message requirements.
- Click Select/Done/Claim.
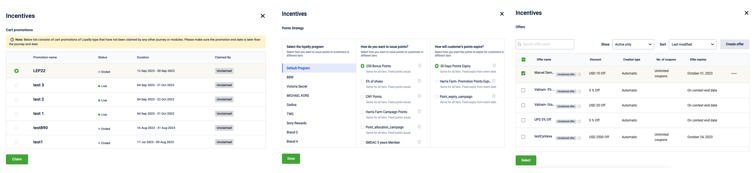
- Click Done.
The selected incentive is added to the engagement message. For information on creating any type of incentive, see Incentive management .
A/B Test in engagement block
Overview
A/B testing, also known as split testing, is a method in customer Journeys that helps to compare different content and engagement methods for specific segments of customers over a defined period. This allows you to gather valuable insights about which configurations perform better with the audience. Based on the results obtained, you can make informed decisions about which configuration to adopt for the remainder of the customer journey.
Note: The A/B Test block is not enabled by default. To use this feature, raise a JIRA ticket to the Product Support team (PST) to enable it for your organization.
Example
Consider a scenario where a brand wants to run a holiday e-mail marketing campaign journey for 20 days. With A/B testing you can trigger the campaign with two different subject lines: "Save Big Today!" and "Limited-Time Offer Inside!". Here, the independent variable would be the subject line variation, while the dependent variable would be the click-through rate – how many recipients open the email and click on the links inside. By conducting A/B testing for the initial few days, you can compare the performance of these two subject lines and determine which one leads to a higher click-through rate. Once you've analyzed the results and identified the most effective subject line, you can use that version for the remaining duration of the holiday email campaign journey, maximizing engagement with your target audience.
Configuring A/B testing for a journey
To configure the A/B testing for a journey, perform the following while configuring a journey:
- Drag and drop the A/B testing block on the journey canvas.
NoteThe A/B testing block is a replacement for the engagement block. If you are running an A/B test, you don’t need to include another engagement block.
- In the Block name, enter a name for the A/B testing.
- From the Variants and audience split section, select the Engagement channel and Incentives (optional).
- In the Variants, add Creatives and Incentives (if applicable) for the variants. To add an additional variant, click Add more variant. A maximum of three variants are supported.
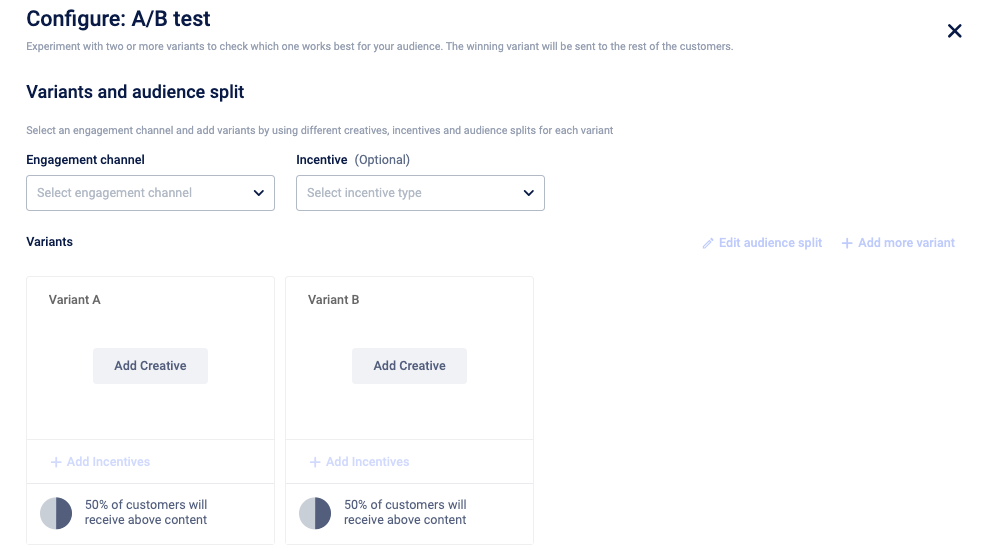
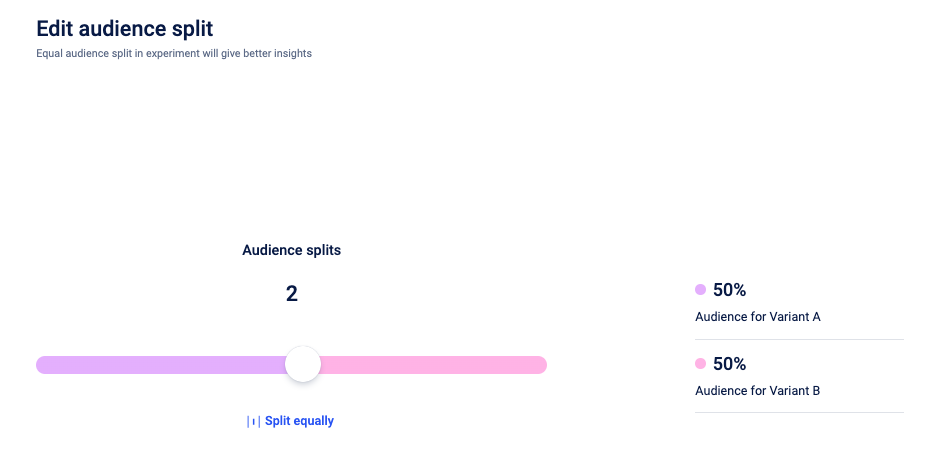
- Click Edit audience split and define the audience proportion for the variants, the split of what %age of your test customers should get which variant. By default, audiences for the variants are split equally.
Notes
- Sum of audience split percentages for each variant should equal 100%.
- Audience split for any variant cannot be zero.
- Fractional values are not allowed.
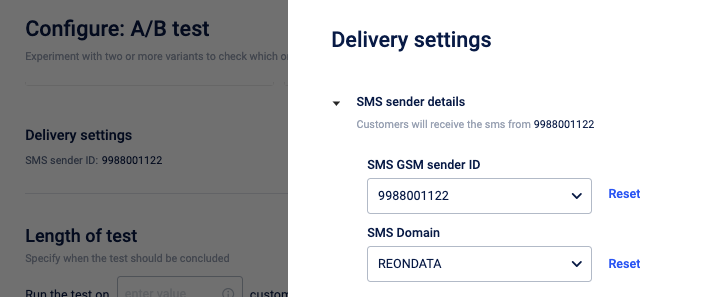
- In the Deliver settings, configure the delivery settings.
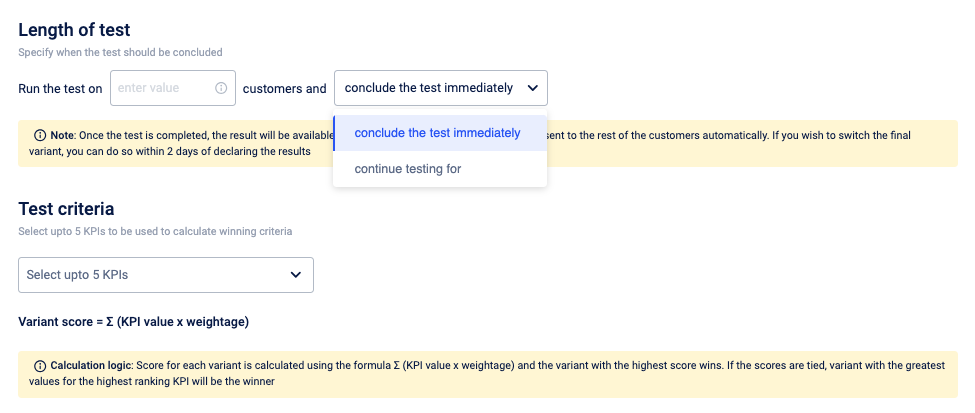
- In the Length of the test section, define the following:
- Number of customers (mandatory): The minimum number of customers that should enter the journey.
- You can define this number based on your knowledge and should be realistic based on the journey configured and your organization’s customer base. For example, if your organisation’s customer base is 10,000 do not set the test criteria to be more than 1000-2000. The ideal number of test customers is 20-30% of your expected audience count who will enter the journey.
- The number of entrants should be equal to or greater than the number of variants.
- The number of entrants should not exceed the total number of customers in the organization. ii. Duration (Optional): After defining the number of entrants, you can choose to conclude the test immediately or select an additional number of days for the test to run after reaching the minimum number of entrants. The system then automatically selects the next set of defined number of entrants for the additional days.
- Number of customers (mandatory): The minimum number of customers that should enter the journey.
Note:A minimum of one-day wait duration is applicable to all A/B tests after the number of test users criteria is met. For example, if the A/B testing gets completed in a couple of hours, the system still takes a minimum of one day to decide the winning variant.
-
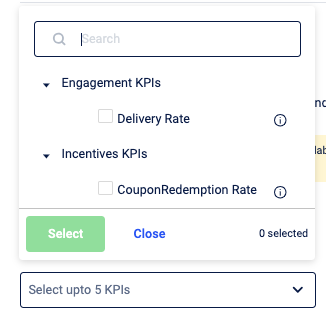
From the Test- criteria dropdown, select the KPIs to calculate the winning variant of your test. The system displays the KPIs based on the engagement selected.
- Engagement Level KPIs: The engagement level KPIs are available by default. The Engagement Level KPIs listed in the dropdown depend on the selected channel. For instance, in Email, you will have access to metrics such as open rate and delivery rate, whereas in SMS, only the delivery rate will be available.
- Incentive Level KPIs: These are available only if you have added Incentives for the test. You can select a Maximum of 5 KPIs in total across both categories.
-
Click Weightage , edit the weightage for the KPIs and arrange the order of the KPIs. The winning variant is calculated based on the KPI value and the %age weightage assigned to it. Ranking order is needed if there is a tie between the scores of two variants.
- Click Done. Your A/B test setup is complete.
- Send your journey for approval.
Notes
A user can set up multiple A/B tests in a single journey. Setting up of each A/B test should be done in a similar way as defined aboveOnce your journey is live, your A/B test begins.
When the criteria defined for the test, such as the number of entrants and wait duration, are met, the test results are calculated.
Based on the specified Key Performance Indicators (KPIs) and their respective weightage, the winning variant is determined.
After the test is completed and until the user takes any action, the winning criteria are sent by default.
Overriding the winning criteria is only allowed for 2 days after the test is completed. After that, the winning criteria are sent by default.
After A/B test setup: Understanding the post-setup process
Notification on the A/B testing
- Users will receive an email notification informing them of the test completion and providing detailed results.
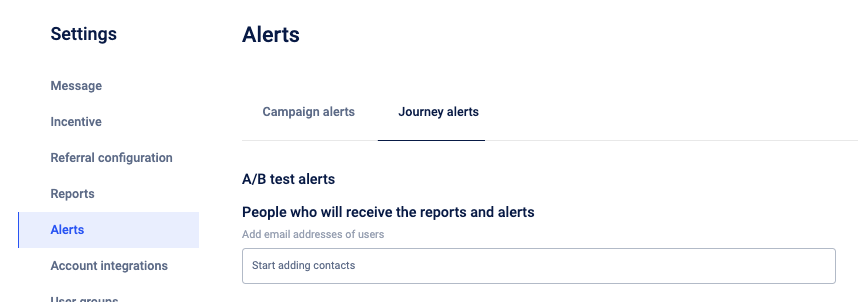
- Email IDs of users who should receive the results of the A/B test should be added in Engage Settings > Alerts > Journey alerts > A/B test alerts.
Editing Journeys with Active A/B Tests:
If you edit the journey while an A/B test is in progress, your test will be reset. When you make the edited journey live, your test will start from the beginning, starting again from entrant number 1.
A/B testing scenario when pausing a journey:
If you pause a journey where an A/B test is live, the test will also be paused. The test will resume when you resume the journey and the test will be completed when the test criteria (number of entrants) and additional wait duration are fulfilled.
A/B testing in a Sunset journey scenario:
An A/B test block in a sunset journey will work the same as it does in a live version of a journey.
Overriding the winning variant
You can override a winning variant within two days of the result. For instance, if three variants (A, B, and C) were defined and Variant B is determined as the winner, but you prefer to send Variant C to customers entering the journey after the test, you can do so. Perform the following:
- Navigate to the Journey where the A/B test was set up and access the A/B test block. By default, the winning variant is selected.
- Select Variant C and declare it as the final variant to be sent to all customers entering the journey.
Context-based tags in engagement block
Context tags are dynamic placeholders you can insert into engagement blocks (such as emails and SMS) to personalize message content with event-specific data. The attributes available as context tags are derived from the event configured at that point in the journey. Depending on where a customer is in the journey, two sets of context tags are available:
-
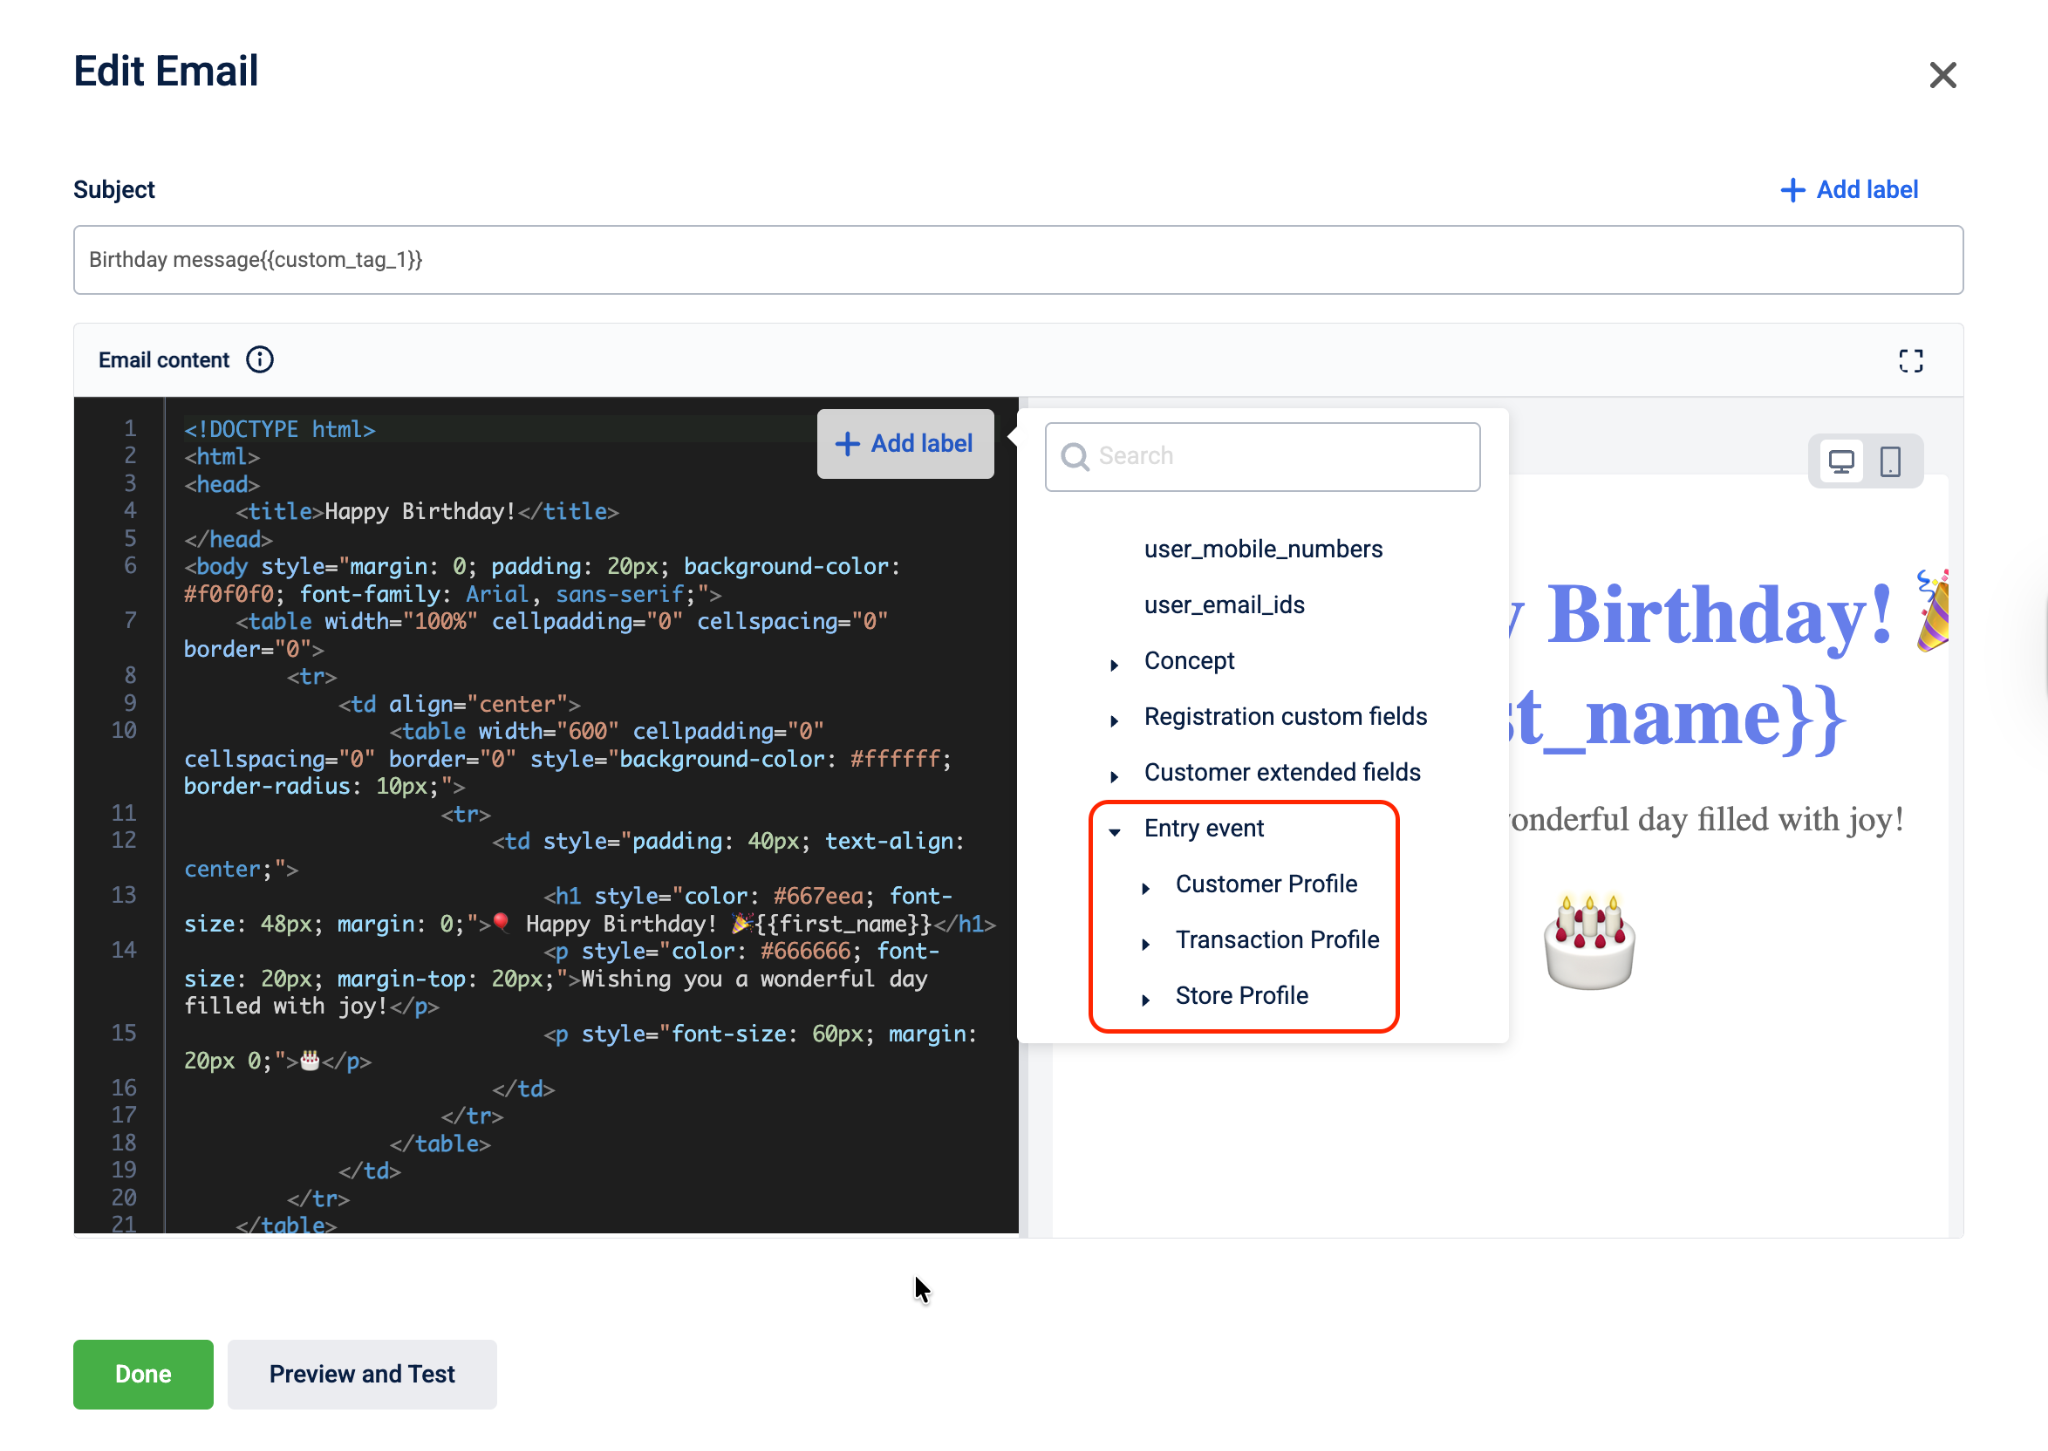
Entry event-based tags — When you configure a journey, you define an entry trigger, a specific action a customer must perform to enter the journey (such as making a transaction or enrolling in a target). The attributes associated with that action become available as entry event-based tags. You can use these tags in any engagement block to personalize the message based on what the customer did when they entered the journey.
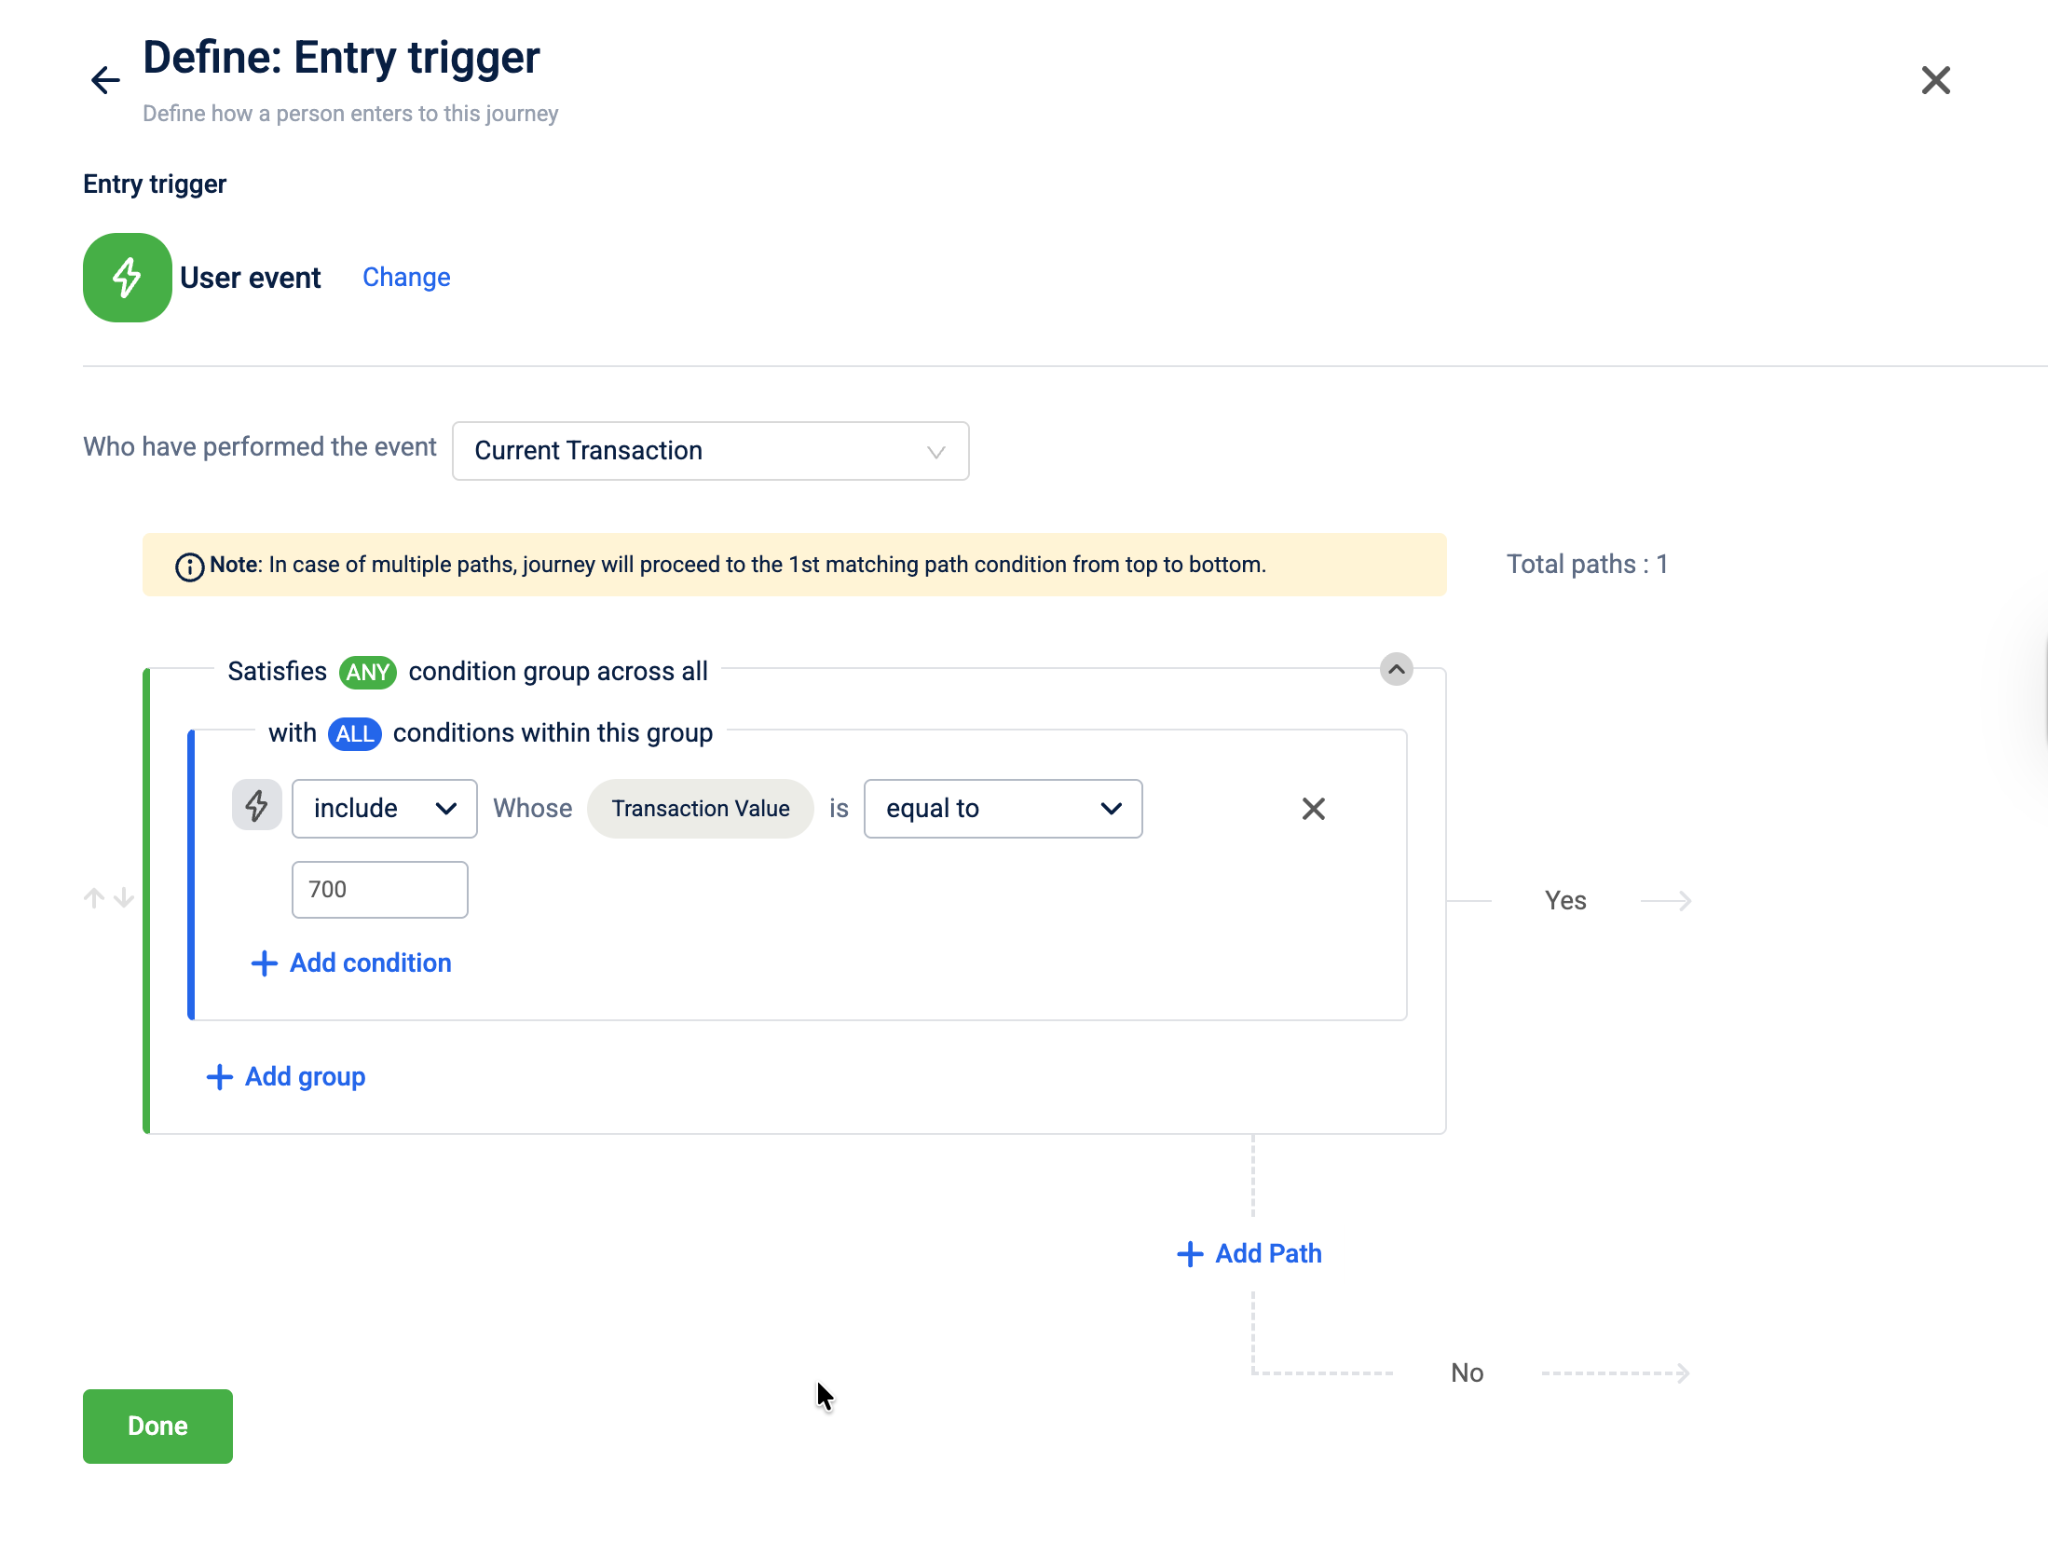
Example: A retail brand wants to send a personalized SMS to customers who make a transaction worth 10,000. In the entry trigger, the brand selects Current Transaction as the event, selects Add entry paths, and sets the condition as Transaction Value is equal to 10,000. In the SMS engagement block, the brand selects Add label and navigates to Entry event > Transaction Profile to insert the transaction value tag into the message. When a customer makes a qualifying transaction, the SMS is sent with the actual transaction value personalized for that customer.
-
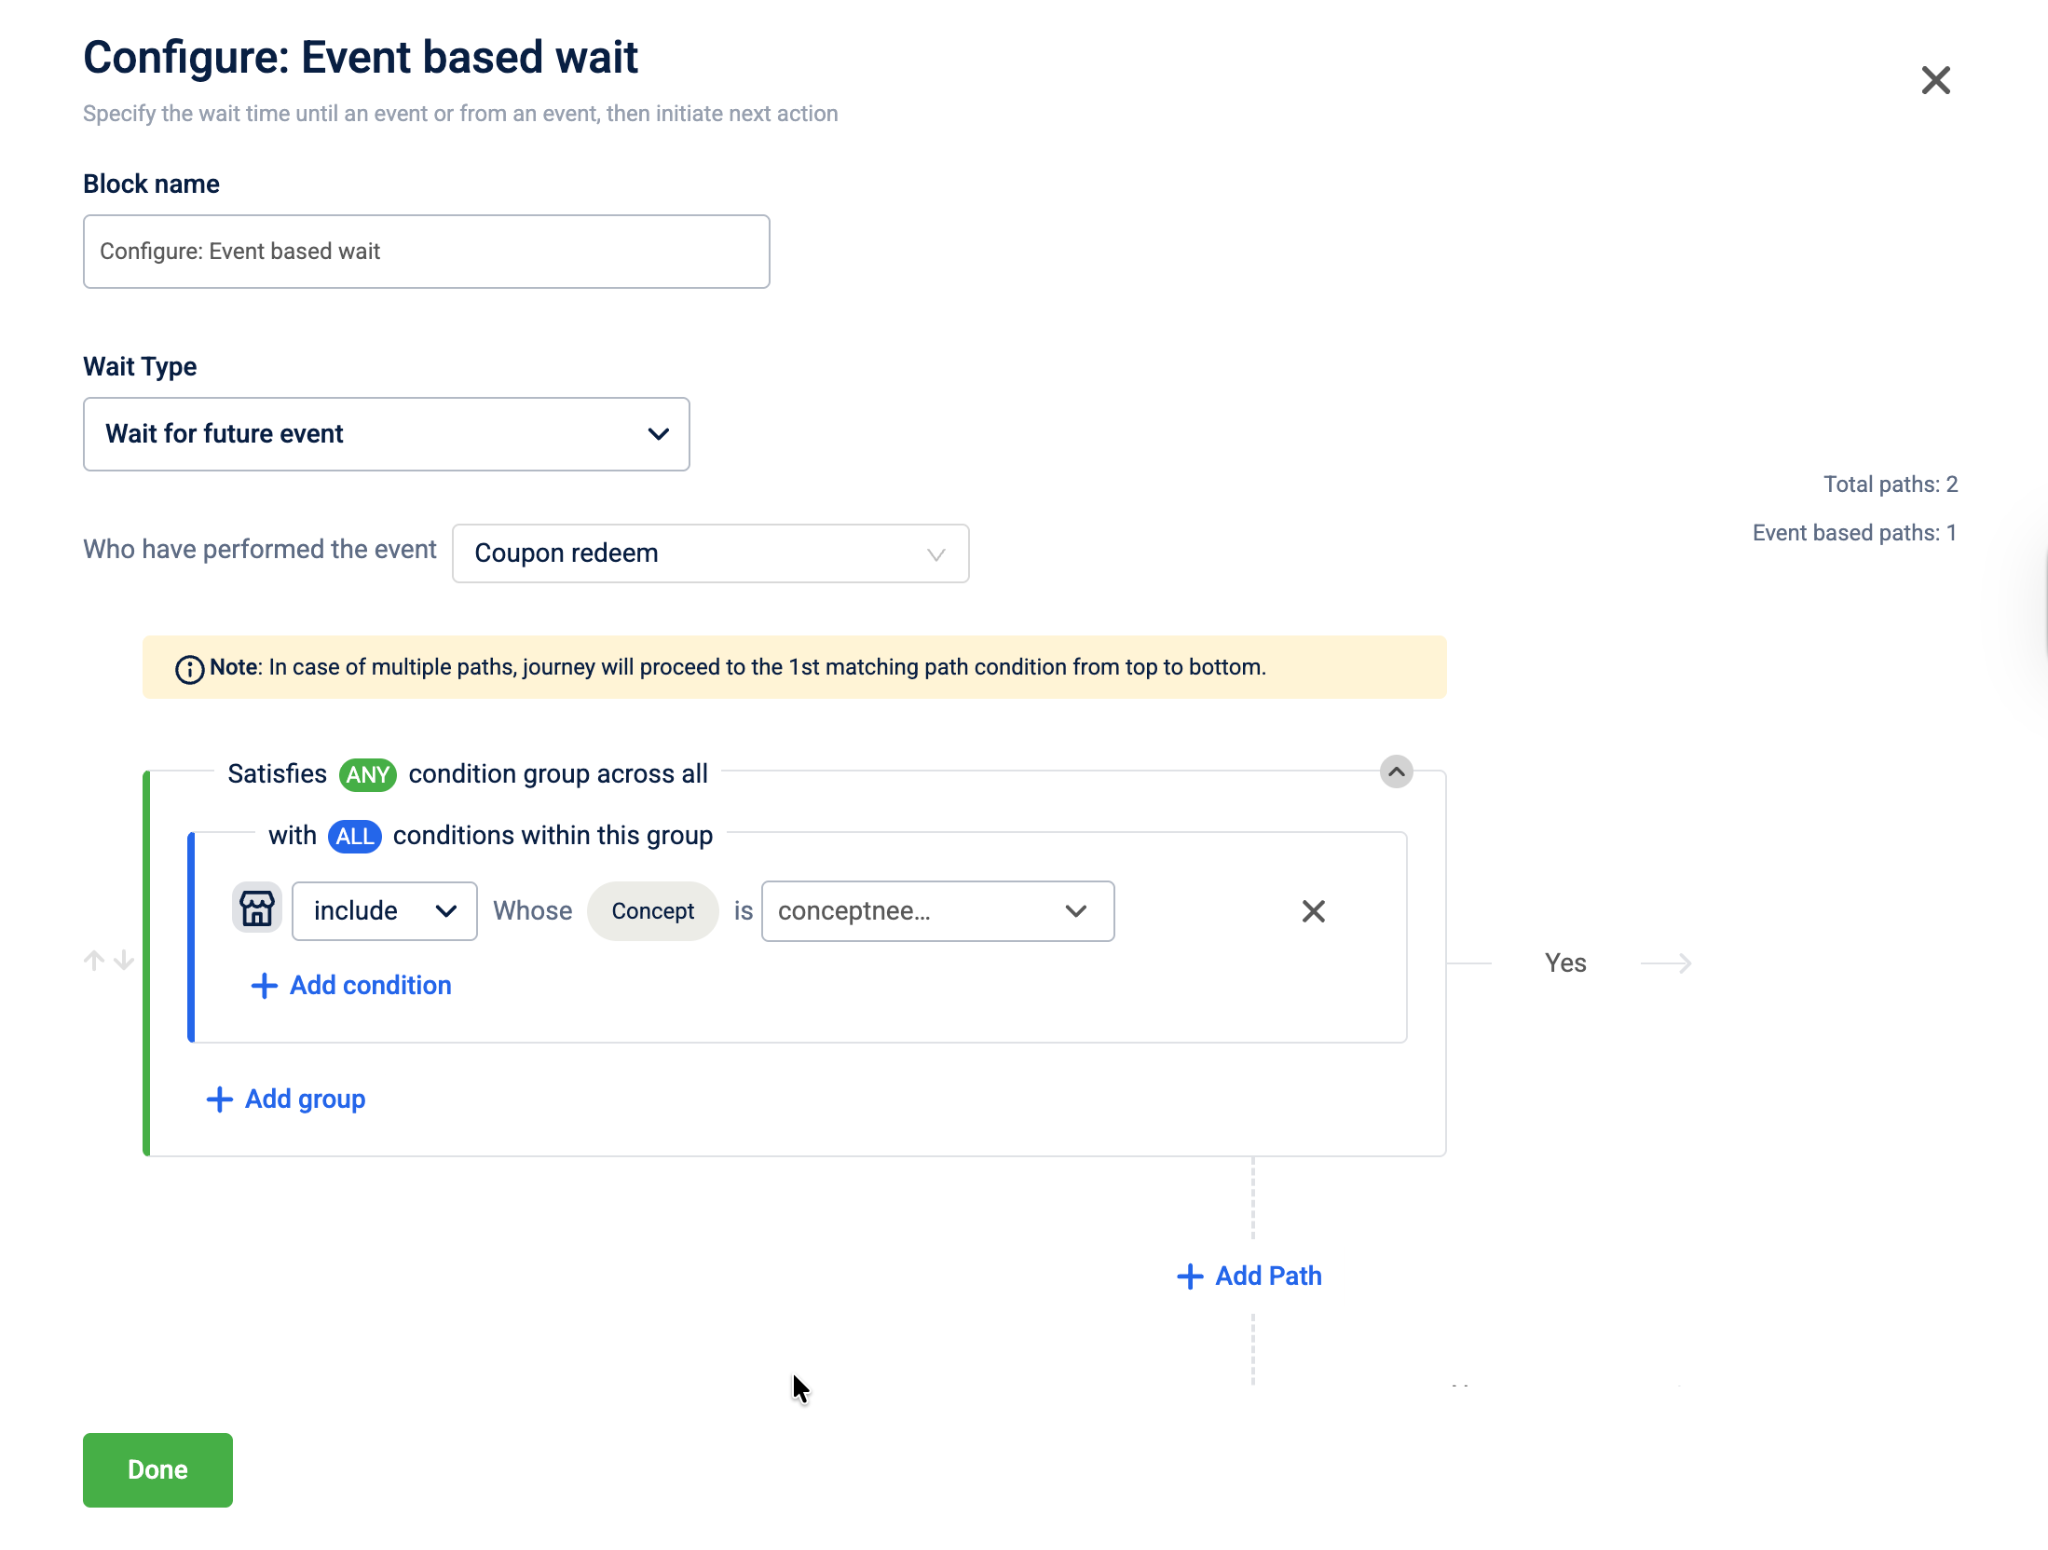
Wait for future event context tags — The Wait for future event block pauses the journey until a specified customer action occurs.Once the event occurs and the customer moves to the next step, both entry event-based tags and the attributes from wait for future event become available as context tags. You can use these tags in the engagement block that follows to personalize the message based on what the customer did at that point in the journey. Note that within the Event-based wait block, context tags are supported only for the Wait for future event type.
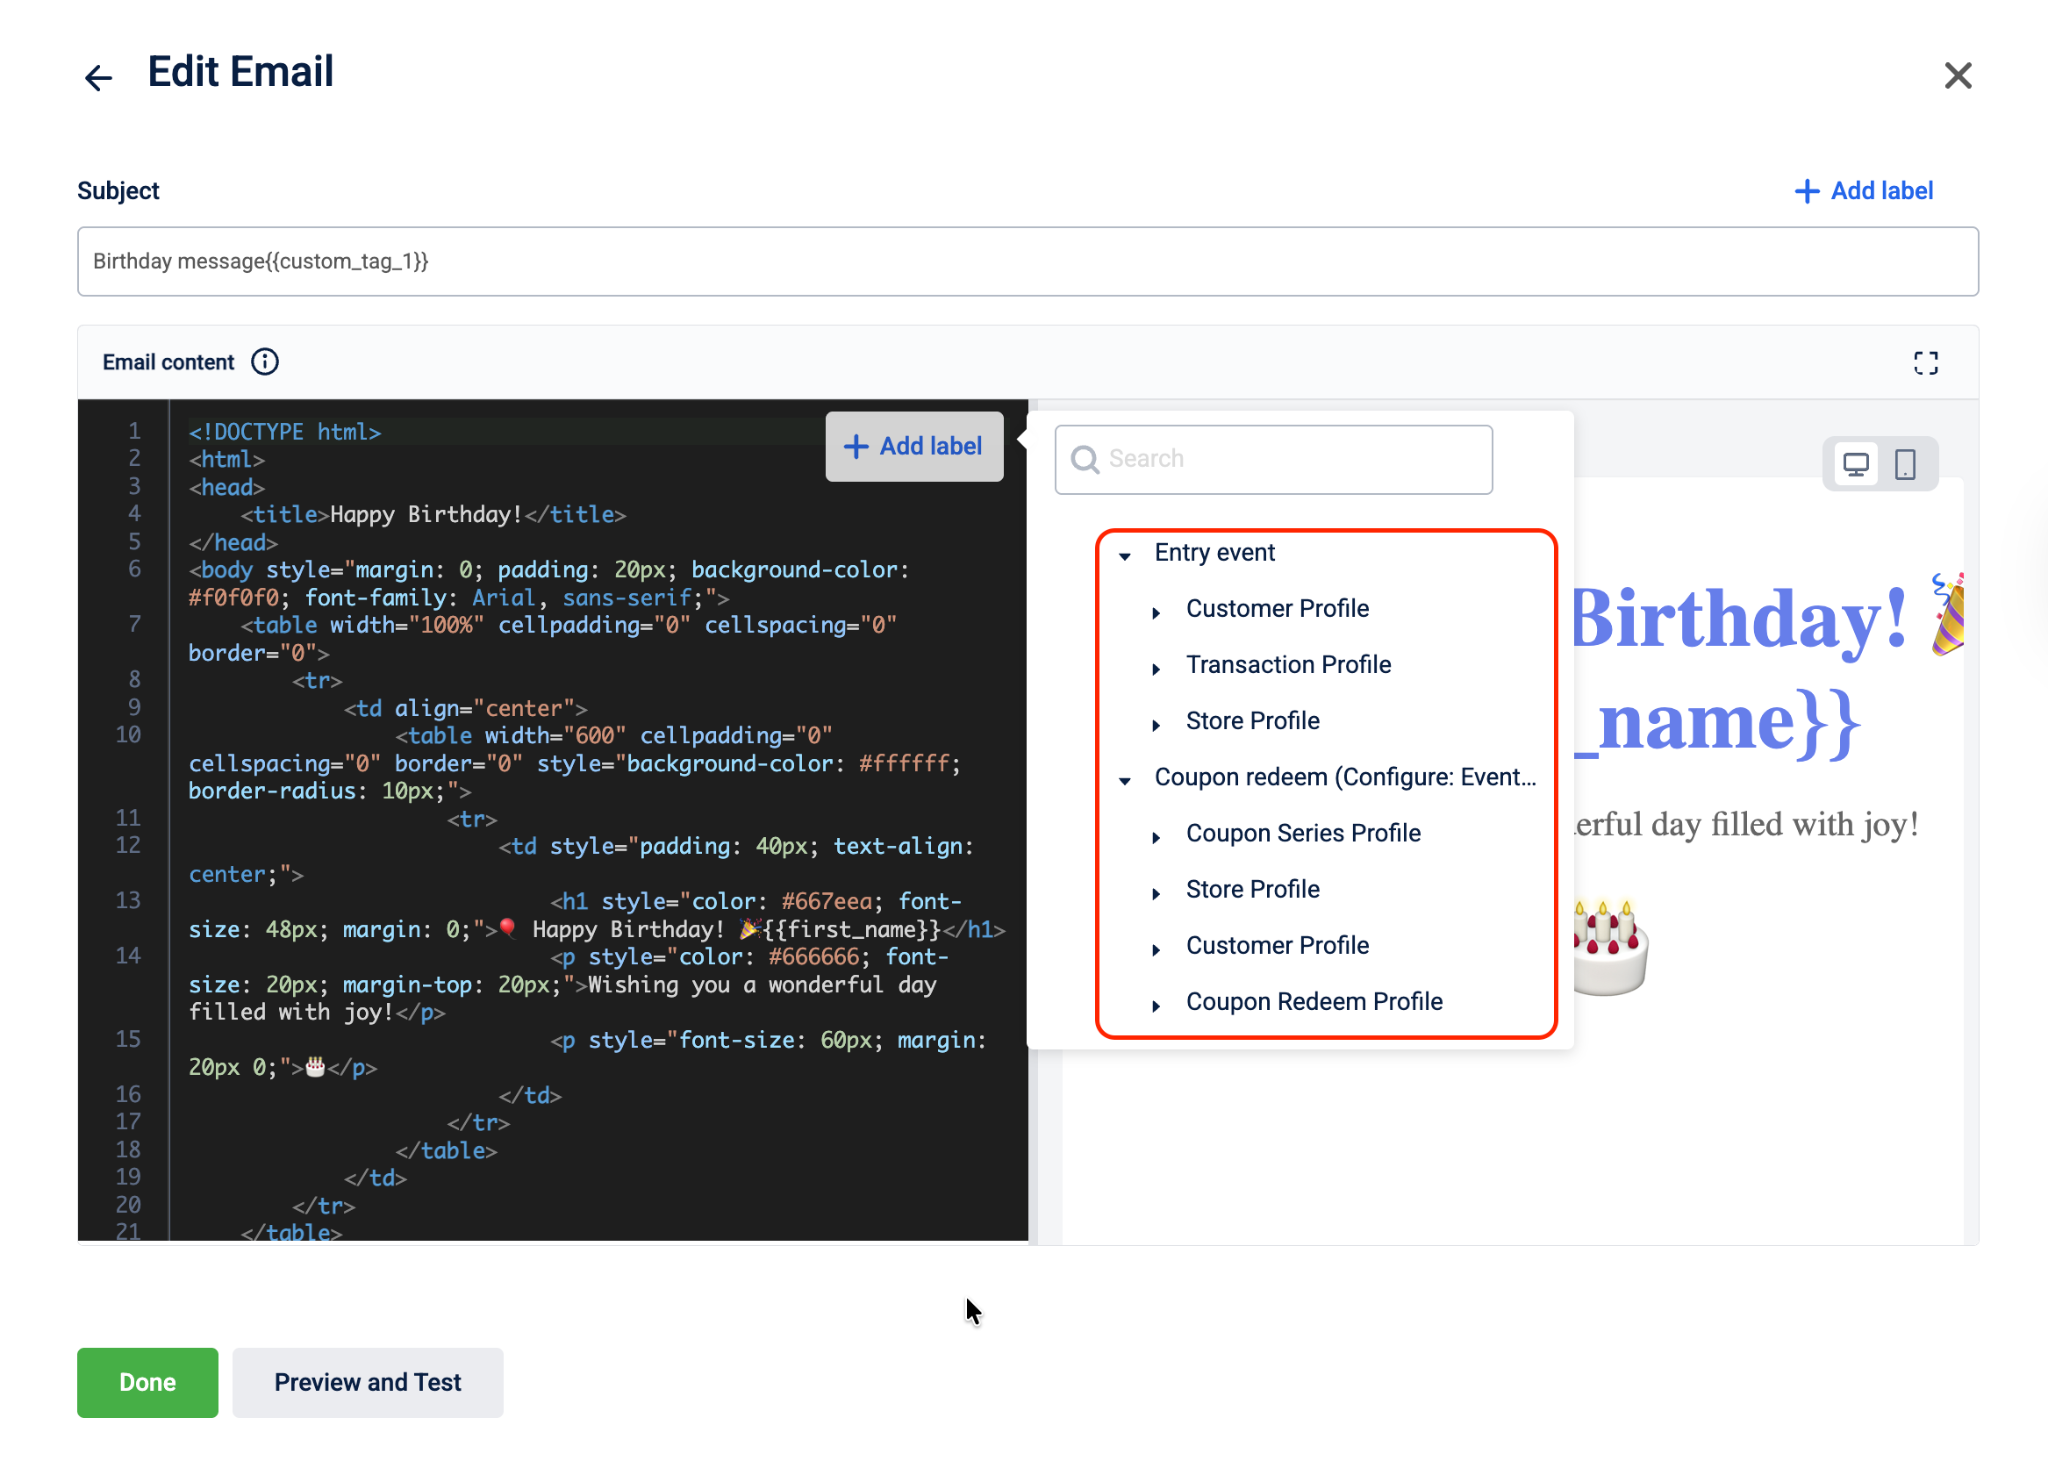
Example: A brand wants to notify customers when a promotion is issued to them. In the Event based wait block, the Wait Type is set to Wait for future event and the event is set to Promotion issued. Once the promotion is issued and the customer moves to the next step, the SMS engagement block on the primary path shows two sets of tags under Add label, entry event-based tags and Promotion issued (Event based wait) tags. The brand uses tags from both sections to personalize the SMS with details from both the entry event and the issued promotion.
How the path determines tag availability
Context tags from a Wait till event block are available only in the path that follows a successful event match (the primary path). They are not available in the else/fallback path (when the event does not occur).
Note: If a customer exits through the else path, context tags from that Wait for future event block are not populated. Design your else path communications using only entry trigger tags or static content.
Steps to use context tags
To use the context tags, perform the following steps below:
-
Go to Engage+ and select Journeys. Click Create Journey.
-
Configure the entry trigger. Define your entry trigger by selecting a user event and configuring the entry condition.
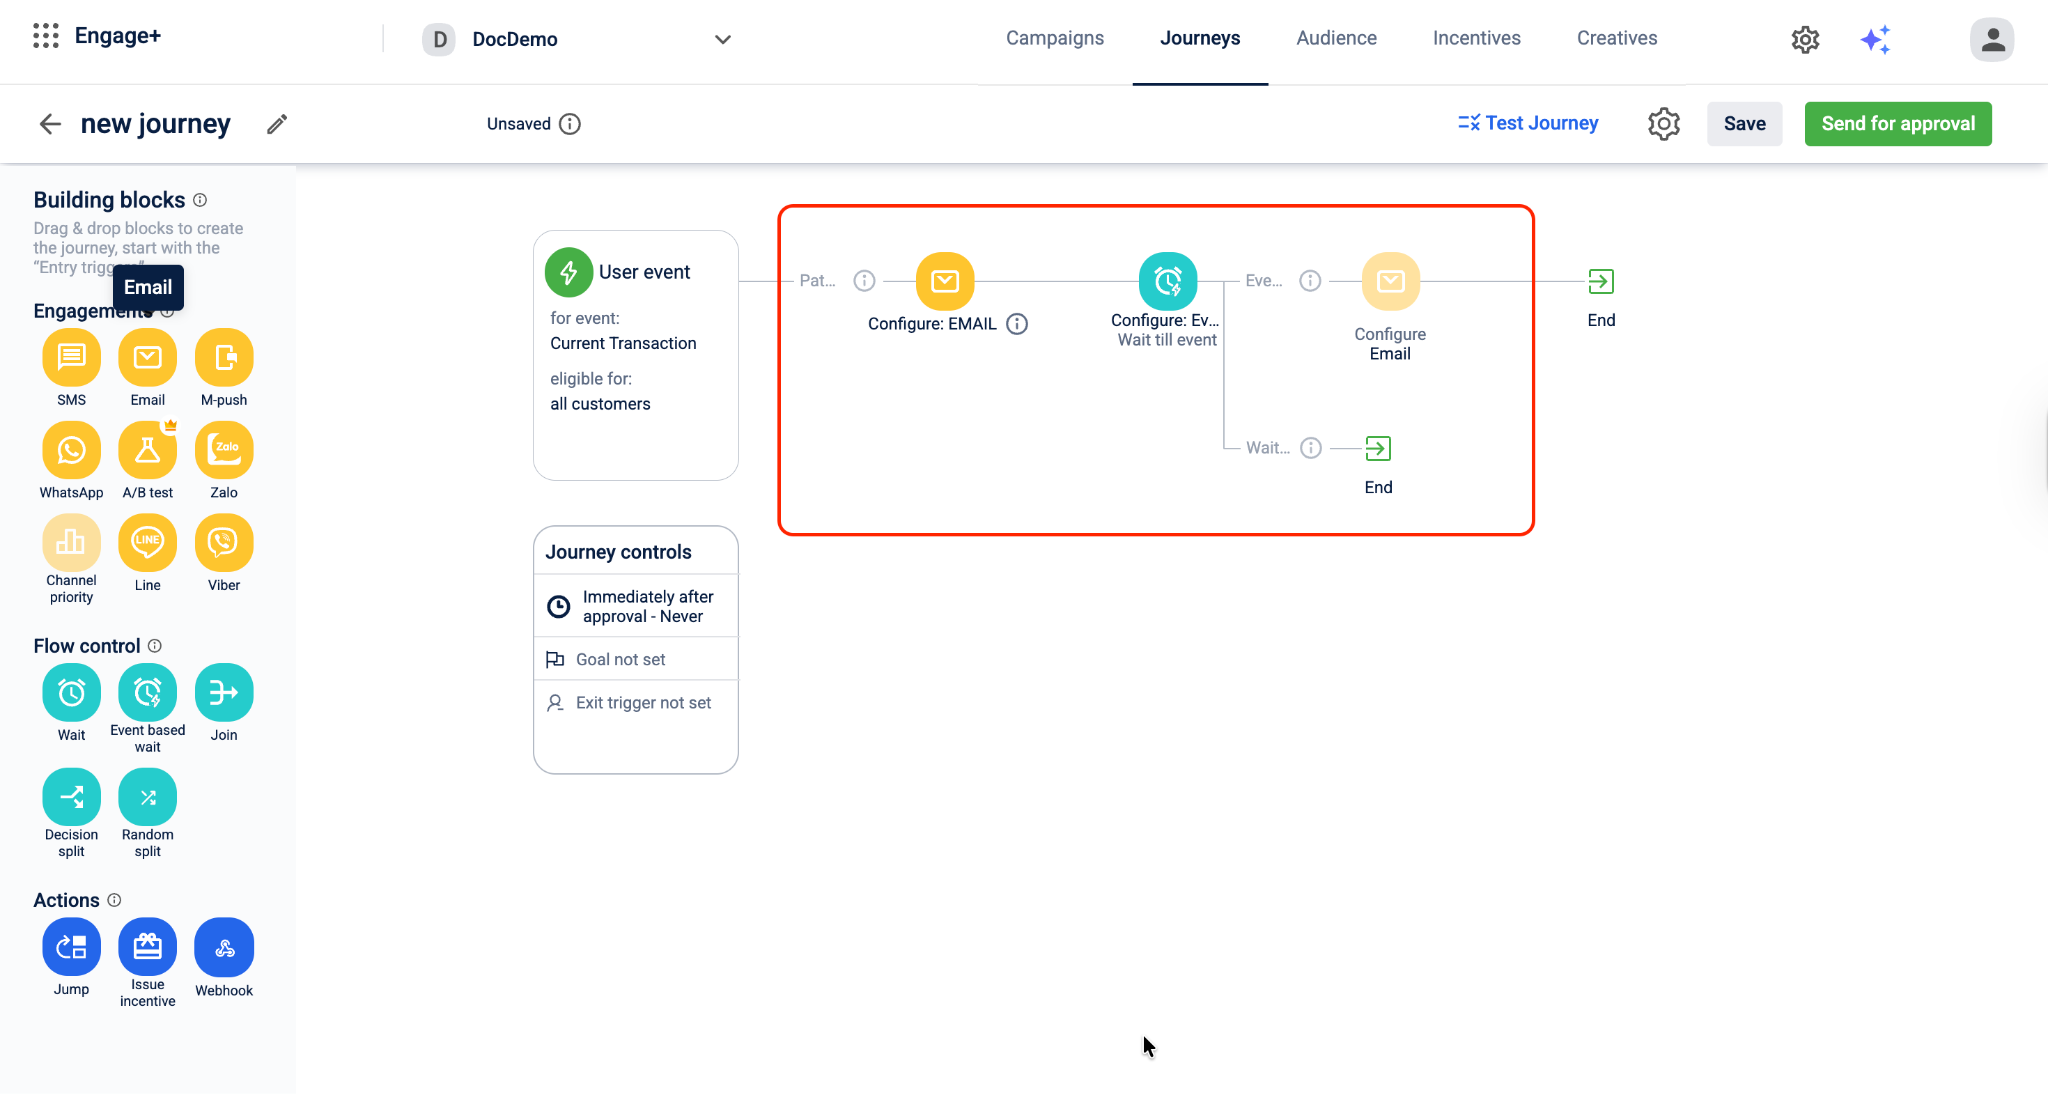
- Add an engagement block after the entry trigger. While configuring the block, select Add labels. The attributes you selected in the entry trigger will be available here under Entry event.
-
Further along the journey, add an Event based wait block and configure it with the relevant event and attributes. Save the block configuration.
Note: You can add multiple Event-based wait blocks in a journey. Each block contributes its own set of context tags based on its configured event type. If a journey has more than one Wait for future event block, each engagement block shows context tags for the Wait for future event block that immediately precedes it on that specific path.
- Add an engagement block on the primary path. On the primary (success) path of the event-based wait block, add an engagement block (such as an email). Open the block to edit its content.
- In the engagement block editor, look for the tags panel. Select the relevant tag from the Wait till event context tags section and insert it into your content.
- Select Save to apply your changes. The engagement block will now use personalized data from the wait event when it is triggered for a customer.
NoteIf your Journey uses context-based tags, ensure that the required
eventContextconfiguration is enabled for your organization. Without this configuration, the Journey cannot resolve context-based tags, which may cause message blocks to fail even when customers successfully enter the Journey. This is a one-time organization-level configuration. Raise a Jira ticket to the Product Support Team to enable it for your organization.
Updated 3 days ago