
External Facts
Overview
External Facts are a type of fact table that allow us to import and work with the data that doesn’t fit into the predefined schemas of the exiting system. This enables brands to directly ingest the data into the Insights database and report on them based on the dimensions existing in the system.
For example, consider a watch manufacturer that requires customers to register their purchase on the brand's website to activate the warranty. To track how many of these customers completed the registration, the brand can ingest this data into the Insights database as External Facts, since it isn't stored in the existing system.
Prerequisites to create an external fact
- Ensure you have the necessary permissions to create external facts. If you need these rights, please raise a Jira ticket with the Access Team.
- External fact data file.
Steps to create an external fact
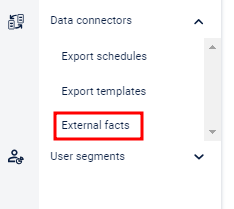
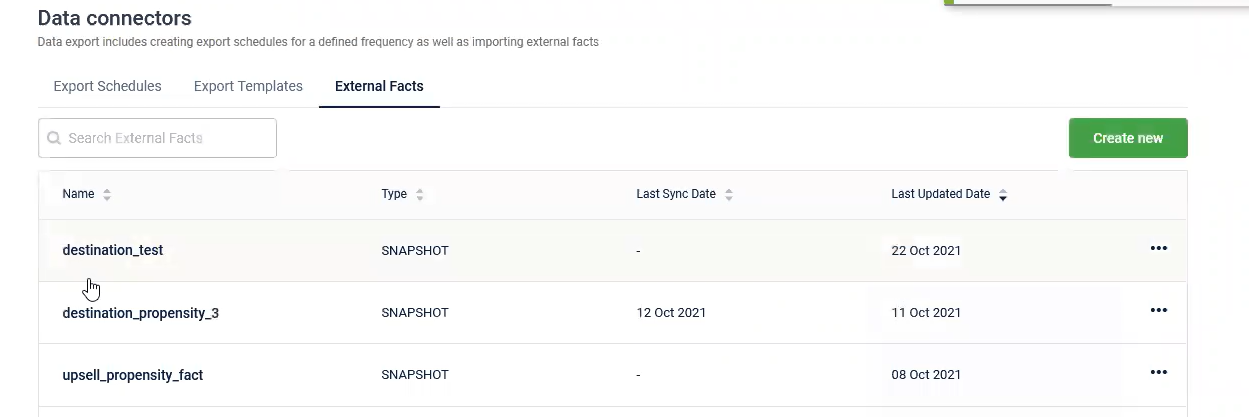
- Navigate to Insights+ and click Data Connectors.
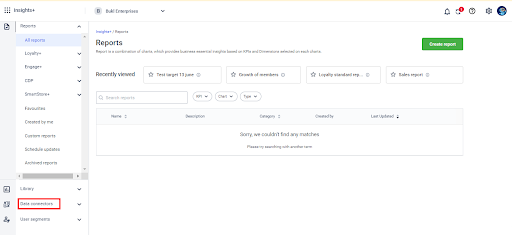
- ClickExternal Facts.
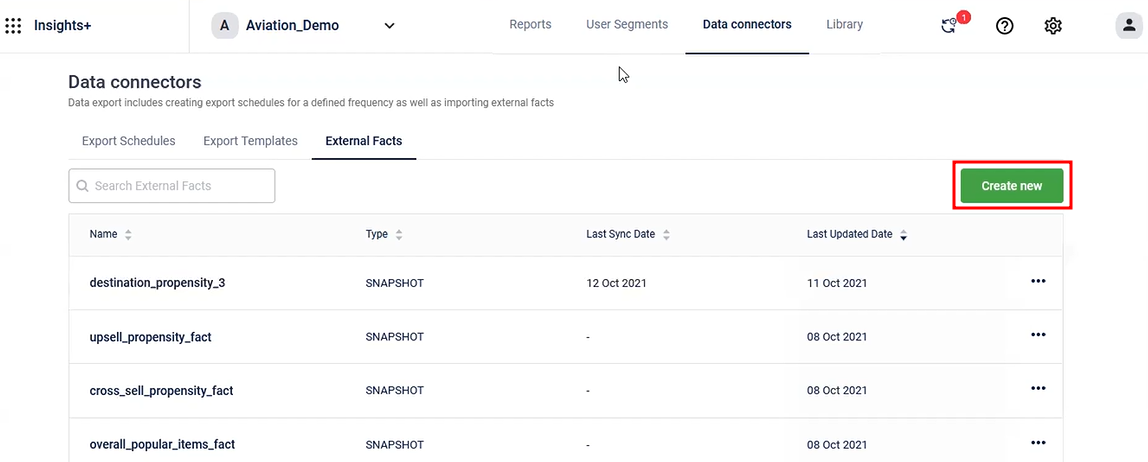
This will show the list of existing external facts for your org.
- Click Create New.
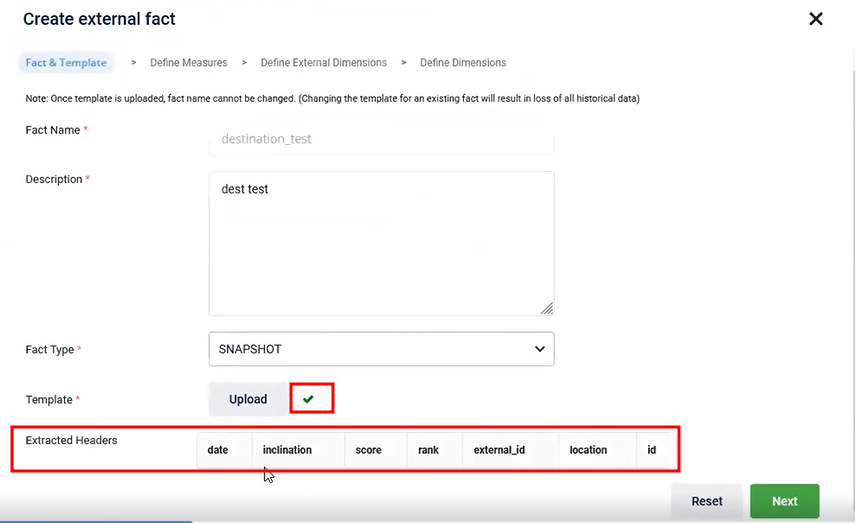
- Provide a name and description for the external fact.
WarningOnce the template is uploaded, avoid changing the fact name. Changing the fact name for an existing fact will result in loss of all historical data.
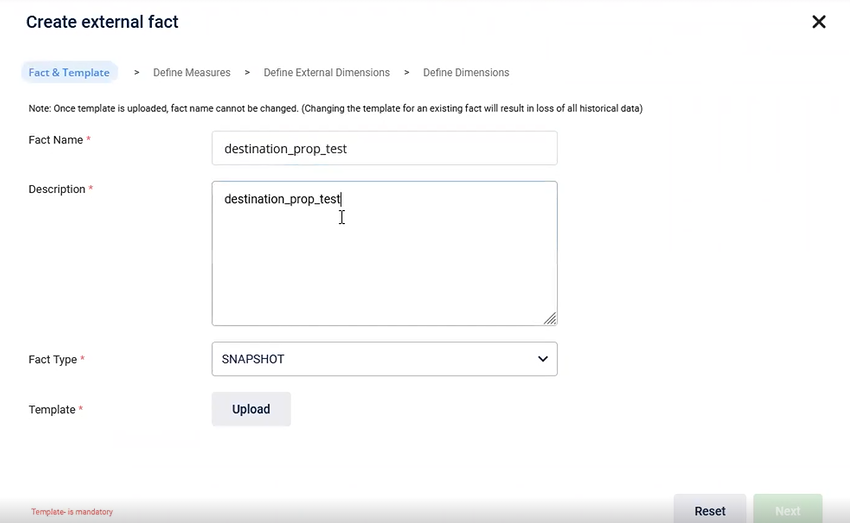
- Choose the Fact Type. There are 2 options.
Snapshot - Snapshot Fact Tables are used to capture the state of data at a specific point in time. These are used in scenarios where the change affects the complete table. For example, a change in the city of residence of a customer can impact multiple data entries.
Incremental - Incremental Fact Tables store only the changes or additions made to the data since the last update. These are used in scenarios where additional data is added to the existing data. For example, a new entry to the bill data table.

- Upload the schema template.
Click Upload and select the excel file containing the data that you want to upload. The headers in this file are used for creating the schema.

After the file is uploaded, a green tick appears near the Upload tab and the extracted headers are displayed.
- Click Next. If you want to reset the details, click Reset and refill the data.
- Add Measures and Dimensions:
- Define measures (quantitative data) and dimensions (categorical data).
- Specify if each field is an internal dimension (mapped to existing Capillary data) or an external dimension (unique to the external fact).
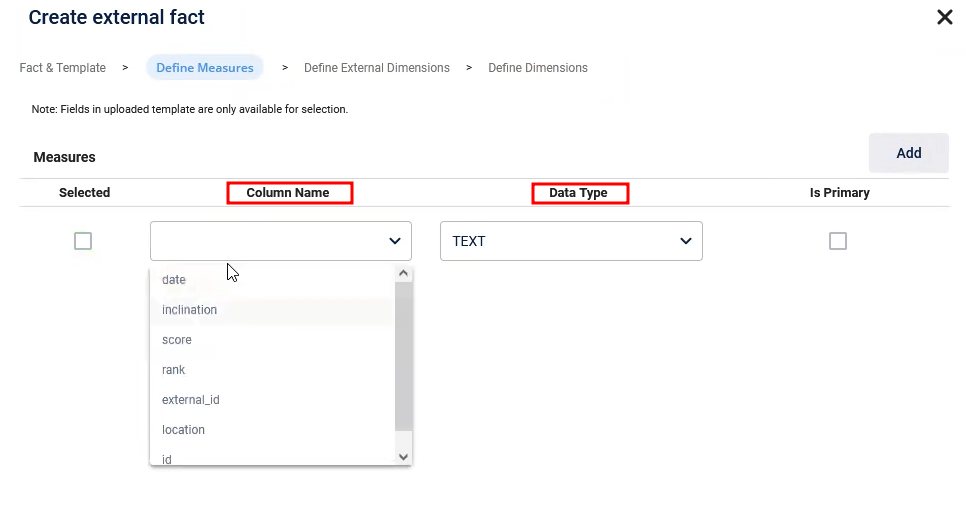
i. To add the measures, click Add.
ii. Select the Column Name from the dropdown box. Select the Data Type of the measure (from Text, Integer, and Double).
NoteOnly the fields uploaded in the template are available for selection.
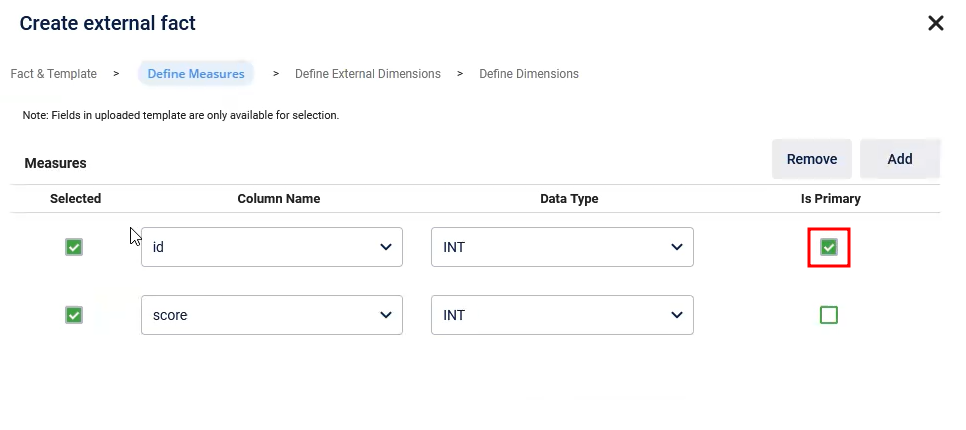
If the measure is a primary key (to uniquely identify rows) of the table, click Is Primary checkbox. Add the remaining measures.
iii. To delete a measure, click the Selected checkbox and click Remove.
NoteMake sure to add the Primary Key, else the Next tab will not be activated.
iv. Click Next.
v. To add the External Dimensions, click Add and fill the Dimension Name and Possible values for the external dimensions.
NoteInternal dimensions are mapped to existing dimensions at Capillary. External dimensions are the new dimensions that need to be created.
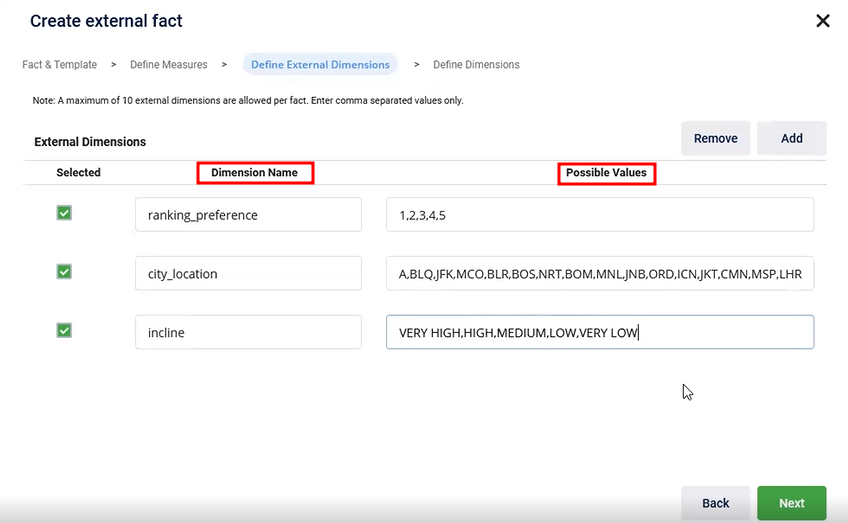
NotePossible Values should be separated by commas, without any space or gaps.
Once created, the possible values cannot be changed. Attempting to edit and modify the possible values will result in the loss of all previous data.
vi. Click Next.
vii. To Define Dimensions, click Add to map all the dimensions present in your template (excel file).
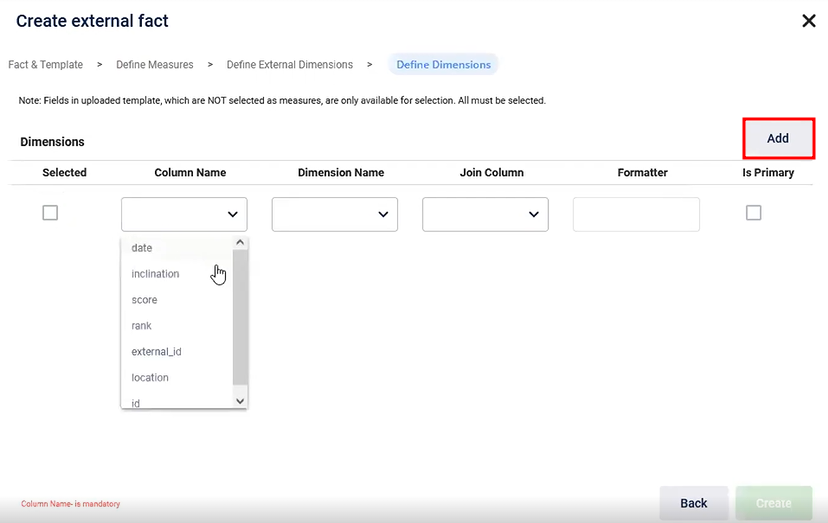
viii. Select the Column Name from the dropdown box. In the Dimension Name, select the respective dimension from the dropdown box. Accordingly select the Join Column from the dropdown box and Formatter.
NoteFormatter is used only in the case of date dimension, such as YYYY-MM-DD.
Any external dimension you create, the Join Column dropdown will show Value.
In case of primary dimensions, select the Is Primary checkbox.
ix. Click Create. Upon successful creation of the external fact, the system will display the message: ‘External fact created successfully’.

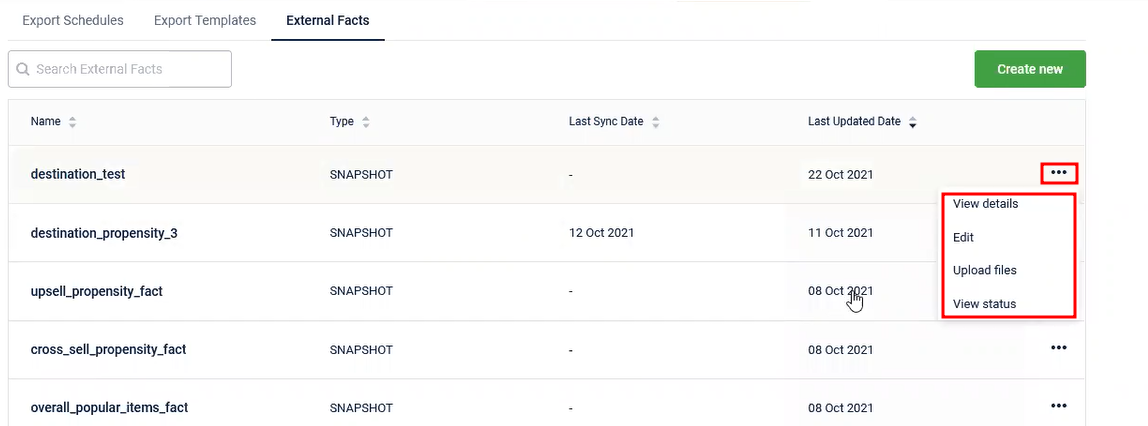
The external fact is displayed in the list. This list can be sorted by Name, Type, Last Sync Date and Last Updated Date.
- Click on the external fact to view its details.
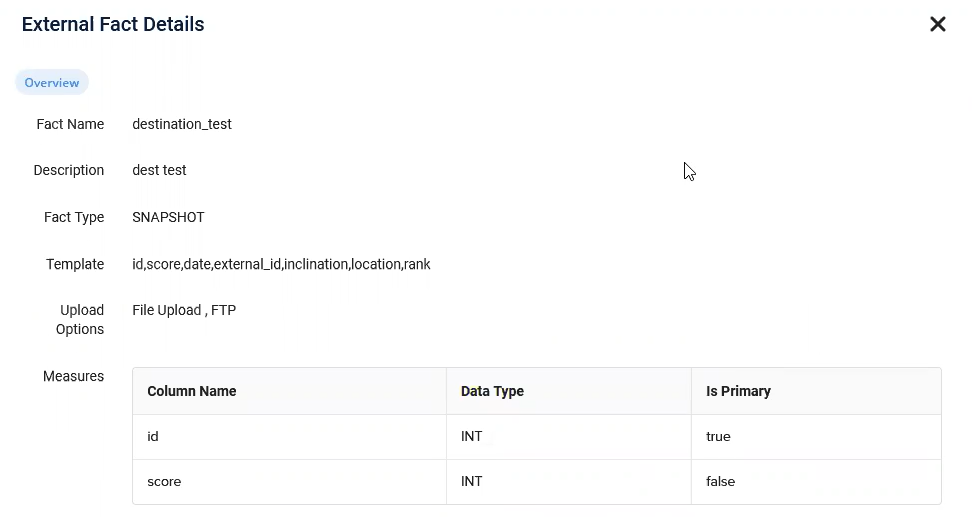
You can view details, edit, upload files and view status of the external fact by clicking on the ellipsis.
WarningEditing the external fact resets the entire fact table.
- Uploading the data.
There are 2 types of data upload: Through FTP and through File.
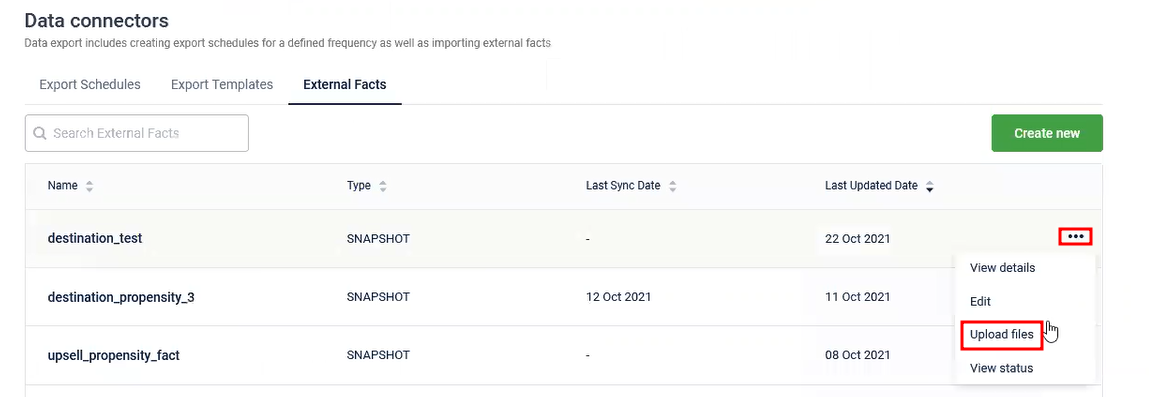
i. To upload data, clickUpload Files.
ii. SelectUpload type - File to upload the file directly. Click Select to locate and upload the file.
NoteFiles lesser than 15 MB can be uploaded through direct file upload. For files larger than 15 MB, FTP upload can be used.
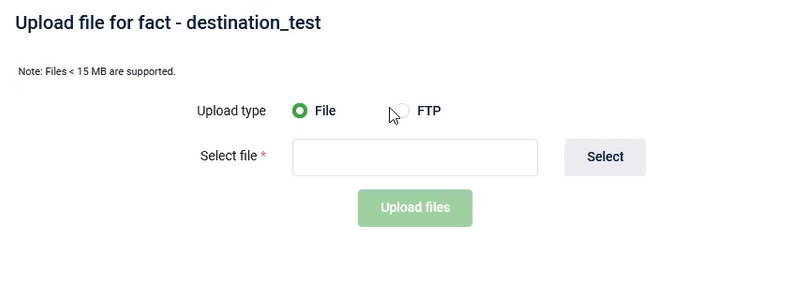
iii. To upload the file using FTP, select FTP and choose the desired FTP location from the dropdown list and click Save FTP Settings.
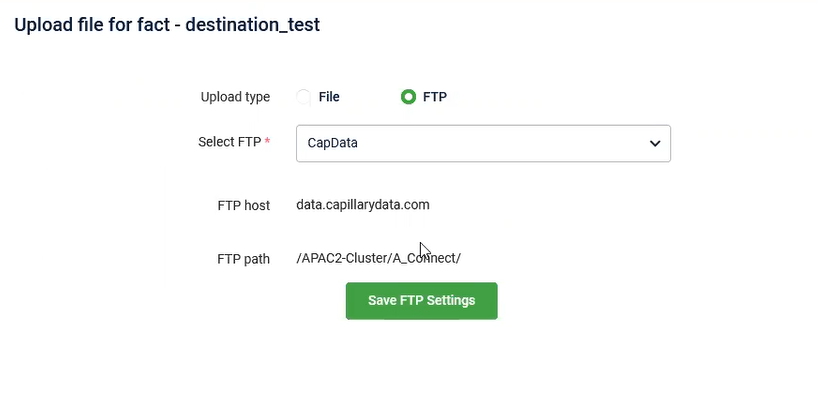
After the file is uploaded, a success message appears saying FTP details set for fact successfully.
The external fact is now ready for use.
Example
Airline Destination Propensity
Consider an airline that uses historical transaction data to predict customer travel preferences. This predictive data includes:
- Customer ID (Frequent Flyer ID)
- Predicted destinations based on customer travel history
- Additional attributes like score and inclination
Since this data cannot be processed by the existing schema, you can use the External Fact option to process this data and to assist in prediction of customer travel preferences. The airline can create tailored offers and reports based on the predicted travel preferences, enhancing customer engagement and loyalty programs.
For this particular example, lets say the airline has the data given below:
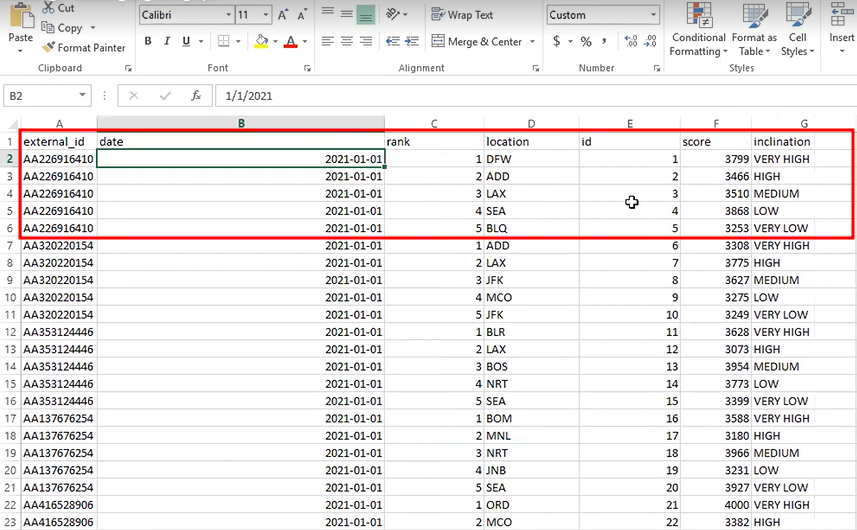
In this sheet, the first 5 rows data (excluding the headers) belongs to one customer.
The following table describes each of the column types.
| Column Name | Description |
|---|---|
| External Id | It is the Frequent Flyer ID of the customer at the airline end. |
| Date | Date when the data is added, at the Capillary end. |
| Rank | Ranking based on the inclination of the customer to travel to the location given in column D. 1 being the highest and 5 being the lowest. |
| Location | Locations to which the customer flies (based on his travel history). |
| Id | Unique identifier for the table (based on the number of rows, for example, 1 to 100). It is very important to have a unique identifier for the table as it acts as the primary key of the table. |
| Score | Value of an attribute used at the airline end. |
| Inclination | Shows the inclination of the customer to fly to the respective location, ranging from very high to very low. |
So, in this example, this particular customer (with external Id AA22916410) is very much inclined to fly to the DFW location, in comparison to the other locations he has previously flown (ADD, LAX, SEA, BLQ). So the brand can give specific bonus points if the customer checks-in to a lounge at the DFW airport.
Similarly, data of all the customers is ready in this format to be added in Insights+. Perform the following to create the external fact.
- Navigate to Insights+ and click Data Connectors.
- Click External Facts.
- Click Create New.
- Enter the Fact Name and Description. This name will be the Fact table name in Databricks.
- Select the Fact Type. In this case, select SNAPSHOT. In cases where bill or transaction data is involved, use INCREMENTAL.
- Click Upload Template and select the excel file having the airline data. The system will extract the first row of the sheet. Once uploaded, the headers of the columns will be displayed.
- Click Next.
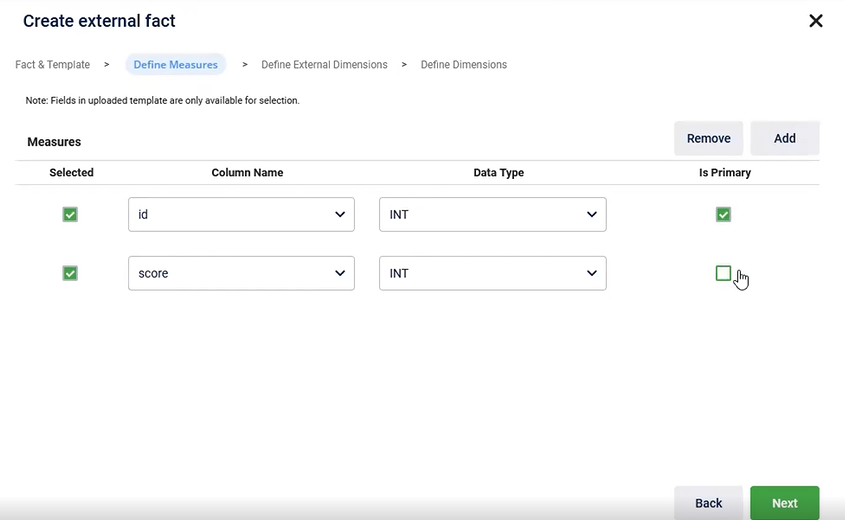
- In the Define Measures tab, click Add. In this use case, Id and Score are measures.
i. Select Id as Column Name by selecting it from the dropdown list.
ii. Select Int as Data Type from the dropdown list (as Id is a number, we select Int).
iii. As Id is a unique identifier for the table (having different values for each row), select Is Primary checkbox. This is the primary key for the fact table.
iv. Select Score as Column Name by selecting it from the dropdown list.
v. Select Int as Data Type from the dropdown list (as Score is a number, we select Int).
You must select the primary key to proceed. Once you select the primary key, the Next tab will be enabled.
vi. Click Next.
- In the Define External Dimensions tab, click Add.
NoteInternal dimensions are mapped to existing dimensions at Capillary. External dimensions are the new dimensions that need to be created.
In this use case, External Id (column A), and Date (column B) will be Internal Dimensions as they are mapped to Capillarys existing dimensions. While Rank (column C), Location (column D), and Inclination (column G) will be External Dimensions (as they are new and need to be mapped).
i. After clicking Add, fill in the Dimension Name and Possible Values for the three external dimensions.
| External Dimension | Dimension Name | Possible Values |
|---|---|---|
| Rank | ranking_preference | 1,2,3,4,5 |
| Location | city_location | DFW,LAX,SEA,BLQ,JFK,MCO,BOS,NRT,BOM,MNL,JNB,ORD,ICN,JKT,CMN,MSP,LHR |
| Inclination | incline | VERY HIGH,HIGH,MEDIUM,LOW,VERY LOW |
NotePossible Values should be separated by commas, without any space or gaps.
ii. Click Next.
- In the Define Dimensions tab, click Add.
Here, we map the data from the excel sheet to the dimensions that we added.
i. Select the Column Name, respective Dimension Name, and Join Column from the dropdown list.
ii. Select the Formatter (applicable only in case of Date)
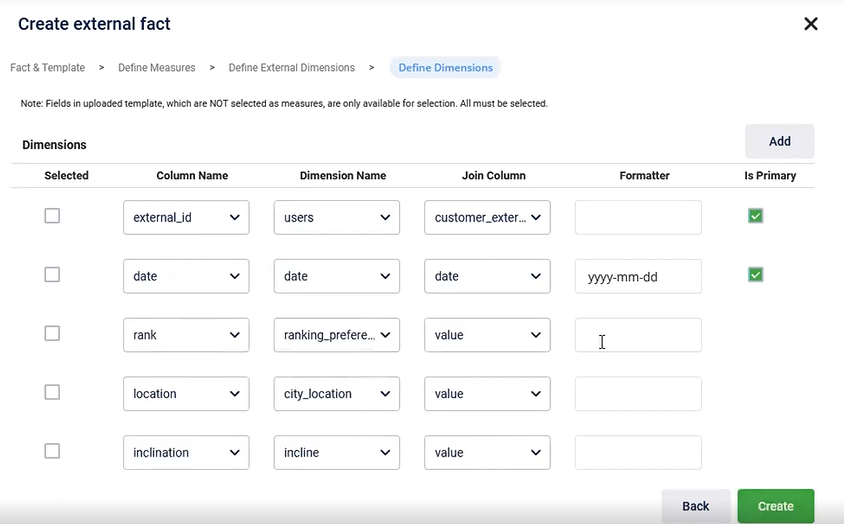
In this use case following will be the values for our dimensions:
| Column Name | Dimension Name | Join Column | Formatter |
|---|---|---|---|
| external_id | users | customer_external_id | |
| date | date | date | yyyy-mm-dd |
| rank | ranking_preference | value | |
| location | city_location | value | |
| inclination | incline | value |
NoteAny external dimension you create, the Join Column dropdown will show Value.
iii. Select the Is Primary checkbox if the dimension is a primary dimension.
iv. Click Next. The external fact will be created and will be displayed in the list of external facts.
- To upload data to the external fact, click ellipsis next to the external fact that you created.
i. Click Upload. In File Type Select File and choose the excel file having the airline data.
ii. Click Upload files. Once the file is uploaded, a success message appears.
This ensures that the data is added to the external fact.
NoteIf you want to create reports based on these external facts, you will have to create KPIs separately. Similarly, If you want to use filters based on external facts, you will have to create the filters separately, by contacting the Insights+ sustenance team.
FAQs
- What are External Facts?
External Facts allow for capturing and reporting on data that doesn't fit into the predefined schema. They are used when data needs to be imported into Databricks through Insights+ without relying on the standard schema fields. This data can be queried on Databricks. - When should External Facts be used?
External Facts should be used when:
- Data doesn't align with the existing schemas.
- There is a need to track data not supported by the standard schema.
- You need to create reports or filters based on non-standard data.
- What is the difference between Snapshot and Incremental Fact Types?
- Snapshot: Reloads the entire dataset each time. Suitable for data that changes infrequently or needs a complete refresh.
- Incremental: Only adds new or updated data. Suitable for data that changes frequently and can be appended or updated.
- What is a primary key in External Facts?
A primary key is a unique identifier for each row in the data table. It is essential for uniquely identifying and managing data rows within the external fact. - Can I use an existing dimension from the system in External Facts?
Yes, you can map an External Fact dimension to an existing internal dimension if the values match. If not, you will need to create a new external dimension. - How do I handle data columns in External Facts?
Measures: Quantitative data used for calculations or aggregations (e.g., Score).
Dimensions: Qualitative data used for filtering or grouping (e.g., External ID, Location). - Are there limitations on the number of measures or dimensions?
There is no strict limitation on the number of measures or dimensions, but there may be practical upper limits. It's advisable to stay within manageable numbers to ensure performance and usability. - What happens if I don't select a primary key?
If a primary key is not selected, you may not be able to proceed with creating or updating the External Fact. The primary key is crucial for identifying and managing rows uniquely.
Updated 5 months ago