
Create an export job (Step 1 of 3)
To schedule an export event, do the following: (All fields marked by * are mandatory)
- On Insights+, navigate to Data connectors > Export Schedules.
- Click Create Export Schedule.
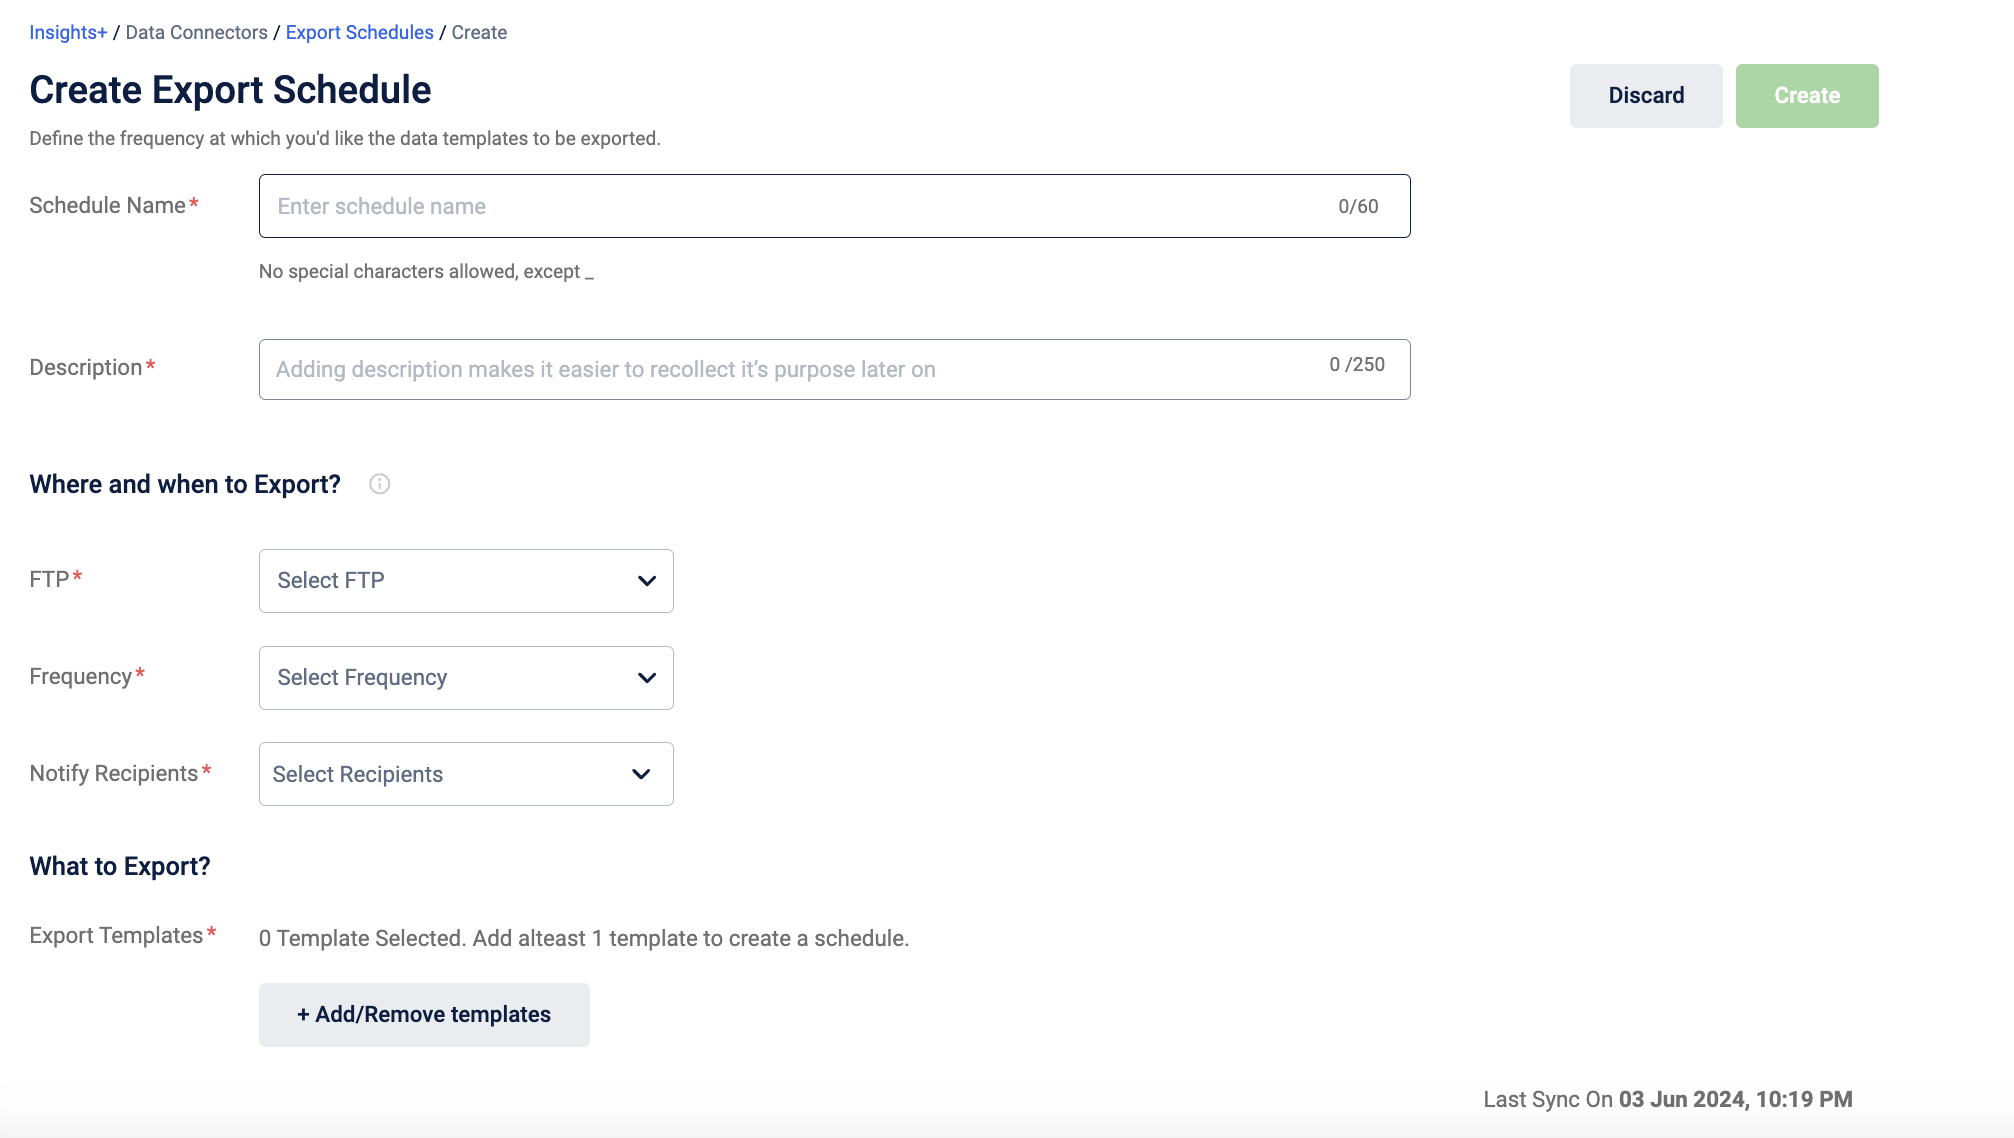
- Schedule Name: Specify a unique name for the current schedule job without any special characters. You can use or space in the name if required. For example, Summer Sale Transactions or SummerSale_Transactions
- Description: Specify a short description of the schedule.
- From the FTP drop-down, choose the FTP Server to which you want to export the current data. The file will save in the default location of the chosen FTP server (Configuring FTP Server for Data Export). You add up to 2 folders as explained in Step 3 of 3, Modifying Template & Creating Schedule (Step 3 of 3) Template.
- Frequency: Choose the frequency of running the current export job - Once, Daily, Weekly or Monthly. You can set a maximum of one-year duration.
Note
- In Validity of recurring schedules, you cannot select past dates, but can only select current date or a future date
- In Export Data of one-time schedules, you can only select past duration until when the data is available
- You can schedule an export based on the use Last Updated Date or Event Date
| OPTION | DESCRIPTION |
|---|---|
| Once | Runs the export job on the scheduled date(only once). In this, the Execute on date will be selected by default, which is the current date. In Export Data from, you need to choose the duration for which you want to capture data (supports up to one-year duration). You can select only up to the last sync date but not the current date or future date. |
| Daily | Runs the export job on a daily basis for the duration you specify. In Validity, choose the duration for which you want this daily schedule to run. You can select only current and future dates. You will get the previous day's data the next day. For example, you will get the current day's data the next day. Note: You cannot select past date in Validity |
| Weekly | Runs the job on a weekly basis for the duration you specify. Note : If you want the file weekly, every Monday, then Execute on should be set to Sunday. |
| Monthly | Runs the job on a monthly basis for the specified duration. In Execute on, select the day of the month when you want to run the monthly schedule, which is from 1-30/31. In Validity, choose the duration for which you want this monthly schedule to run. You can select only current and future dates and schedule up to a maximum of one-year duration. Note: If Execute on is set to 1, you will get monthly data that is available until the 1st of every month on the 2nd. |
- Notify Recipients: Select the recipients for the current schedule and click Select to apply. These users will get recurring notifications (until the validity of the job) whenever the job runs and sends the link of the target location of the exported data
- Enable the Encrypt data toggle switch, if you want to encrypt the export data. Configure the public keys, if the public keys are not configured. Refer to documentation on the data encryption settings for export.
- From the Public key drop-down, select the public key name.
- Continue to next steps.
Updated about 1 month ago
Did this page help you?