Getting Started with Rewards Catalog
Note : Rewards catalog is based on API first architecture, so brands can directly use the APIs to create, update and view the rewards.
Prerequisite
- Marvel Rewards should be enabled for the org
- To enable, create a JIRA request to the Capillary Product Support Team with the following info:
- Org ID
- Till ID. Onboarding can be performed for only one Till in an org. The till code is necessary for onboarding organizations in Marvel because it enables the Gamification application to make an InTouch API call. This call validates the customer by retrieving their details and ensuring they are valid. Without the till code, the Gamification application cannot perform this validation during the onboarding process.
- To enable, create a JIRA request to the Capillary Product Support Team with the following info:
Create Rewards
To create rewards on the Marvel UI, perform the following:
- Go to the old UI of Capillary and type Marvel in the search bar.
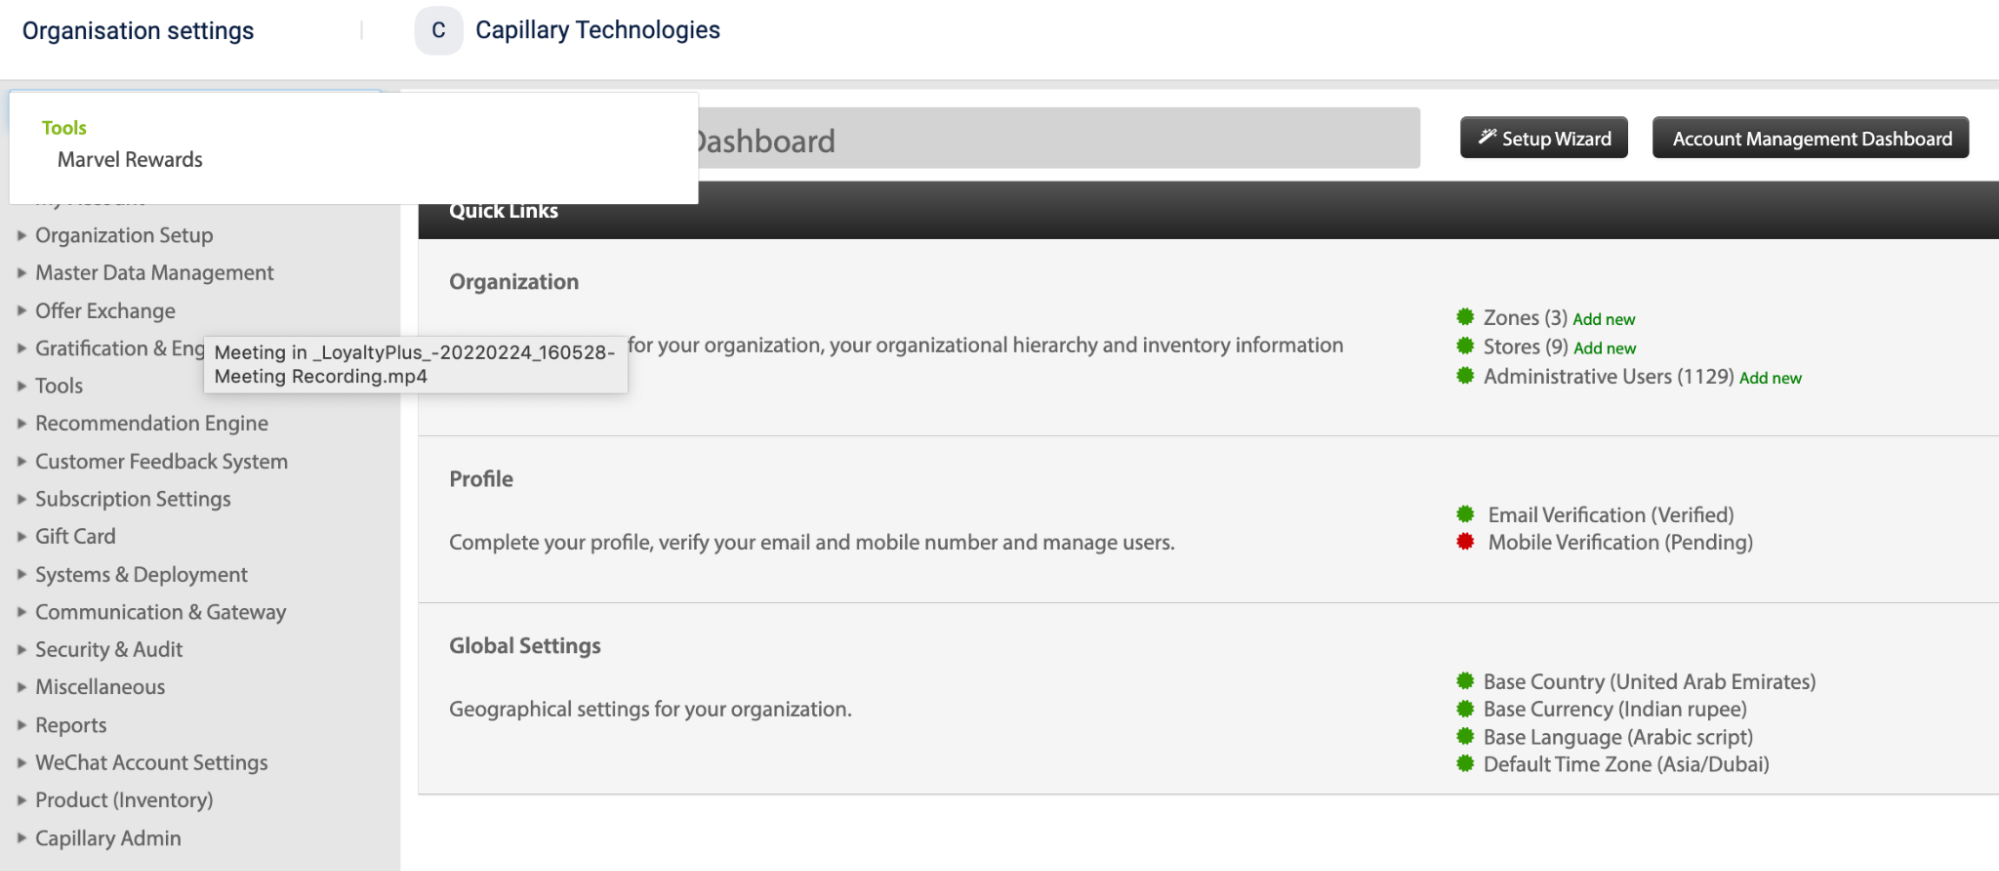
- Click on Marvel Rewards. You will be redirected to the below page for your org
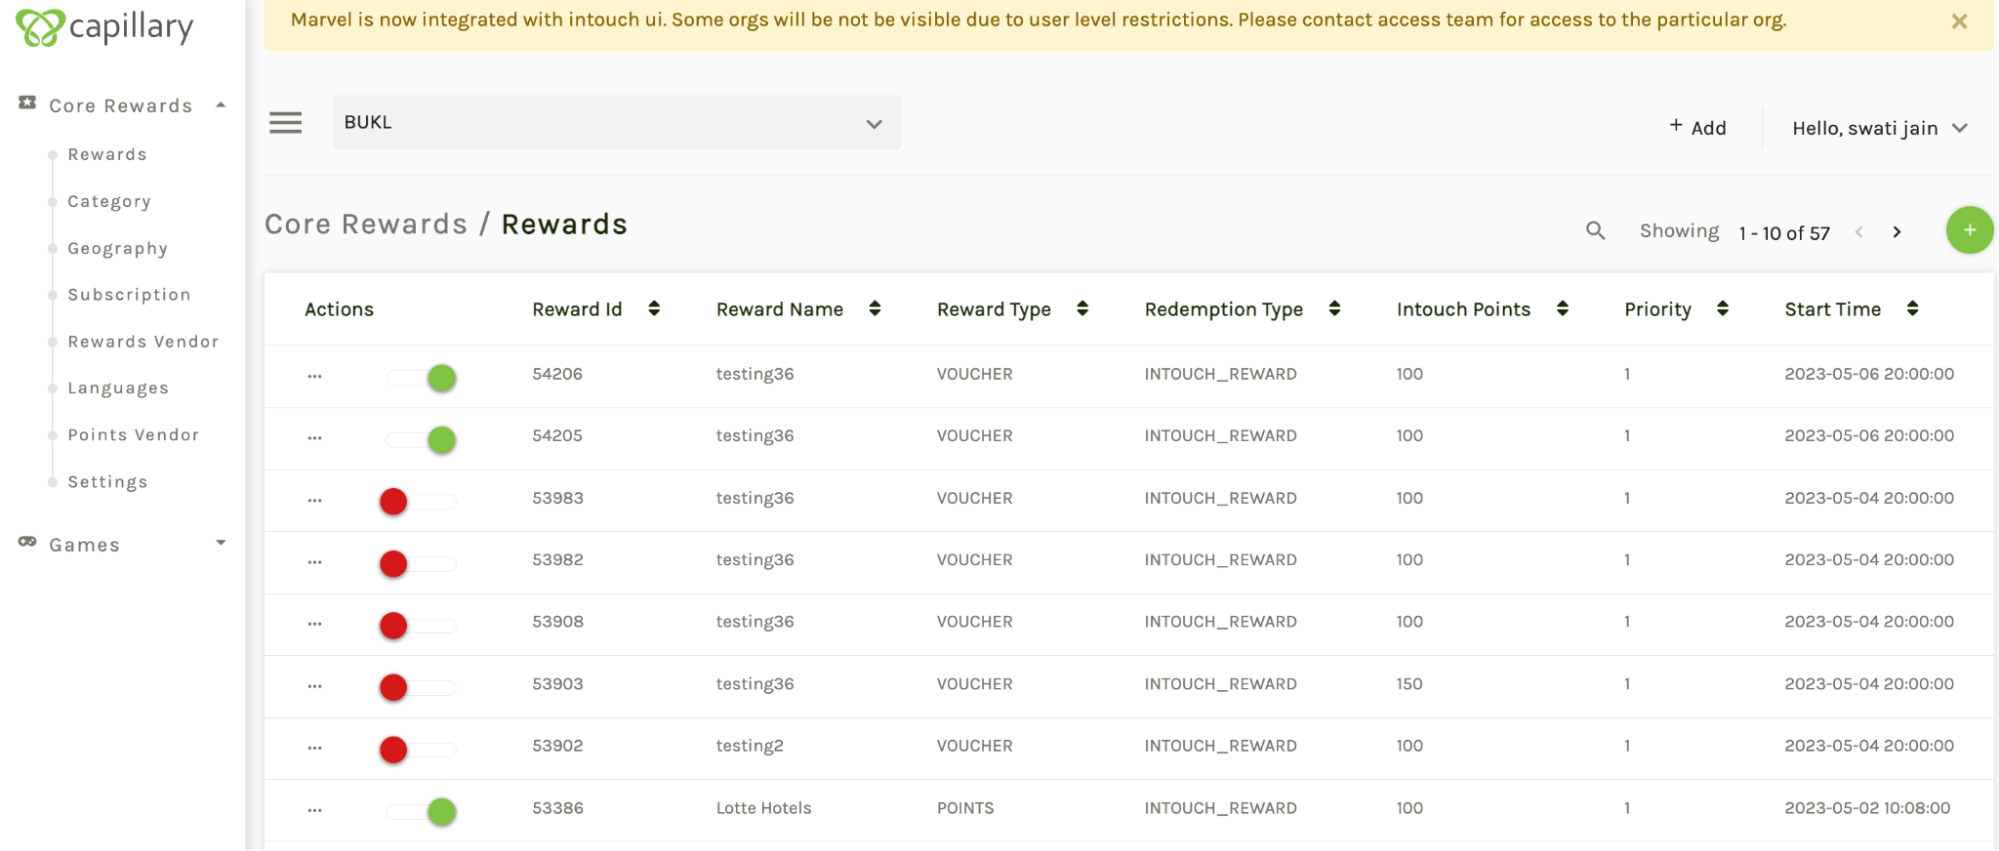
- To create a new reward, click on the + icon on the top right corner. Enter all the fields mentioned below:
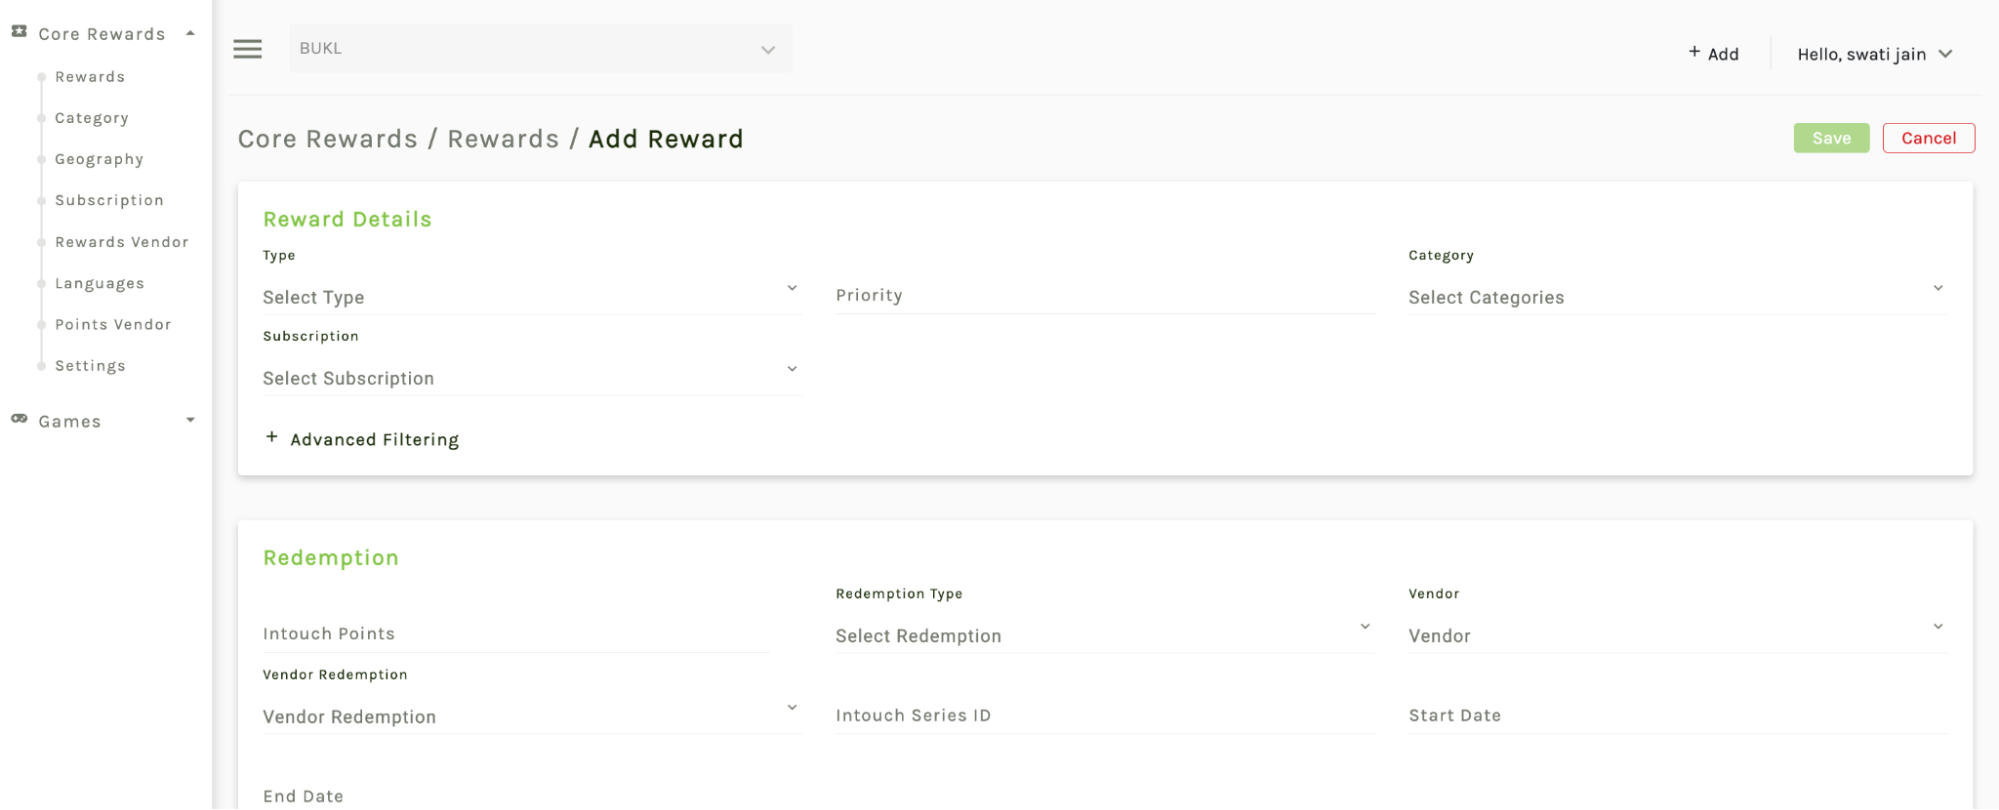
Note:Ensure that an external points system (e.g., Bonus Link) is configured when enabling external points redemption at the organization level. If external points APIs are not configured, the "Create Reward" option in the UI will remain disabled.
a. Type - Select the type of reward you want to create (e.g., points, free voucher). This is just a metadata.
- Physical voucher: Physical coupons generated against redeeming customer points. For example, redeem 150 points for a flat 150 off coupon.
- Free voucher: Digital coupons generated without any points redemption.
b. Priority - Set the priority level for the reward (e.g., high, medium, low or 1, 2, 3, 4 and so on). This is a metadata for the reward.
c. Category - Select the category for the reward (e.g., fashion, electronics, groceries). You can create the categories in the category section in Marvel. This is a metadata for the reward.

d. Subscription - This is not working and to be ignored while creating a reward.

e. Advanced Filtering - Use filters such as tier, group, or label to specify the target audience for the reward. This is a metadata for the reward. The character limit for tiers, groups, and labels is 255 characters each.
f. Redemption type - Define the redemption type if it is intouch reward or vendor reward or cart promotion.
- InTouch only rewards: These are points or coupons created in Capillary and uses Capillary APIs.
Here, the system will use the vendor specific API to issue vendor coupons and after receiving a successful response from the API, the system will use the capillary issue coupon API to issue coupons and retrieve the coupon codes. This redemption type helps to track the number of coupons issued to customers through the vendor system.
- Cart Promotion rewards: These are promotions created in Capillary.
g. Vendor and vendor redemption

In Vendor redemption, you can configure rewards linked to a particular vendor. You can also configure multiple actions in a single vendor redemption, for example, one to check if the customer has points and another to issue the reward.
Note:Ensure that an external points system (e.g., Bonus Link) is configured when enabling external points redemption at the organization level. If external points APIs are not configured, the "Create Reward" option in the UI will remain disabled.
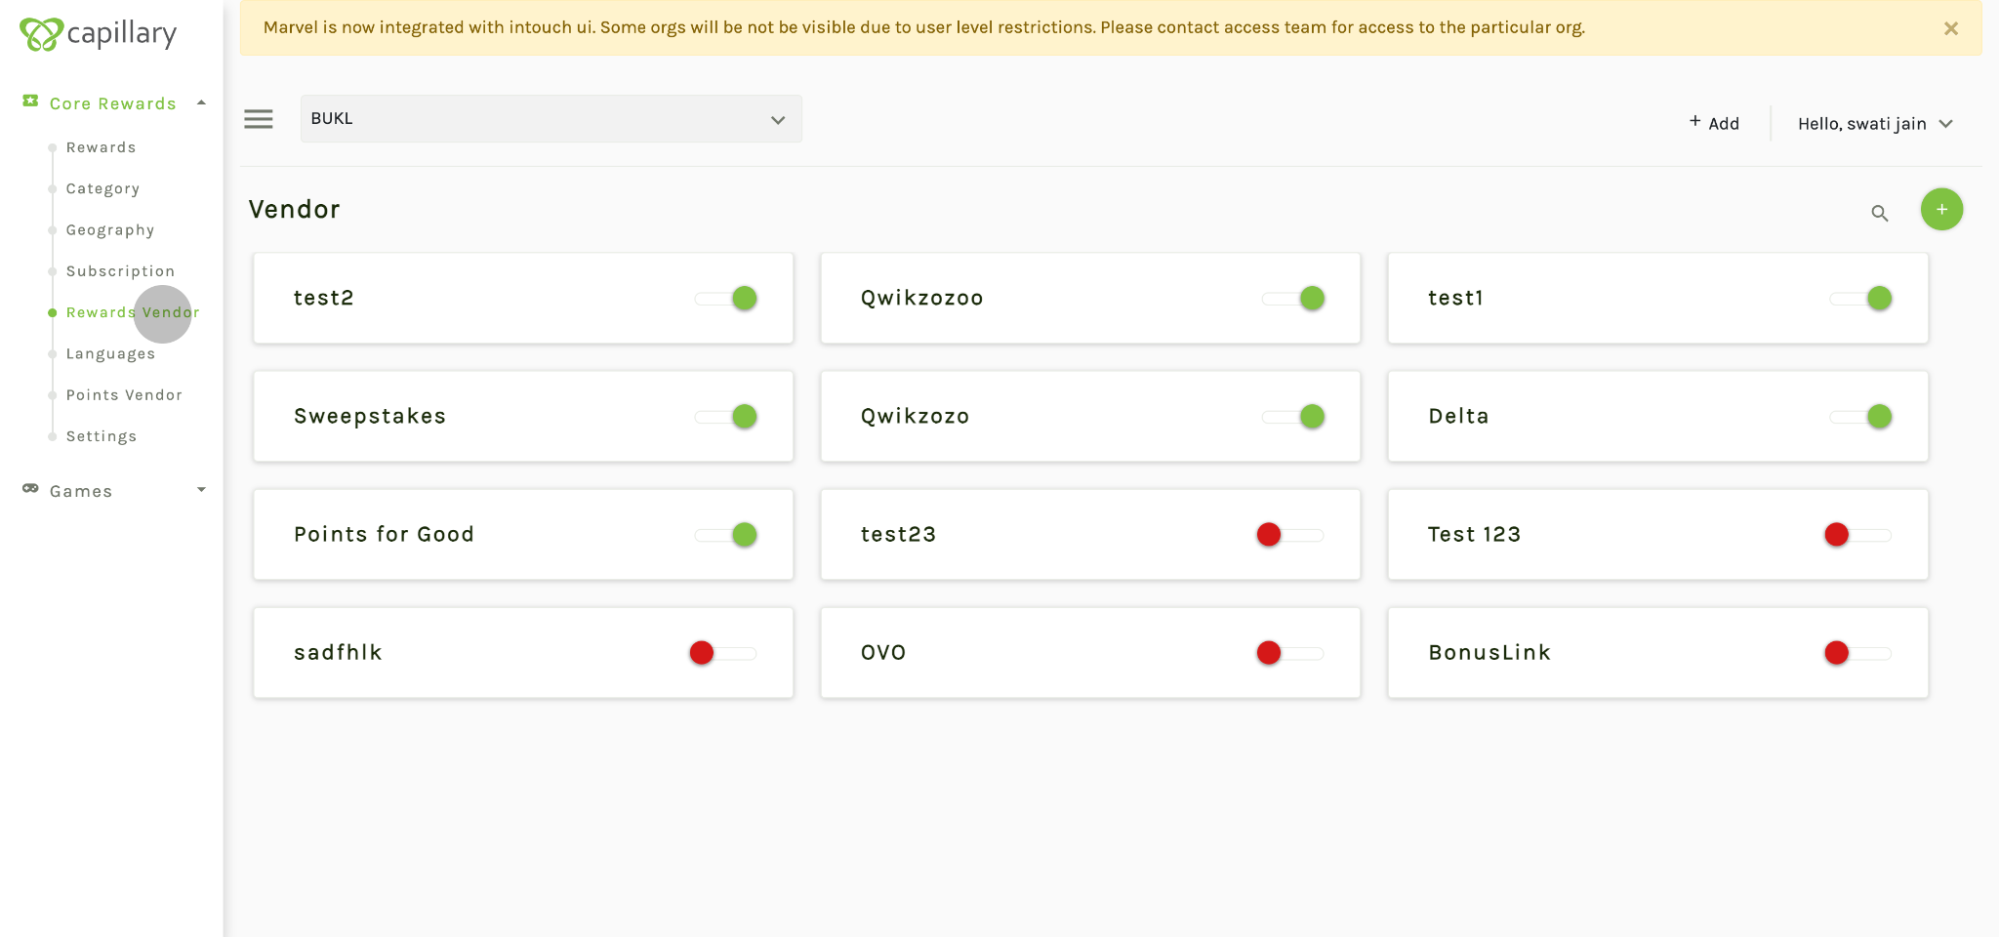
Begin by creating the reward partners. Navigate to the rewards vendor section
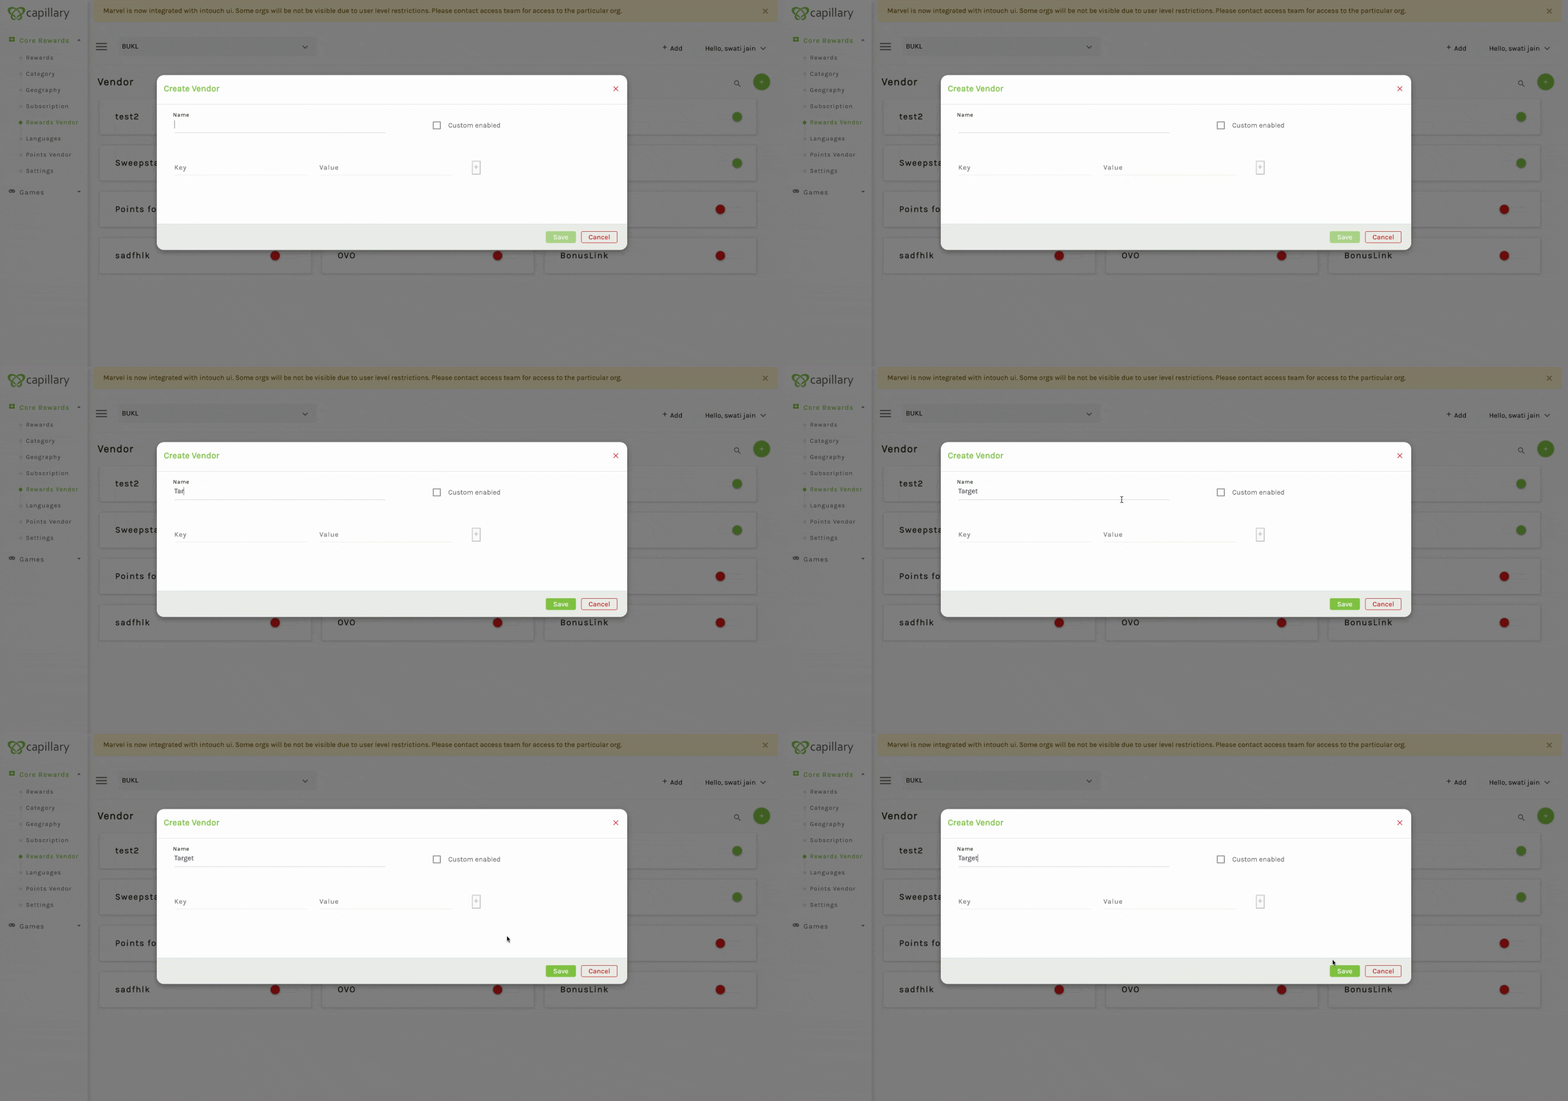
- Click on the plus icon and assign a name to your reward partner, such as "target". Assign key-value pairs to the target. These will be used in all vendor redemptions created in subsequent steps. You can add frequently used fields as key-value pairs here. Then, click on save and create the vendor.
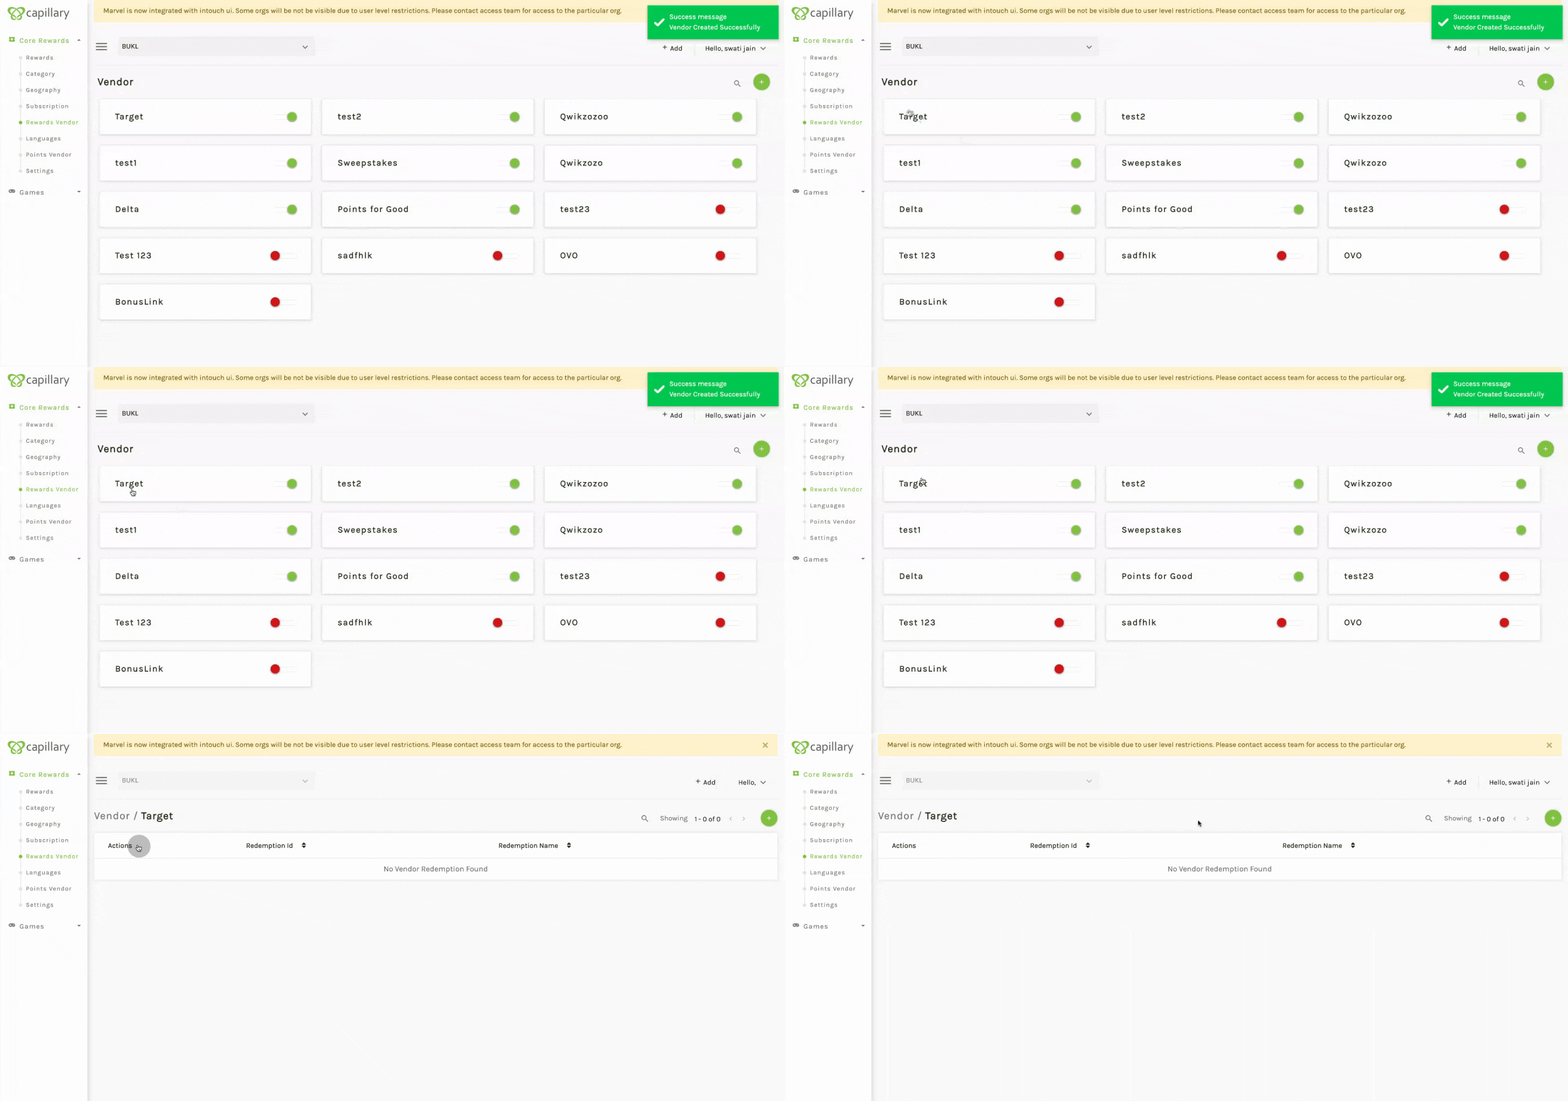
- With the vendor created, select "target" and create vendor redemptions. Vendor redemption under vendor means specific APIs for the target will be called, created as a partner reward, and later linked to the catalog item.
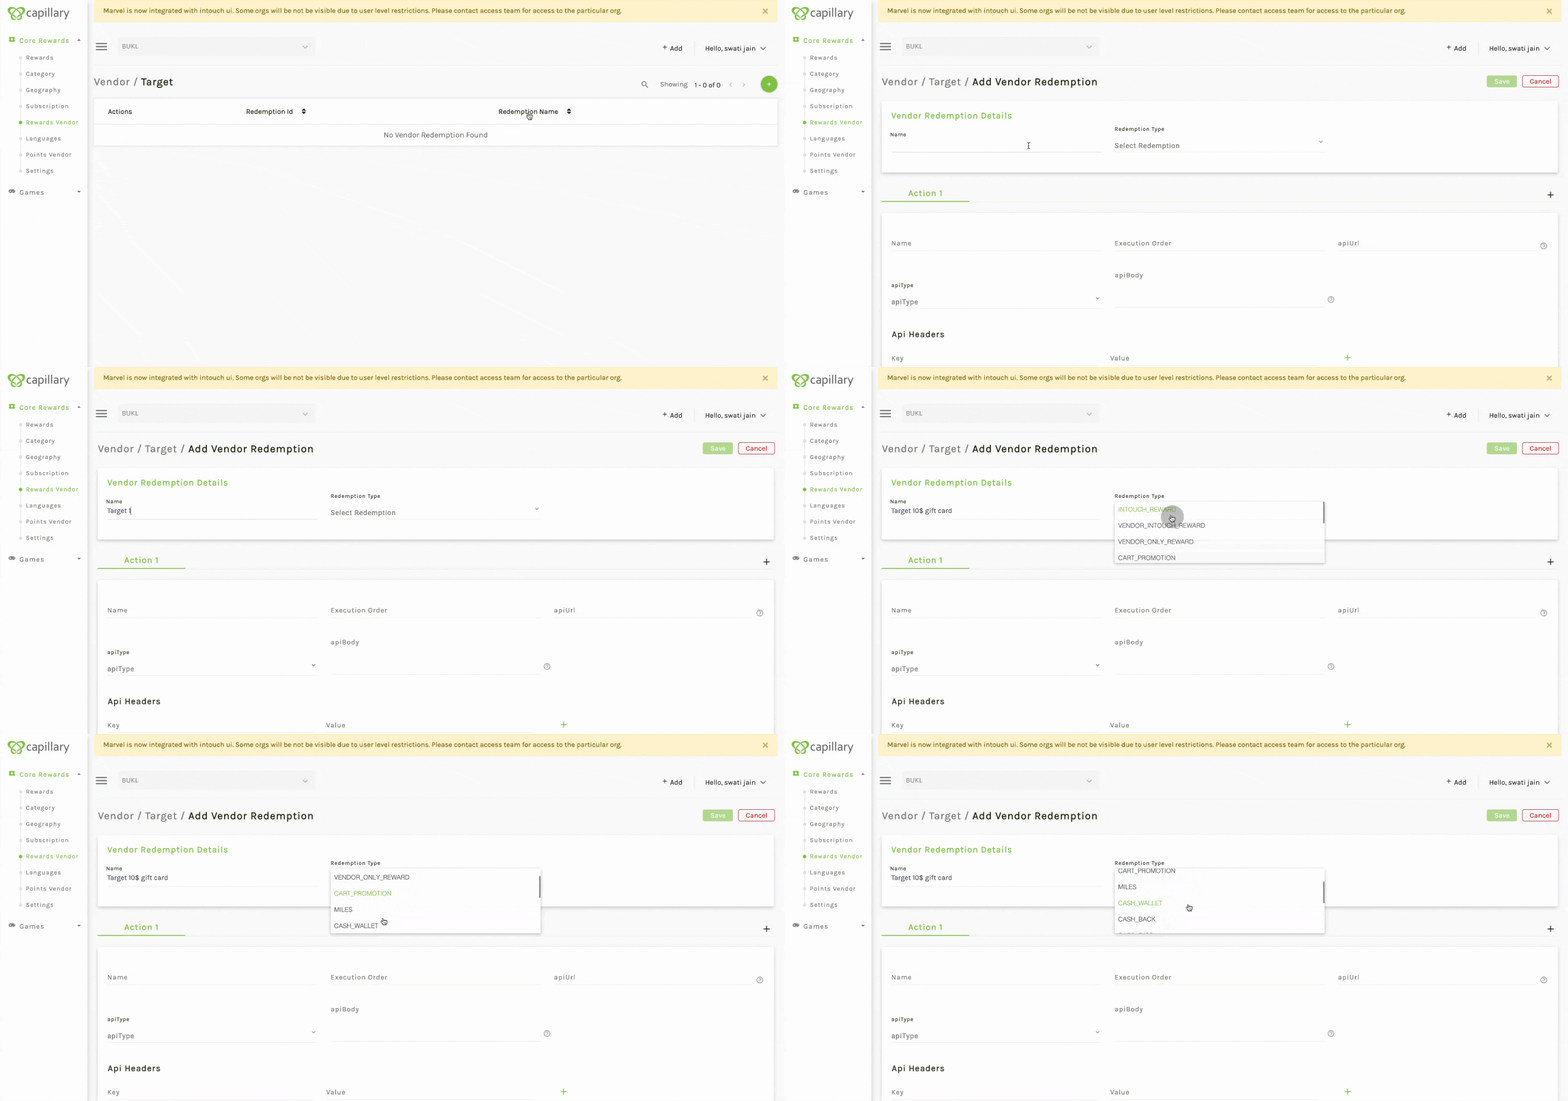
- Click on the plus icon and assign a name to your vendor redemption. Choose the type of reward, such as miles, cash wallet, cashback card, discount, charity games, vouchers, sweepstakes, auction, etc.
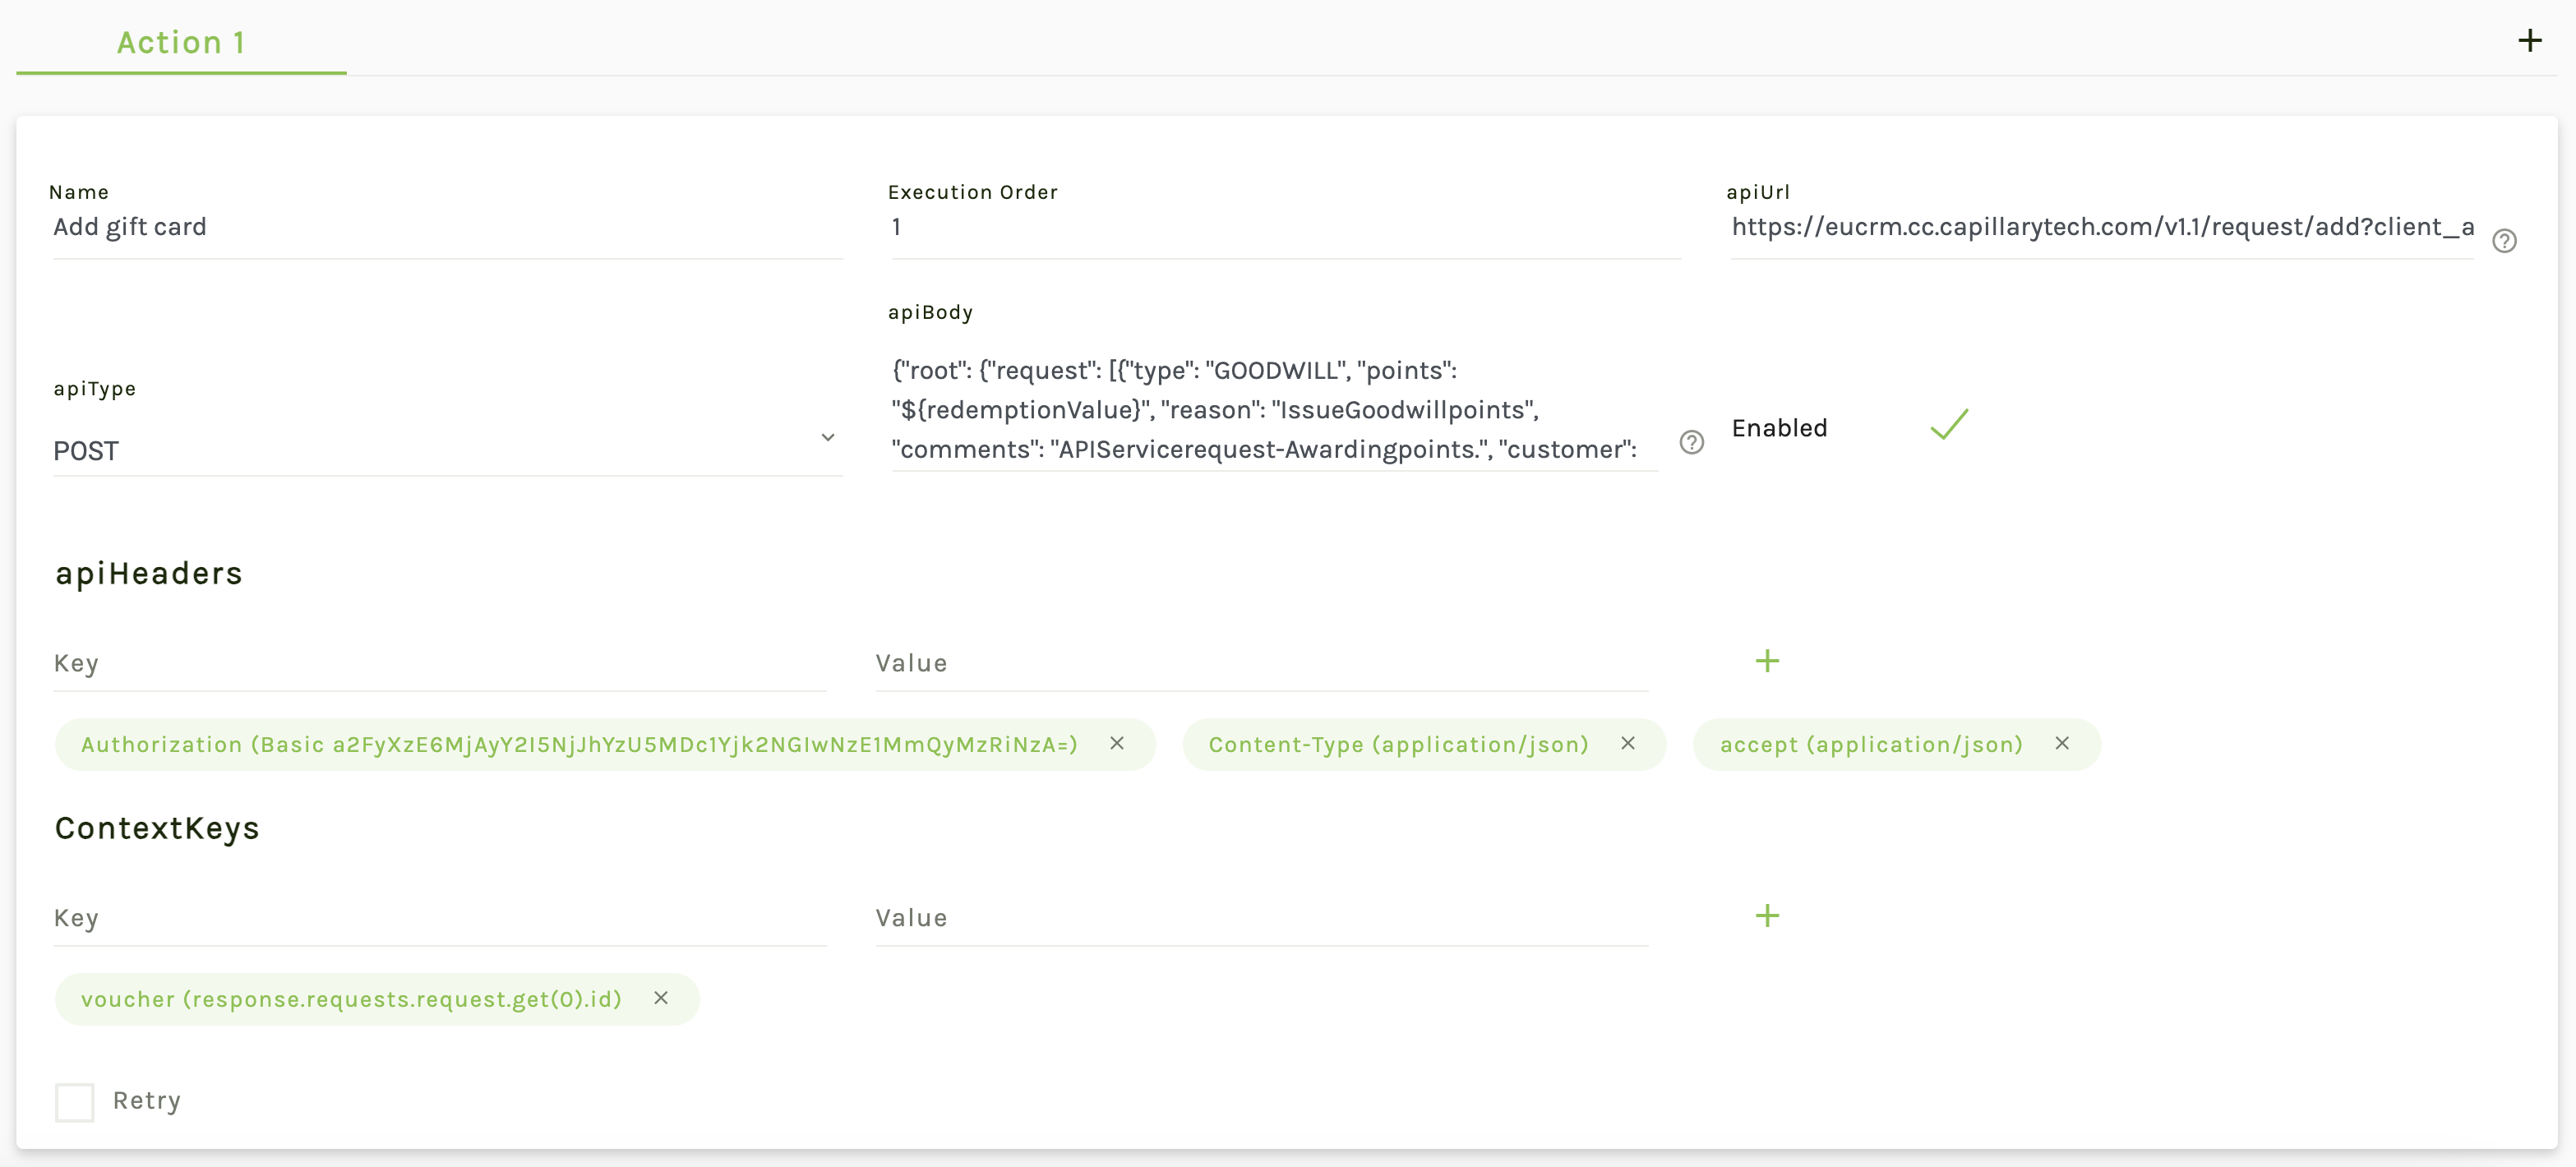
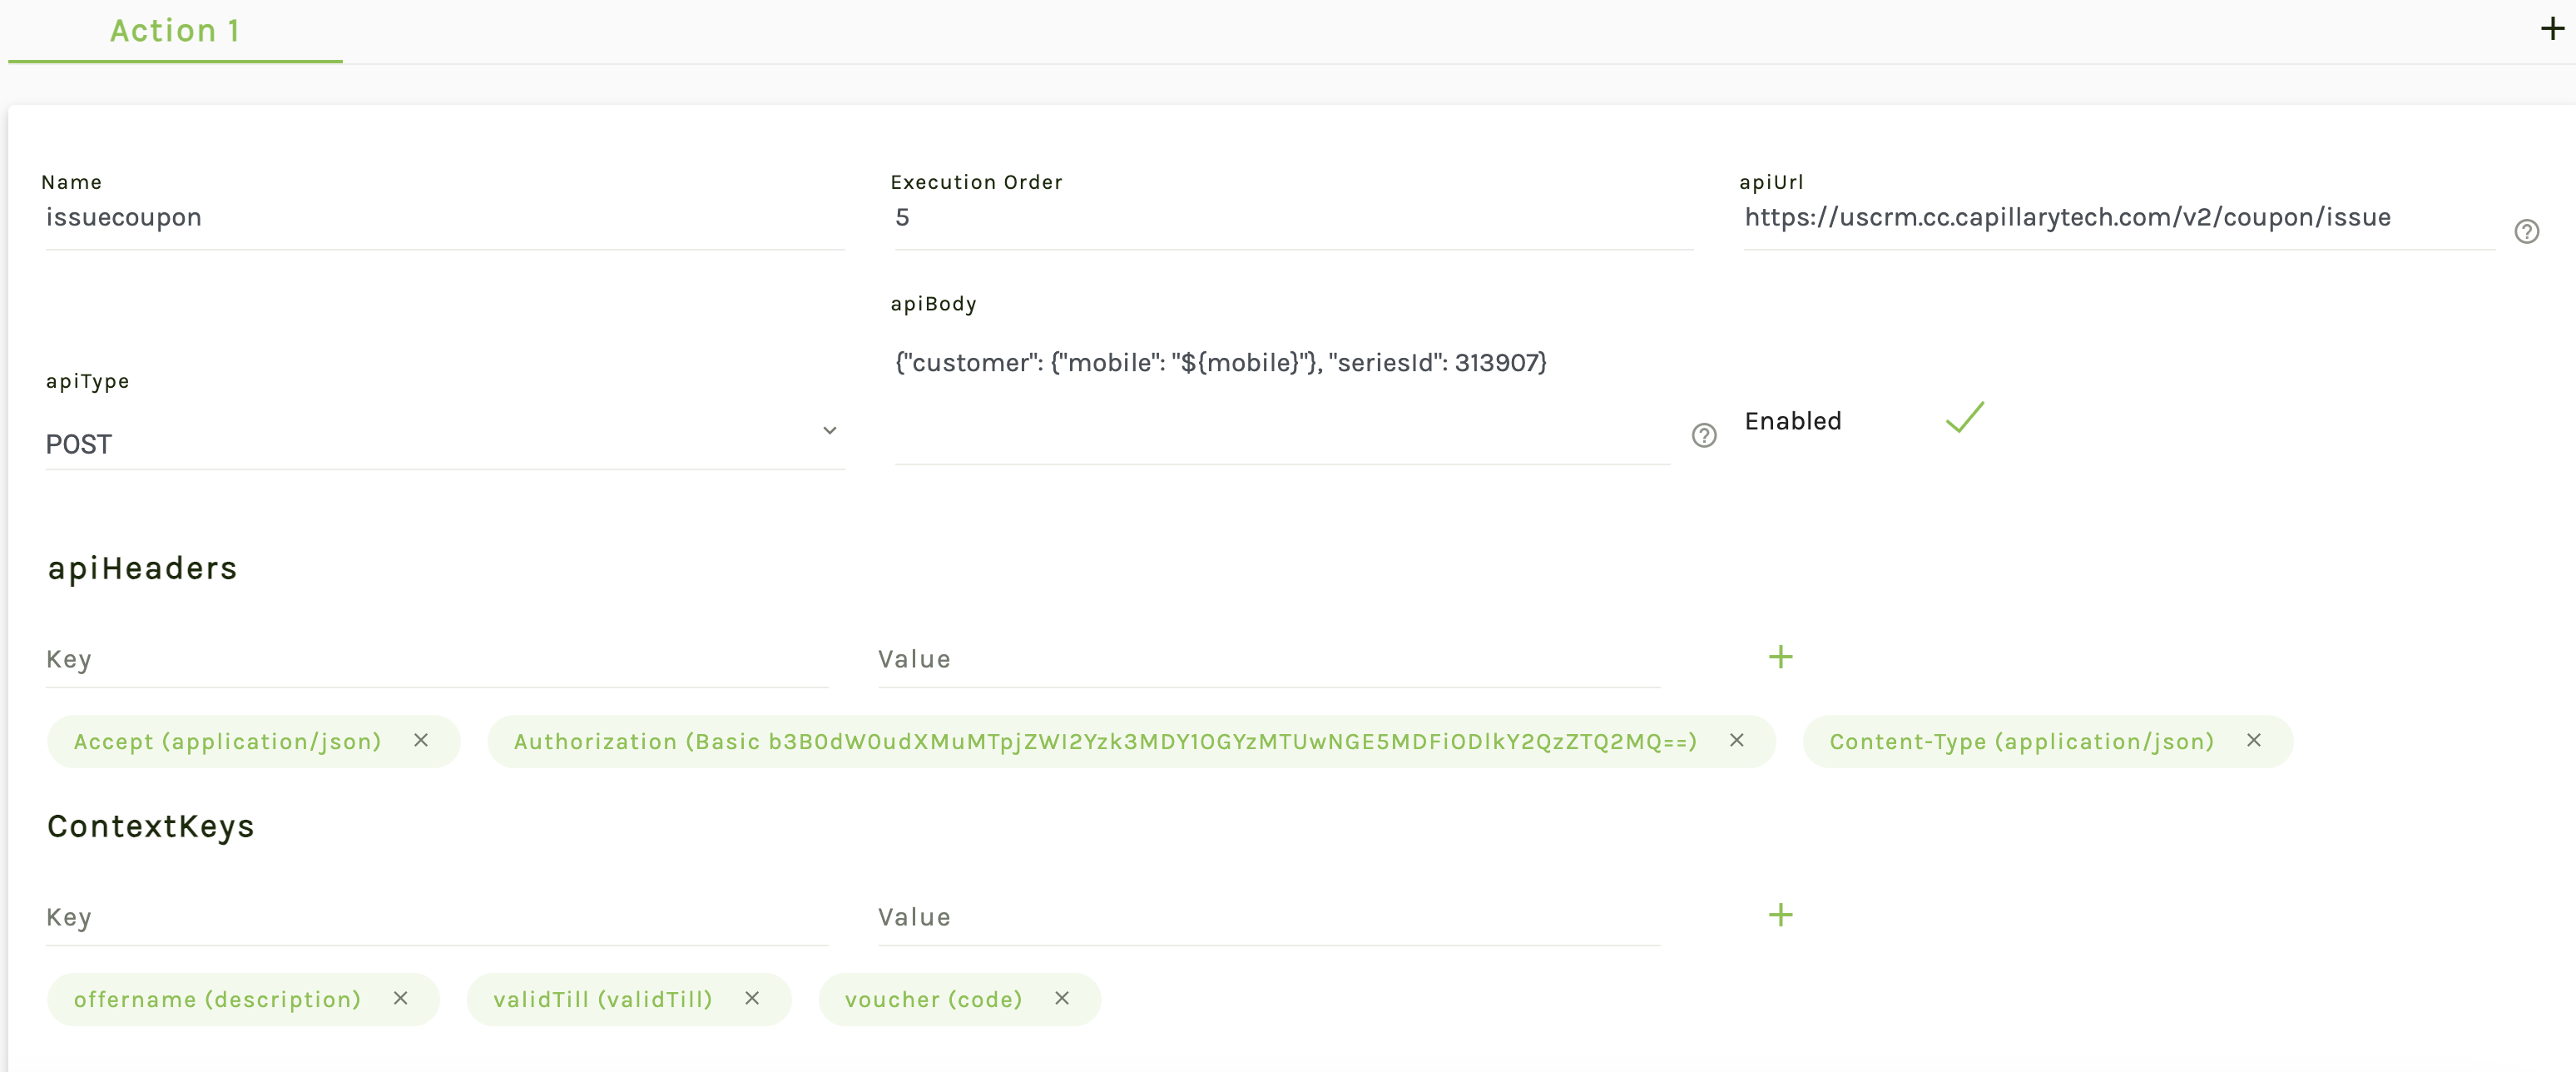
- Actions are the APIs that will be called to issue this particular reward. Assign an execution order to the actions.
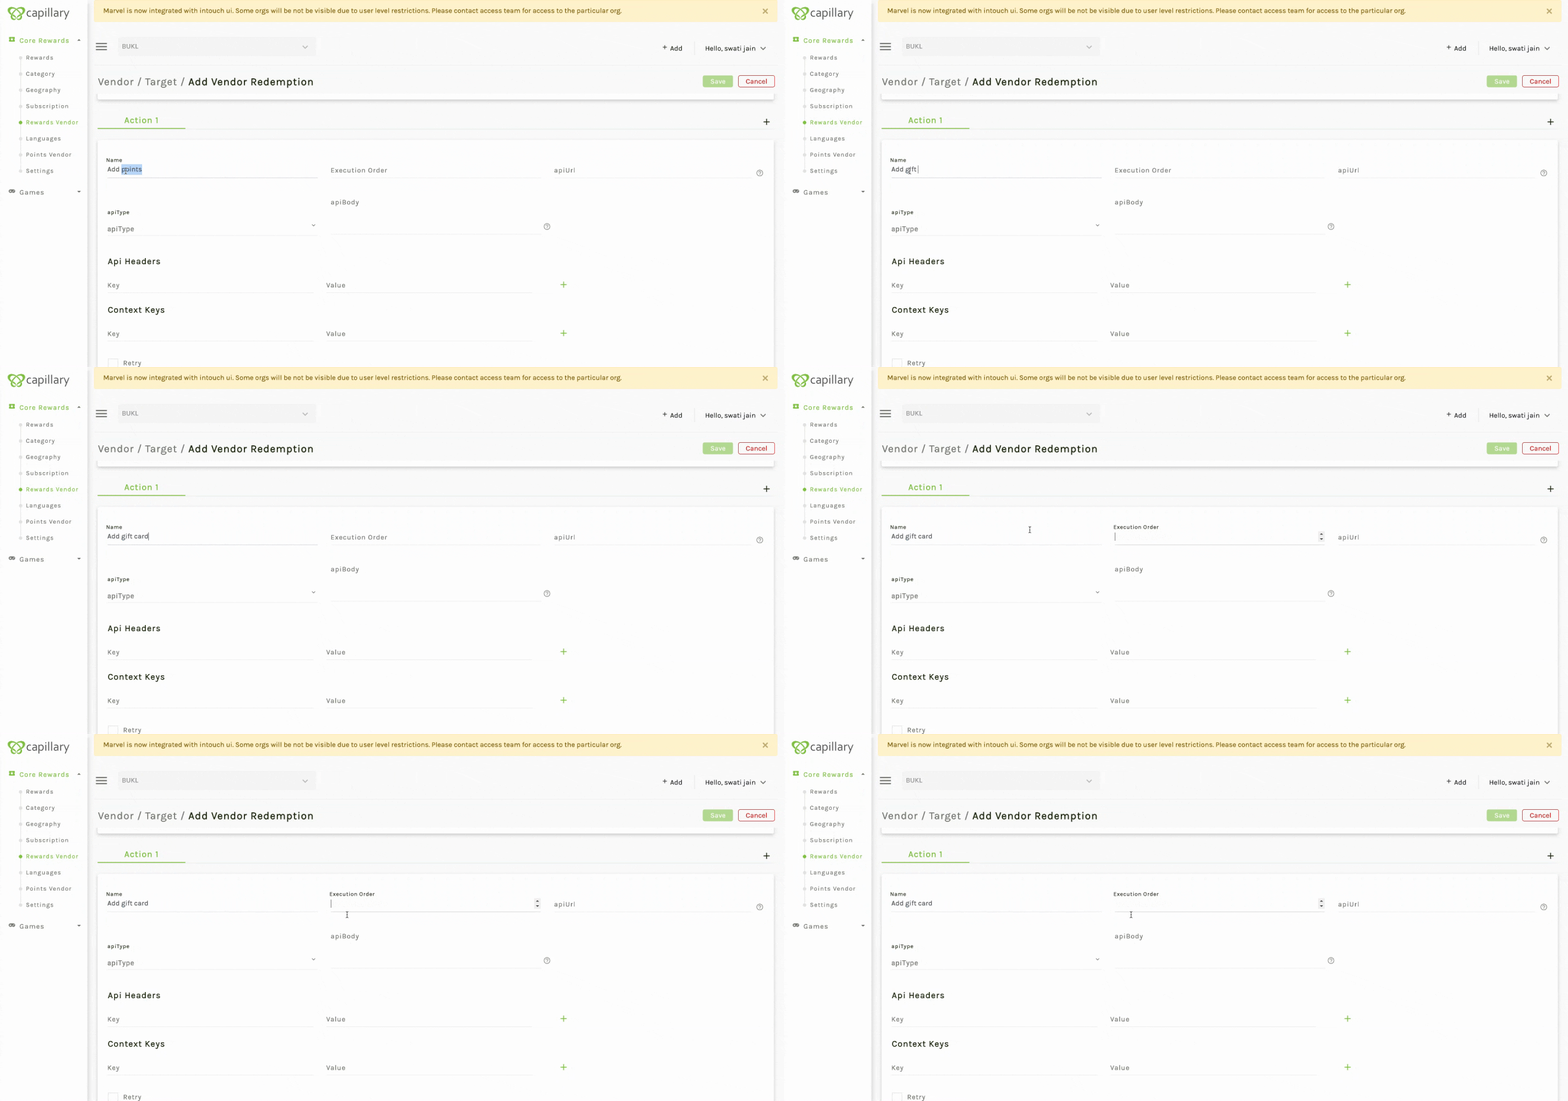
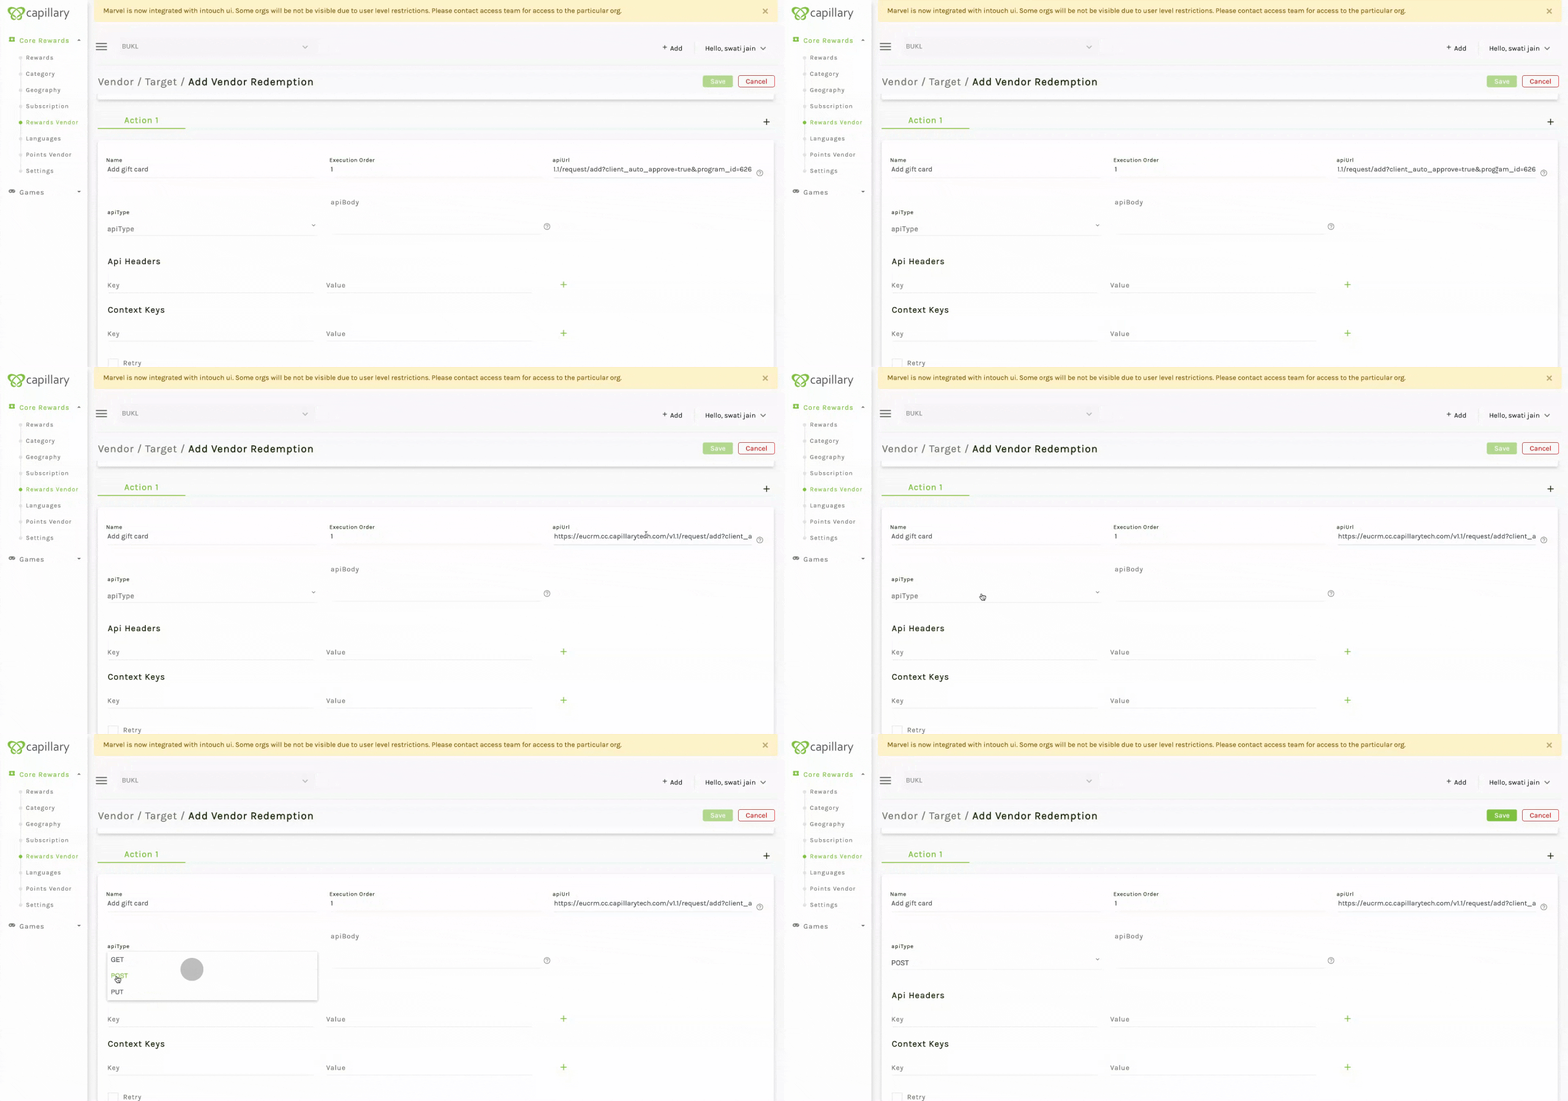
- Provide the API URL for the vendor and specify the API type.
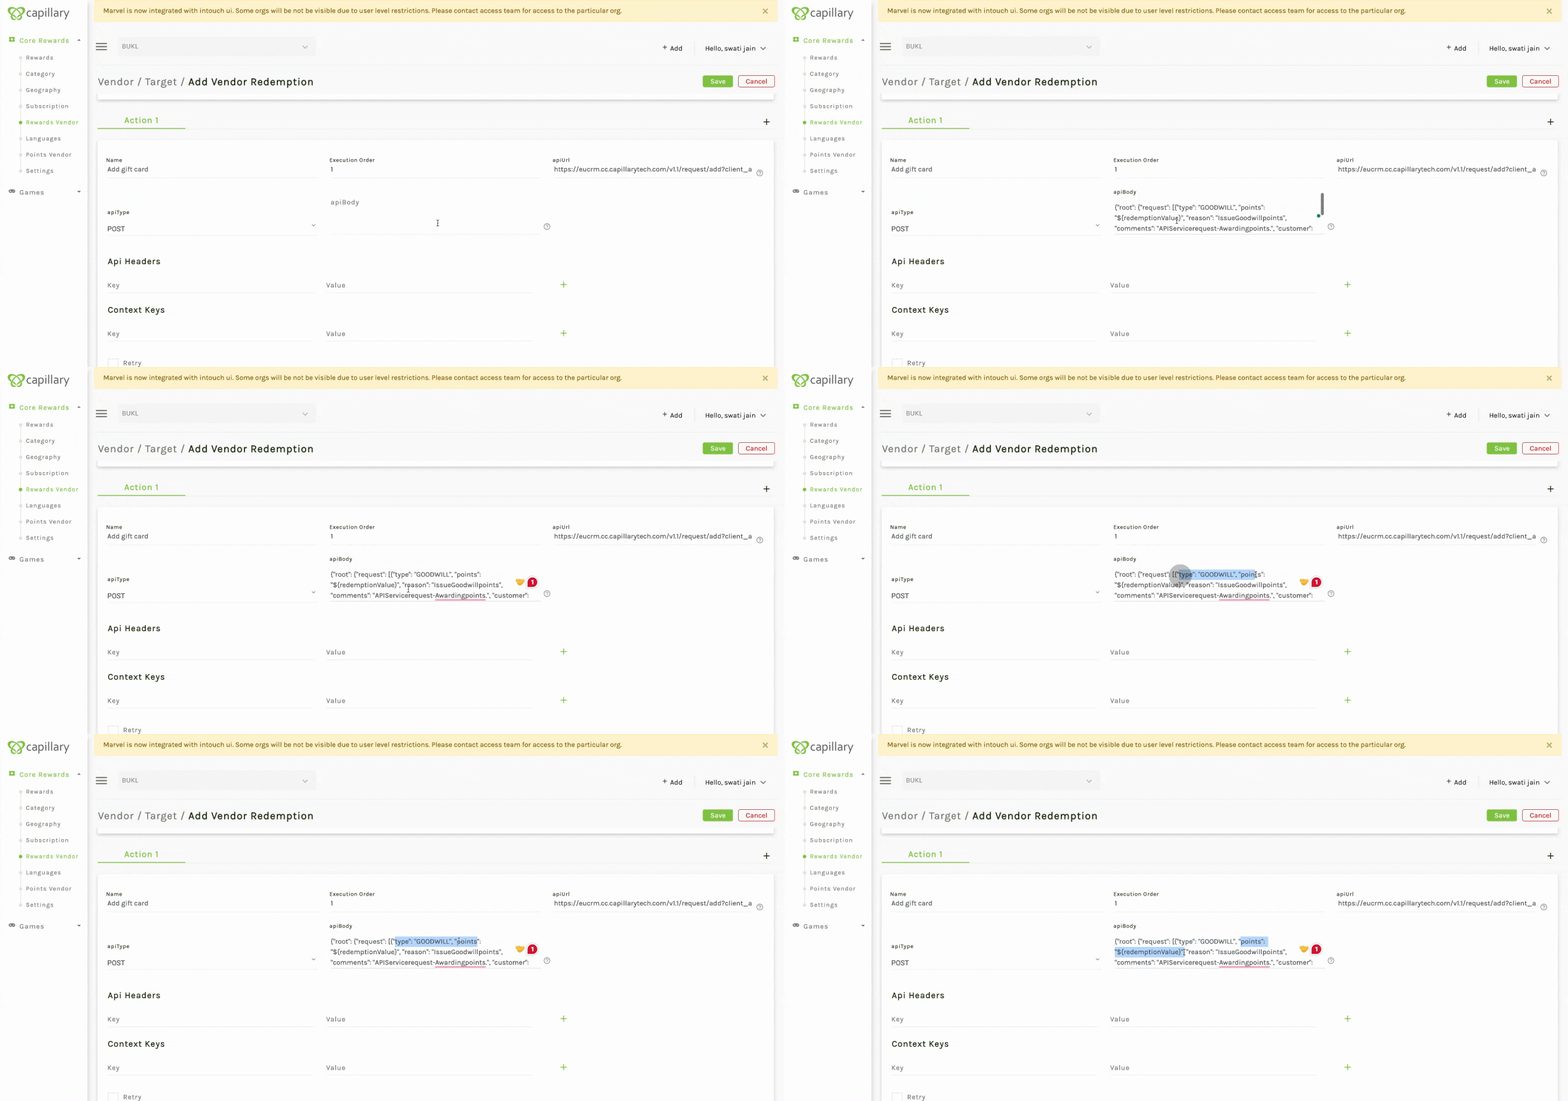
- Add the request body. Specify the redemption value and mobile number as variables here which will be passed in the request to issue a reward call. You can also include custom fields, fulfilment status and reward transaction ID in the API body. The fulfilment status and the reward transaction ID are variables resolved in the backend according to the associated transaction.
- Custom Field: Enables brands to add additional data in the API request. Use the format customfield_customFieldName. For example, a custom field named "Address: Bangalore" should be written as customfield_Address then it will replace the value of custom field with Bangalore. Note: Only custom field created with
ISSUE REWARDscope is supported. - Fulfillment Status: Enables to update the fulfilment status. Use the parameter fulfillmentStatus, formatted in camelCase.
- Reward Transaction ID: Enables to add the reward transaction ID. This helps the vendor to identify the transaction associated with the issued reward. Use the parameter rewardTransactionId, formatted in camelCase.
NOTE:- The API body supports other parameters that can be included based on the brand's specific requirements or integration needs.
- Internal Capillary APIs can also be used.
,
    "apiBody" : "{\"transactionId_property\": \"${rewardTransactionId}\",\"customFields_property\": {\"customField_1_property\": \"${customfield_CF1}\"}, \"fulfillmentStatus_property\": \"${fulfillmentStatus}\"}",
- Custom Field: Enables brands to add additional data in the API request. Use the format customfield_customFieldName. For example, a custom field named "Address: Bangalore" should be written as customfield_Address then it will replace the value of custom field with Bangalore. Note: Only custom field created with
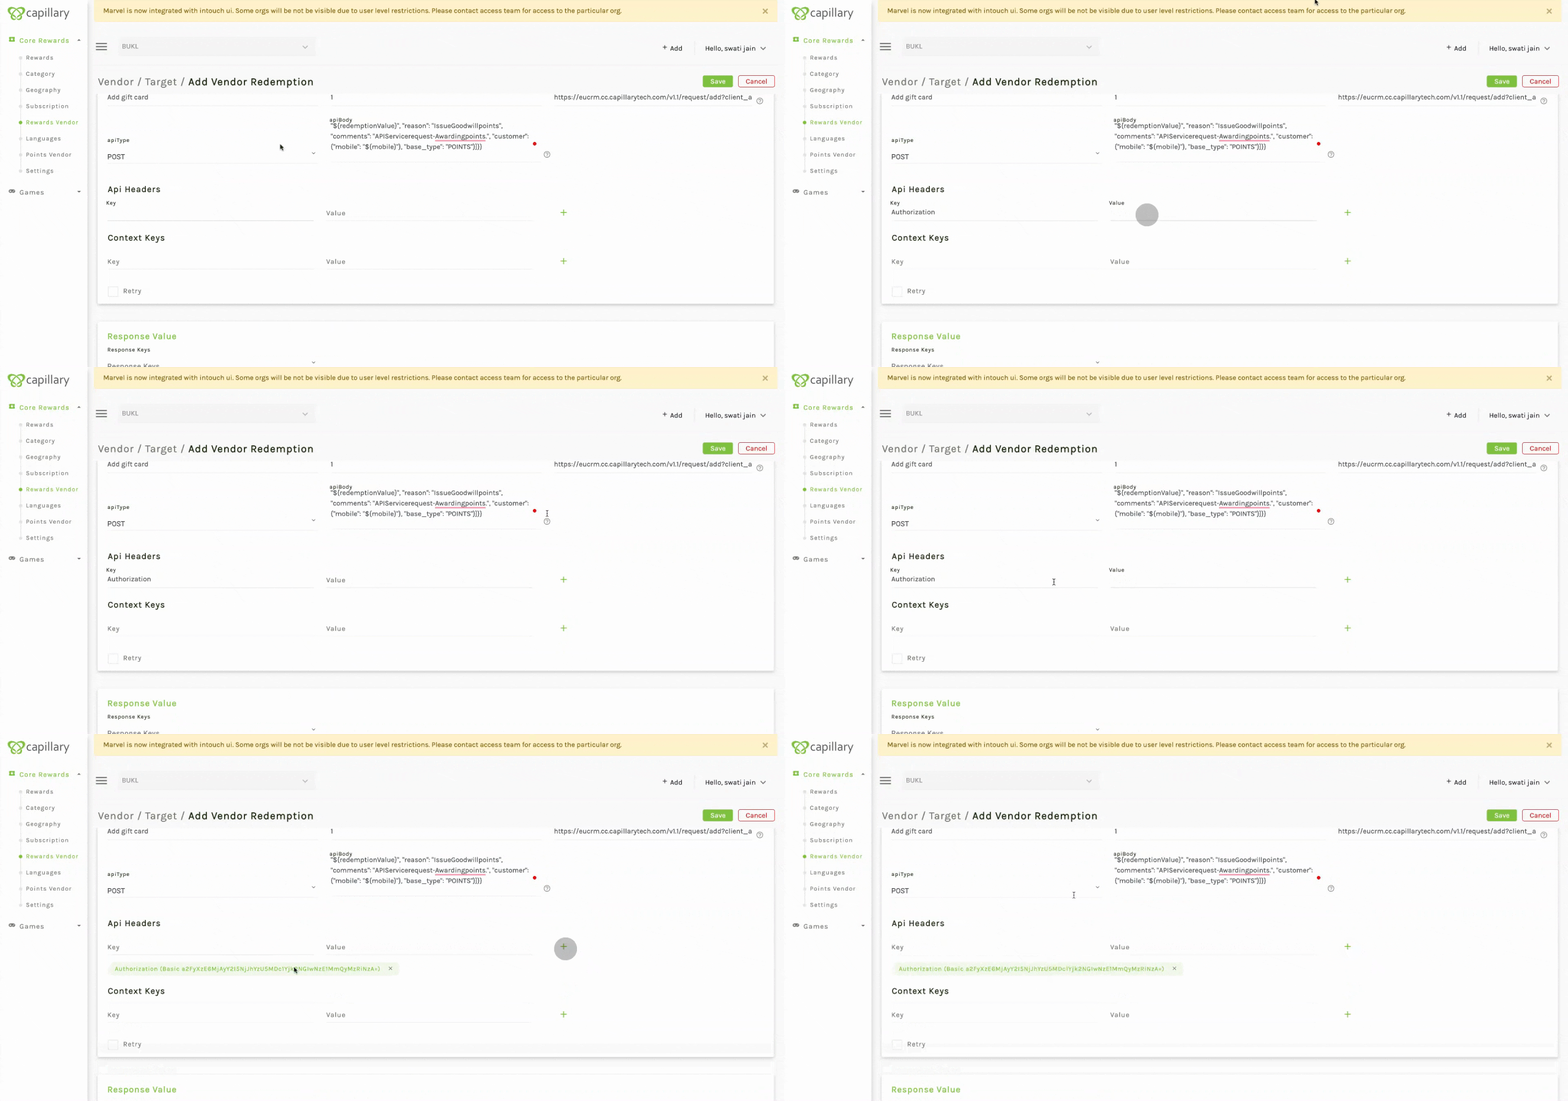
- API headers contain authentication details and content-type. Enter the authorization in the API headers and save them by clicking on the + icon. Add more API headers as needed and save them.
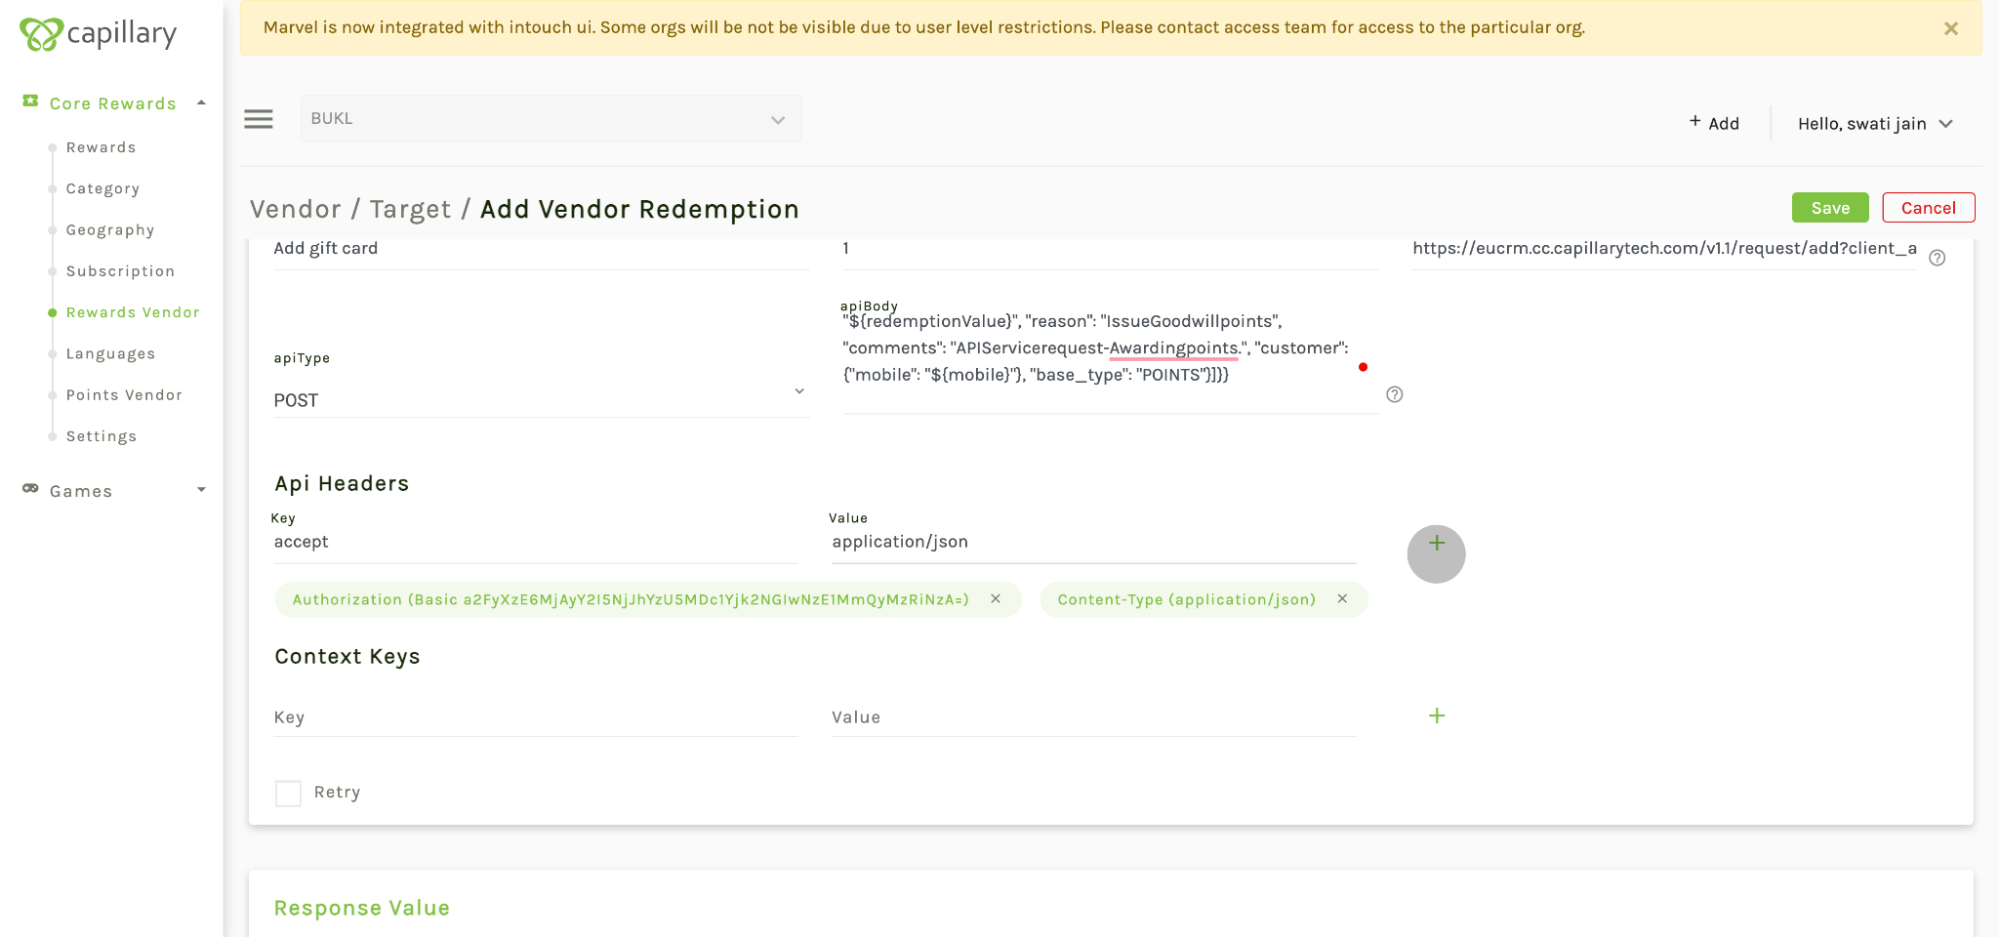
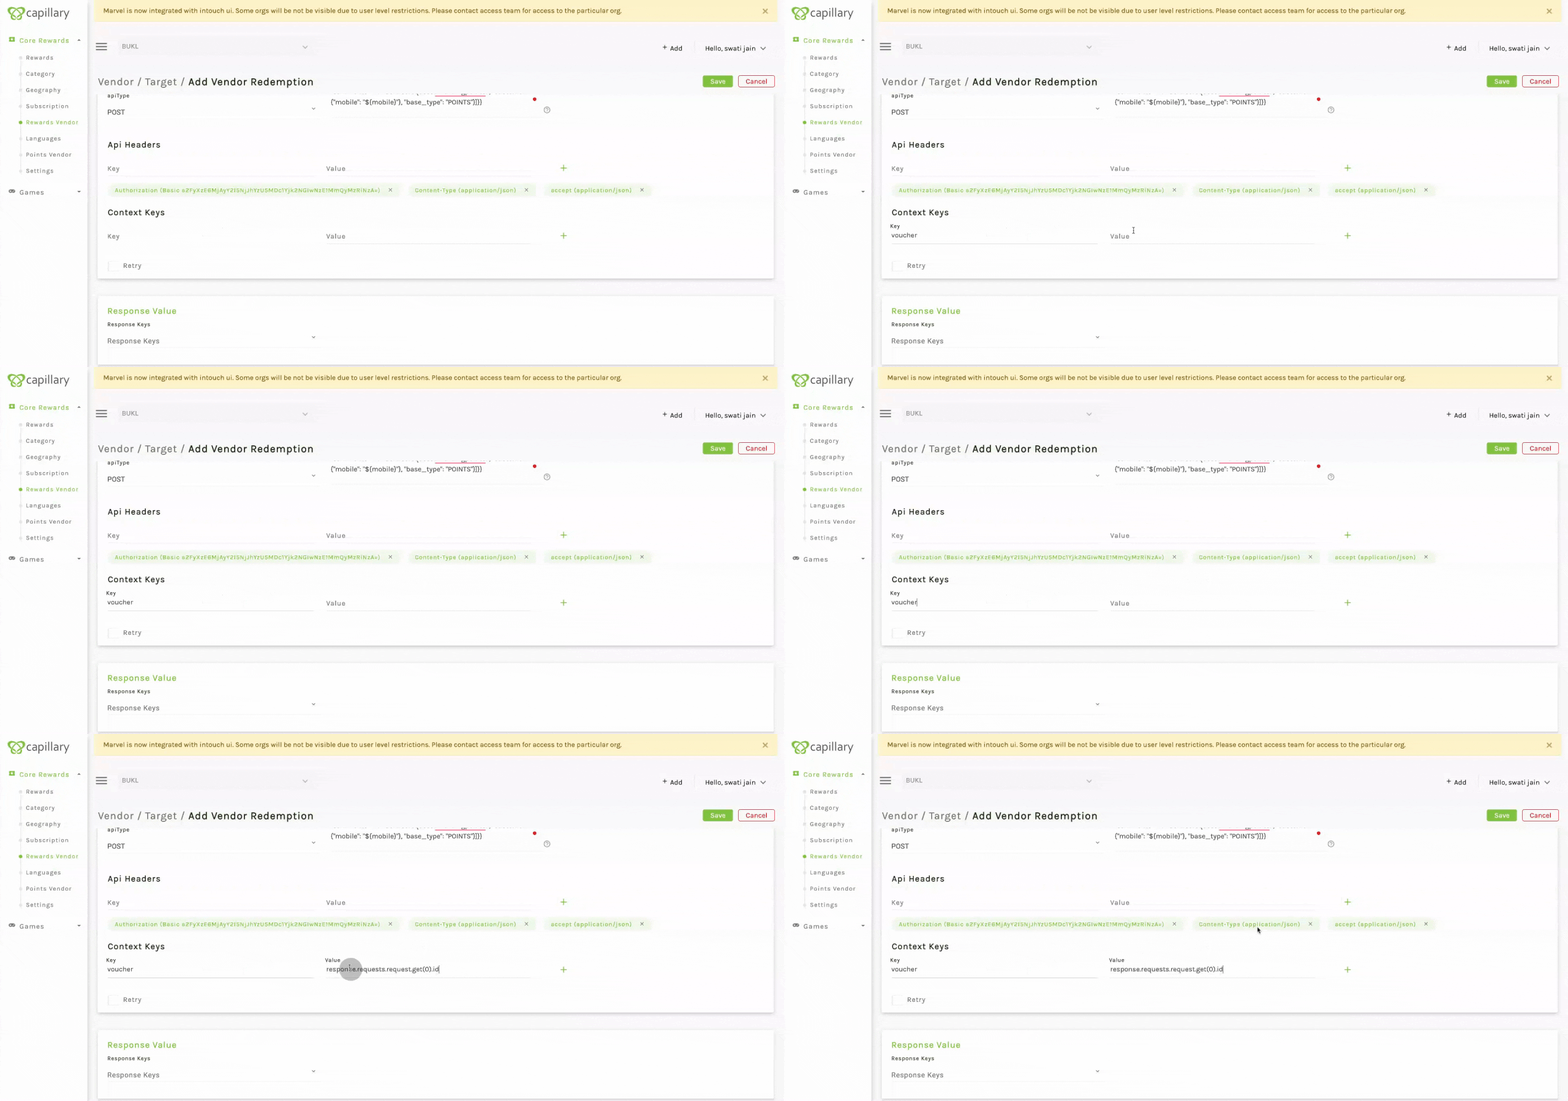
- Context keys contain the response of the vendor. Specify the fields to return in the response. Enter "voucher" as a mandatory param if storing any code or unique id. Provide the path of the response as value for that particular field.
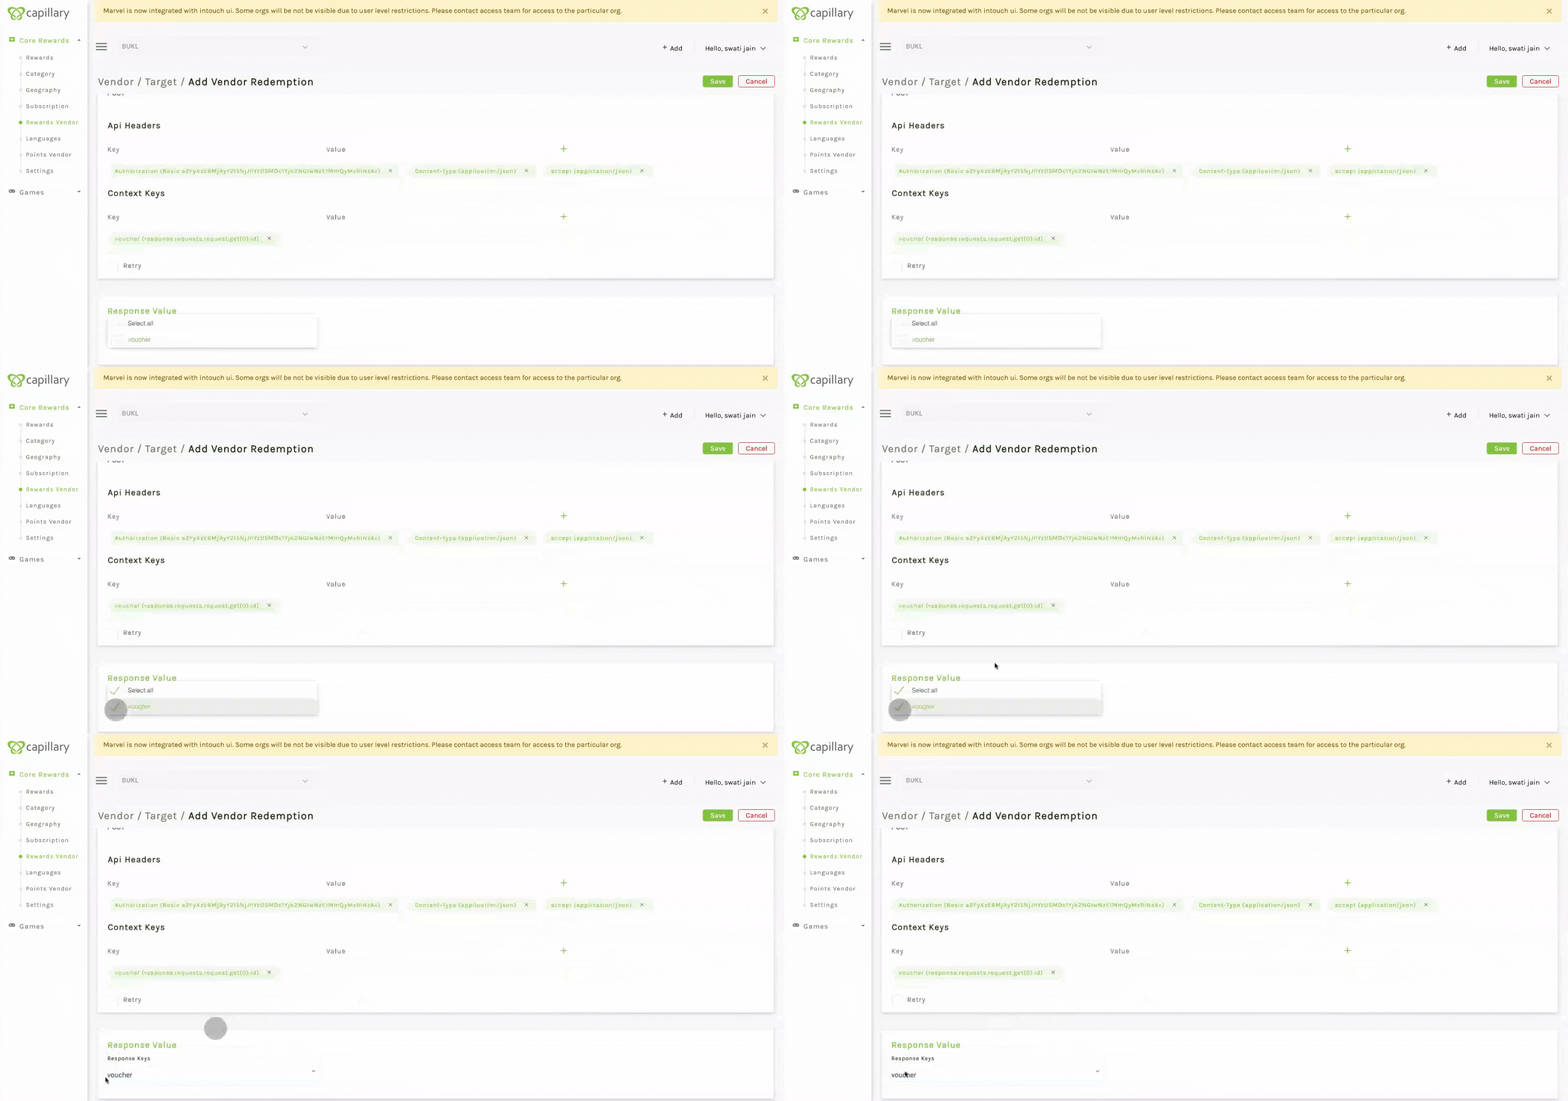
- Select the response value needed in the issue reward response block and click on save to save the vendor redemption.
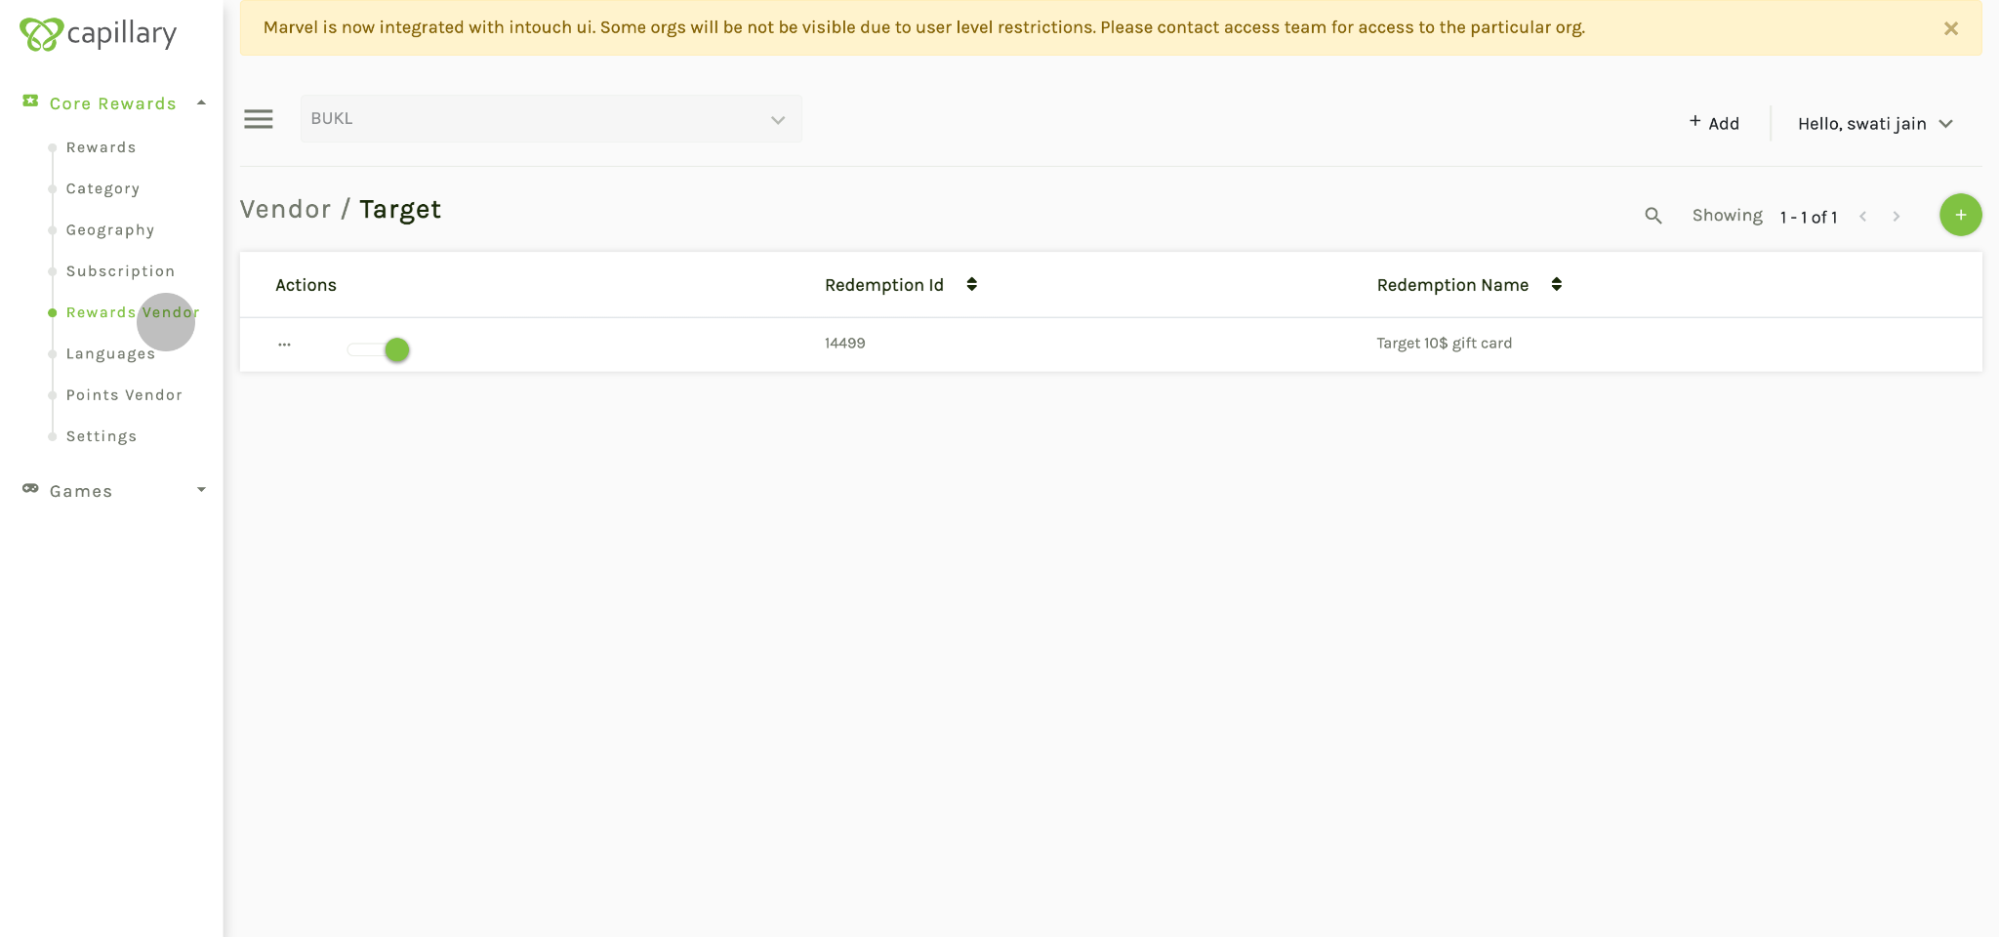
- Create as many vendor redemptions as needed under a particular reward vendor.
- Once the vendor redemptions are created, return to the reward creation and create a new reward and select the vendor and vendor redemption to be linked to this reward.
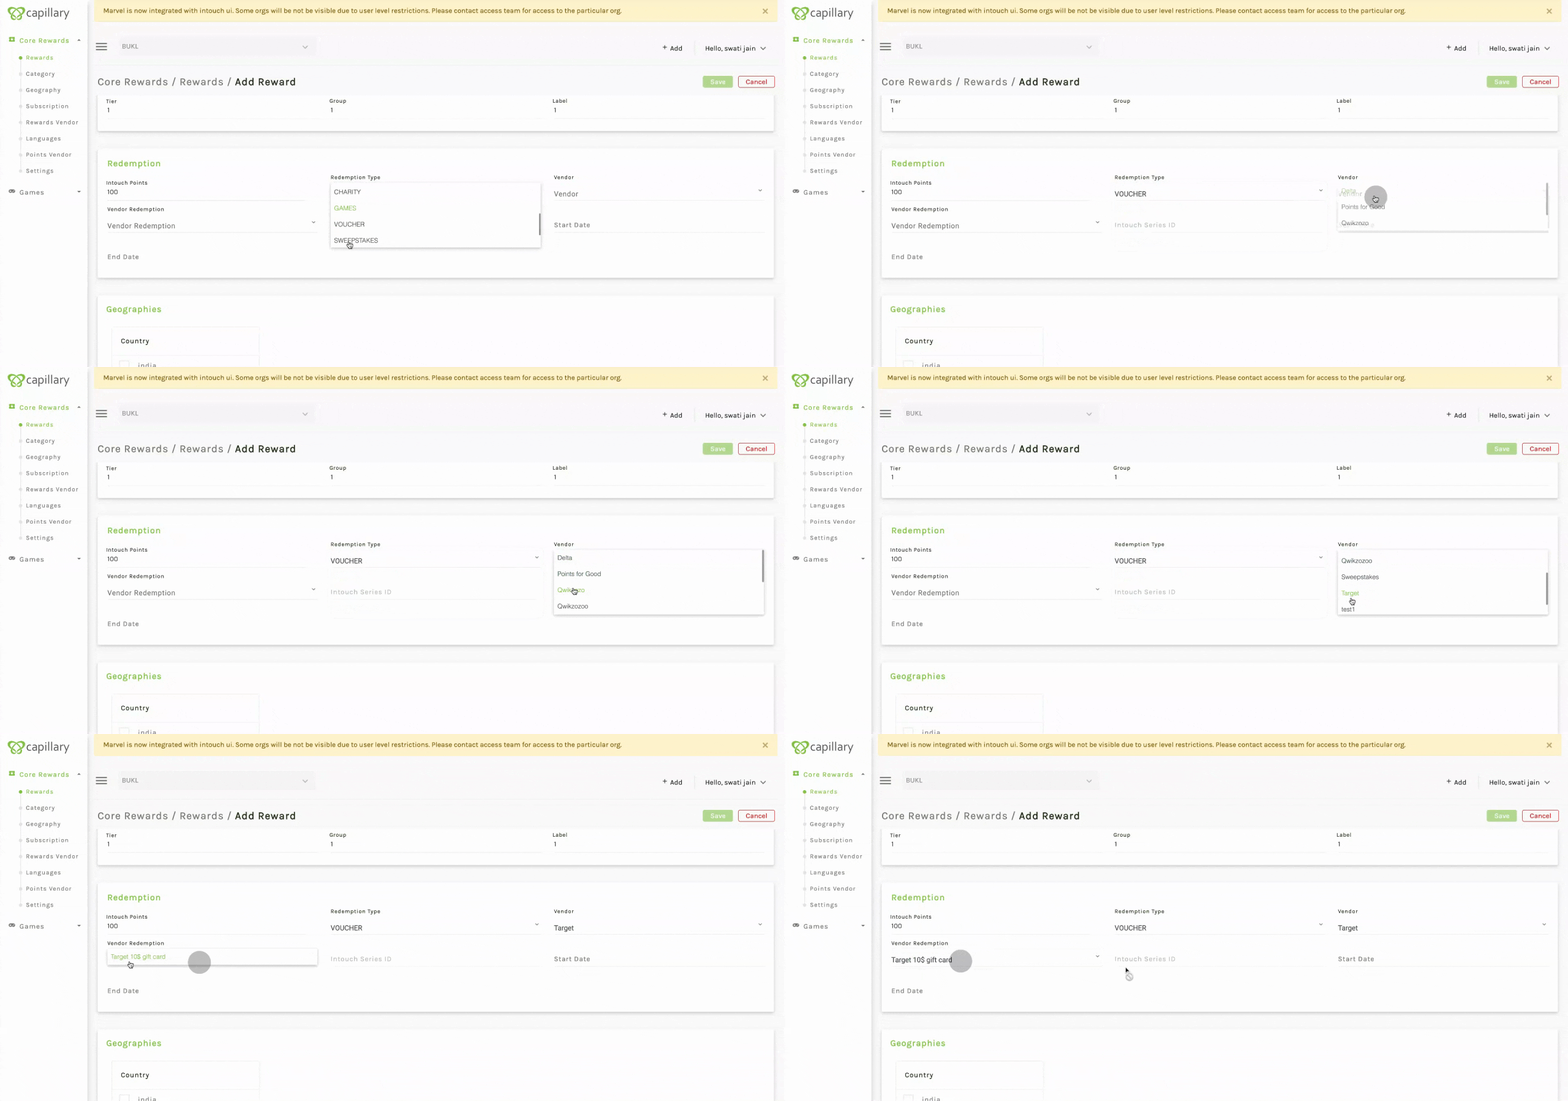
NoteThere is no limit on the number of rewards you can create.
Example 1 for vendor redemptions


Example 2 for vendor redemptions


h. start and end date of the redemption period. While creating the reward, start date must be in the future.
i. Geographies - Select the country where the reward is applicable. This is a metadata for the reward. You can define these in the Geography section in Marvel.

j. Name - Enter a unique name for the reward.
k. Description - Provide a brief description of the reward and its benefits.
l. Reward Image - Upload an image that represents the reward. Only one reward image can be linked to a reward in a single language.
m. Thumbnail Image - Upload a thumbnail image for the reward. Only one thumbnail image can be linked to a reward in a single language.
n. Terms and Conditions - Provide the terms and conditions associated with the reward.
- You can also define the name, description, reward image, thumbnail image, terms and conditions in multiple languages for a particular reward. Create the languages in the languages section of Marvel and use them while creating a reward.

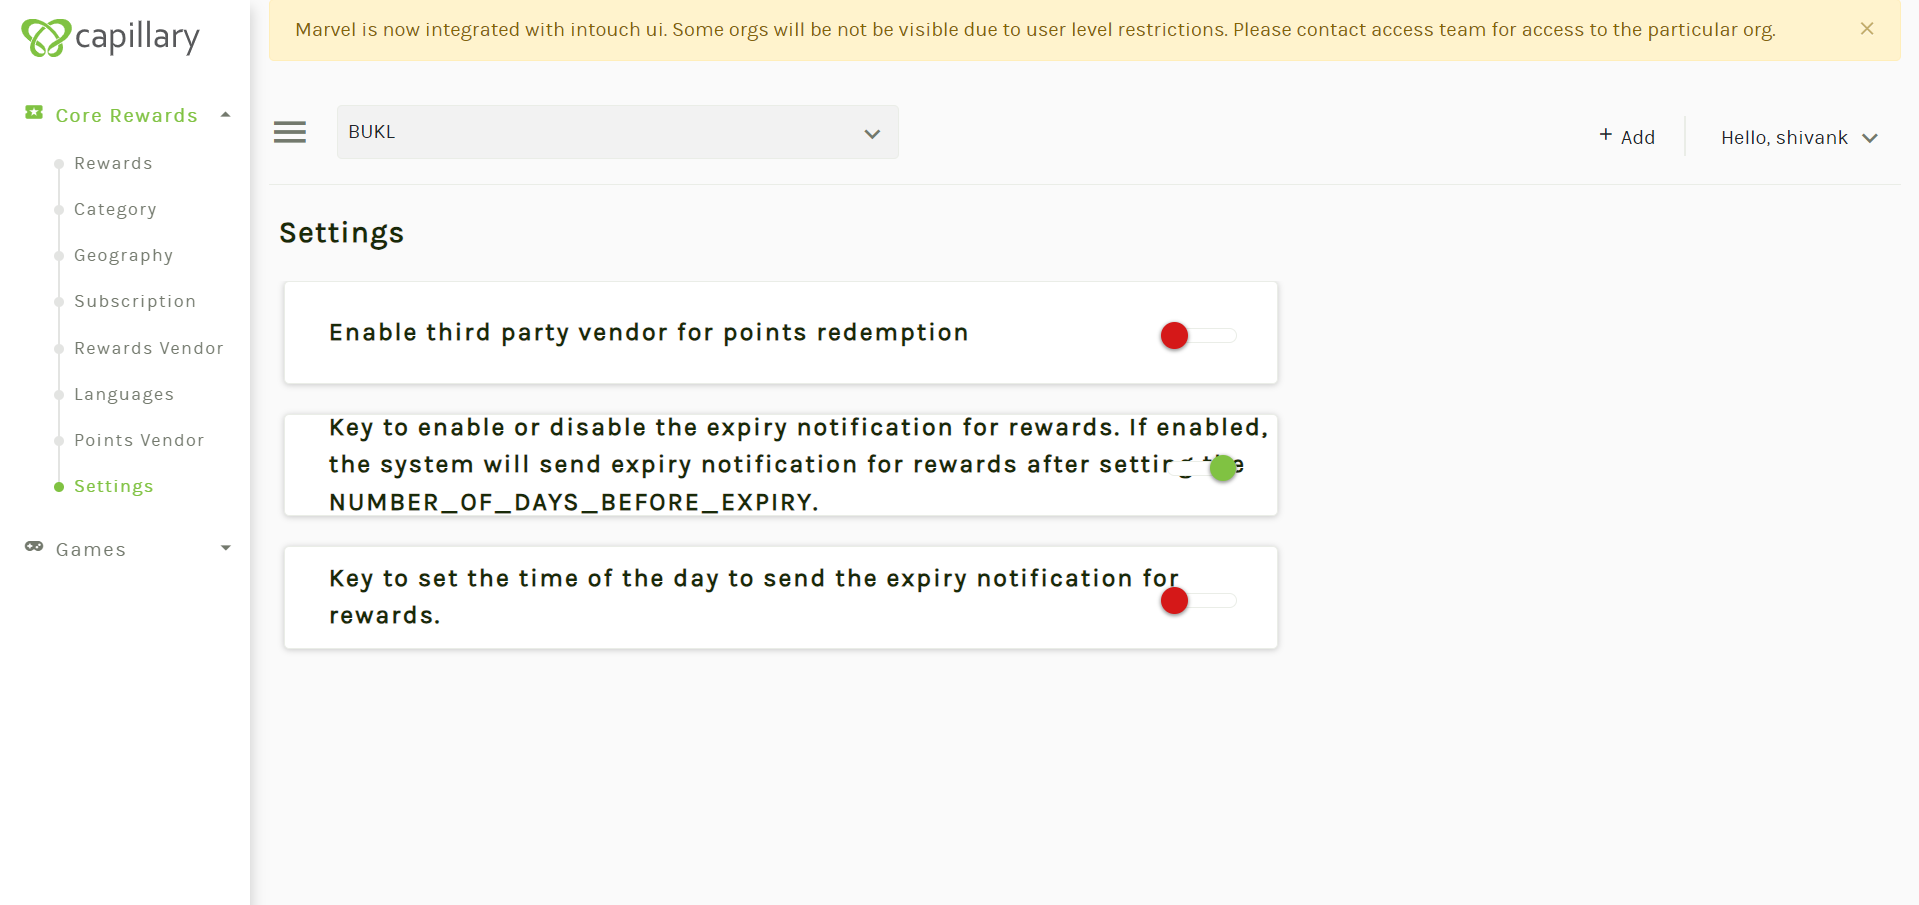
- Points Vendor: Brands can either use Capillary as the points vendor or use their own loyalty platform or partnered platform and do the configuration here in the Points vendor section of Marvel. This allows brands to use rewards catalog even if they don’t use Capillary as their loyalty product.

- Enable this option to define third party vendors for points redemption in the Points vendor section of Marvel.

- Once you have filled in all the required fields, click on the Save button to create the reward.
Use cases
- Intouch Rewards - Coupons & Cart Promotions
- Get a 20% discount upto 100 on your next transactions.
- Redeem 500 points and get this offer
- External or Vendor based rewards
- Get 10 AirCap miles for every 10000 points you redeems
- Get a recharge of 100 for 500 points
Reward Field Editability by State
| Field | Upcoming | Live | Ended |
|---|---|---|---|
| Start date | ✓ | ✗ | ✗ |
| End date | ✓ | ✓ | ✓ |
| Reward enable/disable (yes/no) | ✓ | ✓ | ✓ |
| Reward type | ✓ | ✗ | ✗ |
| Payment config | ✓ | ✓ | ✓ |
| Vendor redemption ID | ✓ | ✓ | ✓ |
| InTouch series ID | ✓ | ✓ | ✓ |
| Supplementary criteria (loyalty program, tier, subscription program) | ✓ | ✓ | ✓ |
| Labels | ✓ | ✓ | ✓ |
| Cards | ✓ | ✓ | ✓ |
| Segments | ✓ | ✓ | ✓ |
| Groups and rank within group | ✓ | ✓ | ✓ |
| Reward rank | ✓ | ✓ | ✓ |
| All restrictions/limits/inventory | ✓ | ✓ | ✗ |
| Name | ✓ | ✓ | ✓ |
| Description | ✓ | ✓ | ✓ |
| Terms and conditions | ✓ | ✓ | ✓ |
| Custom fields | ✓ | ✓ | ✓ |
| Rich text fields | ✓ | ✓ | ✓ |
| Reward image | ✓ | ✓ | ✓ |
| Thumbnail image | ✓ | ✓ | ✓ |
| New images (name, alt text, URL) | ✓ | ✓ | ✓ |
| Videos (name, alt text, URL) | ✓ | ✓ | ✓ |
| Language enabled (yes/no) | ✓ | ✓ | ✓ |
| Tier | ✓ | ✓ | ✓ |
| Group | ✓ | ✓ | ✓ |
| Label | ✓ | ✓ | ✓ |
| Categories | ✓ | ✓ | ✓ |
| Geography | ✓ | ✓ | ✓ |
Points to Note
- If a reward is enabled, then it will be returned in the get call. To filter out the rewards which are enabled but start date is in future, app layer can control this.
- In case of vendor rewards, vendors should support the reversal of rewards issued.
- Subscription section is present in Marvel UI but it is not functional.
API documentation for Rewards Catalog
You can find the API documentation here
Updated 8 months ago

