
Single Sign On (SSO)
In this section, you will find details on how to enable and integrate Single Sign-On (SSO).
Single Sign-On (SSO) is an authentication process that allows you to access multiple applications and systems with one set of login credentials (username and password). With Capillary SSO integration, you can log into Intouch using the same identity information that your organization uses for SSO login.
Capillary uses Okta to enable and integrate SSO.
Get in touch with [email protected] for enabling and integrating SSO.
Prerequisites
- SSO metadata
- IdP signature certificate
- Domain list
- Okta admin account
Enabling SSO
To enable Single Sign-On (SSO), you must activate the Enable Single Sign On (SSO) configuration.
To enable and for assistance in integrating SSO, send an e-mail to [email protected].
NoteYou can enable SSO for only single organisation. Hence, this is not recommended for multi-org users.
Integrating SSO
To integrate, perform the following:
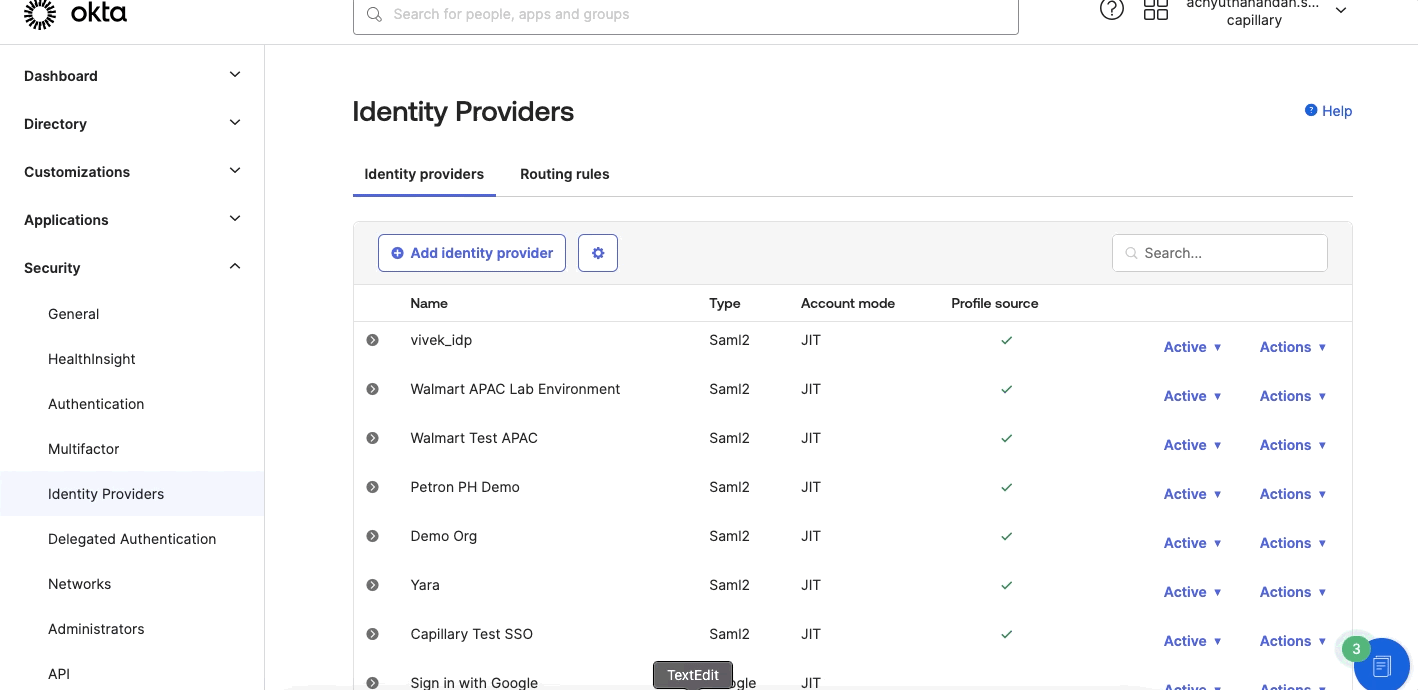
- From the Okta admin page, navigate to Security > Identifiers > Add identity provider and select SAML.
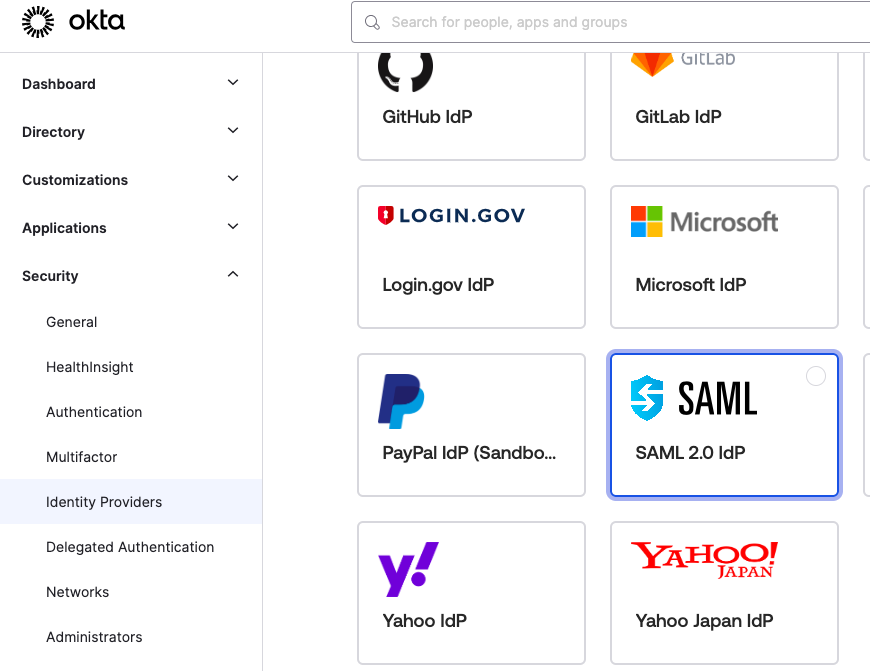
Note: Capillary supports SSO with SAML 2.0 authentication only (SAML 2.0 IdP).
- Click Next.
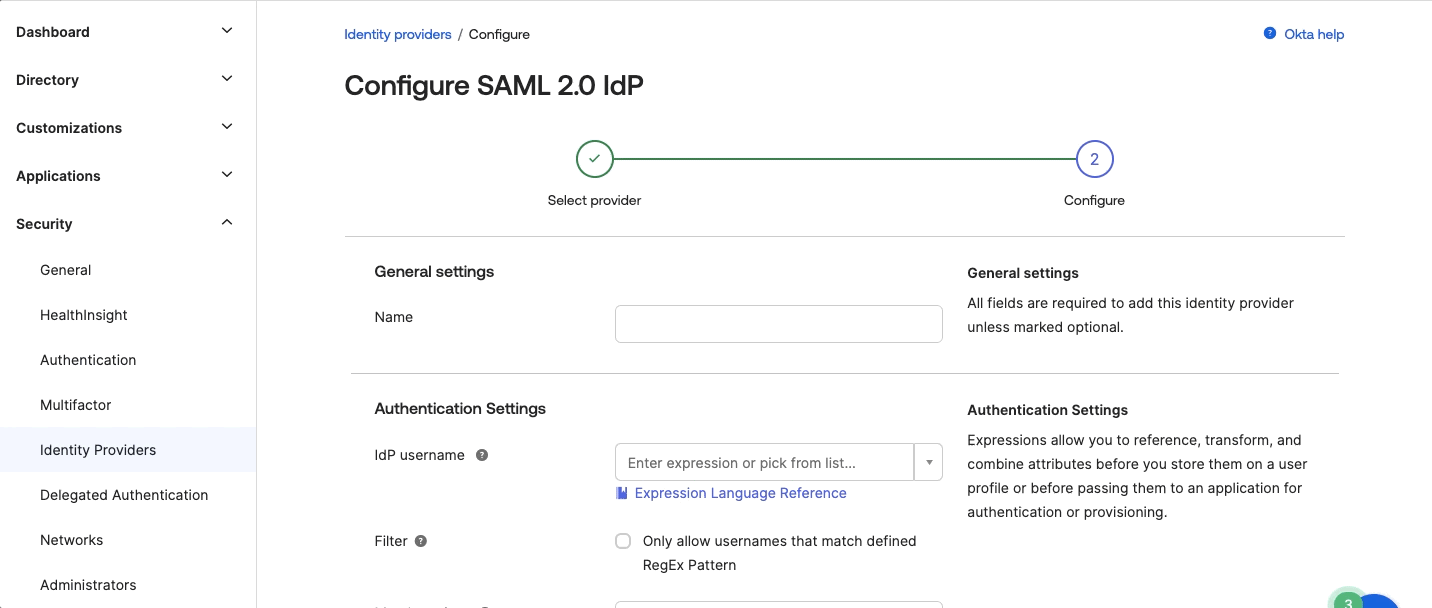
- In the Configure SAML 2.0 IdP page, enter the following details:
- Name: Enter the customer name.
- Prerequisite: An attribute must be defined and mapped. See step 5 for information on attribute and mapping.
Idp username - Specify the name of the attribute that contains the user's email address. This enables Okta to authenticate the user based on the email address. For example, you may define this attribute as "appuser.emailaddress" in the Profile Editor and map it to the user's email address. - Match against - Select Okta Username or Email. This matches and authenticates users to an IdP based on their user name on Okta or their defined email address.
- Account Link Policy - Select Automatic.
- Group Assignments - Select Assign to specific group and from the Specific Groups, select SSO Users. Users who are newly created on the IdP will be added to this group after their verification has been confirmed through metadata.
- IdP User URI - Search and find entityID in the metadata file and enter the entityID URI.
- IdP Single Sign-On URL - Search and find the location in the metadata file and enter the location URL information.
- IdP Signature Certificate - Upload the IdP signature certificate. This should be in .pem format.
- Destination - Search the location in the metadata file and enter the location URL information. This is the location to send the SAML Response.
Use the default values for the remaining fields.
- Click Finish.
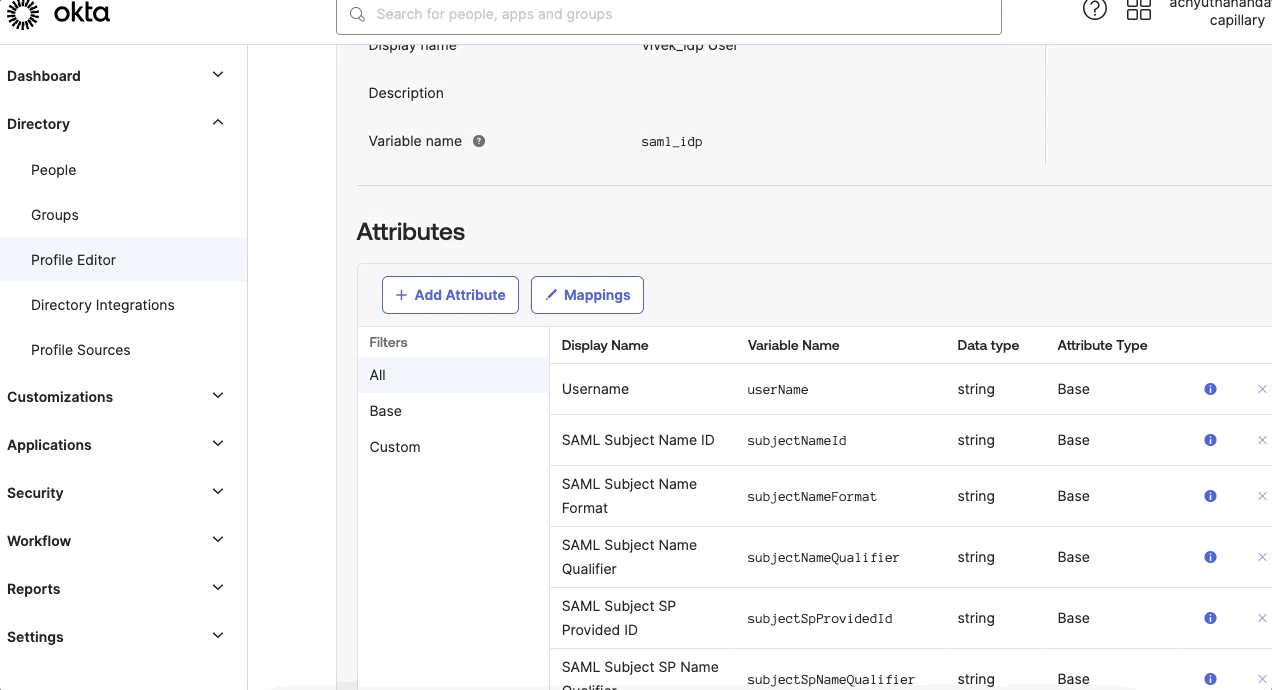
- Navigate to Directory > Profile Editor > customer > Add Attributesand enter the attributes:
- Display name- Enter a valid display name. This is a label that appears on the UI.
- Variable name - Enter the name of the attribute that can be referred to in mappings.
- External name- Enter the SAML standard URL.
- Enable Attributes- Select the checkbox and enable the attributes.
Use the default values for the remaining fields.
- Click Save.
- In the Profile Editor, click Mapping and map the attributes. To map the attributes, select Capillary SSO to Okta User, and select the defined attributes against the respective Okta user attributes.
- Navigate to Security > Identity Providers > Routing rules and define the Routing rules. Enter the following details:
- Rule Name- Enter the customer name.
Note: Make sure that the customer name entered in the identity provider and routing rules are the same. - User is accessing- Select Intouch.
- User matches- Select Domain list on login and enter the domain names. For example, abc.com, abc.in etc.
Use the default values for the remaining fields.
- Rule Name- Enter the customer name.
- Click Create Rule.
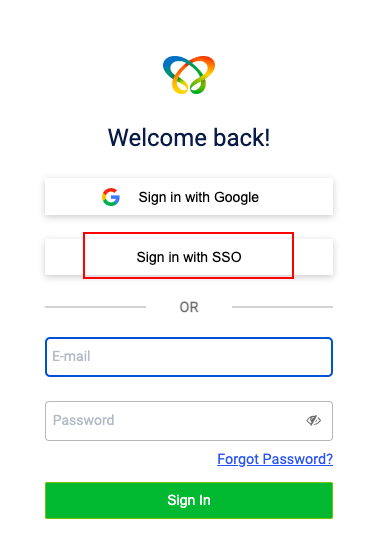
The SSO integration is now fully complete. You can select the SSO option to sign into Intouch using your SSO login credentials.
Disabling SSO
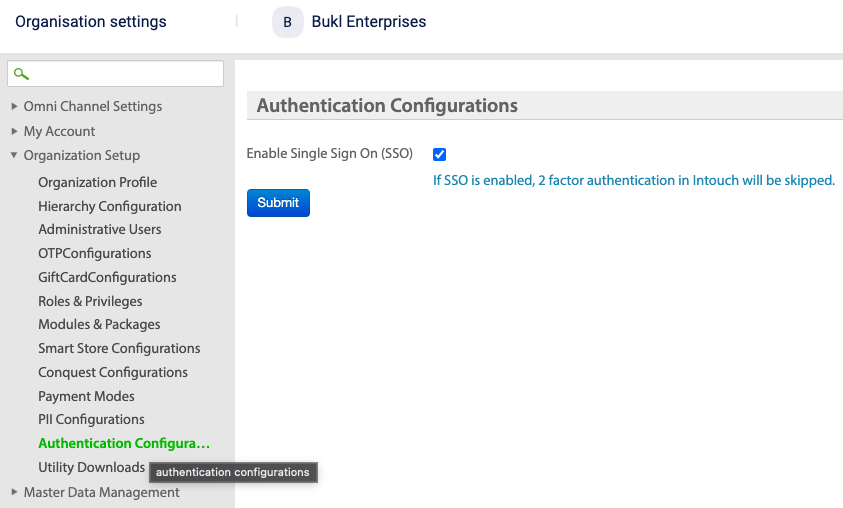
To disable SSO, navigate to Organisation settings > Authentication configurations and clear the Enable Single Sign On (SSO) check box. If you do not have access to organisation settings, send an e-mail to `[email protected].
SSO login scenarios and errors
The table below provides information on error messages that occur in various scenarios.
| Scenario | Error Message |
|---|---|
| A user from an SSO-enabled org tries to log in using SSO without an Intouch account created by Capillary access team | "User does not have access to Intouch." |
| A user from an SSO-enabled org tries to login using SSO after the Capillary access team has created an account but has not defined the access level | "User does not have access level defined." |
| A user from an SSO-enabled org tries to log in using SSO after the Capillary access team has created an account but the account is inactive (the user has been disabled) | "User does not have access to the org." |
| SSO for an org was enabled earlier but is now disabled | All SSO-related changes are rolled back, allowing users to reset their passwords and log in using Intouch credentials. |
| A user from an SSO-enabled org with Intouch credentials tries to log in using Intouch credentials. | "The email ID or password entered is incorrect". The user will be allowed to log in only using SSO. |
Updated about 1 year ago