
Test Campaign
The test/preview flow within the campaign framework allows users to validate campaign configuration and message delivery before launching the campaign to a live audience. This helps in ensuring correctness of audience targeting, content, and scheduling.
With this feature, you can configure the campaign for a set of test customers and trigger test sends to observe how messages will be delivered. You can review the entire campaign experience end-to-end, including message appearance and personalization.
Prerequisite
To test a campaign, test customers should be added. Campaign previews and test sends will be delivered only to these defined test customers. Any campaign sent in test mode will apply only to this group.
Adding test customers
To add test customers, follow these steps:
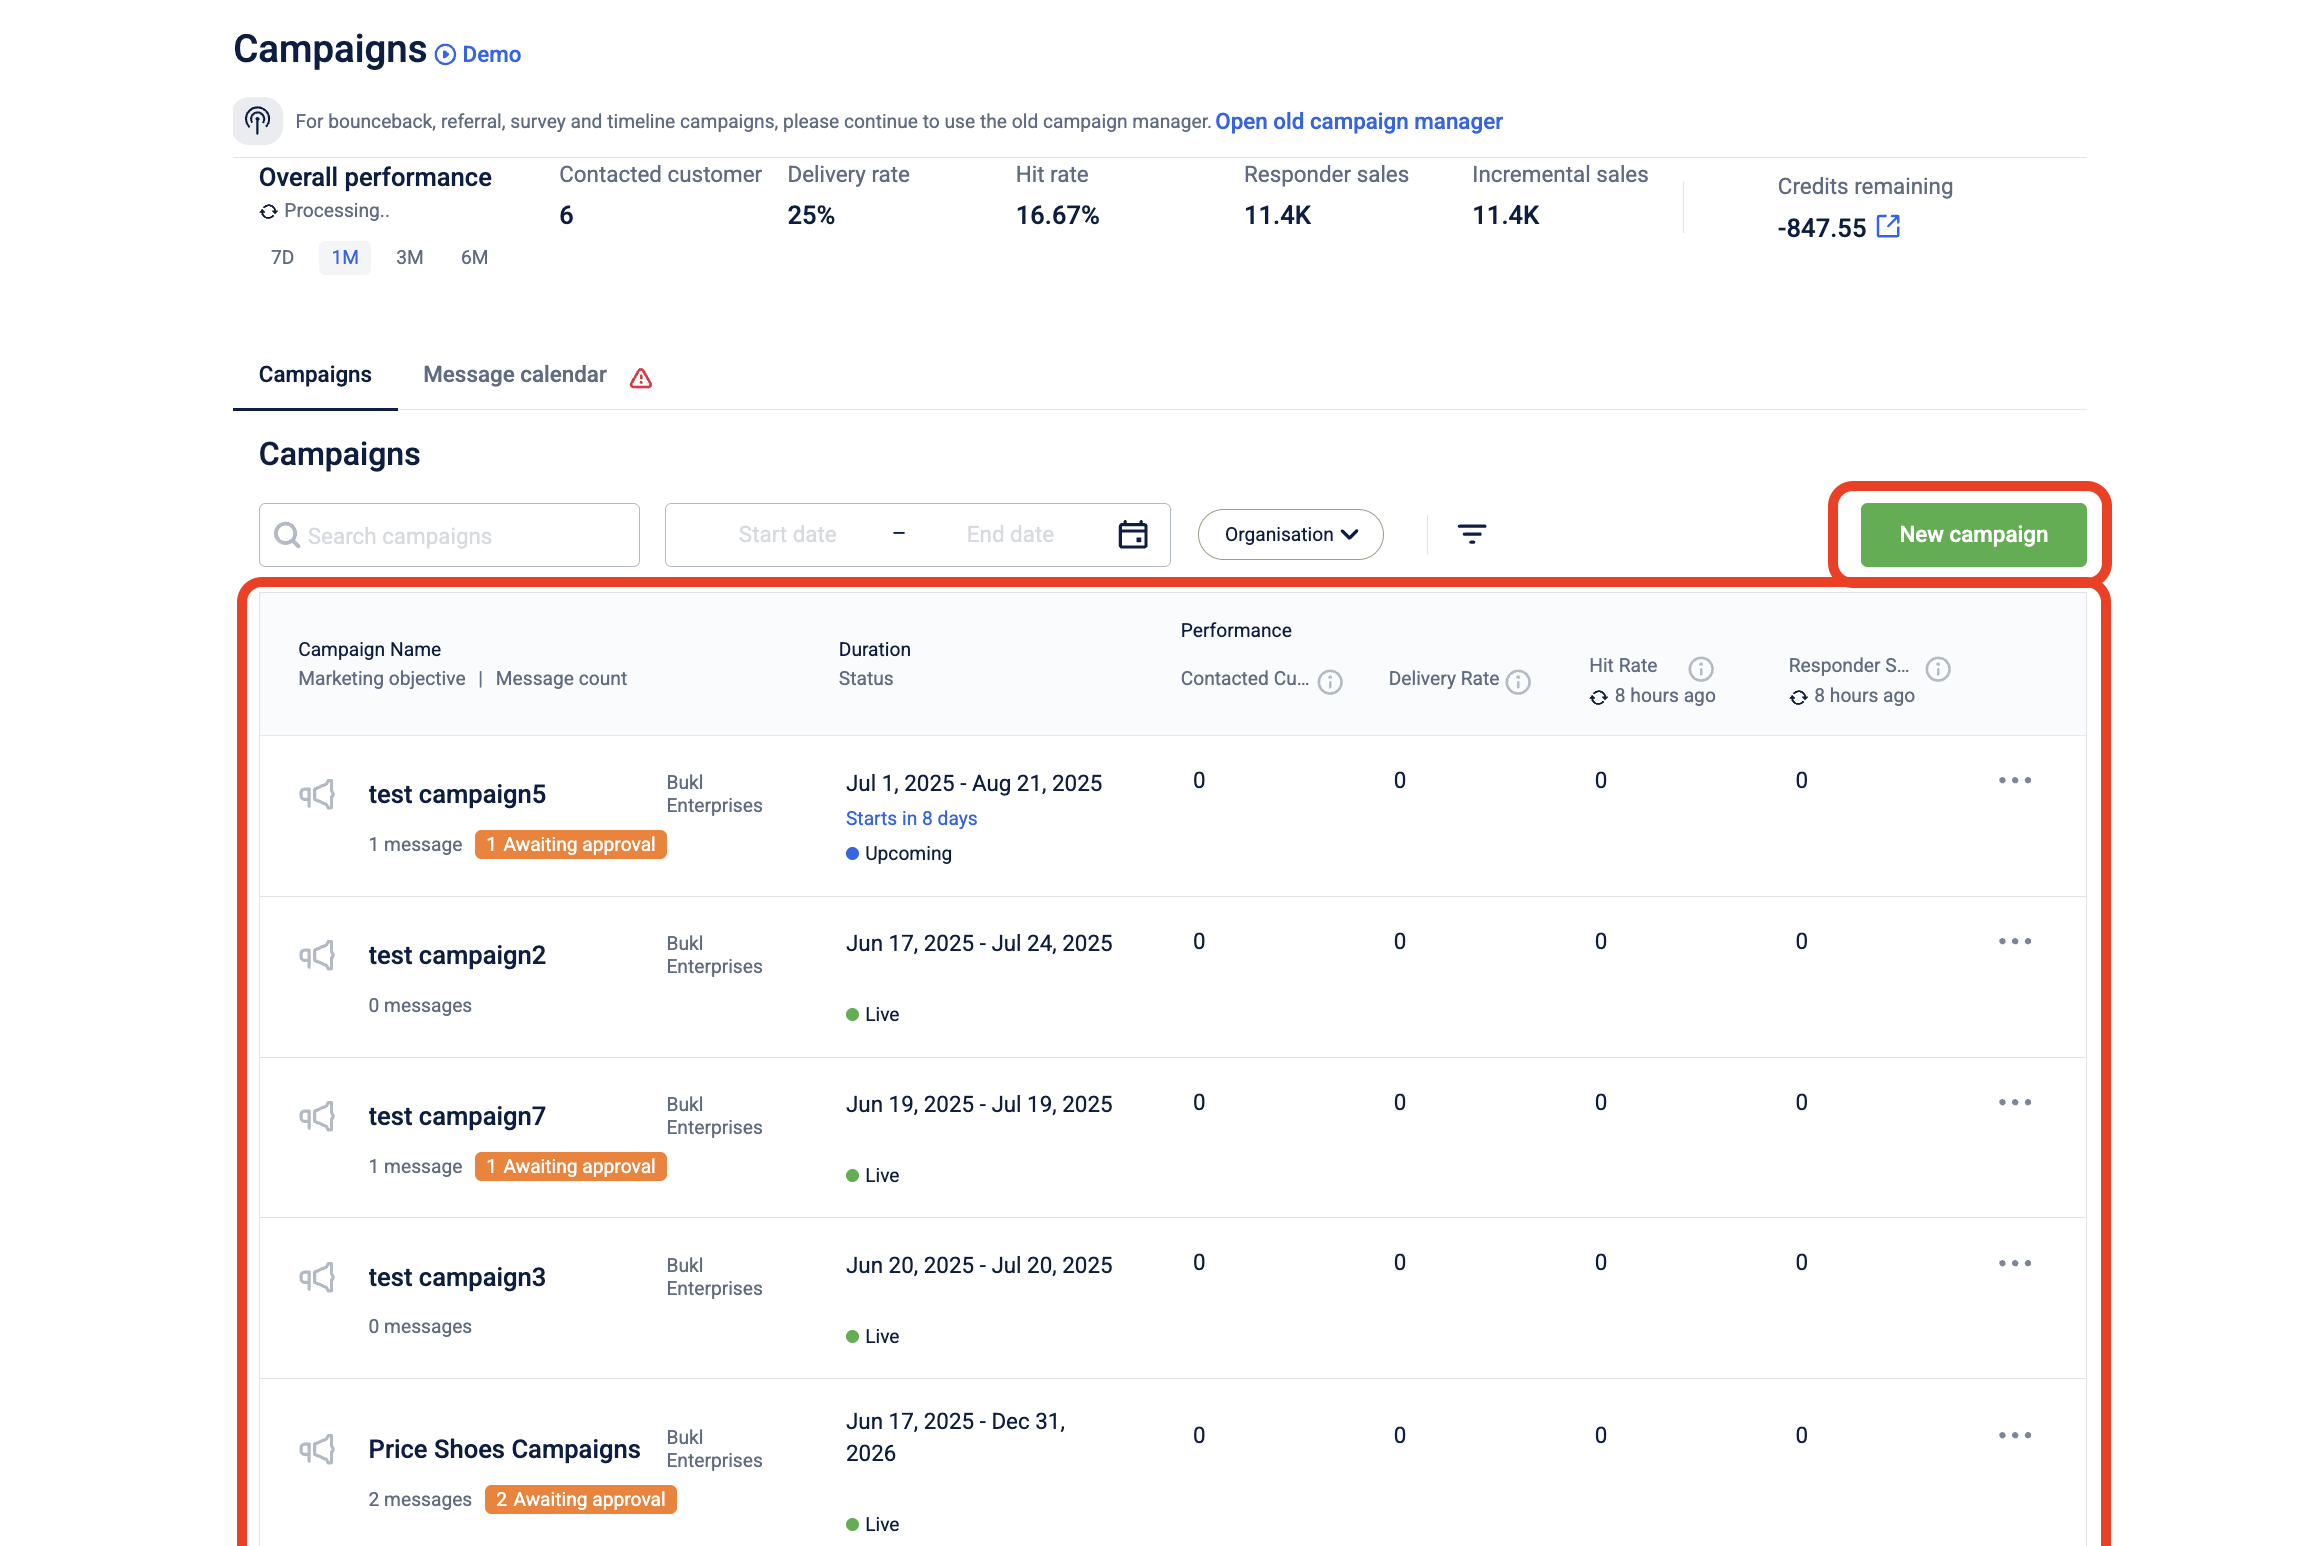
- Navigate to the Campaigns page.
- Create a new campaign or select an existing one from the campaign list.
- Create a New message.
- Add an audience group to define the target recipients for the campaign.
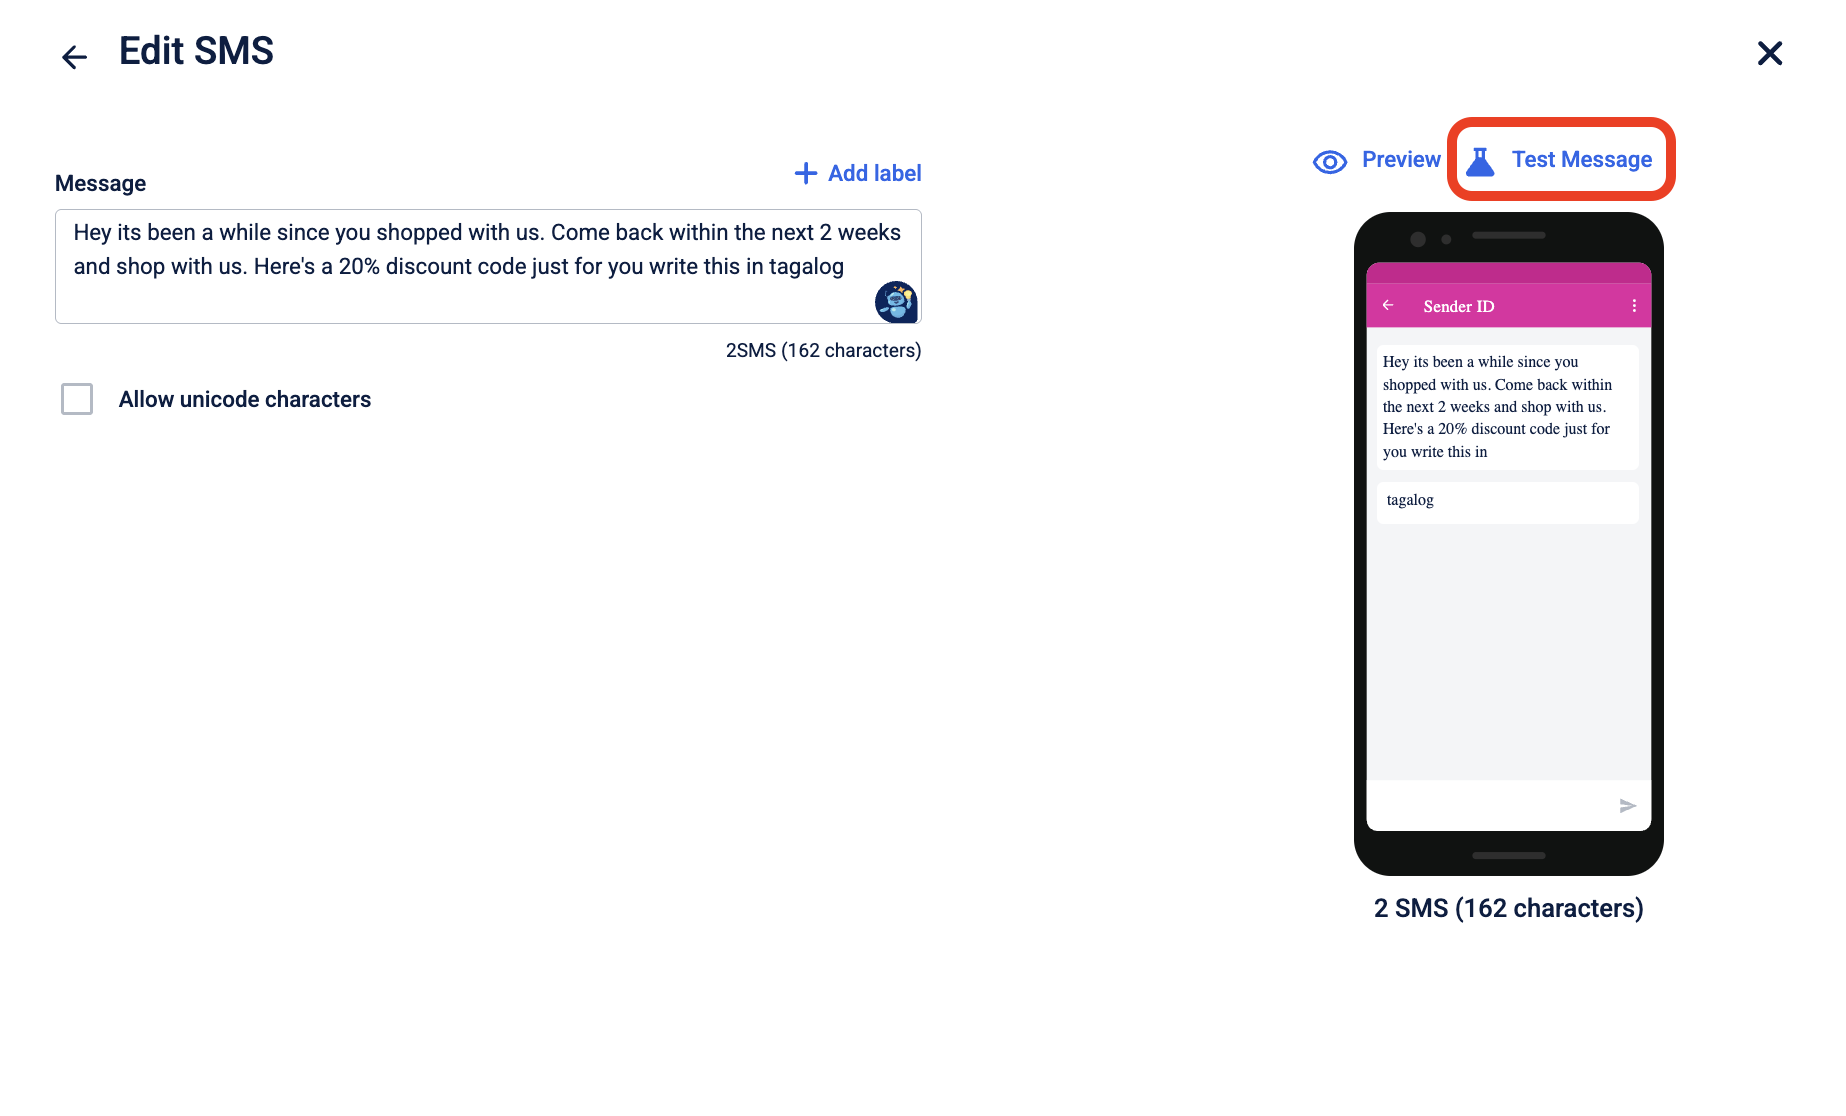
- In the Content section, select the engagement channel (e.g., SMS, Email, WhatsApp) you want to use to send the message.
- Create a new template or choose from an existing one.
- Click Test Message to send a test to your selected test customers.
-
Search for the desired contact using their identifiers in the text field. You can either:
- Individually add test users by entering their mobile numbers or email IDs, or
- Create a new test group and add multiple test user group.
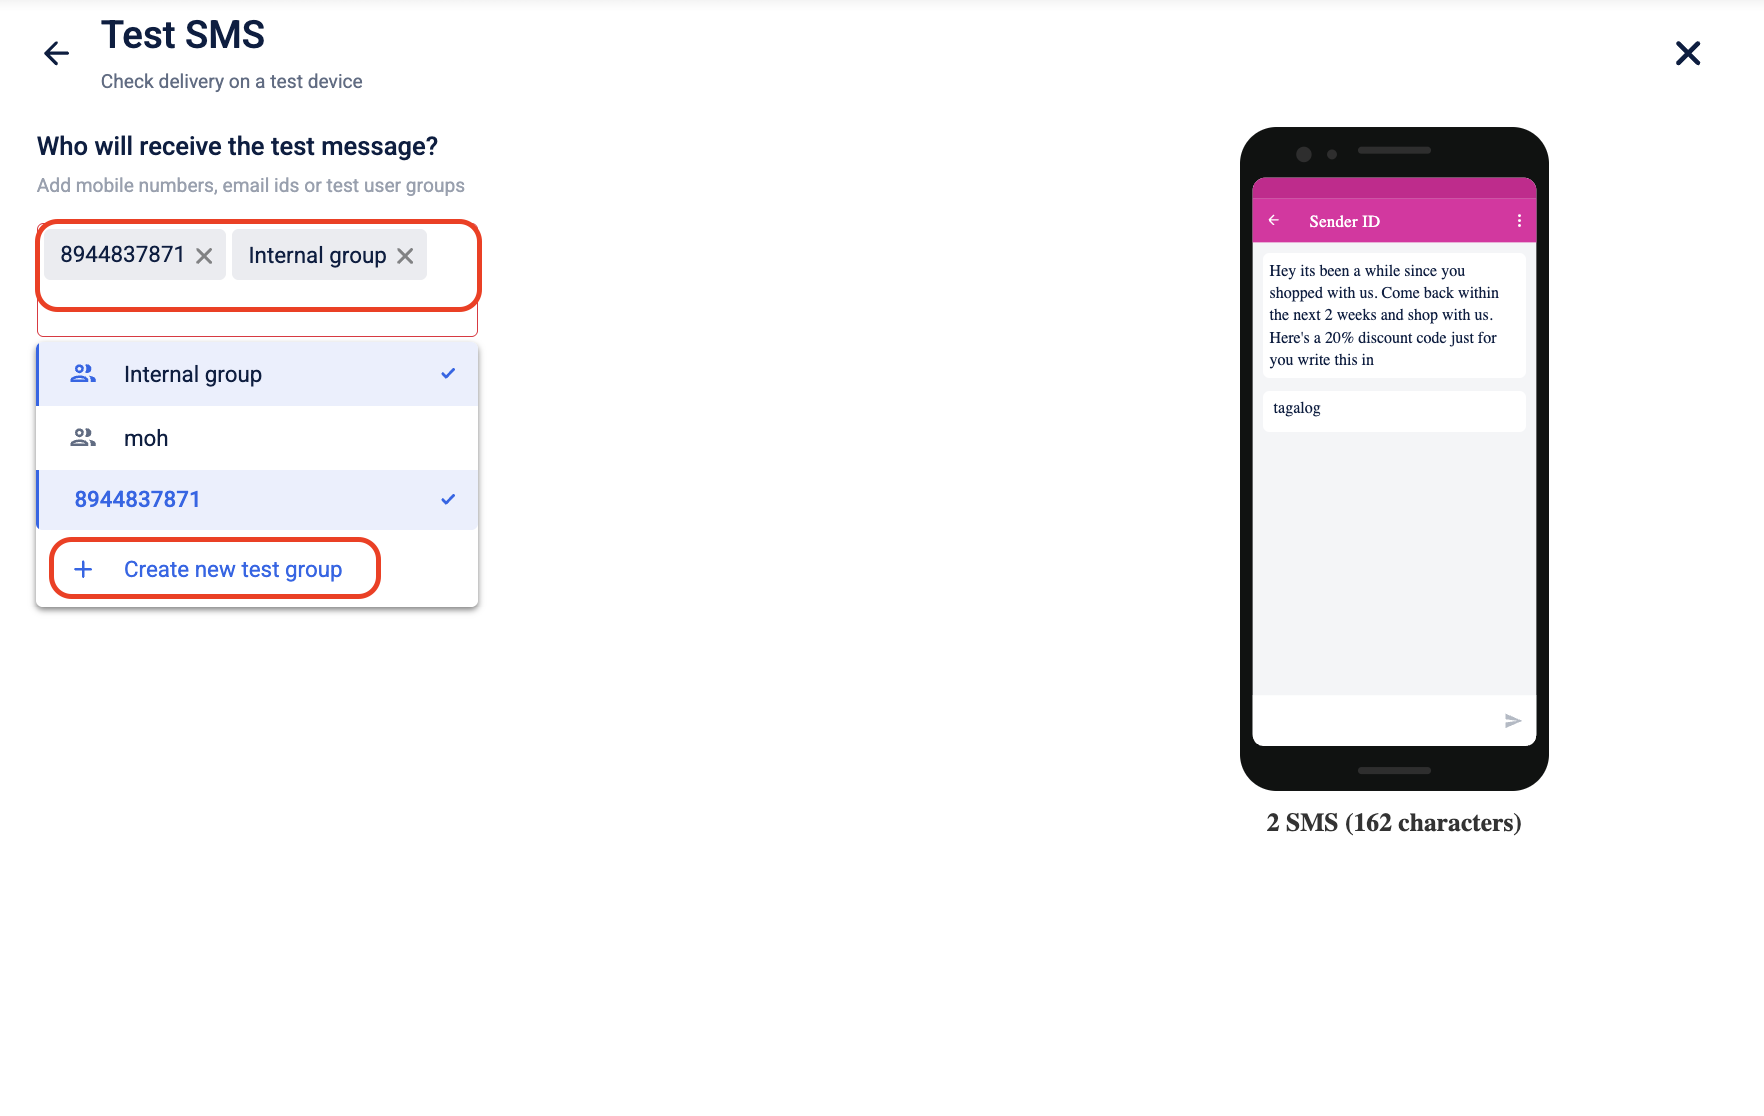
To add test customers Individually
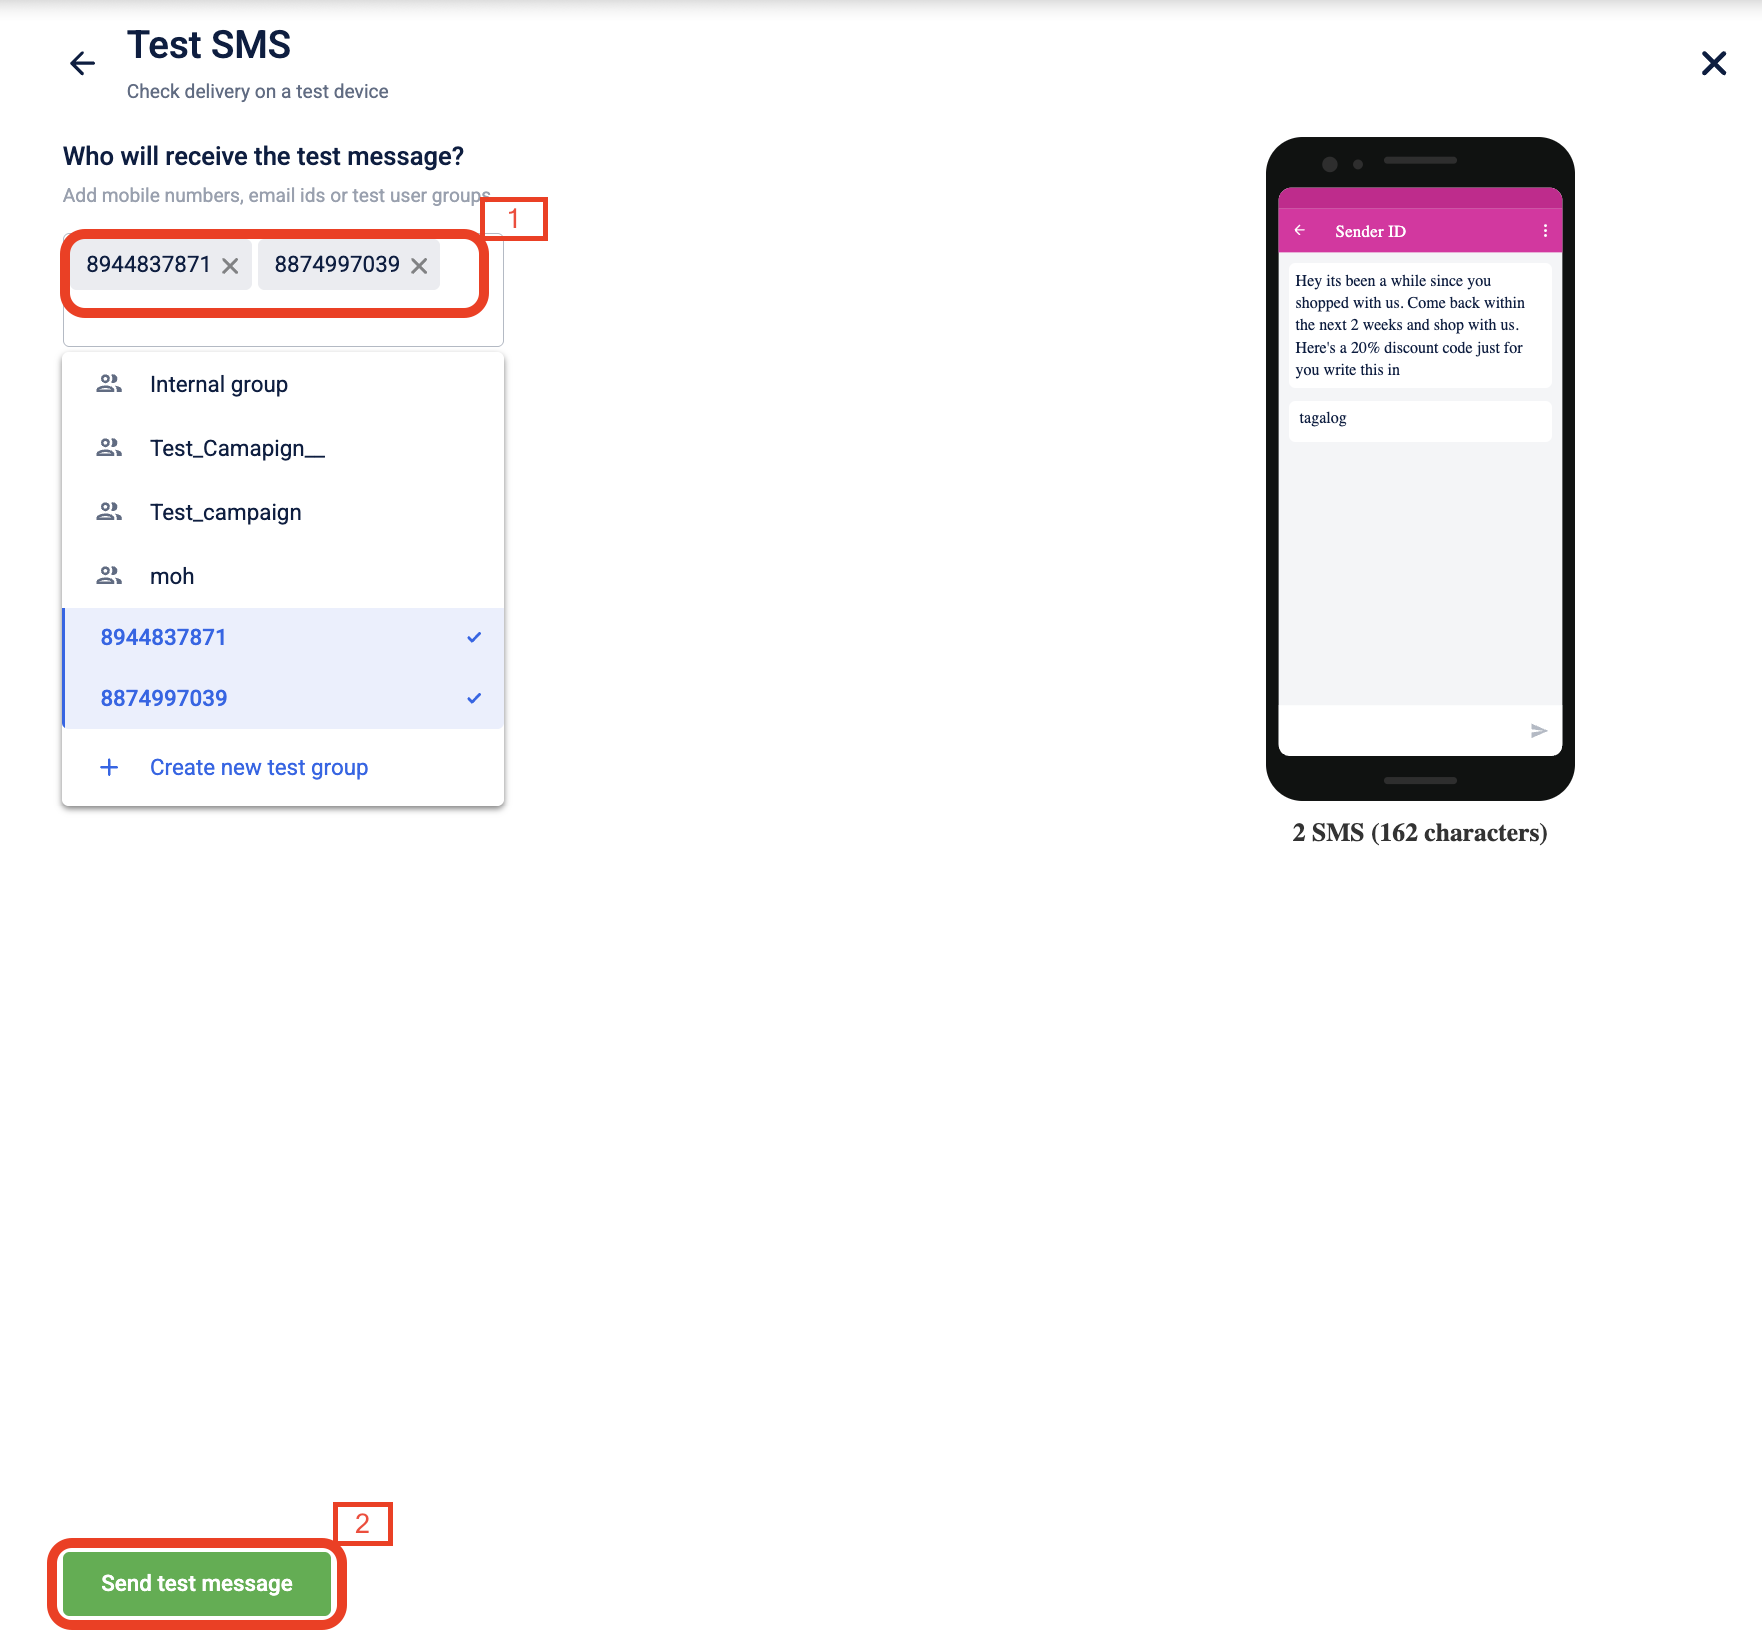
- Search for the desired contact using their identifiers in the text field.
- Select Send test message.
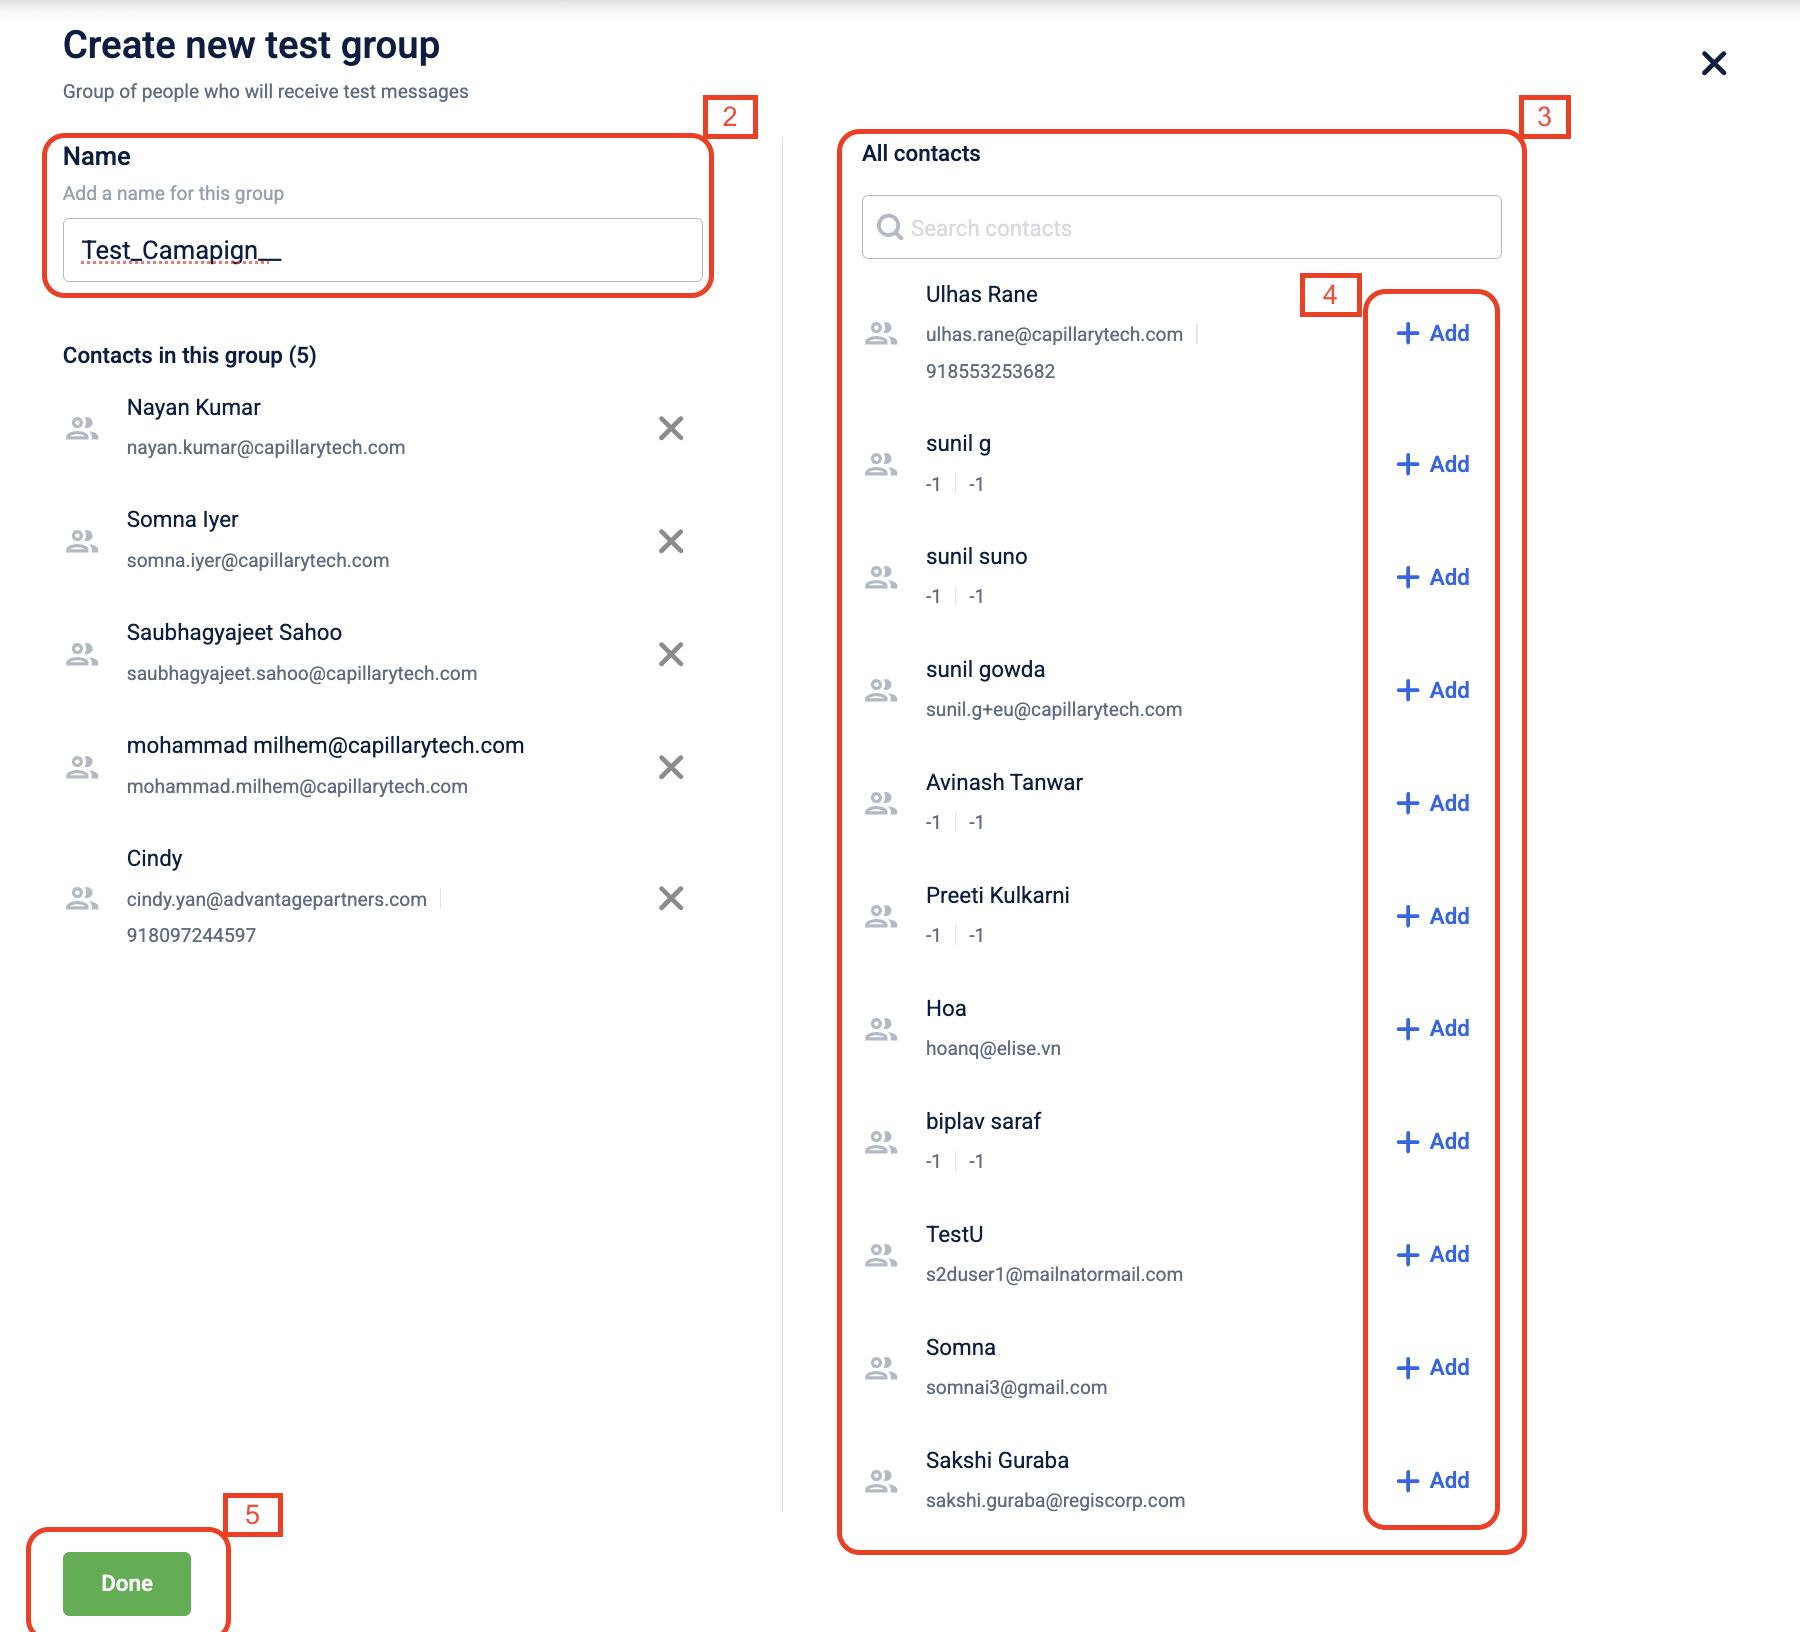
To add test customers in new test group
- Select Create test group.
- Enter a group name.
- Search for the desired contact using their identifiers in the text field. There is no limit in the number of customers that you can add.
- Click on Add to add them on the group.
- Select Done to save the changes.
Updated 4 months ago