
Bounceback or DVS Campaign
ImportantBounceback or DVS campaign can be created from the old UI only.
Bounceback campaigns help issue coupons instantly to customers based on the current purchase or a barcode scan. Hence, you can write rules on either of the two events:
- New Bill DVS: Lets you create rules on a new transaction
- Scan (New Feature): Lets you create rules on a new scan event. This supports SKU/product code, promotion code, and customer included in the ‘feed’ API input. You can create conditions on product code, product brand, and product category.
NoteAs only the New Transaction event was supported earlier, all the existing DVS actions will be marked with the NewBillDVS event and there won’t be any impact on the existing DVS actions.
Scope Limitation
-
The scan event works only for registered customers
-
Loyalty actions such as points allocation couldn’t be triggered for a scan event
-
Reporting on Essential Insights is not covered for the scan event
-
A customer can redeem these coupons either for the same transaction or on the next transaction by the customer.
This article covers the following:
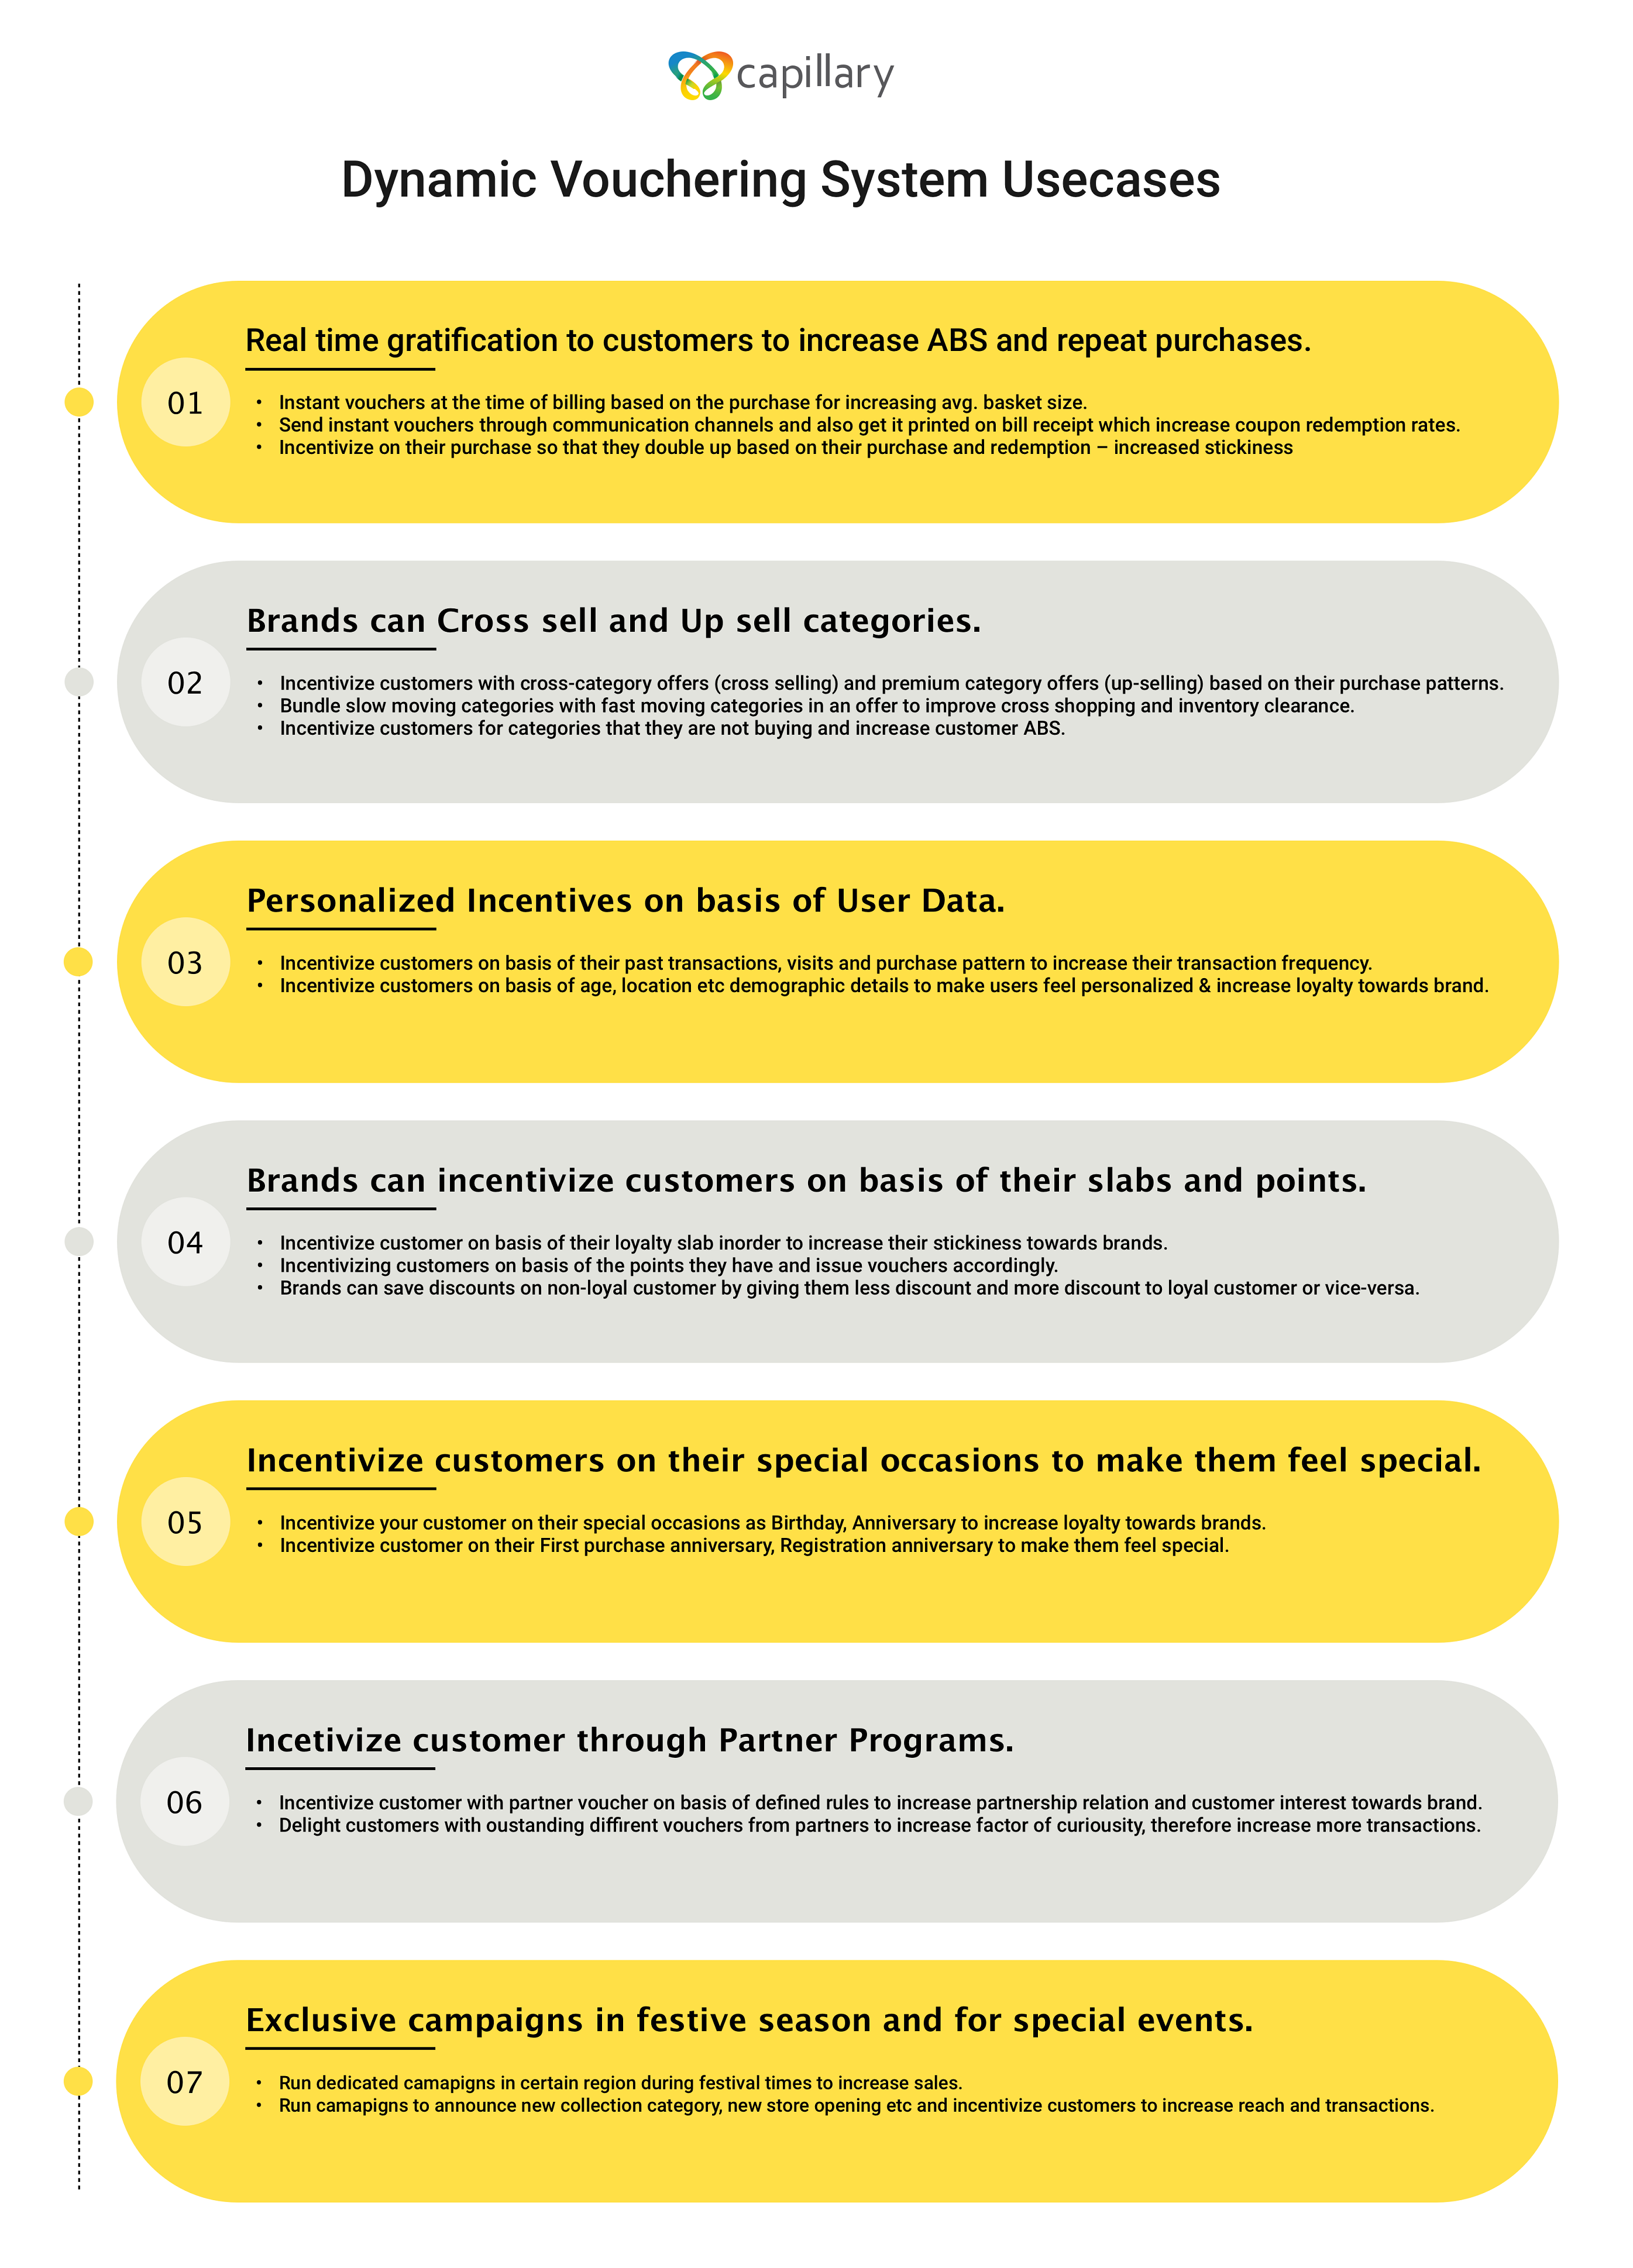
- Use Cases of DVS or Bounceback Campaign
- Create Bounceback or DVS Campaign
- Creating SMS Template for Bounceback Campaign
- Creating Email Template for Bounceback Campaign
- Creating WeChat Template for Bounceback Campaign
- Campaign Priority Settings
Usecases of Bounceback Campaign
Create bounceback or dvs campaign
To create a new Bounceback campaign
-
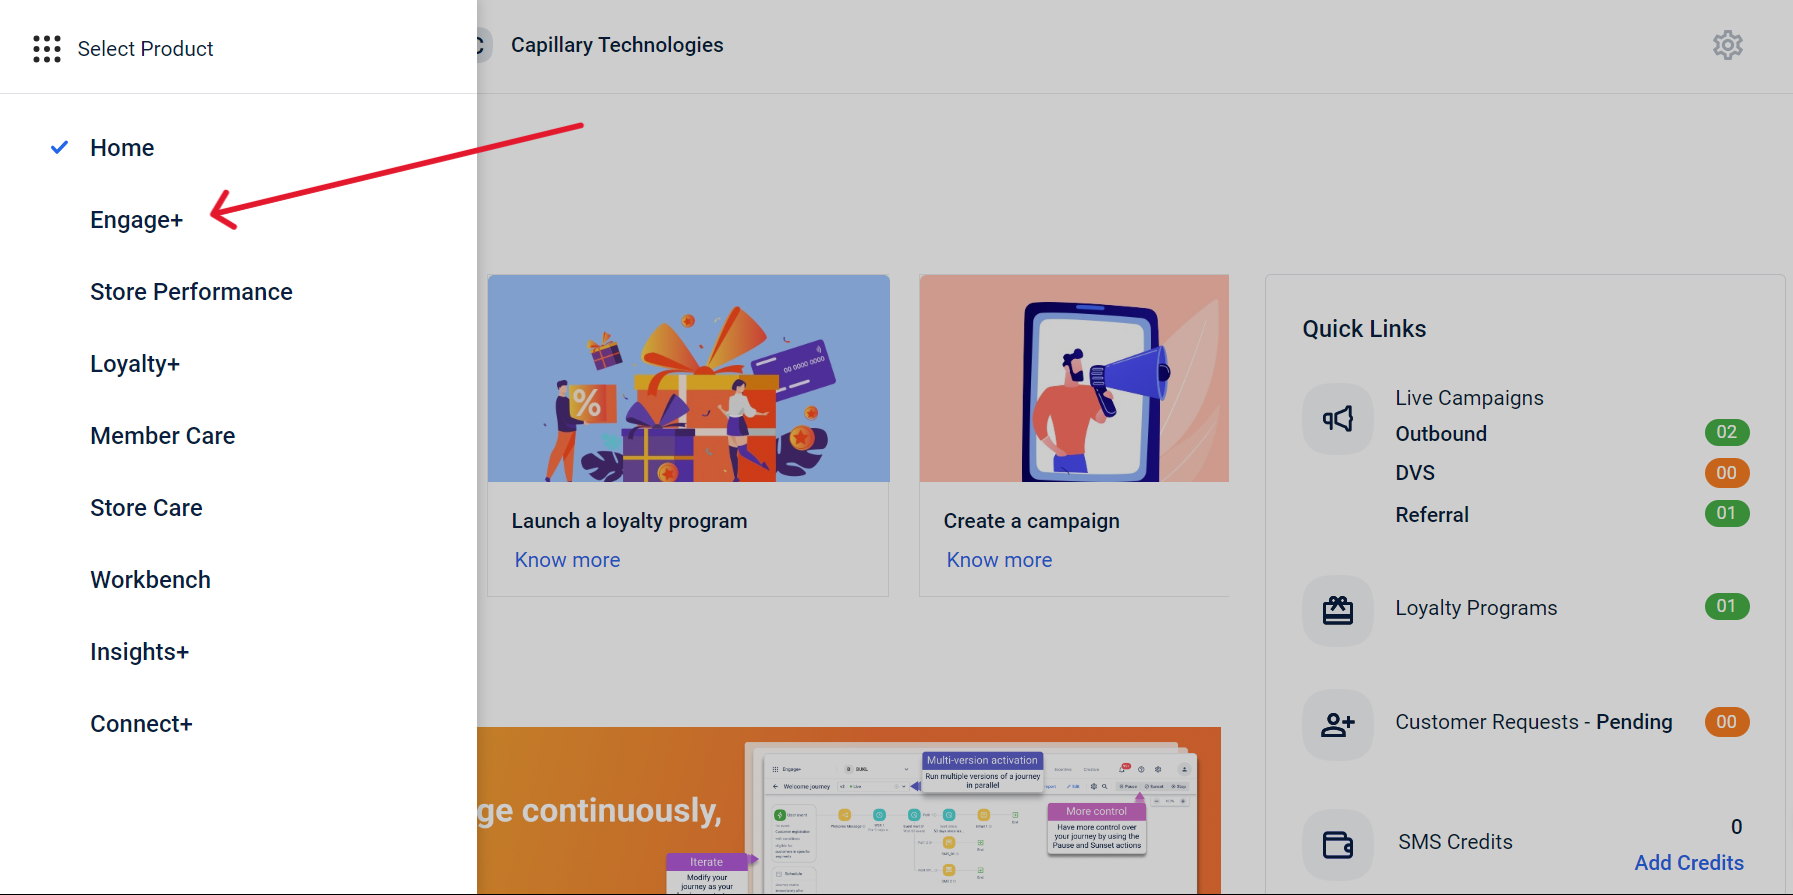
On the InTouch portal, select Home from the left-hand corner.
-
Select Engage+ from the sidebar menu.
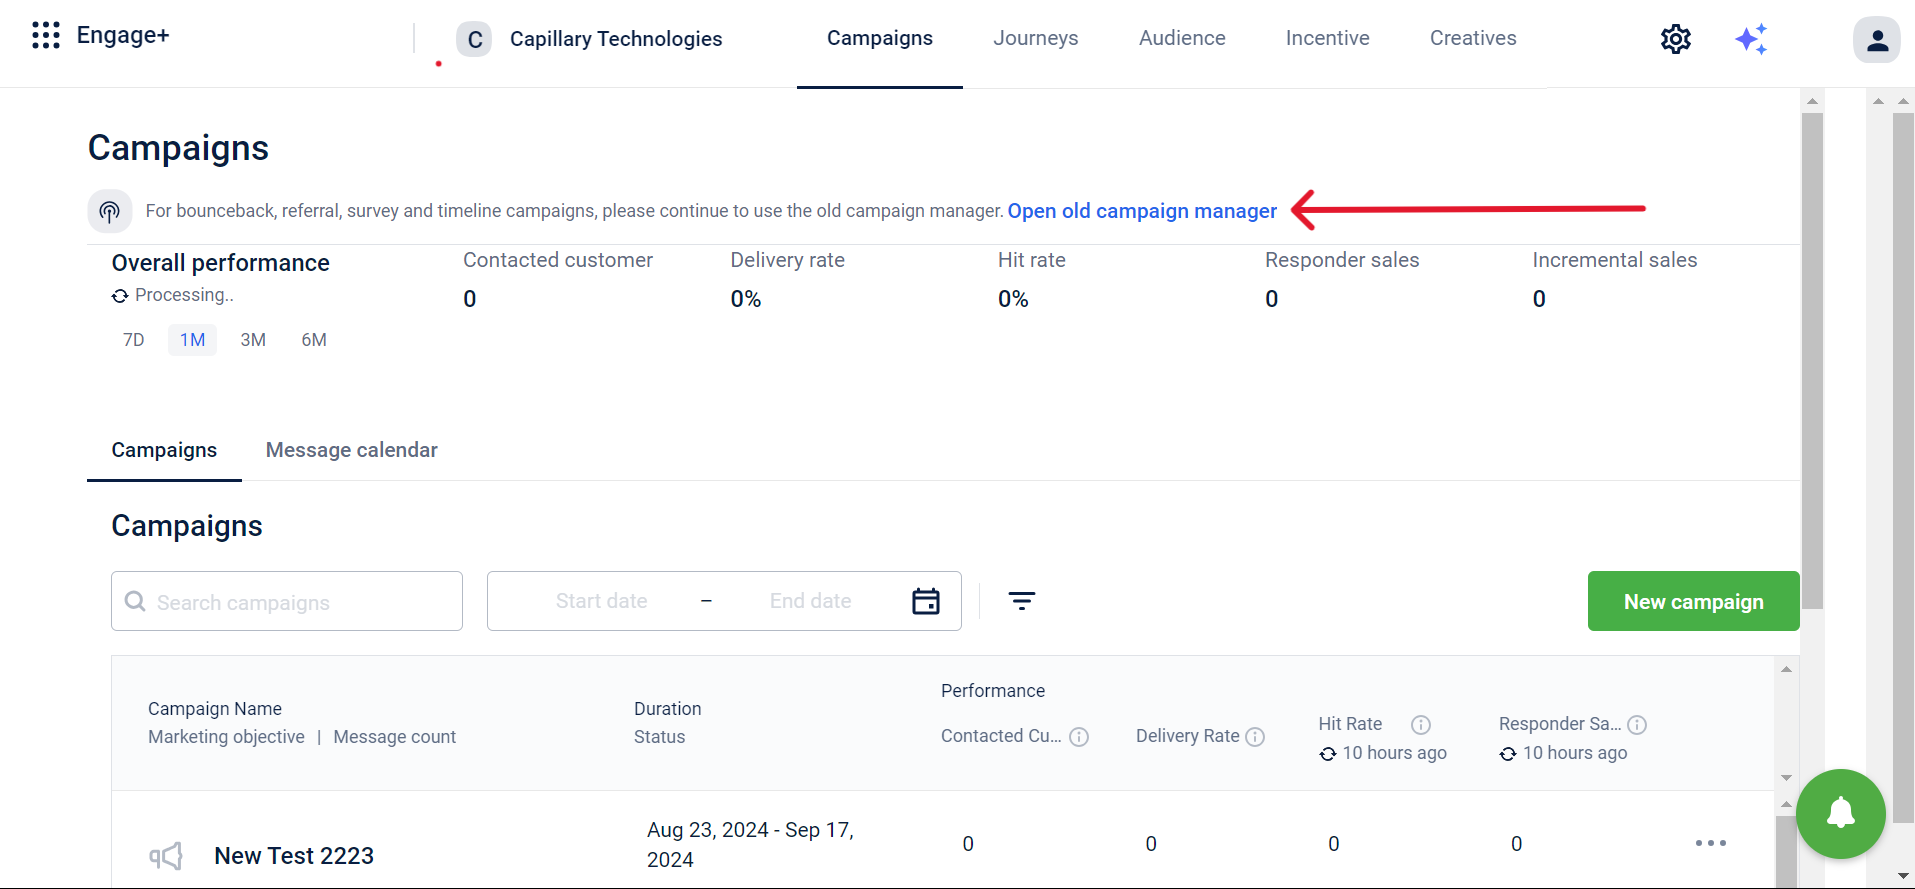
- Select Open old campaign manager.
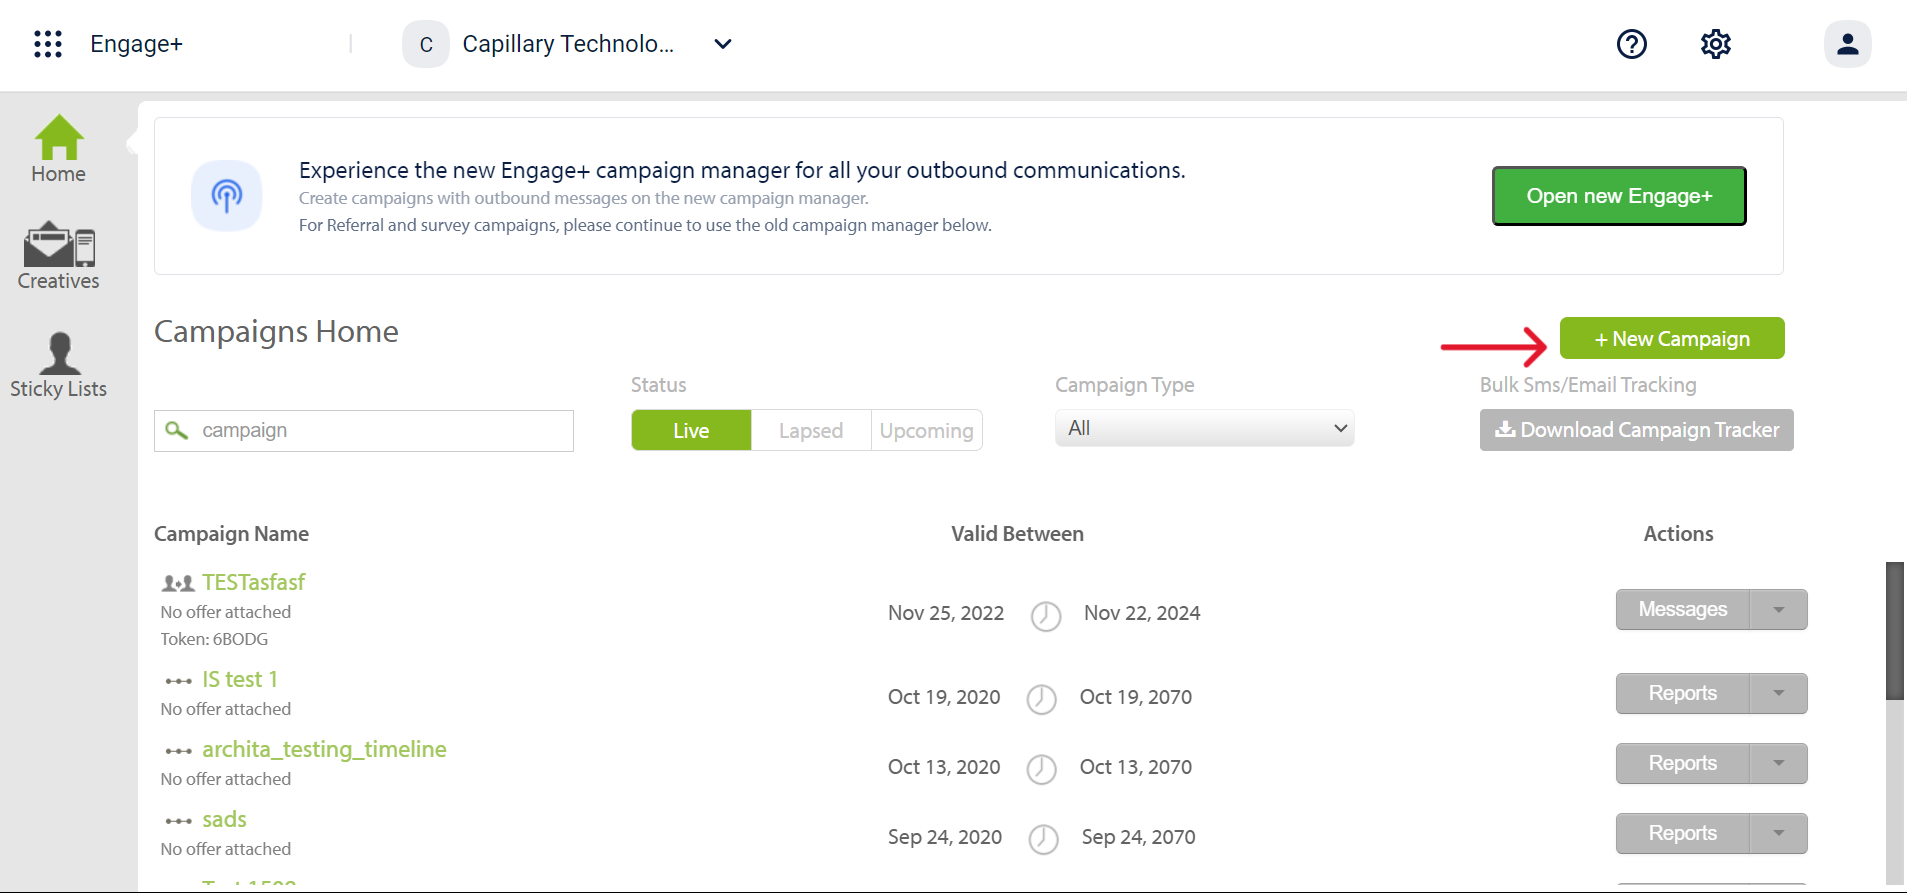
- Select +New Campaign from the Campaigns Home page.
- Choose the campaign type from the dropdown menu. Choose Bounceback Campaign.
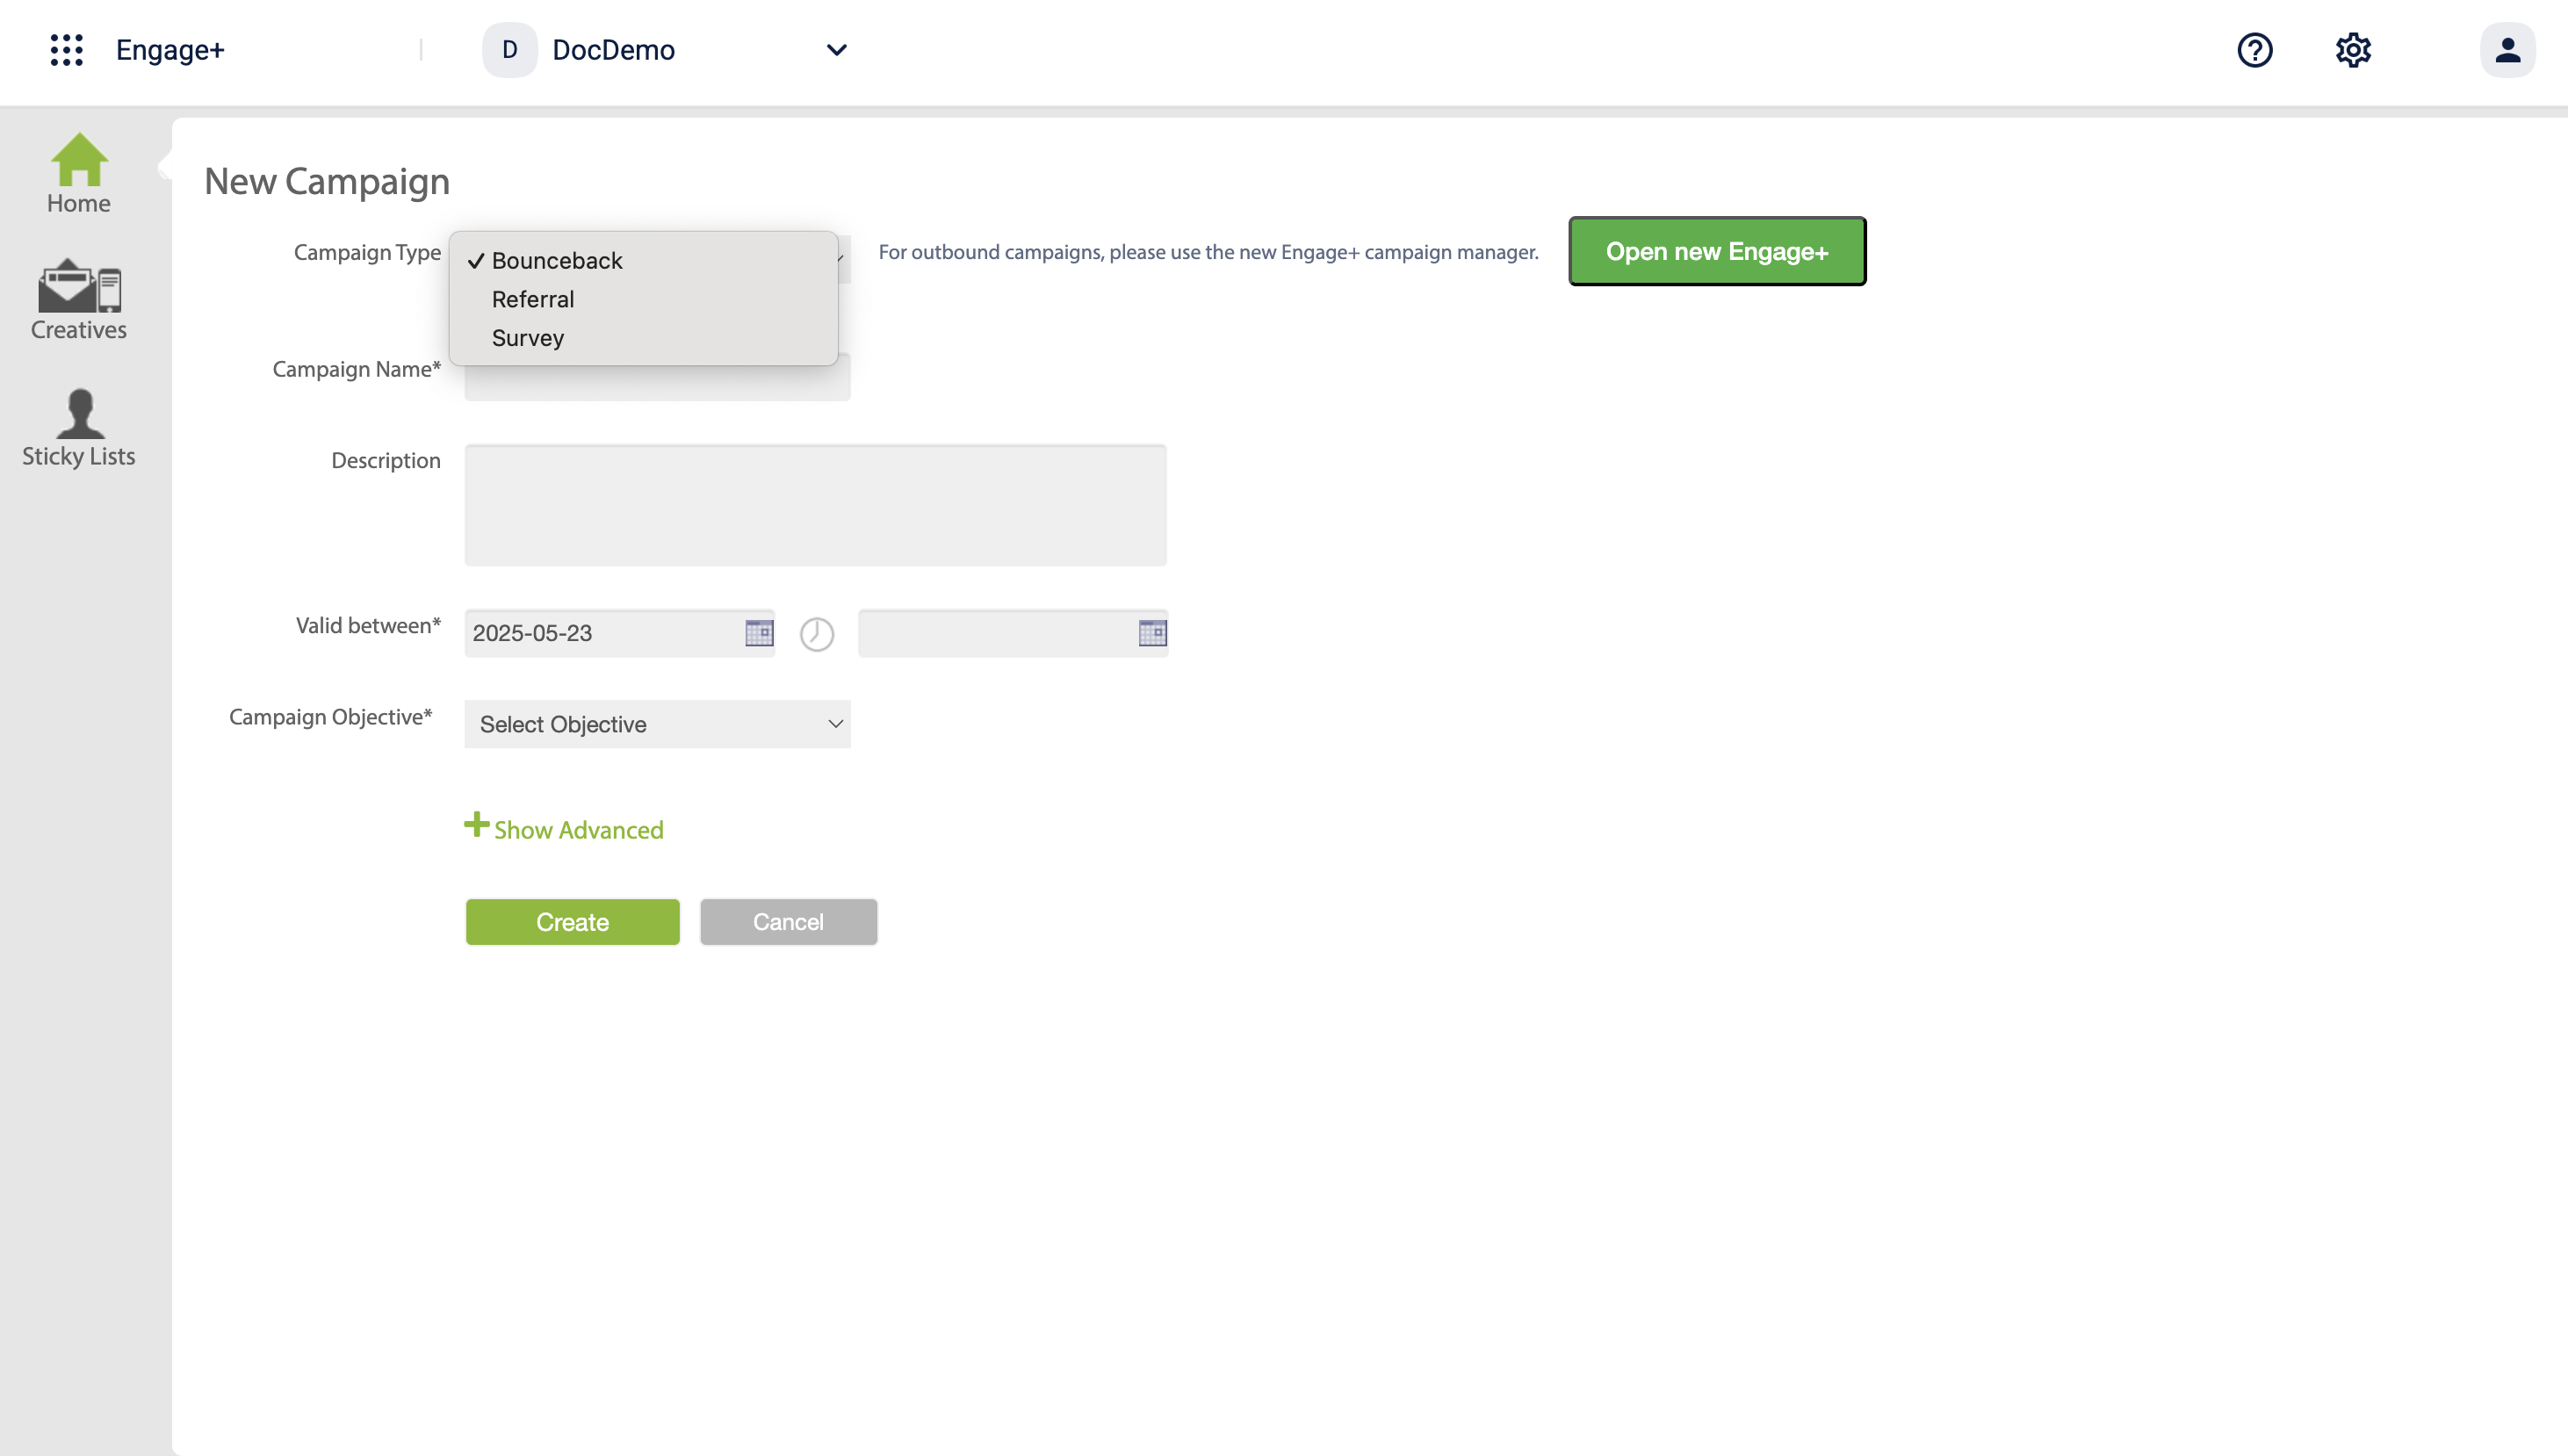
- Enter the required details for the selected campaign and select appropriate configuration settings.
The table below provides descriptions of each field.
| Field | Description |
|---|---|
| Campaign Name | Name of the campaign. |
| Description | Brief description of the campaign. |
| Valid between | The date range when the campaign is active. Only transactions that occur within this period are eligible for coupon issuance. Transactions before the activation time are not eligible, even if the offer is activated later. |
| Campaign Objective | The primary objective of the campaign. |
| Disable Test-Control for this Campaign | Enable or disable test control - dividing the audience into test and control groups to evaluate the campaign's effectiveness. |
The table below describes each category:
| Categories | Values | Help Text |
|---|---|---|
| Acquisition | General | Acquire new transacting customers from a given acquisition channel |
| Referral | Acquire new transacting customers through referrals by existing customer | |
| Delight | Birthday/Anniversary | Delight customers with incentives around life events to encourage them to transact by redeeming points or coupons |
| Feedback/Survey | Delight customers with incentives and encourage them to take a survey or provide feedback | |
| Informational | Customer Joinee Program | Encourage new loyalty customers to know more about the program benefits and the brand. Increase in repeat purchase frequency and LTV |
| Store Opening (Awareness) | Inform customers nearby about a new store opening to boost transactions at the store | |
| Product Launch | Inform potentially interested customers about a new product launch to boost sales for the newly launched product | |
| Season/Arrivals | Inform potentially interested customers about new collections/stock in the stores to boost sales | |
| Brand awareness, Infomercial | Brand building exercise and information sharing with customers to increase overall customer engagement with the brand | |
| Promotional | Up sell | Promotional campaign to encourage people to buy higher volumes of the same SKUs - higher count per SKUs |
| Cross-Sell | Promotional campaign to encourage people to buy different SKUs - higher count of unique SKUs | |
| Sales Booster | Promotional campaign to encourage people to buy more - higher ABS and ABV | |
| Miscellaneous | Heavy Discount Sale (includes EOSS) | Boost sales during any heavy discount periods including festivals and EOSS |
| Frequency Enhancer | Encourage lower frequency visitors to transact more frequently | |
| Lapsation | Reactivate lapsed customers and encourage them to transact |
- Select Disable Test-Control to include all the customers eligible for this campaign. (Normally every campaign will have a control group (for example 10% of the eligible members who are randomly selected) to whom the marketing communication is not sent. The control group is essential to measure profits.)
- Click Create Campaign. You will see the following screen:
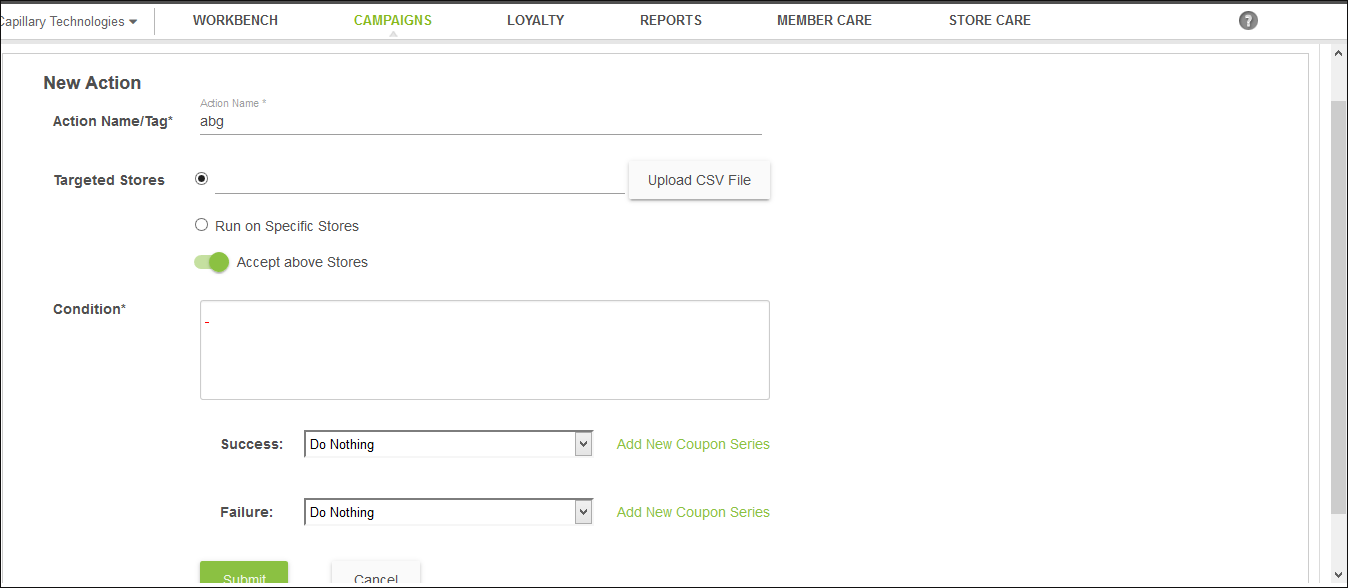
- Click on +New Action to create a rule for the Bounceback campaign. You need to create at least one action for a campaign
-
Configure the rule based on the descriptions provided below and click Submit to save the configurations
-
In the Action Name/Tag, enter a name for the rule. It is recommended to specify a unique action name. It can be paired with the Campaign's name
-
In Event specify the event for the rule - NewBillDVS or Scan Event
-
NewBillDVS: Choose this to create rules on new transaction event
-
Scan Event: Choose this to create rules on the scan event
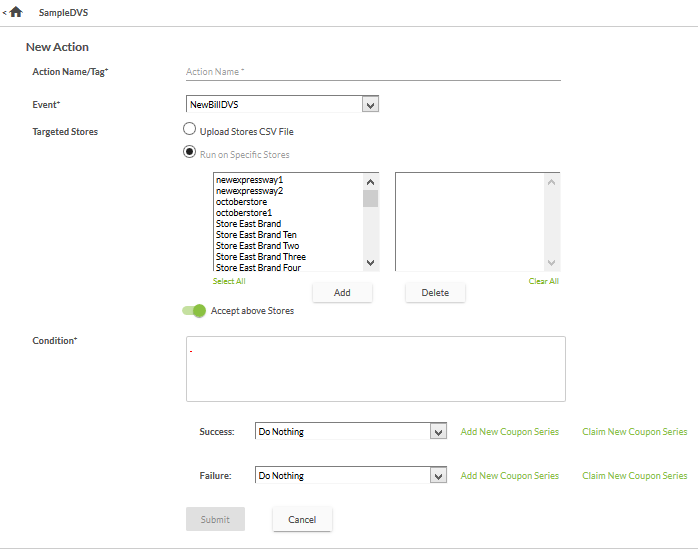
- In the Targeted Stores, select either Upload Stores CSV File or Run on Specific Stores.
- If you select Upload Stores CSV File, the following screen appears
- For CSV upload, stores name should be uploaded via CSV.
- In Run on specific stores list, select the stores that you want to include or exclude for this campaign. To select stores, highlight the stores you want to select and click Add
- By default, the Accept above Stores option is enabled. Keep the option on if you want the selected stores to be included for the campaign.
- To exclude stores that you have selected from running this campaign, click the button to enable the Reject above stores option.
- If you do not select any stores, then all the stores will run this campaign by default
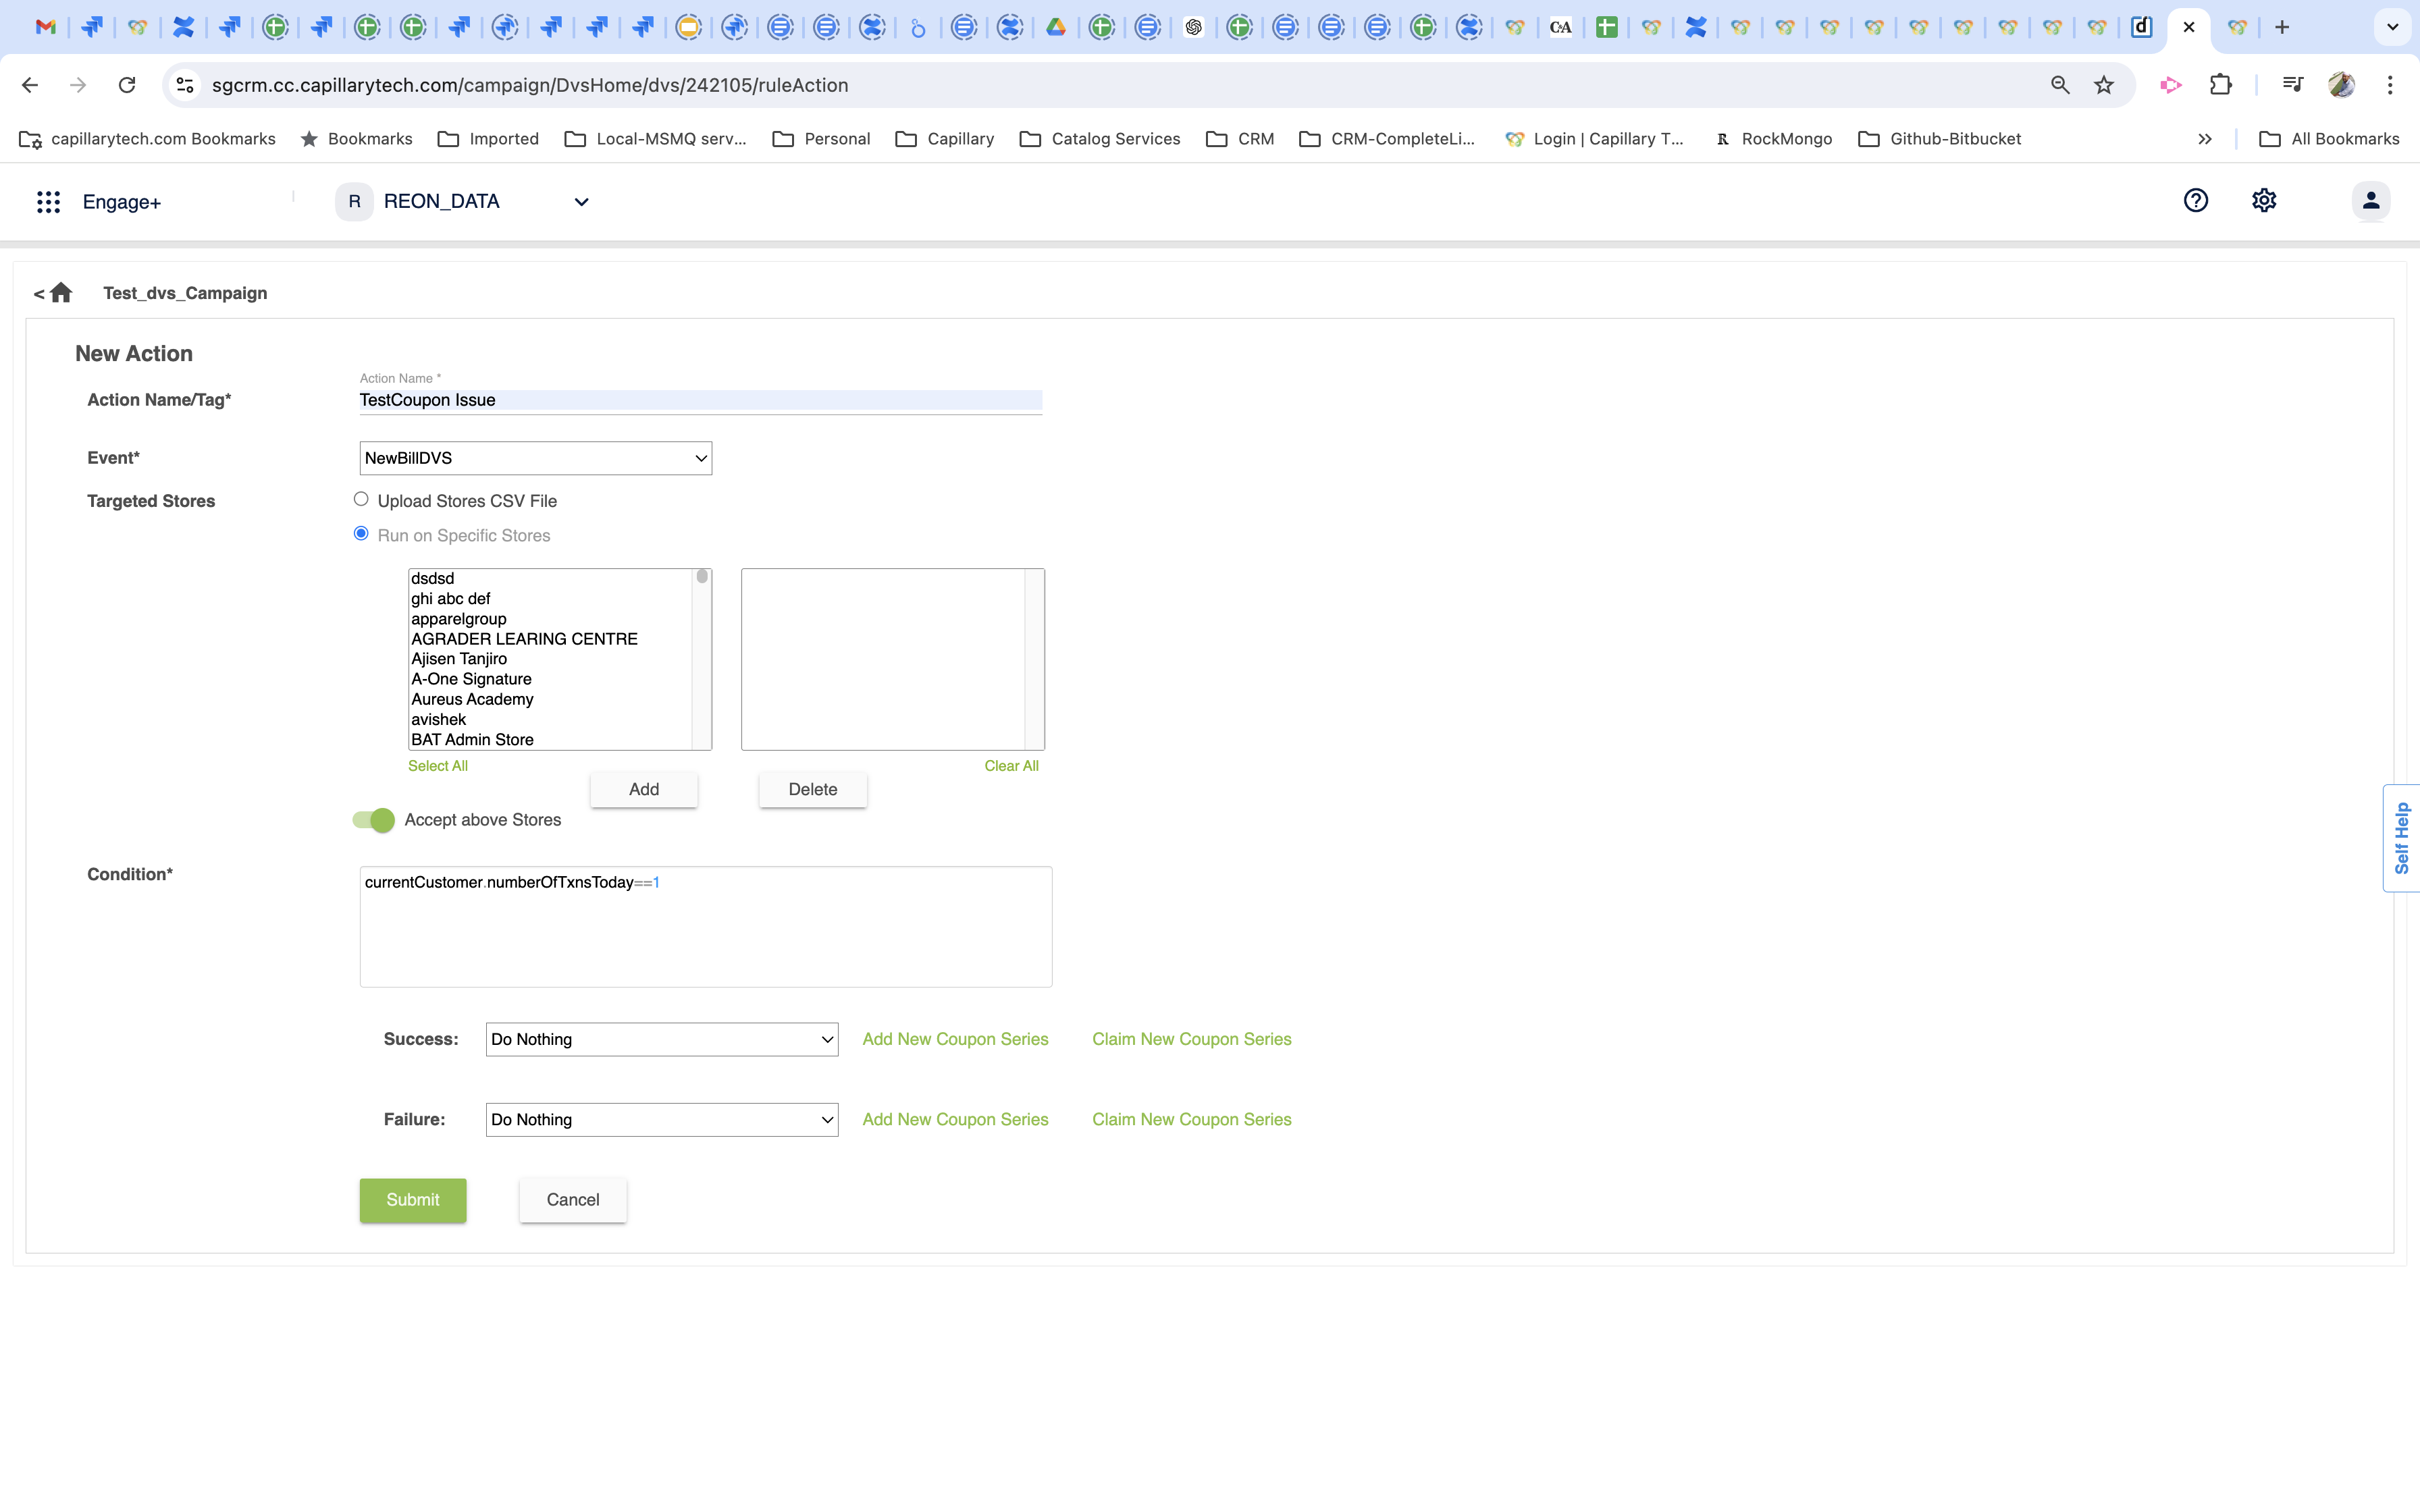
- In the Conditions box, set the conditions for this campaign to take effect
As you type conditions, auto-suggests tags appear which you can select. For example, if you want to create a condition for transactions greater than 100 dollars, type currentTxn.value>100.
New conditions supported for Scan event: SKU Code (currentProduct.code), SKU Brand (currentProduct.doesBrandRegexMatch), SKU Category (currentProduct.doesCategoryRegexMatch), Promotion Code (currentEvent.promotion), Customer (currentCustomer.) - all the conditions of transactionAdd are supported for customer. - Create rules either on the condition Success or Failure or both in the respective fields
- Click on Add New Coupon Series to create a new coupon series or click Claim New Coupon Series to claim an existing offer.
Once you see the offer(s) created or claimed for the campaign in the drop-down. Choose the offer that you want to claim for the condition Success or Failure case. You will see the supported communication channels

-
Click Add of a specific channel to create the message template, and create the template accordingly. Refer to the sections to know how to create a template for each channel.
-
For SMS and email, you can choose your preferred sender IDs from the ones configured for the org to send DVS messages.
-
Check Use default sender to send messages from the default sender ID configured for the communication type.
-
Uncheck Use default sender to your preferred sender ID. You will see options to select sender domain and sender IDs. Use the drop-down to choose your preferred options.
Select the Domain select domain , GSM sender id, and CDMA sender id.
-
-
Click Submit to save the campaign
-
We can write a rule in DVS in which customer can receive multiple coupons on the first transaction of the day.
- Create the first action under the DVS campaign with the rule
currentCustomer.numberOfTxnsToday == 1. Set the maximum coupon issuances as per your requirement. If you want to issue coupons after the first transaction, create a second action.
- Create the first action under the DVS campaign with the rule
Creating sms templates for bounceback campaign
Click Add against SMS. The SMS screen setting screen appears:
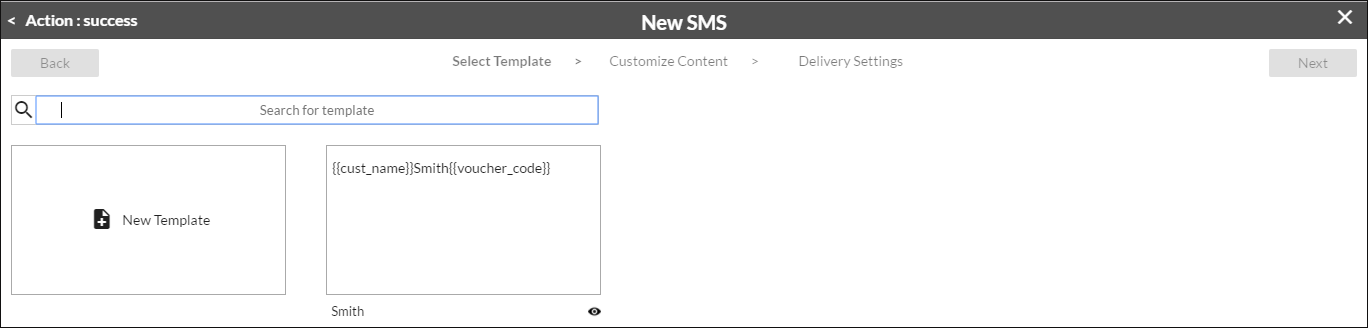
- Click on either New Template or select an existing one.
- To create a New Template for the SMS, click New Template
- In the Message box, type a new message with the tags of Customer Name, Voucher Code, and Voucher Expiry Date as shown below:
- Click Next, a pop-up message appears as shown below. Either save the template by giving a name or skip
- In the Delay in sec(s) box, add the number of seconds/minutes by which you want to delay the message from the transaction time.
- Click Save
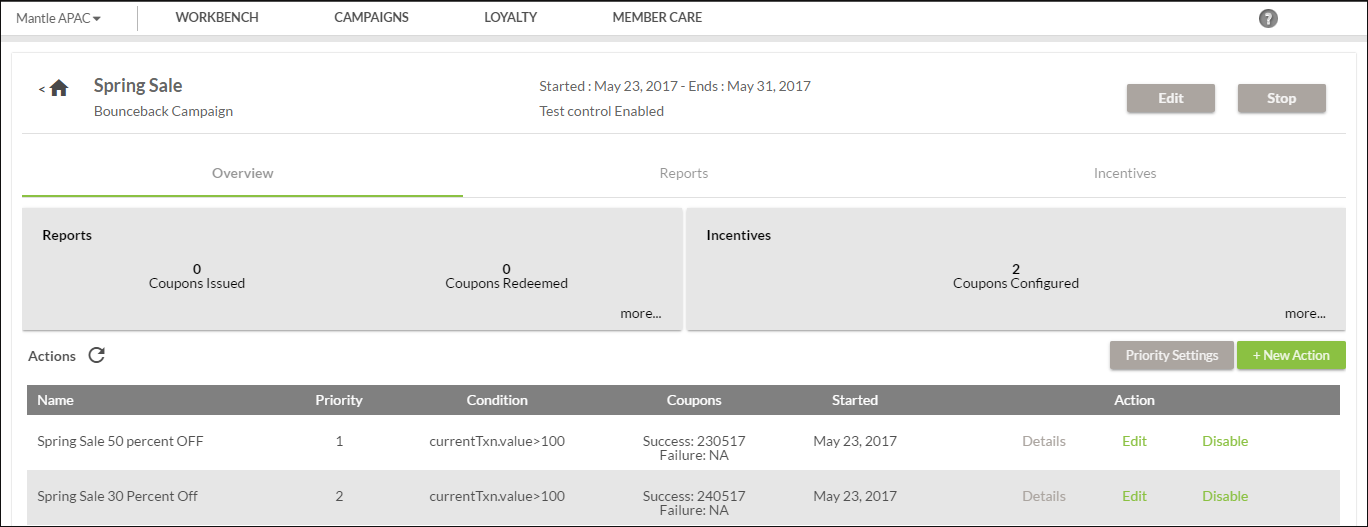
- You will be navigated to the Overview page where actions are listed as shown below. Actions can be edited and deleted.
Creating email template for bounceback campaign
- Once you click Add, you will see options to create a new template or select an existing template
- Click New Template to create a template from the scratch or select one from an existing list
- To create a New Template for an Email, click New Template. The Email screen setting screen appears:
- In the Subject box, type the email subject
- In the Message body, type the content and use insert tags to include dynamic tags in the email
- Click on Preview to view, click Next. The following screen appears:
- In the Delay in sec(s) box, add the number of seconds/minutes by which you want to delay the message after the transaction.
- Click save
- The Finalize Settings screen appears. In the Finalize Settings section, you can see a preview of the coupon configurations.
- If you are satisfied with the settings, click on submit to save the coupon configurations. You return to the overview tab.
- Click +New Action to add the rule for the campaign. You can add as many rules as you want. The Actions List section displays all the rules created in the bounceback campaigns.
Creating wechat template for bounceback campaign
Once you click on Add, do the following in the new pop-up that appears:
- Click the available drop-down and choose a template from the existing list. New template cannot be created
- In the Delay in sec(s) box, add the number of seconds/minutes by which you want to delay the message after the transaction.
- Click Save
Campaign priority settings
If a campaign has more than one rule and a transaction satisfies multiple rules, you can define which rule to be executed among two or more on the Priority settings page.
-
On the Campaign details page, click Priority Settings
-
Set the maximum number of coupons that you want to allow per transaction in Maximum coupons issued to a customer in a single transaction
-
Enable Set Priority to configure rule-based priority. If you disable this, the system randomly chooses a rule and issues a coupon if multiple rules are satisfied
-
In Priority set the priority of each rule using the up or down arrow. The priorities will be set based on the alignment. The least number (1) will have highest priority. Alternatively, you can also drag and drop the element to the desired position.
Updated 2 months ago