
Inventory profiles
This category lets you import items and product hierarchy according to the organization's product inventory.
You can have up to four levels above items including brands and categories. For example, if L1, L2, L3, and L4 are four categories from top to bottom level, you can import all categories at a time with a proper mapping or one by one from L1 to L4. However, it is recommended to use the second case to ensure proper mapping.
It is important to understand the following points while configuring Profile Templates.
| Action | Behaviour |
|---|---|
| If same field is selected in both update and ignore | Data will be updated |
| A column is selected to update but not mapped | Field data will not be updated |
| Column not selected to update but mapped | Field data will not be updated |
| Updating item-code details for a category or brand ensuring that the Category and brand import is correct | Data will be updated |
Configuring Organisation Unit (OU) support for product entities
Organisation Unit (OU) support for product entities enables you to use the same SKU codes for the different OUs under an organisation.
By default, transactions are tagged under OU. This is achieved by linking the stores where transactions occur to corresponding zones or concepts, and categorizing these zones or concepts as OUs.
Use case
In your organizational setup, there are multiple organizational units (OUs) in place. By default, any inventory that's uploaded to the main organization is automatically shared among all these individual OUs.
However, let's consider a situation where a particular org unit requires its own separate inventory. This necessity arises due to conflicts noticed between the SKU codes it utilizes and those uploaded by other org units.
In such scenarios, you have the option to enable the "OU support for product entities" configuration. This configuration allows the creation of distinct inventories that are specific to each specific organizational unit.
Enabling OU support for product entities
To enable OU support for product entities, create a JIRA ticket and enable the config CONF_OU_LEVEL_PRODUCTS_ENABLED.`
Product category
A product category is used to classify different types of products. For example, smartphones can be categories as “foldables”, “big screen”, “small screen”, “camera phone”.
You will have item code by default which is the lowest level. You can add up to four levels above the item code.
Assume L4, L3, L2, L1, L0 as different levels where L0 is item code and L4 is the super parent. You need to first import a parent category followed by child category.
You can make a super parent category a root category using the option Mark parent category as root if not mapped for existing categories.
This profile lets you update existing categories of a brand or add new child categories. To use this profile, the org should have at least one parent category under it.
- Category Code
- Parent Category Code
- Category Name
- Category Description
Leave the Parent Category Code blank for parent categories and specify the respective parent category code for child categories.
CSV Sample:
Category Code,Parent Category Code, Category Name,Category Description
Shirts,Apparels,categoryName,Men Apparels
Configuring Template
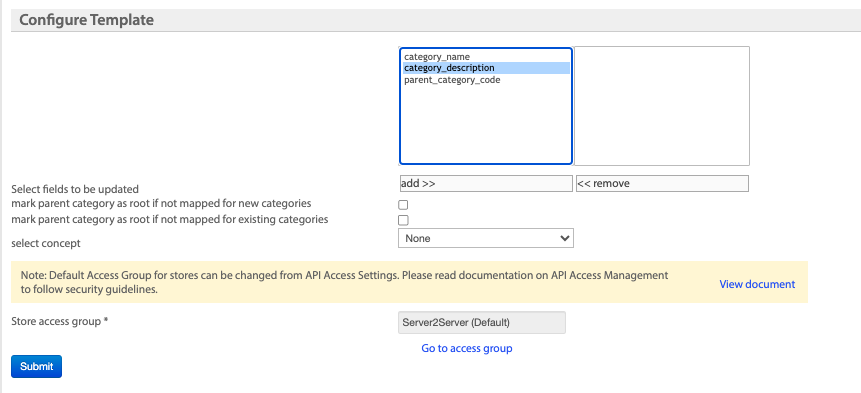
- Add the fields that you want to allow updating for the current template, Any field that you did not add here will be ignored even if you do the field mapping
- Select Mark parent category as root if not mapped for new categories, to enable converting a new category parent if not mapped any parent category
- Select Mark parent category as root if not mapped for existing categories, to convert existing categories - that are not mapped to any parent category - as parent categories
- If OU support for product inventory is enabled, select concept (OU) to map the product category to an OU. For more information, see OU support for product inventory.
- Select the Store access group. For more information on the access group, see Access group.
- Click Submit to save the template.
- Mark parent category as root if not mapped for new categories: Check this option to make new parent categories of the current import as root brands.
- Mark parent category as root if not mapped for existing categories: Check this option to make existing parent categories as root brands through the current import.
Inventory
This profile allows you to import product inventory for an organization. For this, you need to have categories created for the Org and you can specify values of each category in the data file. To import root categories and brands use the profiles Category and Brands respectively. Please navigate to the respective sections for more details.
Note: If any new category is identified in the file that you import, a category is created without any parent mapping. Hence, if you have new categories, it is recommended to do a category import before importing inventory details.
Important checklist for inventory import:
Before importing inventory
- identify hierarchy levels and new attributes in the file.
- Item codes are alpha-numeric and do not have special characters, spaces, blank or null values.
- Item codes are unique and no duplicate codes are available.
- An item code is associated only to one category.
- Character count of item codes do not exceed 50 (Else, contact the Platform API Team to extend the character limit)
Note:
- If an item-code has prefix '0' or long digit value, example: 9988777665511, 00006785, it is recommended not to open the file directly on Notepad.
- You can use only predefined attributes or custom attributes configured in InTouch > Settings > Miscellaneous > Inventory Operations > Inventory Attributes. Any unknown attribute will be ignored automatically. Make sure to configure your required attributes on the Inventory Attributes page before importing
Inventory hierarchy
Each organization might have a different product hierarchy - it could be hierarchy levels, supported attributes, brands or any other attribute. Before starting with the import, you need to validate the data file of the organization with that of the Capillary's.
This profile is used to import the inventory details of stores. The CSV file should contain all the mandatory fields along with supported optional fields.
- SKU*
- EAN*
- Price
- Description
- Brand Code
- Category Code
- Style Code
Prerequisites
- Data Quality Report (DQR) to check the quality of data mapping (in percentage).
- Compare inventory item-codes with that of transaction line-items before importing.
CSV Sample:
Sku,Ean,Price,Description,BrandCode,CategoryCode,StyleCode
1234567,1234567,32,Pencils,Camelin,Camelinpencil2HB,PencilSytle
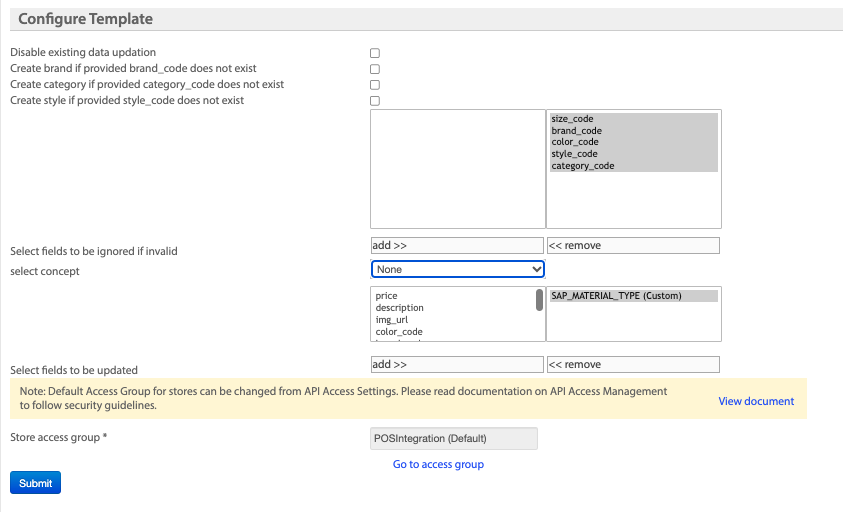
Configuring Template
| Option | Description |
|---|---|
| Disable existing data updation | Check this box to not allow updating existing inventory details if the field value is already available. Not applicable for first time import. |
| Create brand if provided brand_code does not exist | Check this box to allow creating brands automatically if any new brand code (as per the Capillary database) appears in the CSV file. |
| Create category if provided category_code does not exist | Check this box to allow creating categories automatically if a new category code (that is not in the Capillary database) is identified in the CSV file |
| Create style if provided style_code does not exist | Check this box to allow creating styles automatically if any style code provided in the CSV file does not exist in the database. |
| Select fields to be ignored if invalid | Add fields that you want to ignore from updating in case of invalid field names identified in the CSV file. |
| Select concept | If OU support for product inventory is enabled, select concept (OU) to map the product category to an OU. For more information, see OU support for product inventory. |
| Select fields to be updated | Add fields that you want to update in the current import. Any other field that is available in the CSV file will be ignored even if you do the field mapping. |
| Disable updation of custom fields with empty values | Check this box to not allow updating custom field values with null values if found in the csv file. Note: Leaving a custom field blank or null in the import file will not clear or reset the field. To clear a custom field value, enter a dash ('-') in the import file. The system will interpret the dash as 'no data' and reset the field. |
Update Inventory Line-items
This profile lets you update line-item ids (item codes) in the loyalty_bill_lineitems table. Use this profile to update item ids that are wrongly entered or with null values.
- Line-item id
- Item Code
Prerequisites
Compare inventory item-codes with that of transaction line-items before importing
CSV Sample
Line Item Id, Item Code
9970661,GB58
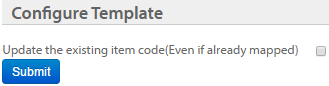
Configuring Template
Check the Update the existing item code box to allow updating existing item codes with the new values in the csv file and click Submit.
Add Brands
This profile lets you add child brands, or update existing brands. To use this profile, the org should have configured at least with one parent brand.
Brand addition limits and error handling
When you add brands using the Intouch API or UI, the system enforces a maximum active brand limit for your organization. By default, this limit is 250 brands (controlled by the org_product_brands_limit setting). If you try to add a brand and your organization already has the maximum number of active brands, the system blocks the addition and displays a validation error. You must deactivate or remove existing brands before you can add new ones if you reach this limit.
Important: Adding brands using the Import Profile Add Brands does not enforce the org_product_brands_limit. You can import brands in bulk using this profile even if your organization exceeds the default brand limit. However, brands added this way will still be subject to other validation checks.
- Brand Code
- Brand Parent Code
- Brand Name
- Brand Description
CSV Sample:
Brand Code,Parent Brand Code, Brand Name,Brand Description
Shirts,Apparels,Brand Name,Men Apparels
Configuring Template
Add the fields that you want to include for the current profile template and click Submit to save the template.

*Mark parent brand as root if not mapped for new brands: Check this option to make new parent brands of the current import as root brands.
- Mark parent brand as root if not mapped for existing brands: Check this option to make existing parent brands as root brands through the current import.
- If OU support for product inventory is enabled, select concept (OU) to map the product category to an OU. For more information, see OU support for product inventory.
Add product attributes
This profile lets you add or update product attributes. A custom / product attribute is a user-defined attribute for a product. For example, a smartphone model can have a “colour” attribute that contains information on the colours available for the smartphone model.
CSV Sample:
attribute_is_enum, attribute_label, attribute_type, attribute_extraction_rule_type, attribute_extraction_rule_data, attribute_is_soft_enum, attribute_use_in_dump
Configuring Template
Add the fields that you want to include for the current profile template and click Submit to save the template.
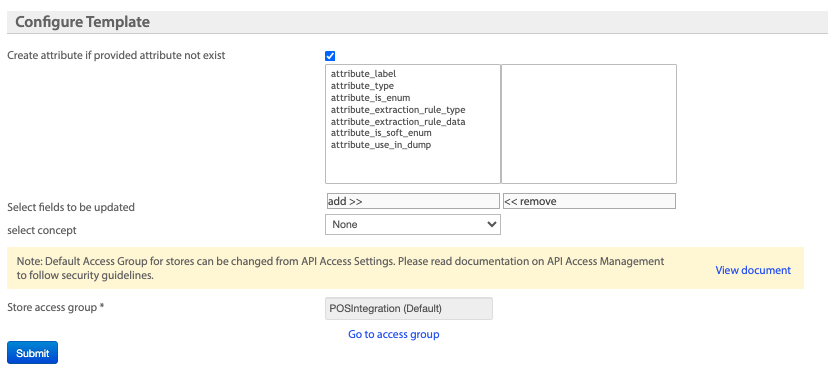
- Select the attributes and click add
- If OU support for product inventory is enabled, select concept (OU) to map the product category to an OU. For more information, see OU support for product inventory.
- Select the store access group.
- Click Submit.
Add Product entities individually
This section enables you to add the product colour, category, size, attribute, brand and style individually.
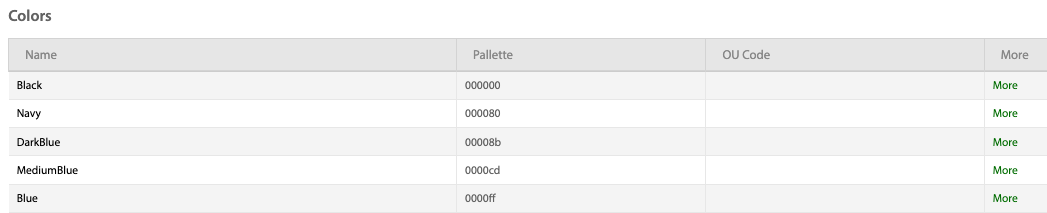
Product colors
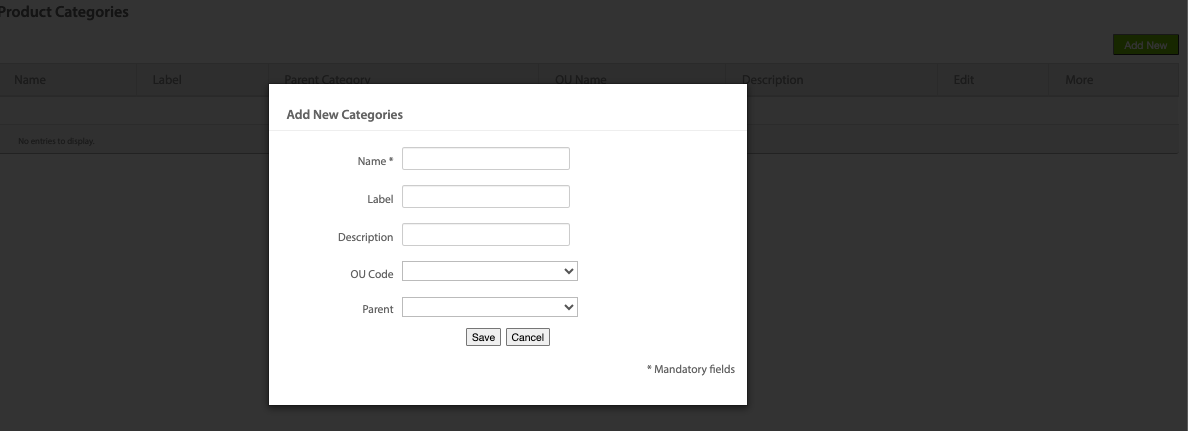
Product categories
To add product categories, perform the following:
- Click Add New.
- In the Name text field, enter a name for the category.
- (Optional) In the Label text field, enter a label name.
- (Optional) In the Description text field, enter a valid description for the category.
- If OU support is enabled, from the OU code drop-down, select the OU to which this category needs to be mapped. For more information, see OU support for product inventory.
- (Optional) From the Parent drop-down, select the parent of category.
- Click Save.
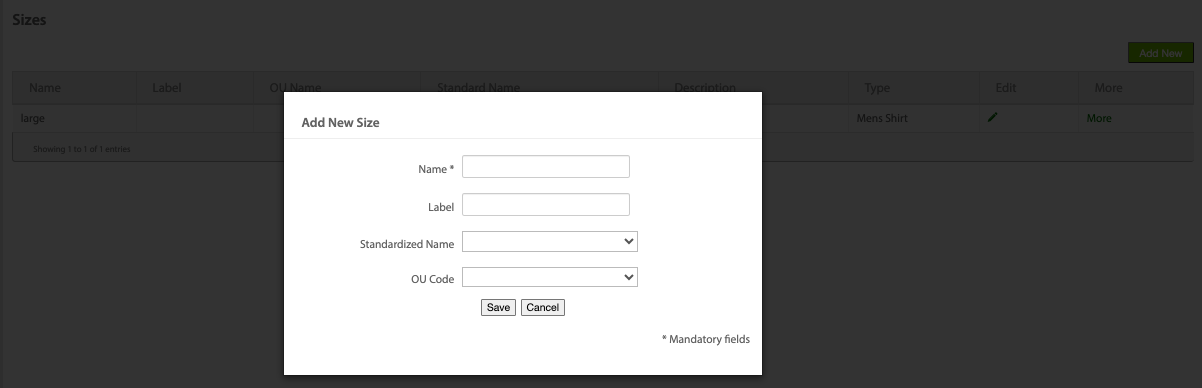
Product sizes
To add product sizes, perform the following:
- Click Add New.
- In the Name text field, enter a name for the size.
- (Optional) In the Label text field, enter a label name.
- (Optional) In the Description text field, enter a valid description for the size.
- If OU support is enabled, from the OU code drop-down, select the OU to which this size needs to be mapped. For more information, see OU support for product inventory.
- Click Save
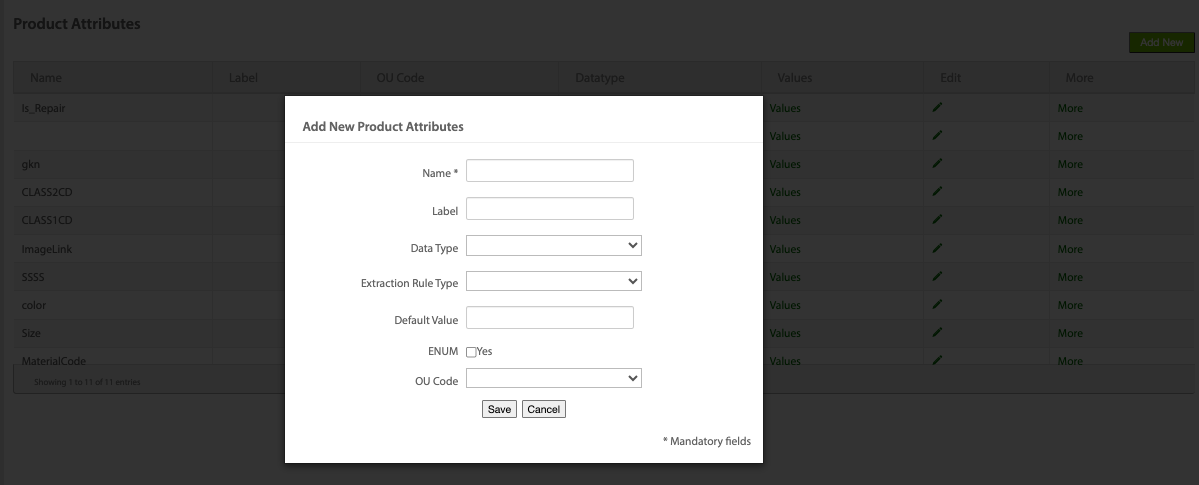
Product attributes
To add product attributes, perform the following:
- Click Add New.
- In the Name text field, enter a name for the attribute.
- (Optional) In the Label text field, enter a label name.
- (Optional) From the Data Type drop-down, select the appropriate data type.
- (Optional) From the Extraction Rule Type drop-down, select the appropriate extraction rule type.
- (Optional) In the Default Value text box, enter a default value.
- (Optional) If applicable, select the ENUM check box.
- If OU support is enabled, from the OU code drop-down, select the OU to which this size needs to be mapped. For more information, see OU support for product inventory.
- Click Save
Product brands
A brand can be used to classify different verticals offered by an organisation. For example, an electronics conglomerate has a brand “VistaLux” that sells televisions. The organisation can create the brand for the vertical.
Brand addition limits and error handling
When you add a brand using the Intouch API or UI, you cannot exceed the maximum number of active brands allowed for your organization. The default limit is 250 brands. If you try to add a brand after reaching this limit, the system will show a validation error and block the addition. To add more brands, deactivate or remove existing brands first.
Adding brands using the Import Profile Add Brands bypasses the brand limit. You can import brands in bulk even if your organization exceeds the default limit, but all other validations still apply.
To add product brands, perform the following:
- Click Add New.
- In the Name text field, enter a name for the brand.
- (Optional) In the Label text field, enter a label name.
- (Optional) In the Description text field, enter a valid description for the brand.
- If OU support is enabled, from the OU code drop-down, select the OU to which this size needs to be mapped. For more information, see OU support for product inventory.
- (Optional) If applicable, from the Parent drop-down, select the parent brand.
- Click Save

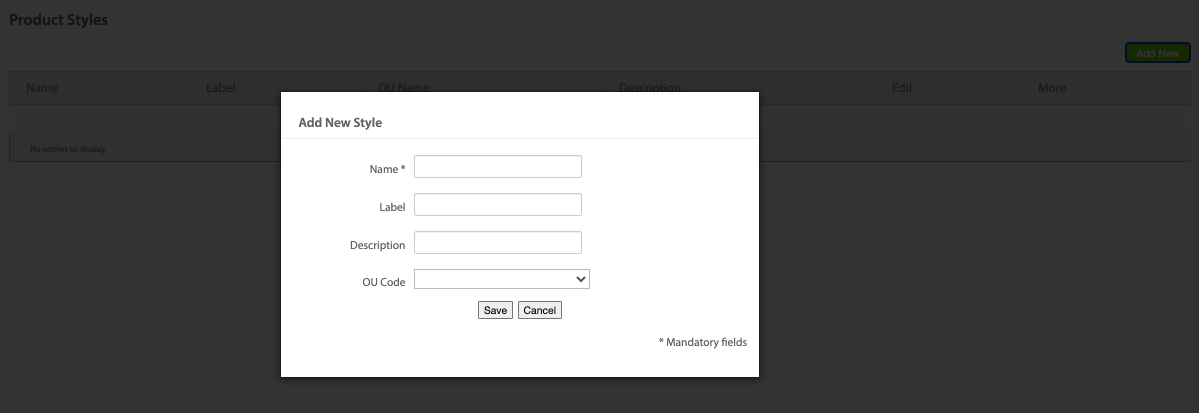
Product styles
To add product styles, perform the following:
- Click Add New.
- In the Name text field, enter a name for the style.
- (Optional) In the Label text field, enter a label name.
- (Optional) In the Description text field, enter a valid description for the style.
- If OU support is enabled, from the OU code drop-down, select the OU to which this size needs to be mapped. For more information, see OU support for product inventory.
- Click Save
Inventory import and category Creation Behavior
When importing inventory data, new product categories will NOT be created and existing category mappings will NOT be updated in incentives unless both of the following conditions are met:
- The
CREATE_NON_EXISTING_CATEGORYflag is enabled. - The
INVENTORY_FIELDS_TO_UPDATEconfiguration includes category fields.
If these configurations are not set, imported SKUs may not appear in incentives due to missing category associations. To ensure that new categories are created and properly mapped during inventory import, verify that both the flag and the relevant fields are configured before starting the import process.
Note: If you notice that imported SKUs are missing from incentives, contact the Product Support team and review your configuration for these settings.
Updated about 2 months ago