Create segments using scheduled FTP upload
Introduction
This feature enables you to automate user segment uploads. You can create a new segment or select any segment that is manually refreshed through FTP upload. For these segments, you can configure an automated refresh cycle using scheduled upload features. For example, a segment created on Insights+ using analytics notebooks(Databricks) refreshes automatically every week - update the segment values to a CSV file by syncing it to the specific FTP path(folder). Insights+ automatically selects the latest file and refreshes the segment according to the selected frequency and validity.
There are two types of customer segments - SCD and Non-SCD. SCD based scheduled upload records segment snapshots at multiple points of time, whereas to perform upload on the latest segment snapshot Non-SCD based scheduled upload is used.

Segment Status
The following are the segment status.
- Inprogress: Segment creation is under process.
- Draft: Signifies a draft state where the recent changes are not saved. You can open the segment to save the draft available and click on Create to save the partition values. You can also edit partitions or Deactivate draft segments.
- Active: Only active segments are available for services that use Segments. You can either edit or deactivate an active segment.
- Inactive: These segments will be inactive and not appear in any service that consumes segments. You can modify an inactive segment to activate it.
Create a new segment
To create a new segment with scheduled FTP server upload, follow the steps.
- On the EI navigation pane, click Segments > User Segments.
- Click the Create Segment.
- In the Segment Name, specify a name for the group.
- In the Description, specify a short description of the segment.
- In Type, select SCD to keep track of customer behavior for the current segment. Select Non-SCD to save only the current snapshot.
- In the Method, select Upload and click Next to continue.
- In Upload Type, select Scheduled Upload.
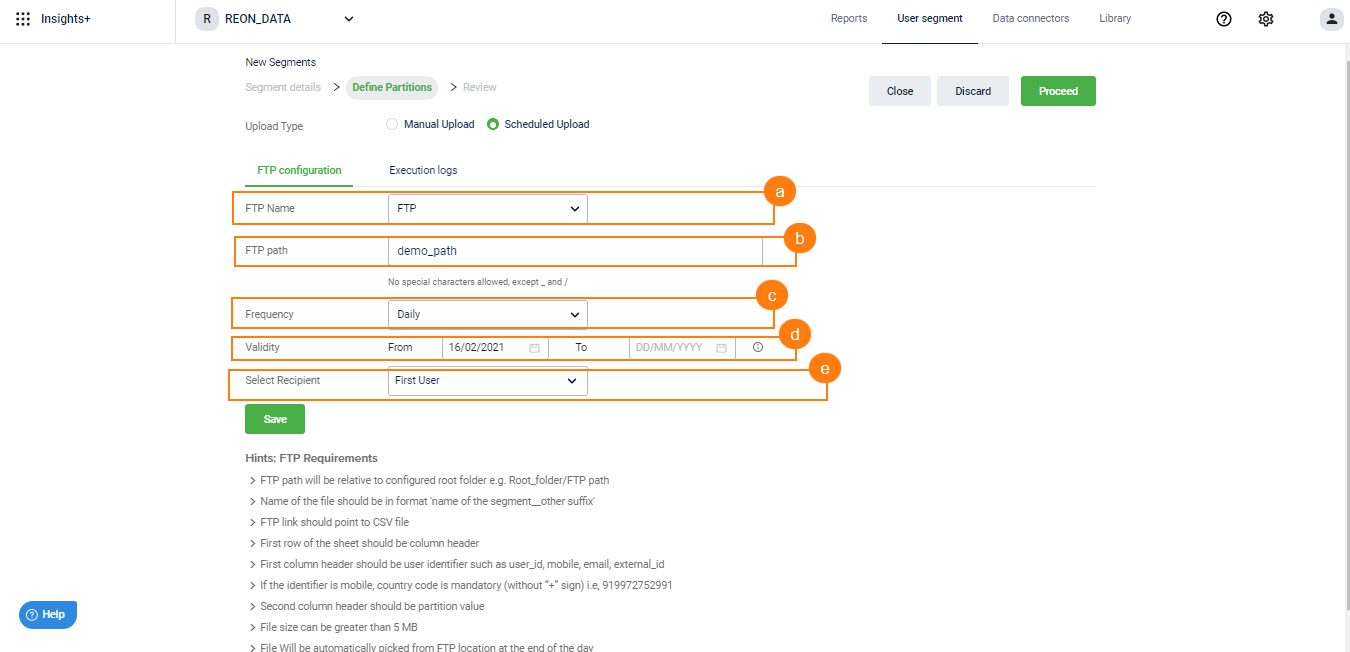
- In Scheduled Upload, select the FTP Configuration to configure the following options

Options | Description |
|---|---|
FTP name | Select the FTP name from the list. You can select from five FTP names as configured in FTP settings. |
FTP path | Enter a valid FTP path. FTP path must be relative to the configured root folder. For example, root_folder/FTP path such as ftp://demo_apac/demo_master/demo_path/demo**points.csv. Here, demo_apac/demo_master/ is the root folder and /demo_path/ is the FTP path.
|
Frequency | Schedule the FTP upload frequency by selecting the options - daily, weekly, or monthly. This schedule starts on the day the user segment is created and ends on the last day, week, or month as selected in the frequency and validity option. Since this update occurs after the ETL process, the underlying data may be up to 24 hours old. Consider the segment created using FTP scheduled upload on October 1, 2020.
|
Validity | To mention the validity of the scheduled upload's frequency, select the start(from) and end(to) date using a calendar picker. |
Recipient | To receive the error notifications, select the recipient(s) using the drop-down list. Any recipient who has access to the organization can receive the notification based on your selection from the drop-down list. |
- Click Save and Proceed. Once the process is complete, review the details and click Create.
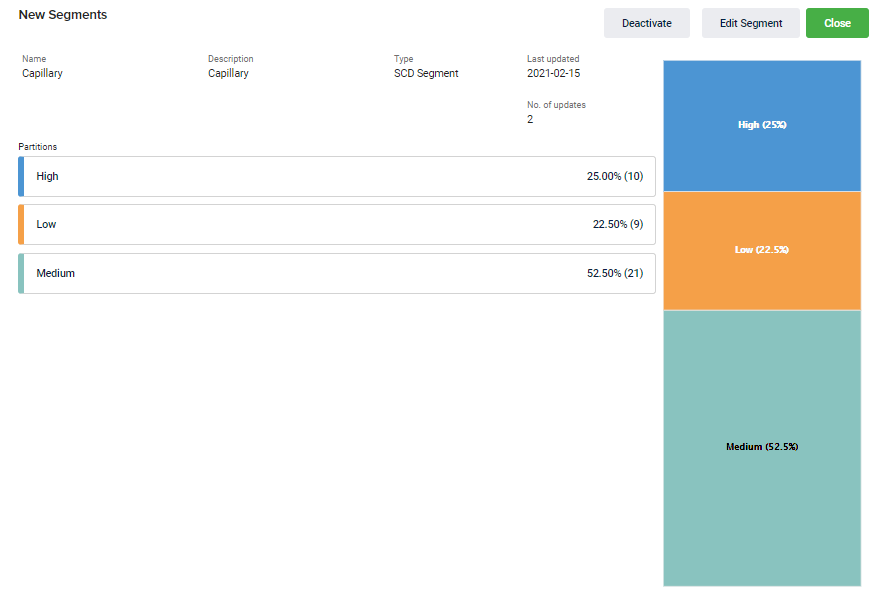
- After the segment creation using scheduled FTP upload, you can see the segment with a list of partitions as shown below.
- You can see the segment partition once the segment is created depending on the start date of the scheduled FTP upload

- Partitions: Partitions are different values of a segment. For example, suppose a segment has High loyal, Medium loyal, and Low loyal as segment values. In that case, three partitions will be created (one for each value).
Edit existing uploaded segment
To modify an existing upload-based segment using a scheduled FTP server upload, follow the steps.
- On the EI navigation pane, click Segments > User Segments.
- Click on the Segment Name that you want to edit. You can filter the summary list by Type (SCD) and Method (Upload) and search for a specific filter in the Search box.
- Click the Edit Segment.
- In the Edit segment, click on Edit partitions.
- In Upload Type, select Scheduled Upload.
- In Scheduled Upload, configure upload options such as FTP, FTP path, Frequency, Validity, and Recipient.
- For detailed information on configurable options, refer to step 8 under the heading Create a new segment.
- Click Save and Proceed. Once the process is complete, review the details and click Create.
- After updating the segment using scheduled FTP upload, you can see the segment with a list of partitions. You can also edit the partition.
After updating the segment, initially, it will be in Inprogress status until the scheduled upload happens, post-process completion the status label disappears
Execution logs
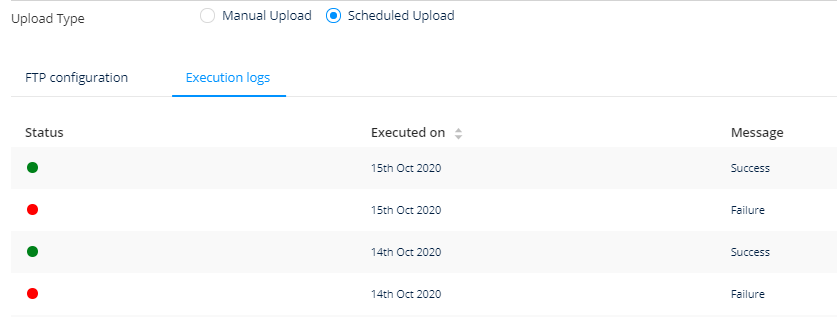
To track each scheduled upload status, you can check the execution logs that contain a list of details of successful and unsuccessful scheduled uploads.
- Green Dot: Signifies successful execution
- Red Dot: Signifies failed execution.

Updated 8 months ago
