
Schedule Report
The Schedule Report function allows you to automate report scheduling, offering options such as daily, weekly, monthly, or fixed times. Once scheduled, the system automatically sends these reports via email to designated recipients. Each email includes scorecards displaying all Key Performance Indicators (KPIs) from the report, along with the option to download the report as an Excel file and a direct link to view it on Insights+. You can customize the email, add a personalized message, and embed KPIs directly within the email. Both Standard and Custom Reports can be scheduled.
Creating Schedule
To Schedule a Report, do the following:
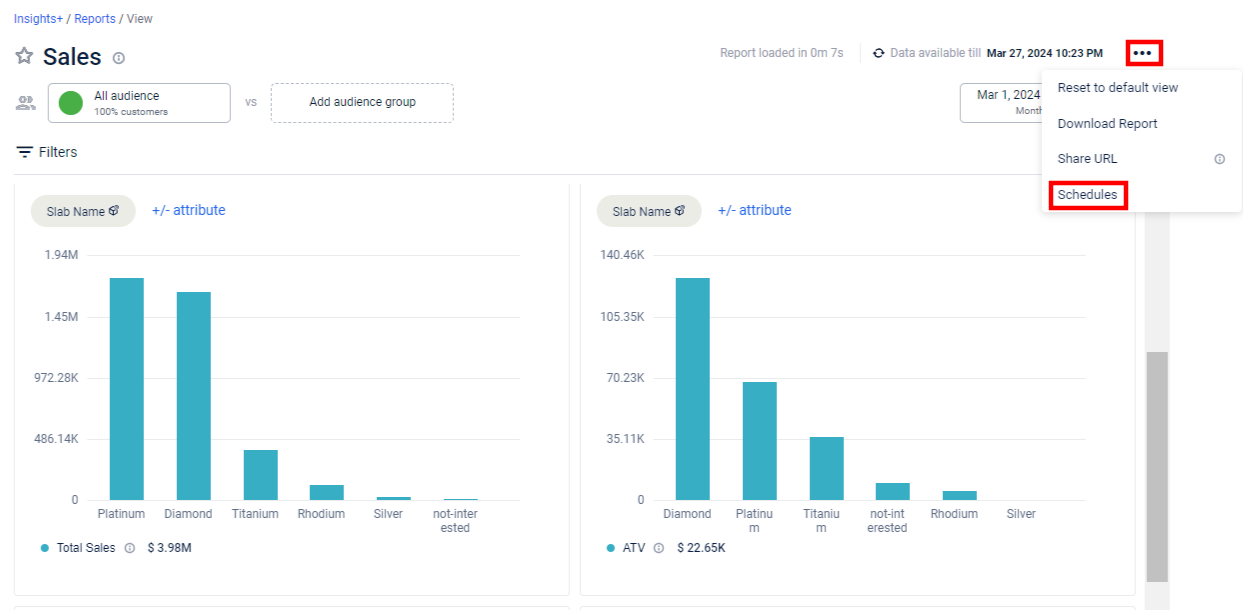
- Open the report you want to schedule. Customize the report if required using the available report filters and chart dimensions
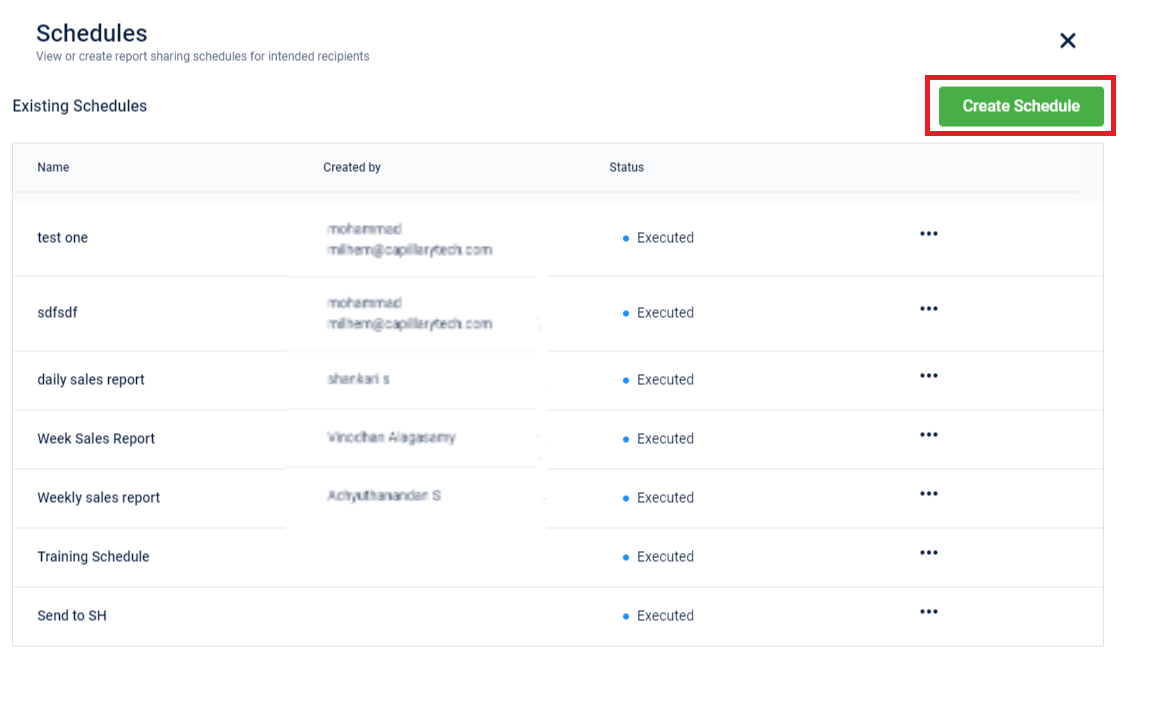
- On the top-right of the report, click the More Options icon >Schedules. This shows the existing list of schedules for that report.
- To create a new schedule, click Create Schedule.
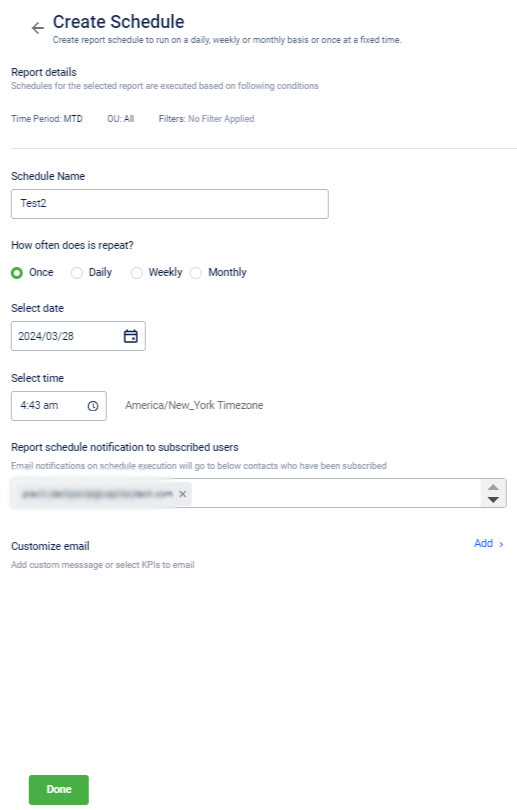
- Configure the fields based on the descriptions provided in the table below
| Option | Description |
|---|---|
| Schedule Name | Specify a name for the schedule job. |
| Time Period | Based on the report duration, the Time Period will be selected automatically. |
| Filters | This will show the list of filters applied to the report (if any). |
| Frequency | Choose the frequency of sending the report - Once, Daily, Weekly, or Monthly. |
| Select Recipients | Select the targeted audience of the report from the list. |
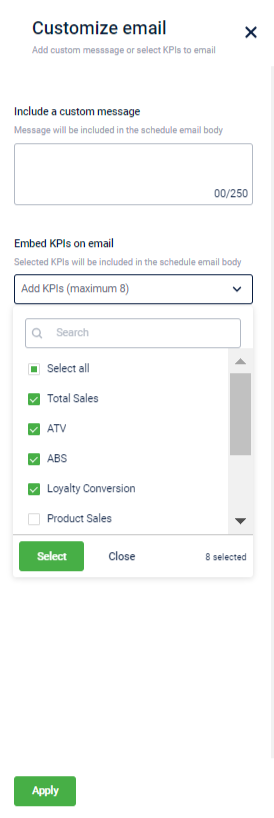
| Customize Email | Enable this option to customize email to include custom message and select KPIs that you want to see in the email. |
| Include a custom message | Enable this option to include a custom message in the email and specify the message in the text box that appears below it. You can have up to 150 characters in the message. |
| Embed KPIs on email | Enable this option to choose the KPIs that you want to embed in the email body (under Report Email) as shown in the screenshot below. You can choose up to eight KPIs. |
- Customize the email by adding a custom message. You can select up to 8 KPIs which will be included in the email. Expand the Add KPIs drop-down and select the required KPIs. Click Apply.
- Click Done on the Create Schedule page.
Viewing and Downloading Report through Email
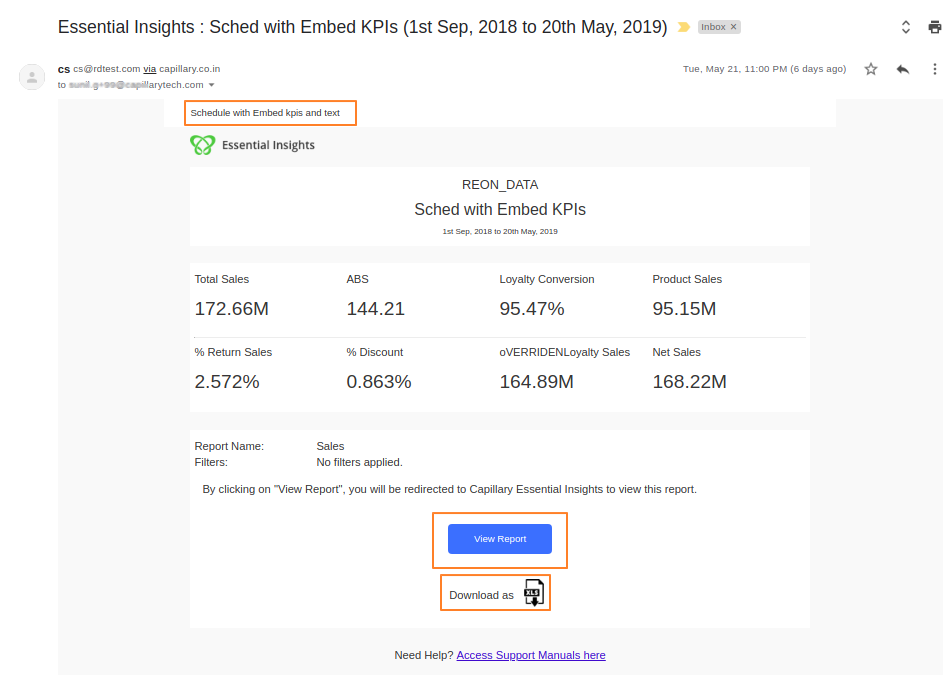
The following is a sample view of an email of a scheduled report.
The message that you set in Include custom message will appear on the top of the email body as highlighted below.
- Click View Report to view the report on Insights+. Login to Insights+ before clicking this option.
- Click Download as to download the report as an Excel sheet.
Applying filters and Dimensions to a Scheduled Custom Report
You can apply filters and dimensions to a custom report that you want to schedule.
To set filters and dimensions:
- Open a custom report
- Click the More Options icon > Edit.
- Add the required filters and dimensions
- Click Save
In recurring jobs, whenever the scheduler runs, you will get a report with prefilled filters and dimensions.
Editing Schedule
Any running schedule can be edited as per the users requirements. All the parameters originally used to create the schedule can be modified. To edit a schedule:
- Navigate to the desired report and click the More Options icon > Schedules
- For the desired schedule click the More Options icon > Edit.
- Do the required changes and click Save.

Pausing/ Resuming Schedule
Any running schedule can be paused before it is executed. To pause a schedule:
- Navigate to the desired report and click the More Options icon > Schedules
- For the desired schedule, click the More Options icon > Pause. The schedule gets paused and a Schedule paused notification appears.
- To resume the paused schedule, click Pause> Resume.
Unsubscribing/ Subscribing to a scheduled report
Recipients of a scheduled report receive reports through emails according to the scheduled frequency. However, a recipient can unsubscribe from a scheduled job manually to stop receiving reports. Also, an unsubscribed recipient can subscribe again to receive reports.
To unsubscribe or subscribe to a scheduled report:
- Navigate to the desired report and click the More Options icon > Schedules
- For the desired schedule, click the More Options icon > Request to unsubscribe.
- If you are unsubscribed from a scheduled job and want to subscribe again, click the More Options icon > Request to subscribe.
Viewing Status Log
For all the existing schedules, you can view the status log as follows:
- Navigate to the desired report and click the More Options icon > Schedules
- For the desired schedule, click the More Options icon > View Status Log.

Updated 5 months ago