
Configure Call Task Settings
Delivery settings
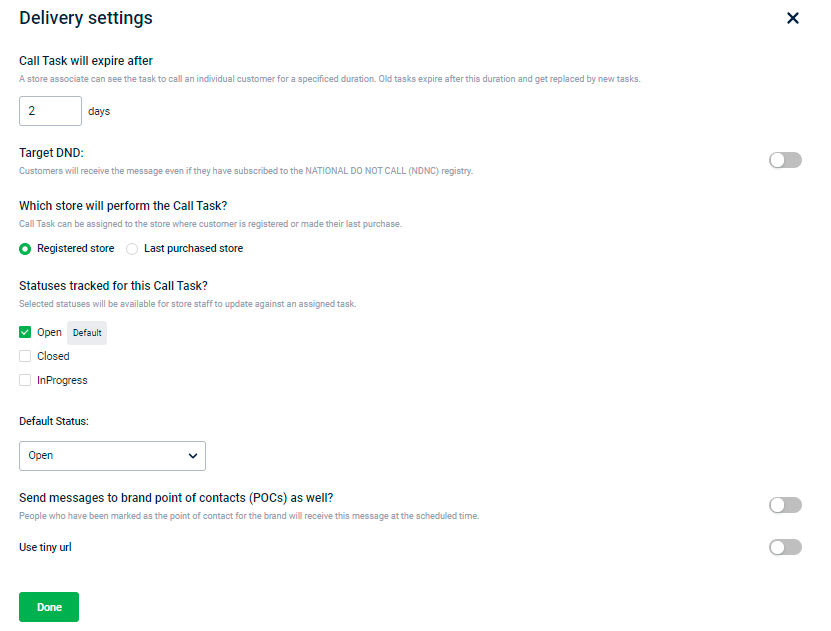
The delivery setting allows you to set the call task expiry period, enable target DND, store to perform call task, track specific status for the call task, enable POC, and use a tiny URL.
Configure call task expiry period
A store associate can see the task notification for the specified duration(days) from the message triggered to date. After the expiry period, the call task content will disappear from the destination app (InStore/Store2Door).
You cannot have call task expiry beyond the campaign expiry date.
For example,
Consider a call task campaign with a start date and execution date is April 20, 2021, and an end date is April 25, 2021.
For one time campaign
- If the call task expiry is set to 3 days, the message will disappear on InStore/Store2Door after 3 days from the execution date - April 23, 2021.
- If the call task expiry is set to 7 days, the message will disappear along with the campaign expiry - April 25, 2021.
For recurring campaign (assume daily with the campaign expiry as 3 days
- The message that triggers on April 20, will be available until Apr 23 (end).
- The message that triggers on April 21, will be available on Apr 24 (end).
- The message that triggers on April 22, will be available on Apr 25 (end).
- The message that triggers on April 23, 24, and 25 will also disappear on Apr 25 (end).
Store to perform call task
You can assign call tasks to the store where the customer is registered or last purchased.
Call task status
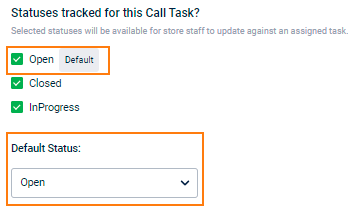
To configure the call task status, follow these steps.
- Enable the task status(Open, Closed, and InProgress) using the checkbox. Enabled options will appear to store staff for updating the task progress.
- Select the default status using the drop-down option.
Note
- Only enabled status can appear in the Default Status drop-down option.
- To configure the custom label name for each status, navigate to Engage+ > Settings > Call Task.
Create custom labels for call tasks
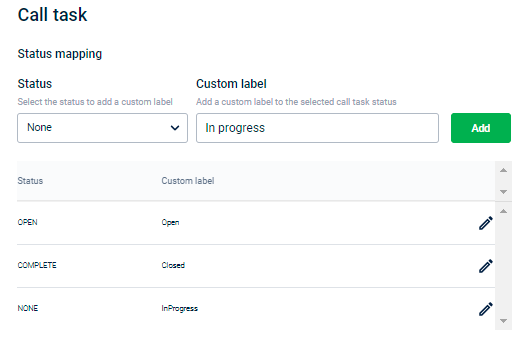
You can create custom labels for each call task status. These labels will show up as statuses in Call Task campaigns.
To create a custom label for a call task status, follow these steps.
- On the Engage+ home page, click on the setting icon and navigate to the Call task page.
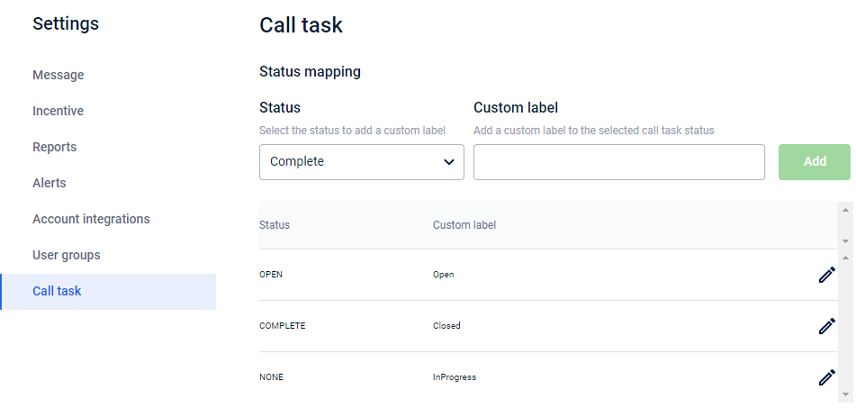
- In Status, choose the status for which you want to create a custom label.
- In the Custom label, enter your preferred name for the chosen status.
- Click Add to save the status mapping.
Updated 4 months ago