
Export Audience Group
The export feature allows you to export metric values for a specific customer list, using an audience filter in a template. For example, you can export transactions made by a specific audience in a particular store.
Make sure to use the appropriate template based on the data you want to export.
See the following example for a better understanding:
ExampleScenario: Alan needs to export loyalty details of customers who registered at a specific store.
Details: You can retrieve registered customers of a specific store using the Members template. However, the maximum time frame for data export is one year, so exporting the entire set of registered customers in one job is not possible.
Solution:
- Create an audience group using filters to identify customers registered in the specific store. For details, see the Registered Store filter under the loyalty category.
- In Export framework, select the Members template and apply the required audience filter.
- Schedule the export. The exported list will contain all customers who registered at the specific store, regardless of the date range selected.
Important points to note when creating an audience list:
- The Members template only allows you to retrieve loyalty and non-loyalty customers.
- The Users template lets you export all target audiences of a campaign, regardless of their loyalty status.
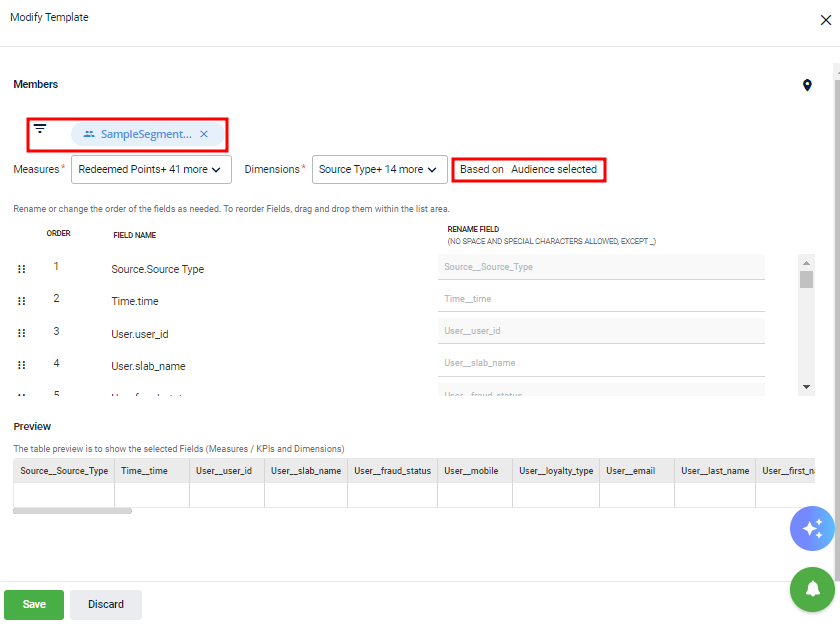
- Date range is not applicable in audience list exports, and the Based on field is set to Audience selected by default.
Note
- To export the audience of a specific campaign using templates other than Users and Members, ensure you select the campaign name, campaign ID, or group name as a filter. Else, the audience list will include audience from all campaigns.
- Custom fields are not selected by default in any template.
- Customers with a birth year before 1901 cannot be retrieved.
- Standard filters, such as outlier status, fraud status, merge status, and admin till, cannot be applied.
Configuring a customer list export schedule involves the following steps:
- Define a name and description for the export job.
- Set up the frequency and validity of the job.
- Choose the templates with events data.
- Tag the audience list to the template.
To export an audience list, perform the following:
- On Insights+, navigate to Data connectors > Export Schedules
- Click Create New.
NoteFields marked by * are mandatory.
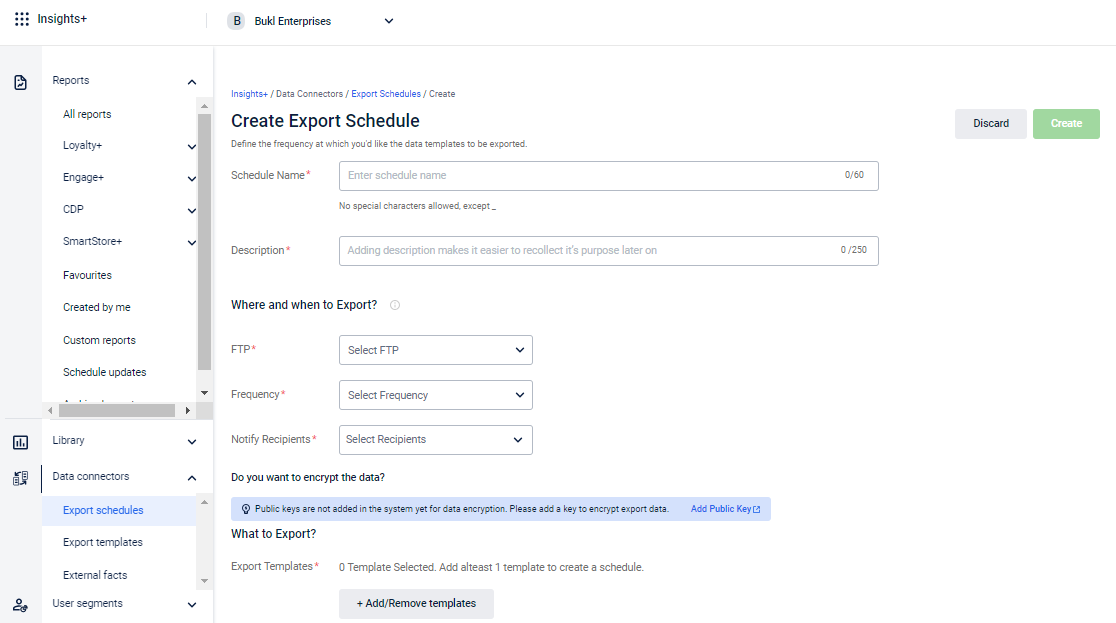
- Schedule Name: Specify a unique name for the current schedule job (maximum character length is 60). Do not include special characters. Use of underscores (_) or spaces in the name are allowed. Example: Summer Sale Transactions or Summer_Sale_Transactions.
- Description: Provide a brief description of the schedule (maximum character length is 250).
- FTP location:
- For external use: From the FTP drop-down list, select the FTP server to which you want to export the data. The file gets saved to the default location on the chosen FTP server. For more information on configuring the FTP server, see Configuring FTP Server for Data Export. (HYPERLINK)
- For internal use: You can either select FTP (to save the files in the preferred FTP location) or S3 (to save the files in the internal S3 server). No server configuration is required to export to S3 (CHECK???)
- Frequency: Select how often to run the export job: once, daily, weekly, or monthly. The maximum duration for a scheduled job is one year.
Note
- For recurring schedules, in the Validity field, you cannot select past dates. You may only select the current date or a future date.
- For one-time schedules, you can select a past date range, limited to the duration for which data is available.
- You can schedule an export based on either the Last Updated Date or Event Date.
| Option | Description |
|---|---|
| Once | Runs the export job one time on the scheduled date. The Execute on date shows the current date, by default. In Export Data from, choose the data duration you want to capture (supports up to one year). You can select dates up to the last sync date, but not the future dates. |
| Daily | Runs the export job daily for the specified duration. In Validity, choose the duration for which the daily schedule will run. Only current and future dates are allowed. The data for the previous day will be available the next day.
|
| Weekly | Runs the export job weekly for the specified duration. In Execute on, select the day of the week to run the job. In Validity, choose the duration for the weekly schedule. You can only select current and future dates, with a maximum schedule duration of one year.
|
| Monthly | Runs the export job monthly for the specified duration. In Execute on, select the day of the month (1-30/31) to run the job. In Validity, choose the duration for the monthly schedule, selecting only current and future dates. The maximum schedule duration is one year.
|
- Notify Recipients: Select the recipients for the current schedule and click Select to apply. These users receive recurring notifications, valid for the duration of the job, each time the job runs. The notification includes a link to the target location of the exported data.
- Encrypt Data: You can encrypt the exported data. If the public keys are not already configured, configure them by referring to the documentation on data encryption settings for export.
- Public Key: From the Public Key drop-down list, select the appropriate public key name.
- In Export Templates, click Add/Remove Templates
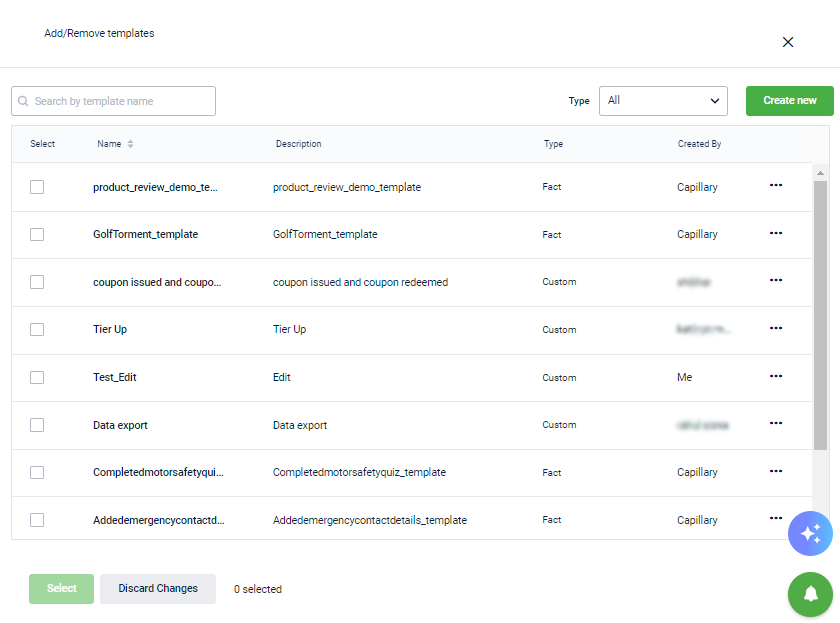
Check the templates you want to add to the export job and click Select. You can select more than one template.
For standard templates, the system displays the default measures, and for custom templates, it shows the selected KPIs count. All dimensions applicable to the KPIs or measures are displayed. You can modify the template to select only the necessary dimension values and apply filters to the existing data if needed.
- After selecting a template, click Modify to make changes.
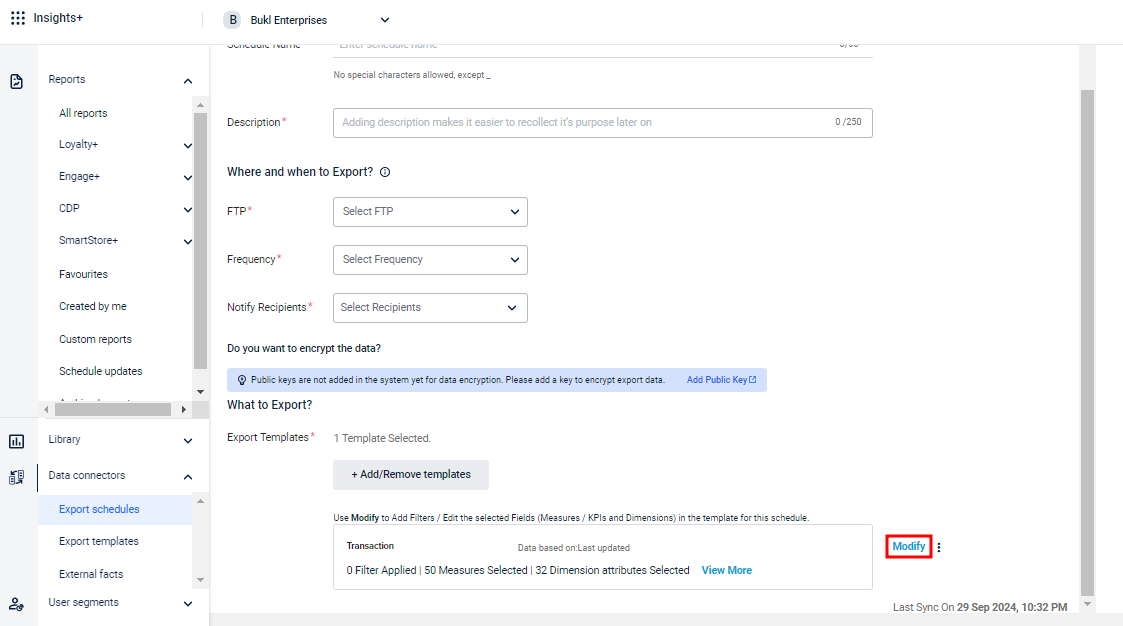
Note: Once you select a template other than users or members, it is required to add the filter campaign name, campaign id, or group name to get customers of that campaign or group. Else, you will get the details from all campaigns.
- Click the Filters icon and navigate to the Audience tab.

- Select your preferred audience list. You can also search for a specific list using the Search box. You will see all the selected audience list (segment) as shown below.
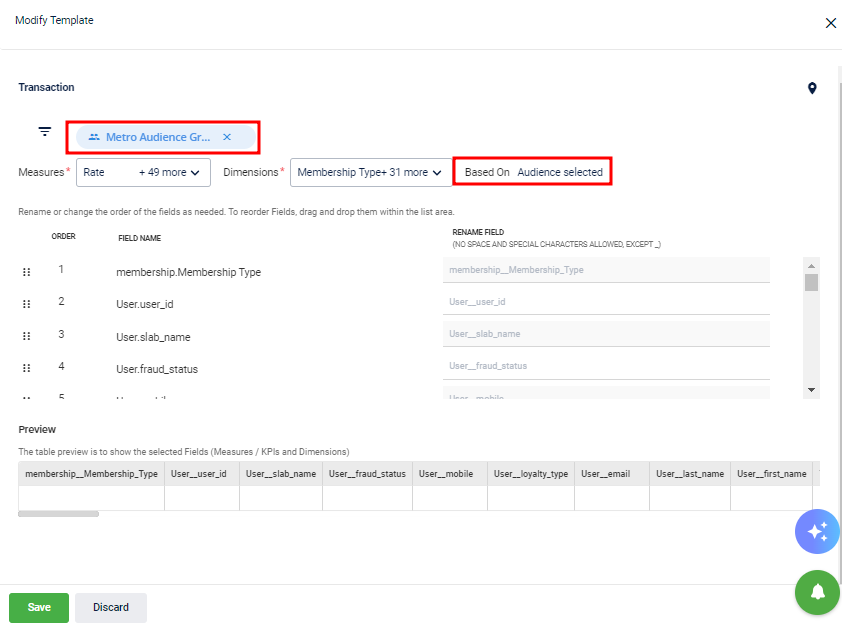
- Click Save
Updated 5 months ago