
Getting Started
Create offers
Important: Coupon offers are only evaluated if they are active at the time a transaction is processed. If a transaction occurs before an offer's activation date and time, that transaction is not eligible for coupon issuance, even if the offer is activated later or other eligibility criteria are met. Always ensure your offer is active before expecting it to apply to transactions.
To create a new offer with coupons, refer to the following :
- Navigate to Engage, select the Incentive tab, and then click Create Offer.
- Define the Offer name & configure the expiry details.
- Configure the Discount details.
- Configure the Coupon details.
- Configure the Issual & Reminder and the coupon Redemption settings.
- Select Preview & Save.
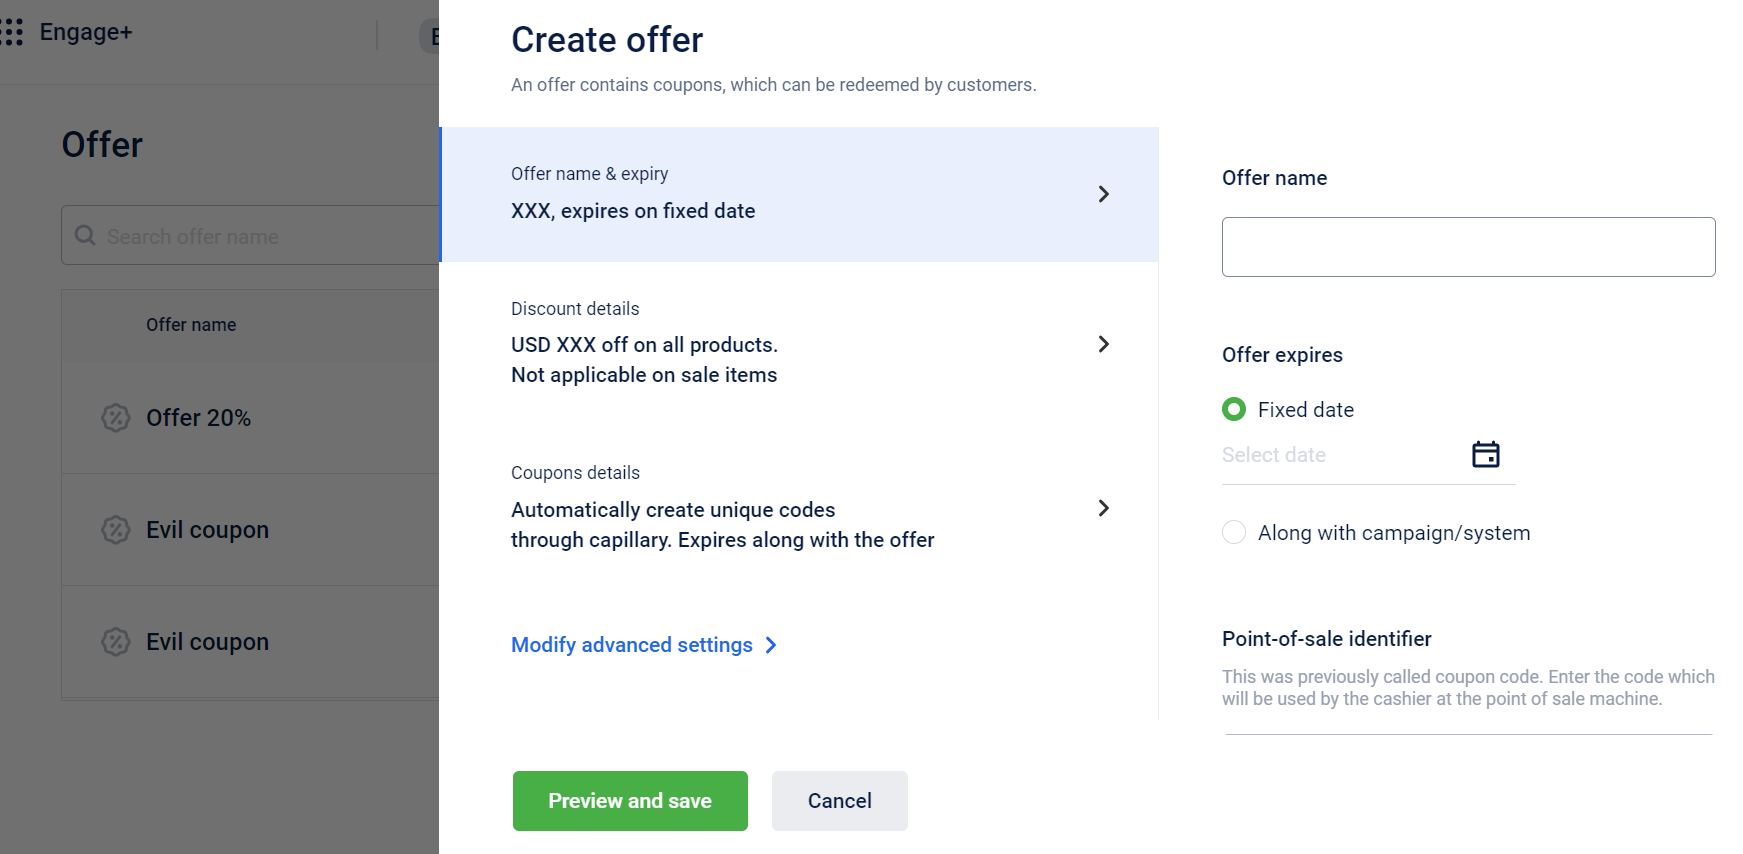
Defining Offer Name & Configuring the Expiry details
To define a name for the offer and configure the expiry details, perform the following:
- In the Offer name text box, enter a name for the offer.
- In the Offer Expires field, define the offer's expiration date. You can either set it to expire Along with campaign/systemto expire along with the service that consumes this offer. For example, if the service, say Outbound Campaign, expires on 31st Dec, the offer also expires on the same date and time or a Fixed date to expire the offer on a specific day. Click the calendar icon to set the expiry date. If 31st Dec is set as the fixed offer expiry date, irrespective of the expiry of the service consuming the offer, the offer expires on 31st Dec.
- In the Point-of-sale identifier(POS) text box, define a code that the cashier will use on the point-of-sale(POS) machine.
- You can enter the values for your coupon in the custom metadata fields like Tracker ID, Offer type etc...
Note :You can add additional custom field (metadata) in Configuring the Offer Settings at the Organisation Level
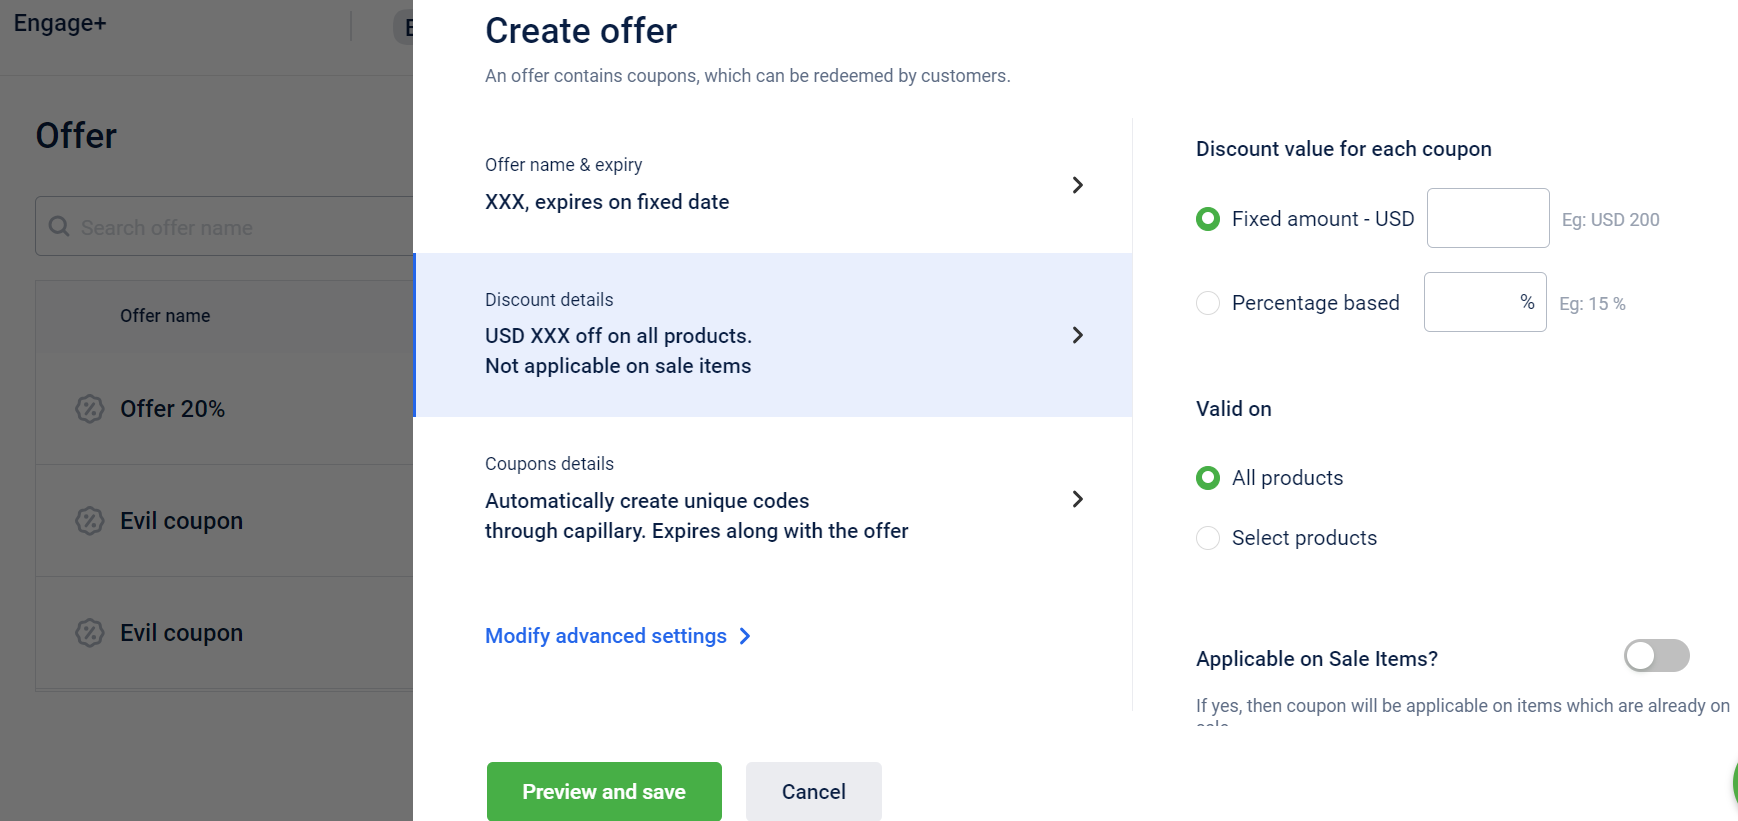
Configuring the Discount Details
To Define the discount value of each coupon and the products on which they can be redeemed follow these steps.
- In the Discount valuefor each coupon, you can set the discount as either a fixed amount or a percentage based.
- Fixed Amount for flat amount discount Specifies the amount in the respective field ($20).
- Percentage based on % (of the transaction amount) discount and the percentage is specified in the respective fields (10%).
- Enable the "Max Discount" option to set a maximum limit on the discount amount.
- In the "Valid On" field, you can choose the coupon's applicability.
- select "All Products" for the coupon to apply to every product, or select Selected Products for the coupon to apply only to selected items.
- Click on the selected product.
- From the drop-down choose Category (to select products by category) or Item Code (to select products by item code).
- By category: Select preferred categories from the drop-down -> Click Select -> Click Add Product to add more products. Note: A maximum of 1,000 categories can be selected per coupon series. The Select button is disabled once the limit is reached.
- In select products, we can choose multiple Product Entities such as Brands, categories, and attributes and upload the SKU codes option.
- select the relevant categories.
- select "All Products" for the coupon to apply to every product, or select Selected Products for the coupon to apply only to selected items.
- Enable "Applicable on Sale Items" to allow the coupon to be used on items already on sale.
Note: If you enable the ‘Applicable on sale items’ option, the offer will be applicable on both (All products/ selected products and on sale products).
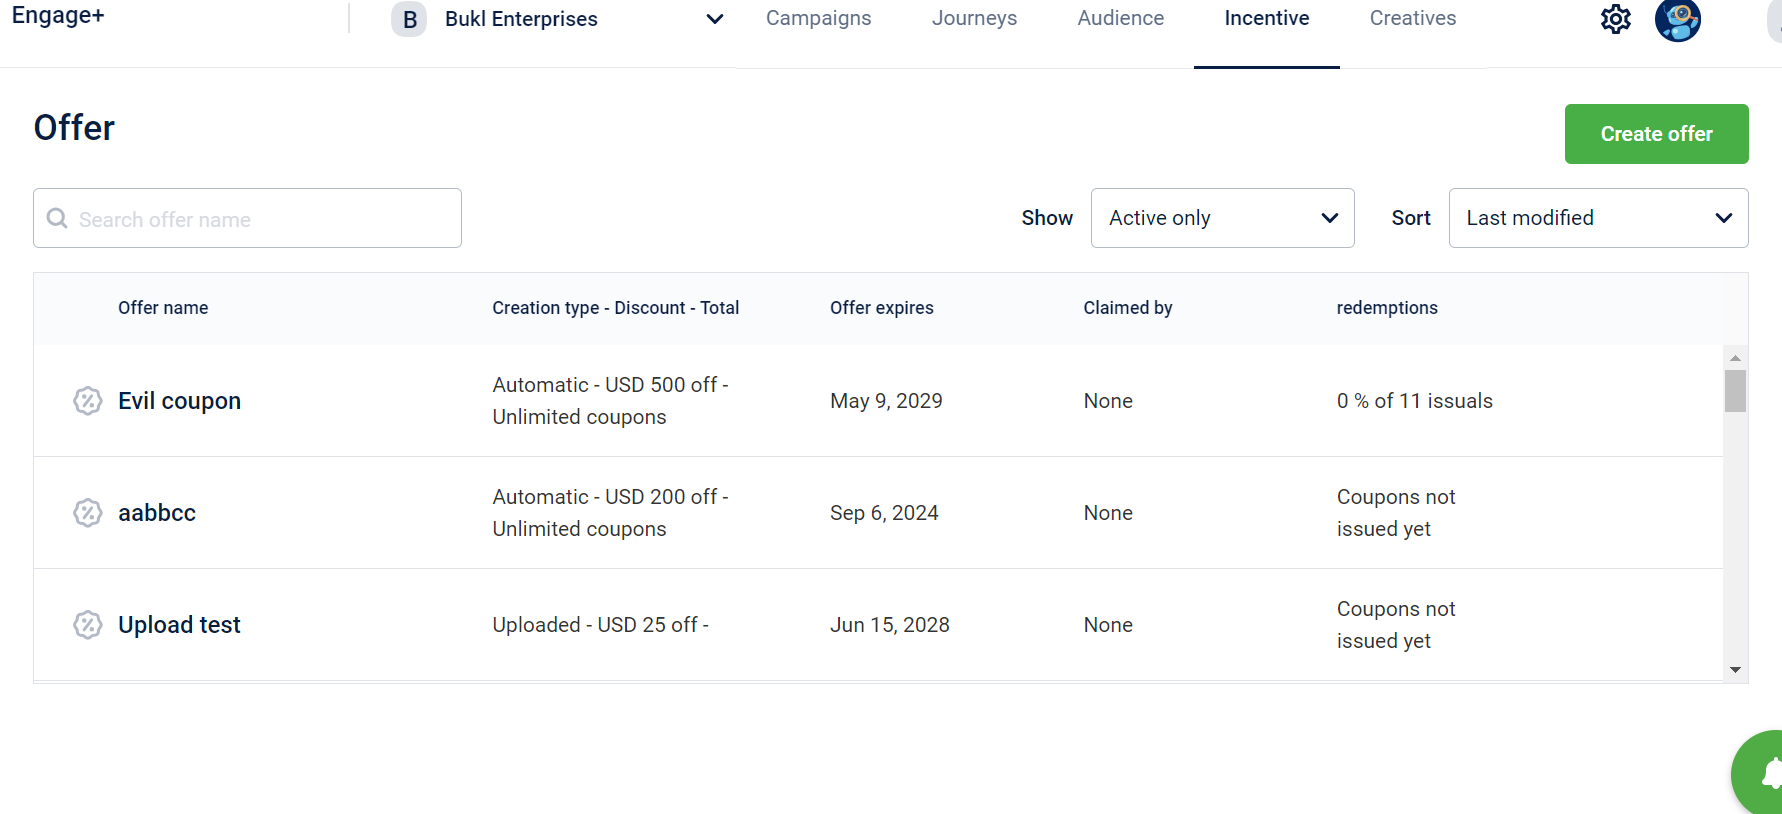
View Offers
You can view offer details whenever required on the Incentives page, refer to the following to view offers.
- Navigate to Engage, and select the Incentive tab.
- From the list of offers, click on the preferred offer to view.
- choose the configuration to view the offer name & expiry, discount details and coupon details.
- Navigate to the Information tab to view the created date, modified date, last issued date, last redeemed information, redemption rate, claimed details, offer ID, and offer code.

- If an outbound campaign claims the offer, then you will see the name of the campaign that claimed the offer in the campaign using this offer.
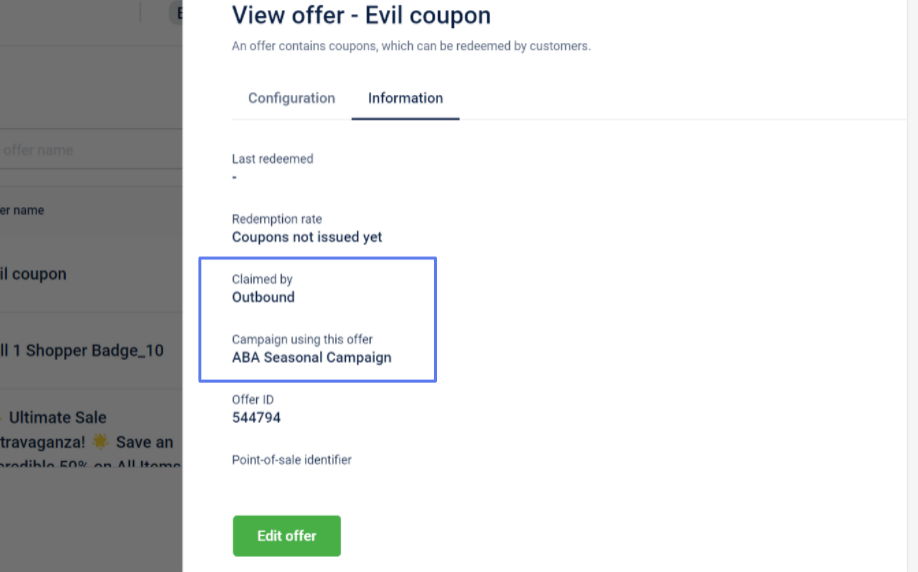
- If the offer is claimed by Loyalty, you will see the name of the program that claimed the offer in the program using this offer.


Modify Offer Details
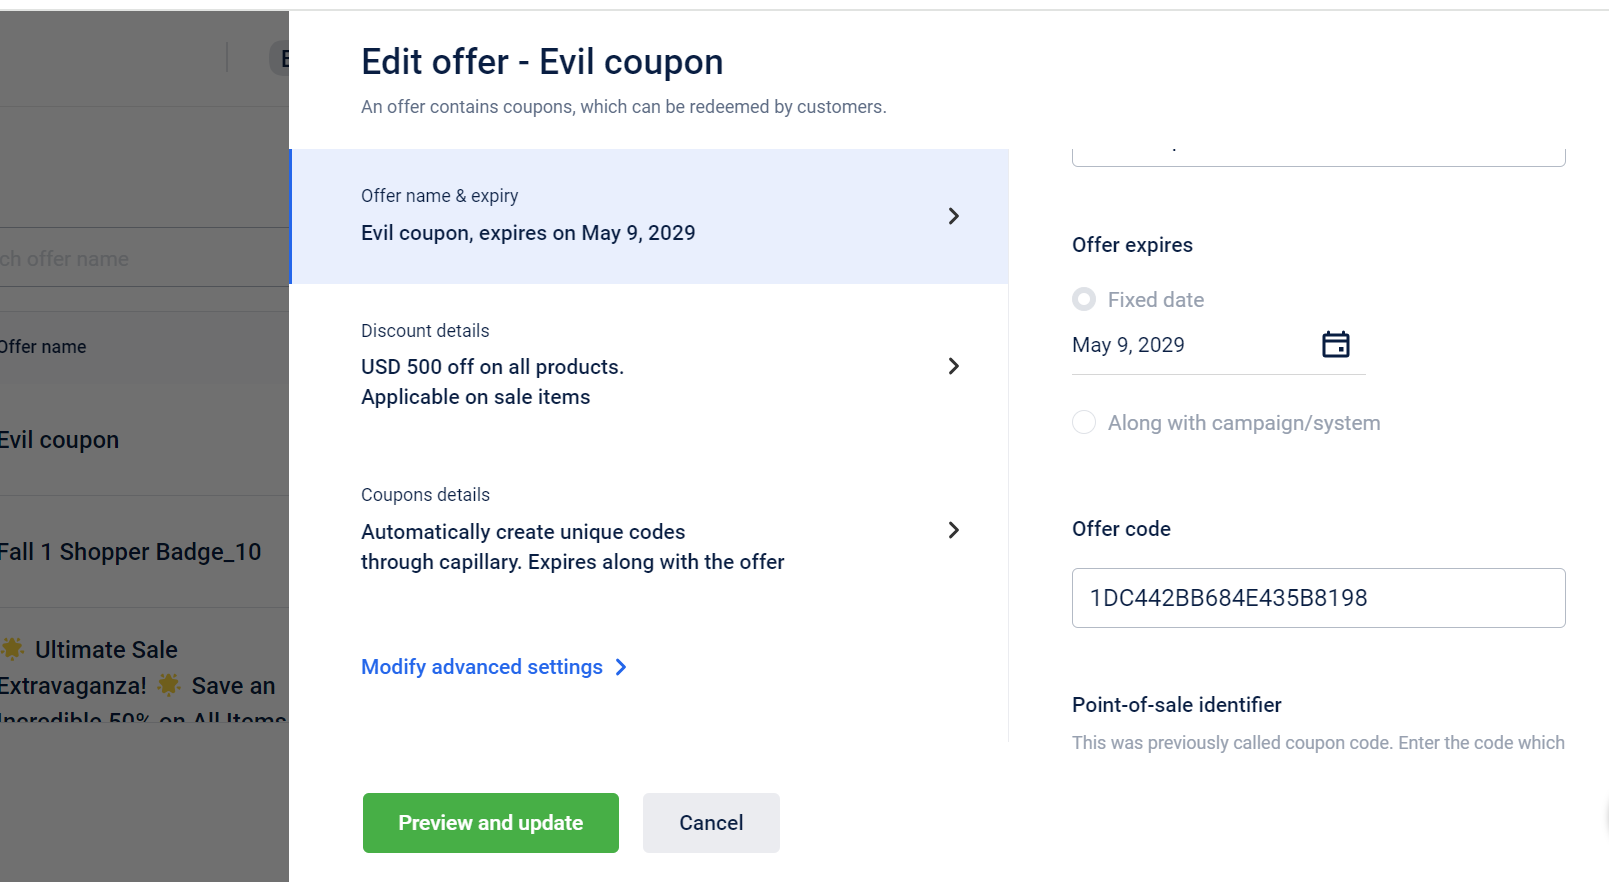
You can edit offers to modify settings like the name, offer details, allocation, redemption, and reminder options. Additionally, you'll find a field for the Offer Code (Series Code). The offer code is generated by default, but you can change it if needed.
Refer to the following to modify the offer.
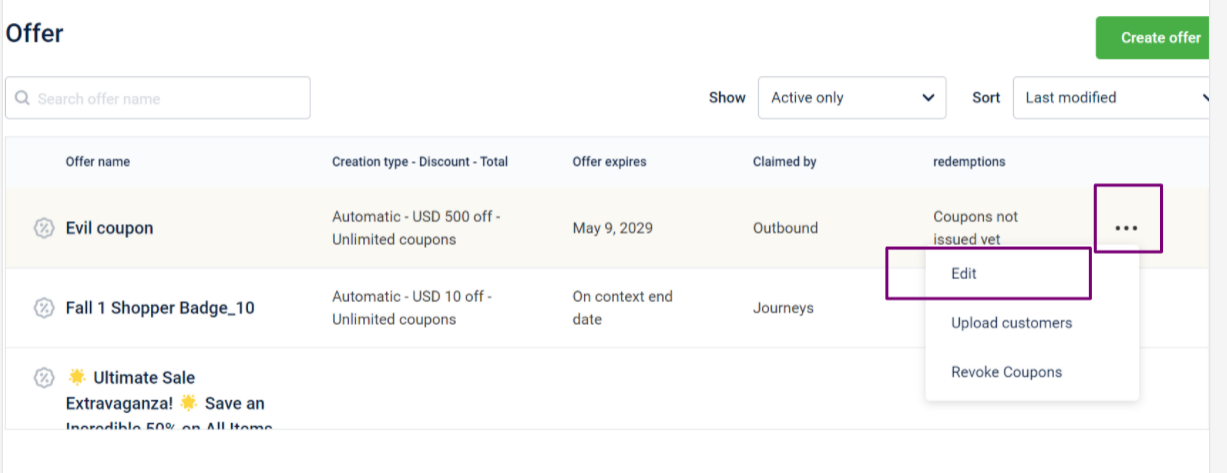
- Navigate to Engage and select the Incentive tab.
- In the Offers dashboard, click on the preferred offer you want to modify or click on the three dots.
- Click Edit.
- You can modify the name, offer code, issual, expiry, and reminder configurations. However, you cannot change the offer expiry type, coupon code creation option, or offer ID.
- Click Preview and update.
- Click Update.
You cannot modify the Offer expiry type, way of coupon code creation and offer id.
Configuring the Offer Settings at the Organisation Level
You can configure the Offer settings at the Organisation level from the Incentives settings page. To navigate to the Incentive settings page follow these steps :
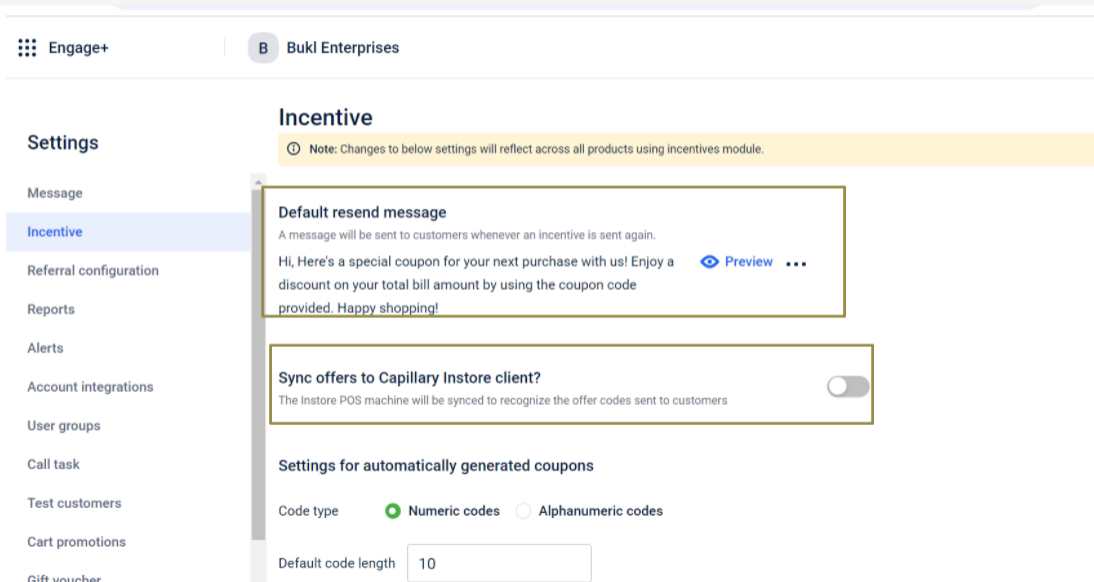
- Navigate to Engage, click the Setting icon and select Incentives.
- configure the settings that need to be modified.
- Select save change.
To configure each Incentive setting like default resend message, sync offers with stores etc ... follow these steps :
- In Default resend message you can Configure the default message to be sent to customers when a coupon is reissued. You can also Preview the message to confirm whether the message is looking as desired and make necessary changes if required.
-
Enable Sync offers to Capillary InStore client? To sync offers or incentives that are created or added on Engage+, enable Sync offers to the Capillary InStore client toggle button.
-
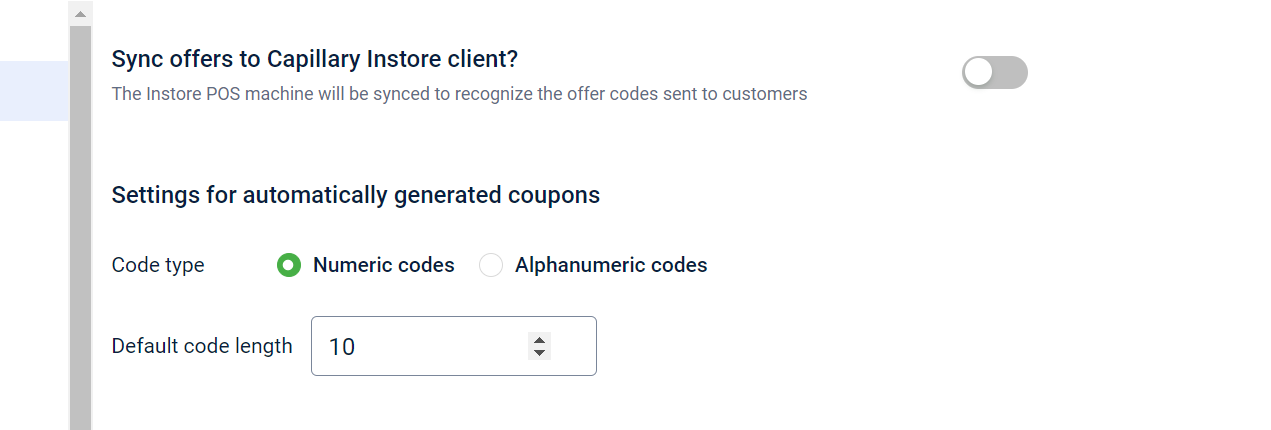
For auto-generated coupon codes In Settings for automatically generated couponsyou can set the default code length. In this, you can set the length of the coupon code Recommended length: 5-7 characters and set code type you can select your preferred character type in the coupon code. Select Numeric Codes to set the coupon codes only in numeric characters. For example, 12345678 or select Alphanumeric Codes to set the coupon codes in alpha-numeric characters. For example, ABCD1234.
-
In the Settings for automatically generated coupons, you can configure the default code length and character type.
- Code Length: Set the desired length for coupon codes. The recommended length is 5-7 characters.
- Code Type: Choose the type of characters for your coupon codes.
- Numeric Codes: Generates coupon codes using only numbers (e.g., 12345678).
- Alphanumeric Codes: Generates codes with a combination of letters and numbers (e.g., ABCD1234).
-
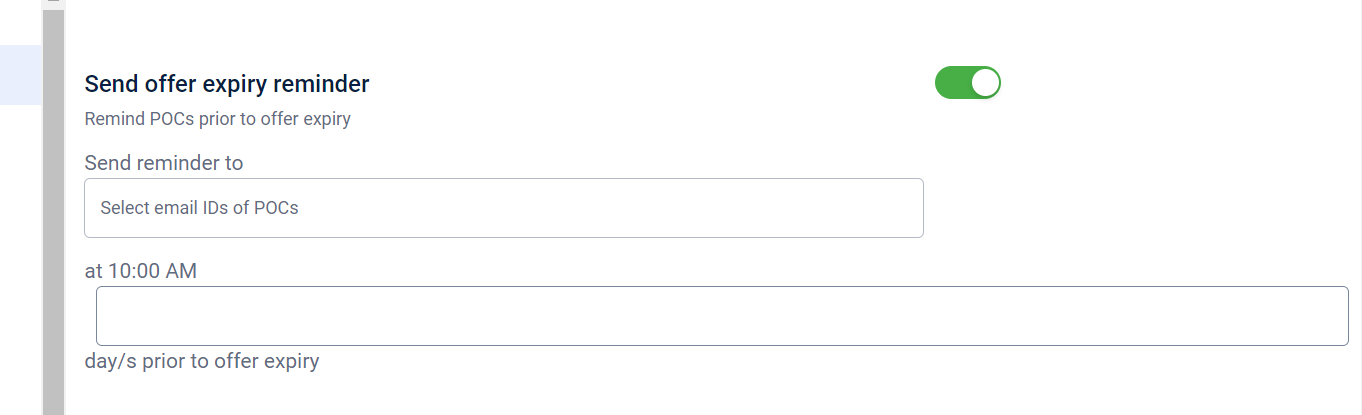
Enable the "Send offer expiry reminder" to schedule reminder emails for offer expirations to the POCs. These emails will be sent at 10 a.m. on the days leading up to the chosen offer expiry date.
- Click “Send reminder” to view the list of configured POCs and select the ones you want to notify.
- In the "Days prior to offer expiry" field, specify the number of days before the expiry date when the reminder should be sent.
-
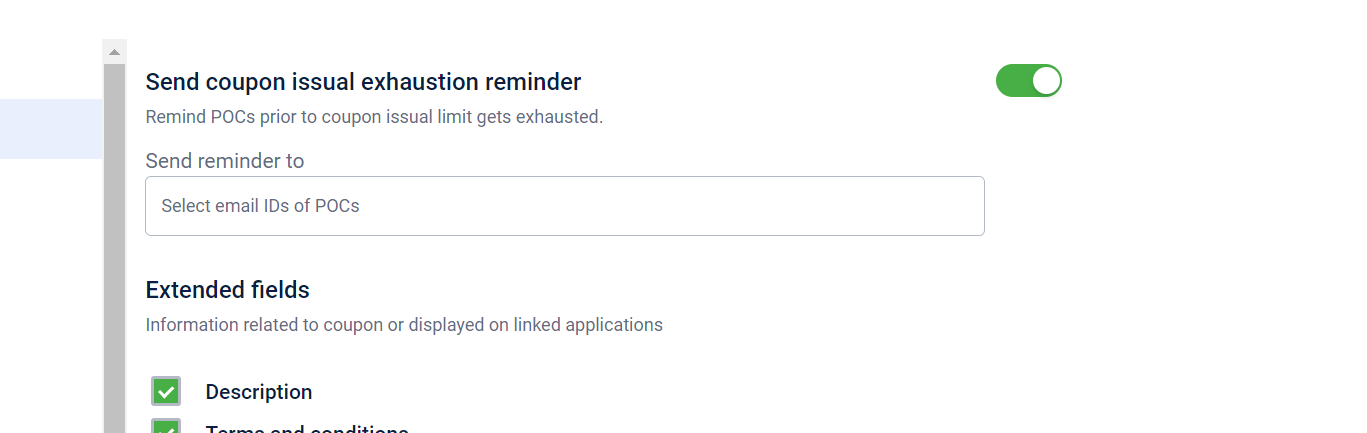
Enable the "Send coupon issuance exhaustion reminder" to schedule a reminder email when coupon issuance is approaching exhaustion before the coupon limit is reached.
- Click “Send reminder to" view the list of configured POCs. Select each POC you want to notify.
-
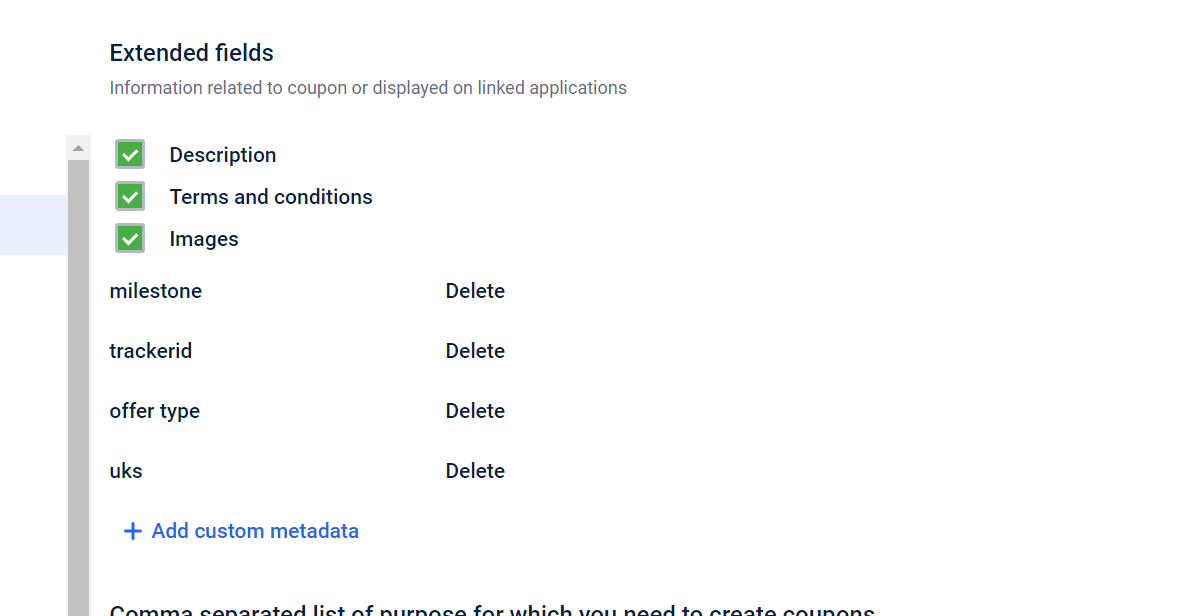
In Extended fields Select the fields that you want to include with the incentive. You need to enable each field you want to include as a coupon-level extended field (metadata fields) in the Incentives section of Product Settings.
You can select the following fields:- Description: Include the offer description in the incentives.
- Terms and conditions: Include terms and conditions of the offer in incentives. The maximum number of characters accepted in terms and conditions is 500 characters.
- Images: Includes images in incentives, You can add images from the creative gallery or upload them from your local system. You can add up to three images.
-
In Add custom metadata you can add any custom metadata, click +Add custom metadata, enter the metadata name, and click Save. You can add up to five custom metadata and a maximum of 20 custom extended fields.
- In Comma separated list of purpose for which you need to create coupons you can include the Possible purposes for coupon creation separated by a comma (displayed as a drop-down list in the coupon creation UI).
- In Delivery settings, you can add SMS Sender Details to ensure that GSM and CDMA customers see the SMS coming from their respective sender IDs and Email Sender Details to ensure the email address or domain from which customers will receive emails
To set up the delivery settings, follow these steps.
- In SMS Sender Details, you can add the SMS Domain, which is the backend address used by the SMS provider to manage messages (not visible to users). Additionally, set the SMS GSM Sender ID, which determines the phone number or name that appears on your phone for SMS from GSM networks, and the SMS CDMA Sender ID, which sets the phone number or name that appears for SMS from CDMA networks.
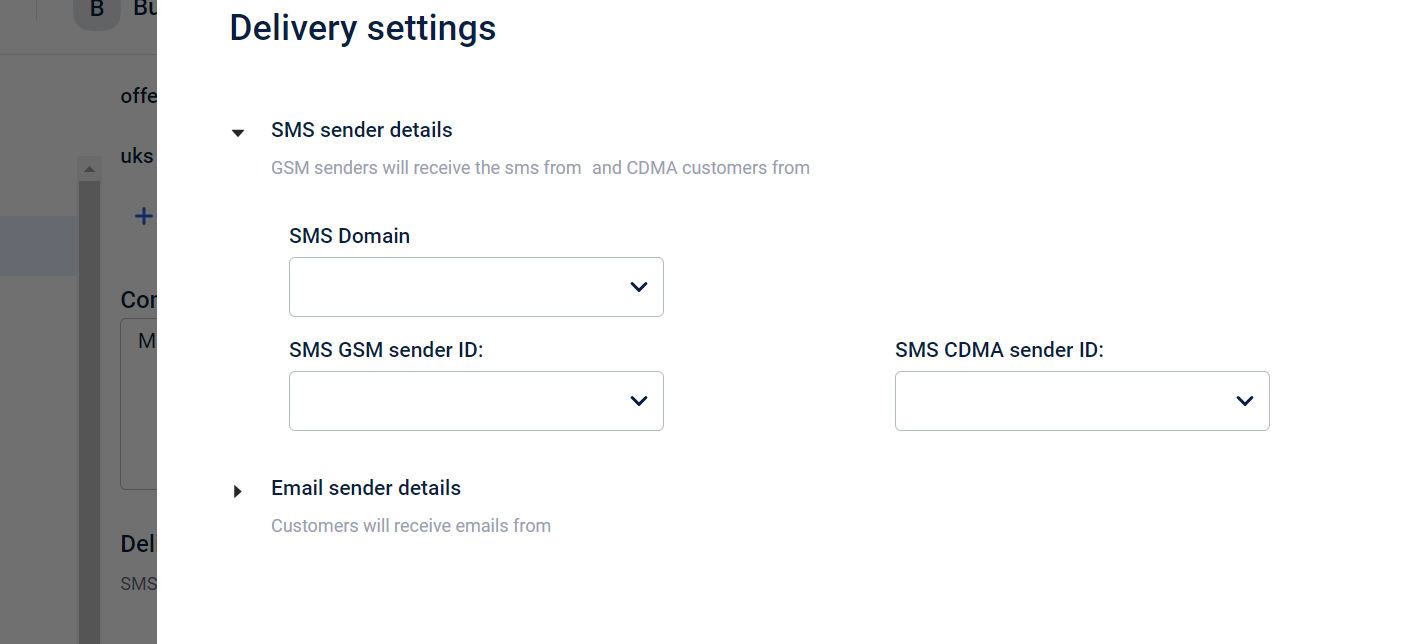
- In Email Sender Details, you can configure the **Email Domain,**which shows the email provider, the Sender ID, which is the specific email address used to send the email, and the Sender Name, which is the name displayed alongside the email address.

- Click on done.
Updated 1 day ago