
Authorization
This page provides you with information on creating access controls and setting authorization for APIs.
Authorization ensures that authenticated users with the right permissions can use specific APIs or resources. For example, you can configure authorization settings to limit a user to making only "GET Customer Detail" API requests (for reading information) without the ability to add new customers.
Authorization in Capillary APIs is achieved using the Access control feature.
Key concepts
Access group
An access group is a set of Data API and Config API resources with defined permissions.
You can use these access groups and can set API endpoint access restrictions for stores. For example, an access group Instore with only Write (POST) access to [Customer](https://docs.capillarytech.com/reference/customer) resources.
By default, Built-in access group (created by Capillary) are available and can be used for common integrations such as POS, Instore, and Admin. If required, you can also create a Custom access group.
NoteNote
For the existing integrations, access group is provided based on the existing usage analysis. You can create a custom group, if additional accesses are required.
Resources
A Resource includes a set of APIs. For example, a Card resource includes all APIs related to the Card entity. Similarly, a resource named Customer can include all APIs related to the Customer entity.
Existing resources include:
Customer | Images | Leads | OTP | Organization | Organization Data Fields | Partner Program | Partners | Points | Product | Requests | Staff | Store | Survey | Task | Transaction | User Groups | Activity Sessions | User Targets | Target Loyalty | Webhooks | Event Simulation
Permission group
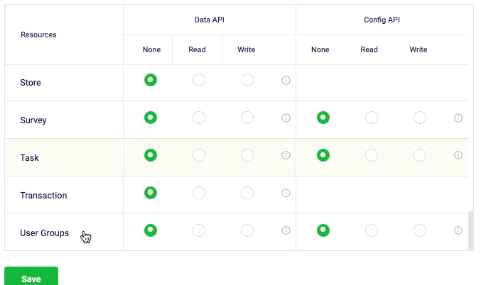
The permission group allows you to set access restrictions to the API resources. The group permission section includes the following details:
- Data API: API endpoints associated with generic data. For example, customer data, basic coupon information, company data, etc.
- Config API: API endpoints that are not related to generic data and are associated with any type of configuration. For example, coupon series, templates, communication templates, etc.
- Resources: A group of logically grouped API endpoints that are used for a common purpose. You can click on the info icon in the Data API and Config PI to see the list of API endpoints in the particular resource.
NoteAll endpoints are not mapped to the exact entity it belongs to. Endpoints are grouped based on the logical reasons. For example, Organization resource includes endpoints from audit entity.
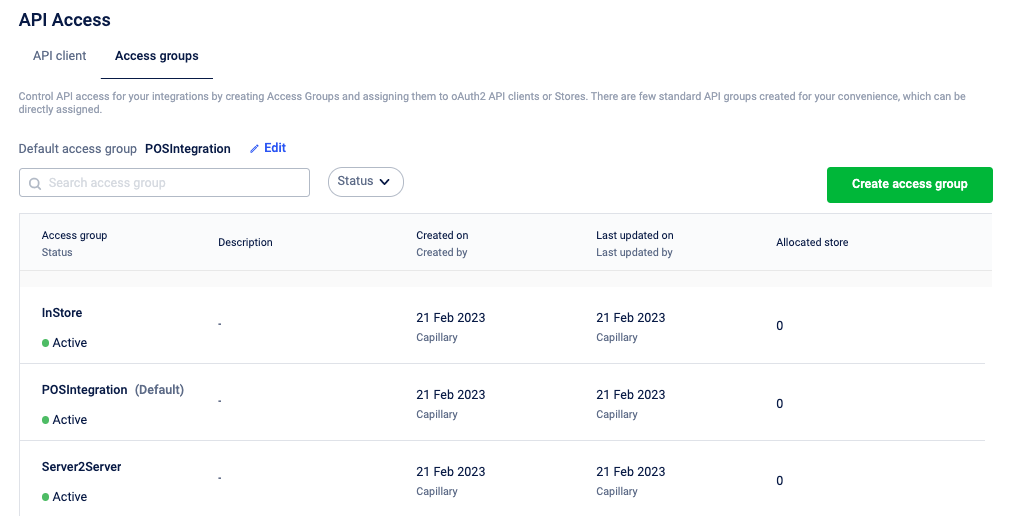
Manage access groups
Create and set permission for access group
To create and set permissions,
- On the Access control tab, click Create access group.
- In the Group name field, enter the desired name for the group.
- (Optional) In the Group description textbox, enter a brief description of the access group.
- In the Group permission, select the and set the permission for Data API and Config API as follows:
-
None: No access to any of the API endpoints associated with the resource.
-
Read: Access to GET API endpoints associated with the resource. For example, an access group with Read access to Coupon resources will have access to all Coupon GET API endpoints.
-
Write: Access to POST API endpoints. For example, an access group with Write access to Coupon resource will have access to all Coupon POST API endpoints.
You can also search with a resource name or an endpoint name and find the required API resource or endpoint.
-
- Click Save.
- Click Allocate store and from the store page, allocate the access group to the store. See Allocate store.
Set a default access group
The default access group defines the default access group for all the stores under an organisation and is also called an org-level access group. All [stores](https://docs.capillarytech.com/reference/store) inherit the default access group from the org. If required, you can edit and change the access group of a particular store. For information on setting an access group to the store, see Allocate store.
When used:
- All tills inherit the access group of the store. If you move a till from one store to another, the access group of the new store is inherited.
- When you change a default access group, API access of all stores that use the default access group changes as per the new default access group.
- During data import, you need to set the default access group before you import multiple stores. For more information, see Data import.
To set the default access group
- In the Default access group click Edit
- Select the desired default access group.
- Click the Done icon.
A Change default group warning message appears. - Click Yes, continue.
- Click Yes, continue.
Allocate access group to a store
To allocate,
- On the access group, click Allocate Store .
The respective store page appears. - Click on the desired store and click Edit.
- From the Access Group drop-down, select the access group.
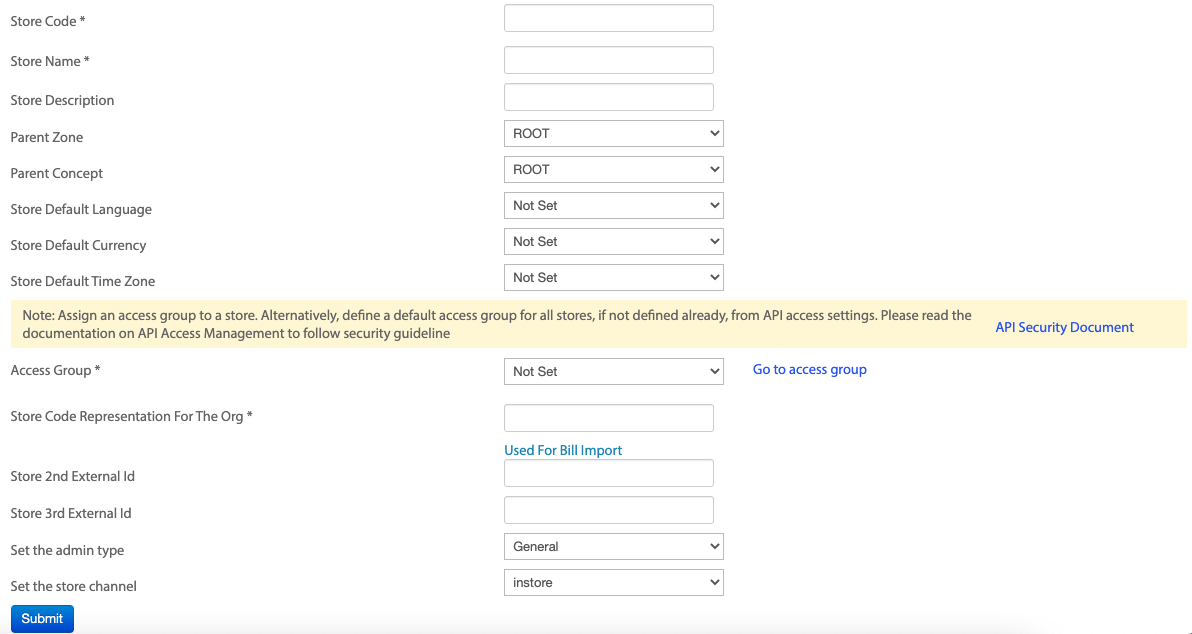
- Click Submit.
For more information on editing a store, see Create store.
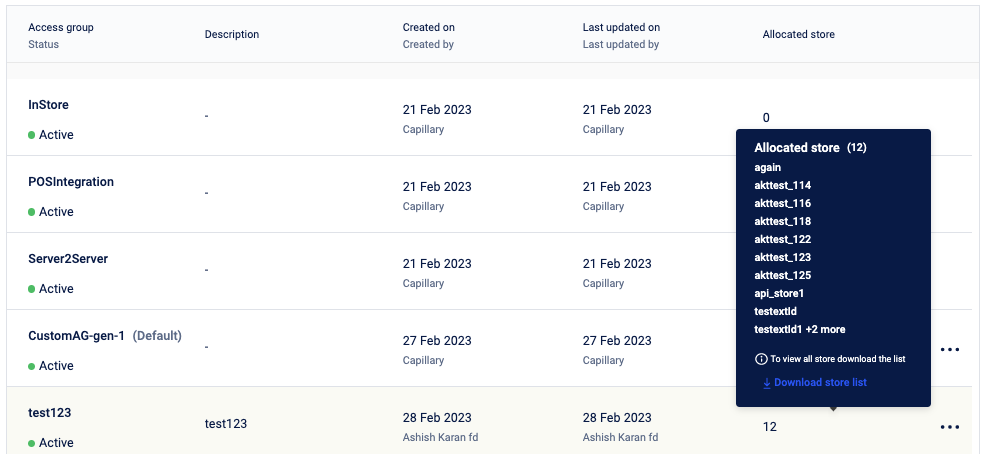
Download the assigned store list
The Allocated Store displays the total number of stores assigned to the respective access group. If the number of stores assigned is more than 10, you can click on Download store list from the allocated store number tooltip and download the assigned store details.
Search, filter, and view access group
You can search for an access group with its name, and can also filter the access group based on its status (active/deactive). Click on the access group to view the access group detail.
Edit access group
To edit an access group, click the 3 dots adjacent to the access group and select Edit. Modify as required and click Save.
NoteAfter you edit and save, it takes one hour to reflect the changes.
NoteYou cannot edit an built-in access group.
Deactivate access group
You can deactivate an Custom access group access group that is not assigned to any store. For custom access groups with stores assigned, remove the assigned stores to deactivate.
To deactivate,
- On the access group you want to delete, click the 3 dots adjacent to the access group and select Deactivate.
- On the Deactivate access group, click Yes, continue.
The access group is deactivated.
Error codes
For error codes related to access control, see API access error codes.
FAQs
- What is the advantage of setting access group permissions?
Setting access group permissions improve API security and avoid unauthorized access. At present, if transaction access is granted for a till it has access to many APIs that are not required for the till. With access group permission configuration, access to unwanted APIs is avoided. The APIs required for integration are identified by behaviour study and are grouped accordingly. - Is a default access group mandatory for integrations?
It is recommended to have a default access group as it helps the stores under the organisation to inherit the access group of the organisation. - Will this impact existing OAuth-based authentication?
No. Access groups are created based on the usage of APIs by the organisations and are provided access accordingly. You can also add the required access group to your store if you need any additional access. - Can you deactivate an access group?
You can deactivate an (>) not linked to any stores. > cannot be deactivated. - Can you override the default access group at the till level?
No. All tills added under a store inherit the store’s access group. This cannot be overridden. - What is the difference between a built-in access group and a custom access group?
Built-in access groups are predefined access groups created by capillary that can be used for common integrations. You can create custom access groups if the built-in access groups do not meet your requirements. - How can you differentiate between a built-in access group and a custom access group?
In the Created by column name Capillary appears for built-in access groups whereas, for custom access groups, the name of the respective person/brand appears.
Updated 6 months ago