
Recurring Campaign
ImportantRecurring Campaign can be created from the new UI only.
To create a recurring campaign, perform the following:
Step 1. Create Audience filter
- Navigate to the Audience page and create an audience group using the Import via FTP Connector option.
- Save and share the name with the user who adds the file to the FTP. The file name should match the CSV file name in the FTP location.
Step 2. Create Connect+ dataflow
- Navigate to Connect+ and create a Connect+ template using the Audience Reload from FTP template.
- Engage updates the audience group within 15 minutes after the Connect+ dataflow runs.
Step 3. Create campaign
- Navigate to Engage and create a Broadcast Campaign.
- Select the audience group created for this recurring campaign.
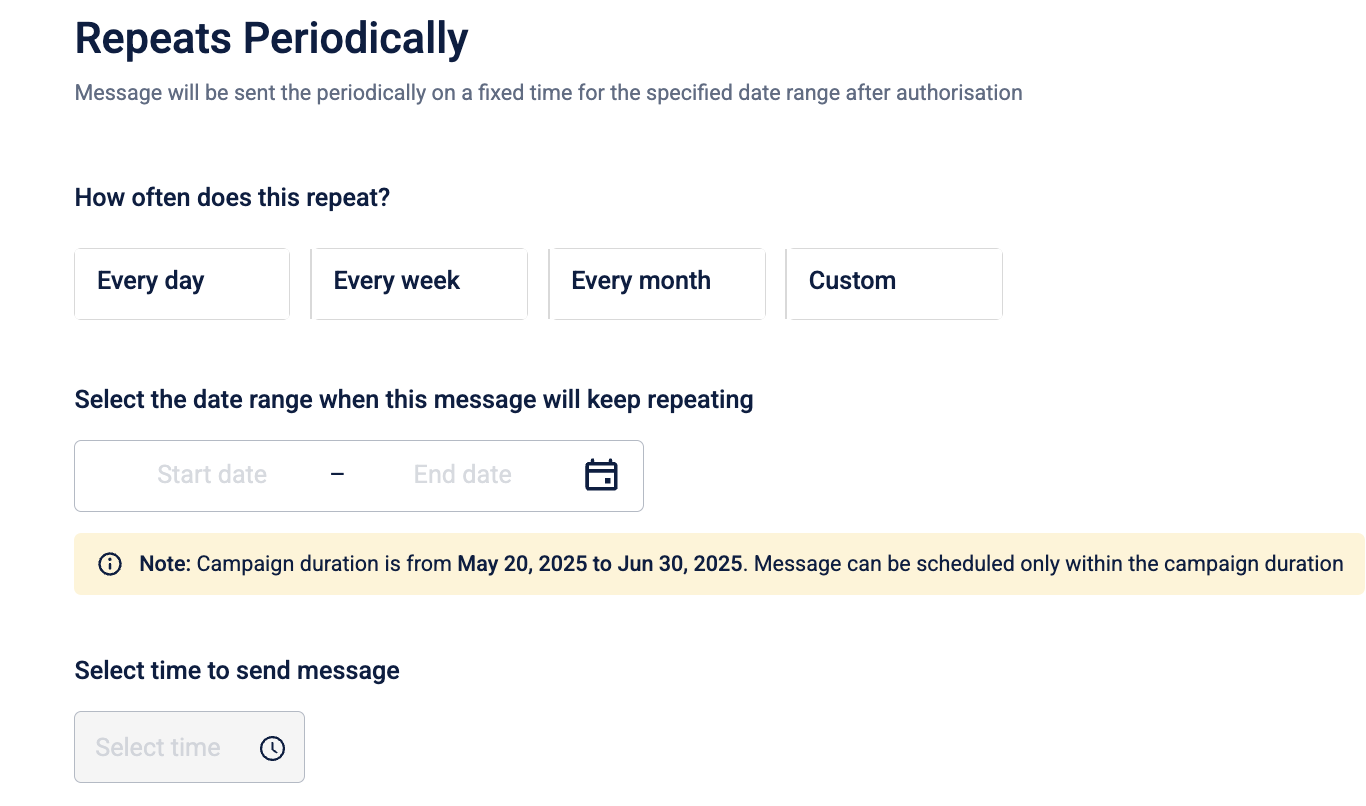
- In the Schedule option, select Repeat Periodically. Define the following:
- Campaign repeat schedule
- Duration of recurring campaign message
- Time to send the message. Schedule the message for at least four hours after the Connect+ dataflow updates the audience group.
NoteIn cases where data sync is delayed or faces issues you can adjust the campaign start time accordingly. For example, if sync completes by 10:30 AM, scheduling the campaign at 10:30 AM instead of 10:00 AM will ensure accurate audience targeting. To enable this feature raise a JIRA ticket to the Product Support Team.
For more information refer to schedule message documentation.
Step 4. Monitor and troubleshoot
- Data flow logs: check processed count and errors.
- Campaign dashboard: verify send counts and engagement.
- For FTP issues, review the error folder.
- If you see “Waiting for file,” confirm the file name and path.
- Ensure that the uploaded audience file includes the custom tags for each user. If the custom tags are missing, the campaign message will be skipped for those users.
Notes
- If the audience list on a particular day is the same as the previous day, the campaign execution is automatically skipped for that day and will be notified via alert.
For example, if user IDs 1 to 100 are targeted on Day 1 and the same user IDs are included again on Day 2 (whether throughaudience filters or FTPuploads), the system will skip execution on Day 2 to avoid duplication.
On Day 3, if a new user base is detected, the campaign will run automatically. No manual action is required from the Customer Success Manager (CSM) or any user.- If, on any day, a portion of users in the audience are skipped from receiving the campaign (for example, due to missing information or data issue), the system automatically sends an alert notification to the brand POC. This alert is triggered only if the number of skipped users exceeds 10% of the total audience for that day.
- Ensure the daily audience size is within the maximum user limit configured for the organization or campaign. If this limit is exceeded, the campaign is skipped for that execution, even if it is scheduled correctly.
- Ensure the campaign is approved well in advance of the scheduled send time. If the campaign is not approved before the system validates it, it is treated as unauthorized, and no messages are sent for that run.
Best practices
- Always use matching names for filters, files, data flows, and campaigns.
- Build in a buffer (e.g., upload file 4 hours before campaign runtime).
- Test with a small CSV of known user IDs before full launch.
- Regularly review and update your audience data to remove users with hard bounce email statuses. This helps ensure accurate coupon delivery and avoids excluding eligible users due to deliverability issues.
- Document all credentials and paths in a shared, secure location.
Managing a recurring campaign
Managing a recurring campaign refers to tracking its performance and making updates when necessary. You can edit the campaign message, deactivate or activate it later provided the changes stay within the campaign’s defined duration.
Editing a recurring campaign
To edit a recurring campaign follow the given steps below:
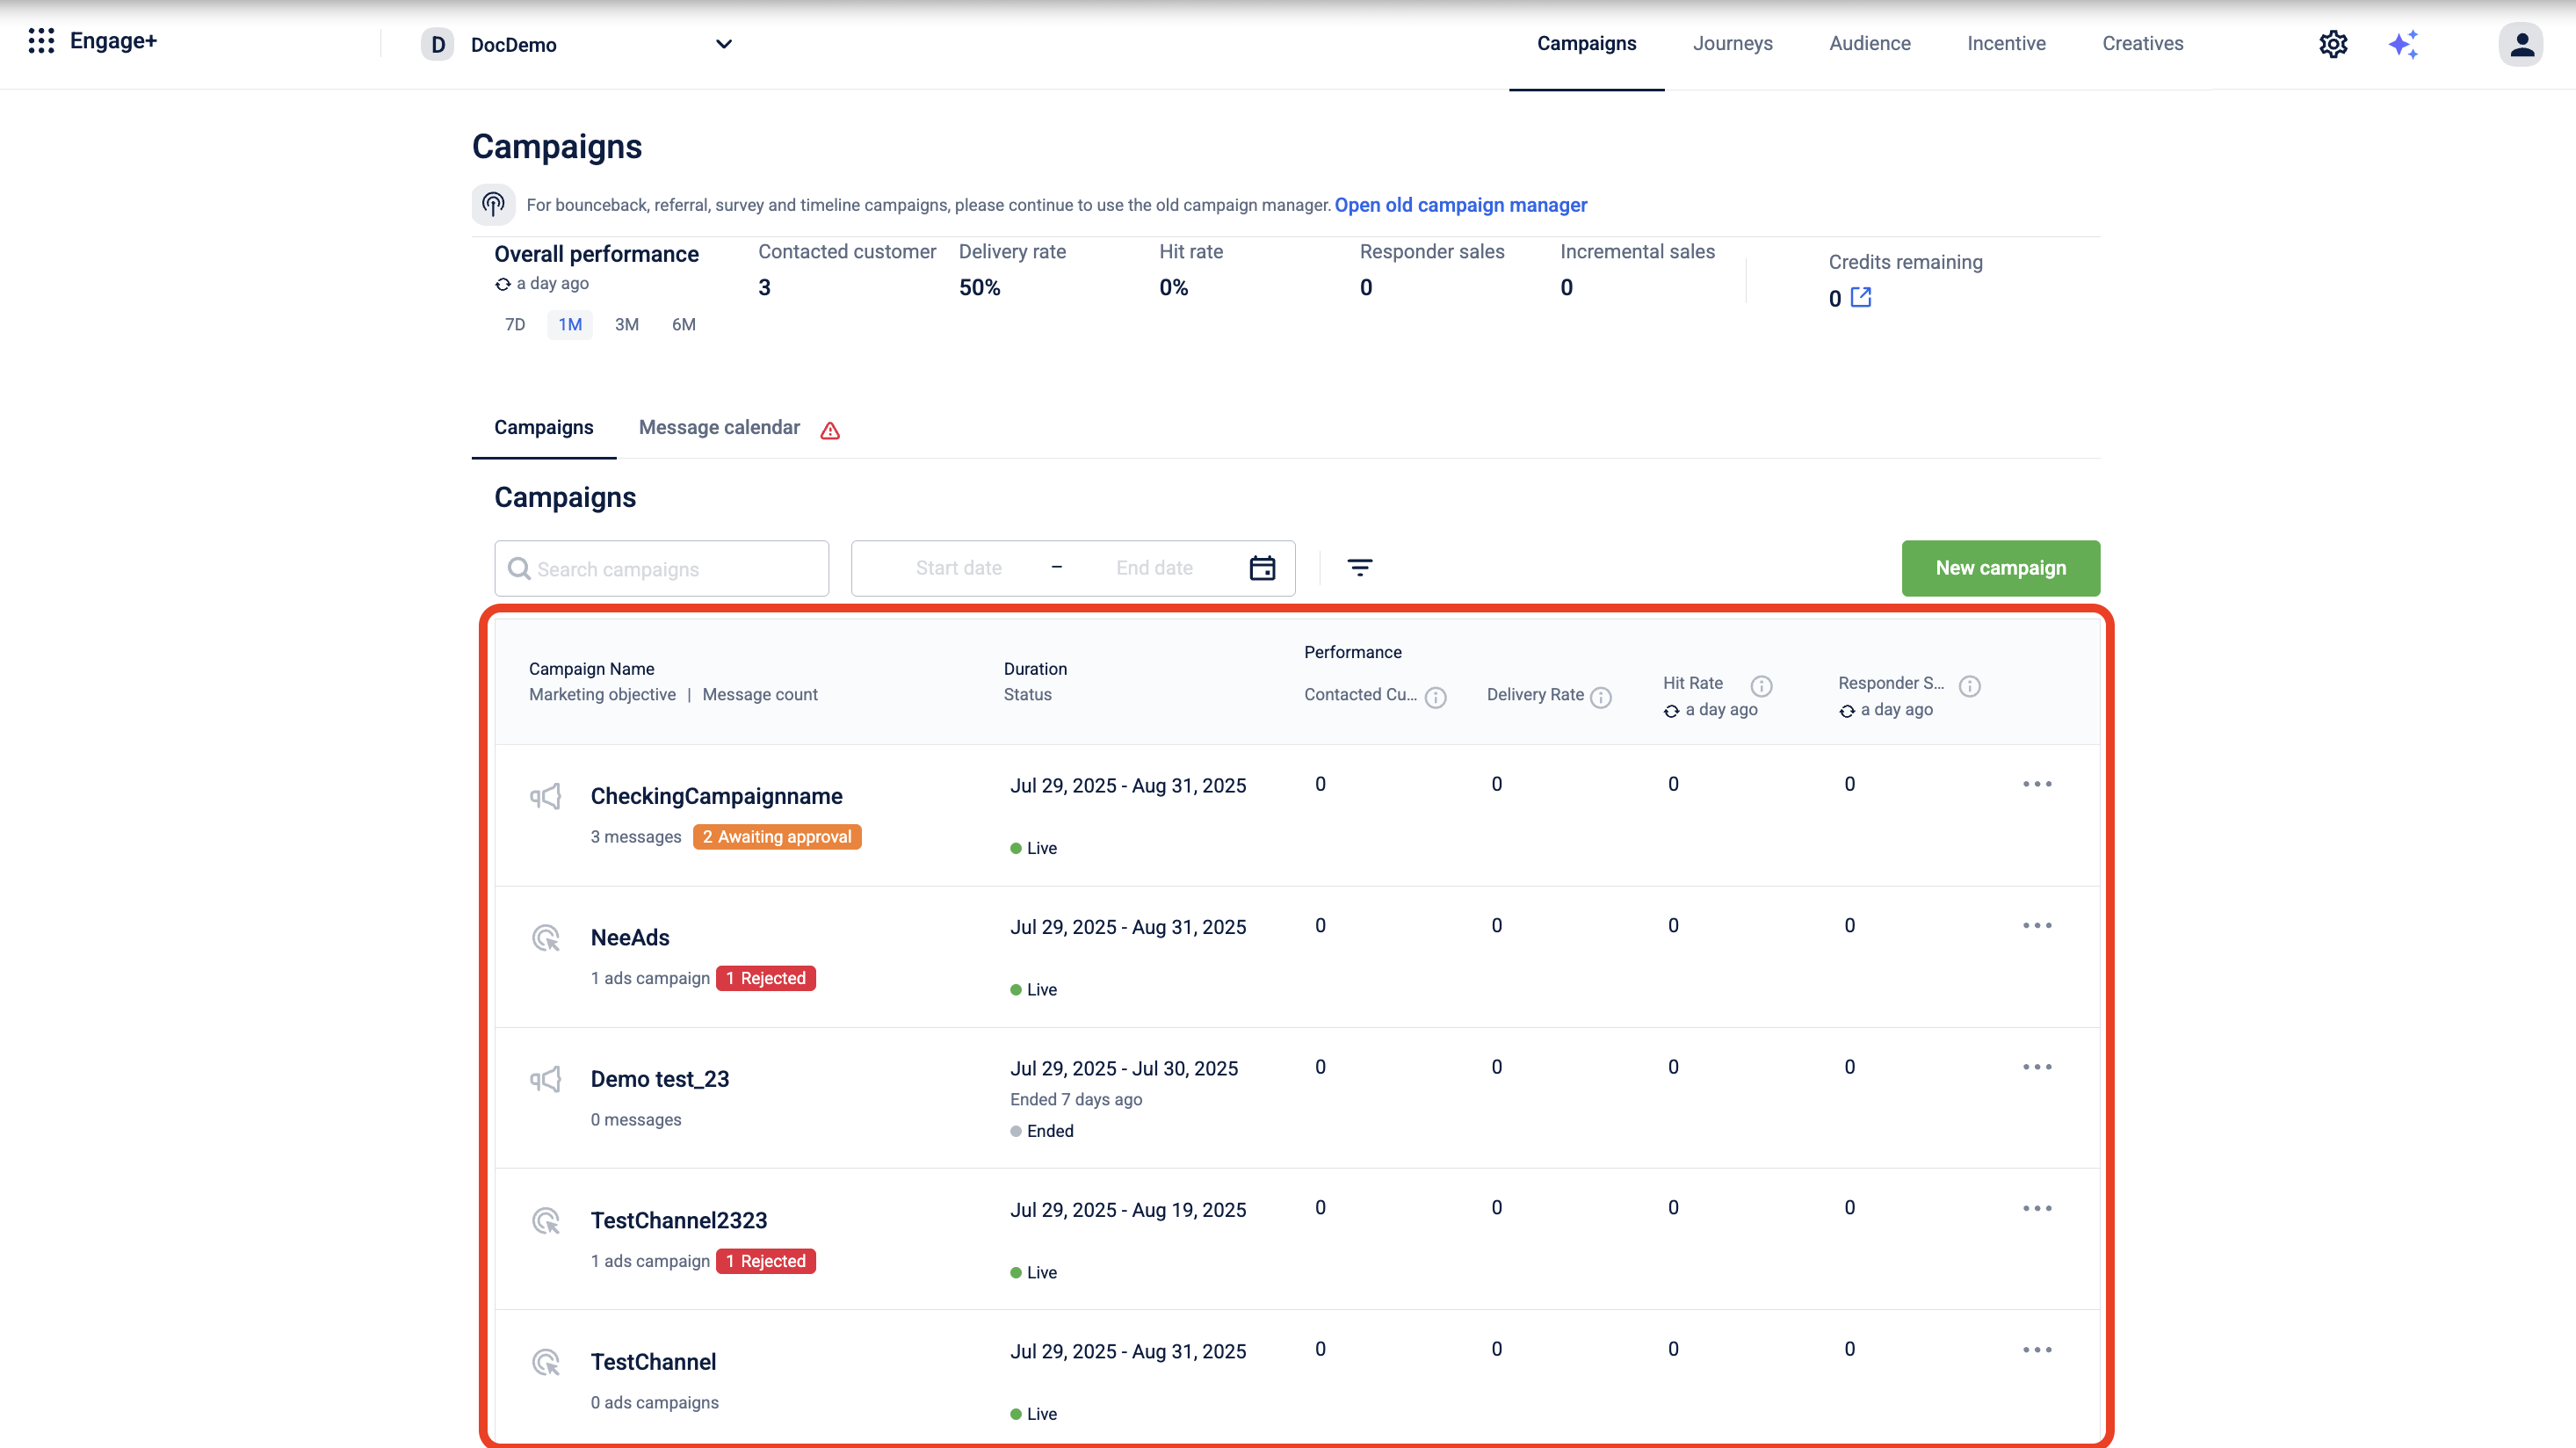
- Navigate to the Campaigns listing page and select the desired campaign.
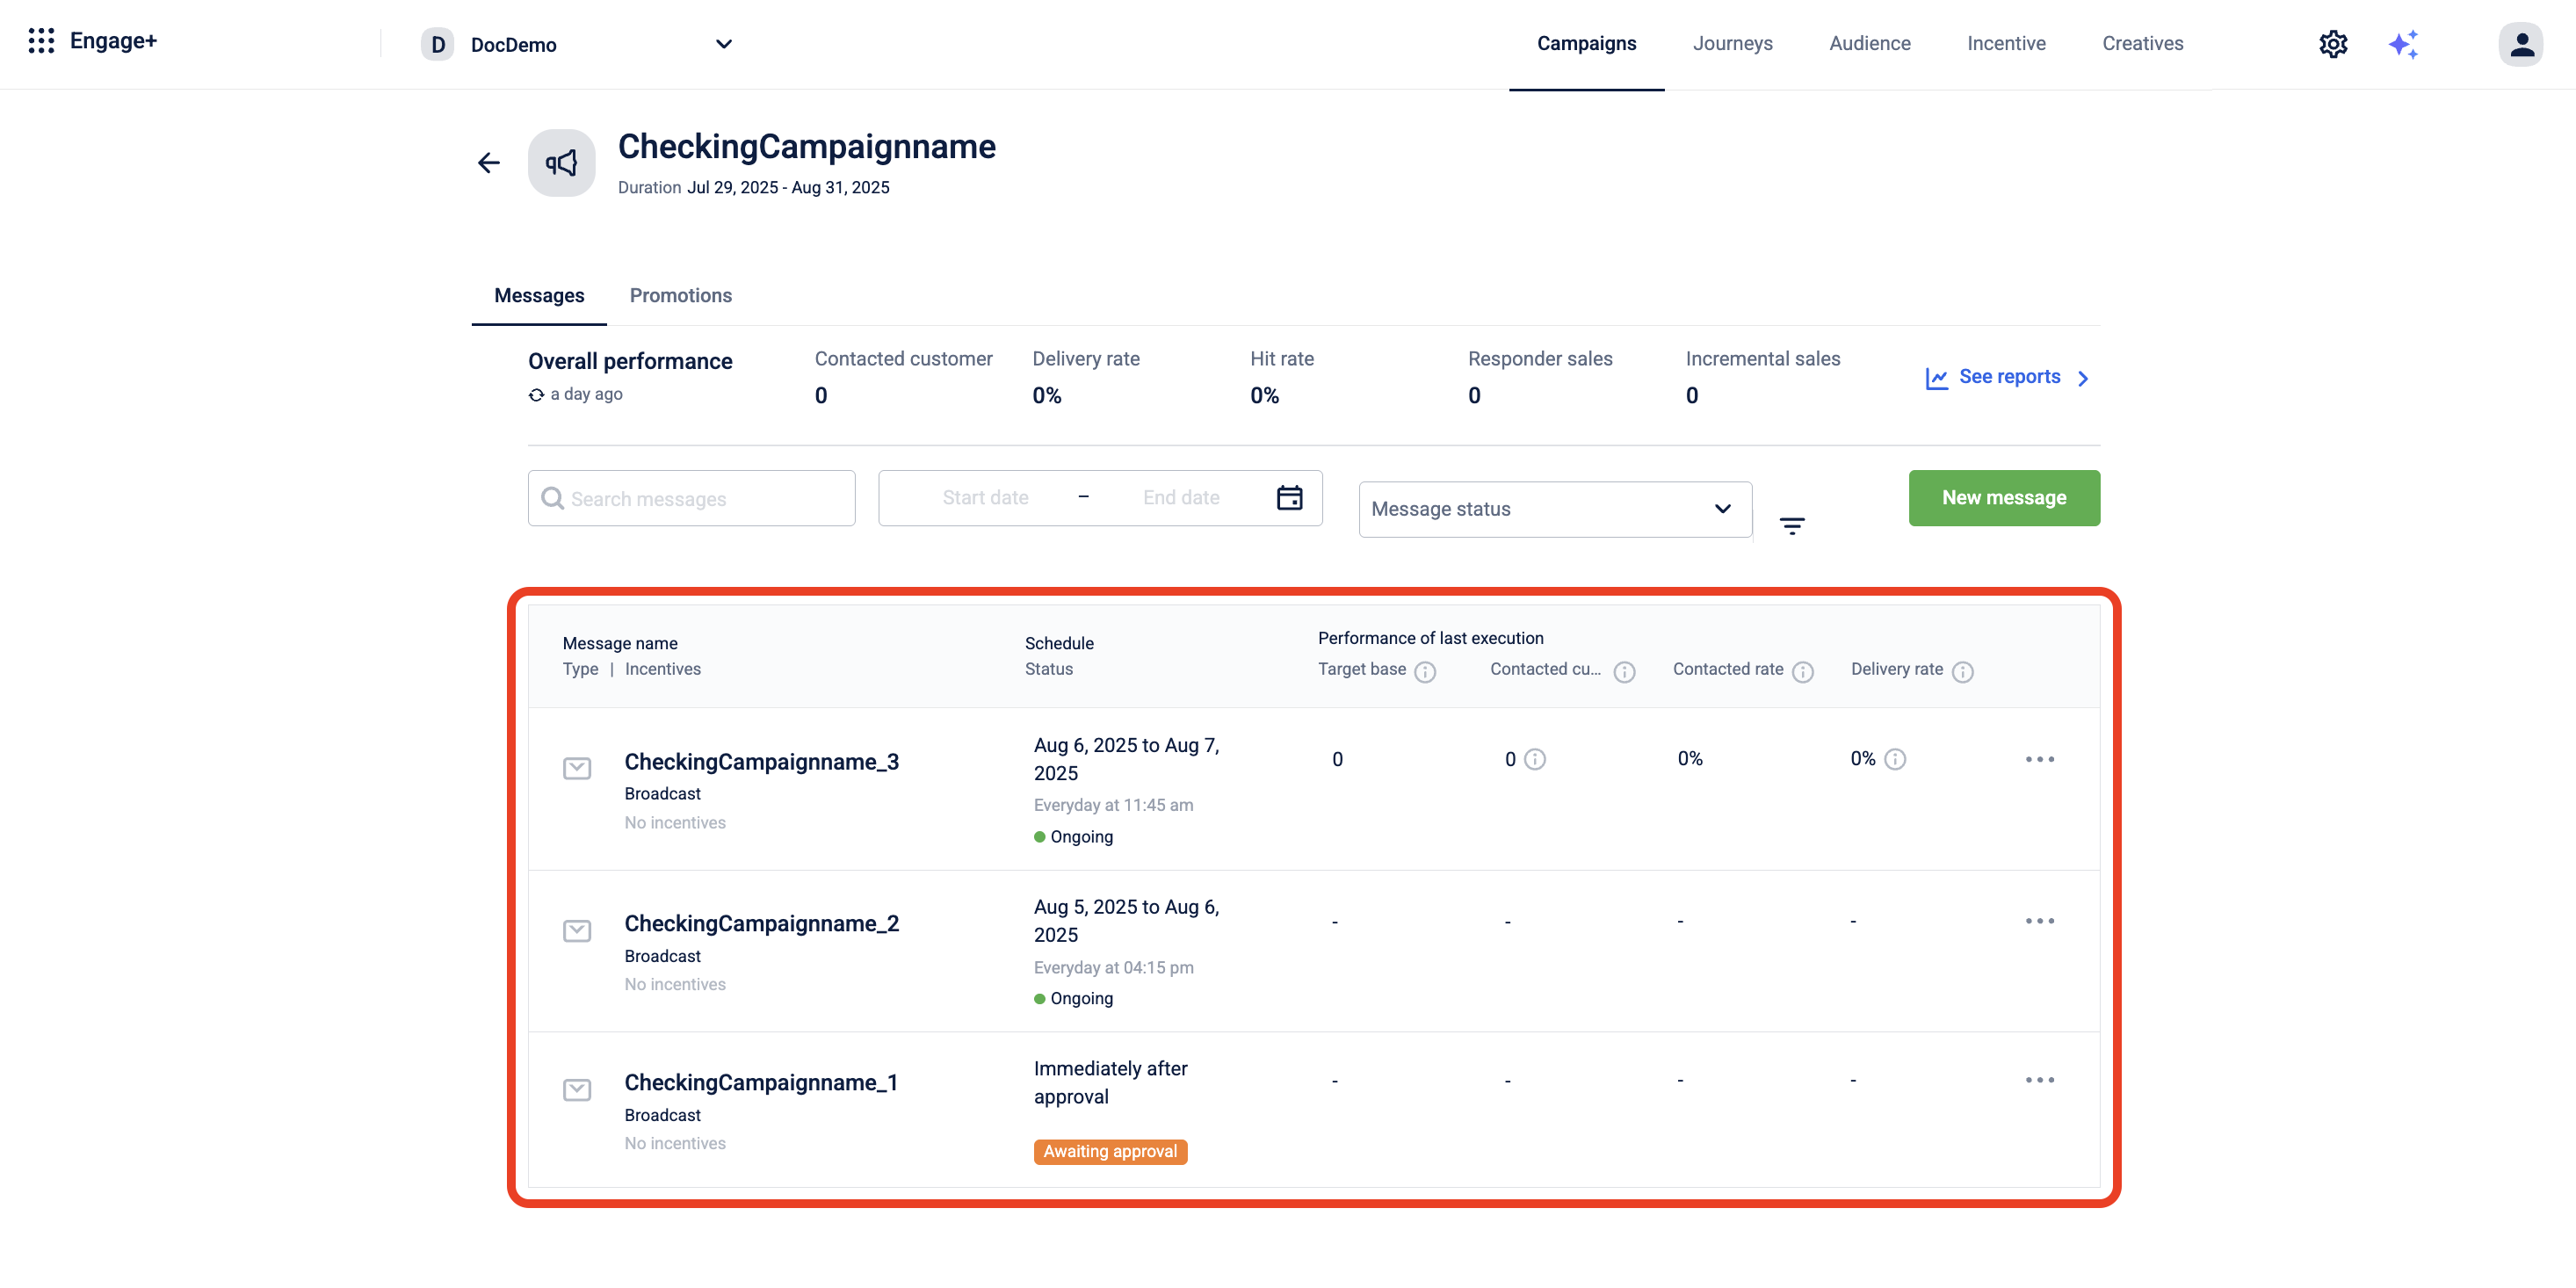
- On the Messages listing page, select the campaign recurring message you want to edit.
- On the Summary page, click Edit.
- You can update the message content.
- You can also change the delivery time frame, provided it is within the campaign's defined duration.
- After making the changes, click Send for Approval.

Once approved, the updated message will be sent to users as scheduled.
NoteTo ensure your recurring campaign starts on time, you must complete its setup and approval at least two hours before the first scheduled trigger. This time is required for system pre-configuration. Campaigns that miss this timeline will be automatically rescheduled for a future date.
Deactivating or activating a recurring campaign
To deactivate or activate a recurring campaign follow these steps.
Deactivating a recurring campaign
To deactivate a recurring campaign follow the given steps below:
- Navigate to the Campaigns listing page and select the desired campaign.
- On the Messages listing page, select the campaign recurring message you want to deactivate.
- On the Summary page, click stop .
The message will be deactivated and will no longer be sent to users.
Activating a recurring campaign
- Navigate to the Campaigns listing page and select the desired campaign.
- On the Messages listing page, select the campaign recurring message which is deactivated.
- On the Summary page, click edit.
- You can update the message content.
- You can also change the delivery time frame, provided it is within the campaign's defined duration.
- After making the changes, click Send for Approval.
The campaign message is activated. Once approved, it will be sent to users as per the updated schedule.
Updated 5 months ago