
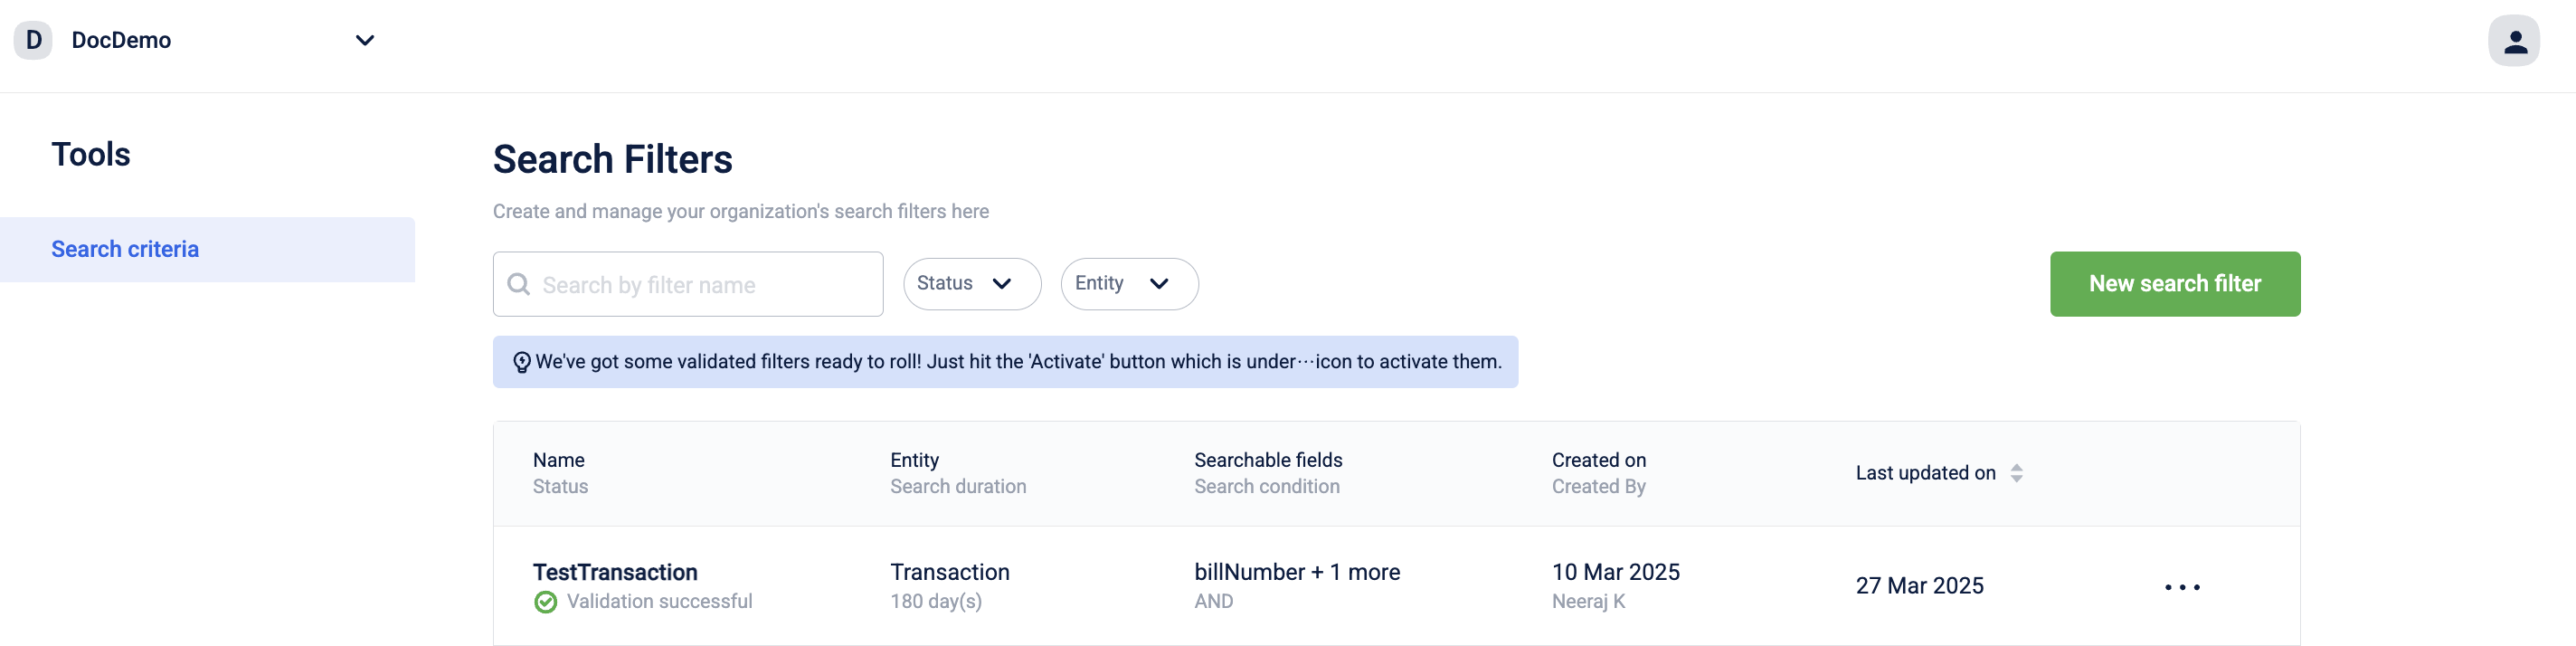
Create a Search Filter
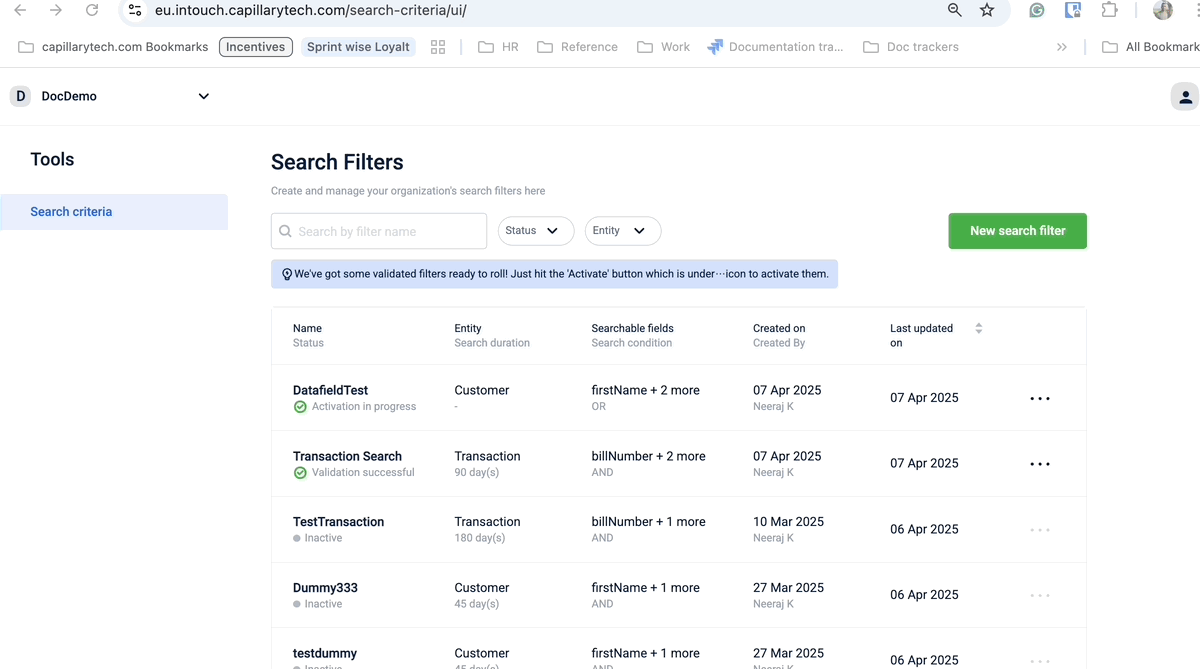
1. Navigate to the Search Filter Configuration Page
- Navigate to Organization Settings > Master Data Management > Search Filters.

- Or, open it directly via URL:
\{host\}/search-criteria/ui
Example for the Europe cluster:
https://eu.intouch.capillarytech.com/search-criteria/ui
2. Start Creating a New Filter
- Click New Search Filter.
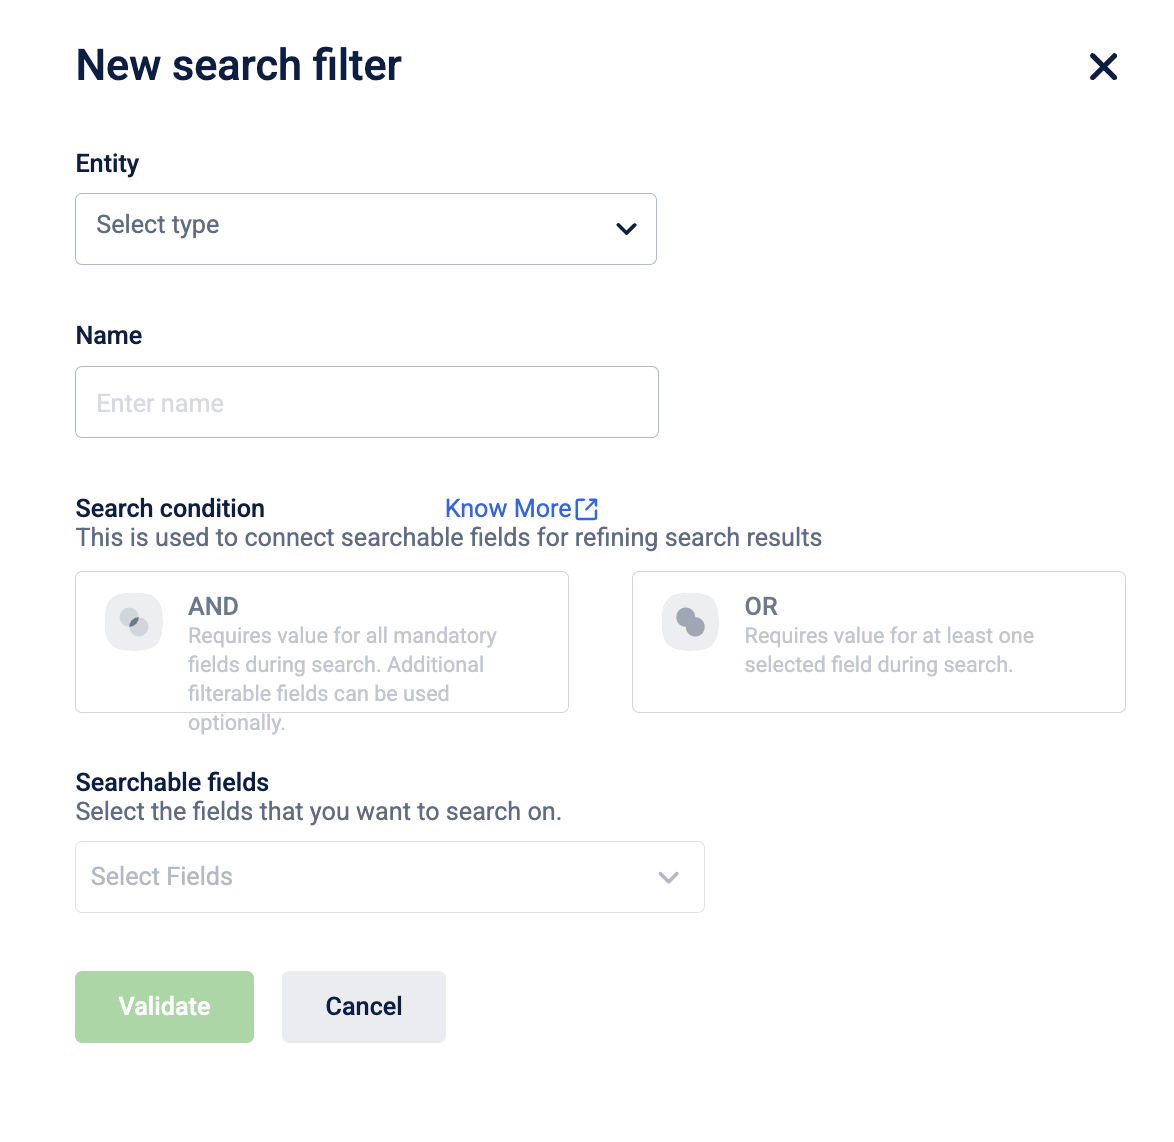
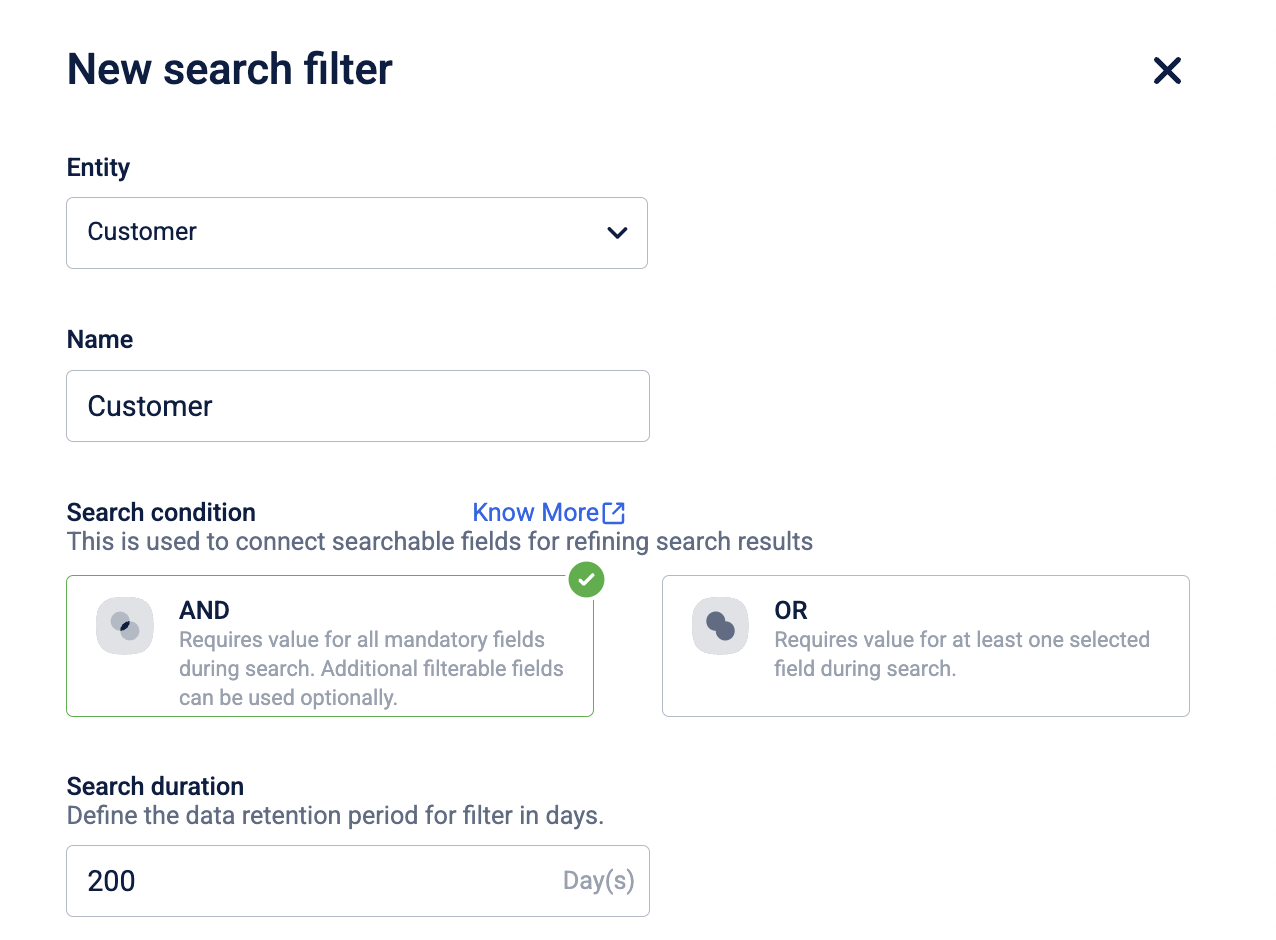
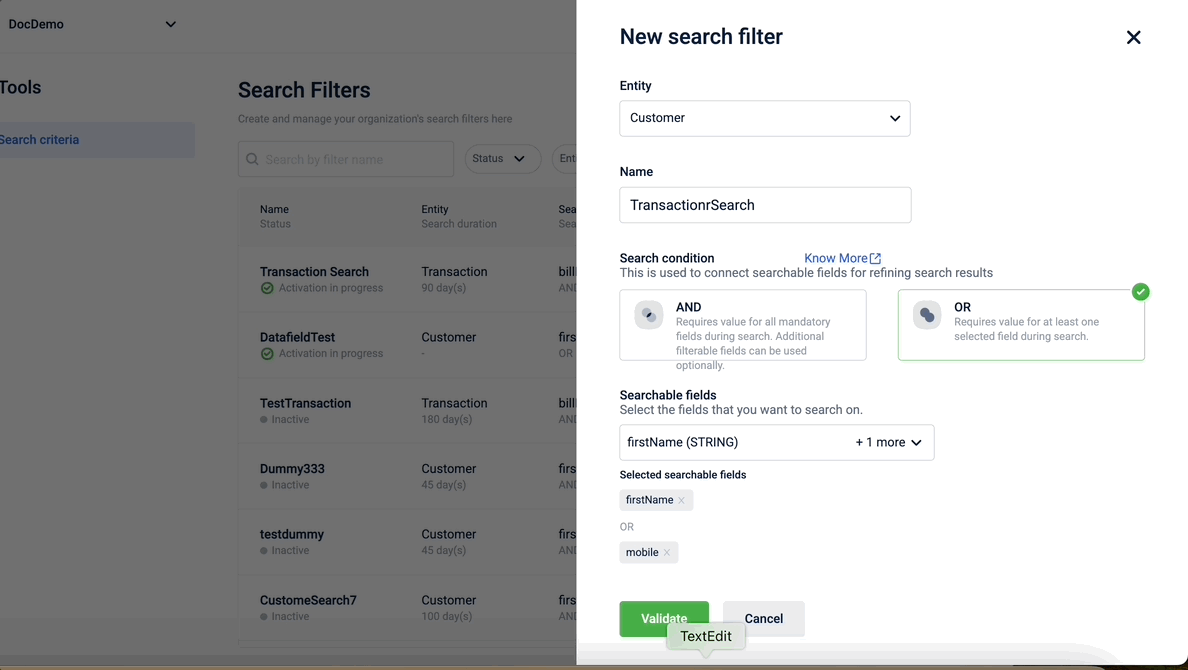
3. Configure Basic Filter Details
-
Entity: Select either Customer or Transaction.
-
Name: Enter a name for the filter.
-
Search Condition: Choose AND or OR.
Entity Search Condition Options Usage Transaction AND only Combine fields (e.g., bill number AND bill date). You can mark fields as mandatory. Customer AND OR AND: Combination searches like first name AND last name.
OR: Partial searches like the first few letters of a name or phone number.
4. Set Search Duration
-
Applicable only for AND condition.
-
Maximum: 365 days
-
For Customer filters using OR, the duration is fixed at 10 years.
-
This defines the rolling window for searchable data.
Duration is based on when the event was ingested:
– Customer: Registration date
– Transaction: Billing date
5. Choose Searchable Fields
Field options vary based on the entity and condition:
| Transaction (AND) | Customer (AND) | Customer (OR) | |
|---|---|---|---|
| Standard Fields | outlierStatus, billDate, billNumber, transactionType (only one date/datetime allowed) | firstName<code>, </code>lastName | firstName, lastName, mobile, externalId, fullName, email |
| Additional Fields | storecode | – | – |
| Custom Fields | Supported | Supported | Not supported |
| Extended Fields | Supported | Supported | Not supported |
6. Mark Mandatory Fields (Only for AND)
- AND filters:
– At least one field must be indexed
– Max 6 mandatory and 5 non-mandatory fields - OR filters: No mandatory fields required
7. Validate the Filter
- Click the Validate button.
-
On the Confirm Filter Creation dialog, click Yes, Sure.
-
Validation takes 15–20 minutes.
-
Filters with high cardinality have a better chance of passing.
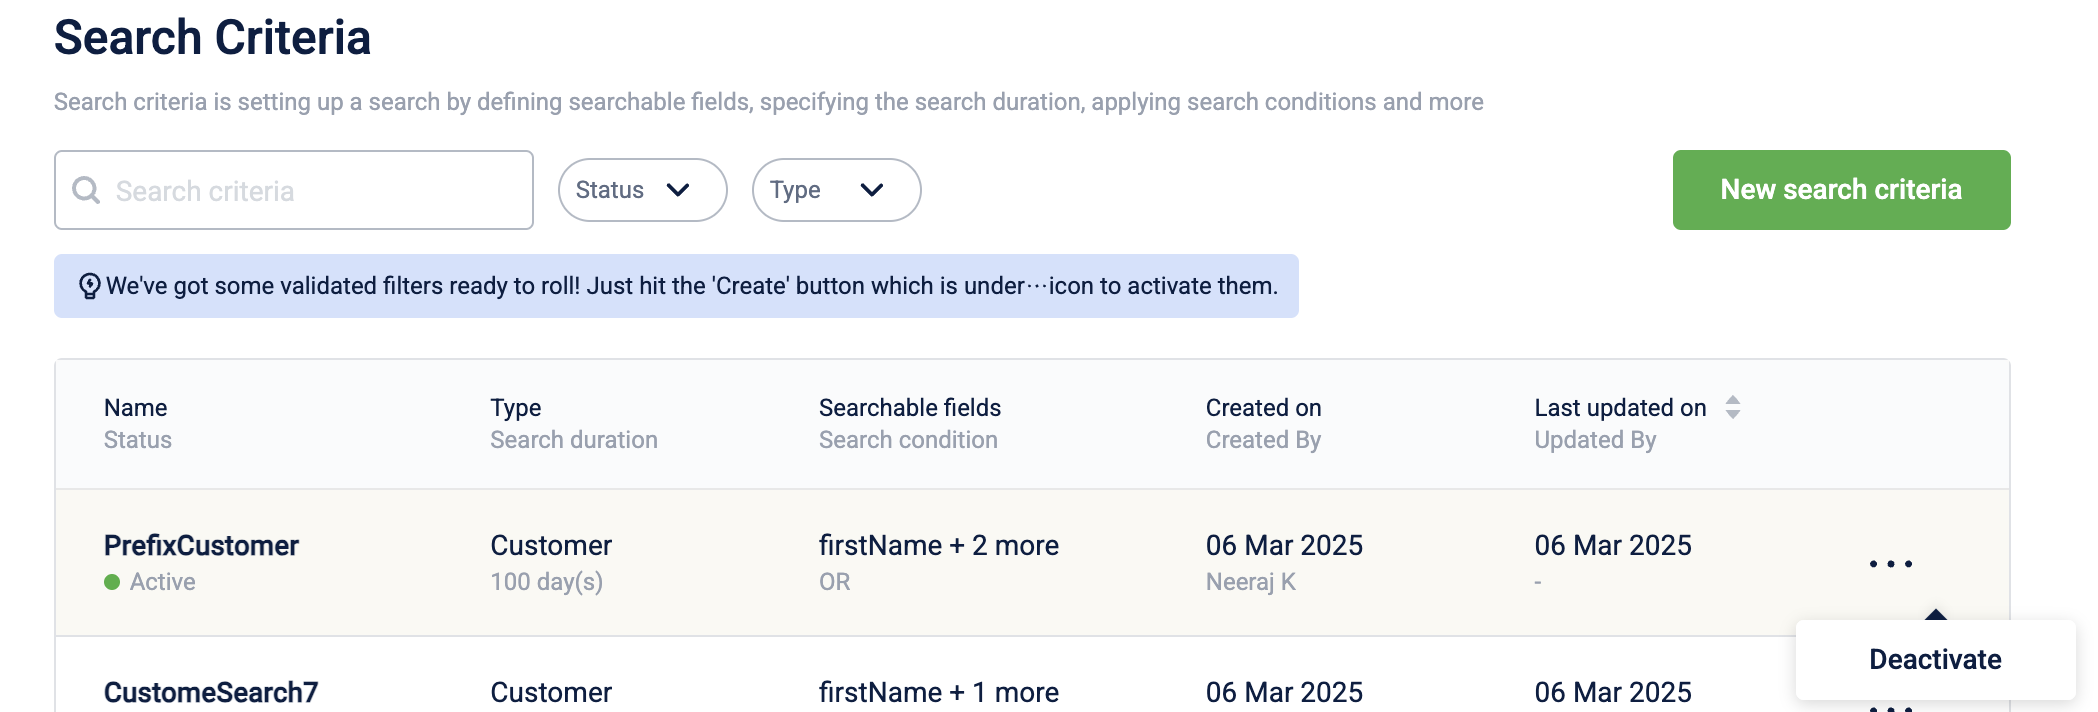
8. Activate the Filter
-
Once validation is successful:
-
Open the meatball menu for the filter.
-
Select Activate, then click Create.
-
- Status changes from Activation in progress to Active.
9. Deactivating a Filter
-
From the list page, select Deactivate from the filter's menu.
Note: Deactivated filters cannot be reactivated. You’ll need to create a new one if needed.
Updated 5 months ago