
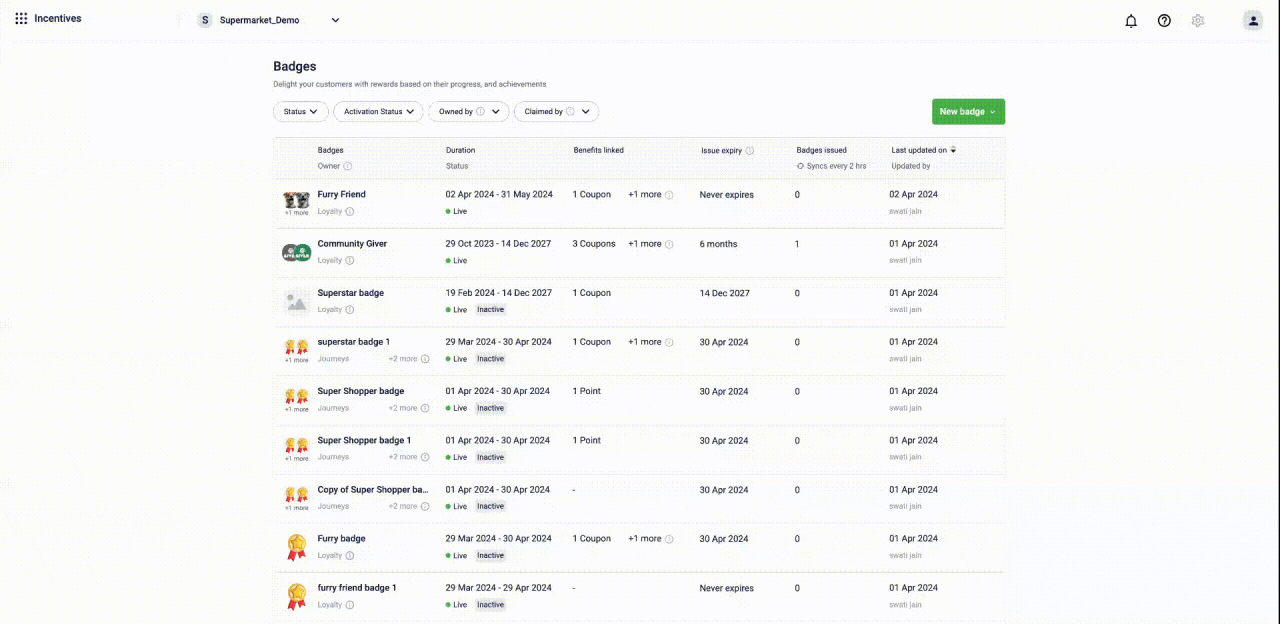
Enabling & Creating a Badge
Enabling badges
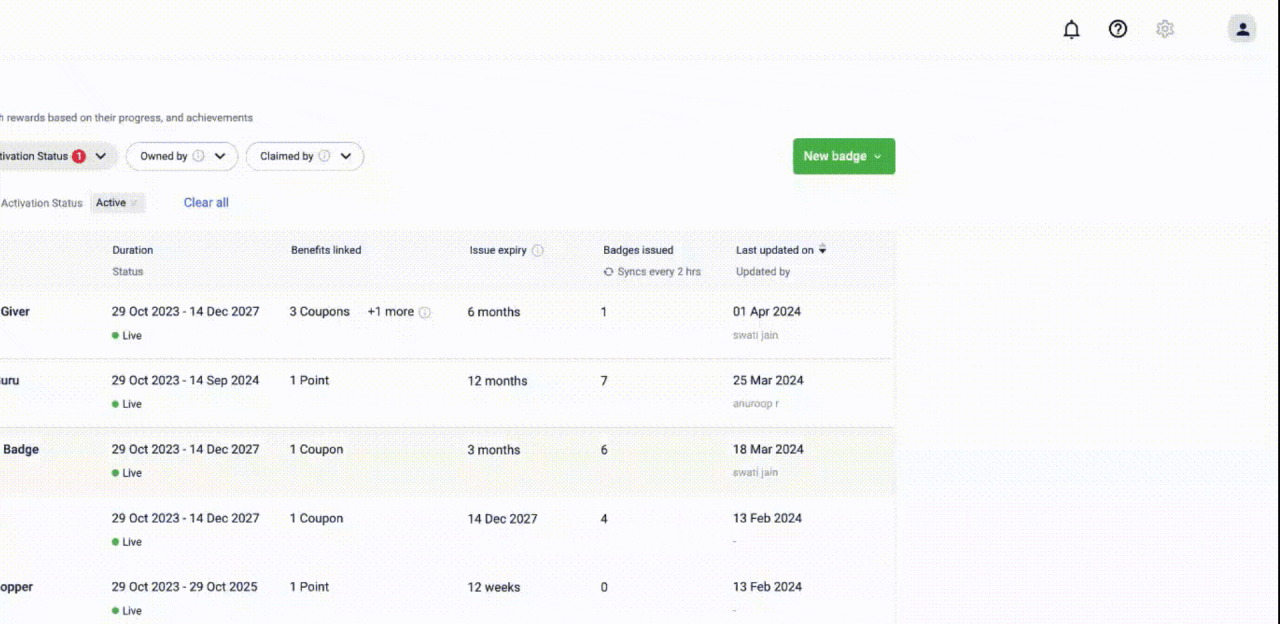
By default, the badges feature is not enabled for all the organisation. To enable the badges feature for your organisation, you need to create a JIRA ticket to the Capillary Product Support Team.
Accessing badges
To access the badges UI, add /badges/ui after the cluster URL. For example, https://eu.intouch.capillarytech.com/badges/ui.
Creating badges using UI
Creating direct issual badge
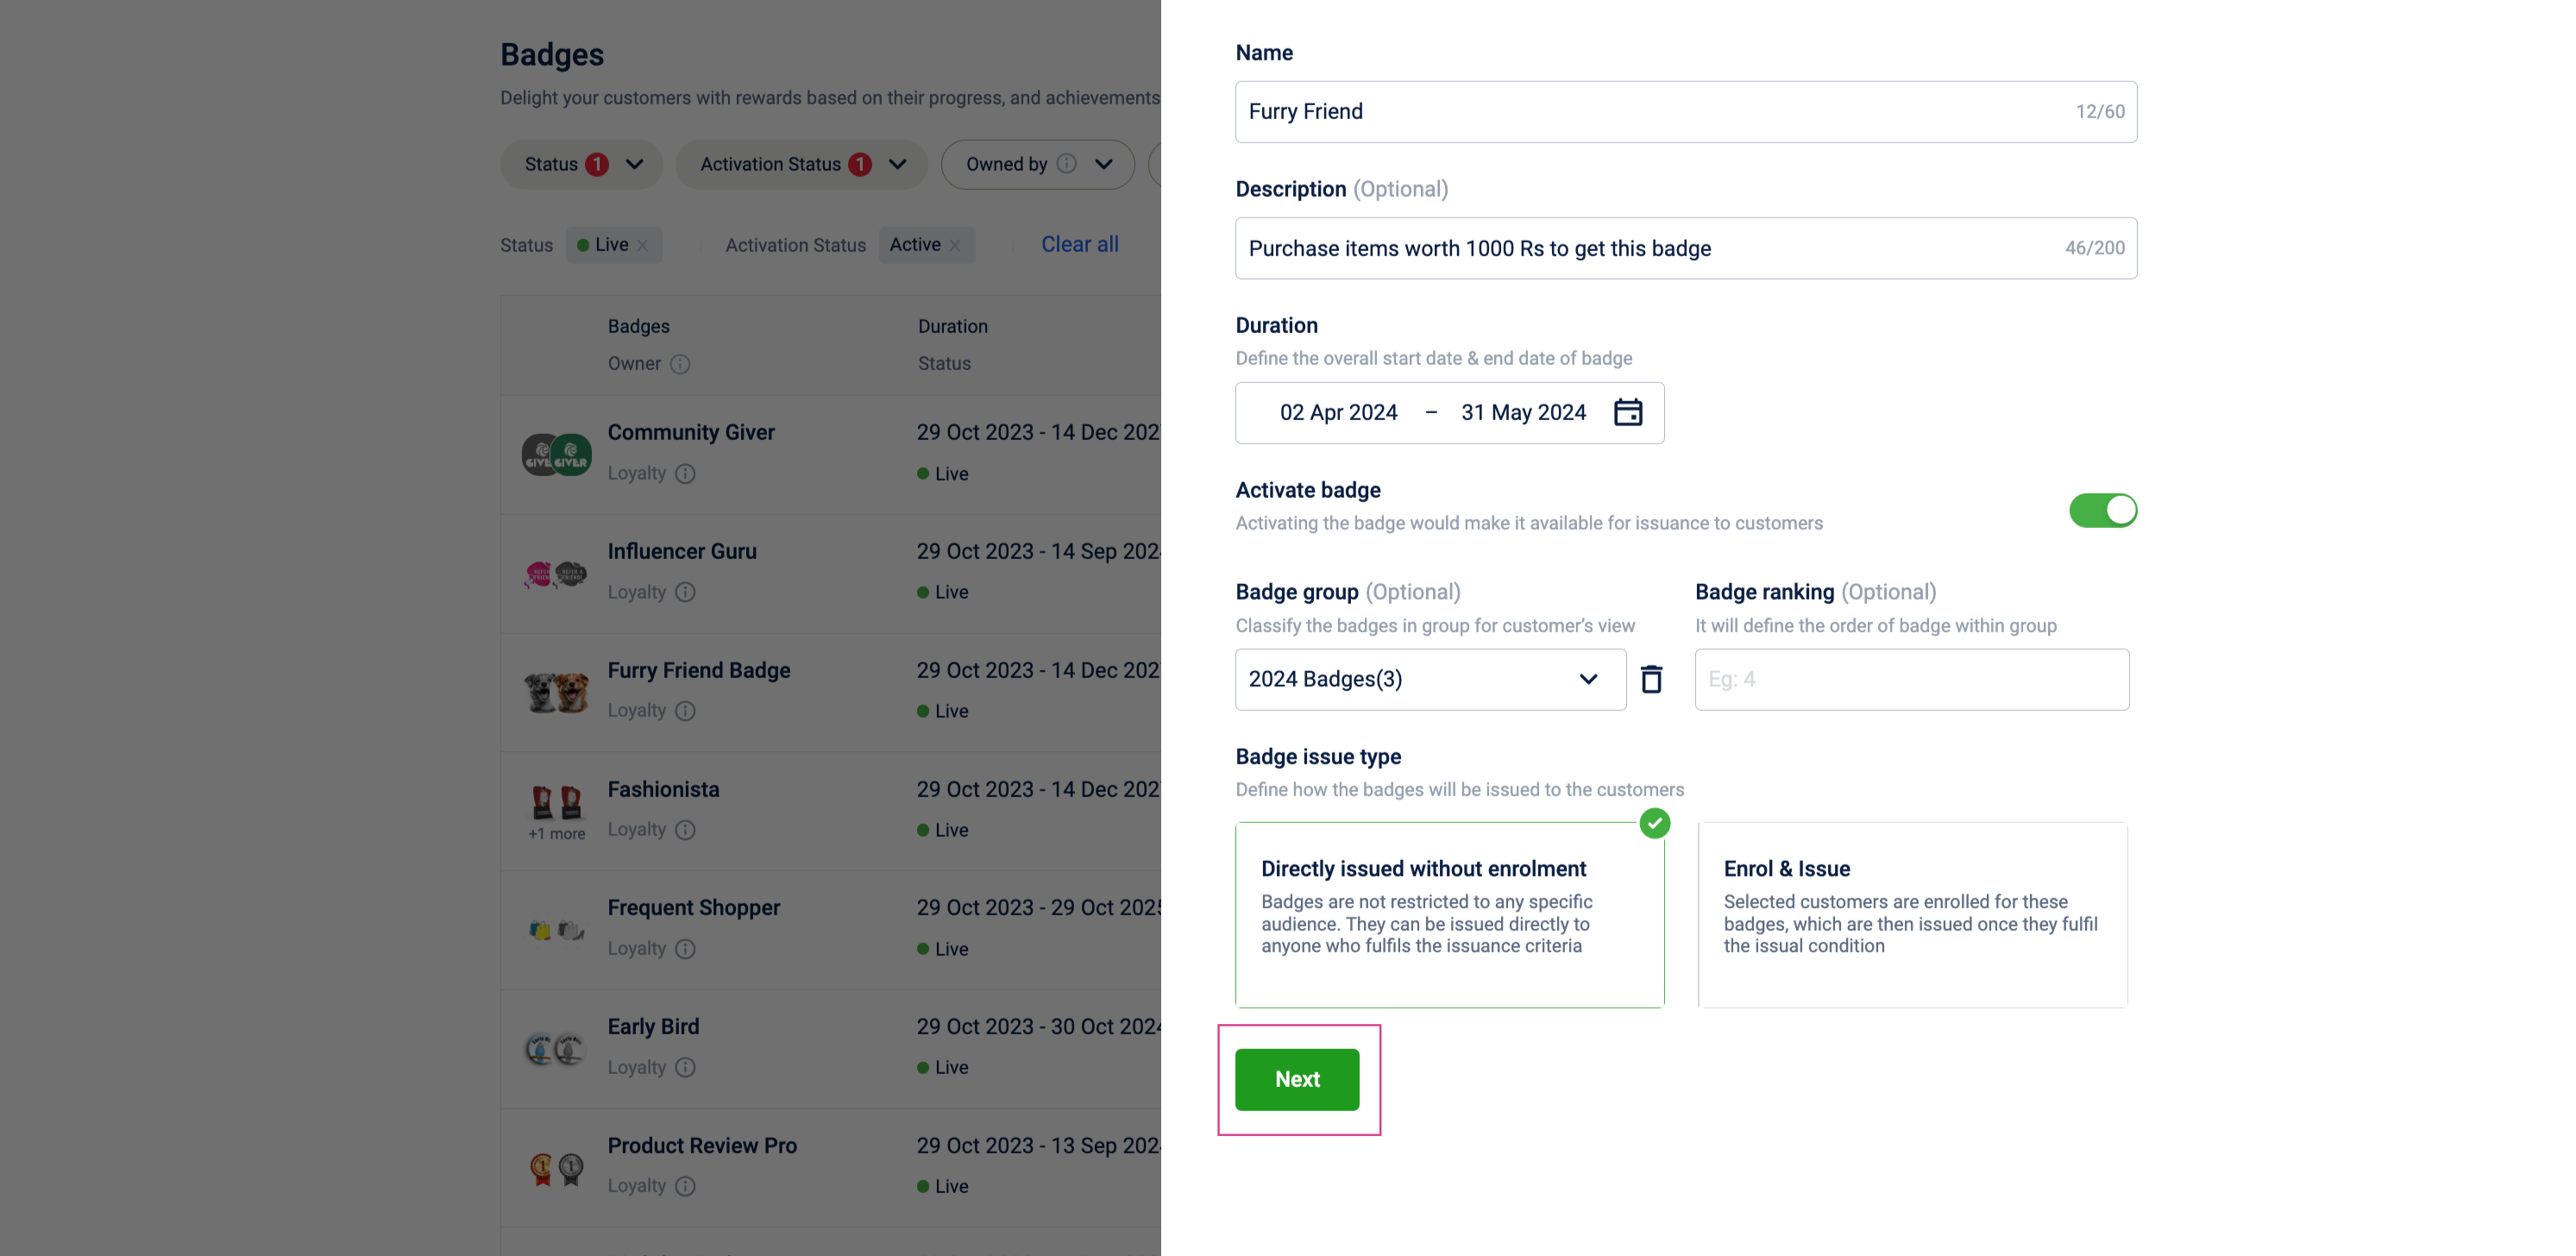
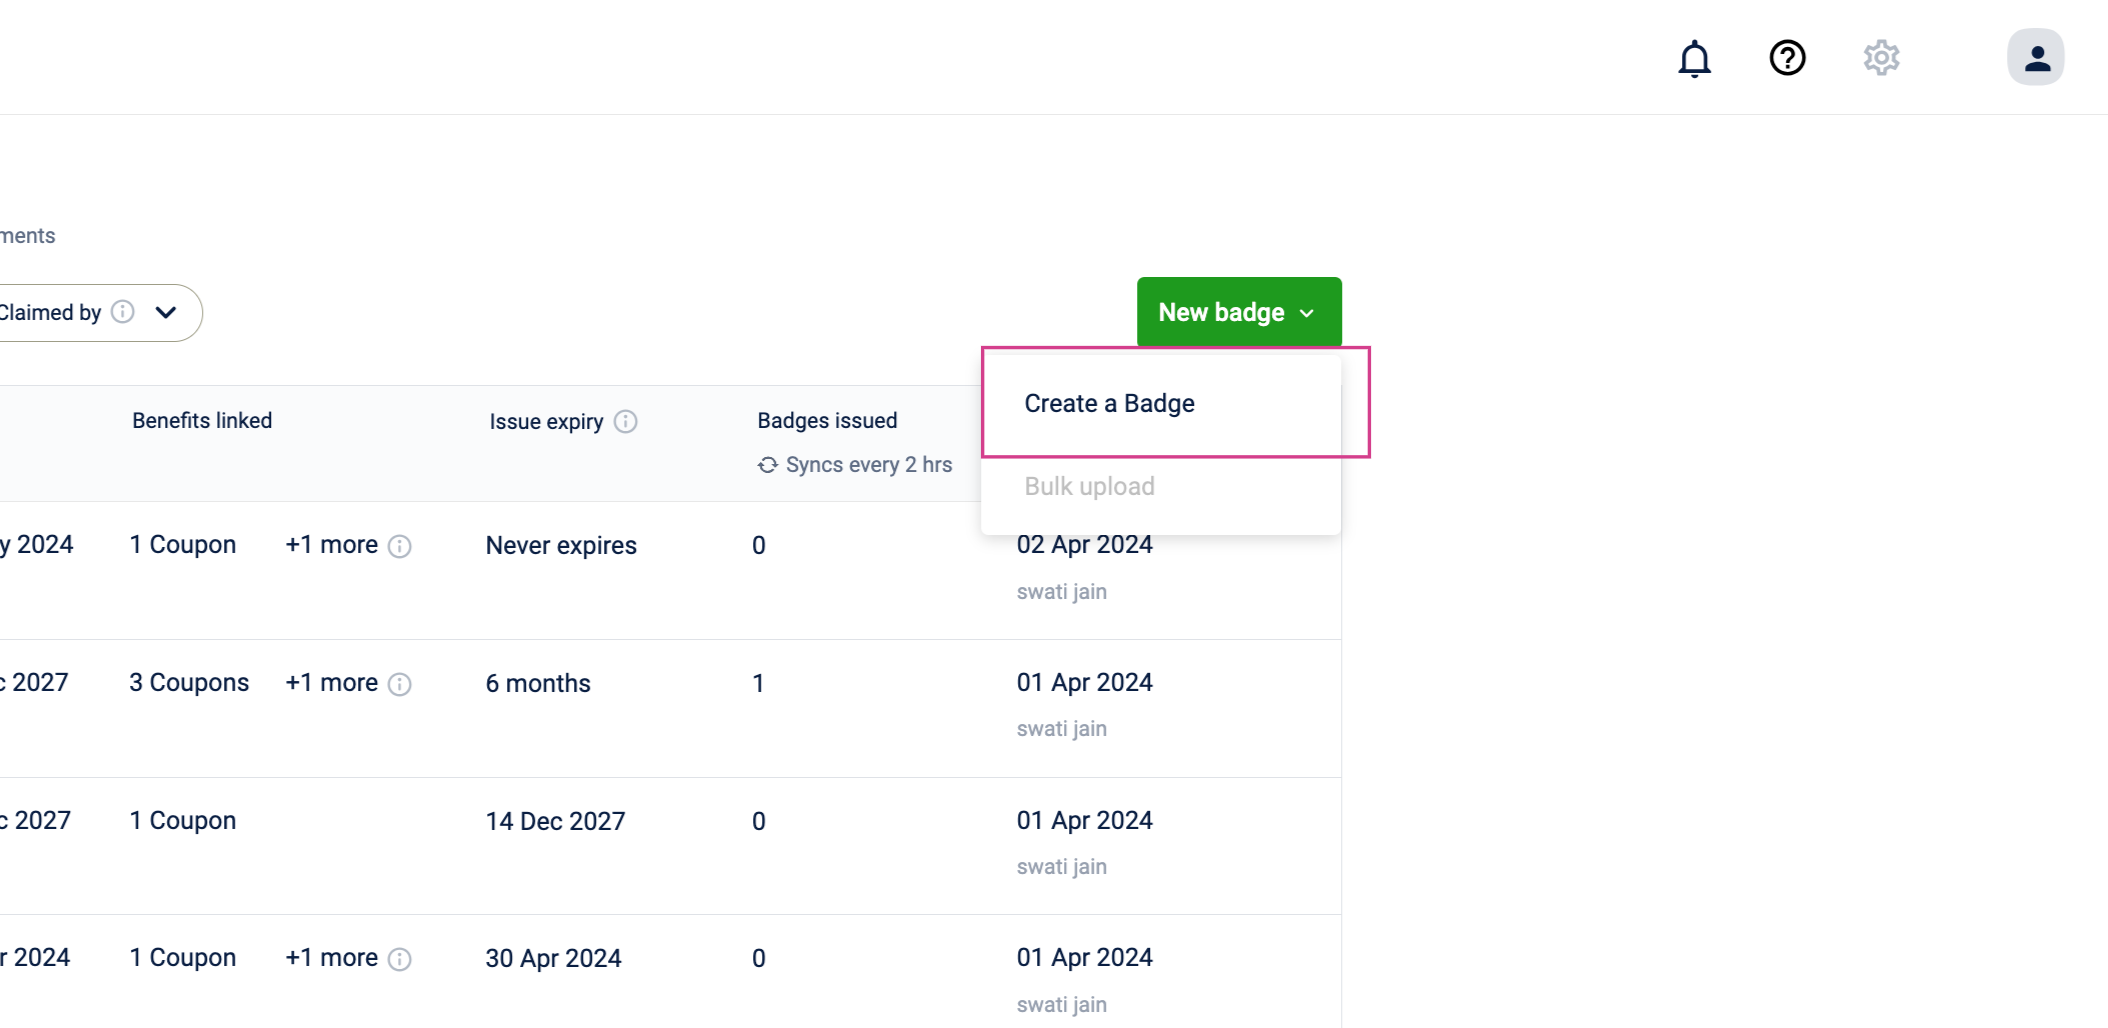
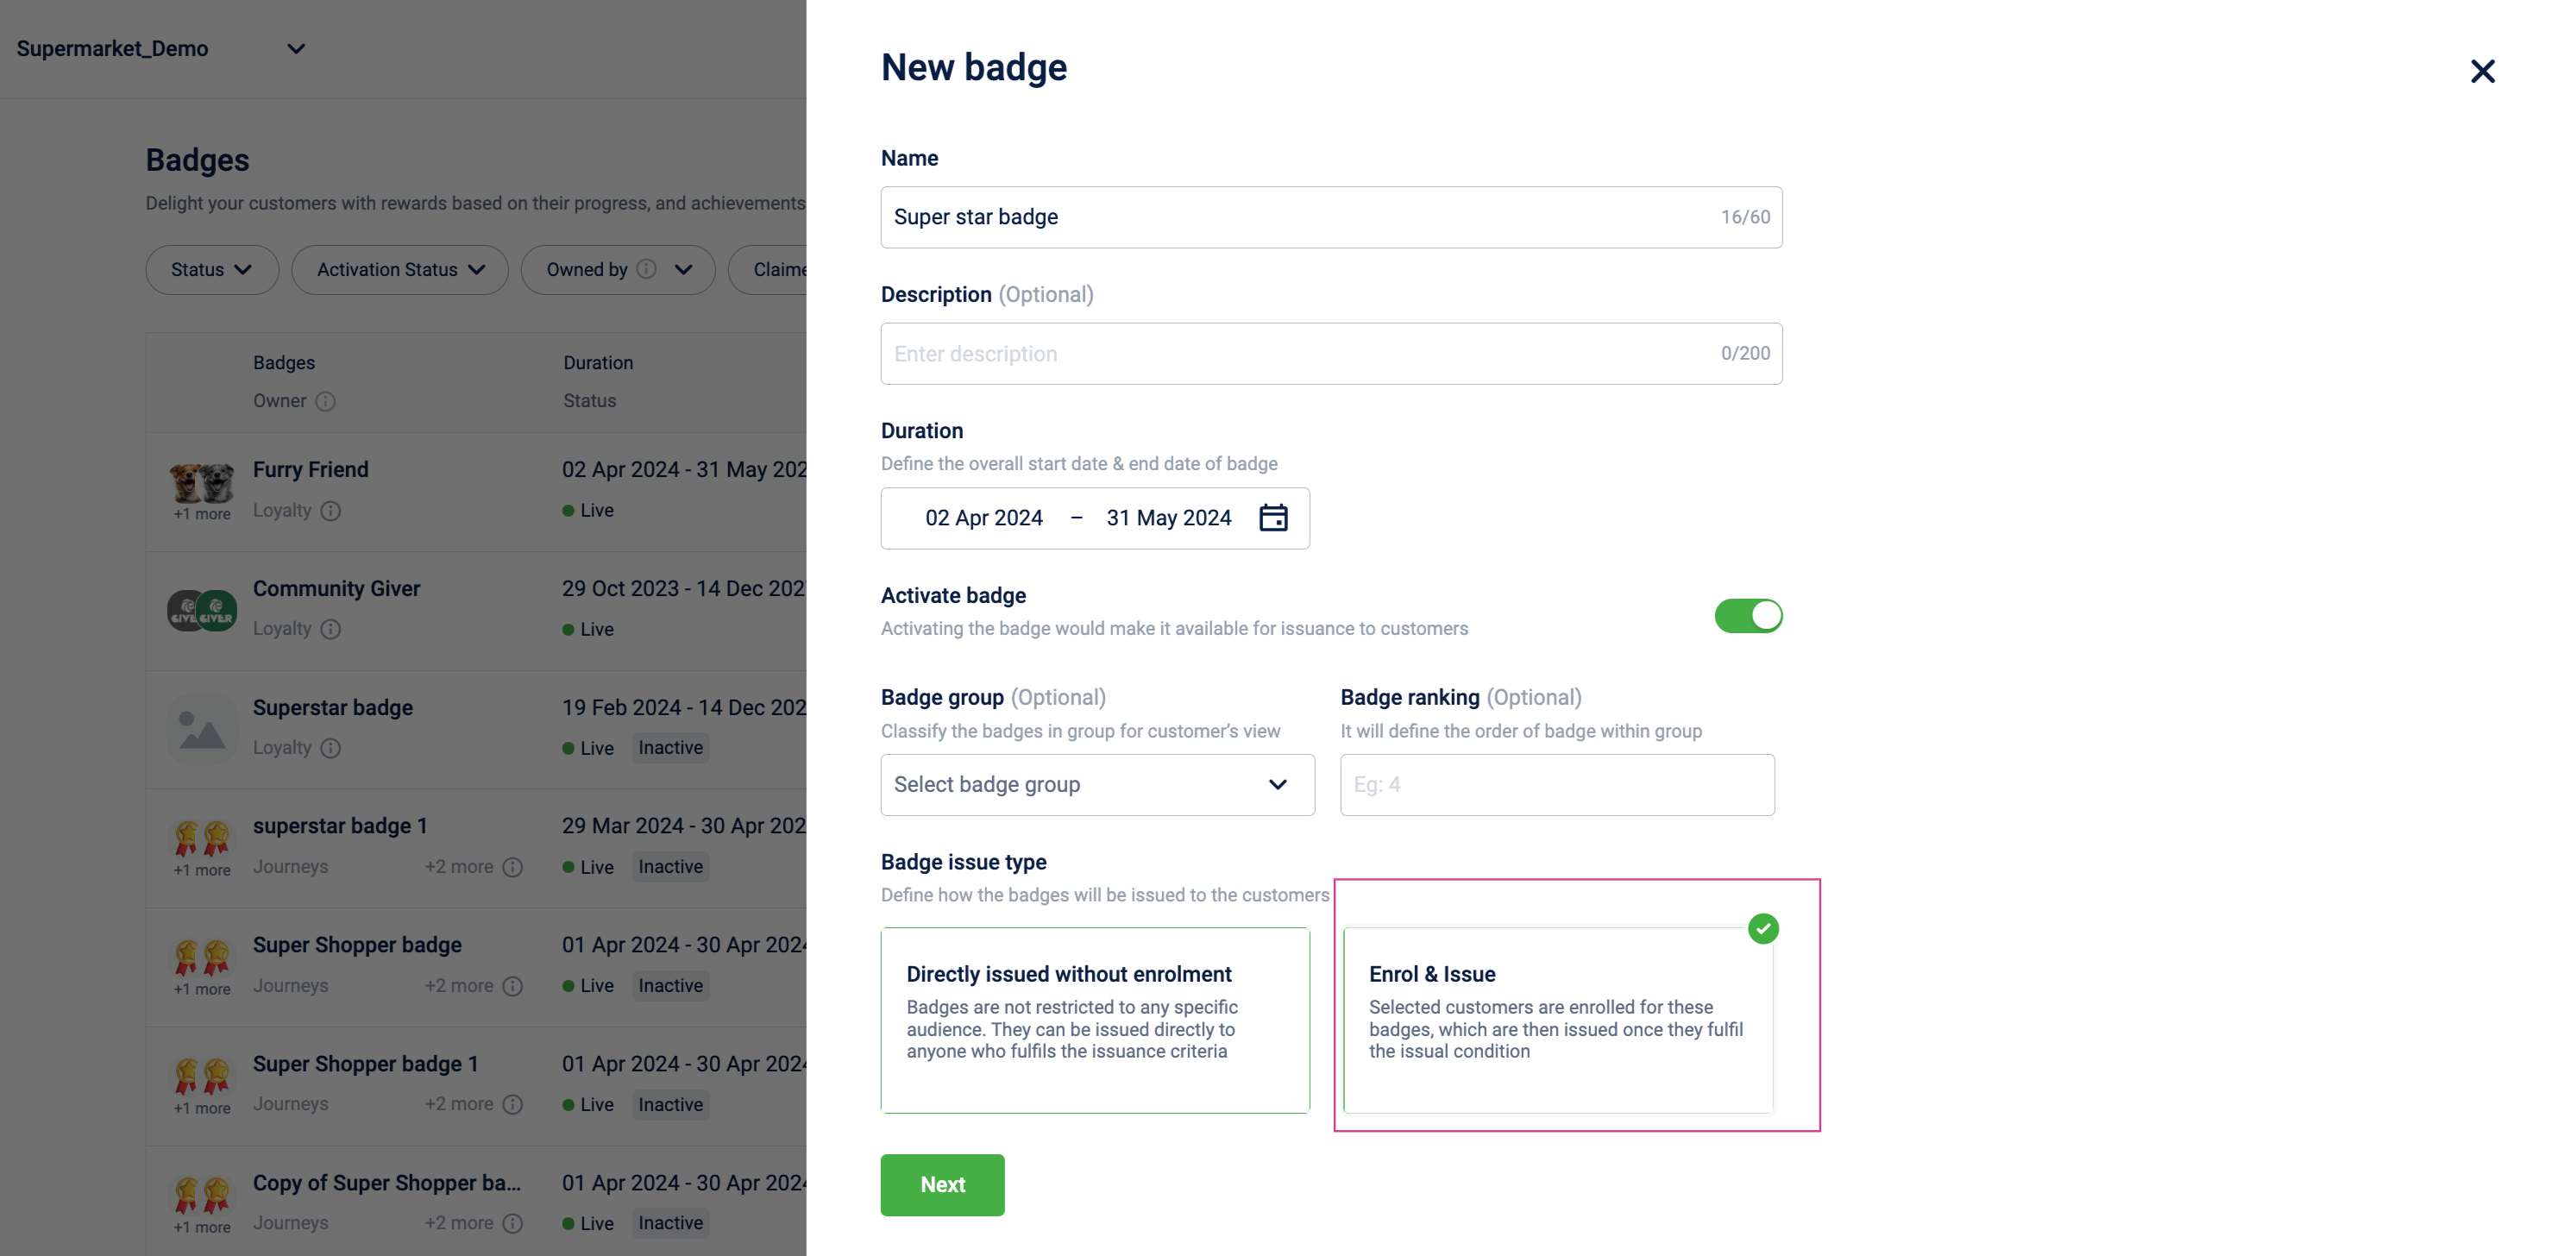
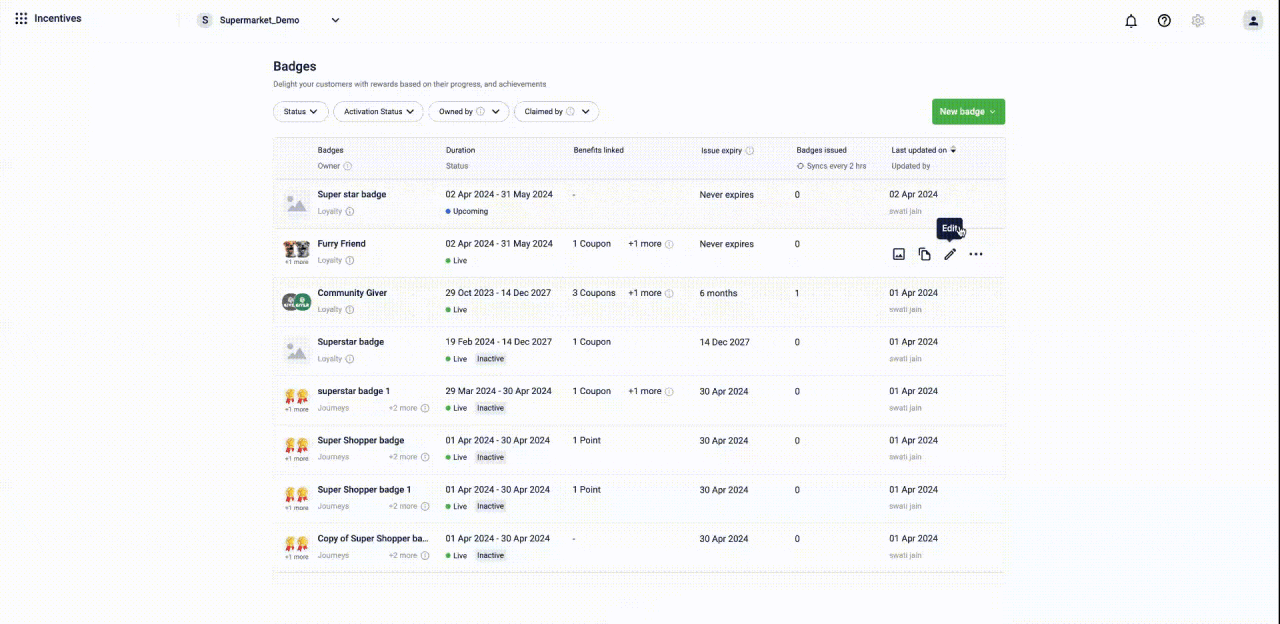
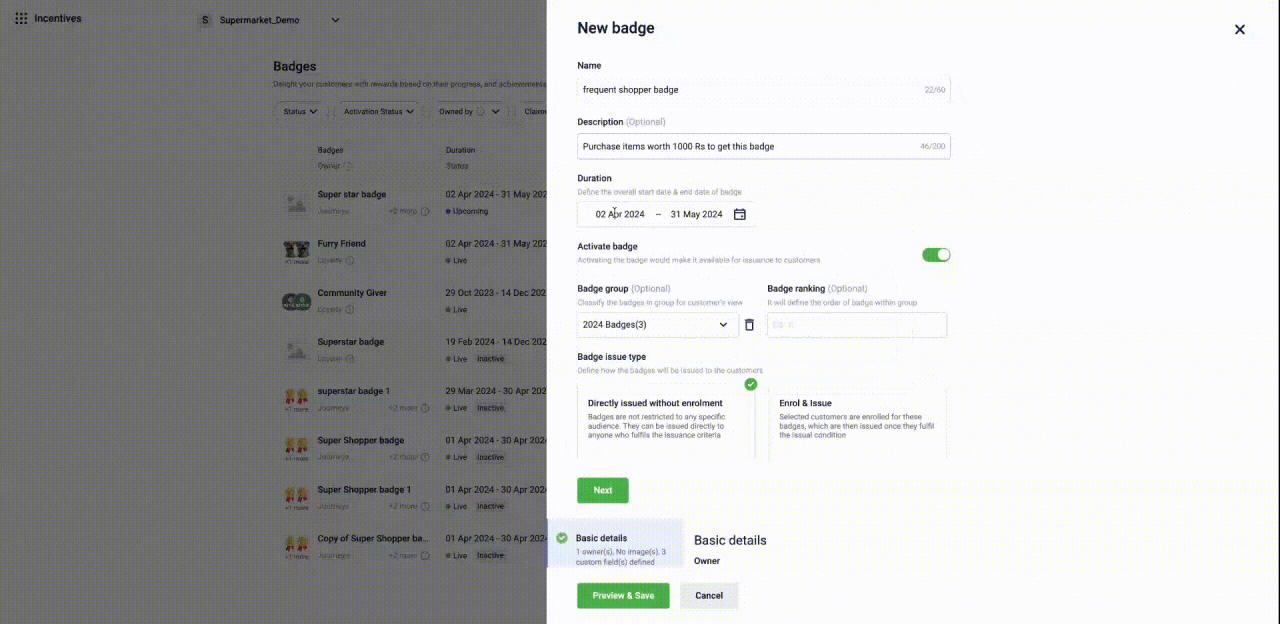
- Click on New Badge to start creating a badge.
- In the Name field, enter a unique badge name. An error message appears if the name is not available.
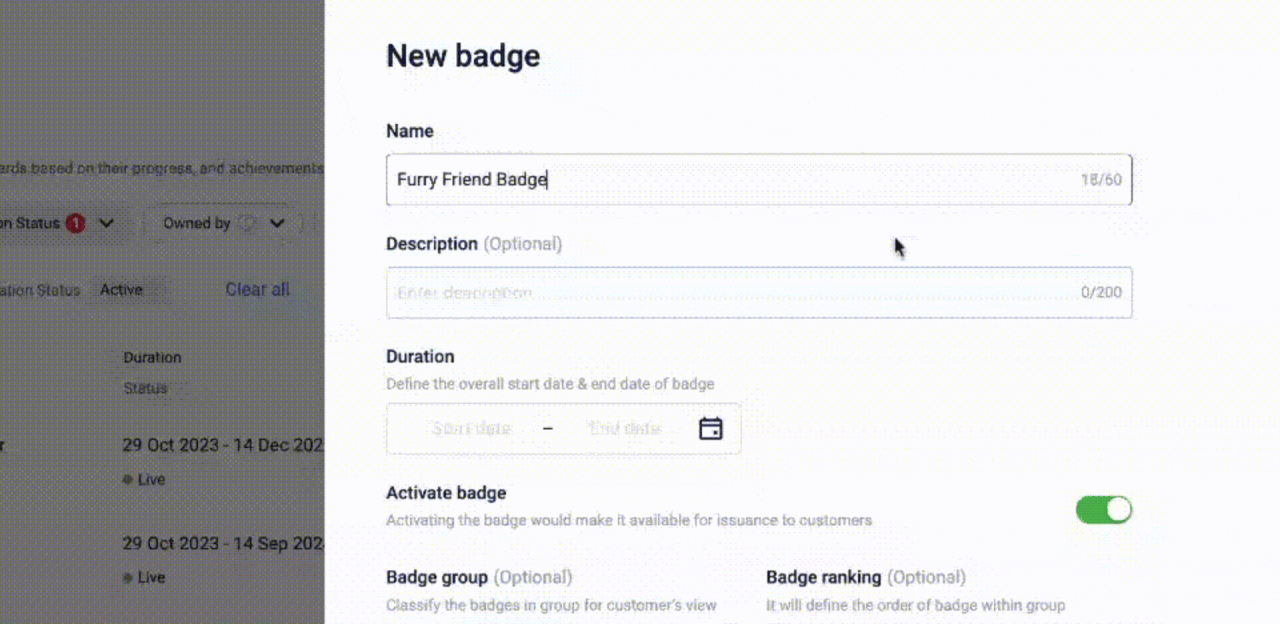
- In the Description field, enter the badge description. For instance, "Purchase items worth Rs 1000 to get this badge."
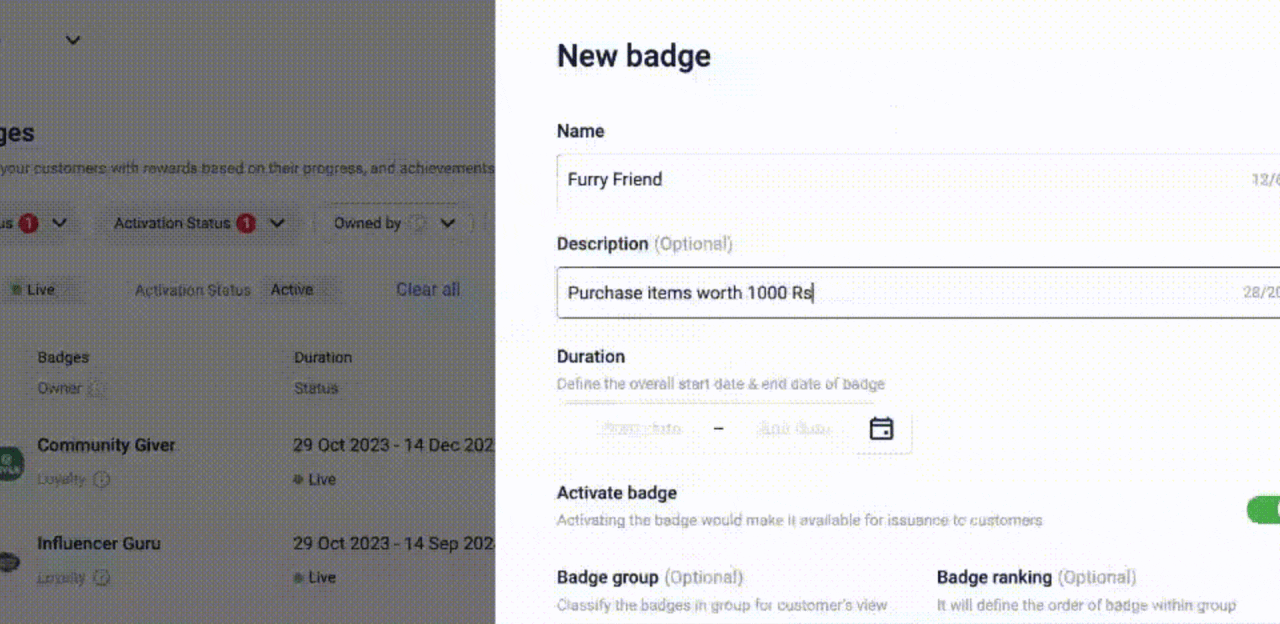
- Set the badge duration.
NOTE: In the UI, you can select badge dates in the past, up to January 1, 1925.
- If only the start date is in the past, a note will be displayed: "The badge’s start date is in the past."
- If both the start and end dates are in the past, a note will be displayed: "The badge’s start and end date are in the past."
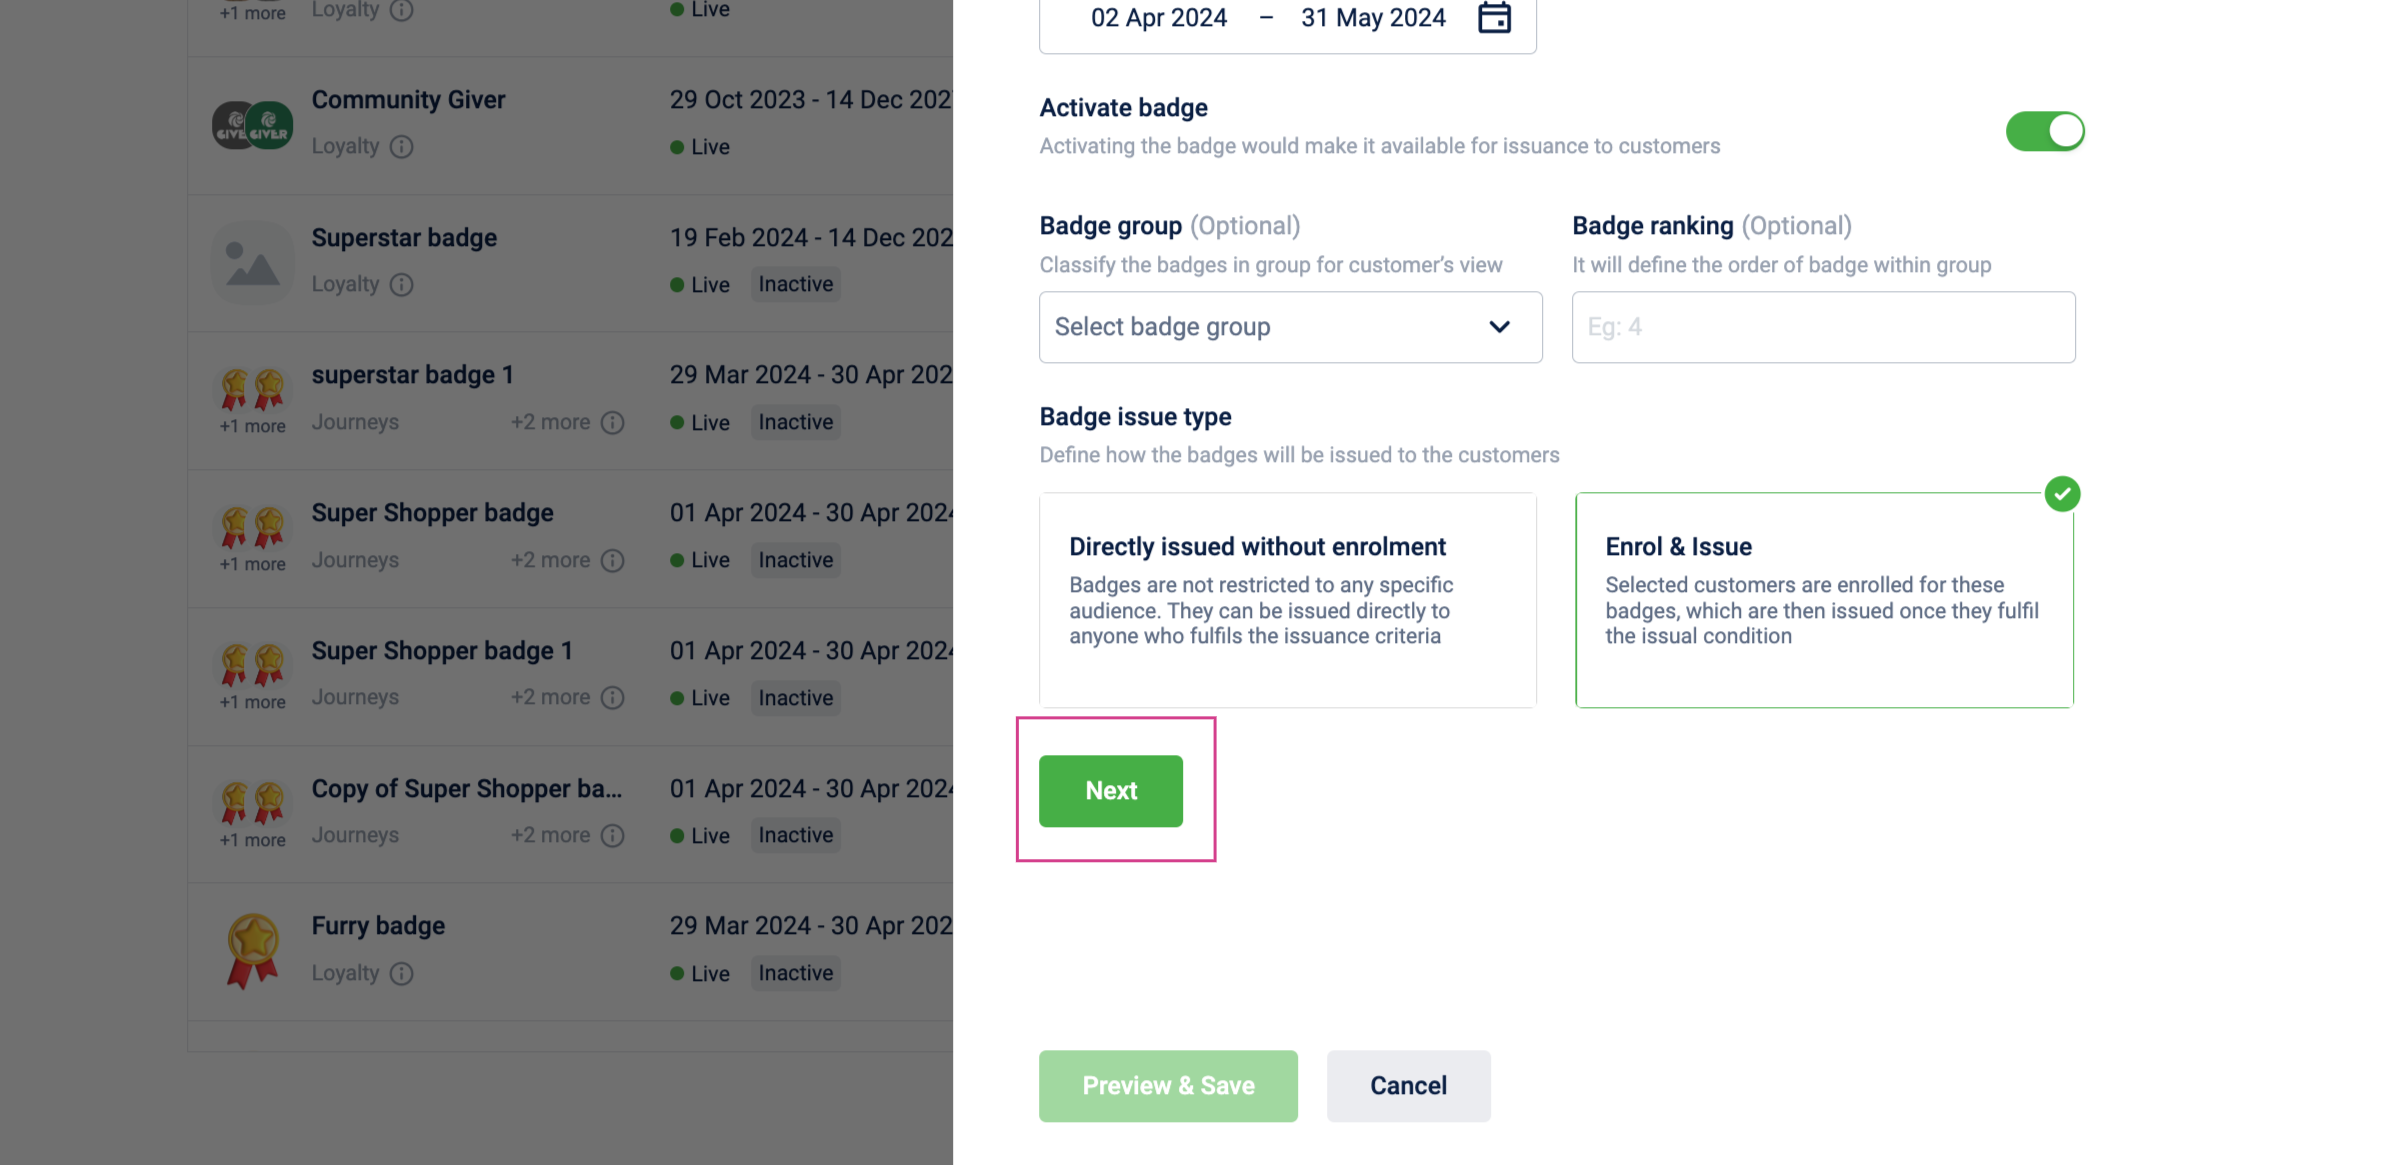
- Use the Activate Badge switch to activate or deactivate the badge. Activating a badge will make the badge available for issuance to customers.
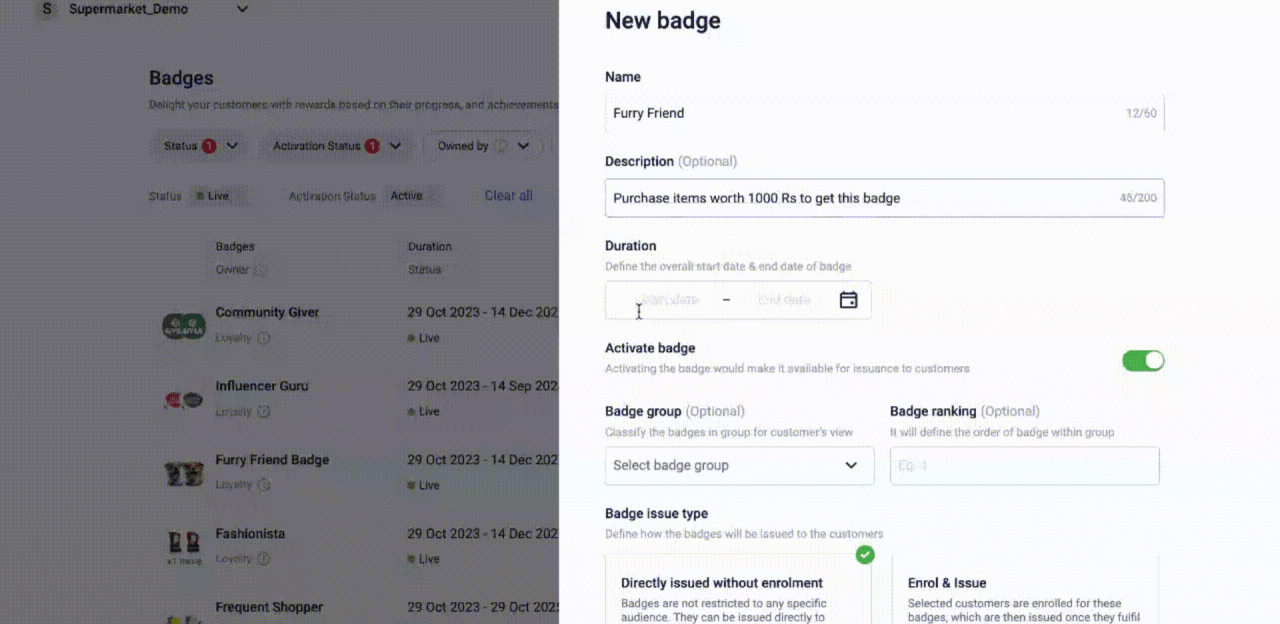
- From the Badge group drop-down, select the badge group. For example, "2024 Badges" group.
- Assign a ranking to the badge in the Badge ranking field.
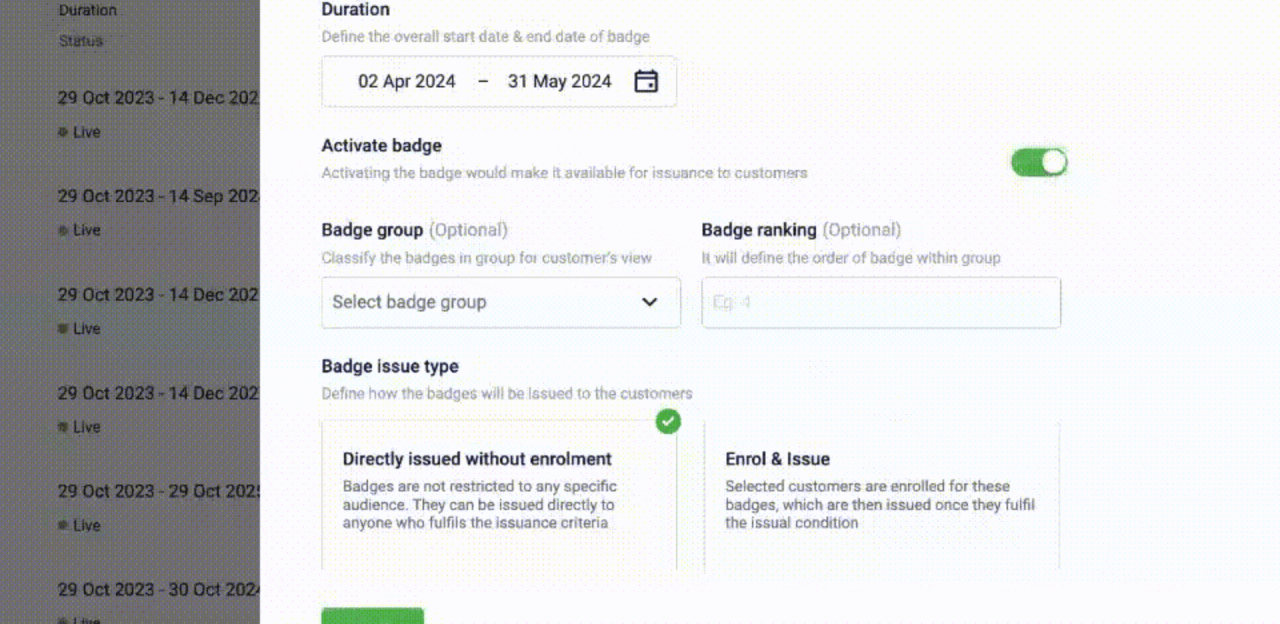
- From the Badge issue type, select Directly issued without enrollment.
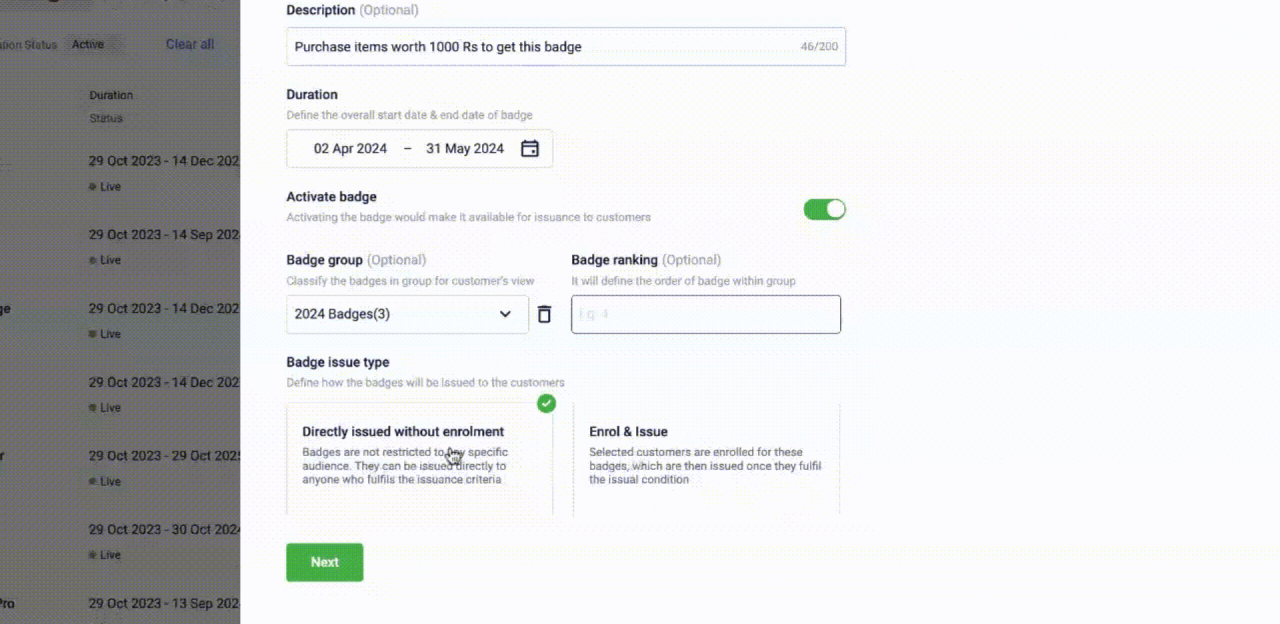
- Click Next.
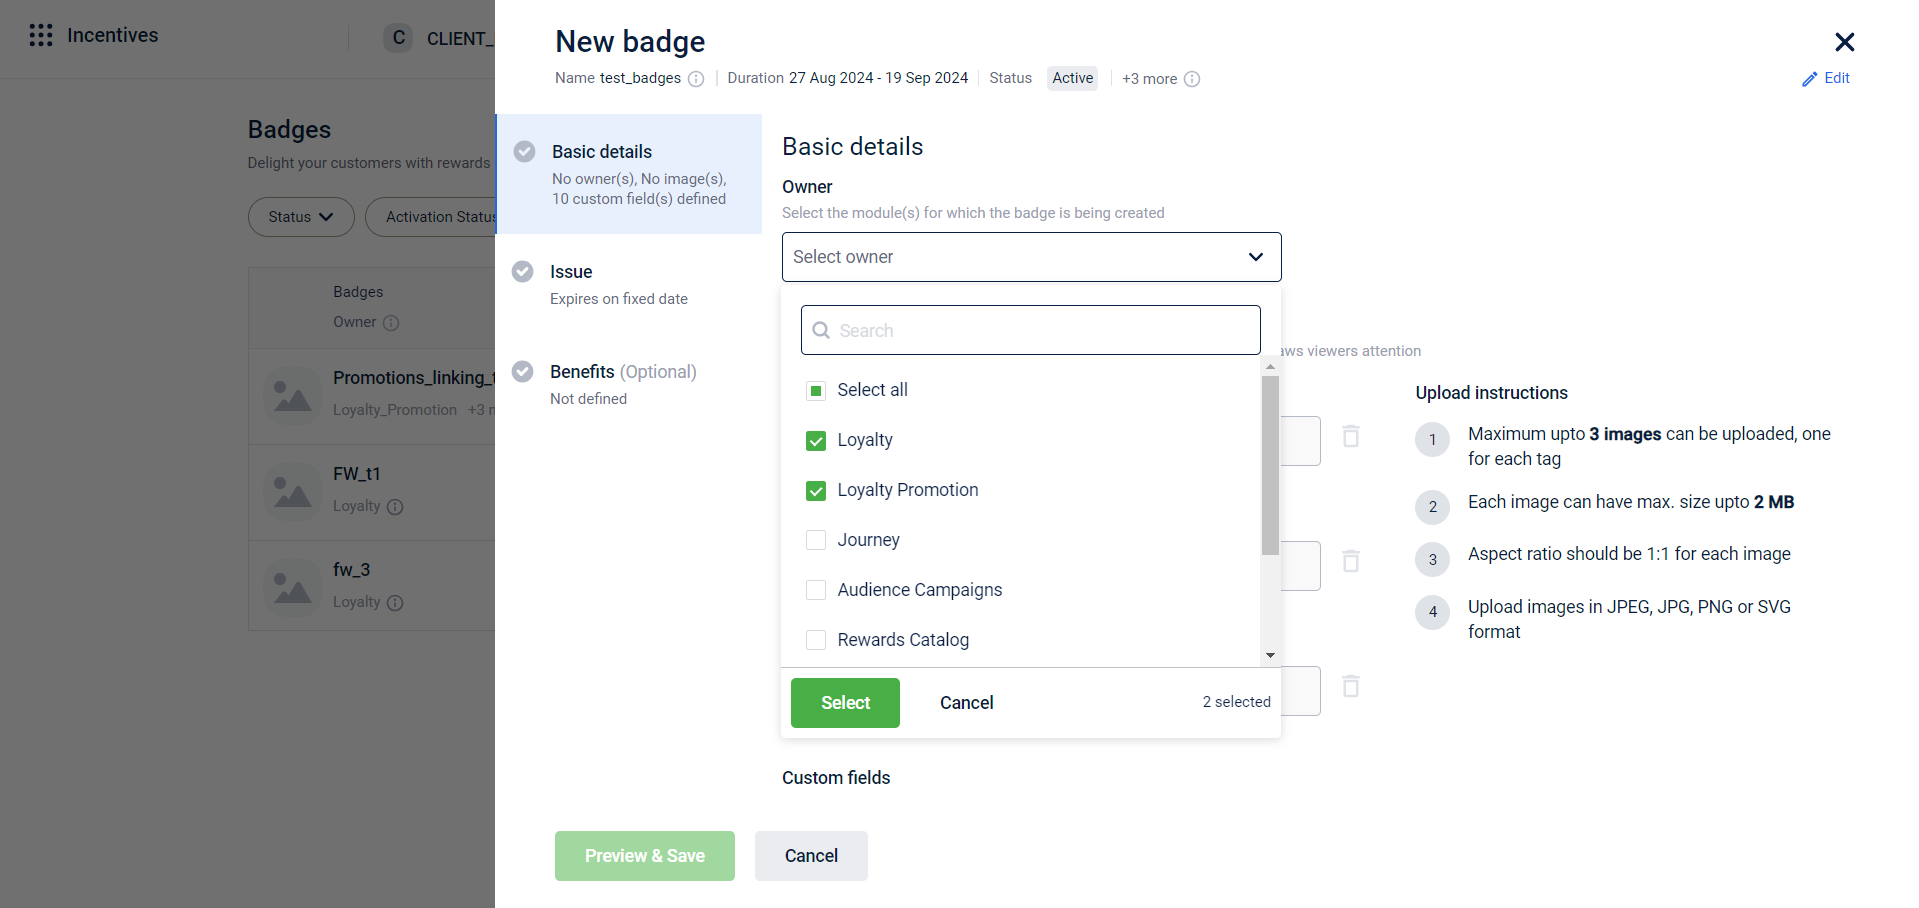
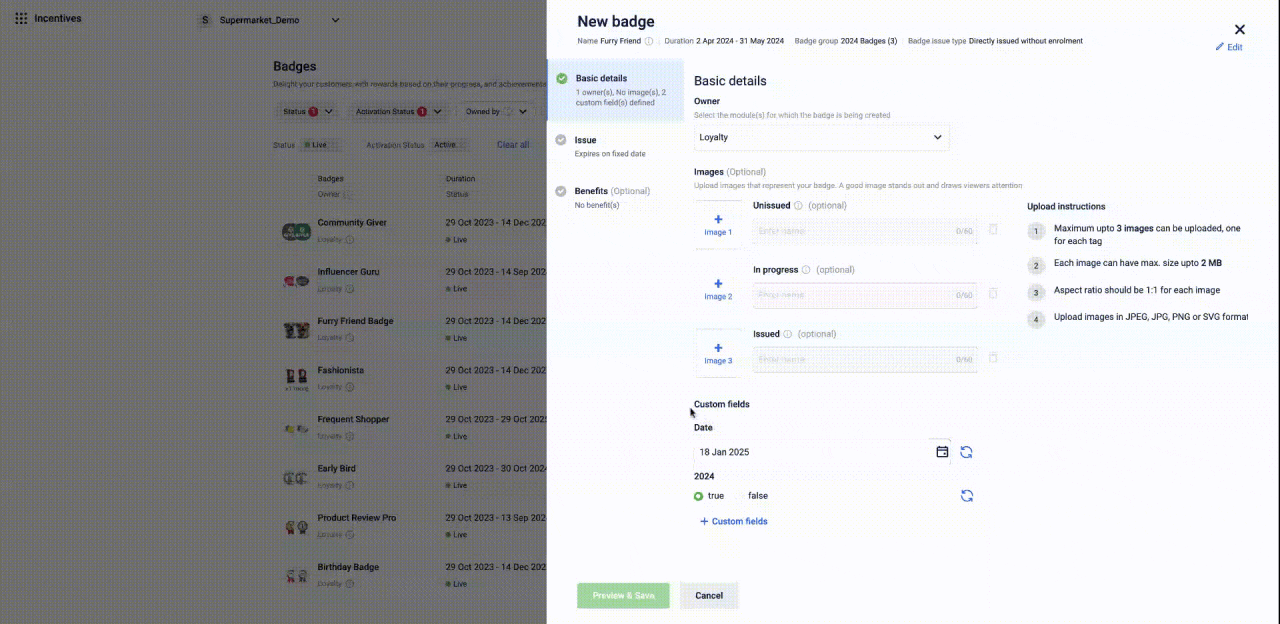
- From the Owner drop-down, select the badge owner. The owner indicates the module where the badge will be used. For example, Loyalty, Loyalty Promotion, Journeys, Audience Campaigns, Rewards Catalog or Goodwill Module.
- Add optional images against the badge statuses.
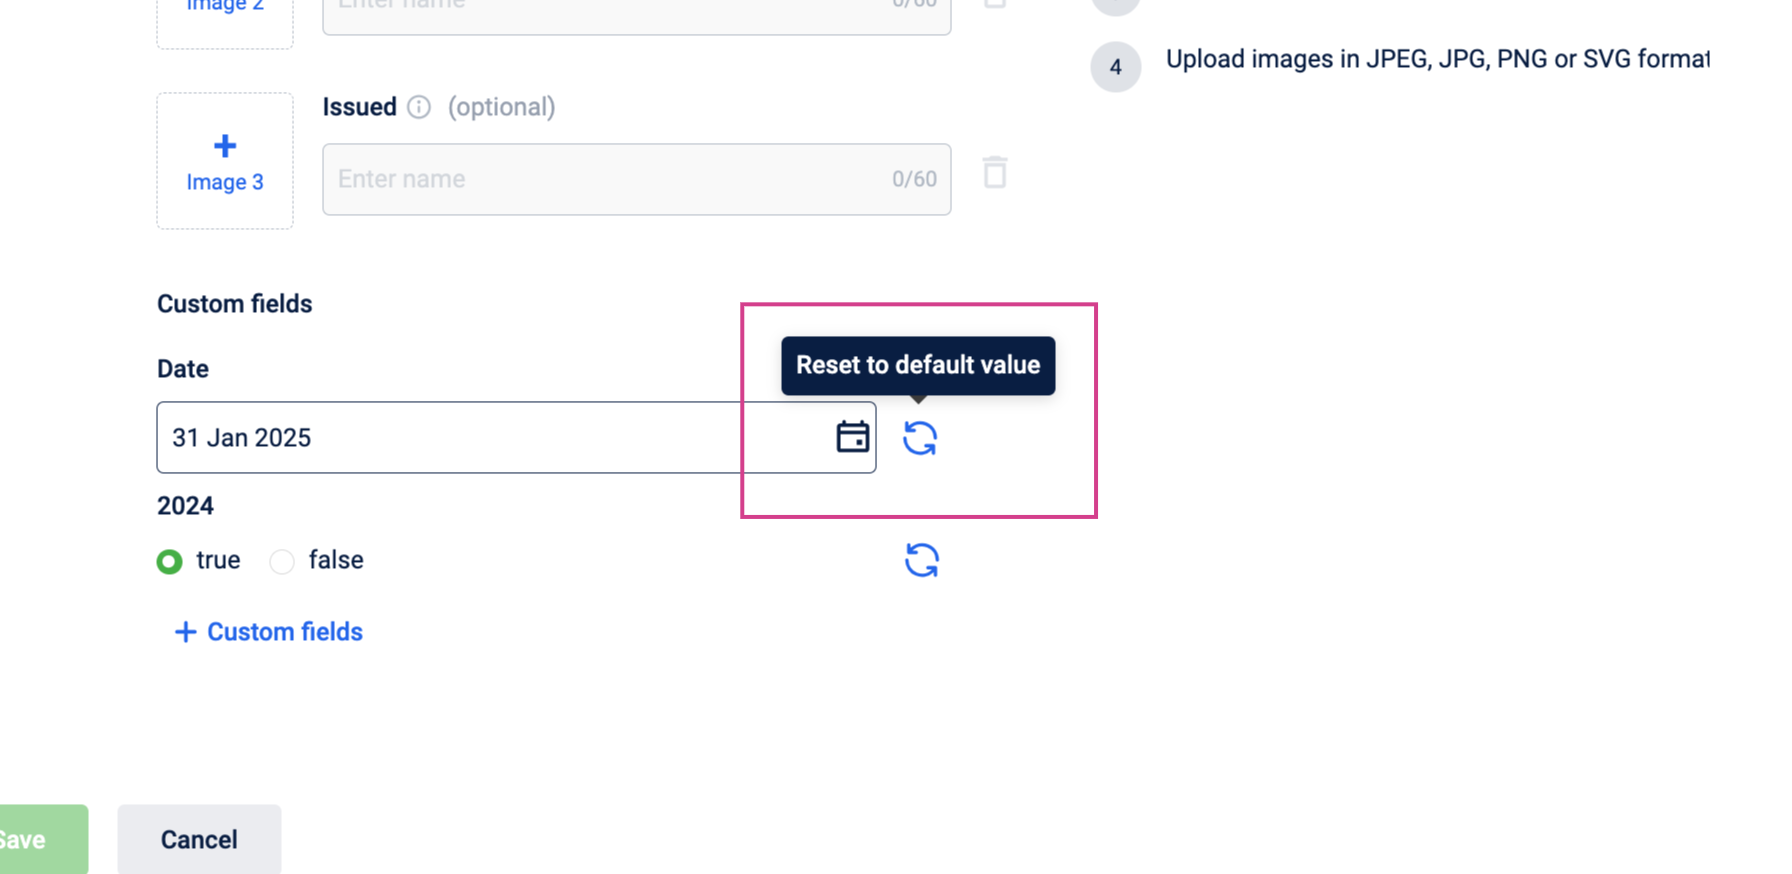
- Add custom metadata related to the badge. The mandatory custom fields defined at the org level are displayed.
If required, you can reset to the default value of the mandatory custom field if needed.
- Add optional custom fields and assign their values by clicking on +Custom fields option. For more information on custom fields, refer to the custom fields documentation.
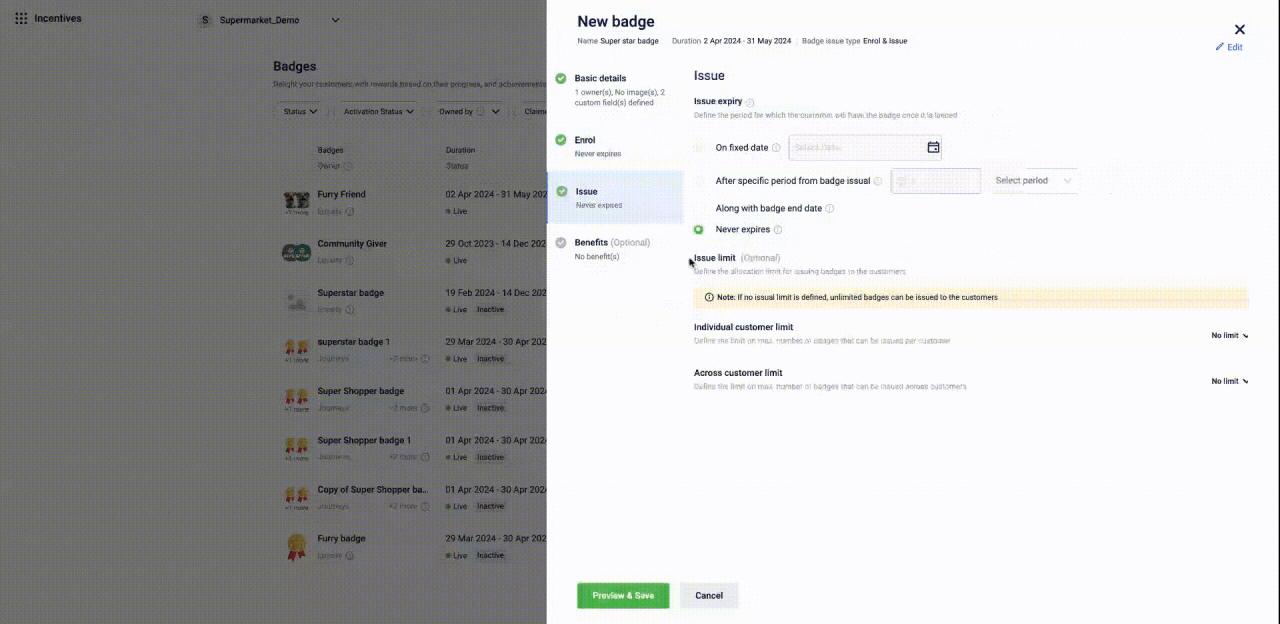
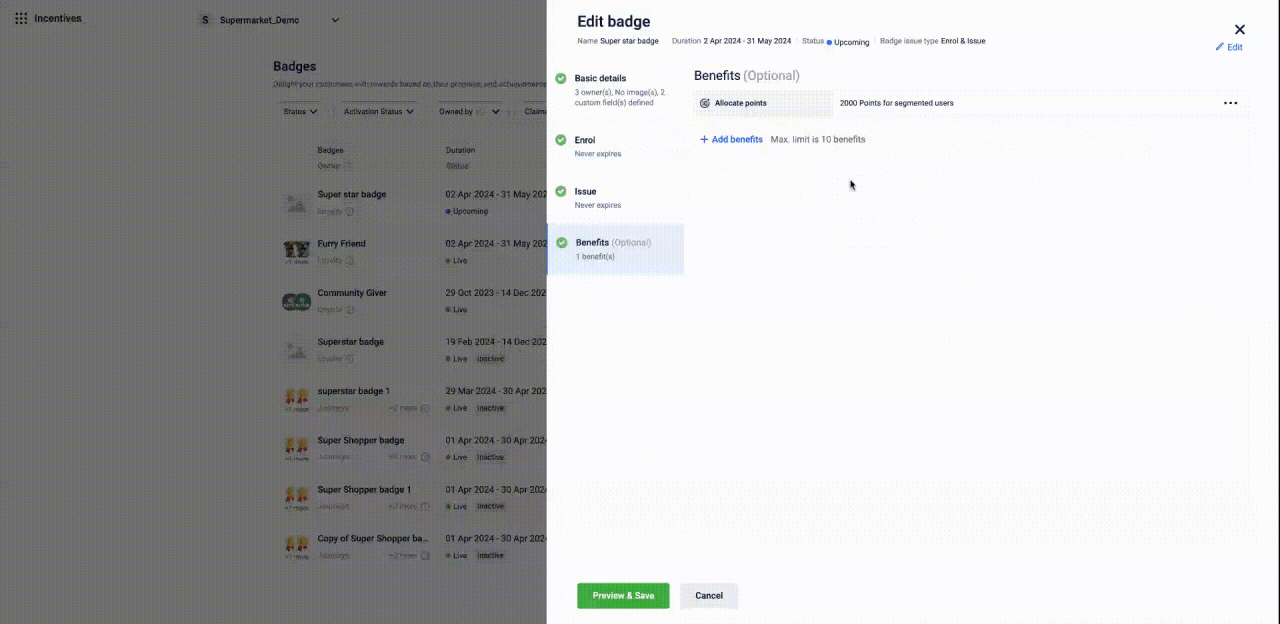
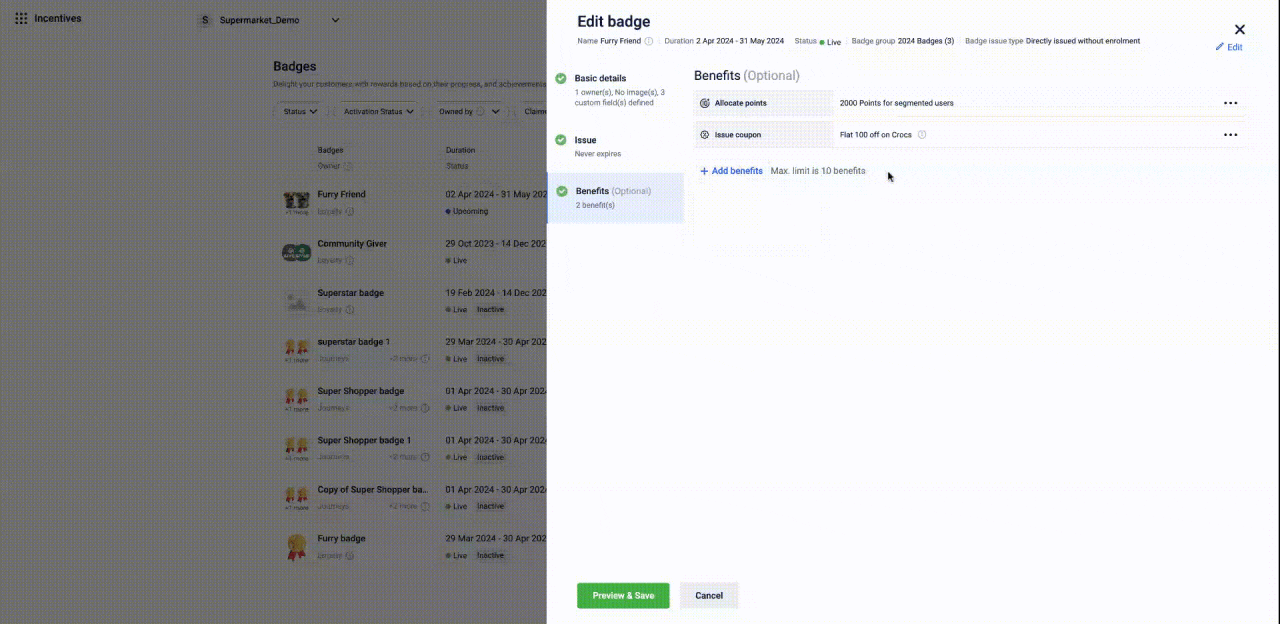
- Define the issual expiry. This is the period the customers will have the badge once issued. This can be a fixed date, a specific period from the issue date, along with a badge end date or never expires.
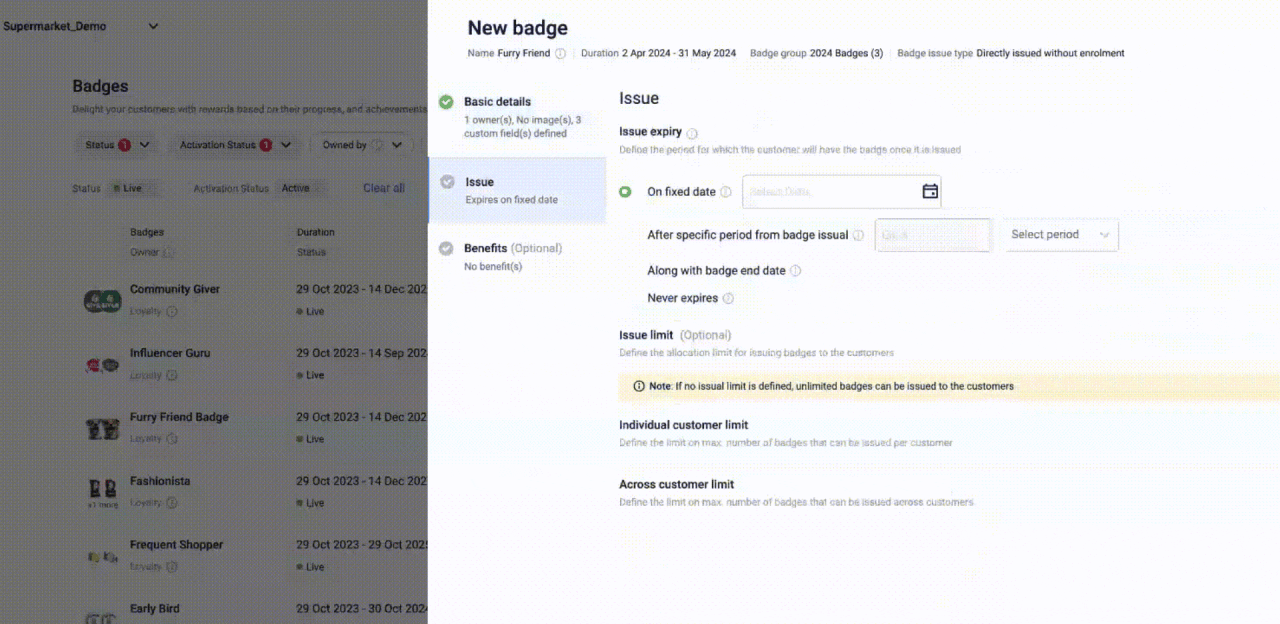
- You can also set an individual or across all customer limit for issuing the badge within a fixed or moving window. This section is optional.
NOTE: If no issual limit is defined, unlimited badges can be issued to the customers.

- Click on Preview and Save.

- Review the badge configurations in view mode. Verify the basic details, and issual details, then click on Done.

The badge is now created.
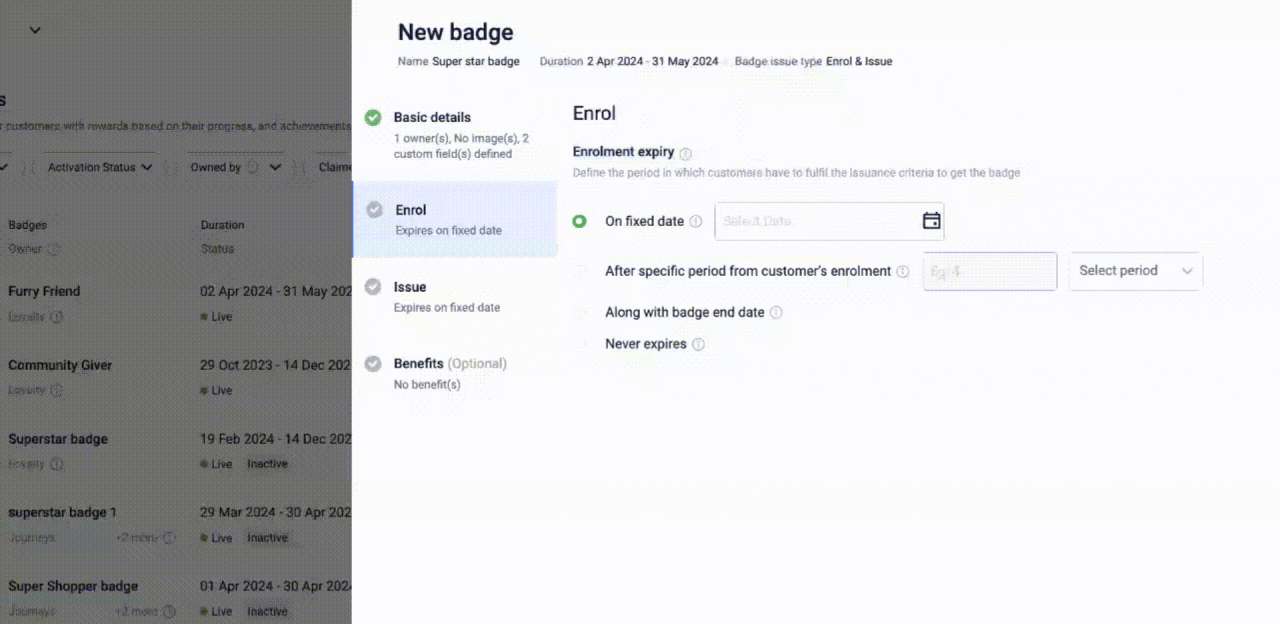
Creating enrol&issue badge
- Click on New Badge.
- Define the name, description, duration, badge activation status, badge group, and badge rank. Refer to Creating direct issual badge for the definitions.
- Select Enroll and Issue. In this badge type, once the badge is created, customers must be enrolled into this badge via audience campaigns. A rule can then be written to determine the activity required for customers to earn the badge.
- Click Next.
- From the Owner drop-down, select the badge owner. The owner indicates the module where the badge will be used. For example, Loyalty, Loyalty Promotion, Journeys, Audience Campaigns, Rewards Catalog or Goodwill Module.
- Click Enroll to define the enrollment expiry. This is the period in which customers must fulfill the issuance criteria to earn the badge. For example, if the badge is issued on April 5 and the enrollment expires after 10 days, customers enrolled on April 5 have until April 15 to complete the required activity and earn the badge. Alternatively, the enrollment can expire on the badge end date, on a fixed date, or never expire.
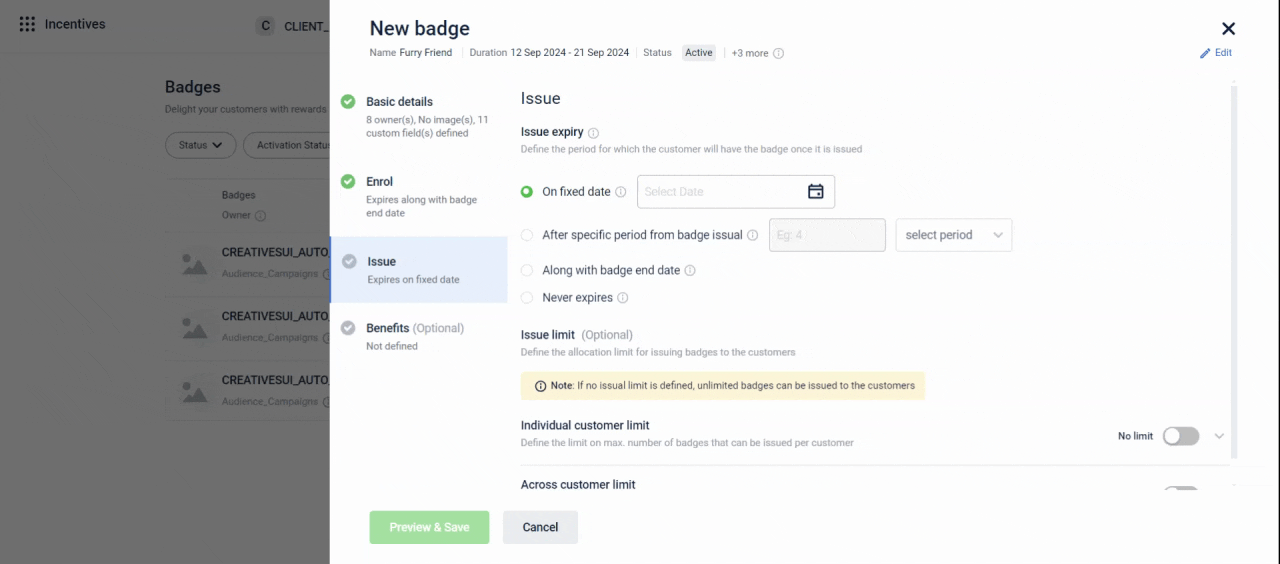
- Define the issual duration, which is the time duration until which the badge will remain with the customers once earned. You can also set an individual or across all customer limit for issuing the badge within a fixed or moving window. This section is optional.
NOTE: If no issual limit is defined, unlimited badges can be issued to the customers.
- Click Preview and Save to finish.
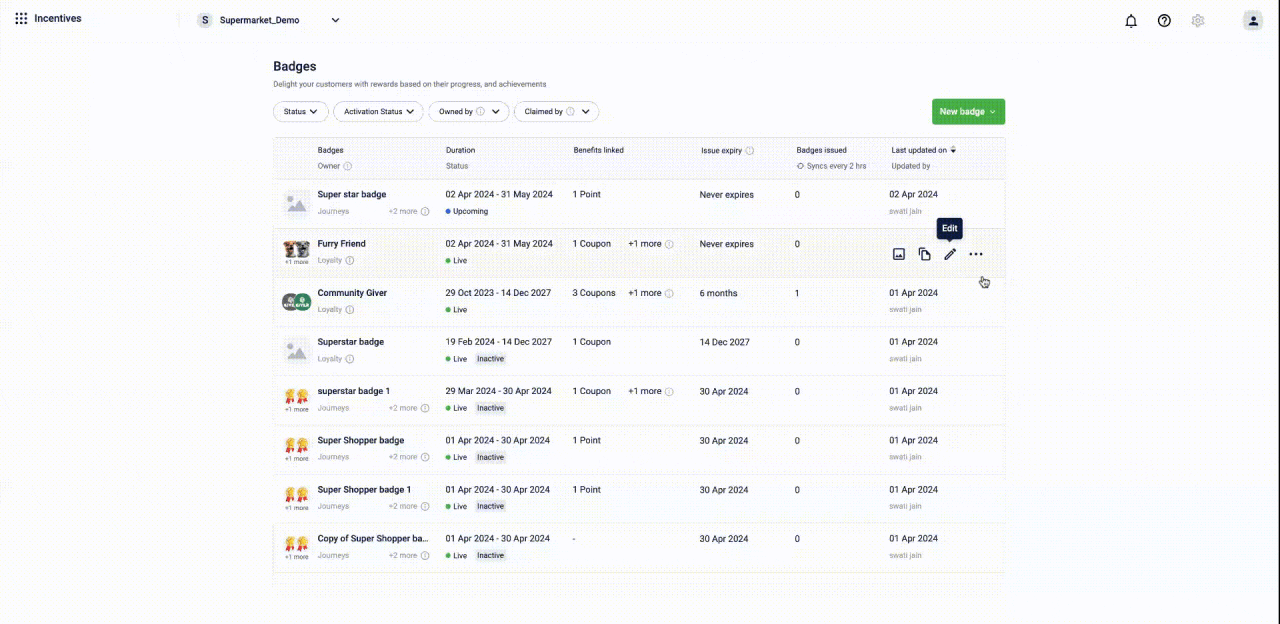
Editing badges
- Navigate to the badge you want to edit and click on the edit icon.
- Make the necessary changes.

- After editing the required details, click on preview and save.
Setting badge issuance limits and restrictions
You can edit a badge and define the issuance limits and other restrictions.
- From the home page, navigate to the badge you want to set the limits, click on Edit, and navigate to the Issue tab.
-
Define the issue expiry for the badge.
Issue Expiry Type Description On fixed date The badge remains with all the customers until a specified date regardless of when it was issued. After specific period from badge issual The badge expires after a specific period from the badge issuance date. Along with badge end date Issue expiry same as badge end date. Never expires The badge never expires once issued. -
Enable the issue limit for the badge if required. To enable, turn on the switch beside the required option.
-
Configure the issuance limit for the badge.
There are two types of limits:
Individual customer limit: Define the limit for the maximum number of badges that can be issued for one customer.
Across customer limit: Define the limit for the maximum number of badges that can be issued for all customers.
There are two windows for limiting the issuance of badges:
Fixed Window: The issuance limit for badge is defined for a particular period.
The types of periods are:
| Period Type | Description | Example |
|---|---|---|
| Specific no. of days | Define the issuance limit for every X number of days. | A maximum of five badges can be issued every five days. The limit resets after five days have passed for the next five days. |
| Week | Define the issuance limit for every defined day of the week. | A maximum of three badges can be issued every week. The week resets on the day that is configured. |
| Calendar month | Define the issuance limit for the first day of the month. | A maximum of five badges can be issued each month. The limit resets at the start of the next month. |

Configuring a fixed window issuance
Moving Window: The issuance limit is defined based on a rolling duration. Each time a badge is issued to a customer, the limit is checked for the specified previous X days.
The types of durations are:
| Type | Description | Example |
|---|---|---|
| Specific duration | Define the issuance limit for every X number of days. | A maximum of five badges can be issued in the last five days. |
| Overall duration | Define the issuance limit for the overall duration of the badge. | A maximum of eight badges can be issued for the overall duration of the badge. |
NoteYou can combine both durations and define the issuance limit.
For example, the customer can receive up to five badges overall, but within the last seven days, they can only receive one badge.

Configuring a moving window issuance
NoteOnce the badge is created, the window type can be changed if the badge till the badge is live. Once the badge is live or ended, the window type cannot be changed.
- Select Preview and save, confirm the details under the Preview badge window, and then select Done.
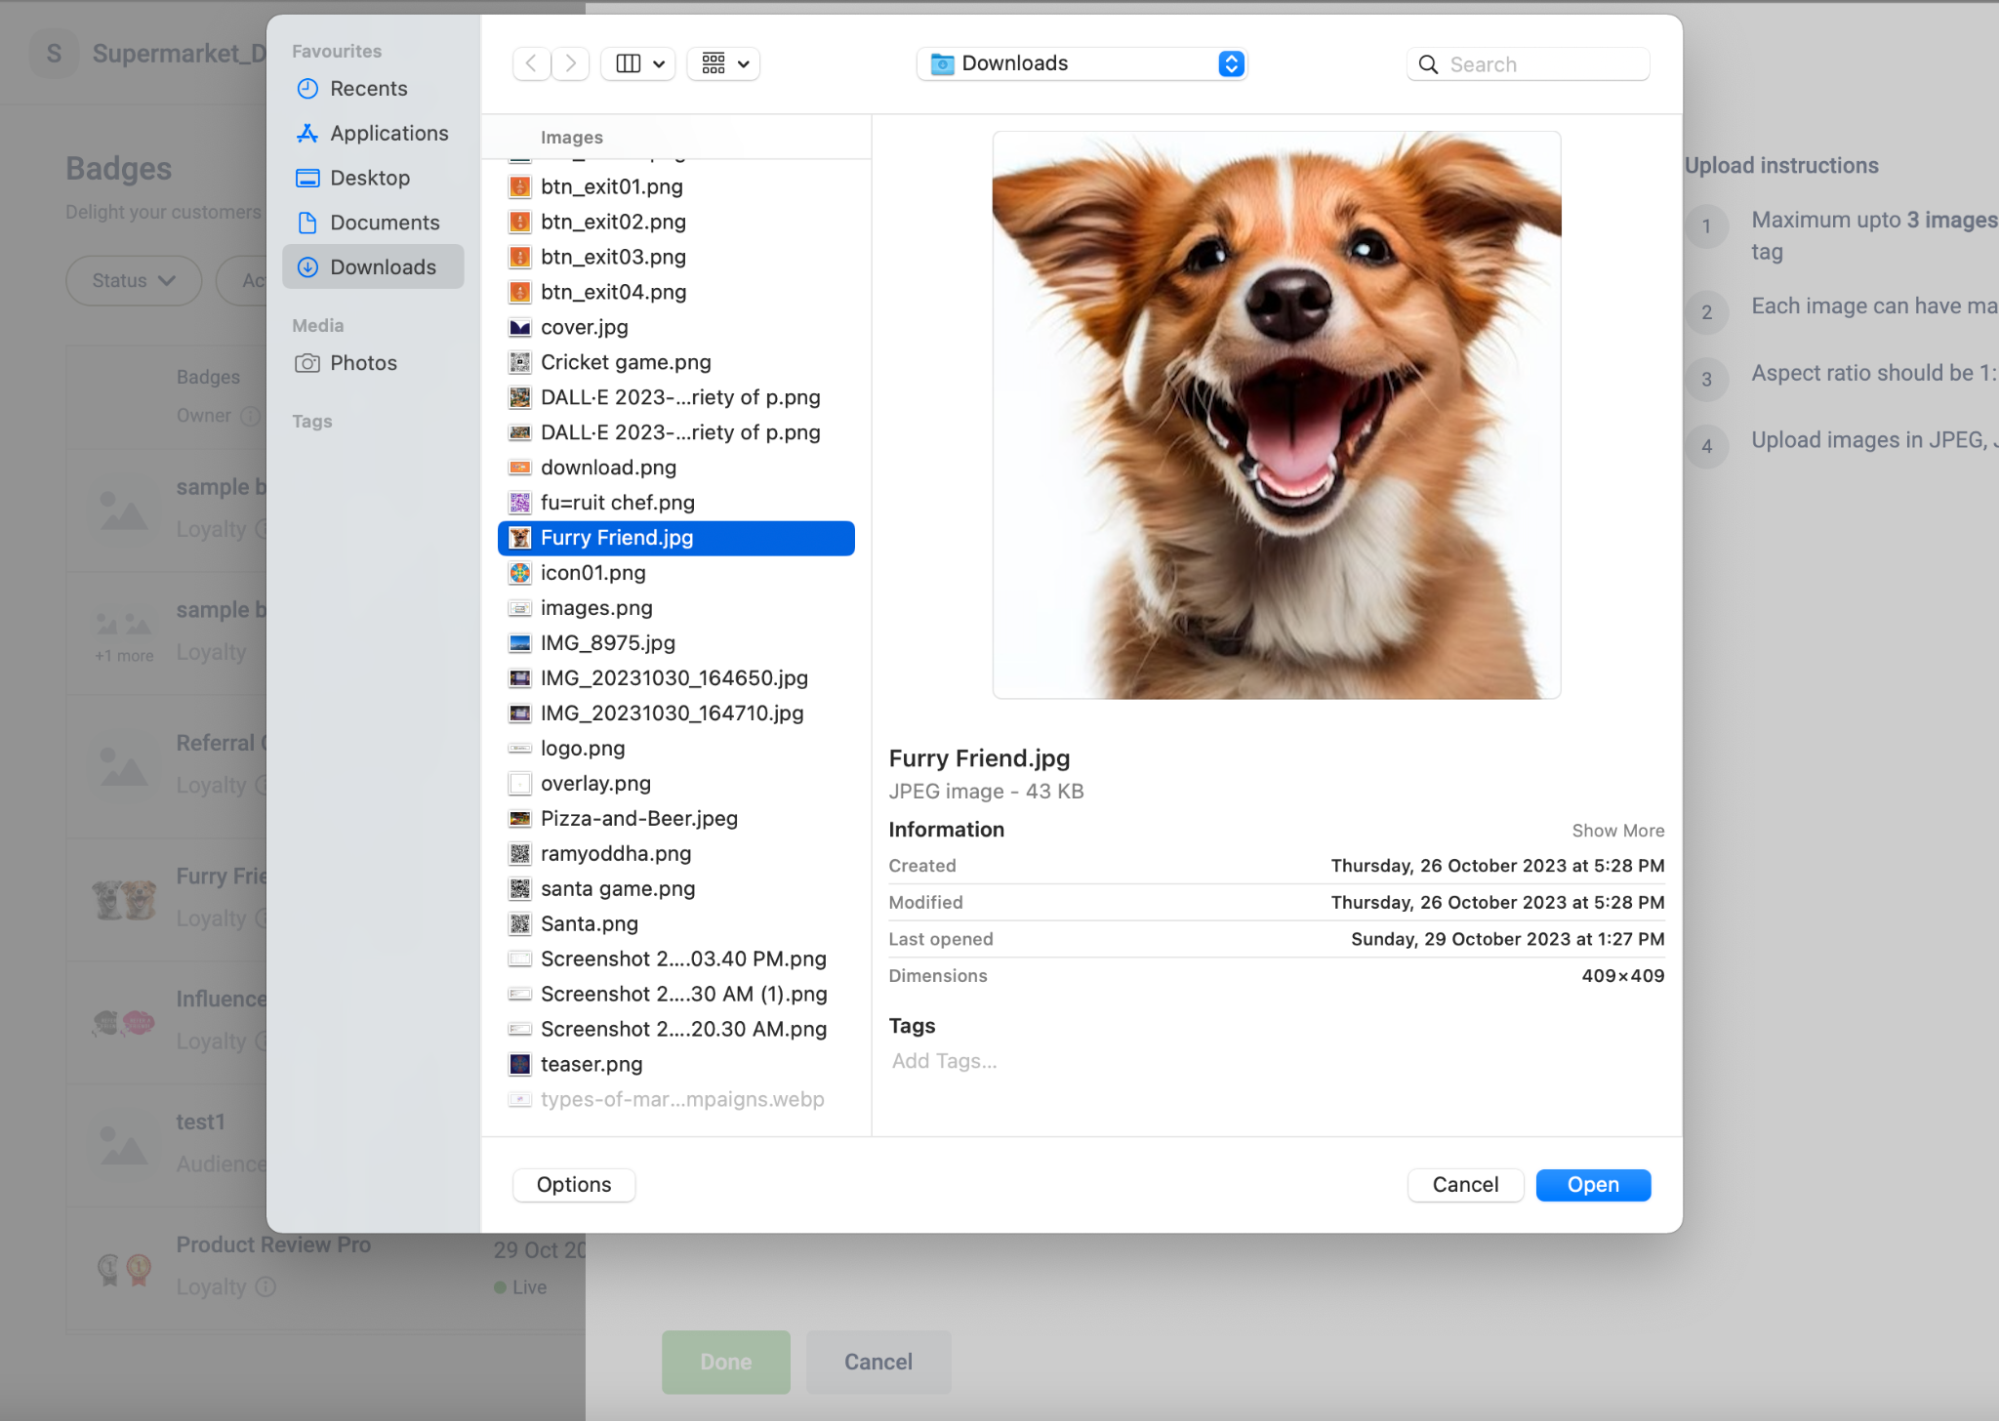
Adding images for badges
You can also add images for the badge after the creation of the badge. Each badge status (unissued, in-progress, and issued) can have its respective image. To add an image, perform the following:
- Hover over the image icons of a specific badge.
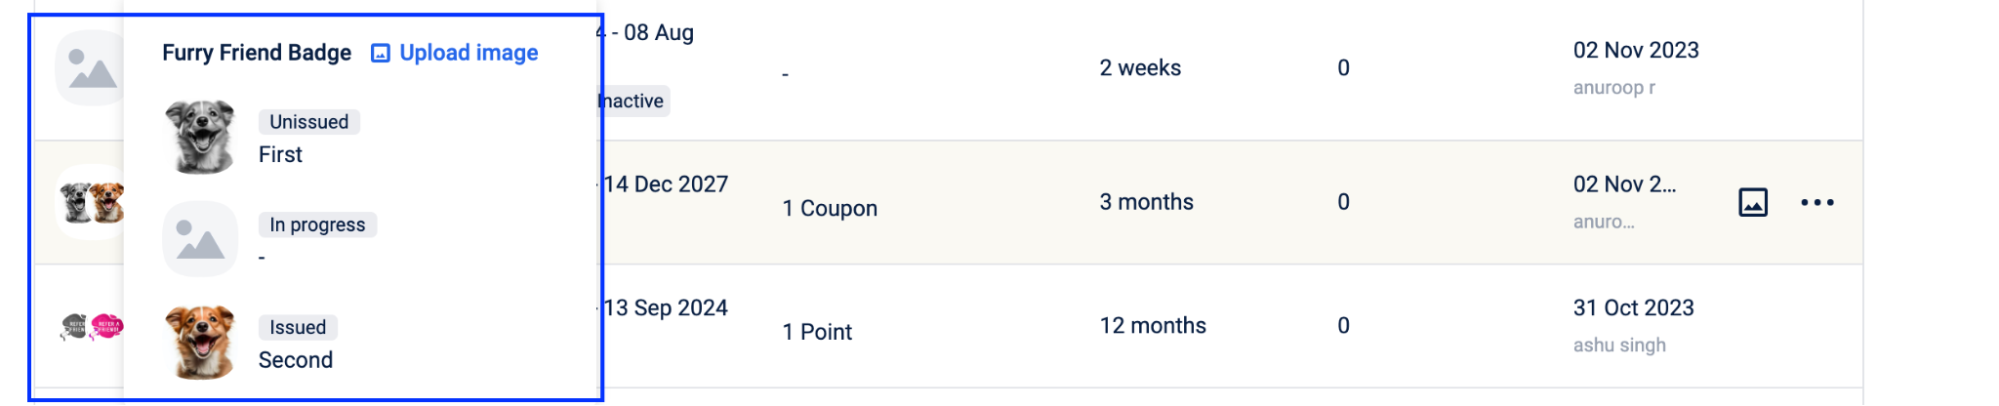
If no image is added, an Upload image option appears. You can also over on the rightmost section of the card and click on the upload images icon.

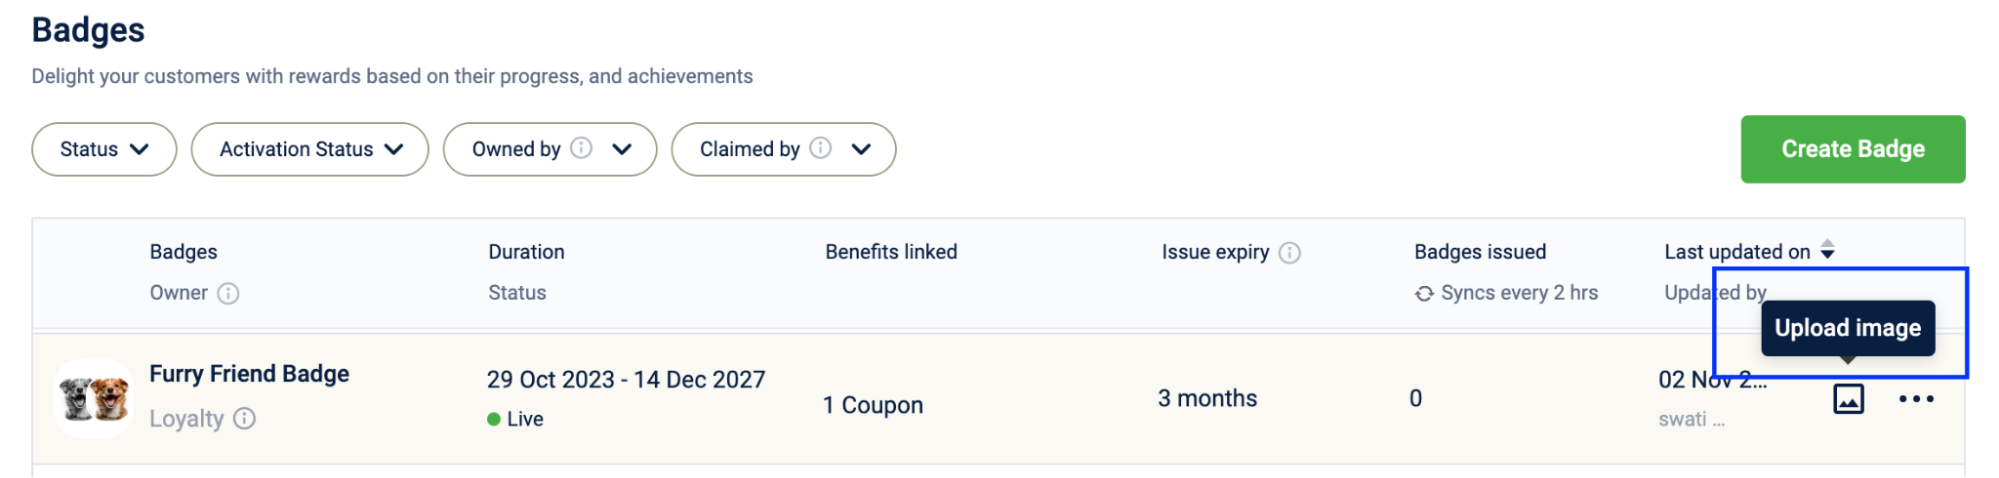
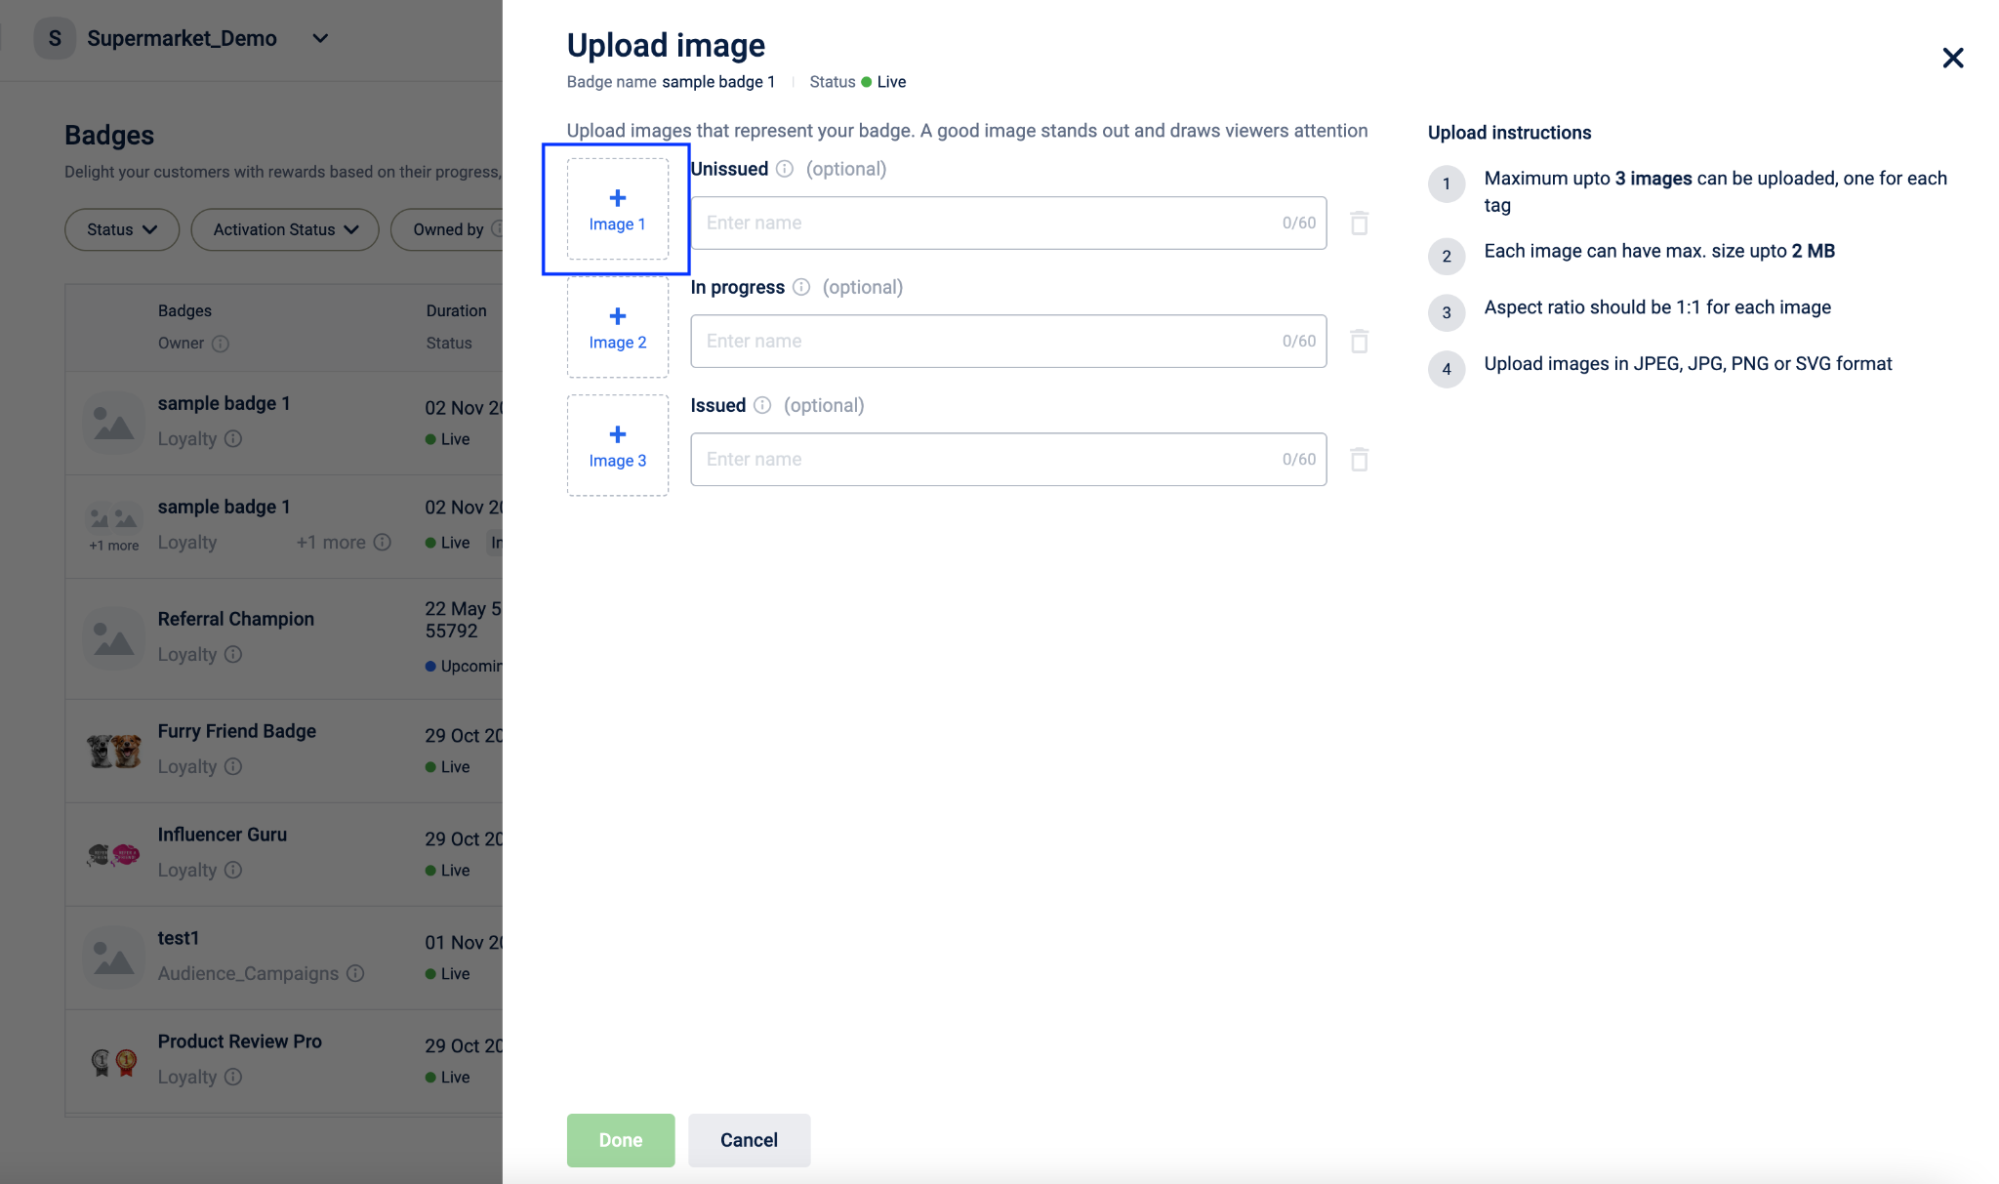
The Upload Image page appears, allowing you to add/replace images and provide names for each image.
- Image tags : Users can choose to add any of the below or all images against a badge.
- Unissued : This tag represents badges that have not yet been issued to the customers
- In progress : This tag represents badges where the customer has partially completed the issual activity but not yet issued
- Issued: This tag represents badges that have been successfully issued to the customers
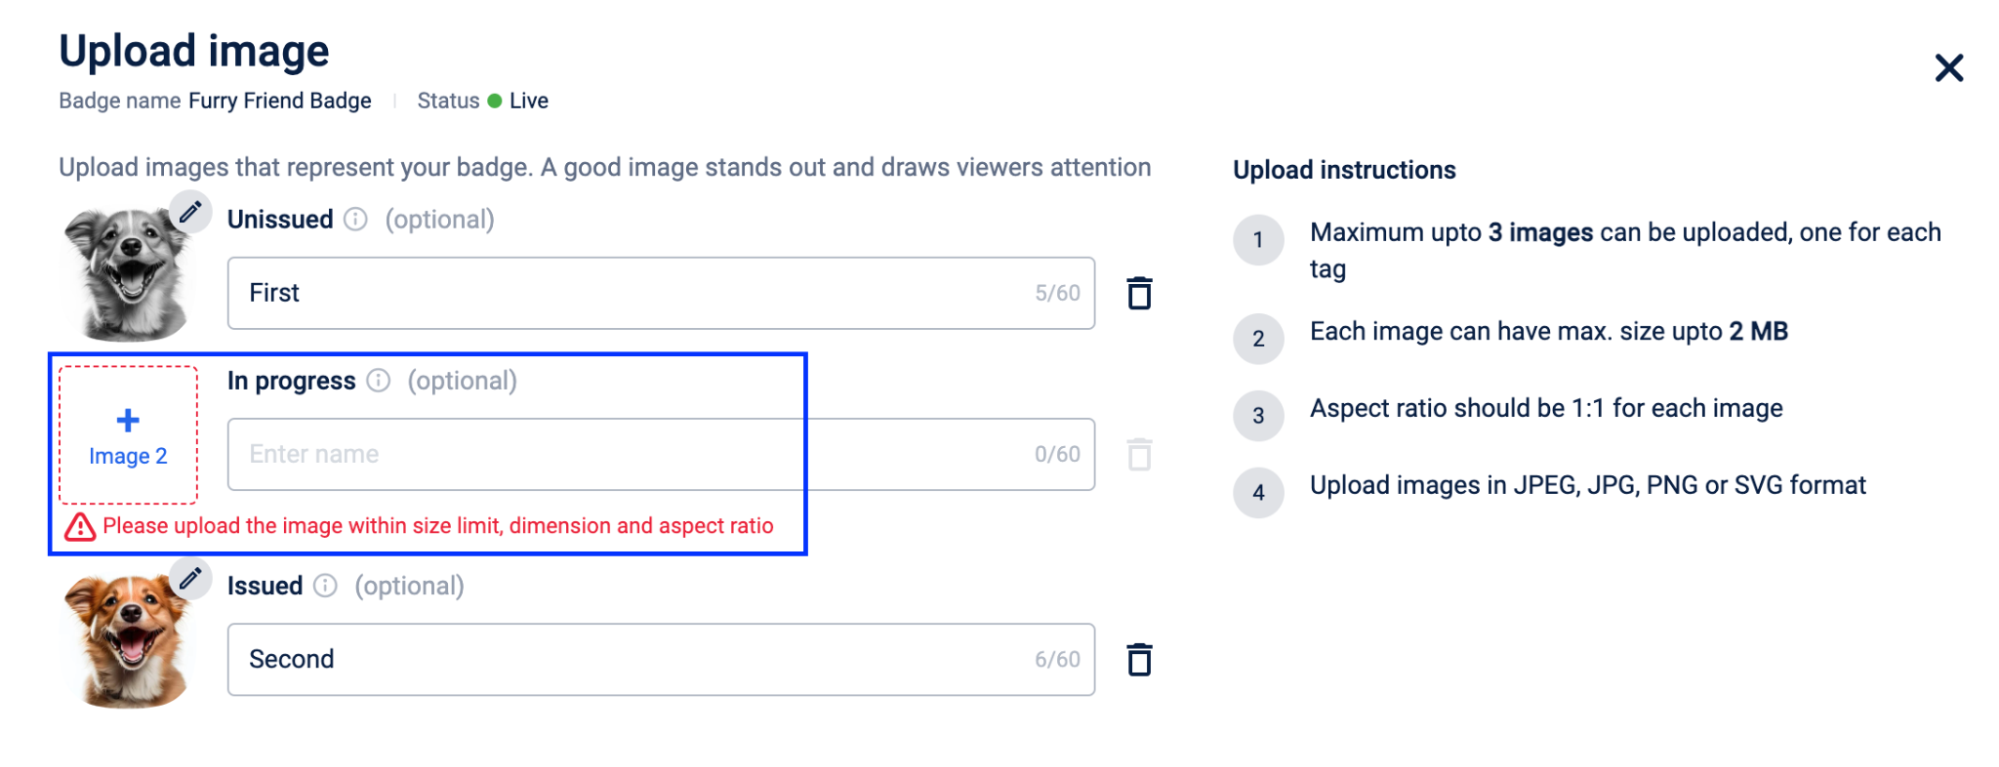
- The maximum size of each image can be 2 MB
- The aspect ratio should be 1:1
- Image formats supported are JPEG, JPG, PNG and SVG.
- Adding images against a badge is optional, brands can also use their own CMS to display the badge icons to their end customers.
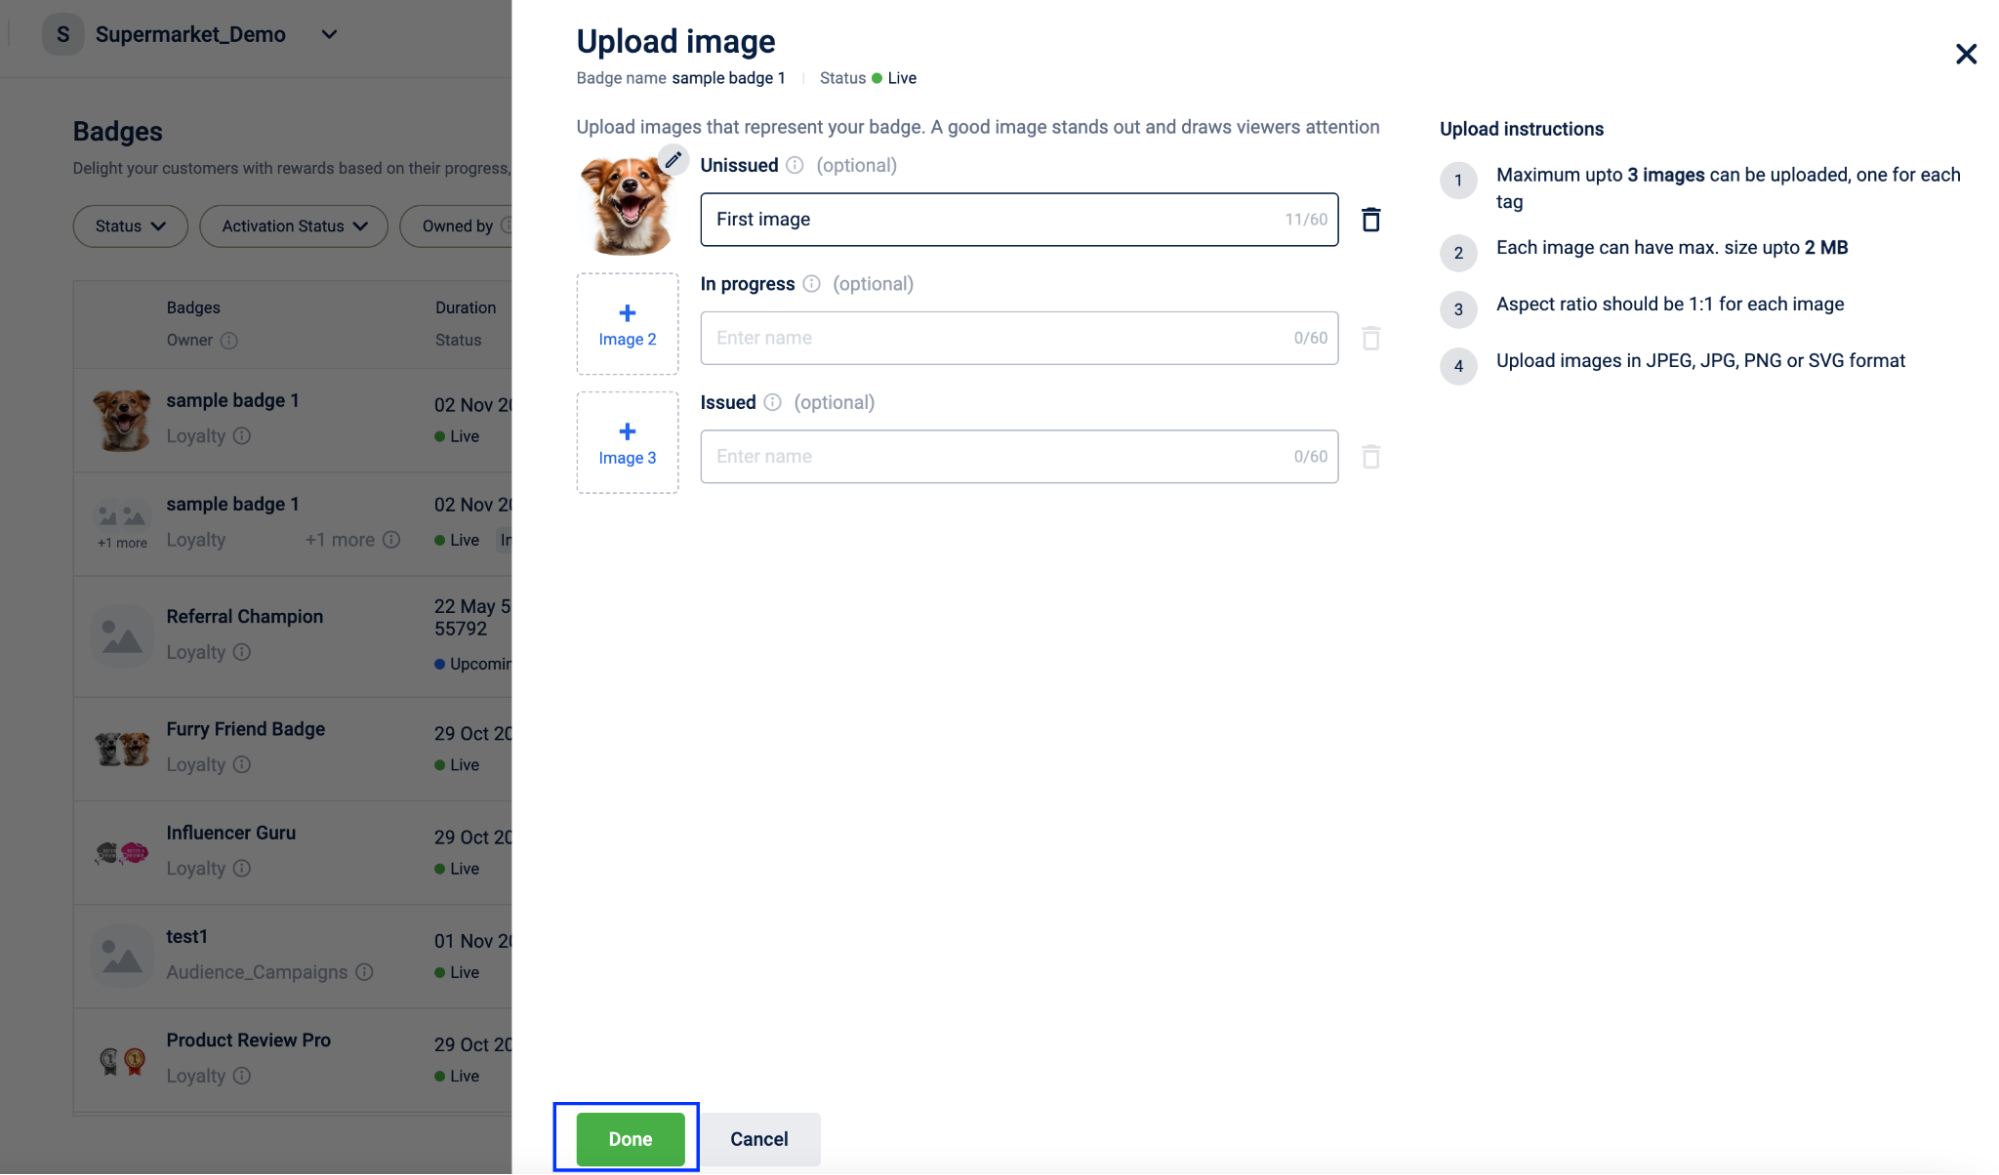
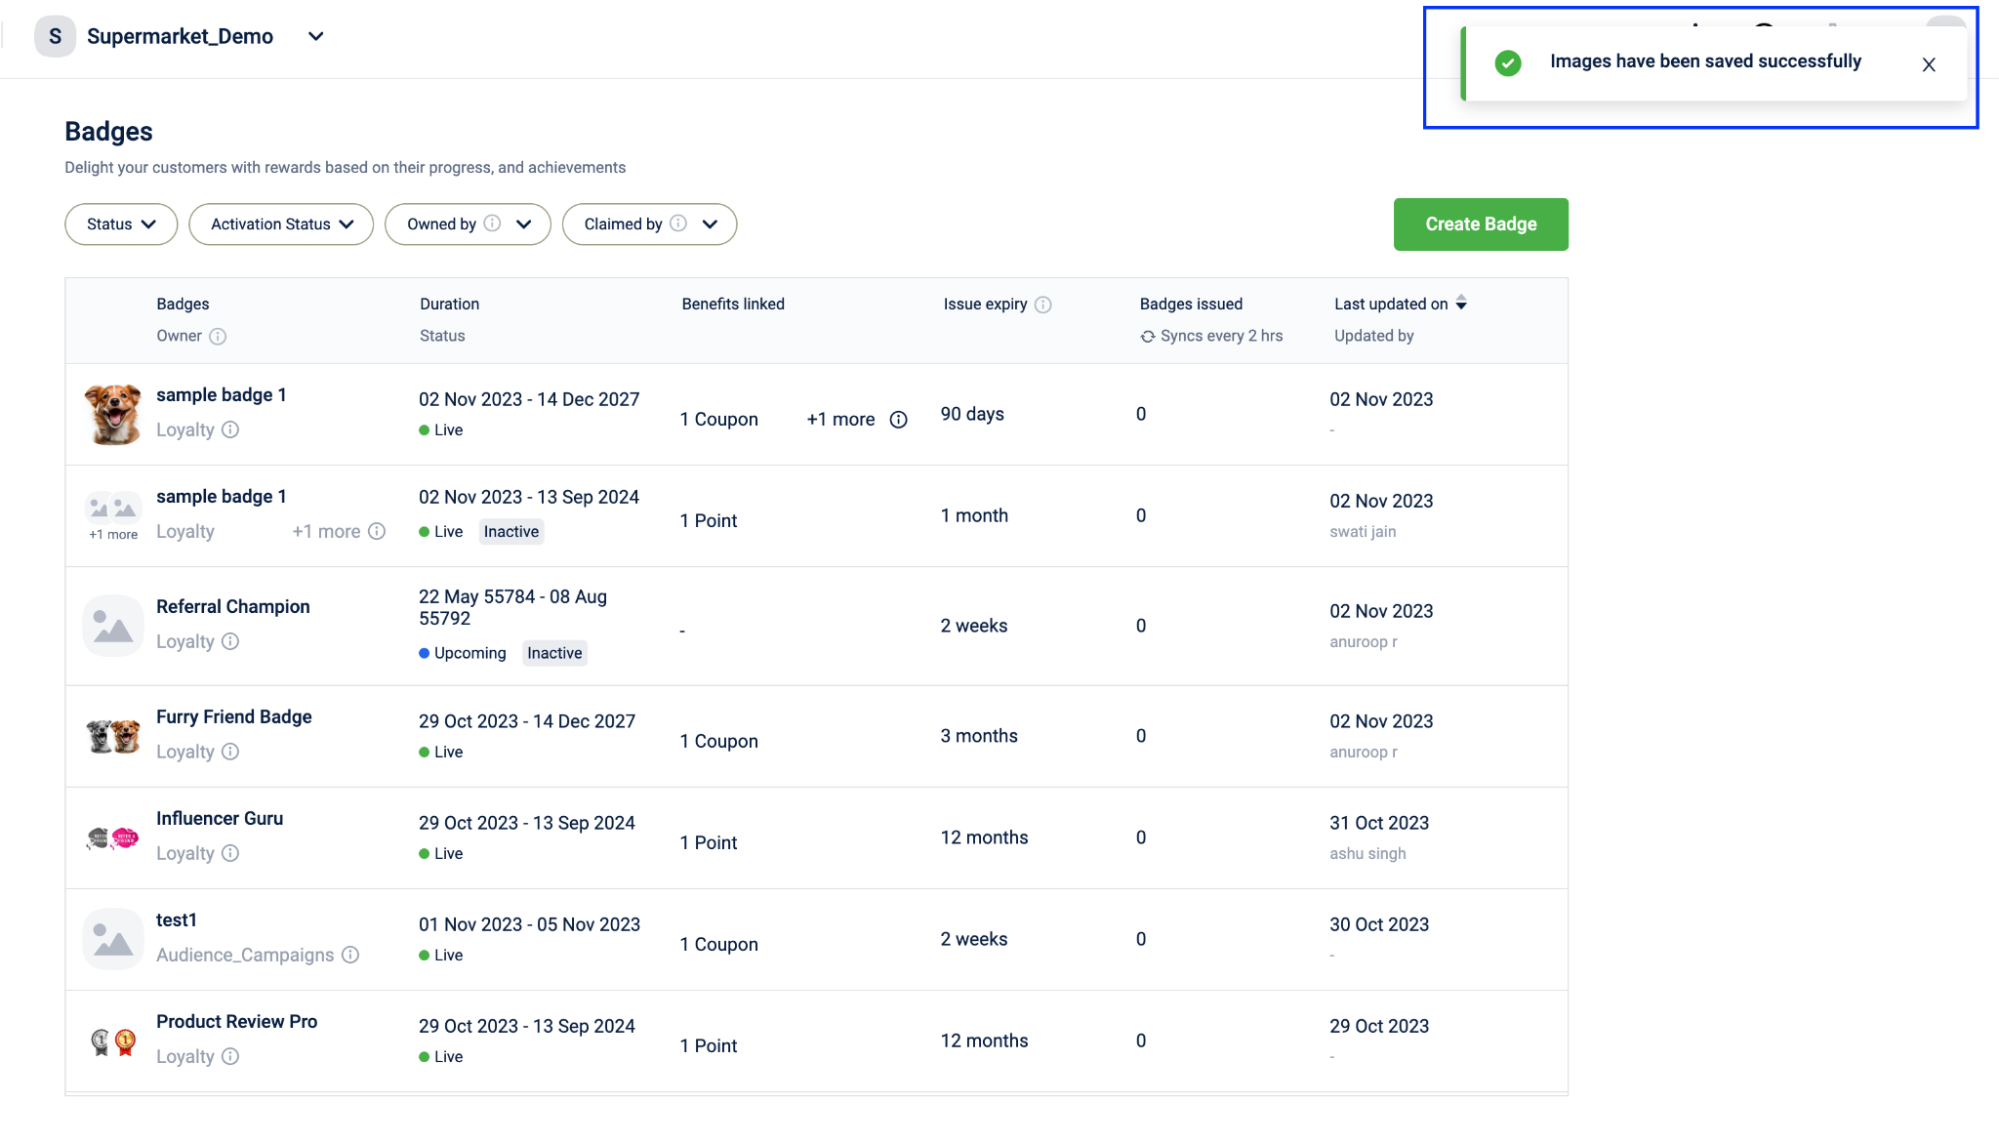
- Click Done. If the image size, aspect ratio, or format is not supported, an error message will be displayed as shown in the image below.
- If the user attempts to exit without saving changes, a dialog box appears, prompting the user to choose between exiting or continuing editing without saving changes. Click Exit to exit without saving the changes.

- If the user attempts to exit without saving changes, a dialog box appears, prompting the user to choose between exiting or continuing editing without saving changes. Click Exit to exit without saving the changes.
Duplicating a badge
You can create a new badge by duplicating an existing badge and editing it as required. This is always recommended than creating a new badge from scratch.
- To duplicate a badge, from the Badges list page, against the badge you want to duplicate, click the Badge icon and on the duplicate icon.
- Enter the name for the duplicated badge. Click on Continue.

- The configurations of the existing badge will replicate. Change the details (Basic info and Issue details) as required.
- Click Preview and Save.
Creating badges using API
For information on Badges APIs, refer to the Badges API documentation.
Creating badges using Connect+
You can use Connect+ for creating and updating badges in bulk. For more information, refer to the Connect+ Badges template documentation.
Updated 5 months ago