
Configure Journey
This section provides you with information on how to configure a journey.
To configure a journey perform the following steps:
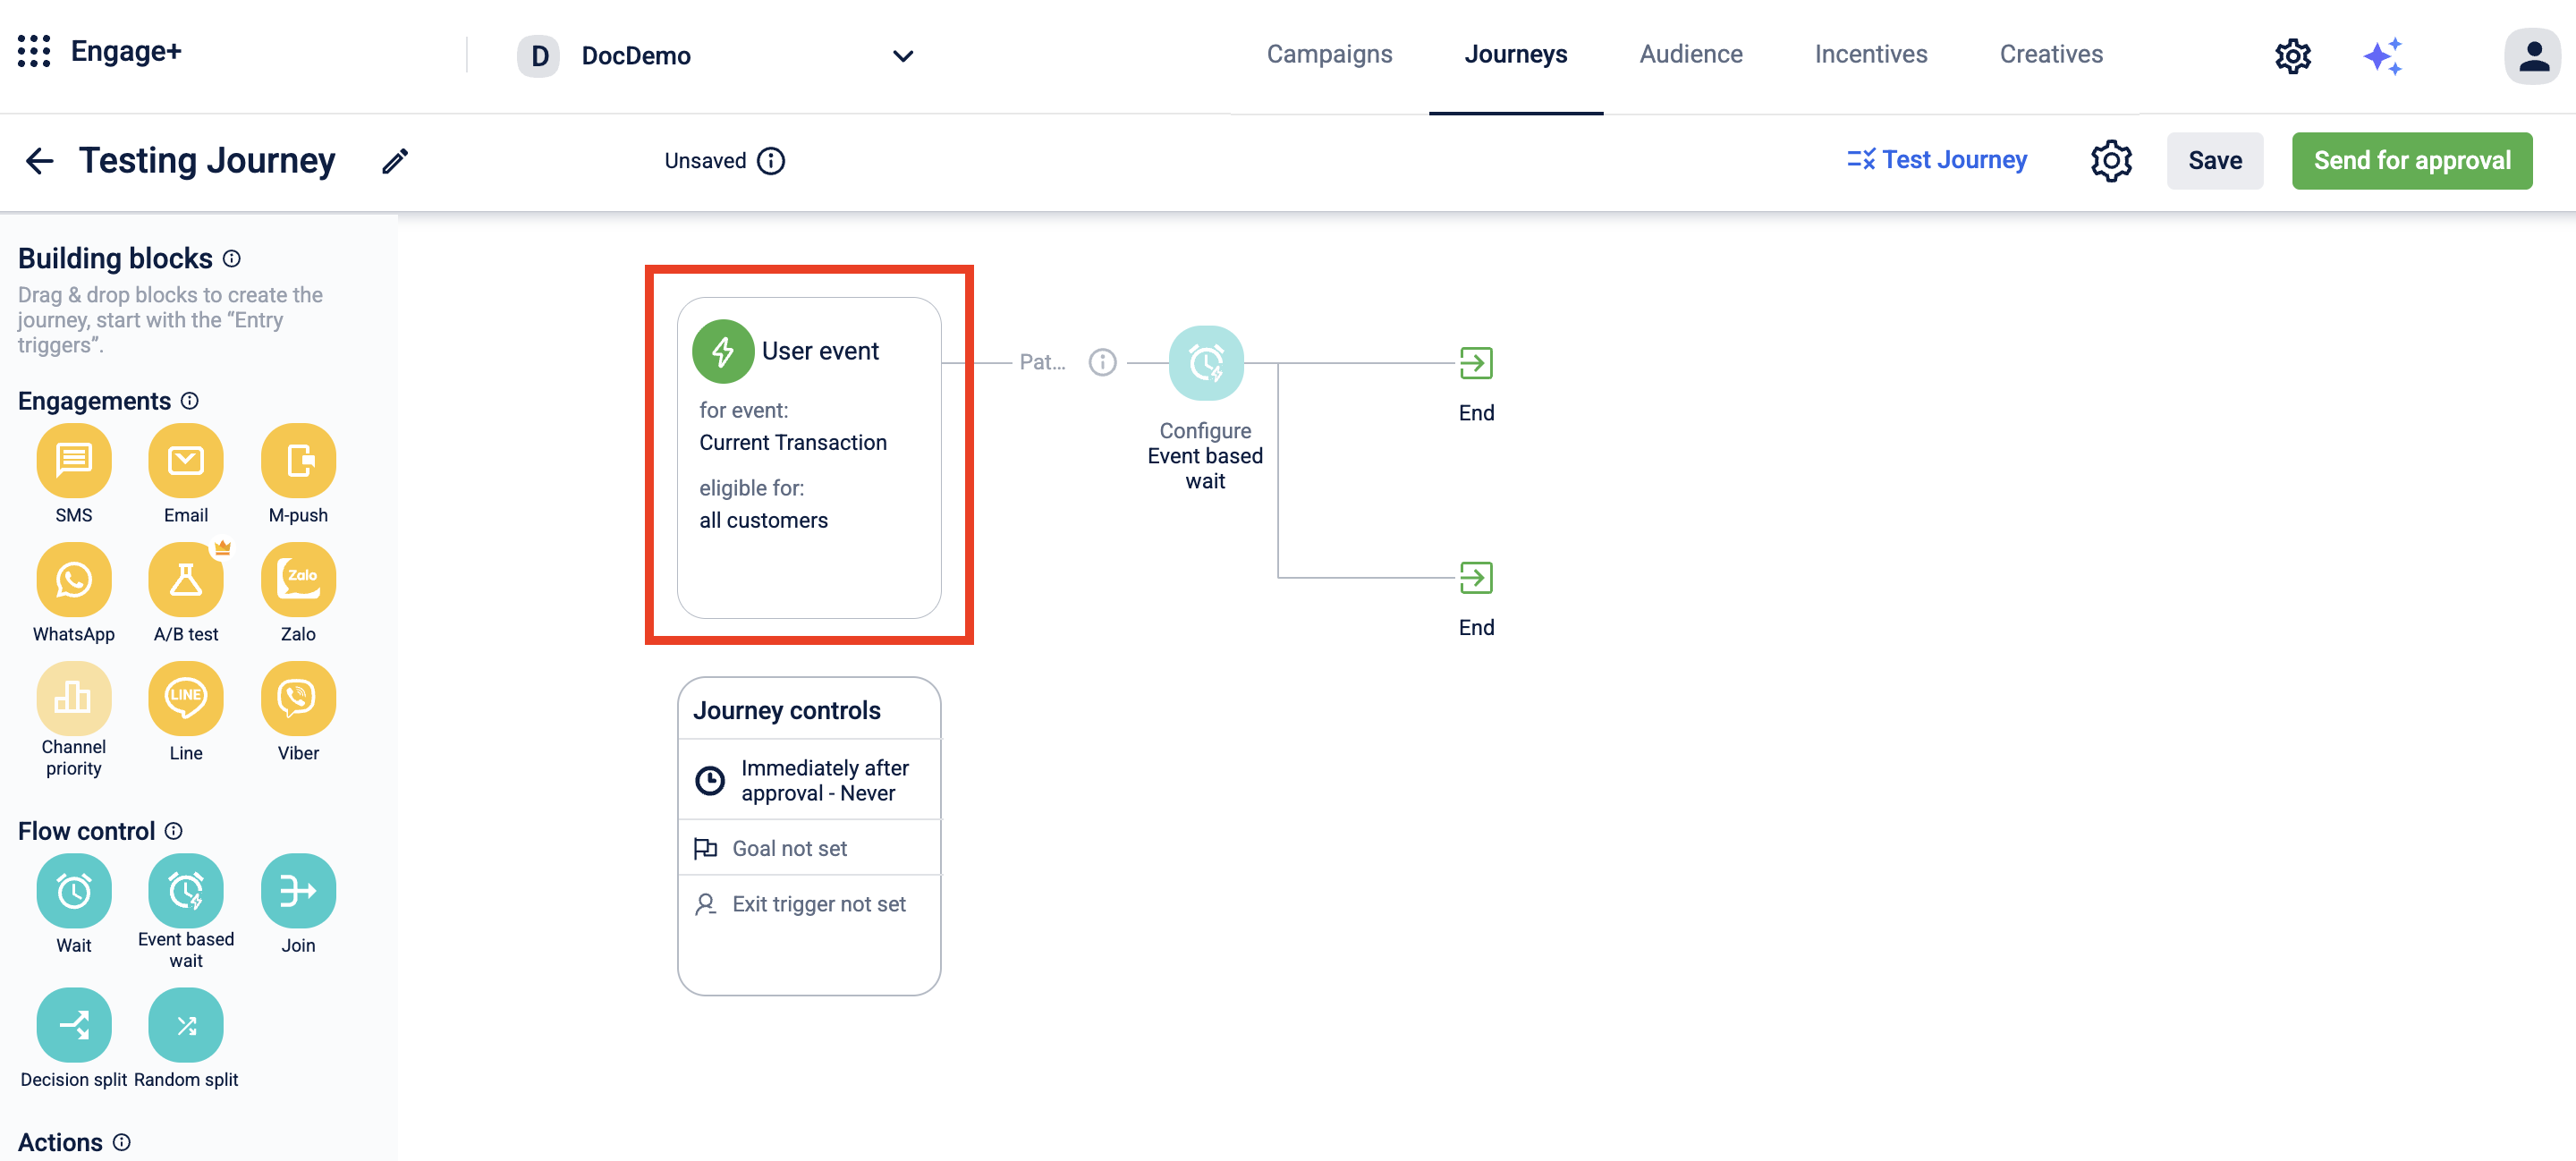
Step 1: Configure the entry trigger
Define how and when a customer enters the Journey. You can define an entry trigger based on a user event or audience list. For example, when a customer signs up, makes a purchase, or meets a specific condition, or defines an audience group to include specific customers in the journey.
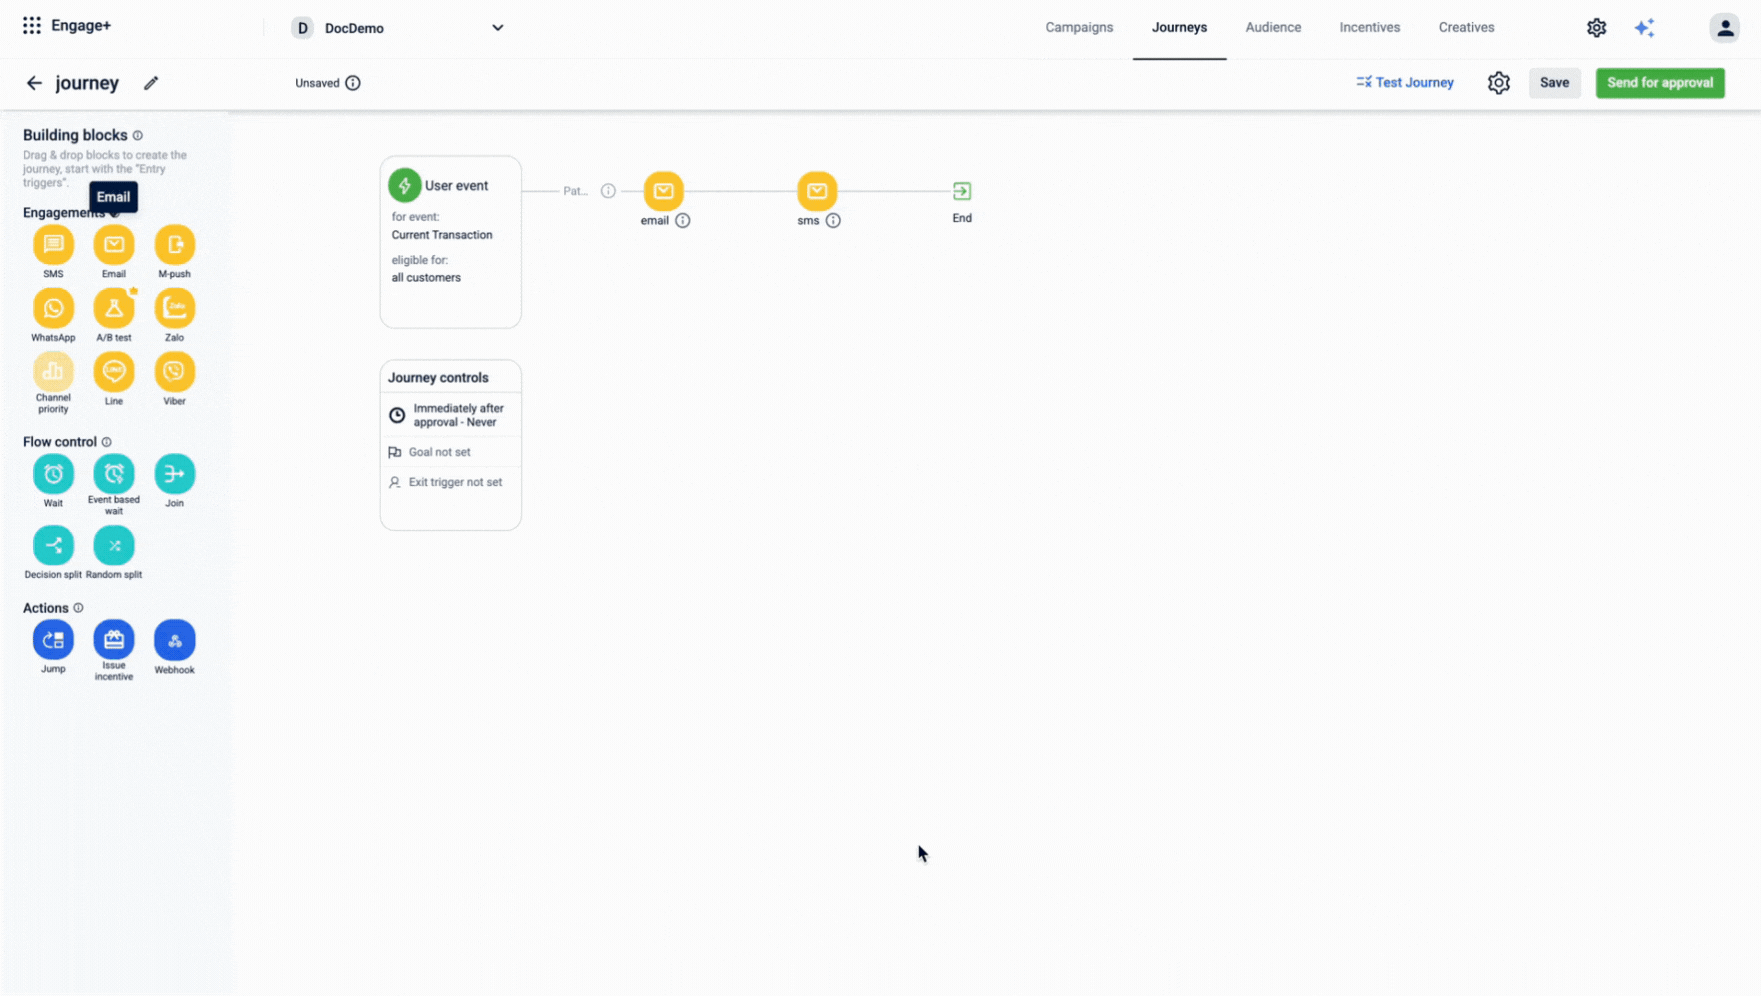
Step 2: Add the building blocks
This is where you design the core path of your Journey. Add the sequence of actions and communications, such as sending an email, updating customer data, or issuing incentives such as points that will guide the customer toward the desired outcome.
Specify when and how often the journey runs. You can choose to start it immediately, at a specific time, or on a recurring schedule.
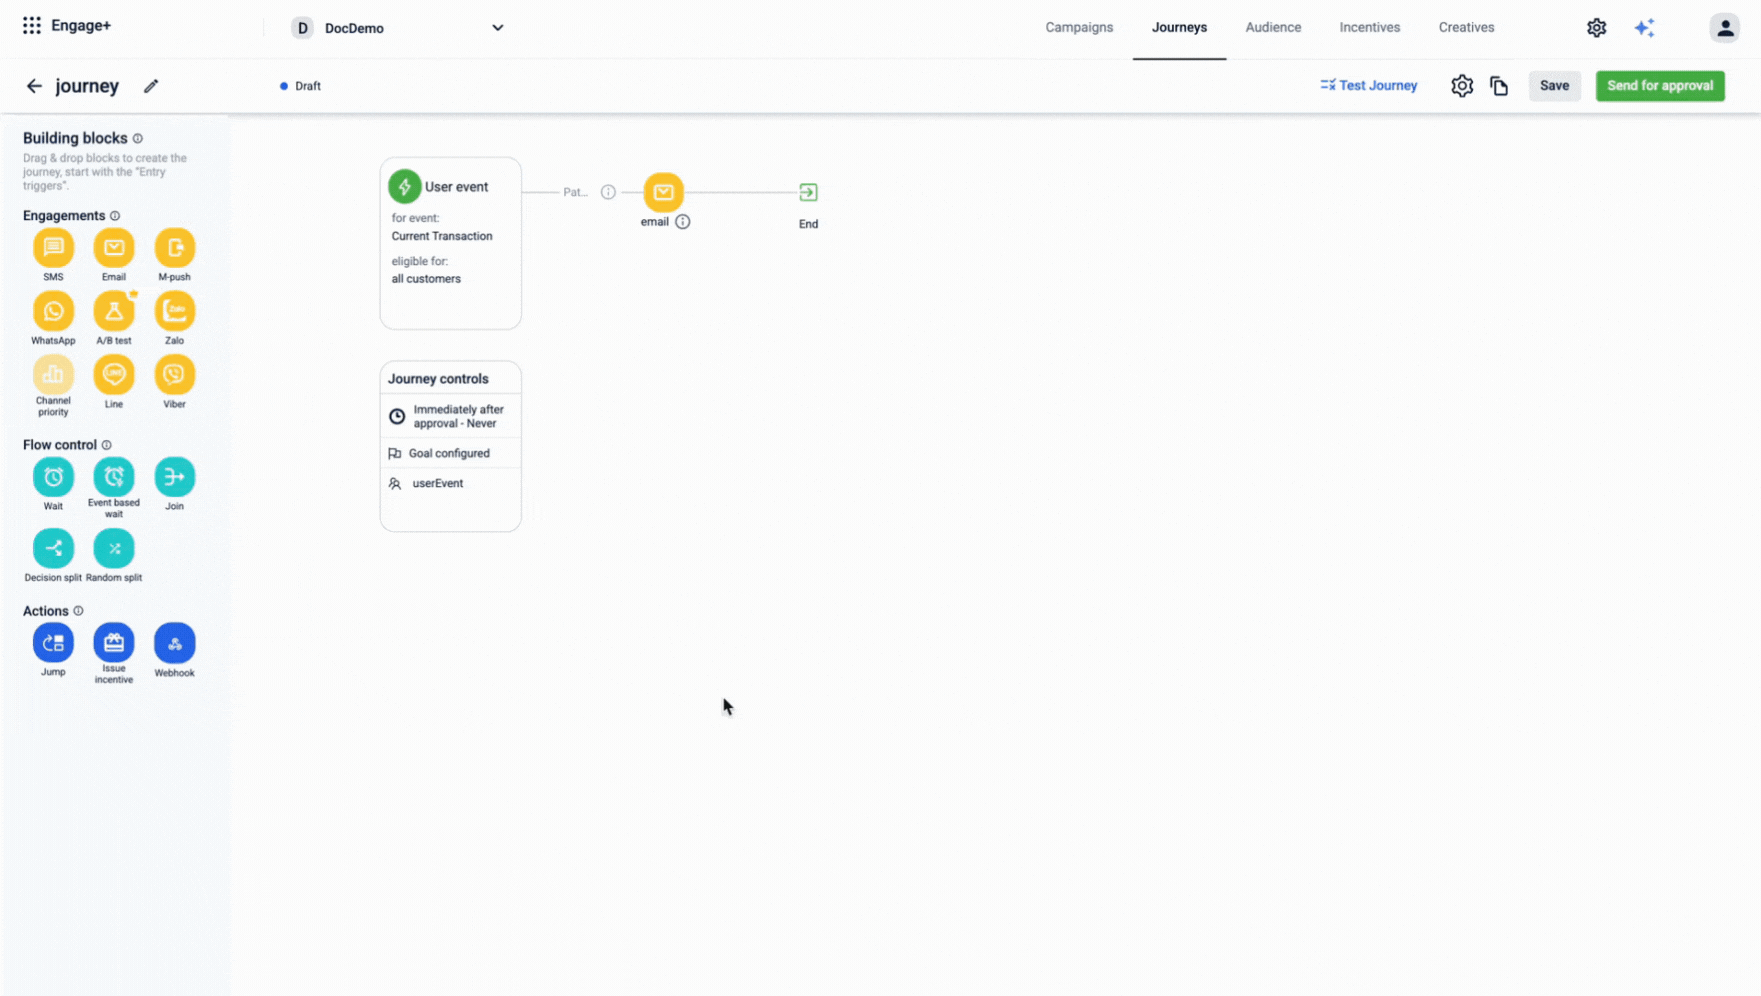
Step 5: Configure the conversion goal
The conversion goal lets you define a specific goal and strategy for a journey. This helps track and measure the journey’s performance against the defined goal.
Step 6: Configure the exit trigger
Define the conditions that will remove a customer from the journey. This is crucial for ensuring customers exit once they have completed the desired action (like making a purchase) or reached the end of the path, preventing them from receiving unnecessary communications.
Step 7: Configure journey settings
This allows you to define how often customers can enter or re-enter the journey, including limits and simultaneous participation rules.
Step 8: Send the journey for approval
Once your journey is designed and configured, submit it for review and approval before it can be activated.
Configuring the entry trigger
To configure an entry trigger, perform the following steps:
-
On the Journey Canvas page, select Entry Trigger to define how customers will enter the journey.
-
Select the type of entry trigger - User Event or Audience List. Note
-
For User Event: From the Who have performed the event drop-down, select the desired event type - Transactional Event or Behavioral Event.
Notes: Attribute-based entry trigger configuration is not enabled by default. To use this capability, raise a Jira ticket to the Product Support team to enable it for your organization.
When using the Exact match type in Entry Trigger conditions, the configured value must exactly match the corresponding event attribute value, including any leading or trailing spaces. If either the configured value or the event attribute contains unintended spaces, the condition will not match, and the customer will not enter the Journey.
Option A: Transactional Event
-
Select Transactional Event and choose the required transaction event from the list.
-
Click +Add Entry Paths to define additional criteria for customers to enter the journey.
-
Click +Conditions to add further filters.
- For transactional events, you can define conditions using three key attributes that help segment and direct customers through different paths based on specific characteristics or purchase details, such as loyalty tier or engagement patterns. The available attributes are: Customer Profile, Transaction Profile, and Store Profile. To know more about these attributes, refer to Adding conditions for transactional event .
Option B: Behavioral Event
-
Select Behavioral Event. You can either choose from existing custom events (if they meet your requirements) or create a new custom event.
-
Click +Add Entry Paths to define additional criteria for customers to enter the journey.
-
Click +Conditions to add further filters.
- For behavioral events, you can define conditions using four key attribute categories: Customer Profile, Store Profile, Product Profile, and Behavioral Event Profile. The Customer Profile and Store Profile attributes are the same as those used for transactional events. For the Behavioral Event Profile, configure attributes based on your specific requirements.
- For the Audience list, perform the following
- Click +Audience group.
2. Select an existing audience group or create an audience group. To create a new audience list, refer to Audience Management. You can select multiple audience groups if required. - Select Done. You have successfully created the entry trigger for the customers to enter the journey.
Changing the Entry Trigger
You can update the entry trigger anytime based on your requirements.
To change the entry trigger:
-
On the Journey Canvas, click the Edit icon on the existing entry trigger.
-
In the modal that appears, review the defined criteria and click Change.
-
Modify the entry criteria as needed and save your changes.
Adding the building blocks
For information on building blocks, see Building blocks of a journey.
Scheduling the journey
-
Select the Journey controls block to begin configuring the journey schedule. In the schedule tab of the journey controls modal, configure the start and end dates for the journey.
-
In the Starts section, there are two options.
- Immediately after approval: Start the journey as soon as it is approved by an administrator.
- On a specific date: Start the journey on a specific date. Select the date from the calendar box.
Note: A 3-hour buffer applies when selecting same day execution. For example, if you select today's date and approve the journey at 10:00 AM, the journey will not start until approximately 1:00 PM. Plan your start time accordingly to avoid unexpected delays.
-
In the Ends section, there are two options
- Never: Run a journey without an expiration date.
- On a specific date: End the journey on a specific date. Select the date from the calendar box.
Configuring the conversion goal (optional):
The journey conversion goal lets you define a specific goal and strategy for a journey. This helps track and measure the journey’s performance against the defined goal. Each journey supports one conversion goal.
Use case:
Requirement:
A retail brand wants to track how many customers complete their online purchase within 3 days of receiving an abandoned cart reminder email.
Solution:
Configure a journey conversion goal with the following settings:
- Conversion Event: Bill Lineitems
- Condition:
includewhoseOrder ChannelisOnline - Eligible Period: 3 Days
- Tracking Starts: Delivered'
Configuring a journey conversion goal:
To configure the journey conversion goal, follow these steps:
- On the canvas, select the Journey Controls block and open the Conversion goal settings.
- From the dropdown menu, select the conversion event you want to track, for example, Bill Lineitems
- Define the conversion criteria by selecting +Add conditions. Use the AND (+Add condition) and OR (+Add condition group) operators to build your logic based on the event's attributes.
- Under Eligible period for conversion, define the lookback window, for example, five days, and select when tracking should begin.
The following table details the available options to define when tracking begins:
| Status | Description |
|---|---|
| Sent | Tracking begins after the message is sent. |
| Delivered | Tracking begins once the message is delivered to the customer. |
| Opened | Tracking begins when the customer opens the message. |
| Clicked | Tracking begins when the customer clicks a link or call-to-action within the message. |
- Select the Message attribution logic to determine how the conversion is credited:
- Last touch: The customer's last engagement is attributed to the conversion.
- First touch: The customer's first engagement is attributed to the conversion.
- Select Save to confirm the goal, then select Save again to update the journey.
Configuring exit trigger (Optional)
An exit trigger is to remove a customer from a journey if they satisfy a given condition. Brands can configure transactional and behavioral events that can cause a customer to exit a journey. This ensures that customers do not get spam/out-of-context engagements.
Use Cases
- A brand wants to target customers who have purchased shoes from them and want to motivate them to buy clothes as well. If a customer has already purchased from the clothes category, they should not receive promotional messages to buy clothes which can be configured in the exit trigger.
- Brands want to motivate users by asking them to upgrade to members. Customers who purchased the membership should be exited from the membership promotional journey
To configure the exit trigger, follow these steps:
- Select the Journey controls block to begin configuring the journey schedule. In the exit trigger tab of the journey controls modal, configure the exit trigger.
- Select a user event from the Select event dropdown.
- Select +Add condition and specify the criteria for exiting based on the selected event's attributes. You can choose to include or exclude conditions and define operators (like equals, contains) and values. The available fields depend on the event you selected.
- Select Save to save all changes to your journey.

Removing an exit trigger
This allows you to remove an existing exit condition from a journey, giving you the flexibility to control when customers should no longer exit based on that trigger. You can remove the exit trigger when the journey is in Draft or Live state, as long as an exit trigger is already configured.
To remove an exit trigger perform the following steps
- On the journey listing page navigate to the journey that has exit trigger configured.
- Select the journey and on the journey canvas navigate to Journey controls.
- Select the edit icon to open the configuration modal, then select Exit Trigger.
- Navigate to the three dots and select Remove exit trigger.
- A confirmation modal appears. Select Yes, remove to proceed.
The exit trigger will be removed from that particular journey.
Configuring journey settings
You can click on the settings icons in the Journey canvas and configure the settings below for the journey.

Entry settings
Customer entry to the same journey
This feature allows you to enable the same journey for customers multiple times if they meet the entry conditions. It supports consistent engagement and helps reach customers at the right moment.
This helps to:
- Maintain consistency in engagement
- Provides a good customer experience by limiting over-communication with the customers
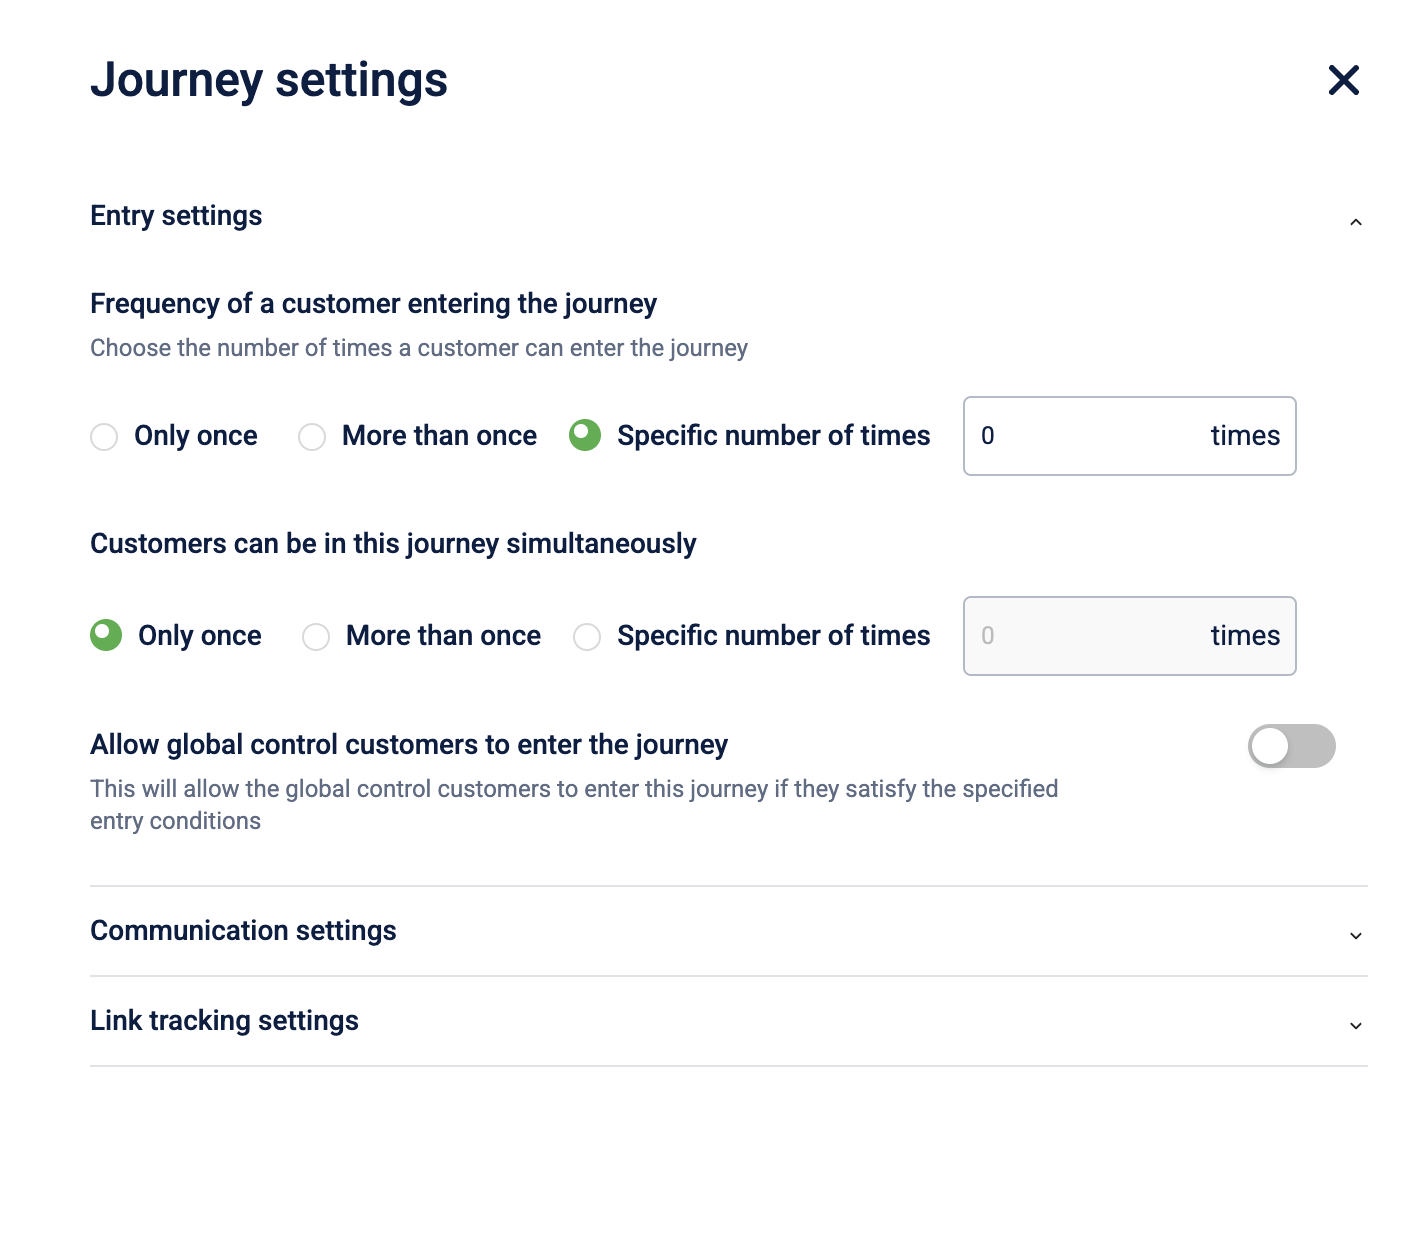
The following conditions must be satisfied for a customer to enter or re-enter the journey. You can configure the settings as follows:
- Frequency of a customer entering the journey- Set how many times a customer is allowed to enter the journey.
- Customer can be in this journey simultaneously- Allow a customer to be part of the journey more than once at the same time if the customer meet the entry conditions again.
Note: This setting is applicable only for journeys with event-based entry triggers. It is not supported for audience-based journeys.
Note
Once entry settings are configured and the journey is published (goes live), they cannot be modified in future versions of the journey.
These are the settings for how often a customer can enter the journey:
| Frequency | Description for Frequency of a customer entering the journey | Description for a customer can be in this journey simultaneously |
|---|---|---|
| Only once | Allows the customer to enter the journey only once. | The customer can have only one active instance of the journey at a time. Once they enter the journey, they remain part of it until they complete or exit it. If they meet the entry criteria again during this period, it does not create a new journey instance. They can enter the journey again only after completing or exiting the current instance and meeting the entry criteria again. |
| More than once | Allows the customer to enter the journey multiple times. There is no limit set. | The customer can have multiple active instances of the journey at the same time. They can re-enter the journey without waiting for the previous one to finish. |
| Specific number of time | Allows customers to enter the journey a fixed number of times. | The customer can enter the journey up to a set number of times, and may have multiple instances running at the same time (unless limited by other settings). |
Example Use Case
Scenario 1 - Ticket Confirmation Reminder
A Ticket Confirmation Reminder journey allows customers to receive a confirmation email after booking a ticket, with the following settings and conditions:
Journey Conditions
- Booking Requirement: The customer must successfully book a ticket (for an event, travel, or movie).
- Notification: They receive a confirmation email with their ticket details.
- Wait Period: The confirmation email is sent 15 min after the ticket booking is completed.
Restrictions
- Entry Limit: The customer can participate in the journey for one booking at a time.
- Re-entry Condition: The customer can enter the journey again only after the current journey is completed and they make a new booking.
Customer Journey Behavior
Once the customer books a ticket, they will receive a confirmation email after 15 minutes. If the customer books another ticket during this 15-minute period, this second booking does not trigger a new journey instance, as the customer is already part of an ongoing journey.
After the confirmation email is sent (i.e., the journey is completed), any new booking made by the customer will trigger a new journey instance.
Configuration Settings for the Scenario:
| Settings | Value | Detail |
|---|---|---|
| Frequency | More than once | This allows the customer to receive multiple confirmation emails if they book multiple tickets. |
| Simultaneous | Only once | This ensures that only one journey instance can be active at a time. If another booking happens while a journey is active, it does not trigger a new journey instance. |
Scenario 2 - Electronics Store Cashback Offer
A Festive Season Cashback Deal allows customers to earn $1000 cashback on a ₹10,000 electronics purchase, with the following settings and conditions:
Journey Conditions
- Purchase Requirement: The customer must buy electronic items worth ₹10,000 or more.
- Reward: They receive ₹1000 cashback for each qualifying purchase.
- Wait Period: Cashback will be credited 2 days after the purchase.
- Offer Validity: The offer is valid for 30 days from the campaign start date.
Restrictions
- Entry Limit: The customer can participate more than once during the 30-day period.
- Re-entry Condition: The customer can receive cashback a maximum of 3 times during the 30-day period.
Customer Journey Behavior
During the festive sale, customers can earn ₹1000 cashback every time they buy electronics worth ₹10,000 or more. They can avail this offer up to 3 times within 30 days. The cashback is processed 2 days after each qualifying purchase. Customers are allowed to make multiple purchases at the same time (as long as they haven’t hit the 3-time limit).
Configuration Settings for the scenario
| Settings | Value | Detail |
|---|---|---|
| Frequency | Specific number of times - 3 | This means a customer can receive the cashback up to 3 times during the 30-day offer period. |
| Simultaneous | More than once | This allows the customer to make multiple qualifying purchases at the same time, and still receive cashback for each (as long as they haven’t already received it 3 times). |
Allow global control customers to enter the journey
You can enable this to include the Control audience (a control audience is a group of individuals who are intentionally left out of a campaign, in order to serve as a group for comparison) in the journey. By default, the control audience is not included in the journey.
Communication Settings
You can enable the toggle switch Ignore subscription status for all communication channels to send messages including transactional messages to all customers, even if their promotional subscriptions are configured to not receive messages. This bypasses the promotional subscription status settings.
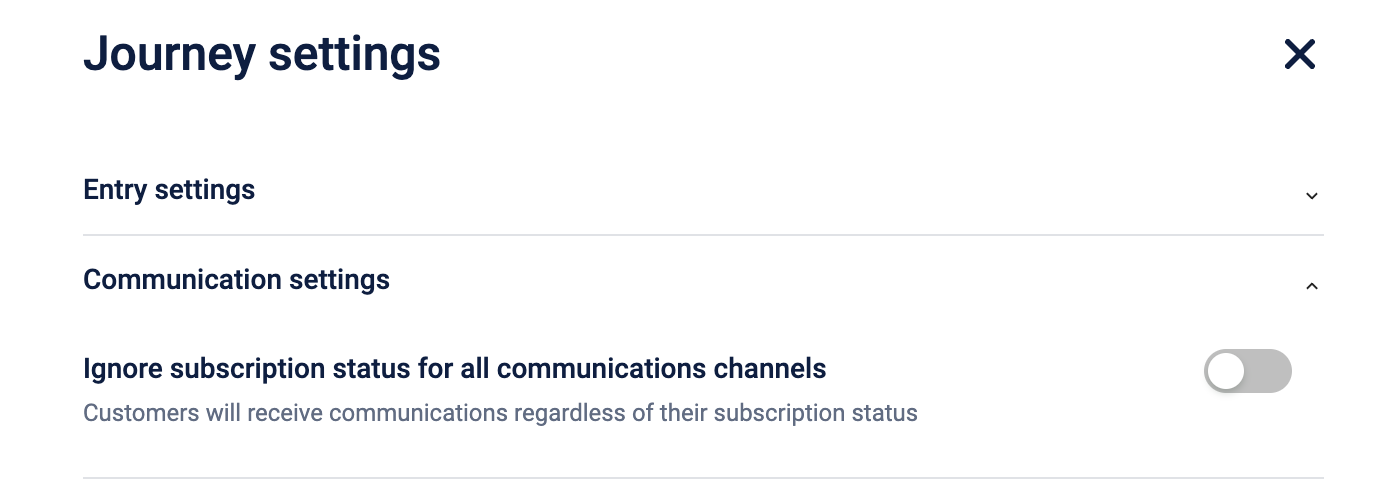
Note: Some transactional or direct emails may bypass subscription checks and reach customers who have unsubscribed from promotional emails. These emails may also not appear in journey or campaign reports. If you enable Ignore subscription status for all communication channels, emails are sent to all customers regardless of their subscription status.
Shortening URLs in communication messages
You can enable the Shorten URL toggle switch in the Link tracking settings to shorten URLs in communication messages. This is applicable for all the engagement channels.
Journey alerts
Journey Alerts are automated email notifications that keep you informed about important events related to journeys. By setting up these notifications, you can monitor journey approvals, status changes, and upcoming expiries without manually checking the system. The alerts are sent in real-time: Alerts are sent in real-time after the triggering event occurs.
You can set the following types of alerts:
| Type of alert | Description | Example |
|---|---|---|
| A/B test alerts | Notifies users of the status. For more information, refer to the documentation on A/B test block. | The "Summer Sale" A/B test has concluded. Version B was the winner and is now being sent to the remaining audience. The system sends an email to the points of contact (POCs), informing them of the following. |
| Journey approval request | Notifies the users when a new journey is sent for approval. When a user submits a new journey that requires approval, this alert is sent to the designated approvers. | A marketing associate finishes creating a "New Year Sale" journey and sends it for approval. An alert is immediately emailed to their manager (who is a designated POC), notifying them that a journey is pending review. |
| Journey status change alert | Notifies the users when the status of a journey is updated. | A "Summer Specials" journey is running, but an integration error causes it to fail. An alert is instantly sent to the system administrators, informing them that the journey's status is now "Failed" so they can investigate and resolve the issue quickly. |
| Journey expiry alert | Notifies the users when a journey is approaching expiry. This alert provides a notice before a journey reaches its scheduled end date. | A "Holiday Deals" journey is scheduled to end on October 31st. You have configured a 5-day expiry alert. On October 26th, an email is sent to the POCs, reminding them that the journey is ending soon, so they can decide whether to extend it or prepare a new one. |
Prerequisite
- Configure the people you want to notify as points of contact(POCs) for your organisation.
Configuring journey alerts
To alert users on message approval requests, low delivery rates, or execution failures, do the following:
-
On the Engage+ home page, select the settings icon and go to the Alerts page > Journey alerts tab.
-
Against the respective journey alert type, select the users to notify from the dropdown. The dropdown lists the points of contact (POCs) for the organisation.
-
Enter the number of days before the expiry date to receive the alert. This notification gives you time to extend the journey or plan a replacement before it ends. For example, enter
3to receive a notification three days before the journey ends. This is applicable for the Journey expiry alert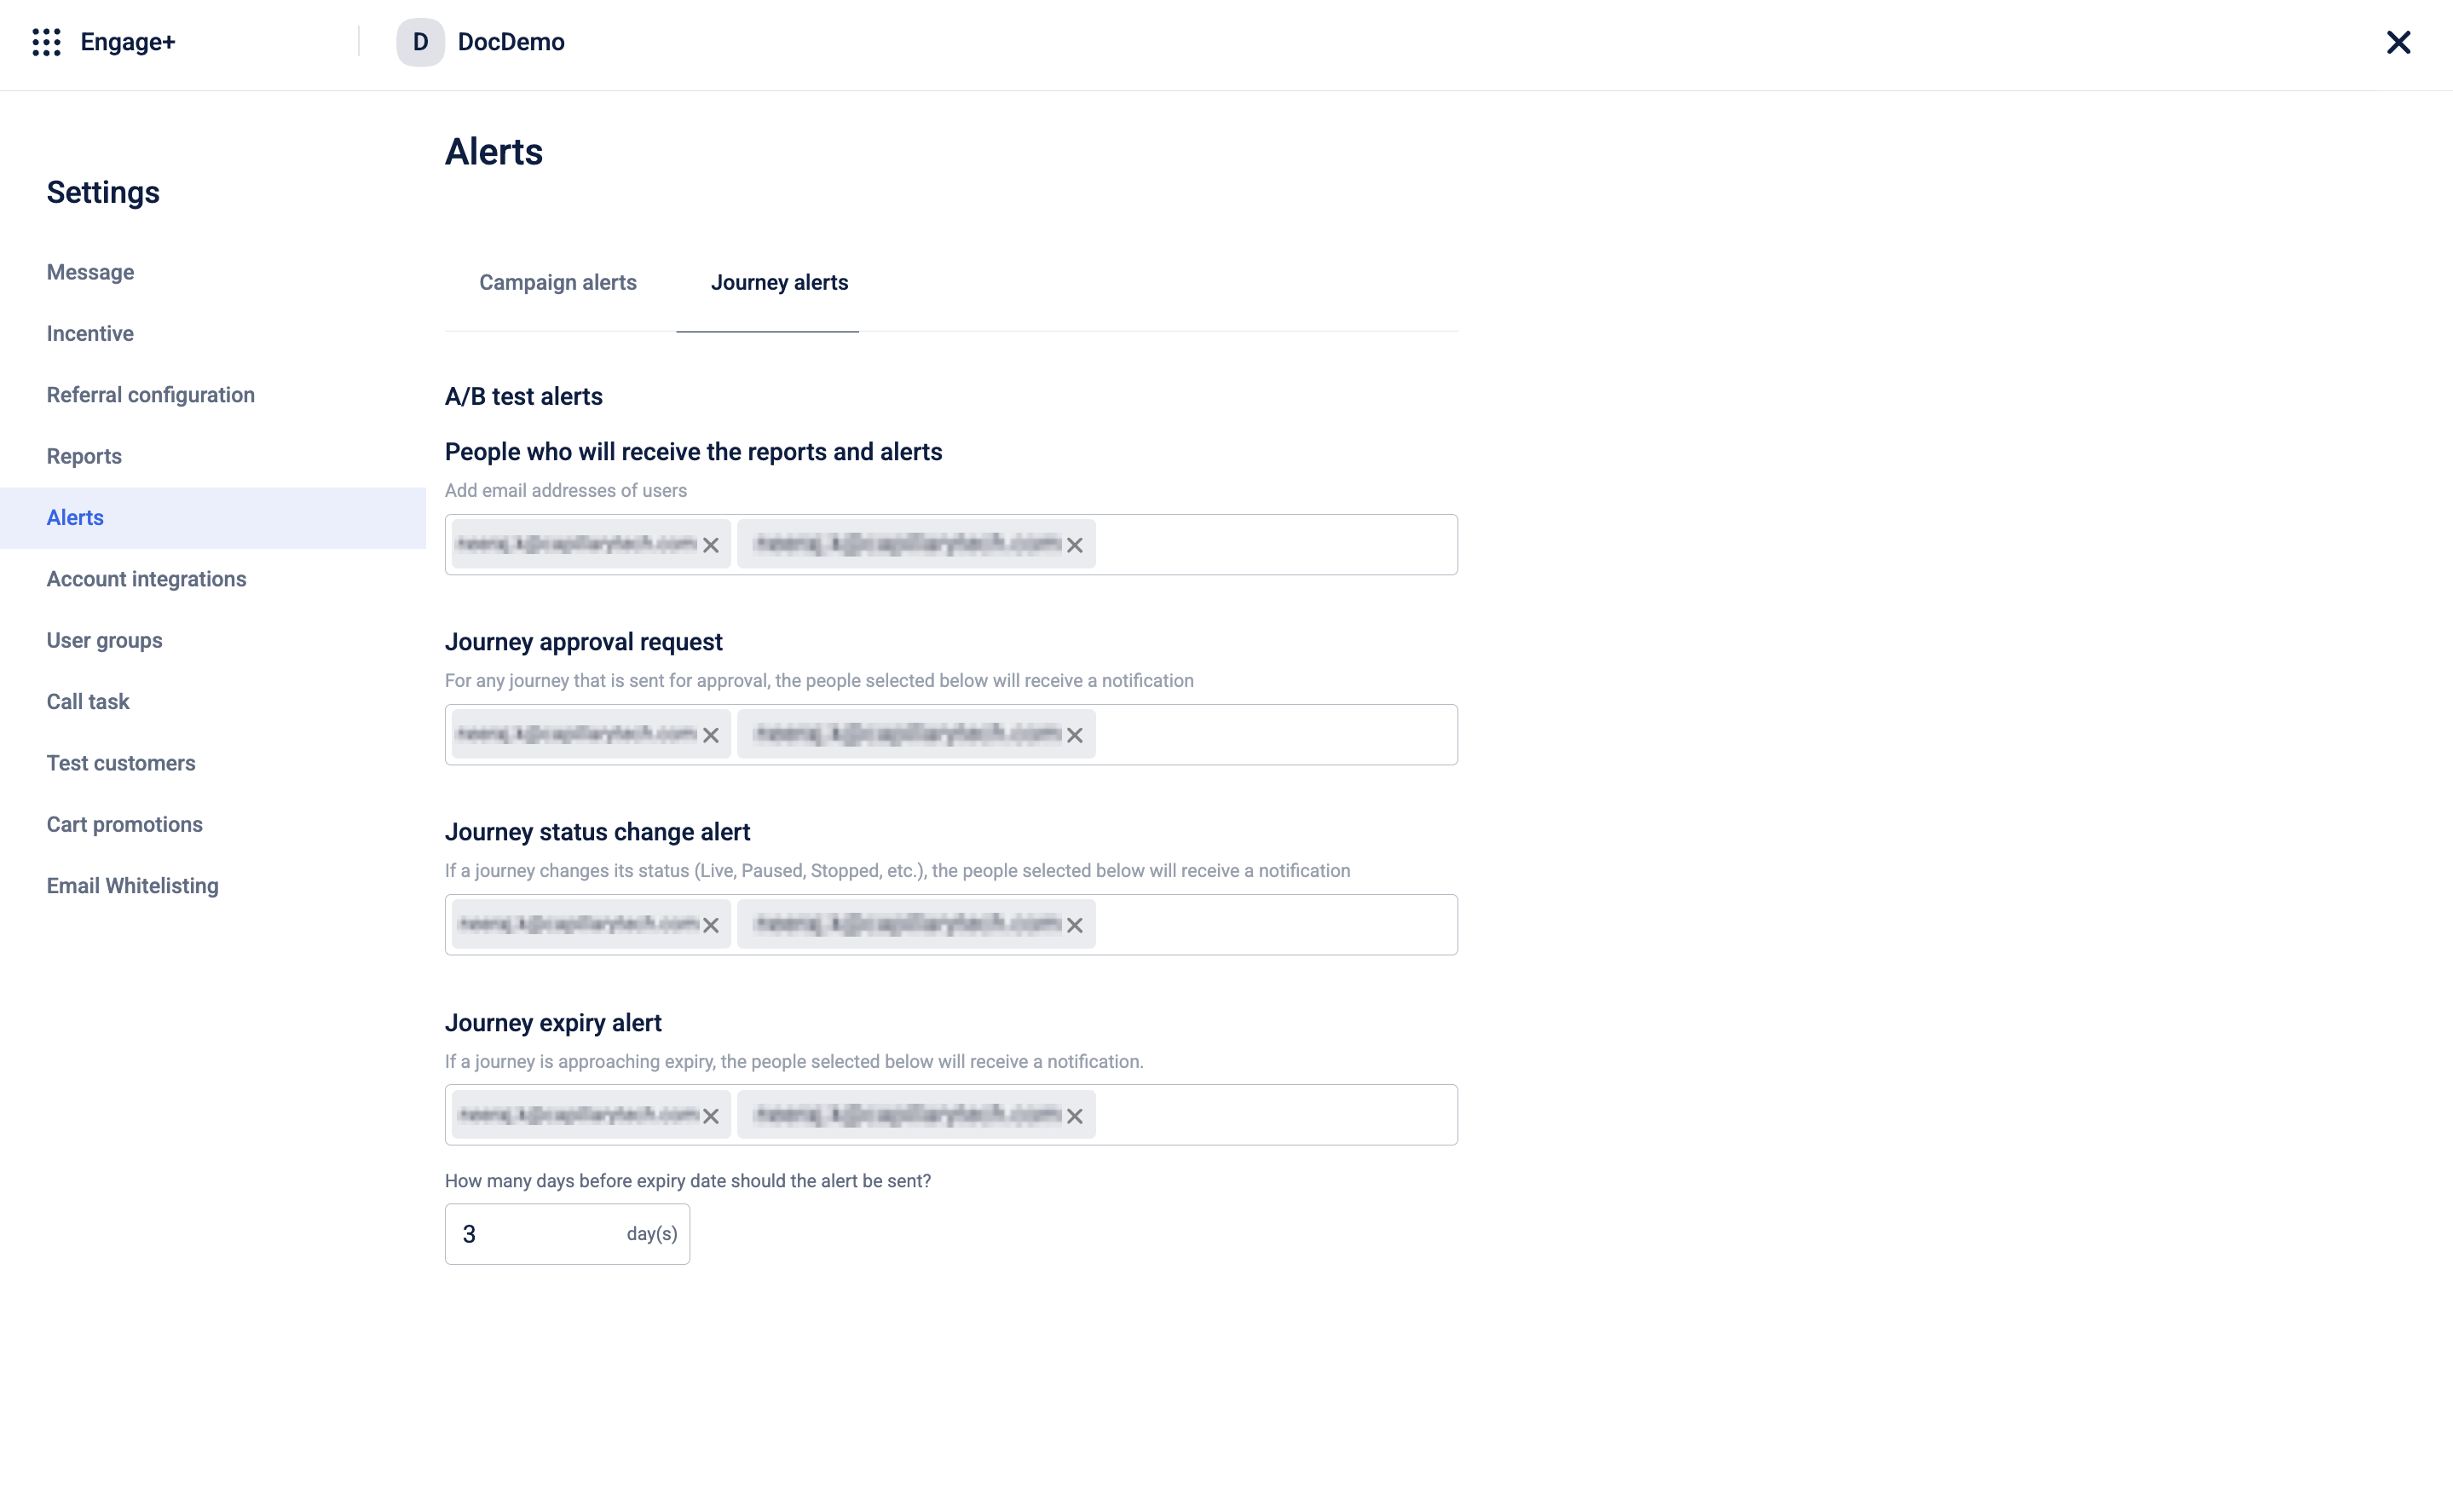
The settings are saved automatically.
Frequently asked questions (FAQs)
1. What is the purpose of setting up Journey Alerts? Journey Alerts are automated email notifications designed to keep you informed about critical events in your marketing journeys. They enable you to proactively monitor campaigns for approval requests, execution failures, or upcoming end dates, allowing you to take timely action and ensure your campaigns run smoothly.
2. I'm trying to add a team member to the notification list, but I'm unable to find them. Why? The person selection dropdown list shows only people who are configured as a point of contact (POC) for your organization. If you can't find a team member, an administrator must first add them to the organization POC list.
3. If I set the expiry alert to seven days in advance, will I get a notification every day for those seven days? No. The alert is sent only once. You will receive a single notification exactly seven days before the journey is scheduled to expire, providing you with a one-time notification.
4. Can I apply these alert settings to a specific journey only? No, the current alert settings are global. When you configure a person to get an alert (for example, a status change alert), they will get that alert for all journeys created on the platform. Journey-specific alert settings aren't currently available.
5. How are the alerts delivered? All Journey Alerts are delivered by email to the people you select in the configuration.
6. Is there any retry mechanism if the message fails to send No, there is no retry mechanism if the message fails to send.
Sending Journey for approval
Before sending a journey for approval, ensure the following:
- New Credit management system is enabled for your org. If it is not, kindly raise a ticket to the Sustenance team.
- Credit rates for all channels that are used for communication in the journey are configured.
After you have configured steps 1 to 5 above, you need to save the journey and send it for approval by clicking on "Send for approval".
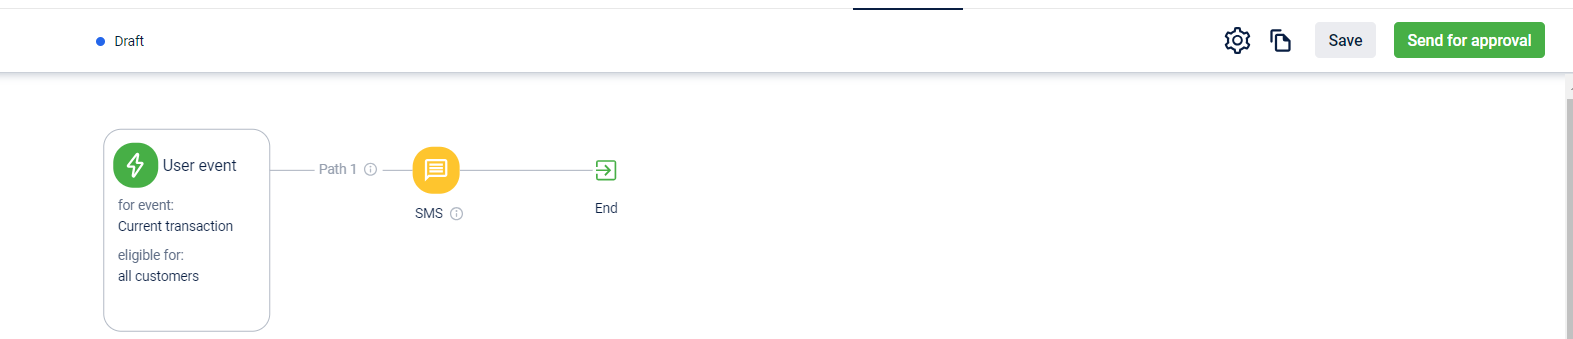
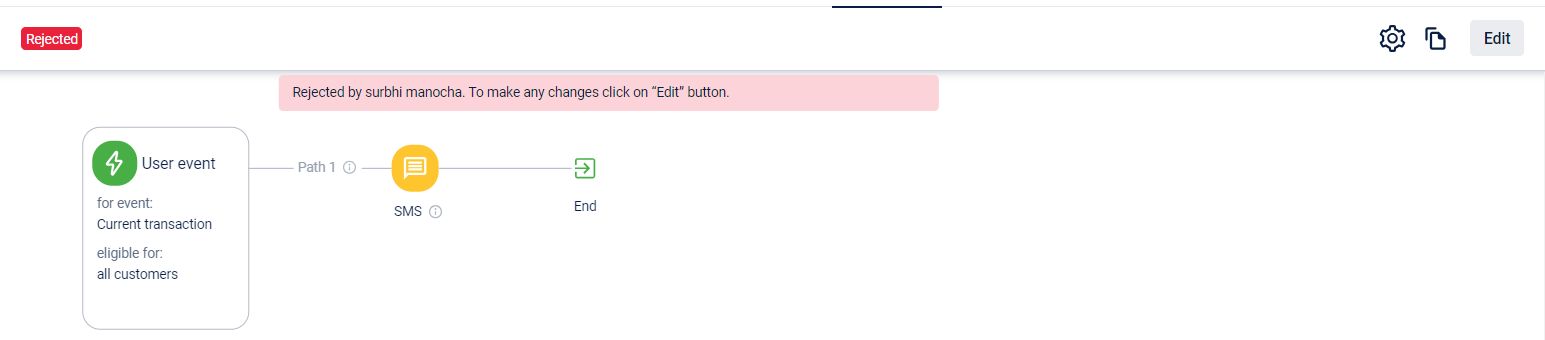
Once the journey has been sent for approval, the approver can approve the journey and the journey will go live as per the schedule configured in Step 3 above.
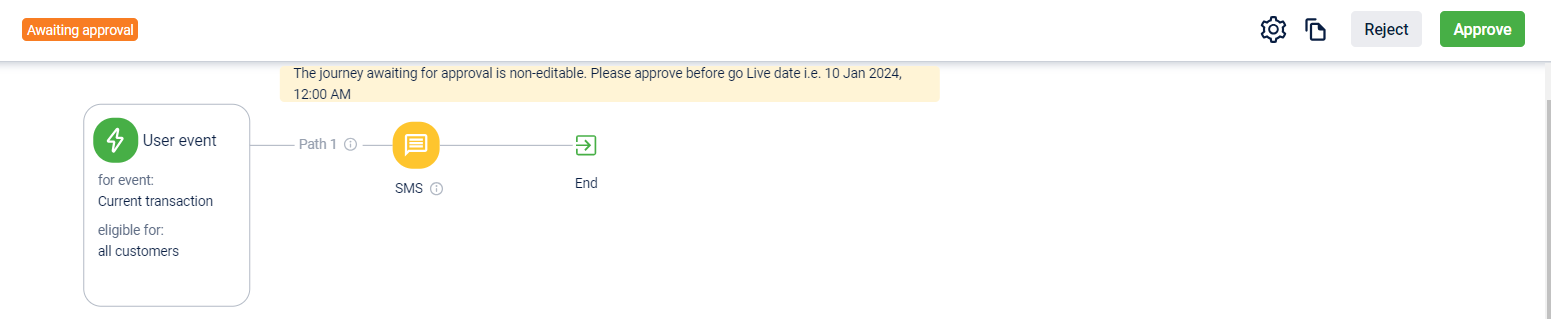
The approver can also reject the journey if the journey needs certain modifications. In that case, journey will go to "Rejected" state and you will have to make changes to the journey by clicking "Edit"
Updated 24 days ago