Grouping and Ranking of Badges
You can define badge groups, the rank of the group and the rank of badges even without the group tagging. This enables sorting customers' badge collections and highlighting their achievements.
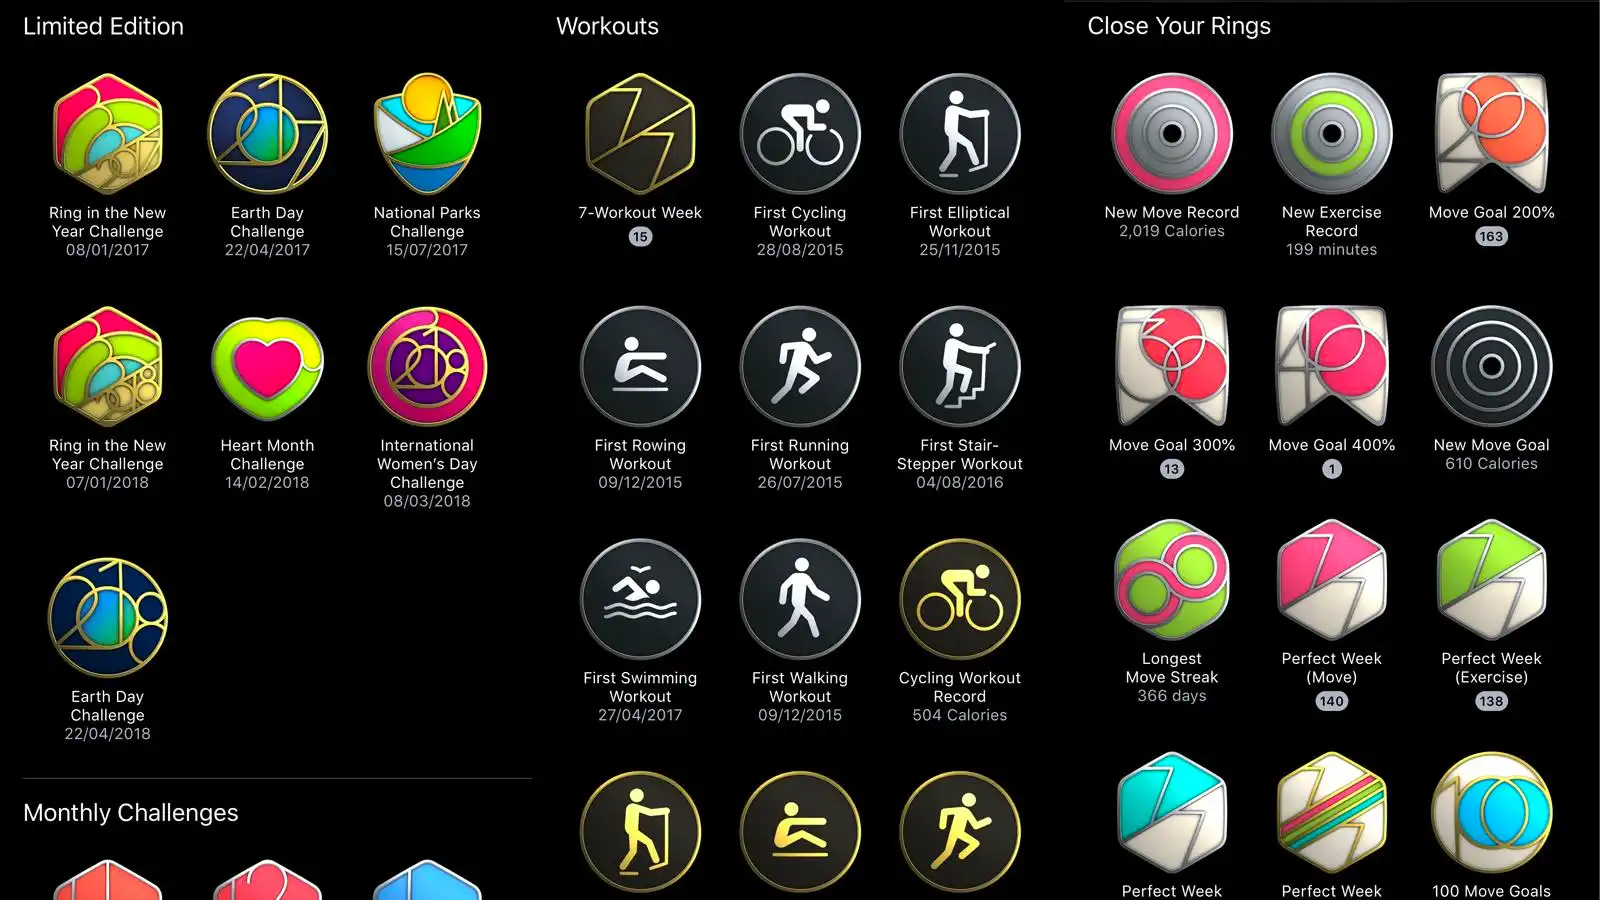
For example, in the below screenshot, Limited Edition badges have a higher priority followed by Monthly challenge badges, Workout badges, and Close your Rings badges. Within each defined group, badges are sorted based on their rank.
Example
Consider three badge groups, Group 1, Group 2 and Group 3 ranked 1, 2, and 3. While creating badges, Badge 1 is tagged with Group 1, Badge 2 is tagged with Group 2, and Badge 3 doesn't have any group tagged but has a badge rank of 1.
Retrieving badges list
In the above scenario, when you retrieve the list of badges available for a customer, the system prioritizes based on the defined groups and badge ranks. Initially, the list is ordered as Badge 1, then Badge 2, and finally Badge 3 (due to the group tag of Badge 3 being null but having a rank).
Impact on deleting a group
If a group is deleted the order of the badges also changes. For example, if Group 1 is deleted, fetching the badge list will now prioritize Badge 2 first (as it belongs to Group 2), then Badge 3 (due to its rank), and finally Badge 1.
The sorting of the badges is performed using the sortOn parameter in the Get customer badge API.
Sorting logic:
- Preference will be given to the groups as per their ranking
- Within the group, preference will be given to the badges for which badge rank is defined, the rest of the badges with no badge rank will be sorted in default descending order of expired date
- If badges with no group are defined, they will be sorted in order of badge rank (if defined), followed by default descending order of expired date
Creating a Group and Assigning a Rank to It
To create the group
Start by navigating to the badges UI settings.
- Go to the badges UI settings.
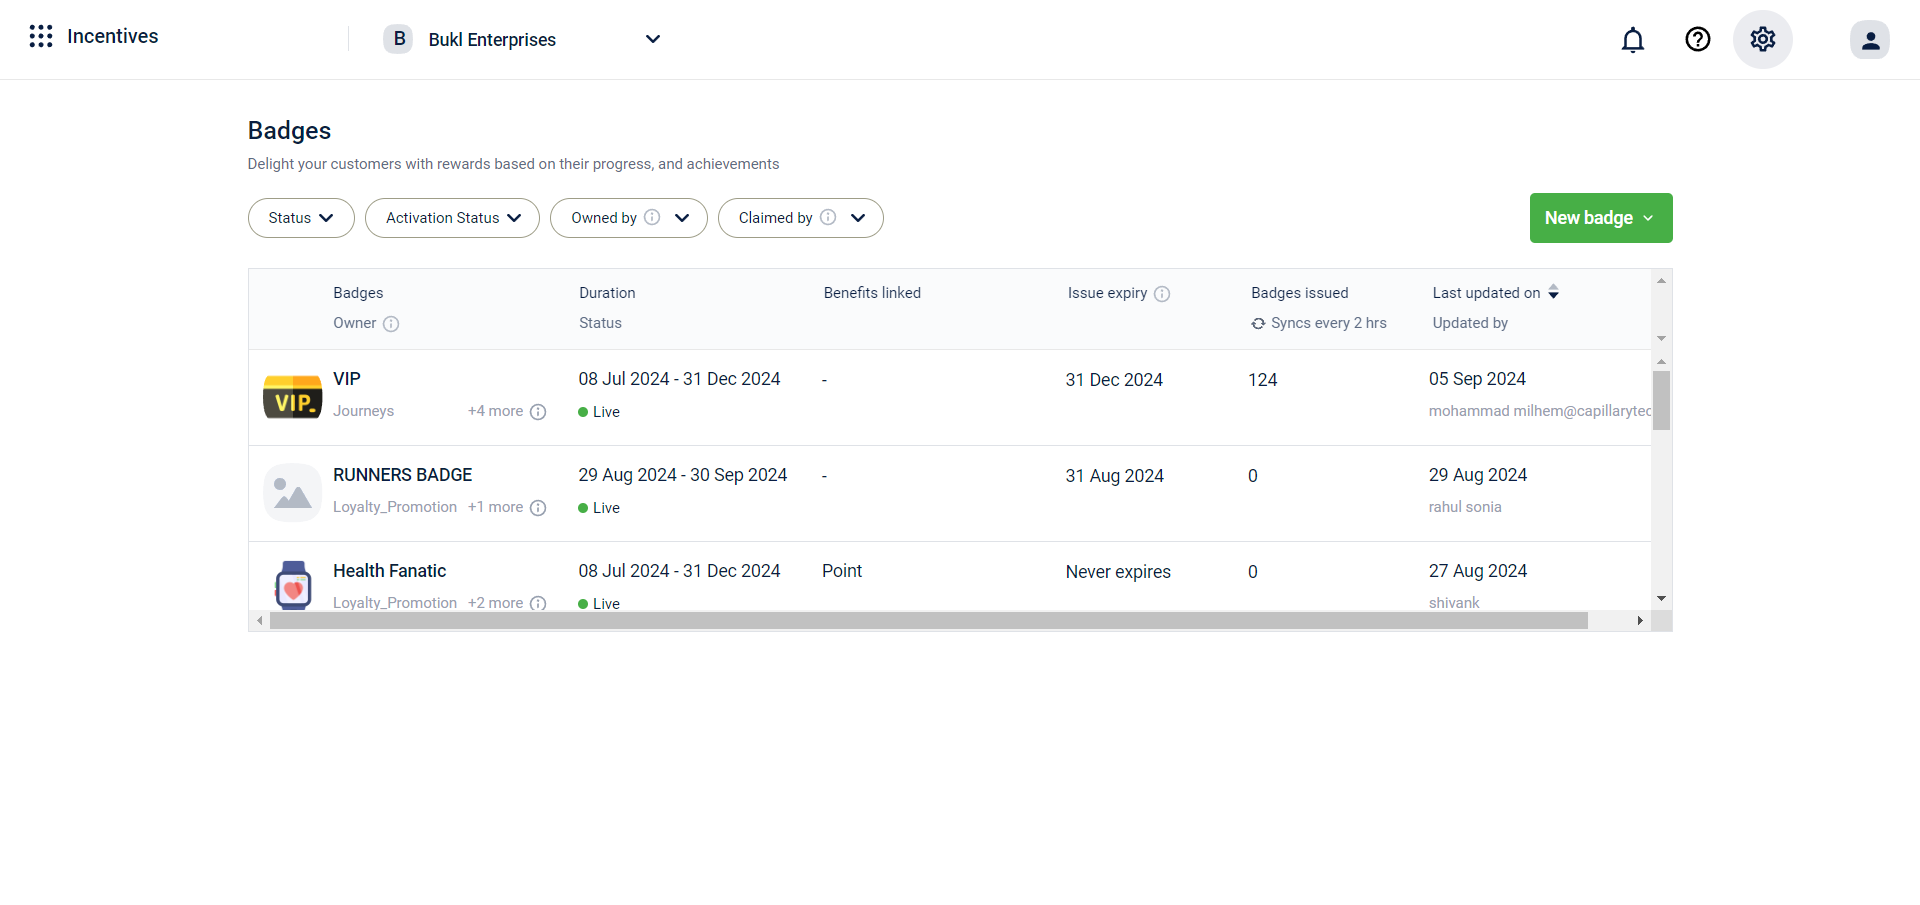
- Navigate to the group section and click on "New Group". Here, you'll create a new group.
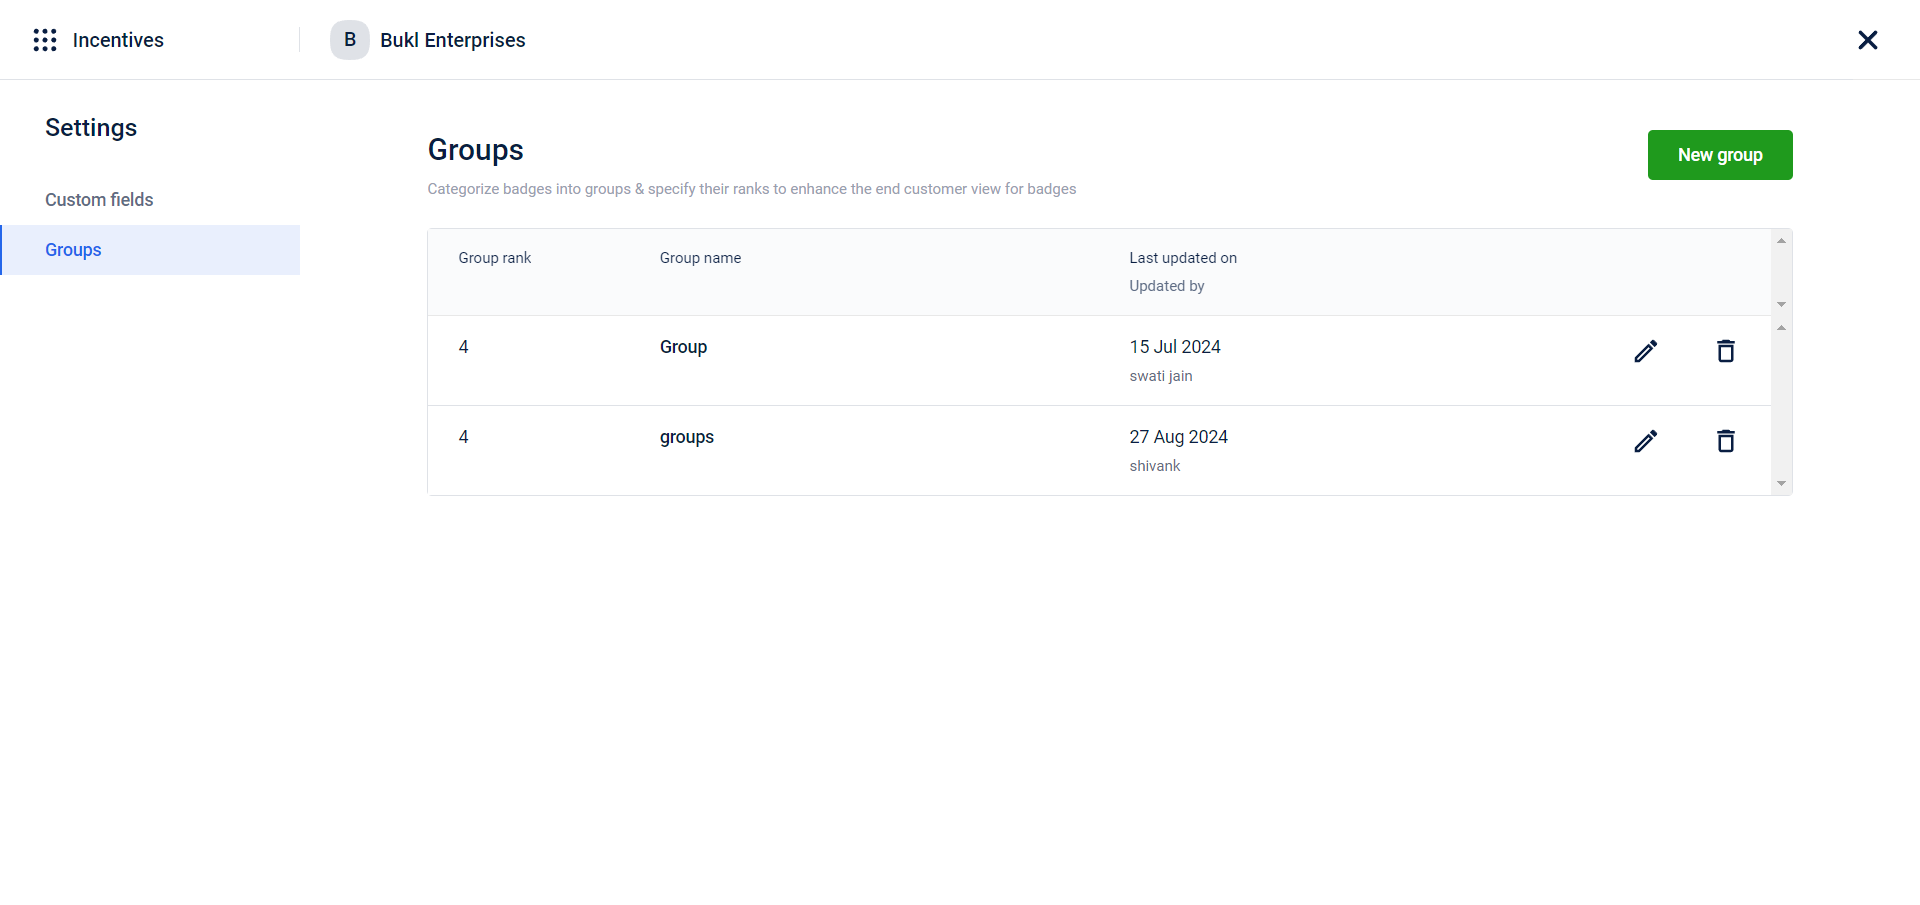
- Name the group, for example, "Summer Group". Give your group a name.
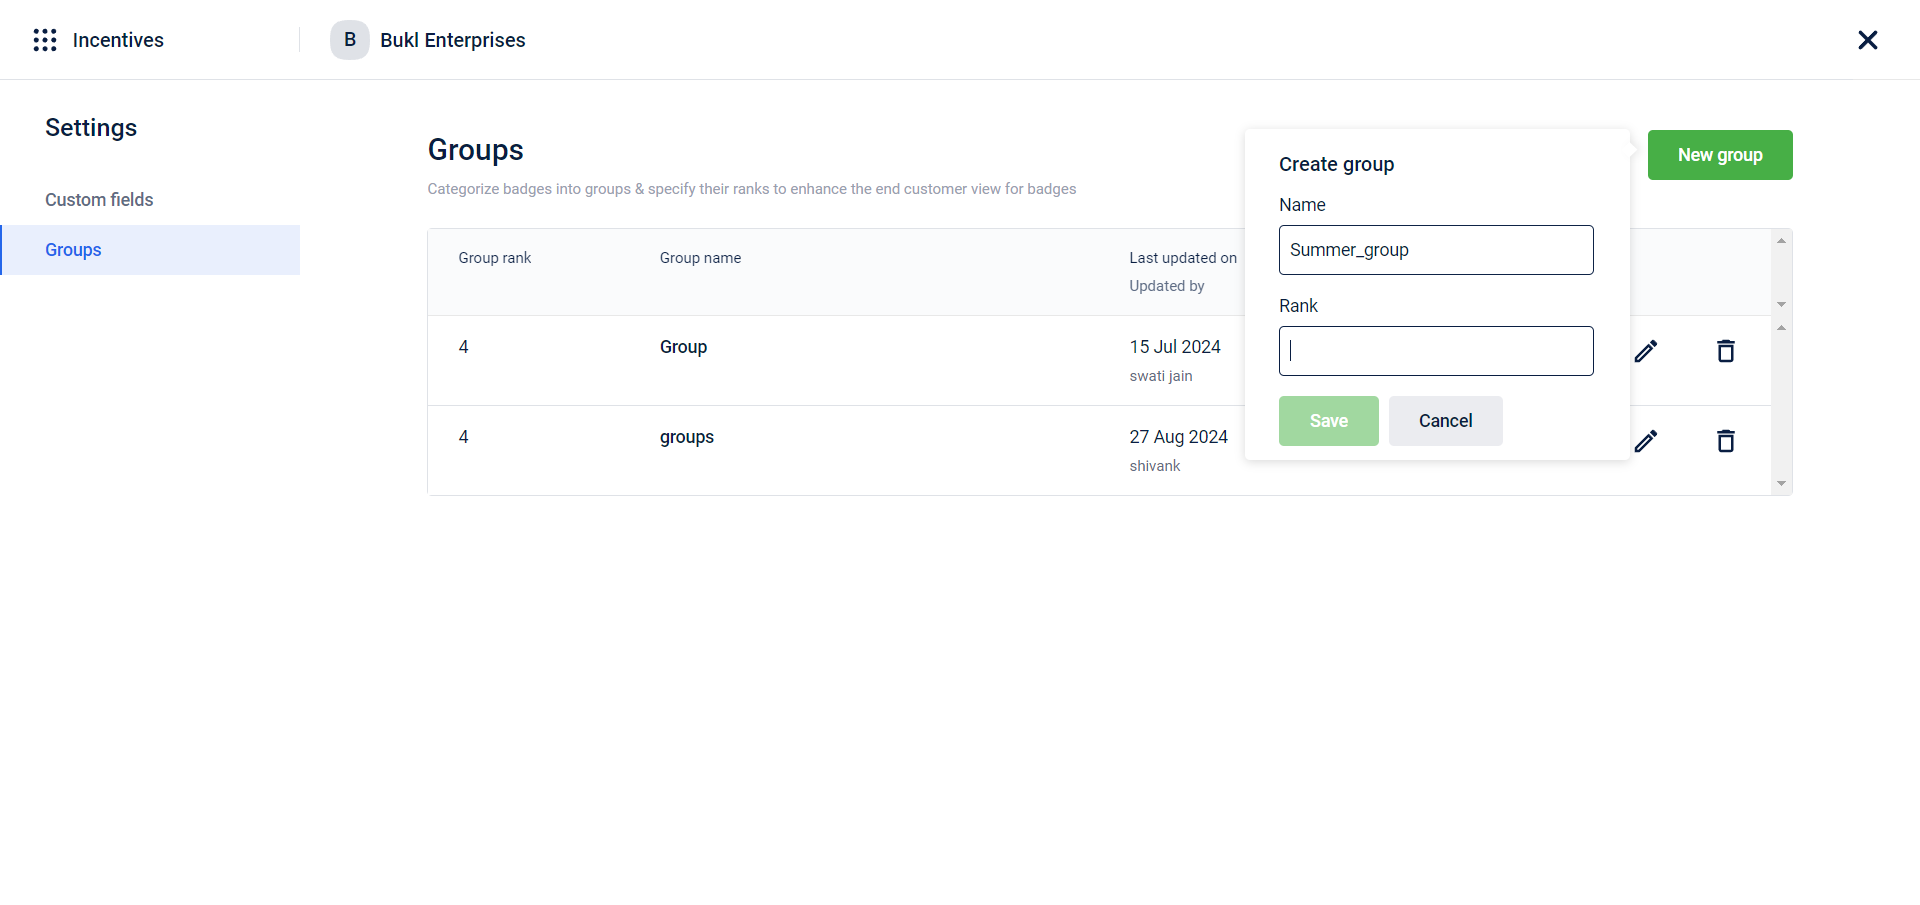
- Assign a rank to the group, for example, "4". The rank indicates the group's priority.
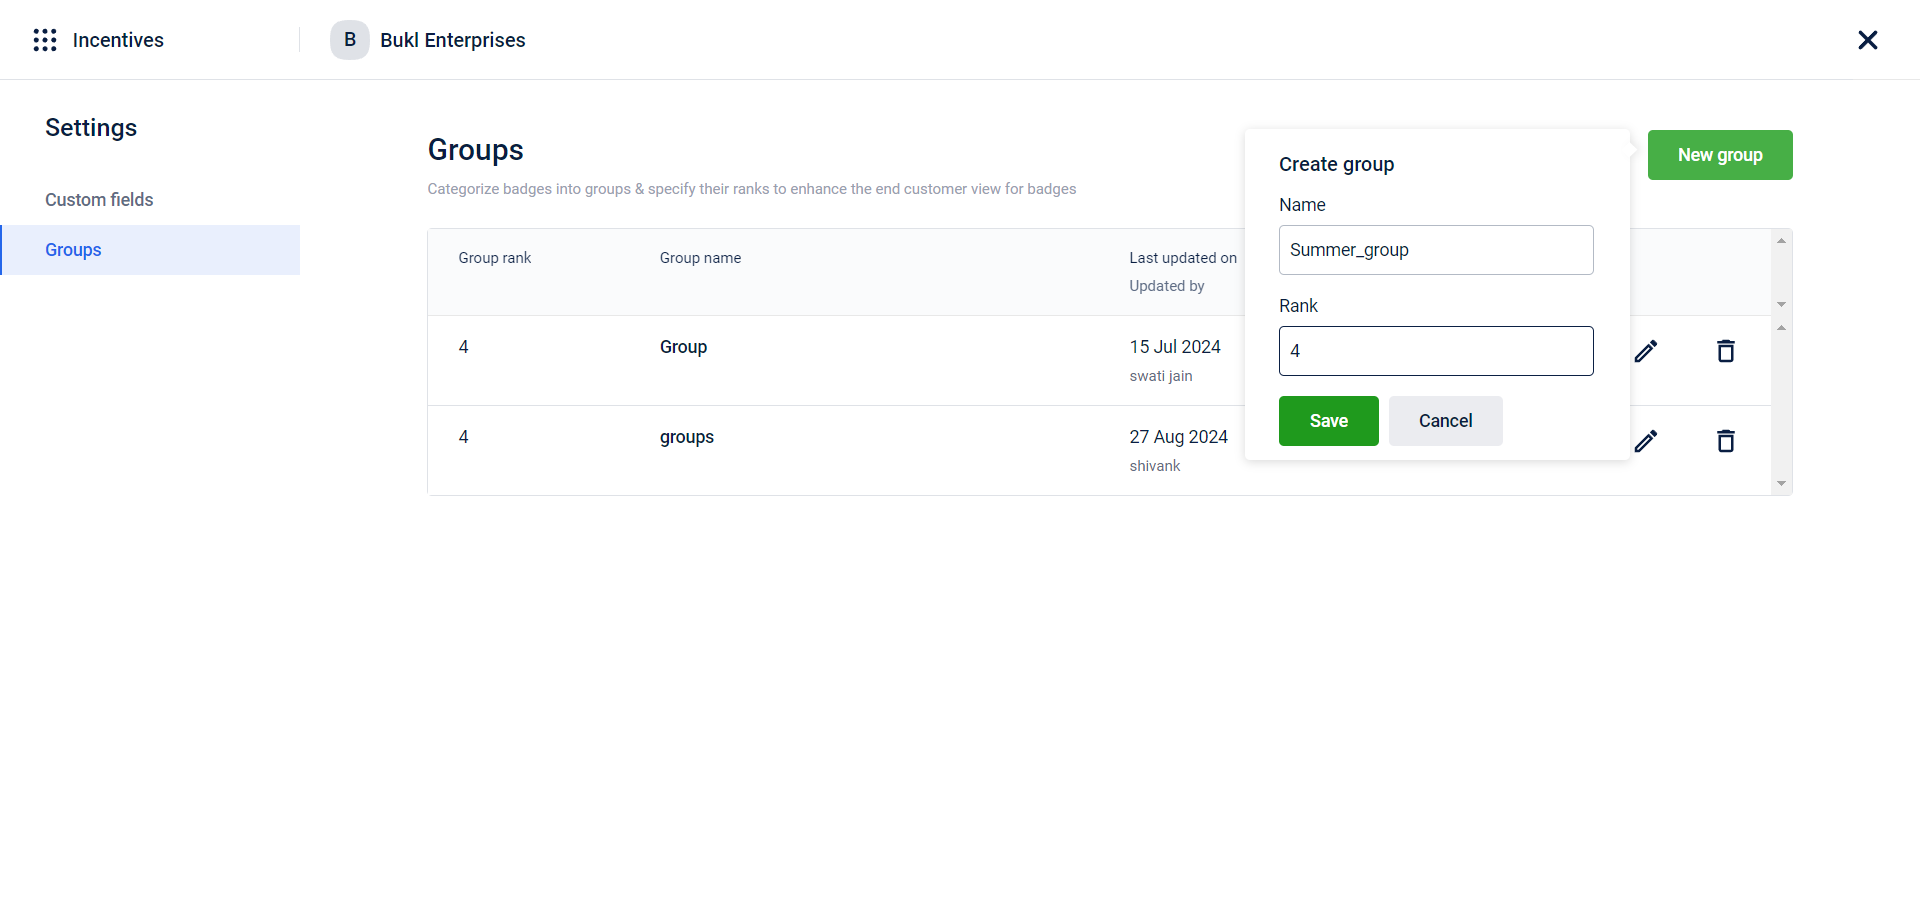
- Click on "Save".
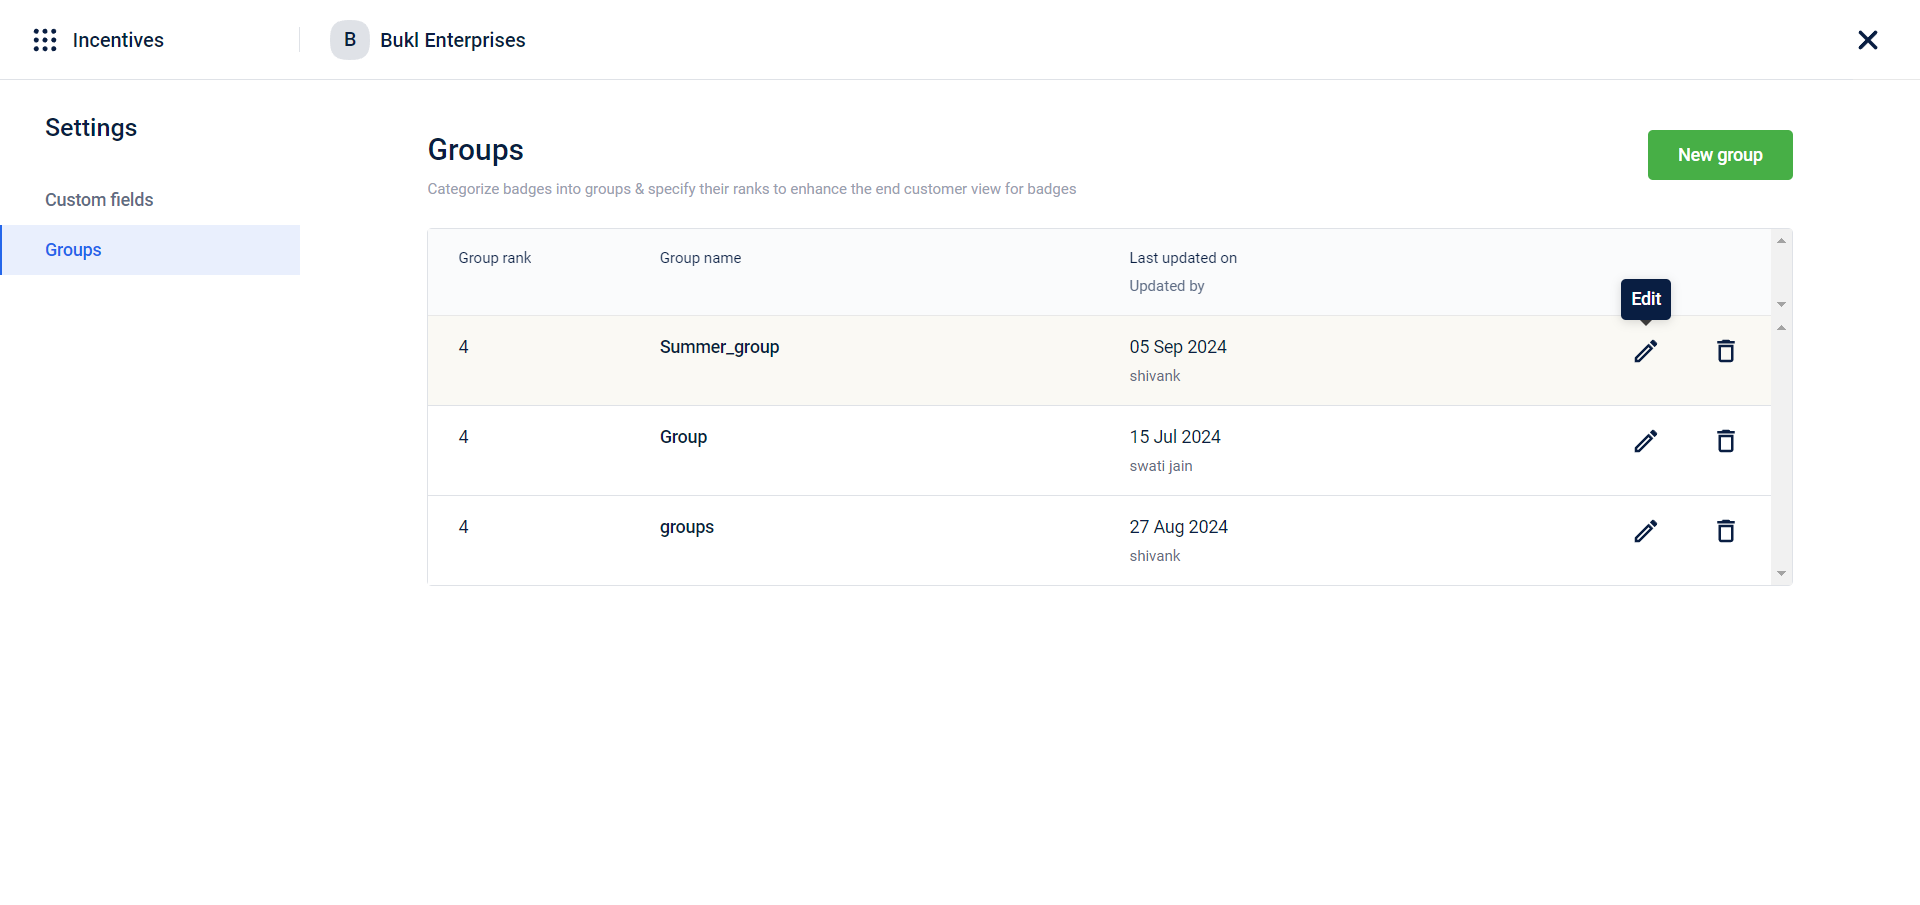
You'll see that the group is now created. You have options to edit or delete the group.
To edit the group:
- Click on "Edit Group".
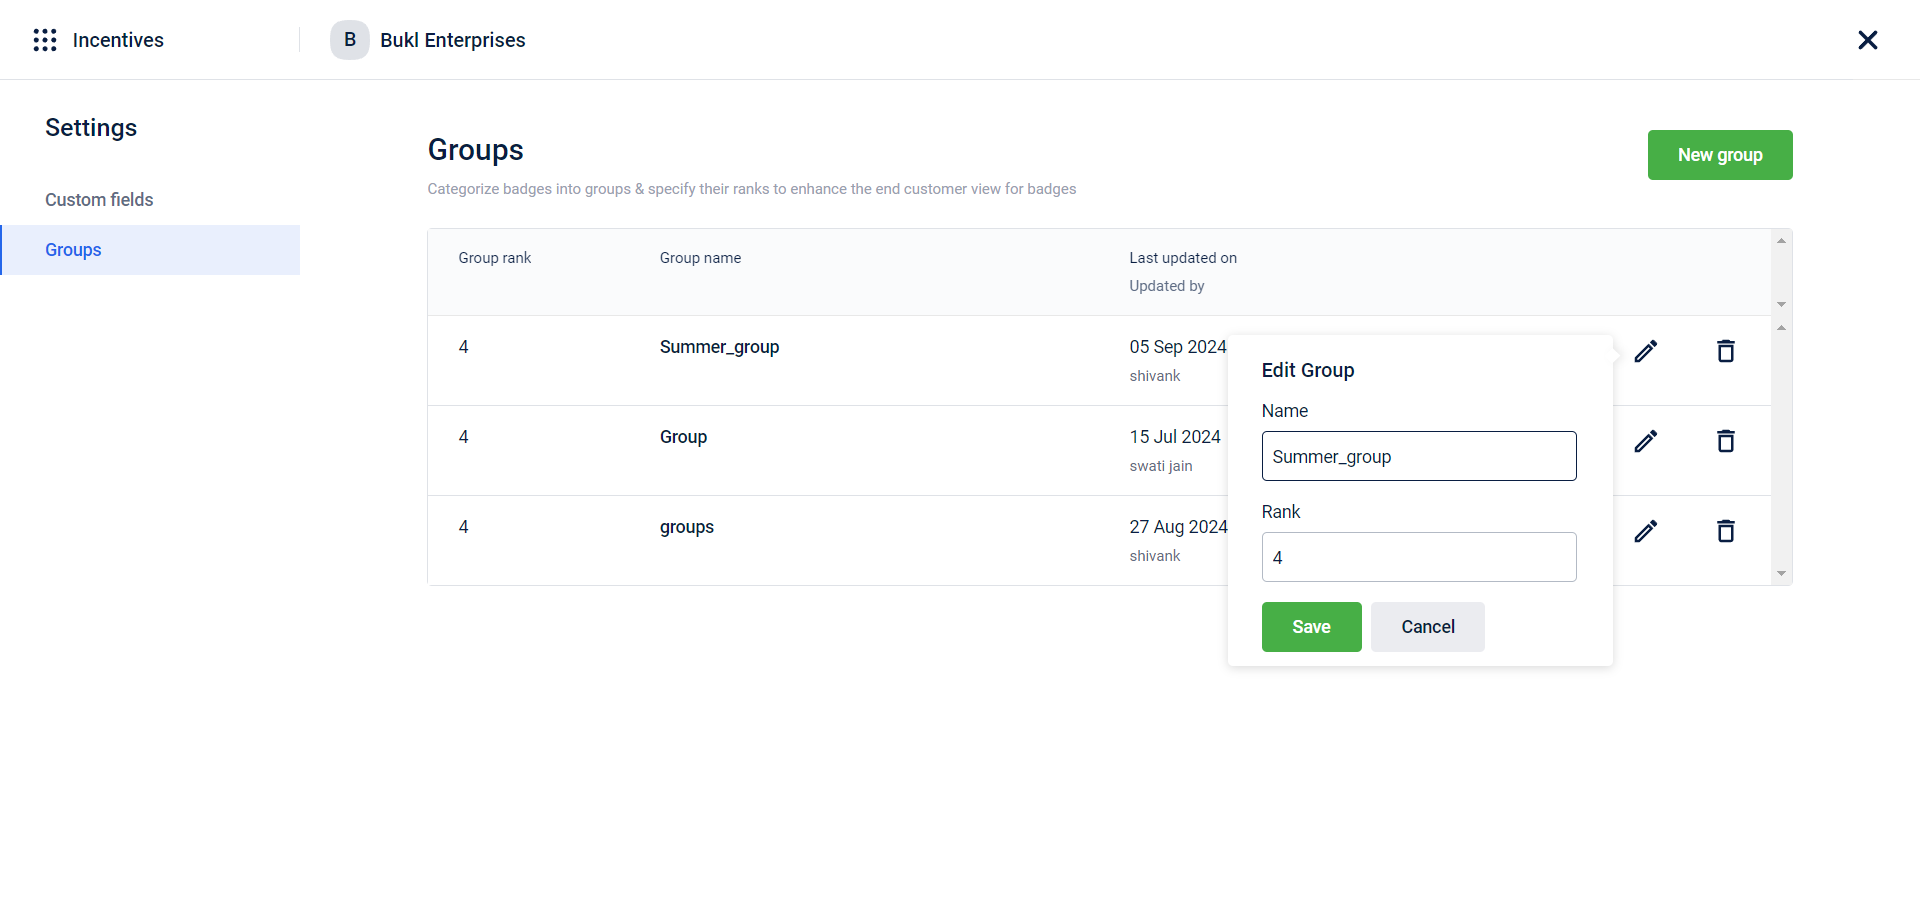
You can change the group's name and rank.
- Change the group name, for example, to "Summer_group_12".
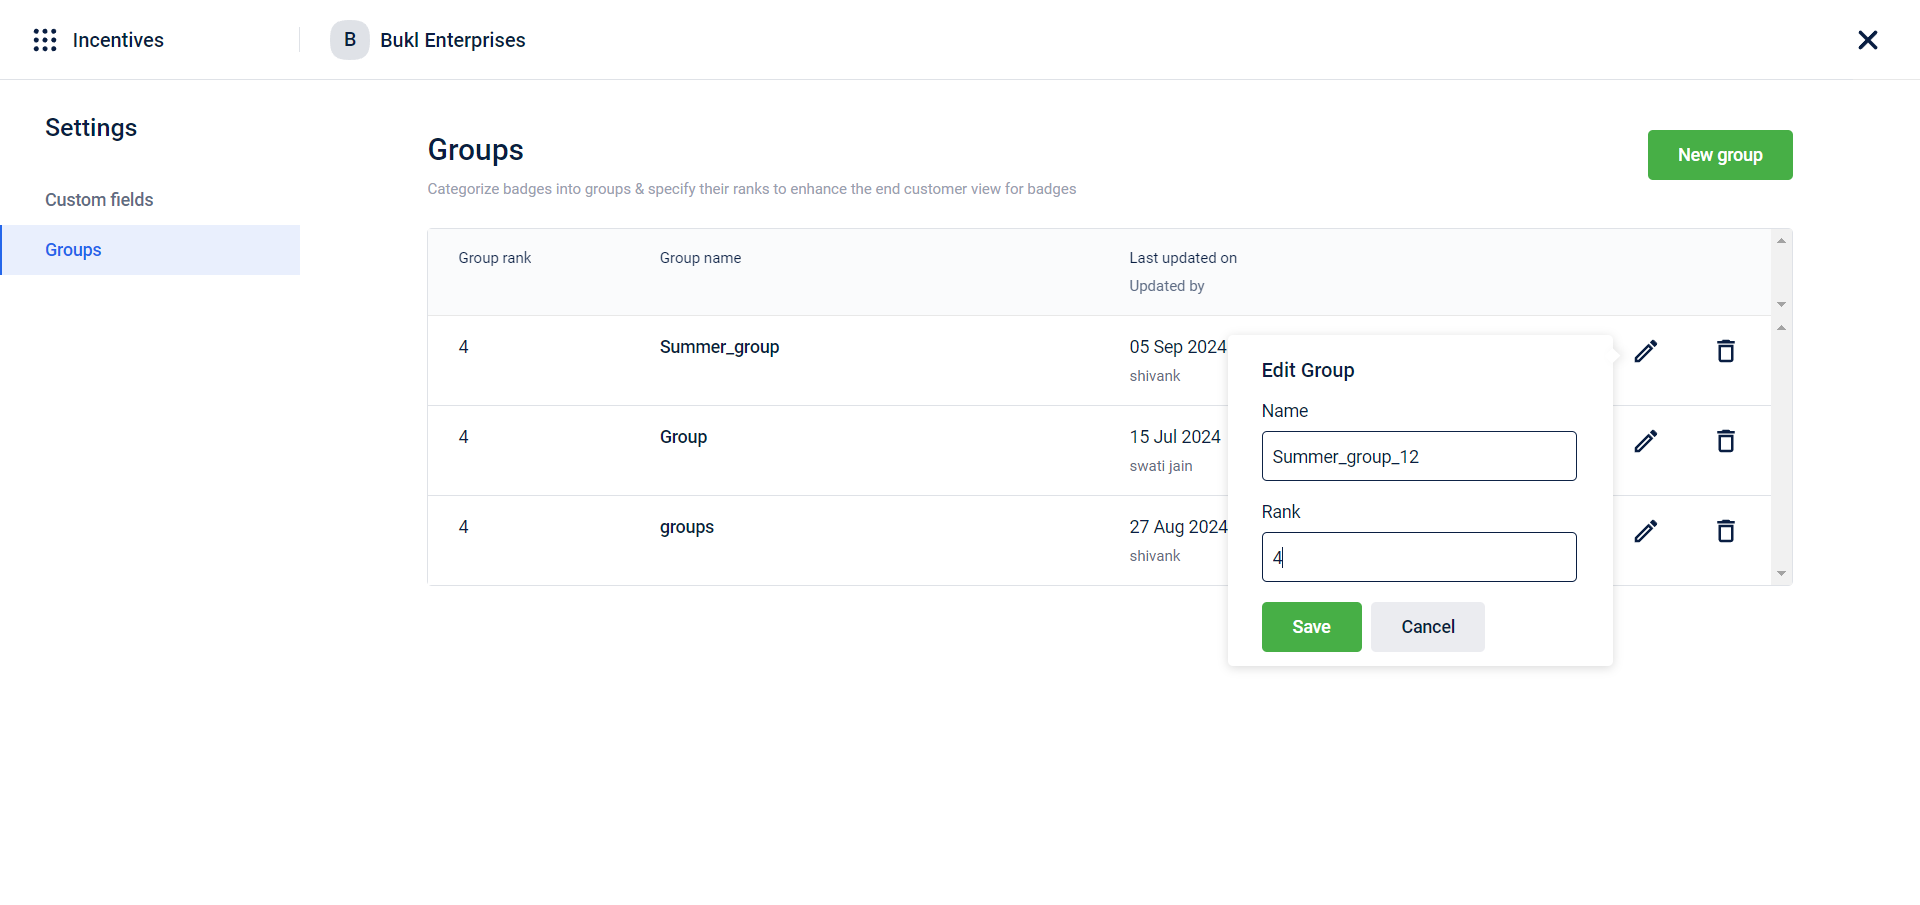
- Change the group rank, for example, to "3". This will change the group's priority.
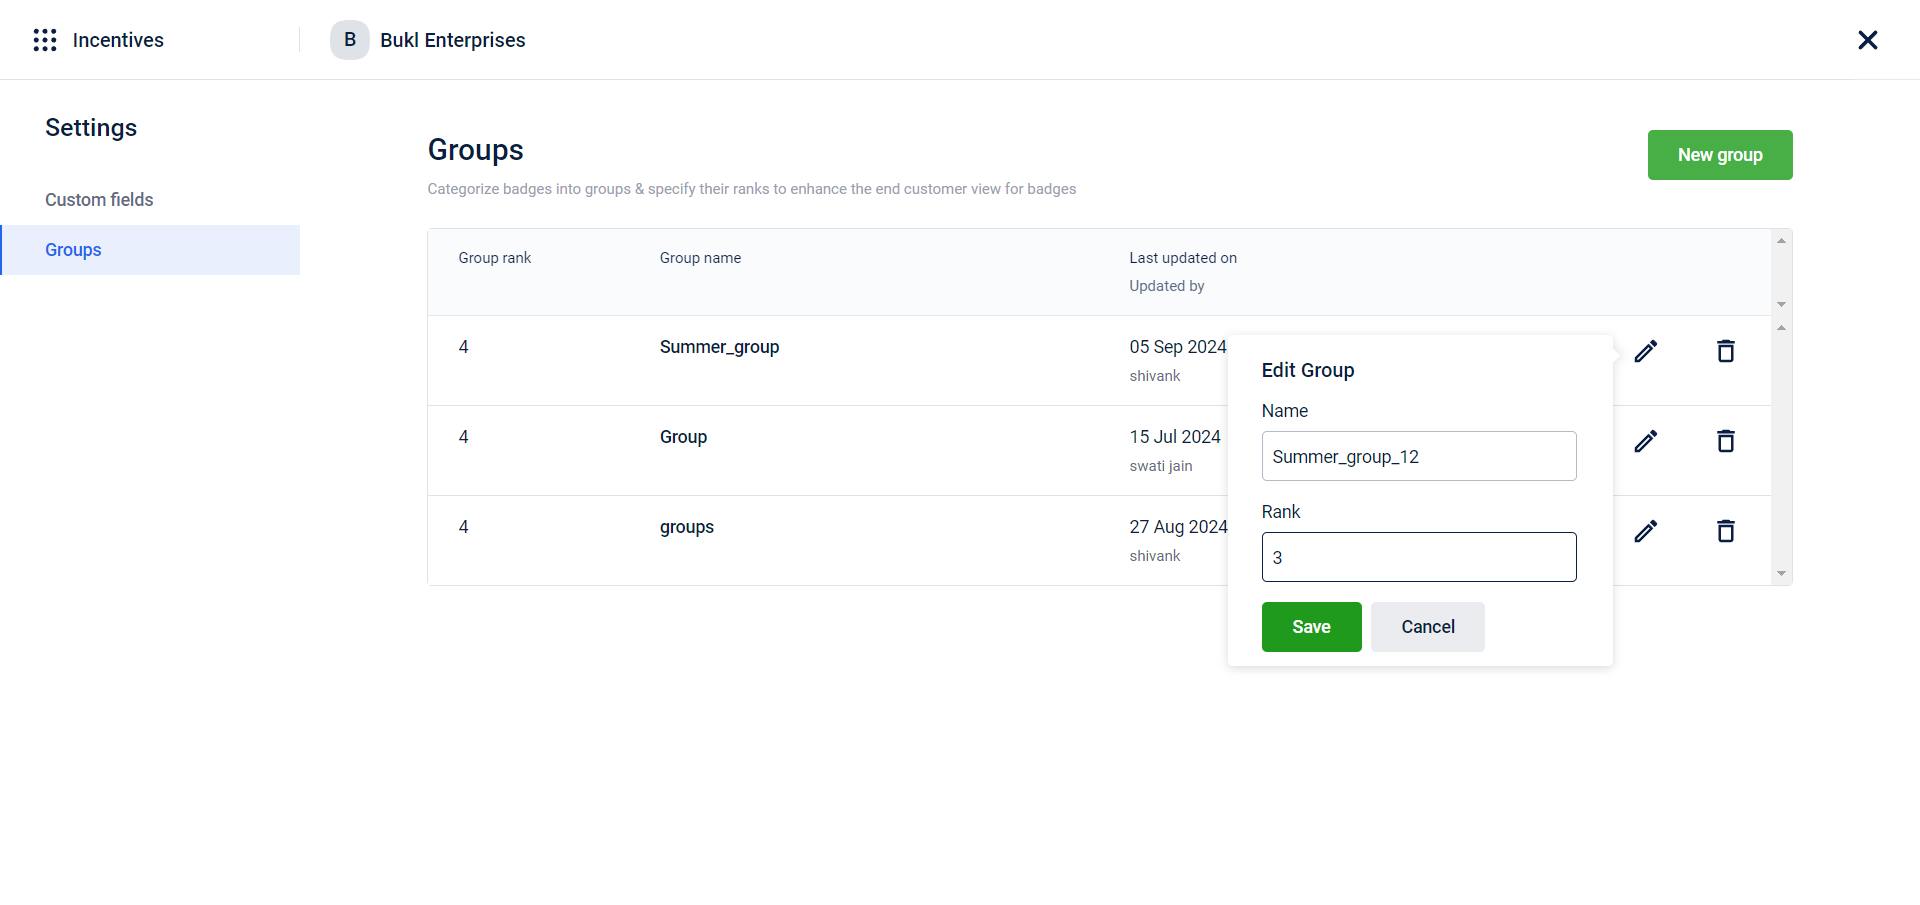
Click on "Save" and Save your changes to apply them.
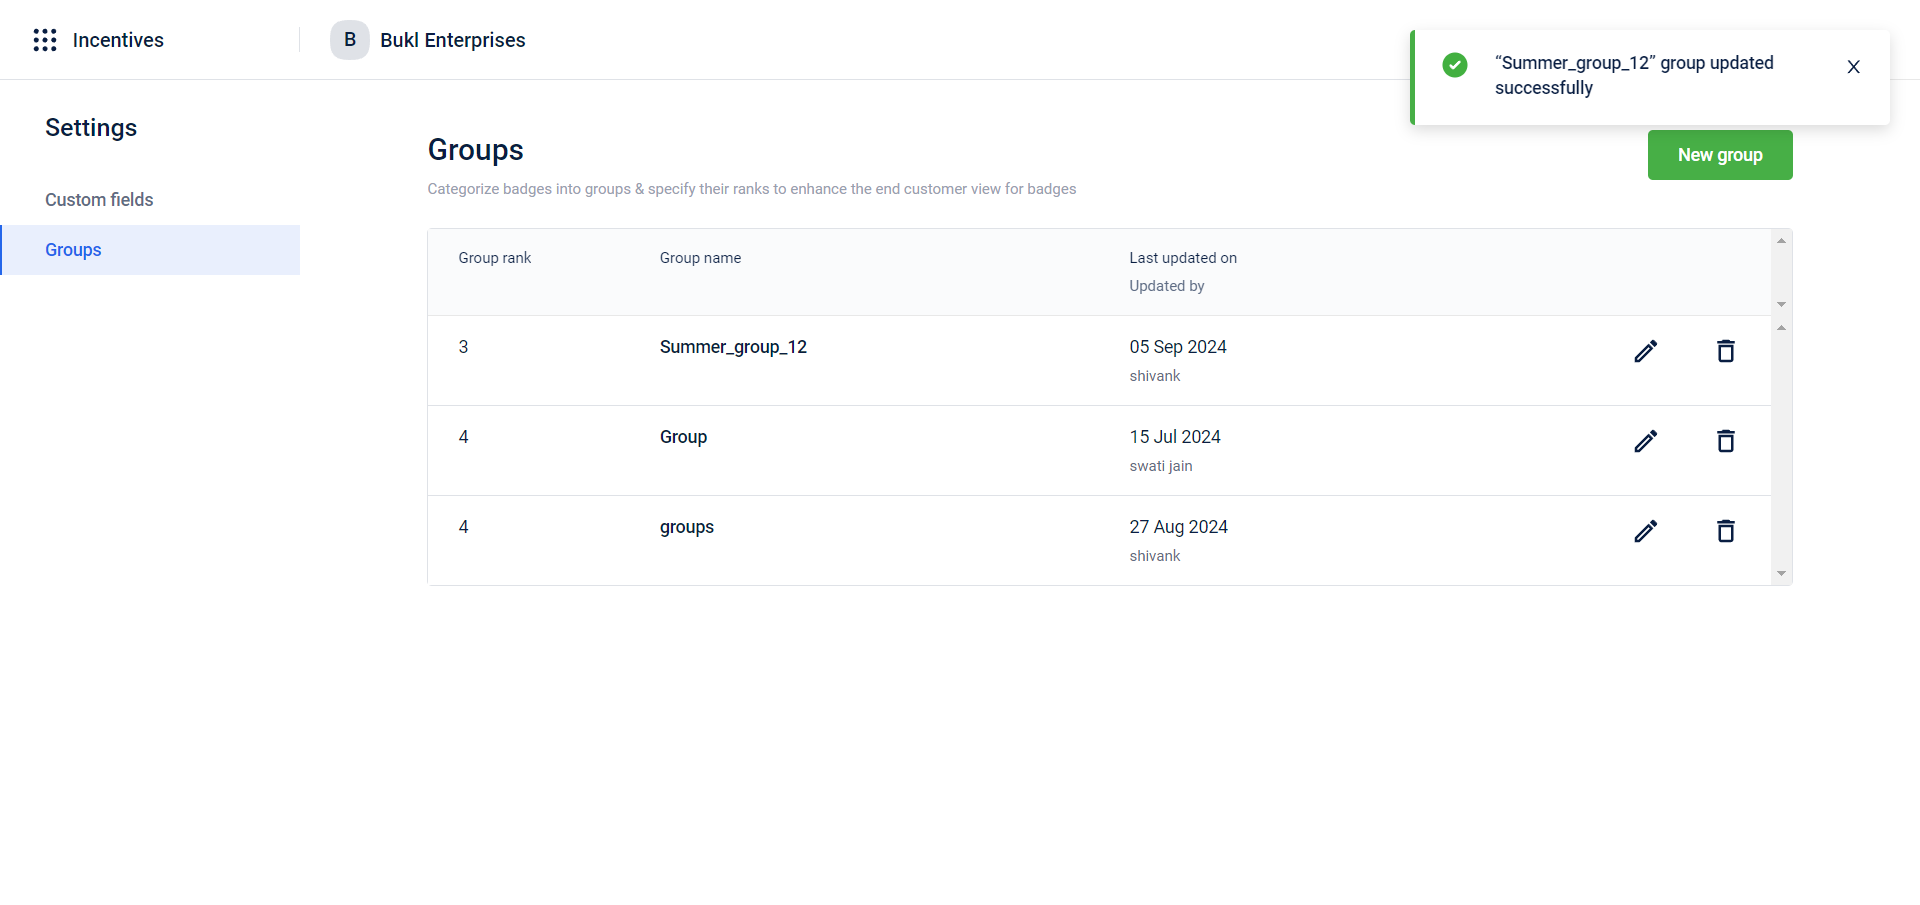
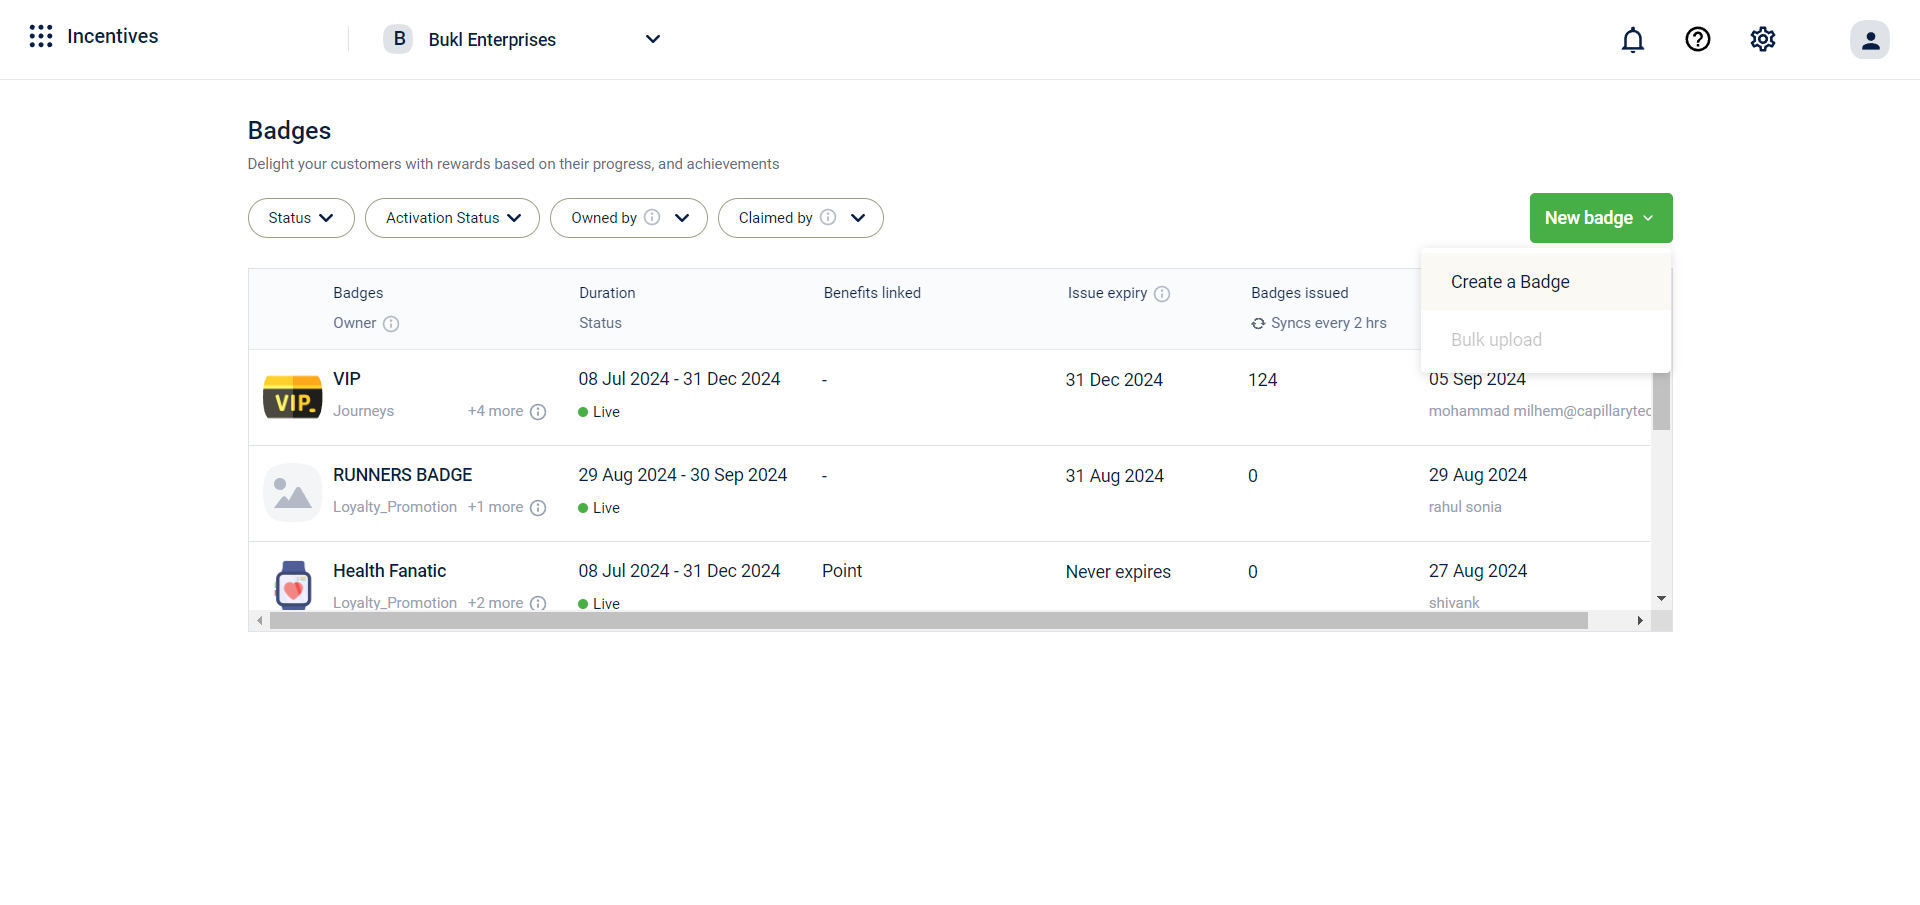
To verify the group's creation:
- Click on "Create a Badge".
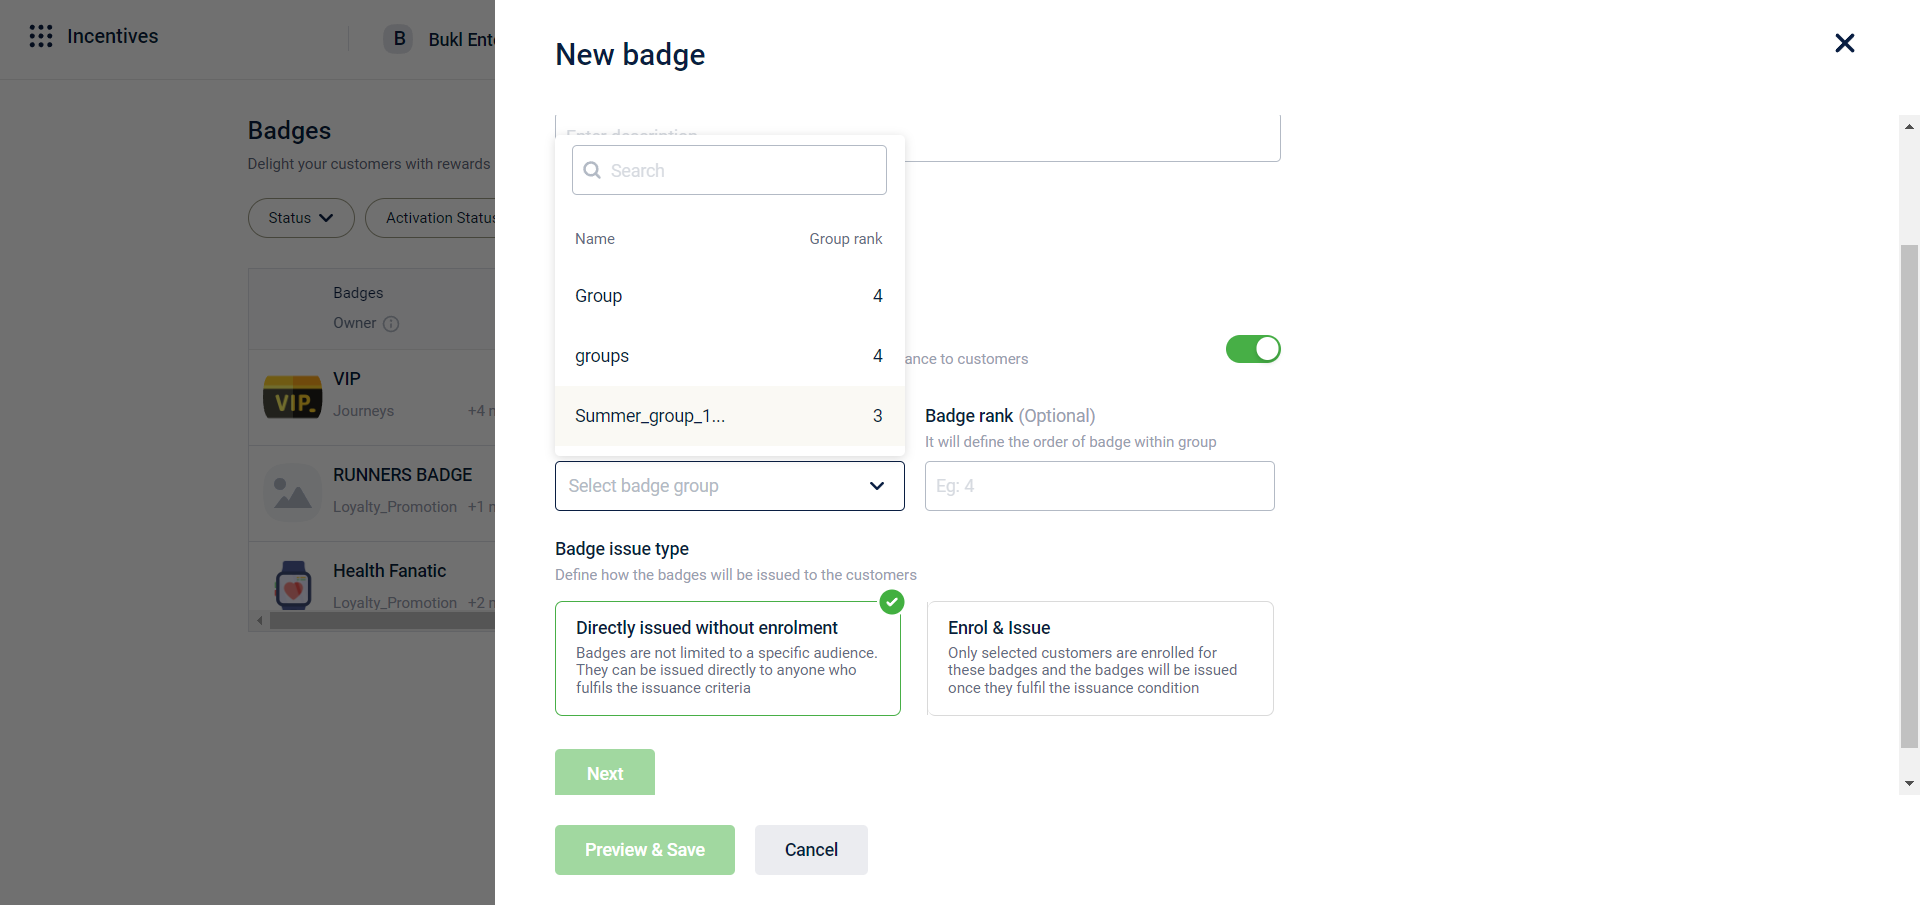
In the badge group section, you'll see the newly created group.
- Check the badge group drop-down. Your new badge group, "Summer_group_12", appears in the drop-down. And you can now assign the badge to the group you created.
Badge Group APIs
You can use the below APIs to Create, Edit, Update and Retrieve the Badge details.
Create badges with Group and Badge Rank
Update badges with Group and Badge Rank
Notes
- Group name must be unique within the active groups in an org
- Group rank is mandatory but there is no uniqueness on group rank
- Badge rank is non-mandatory
- Groups can be disabled by making the isActive flag false
Updated 8 months ago
