
Configure Campaign Settings
The delivery setting allows you to set the sender ID, enable POC, and use a tiny URL.
Enable tracking of clicked links
When a campaign message containing a link is sent to users, Capillary checks the message content and verifies whether Enable Link Tracking is enabled.
If link tracking is enabled:
- The system replaces the original link with a custom Capillary tracking URL. This allows you to track user interactions, such as the number of users who clicked the link.
- When a user clicks the link, they are redirected to the intended destination.
- Since the system uses a Capillary tracking URL, it records and tracks the number of users who clicked the link before redirecting them.
If link tracking is disabled, the system sends the message with the original link and no tracking data is collected.
To track the link (URLs or web links) clicks sent through messages, you need to do the following:
-
On the Engage+ home page, click the settings icon and navigate to the Messages page.
-
Enable the Enable link tracking in messages toggle button.

Note
- Link tracking is available for all links across all engagement channels on Campaigns and Journeys. This includes links added to all input fields such as the email subject, CTA buttons and media content.
- Unsubscribe clicks are not counted as general Call To Action (CTA) clicks. For example, if a user receives an email and clicks the Unsubscribe link it will not be considered as a general CTA click.
Set up communication limits for each channel
When you run several campaigns at once, there’s a risk that the same customer may receive too many messages, either on the same day or across multiple days resulting in customer dissatisfaction. To prevent this, you can limit the number of messages to be sent for each communication channel and overall messages. This is set up at the organisation level. For each channel, you can set daily, weekly, and monthly limit with no maximum limit.
Access Requirements
By default, users do not have access to enable the communication limits feature for an org. If authenticated users need access, raise a JIRA ticket and assign it to the Engage+ Developer team.
Time Period Definitions:
- Day = From 12:00 AM to 11:59 PM (same calendar day)
- Week = From Sunday 12:00 AM to Saturday 11:59 PM
- Month: From 12:00 AM on the first of a month until 11:59 PM on the last day of the same month
To limit the number of messages to be sent through Engage+, follow these steps:
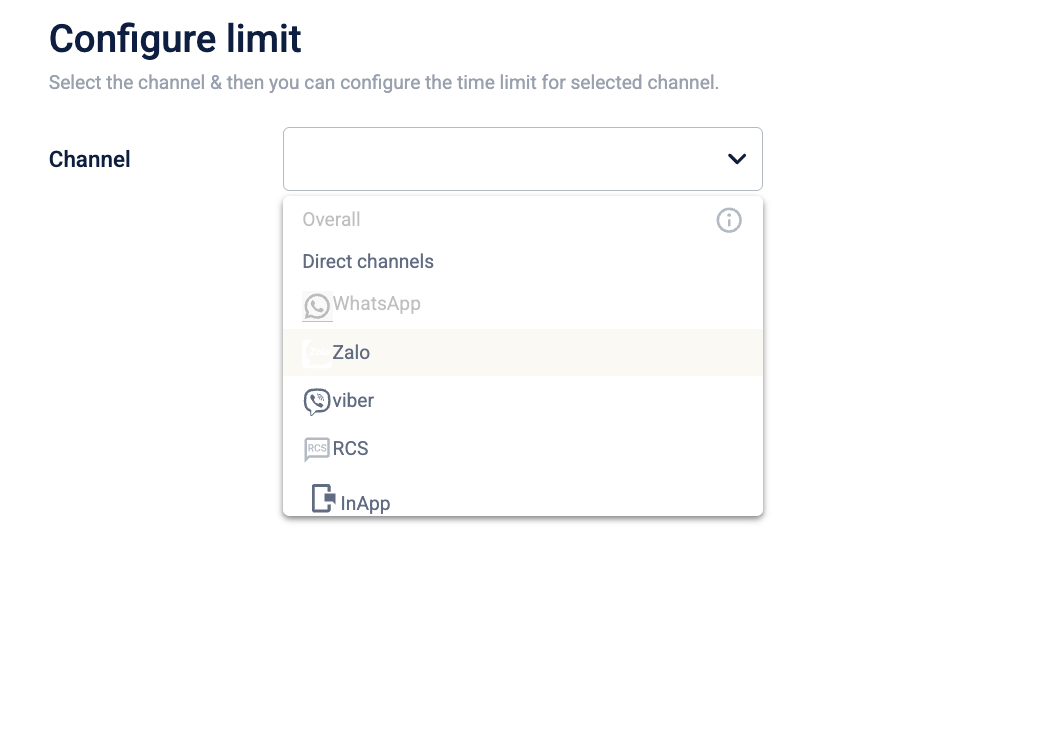
- Click +Add limits.
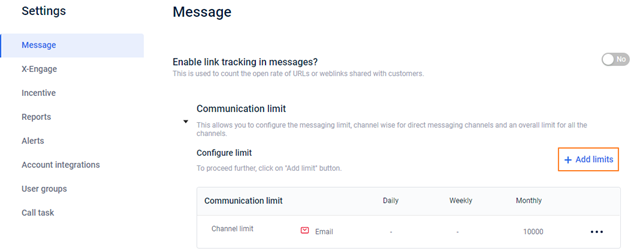
- Select the channel for which you want to set the limit. You can also select Overall to apply a limit across all channels.
- Choose the time period for the limit. You can select one or more of the following options:
- Daily: Check to set a daily limit and enter the limit value in the respective box.
Note A default limit of 10 messages per user within 24-hour window is always enforced, even if no custom limit is configured. Any messages sent beyond this limit will be blocked until the 24-hour window resets. This limit applies across all the engagement channels. To increase this limit, raise a Jira ticket with the Product Support team. The updated limit will be applied within 24 hours. - Weekly: Check this to set a weekly limit and enter the limit value. Example: 100 messages per week.
- Monthly: Check this to set a monthly limit and enter the limit value. Example: 2000 messages per month.
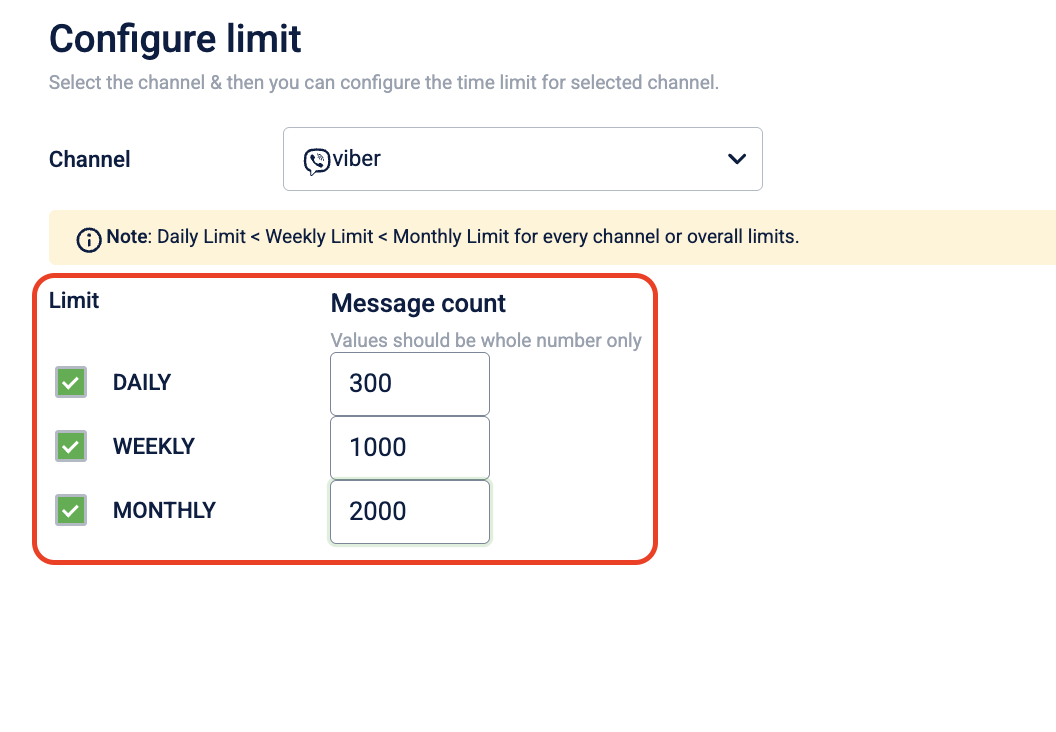
Note
Each value should be equal to or greater than the limit set for the time period. For example, the weekly limit must be equal to or greater than the daily limit, and the monthly limit must be equal to or greater than both the weekly and daily limit.
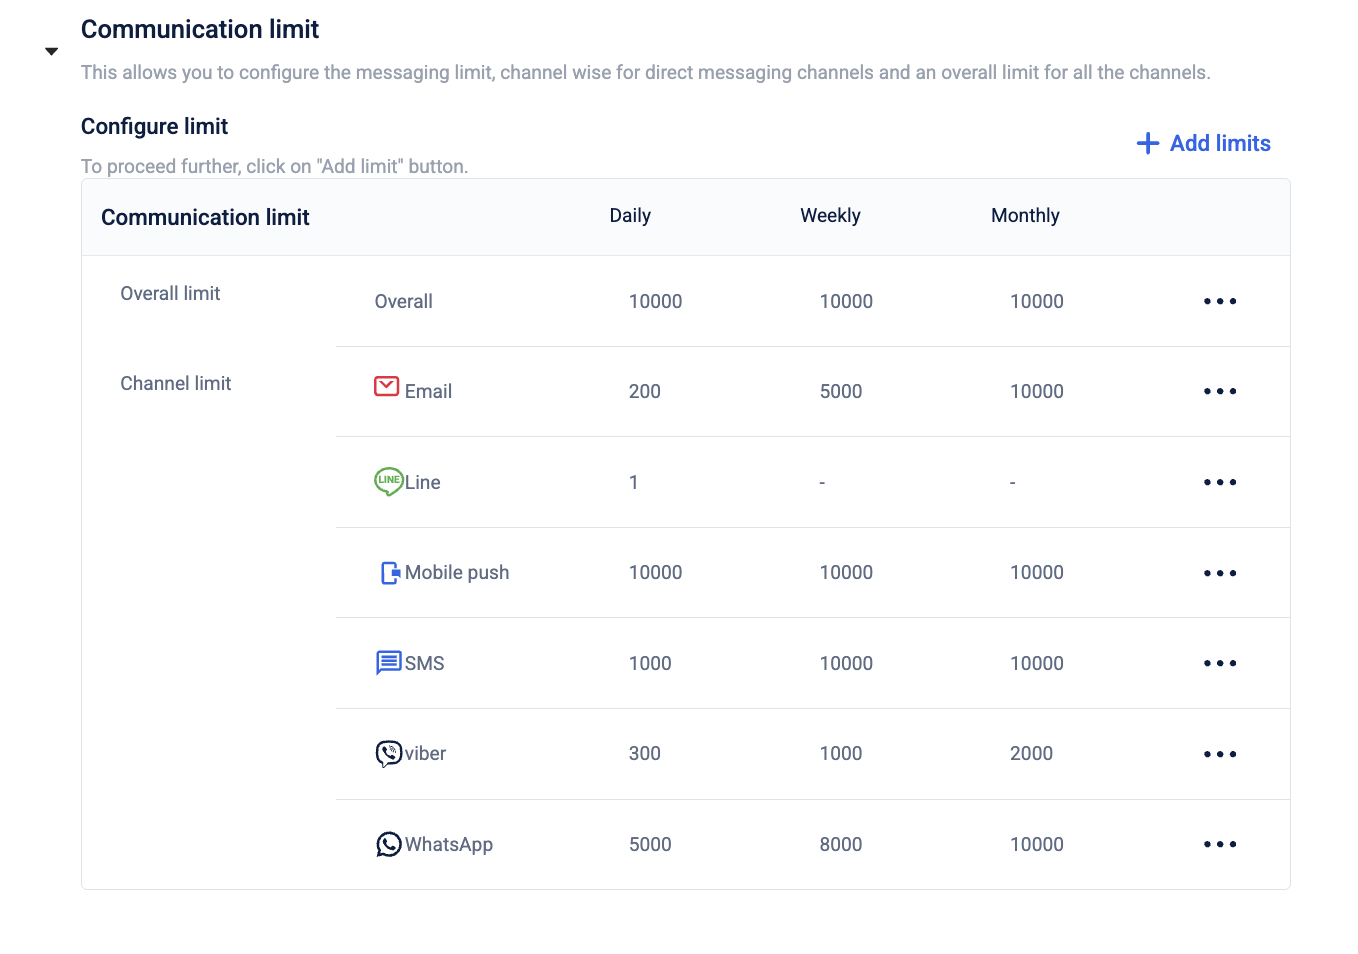
- Click Done to save the settings. You can view the limit Communication Limit box, along with the limits set for other engagement channels.
Edit or delete a communication limit
To edit a communication limit follow the given steps:
- Navigate to the Communication Limit box, hover over the more options icon (⋯) next to the desired engagement channel, then click Edit.
- You can make changes to the previously set limits, then click Done. The updated limit will then be visible in the Communication Limit box.
To delete a communication limit follow the given steps:
- Navigate to the Communication Limit box, hover over the more options icon (⋯) next to the desired engagement channel.
- Click delete.
The engagement channel will be removed from the Communication limit box.
Report notification and failure alert settings
You can set notifications of daily campaign summary reports, weekly SMS and email credit report, and campaign execution update.
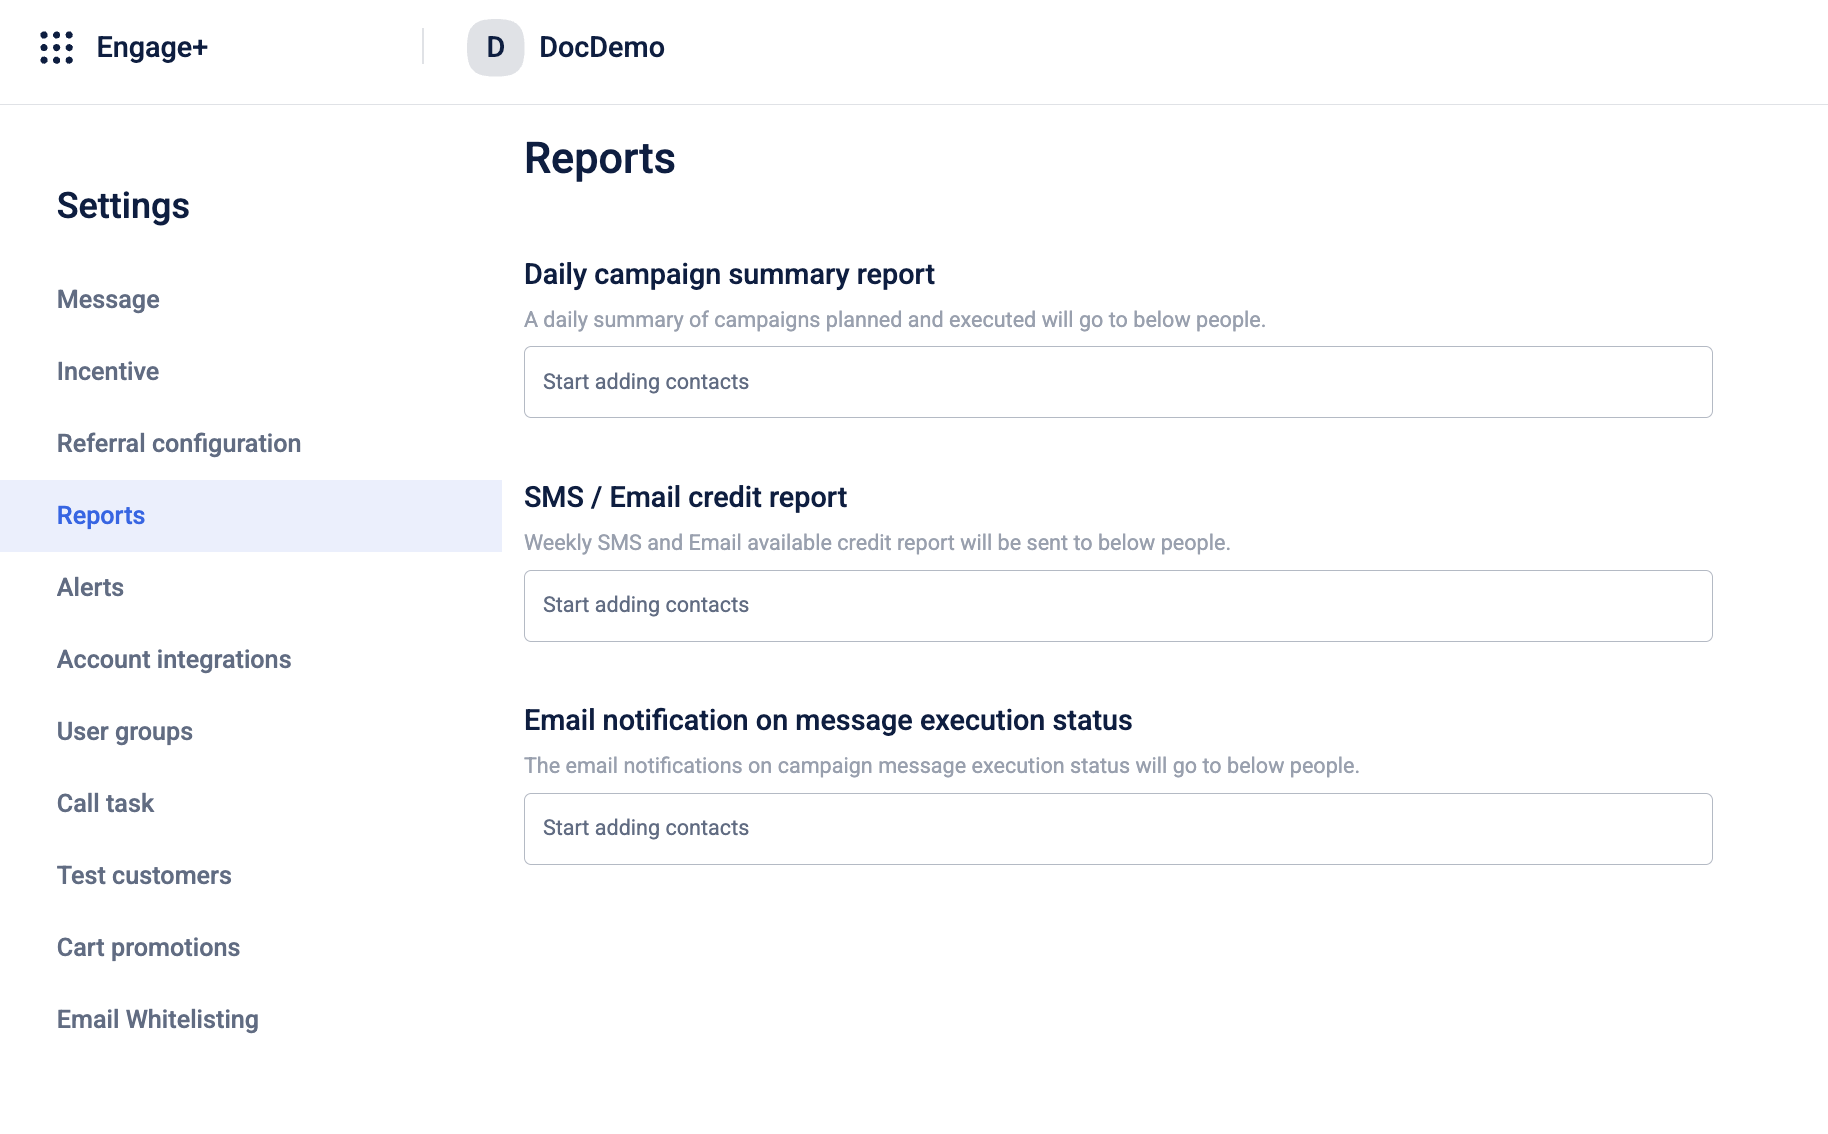
Report notifications
To notify users on the campaign level report, do the following:
- On the Engage+ home page, click on the setting icon, and navigate to the Reports page.
| OPTION | DESCRIPTION |
|---|---|
| Daily campaign summary report | Enter the email IDs of users (comma separated values) that you want to send daily notifications on the Campaign Summary Report. |
| SMS / Email credit report | Enter the email IDs of users (comma separated values) that you want to send the available SMS and email credits on a weekly basis. |
| Email notification on message execution status | Enter the email IDs of users (comma separated values) that you want to notify whenever a campaign message is executed with the status. |
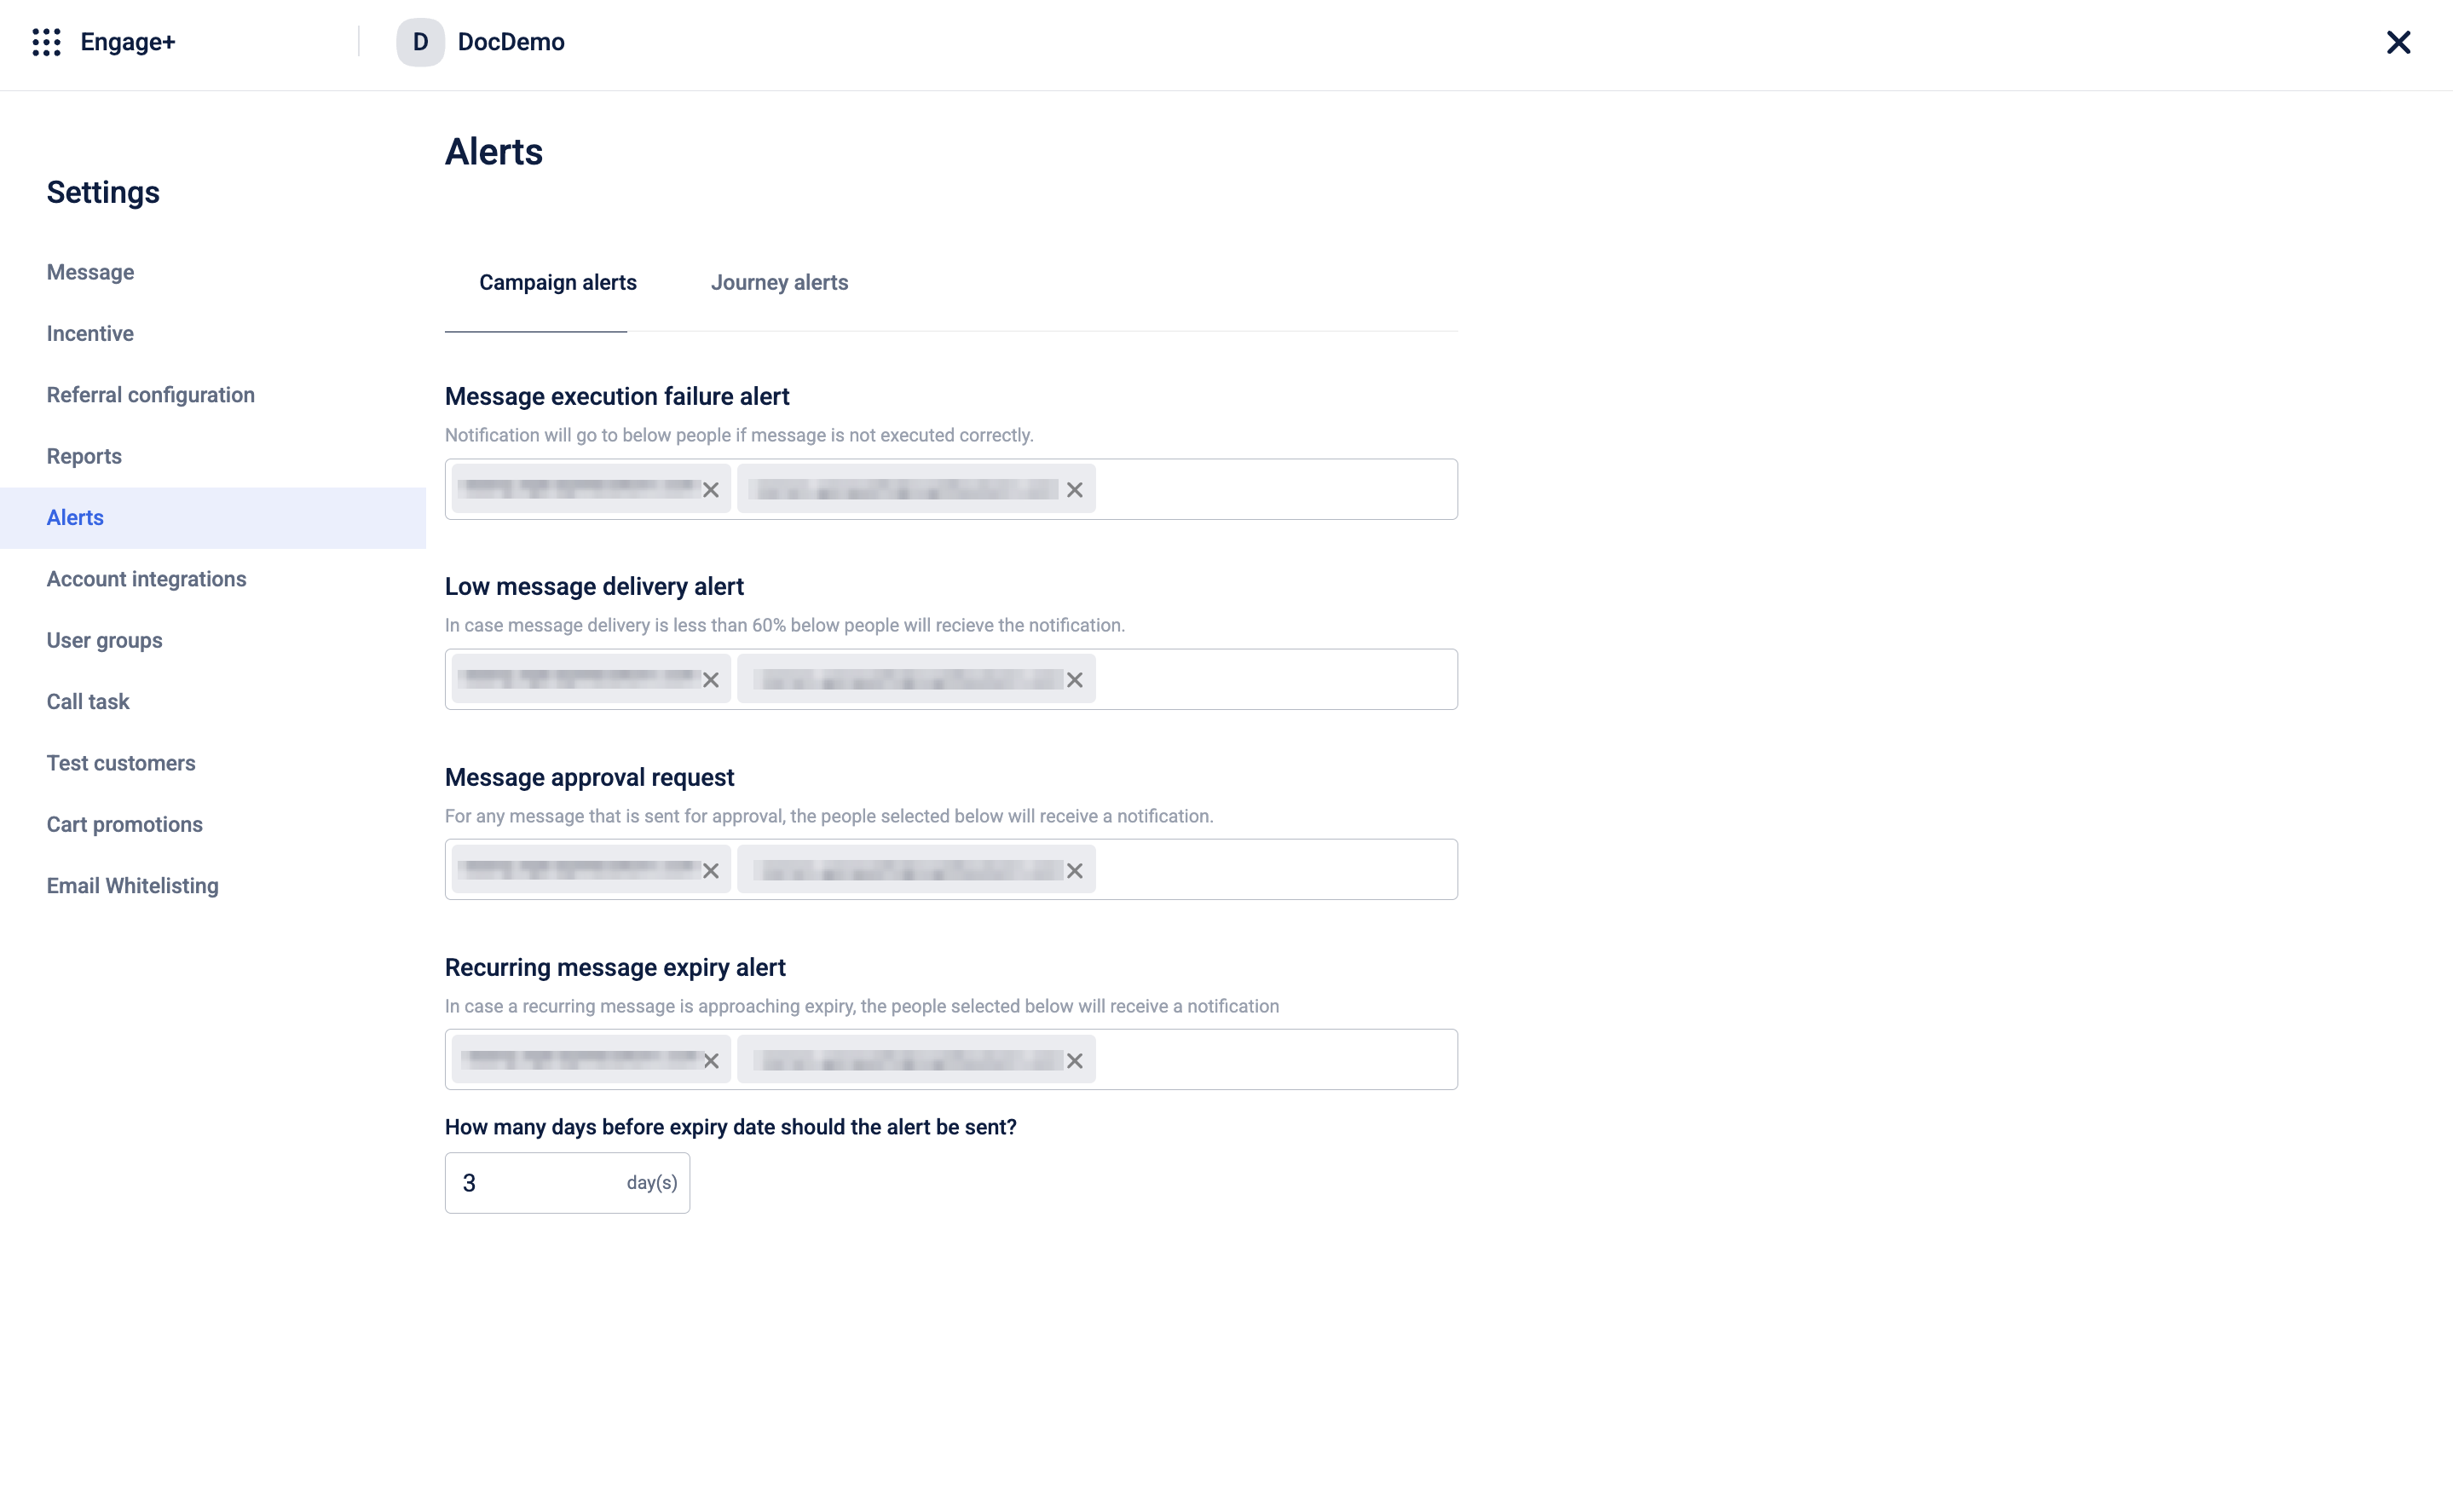
Campaign alerts
To alert users on message approval requests, low delivery rates, or execution failures, do the following:
-
On the Engage+ home page, select the settings icon, and go to the Alerts page.
-
Go to the campaign alerts tab.
The following configurations are available:Configuration Description Message execution failure alert Notifies the users when a campaign message fails to execute. Low message delivery alert Notifies the users when the message delivery rate is less than 60%. Message approval request Notifies the users when a new campaign message is sent for approval. Recurring message expiry alert Notifies the users when a recurring campaign is approaching expiry. -
Select the users to notify from the dropdown. The dropdown lists the points of contact (POCs) for the organisation. For more information, refer to the documentation on Organisation POCs.
-
Enter the number of days before the expiry date to receive the alert.
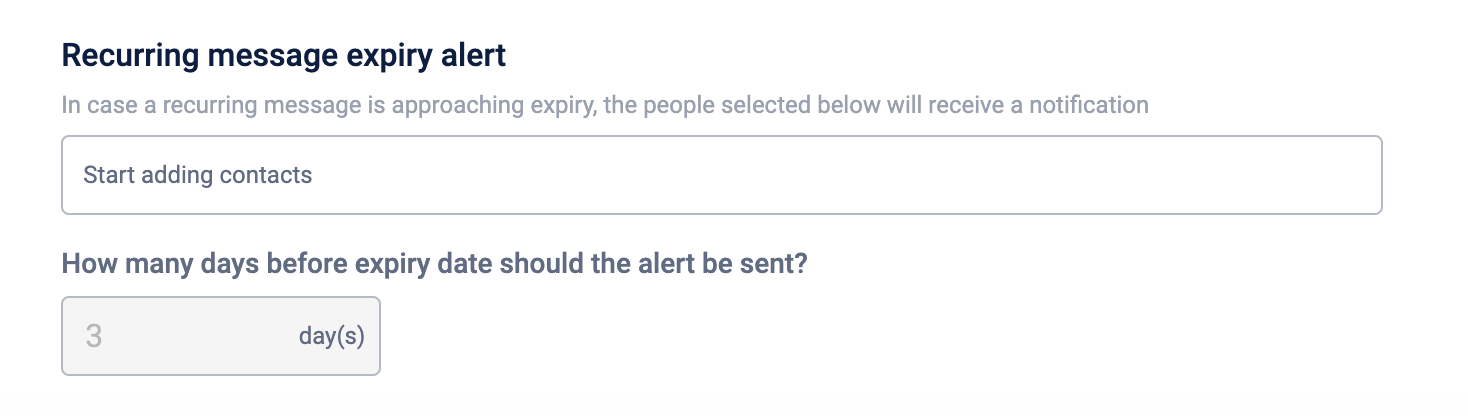
Recurring message expiry alert
This feature allows you to configure reminders when recurring campaigns approach their end dates. You can add contacts and configure the alert settings, specifying the number of days before the end date to send an alert.
For example, if you set the alert to 7 days, it will be triggered 7 days before the message's end date.
Note
Users will receive an alert for every recurring message configured in the organization. There are no specific users assigned alerts at the message level.
Create test user group
Test user groups are special groups of users that you can use to test campaign messages before sending them to a wider audience and share campaign reports and alerts. This feature is used for all engagement channels except email.
To create a test user group:
- On the Engage+ home page, click on the setting icon and navigate to the User Groups page.
- Click Create user group.
- In Name field, enter a name of the test group.
- In All contacts field , add each user using +Add. You can use the search box to find a specific user.
- Click Done to save the group. The newly created group will appear on the User Groups list. Similarly, you can create multiple user groups.
NoteIf the users you add have invalid email addresses, the group will not save.
Test customers
Test customers are sample users or groups used for testing purposes, allowing you to test messages and workflows before they are sent to real customers. This feature is available across Engage+.
Creating test customers
To create the test customers, perform the following:
- From the Engage+ homepage, click on Settings icon and then select Test Customers.
- Select Individuals or Groups.
- For individuals, perform the following:
- Search for the desired contact using their identifiers in the text field.
- Click on Add.
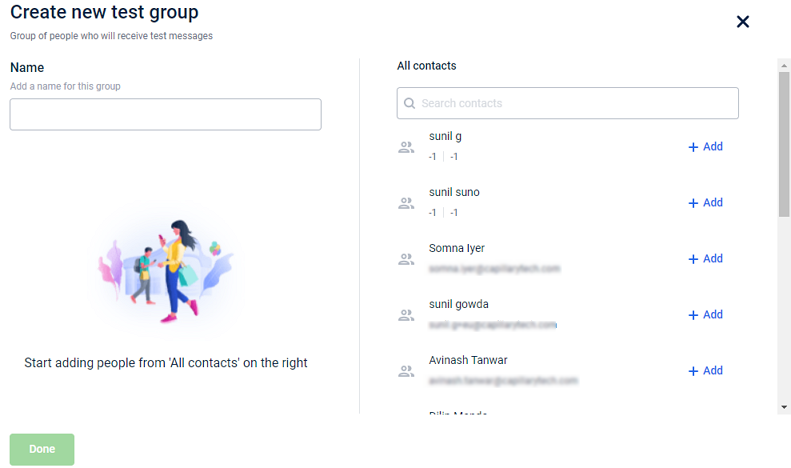
- For Groups, perform the following:
- Select Create test group.
- Enter a group name.
- Search for the desired contact using their identifiers in the text field. There is no limit in the number of customers that you can add.
- Click on Add to group.
- Select Done to save the changes.
Note
While searching for a test customer, ensure that the desired contact is a registered customer. Only registered customers appear in the search results; unregistered customers do not appear when searched.
Editing test customers
To edit a test customer follow the given steps.
- From the Engage+ home page, click on Settings icon and then select Test Customers.
- Select Individuals or Groups.
- For individuals: A list of customers who are selected as test customers will be visible, and you can remove any customer from the list by clicking the cross (×) icon next to their name.
- For Groups, perform the following:
- Click Edit Test Group.
- You can either add or remove customers from the group.
- Click Done to save the changes.
The test group will be updated accordingly.
Deleting test customers
To delete a test customer follow the given steps.
- From the Engage+ home page, click on Settings icon and then select Test Customers.
- Select Individuals or Groups.
- For individuals: A list of customers who are selected as test customers will be visible, and you can remove any customer from the list by clicking the cross (×) icon next to their name.
- For Groups:
- Click Delete Test Group.
- Click Yes, delete group to delete the test group.
The test group will be deleted successfully.
Updated 5 months ago