Delivery settings
The delivery setting allows you to set the sender ID, enable POC, and use a tiny URL.
Configuring WhatsApp sender details
To configure WhatsApp sender details, from the WhatsApp sender number drop-down select the number from which you want to send the messages.
WhatsApp Support for Multiple Numbers under One (WABA) Account
You can link multiple numbers under the same WhatsApp Business Account. This enables brands to maintain separate WhatsApp numbers for transactional/utility and promotional communication.
Adding a new WhatsApp number to the source account
To add a new number under the source account, the CS/gateway team needs to raise a request to the tech/PST team, who can assist with the process.
Once the numbers are added, you can select the desired number in the Delivery Settings when configuring a campaign message. This allows you to choose the specific number from which you want to trigger the campaign message.
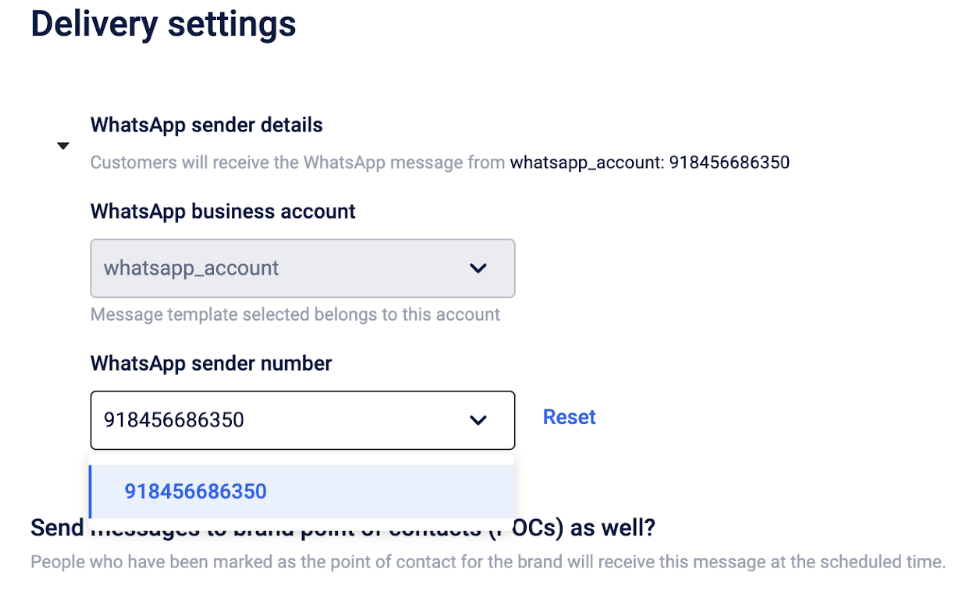
Multiple WhatsApp sender number use cases
- To prevent users from blocking or archiving your chat on WhatsApp:
A common scenario where having different numbers for transactional and marketing communications is beneficial is when you aim to prevent users from blocking or archiving your chat on WhatsApp, thereby avoiding the loss of both promotional and useful information sent via the same number. - On the occasion of the suspension of a number
Platforms like Meta have the authority to take them down if customers consistently block or report the chat in large numbers. Brands, therefore, opt not to rely on a single number for any communication to mitigate such risks.
Delivery settings for messages except for call tasks
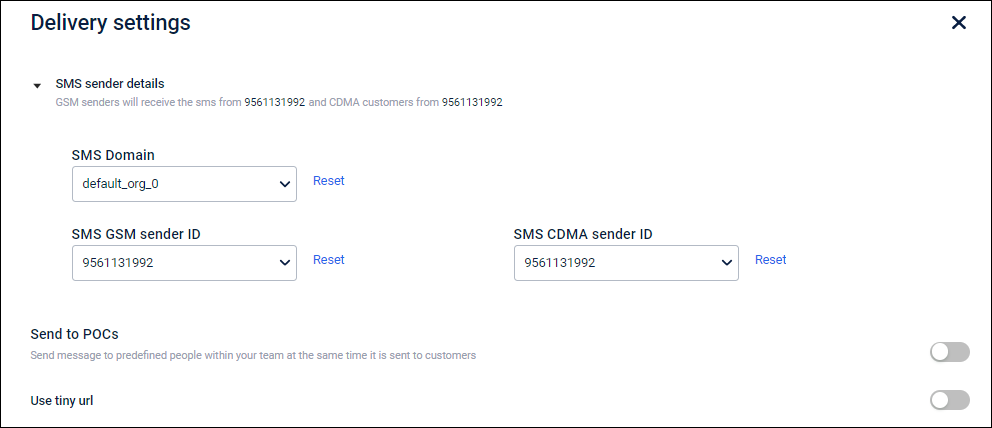
Configure SMS Sender IDs
On the dashboard, click the Settings icon.
- SMS sender detail
- SMS Domain: Select an SMS domain from the drop-down list. The SMS will be sent from the selected domain.
- SMS GSM sender ID: Select an SMS gsm sender ID.
- SMS CDMA sender ID: Select an SMS CDMA sender ID.
Email Notifications to POCs
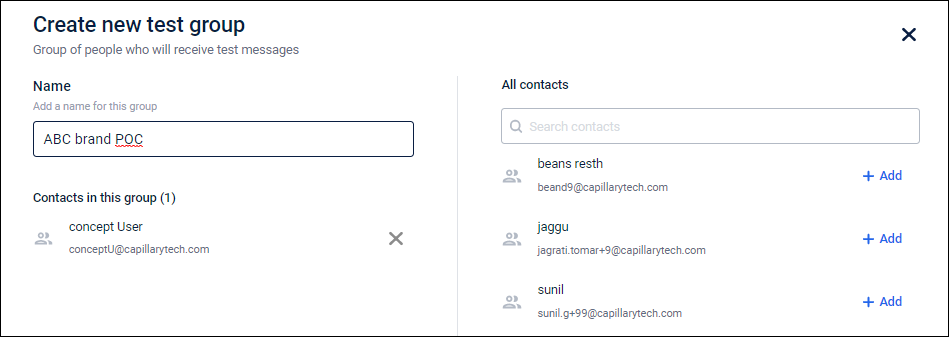
- Send to POCs: POCs (Point of Contacts) are the brand user group. Enable this option to send messages to the POCs as well. The messages will be sent based on the delivery schedule
To create a POCs group, follow these steps.
- On the dashboard, click the settings icon.
- Click Users groups, and then click Create user group.
- In Name, enter a group name for POCs users.
- In the All contacts tab, select users by clicking +Add next to it, and then click Done.
Enable Tiny URL
- Use tiny URL: Enabling this option will reduce the URL's length, whereas, the URL destination will not be affected.
Delivery settings (Call Tasks)
The delivery setting allows you to set the call task expiry period, enable target DND, store to perform call task, track specific status for the call task, enable POC, and use a tiny URL.
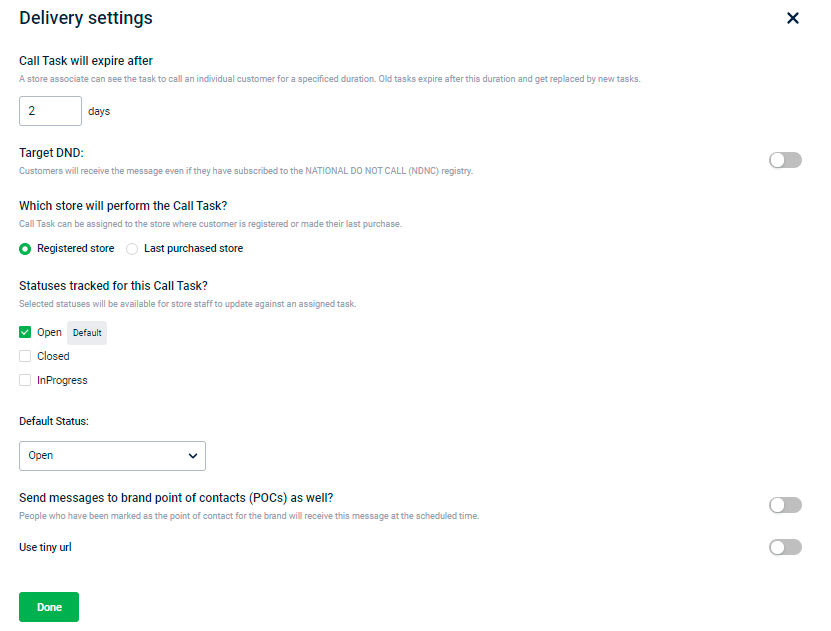
Configure call task expiry period
A store associate can see the task notification for the specified duration(days) from the message triggered to date. After the expiry period, the call task content will disappear from the destination app (InStore/Store2Door).
You cannot have call task expiry beyond the campaign expiry date.
For example,
Consider a call task campaign with a start date and execution date is April 20, 2021, and an end date is April 25, 2021.
For one time campaign
- If the call task expiry is set to 3 days, the message will disappear on InStore/Store2Door after 3 days from the execution date - April 23, 2021.
- If the call task expiry is set to 7 days, the message will disappear along with the campaign expiry - April 25, 2021.
For recurring campaign (assume daily with the campaign expiry as 3 days
- The message that triggers on April 20, will be available until Apr 23 (end).
- The message that triggers on April 21, will be available on Apr 24 (end).
- The message that triggers on April 22, will be available on Apr 25 (end).
- The message that triggers on April 23, 24, and 25 will also disappear on Apr 25 (end).
Target DND Users
Mobile SMS messages are blocked for users who have marked themselves as DND (Do Not Disturb). By default, messages are not sent to DND users, but you can manually enable messaging for them if required. This is useful for checking reachability if those DND users have opted out of DND.
To allow messages to be sent to DND users:
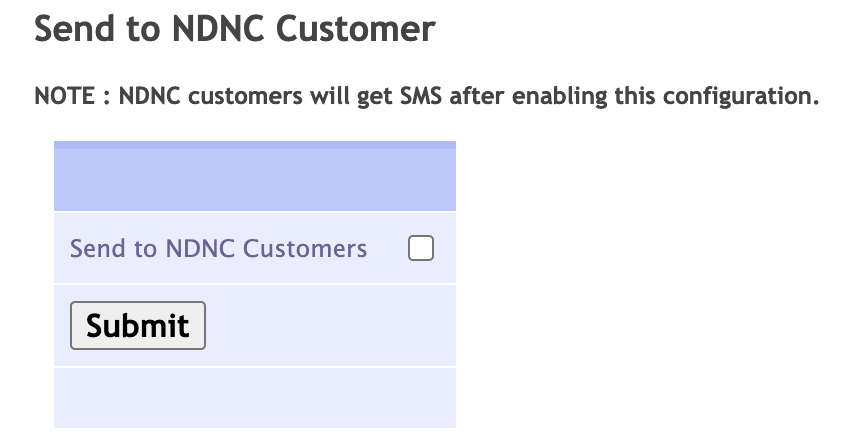
- Enable the NDNC toggle to send messages to customers subscribed to DND.
By default, this option is not available for all organisations. To enable it, navigate to {hostURL}orgadmin/administer/{orgID} and enable the Send to NDNC Customer option.
Store to perform call task
You can assign call tasks to the store where the customer is registered or last purchased.
Call task status
To configure the call task status, follow these steps.
- Enable the task status(Open, Closed, and InProgress) using the checkbox. Enabled options will appear to store staff for updating the task progress.
- Select the default status using the drop-down option.
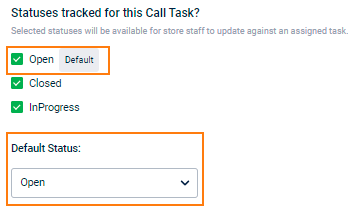
- Only enabled status can appear in the Default Status drop-down option.
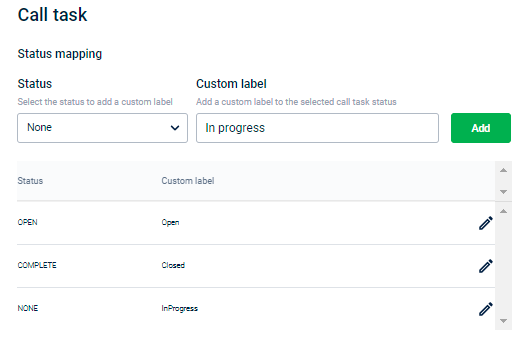
- To configure the custom label name for each status, navigate to Engage+ > Settings > Call Task.
Send communication to control customers
In general, Test Audience/Customers are the selected group of customers or audience to whom all communication messages are sent. Control Audience/Customers are the selected group of customers or audience for whom messages are not sent. The brand decides the ratio and group of the Test-Control audience.
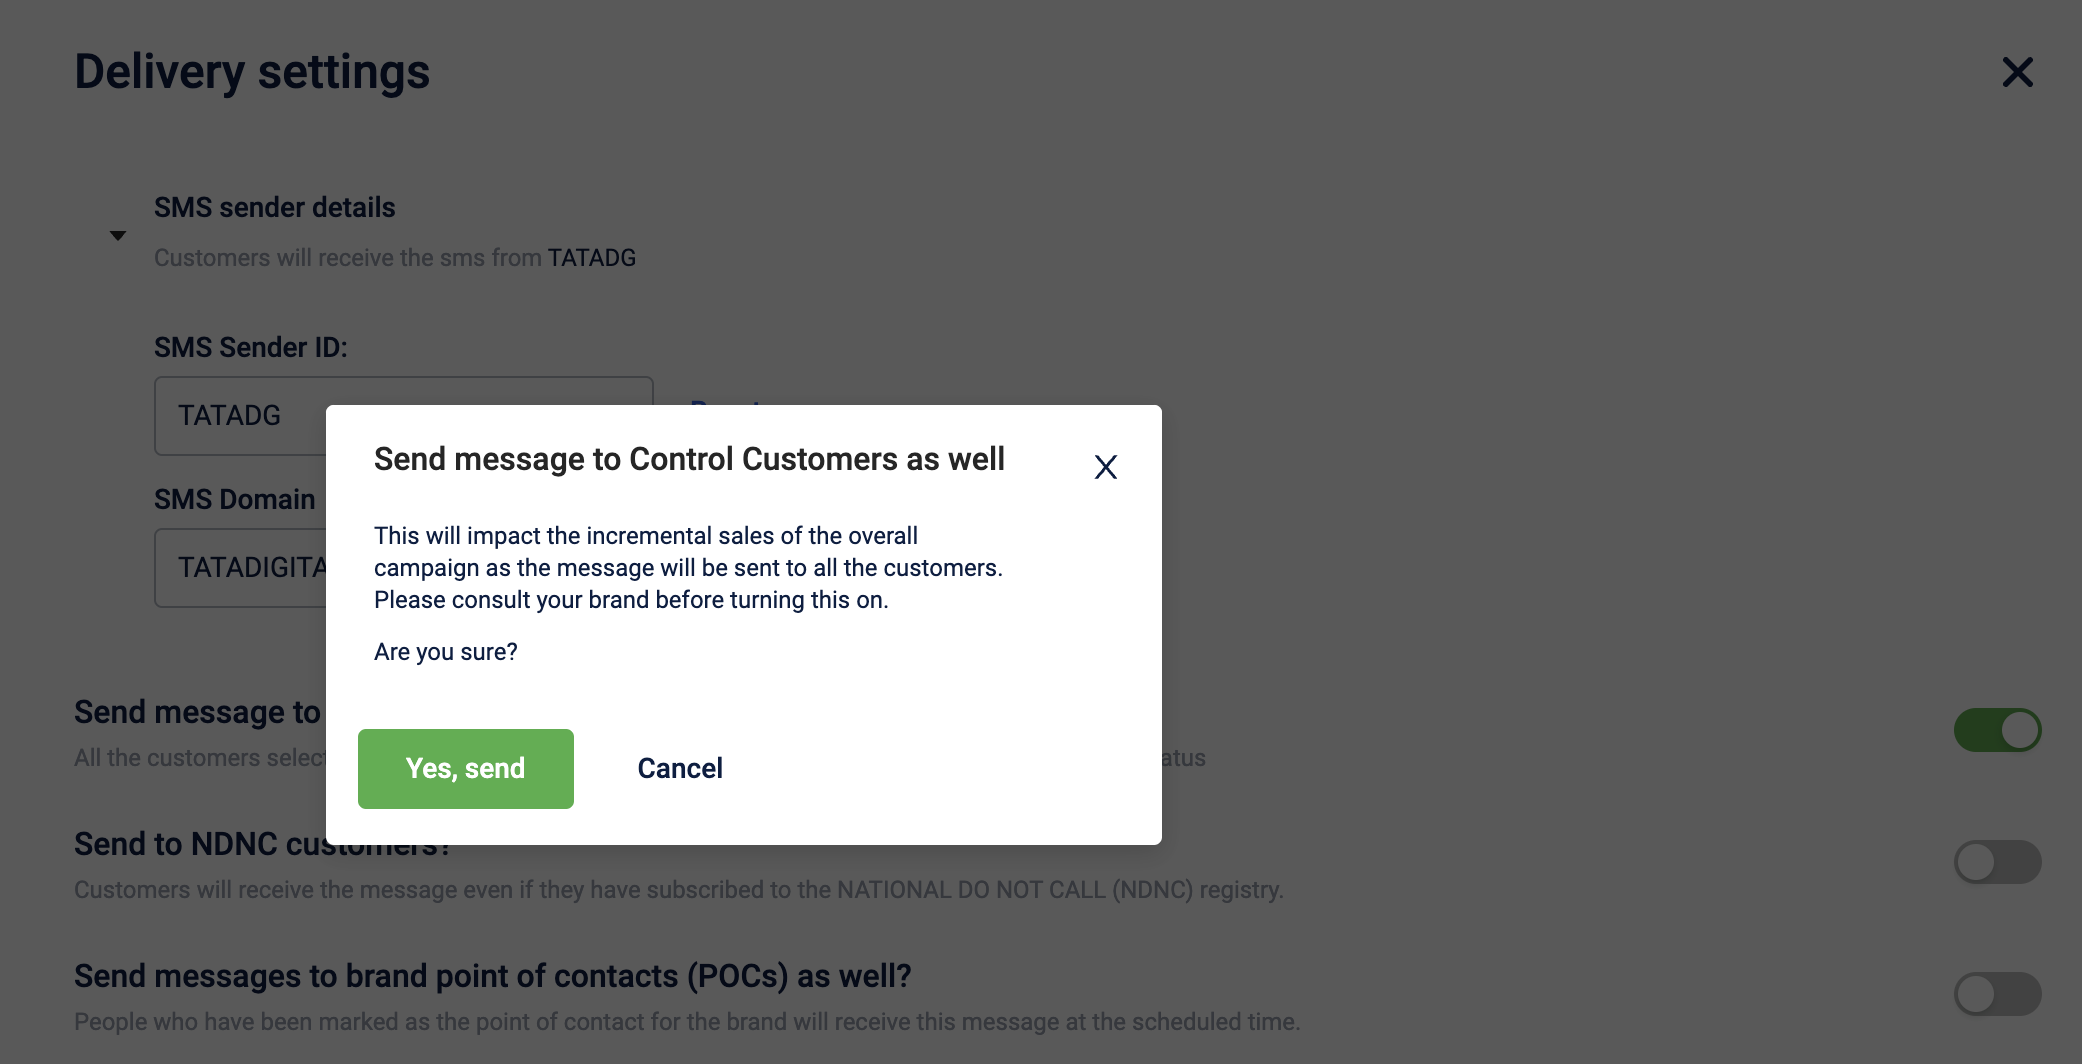
By default, the campaign communication messages are not sent to the Control customers but only to the Test customers. You can turn on the toggle switch to enable sending communications to Control customers.
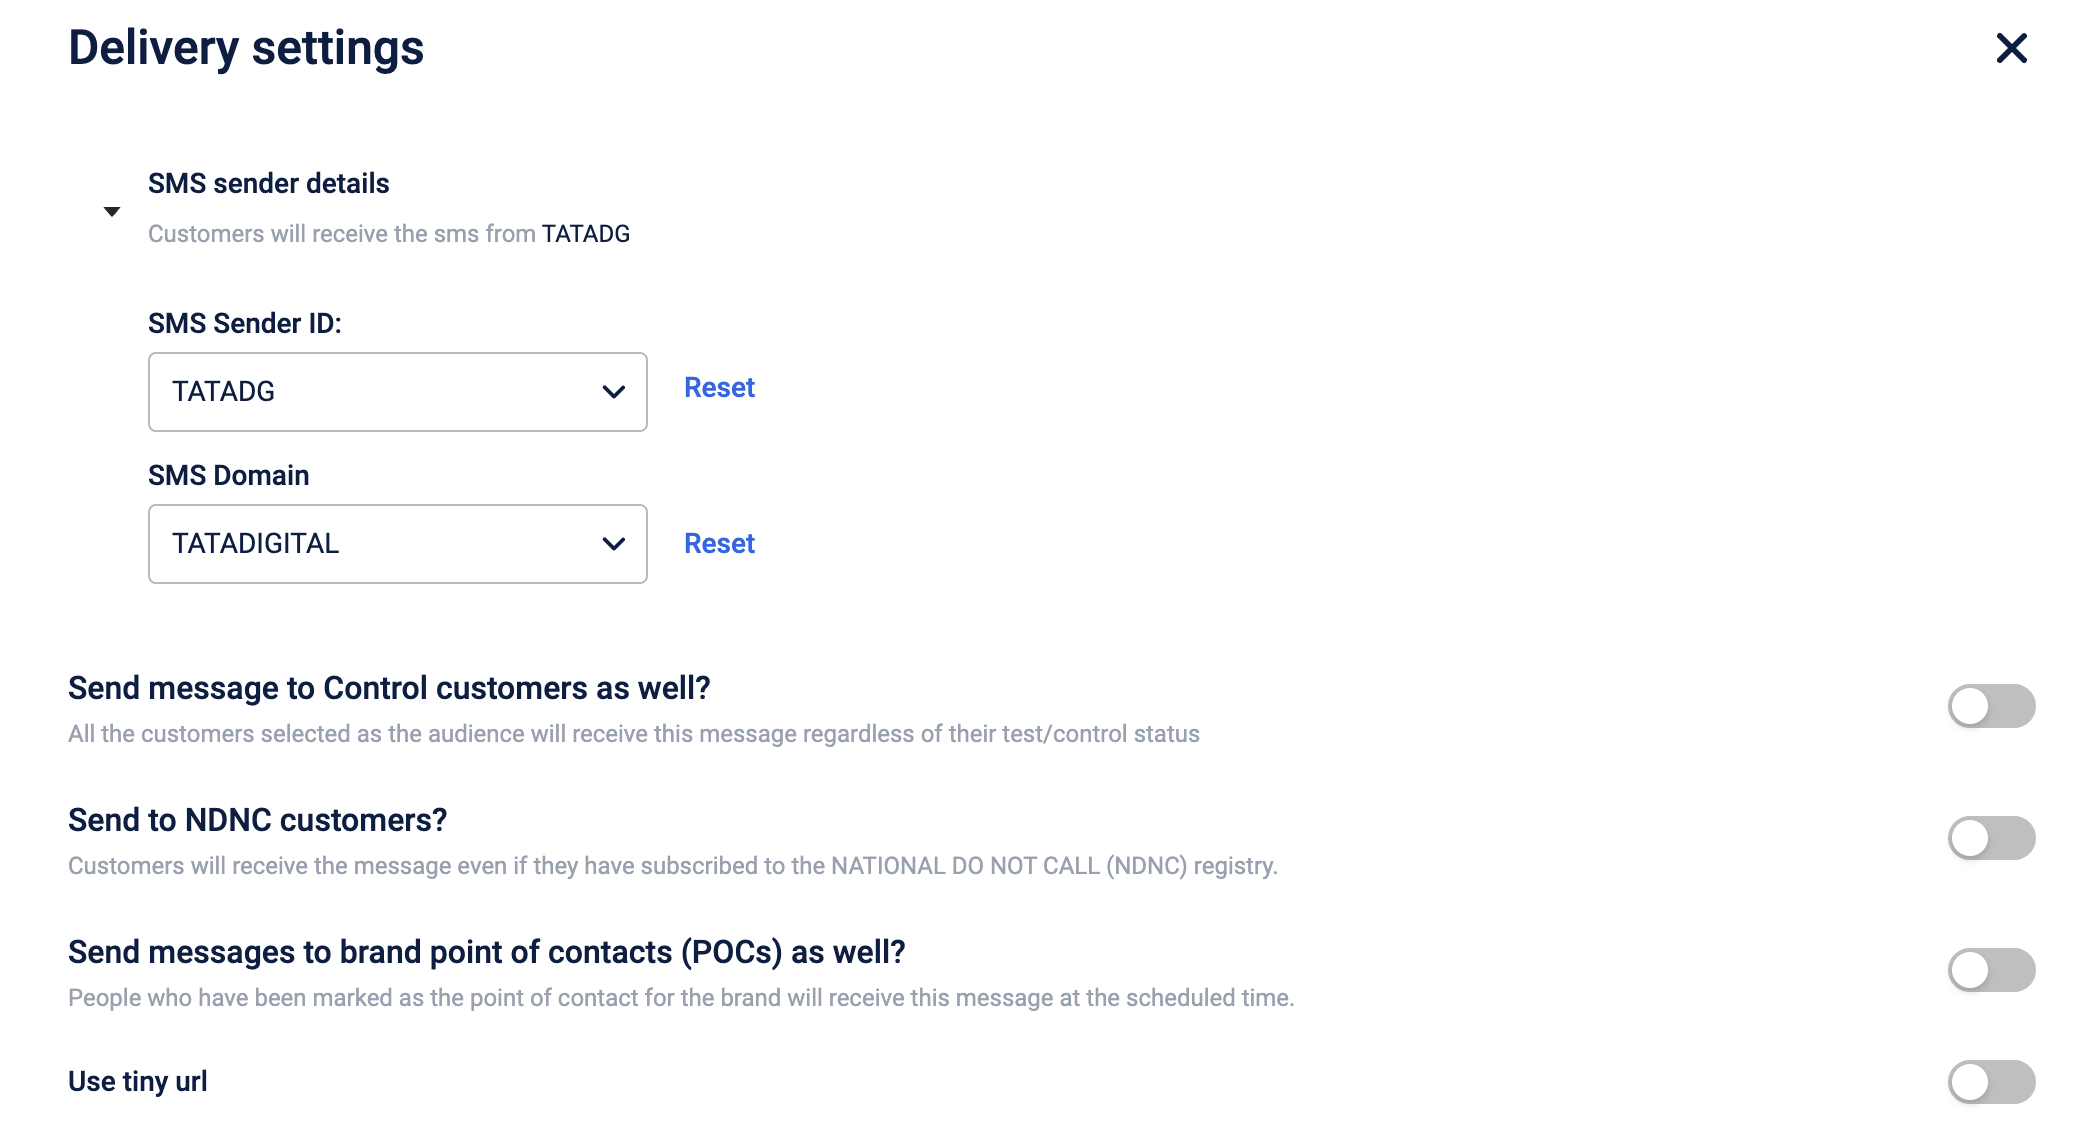
A confirmation message is displayed on enabling the option. Select Yes, send to proceed.
Use case
You can enable this option in scenarios such as:
- sending communication about a brand's promotional program to all customers
- sending feedback form and collect feedback from all the customers
- sending any emergency communication
- event invitation to all customers
Updated about 1 month ago
