
Sending Campaign Messages
Once you have configured and integrated LINE with Capillary. You can manage and execute LINE campaigns.
Note:
Sending campaign messages through LINE is currently supported on Engage+.
The process for sending campaign messages involves the following steps:
- Creating an Audience Group
- Checking the LINE Channel Subscription Status
- Creating a LINE Message Template
- Creating a LINE Campaign
Creating an Audience Group
To create an audience group for a LINE campaign, follow these steps:
- Create the audience group for the campaign.
Note
New LINE users will appear in the Audience list with a 1-day delay due to the audience synchronization (ETL Sync) process.
You must wait for the synchronization to complete and the LINE reachability status to update before triggering the campaign.
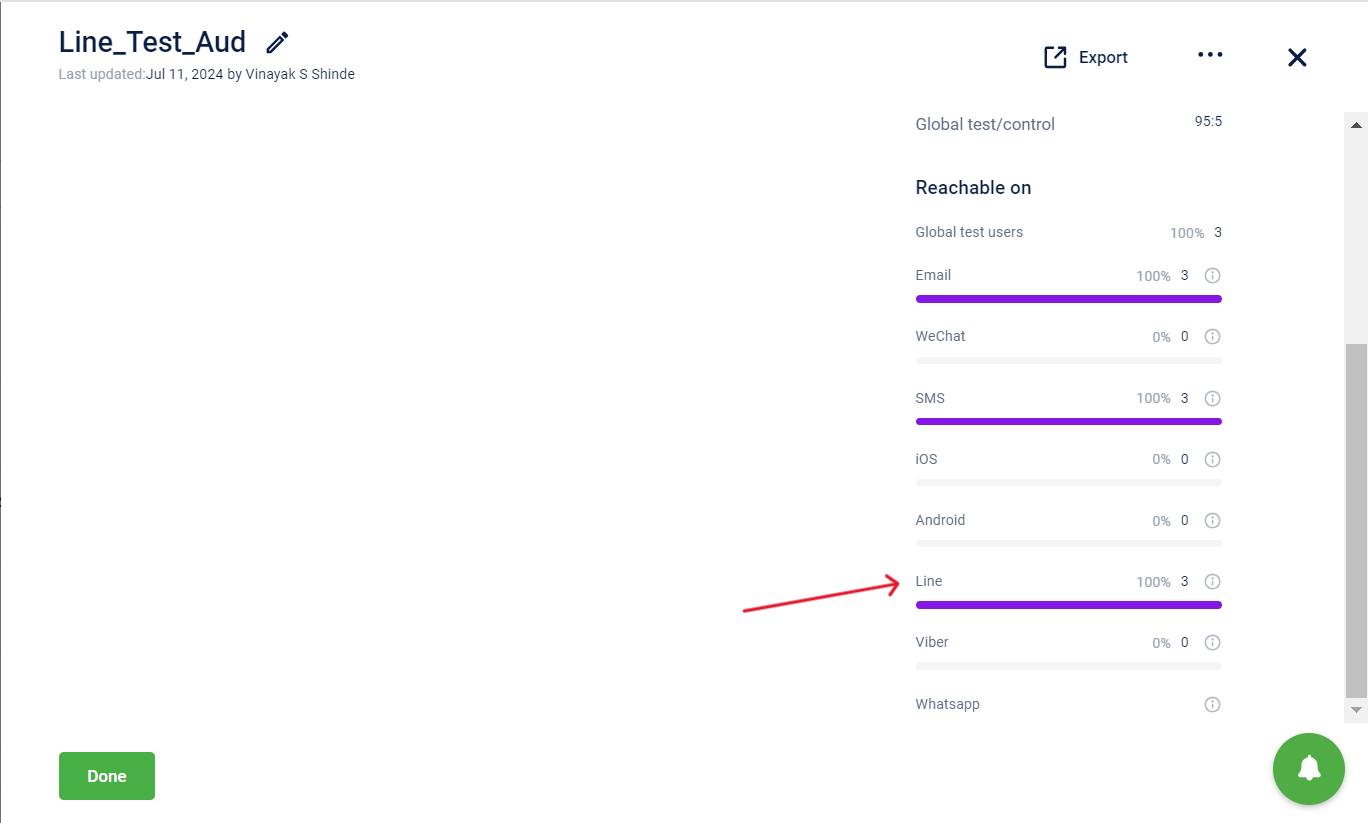
- Click on the audience group to view the reachability status and confirm that it has synced.
Checking LINE Channel Subscription Status
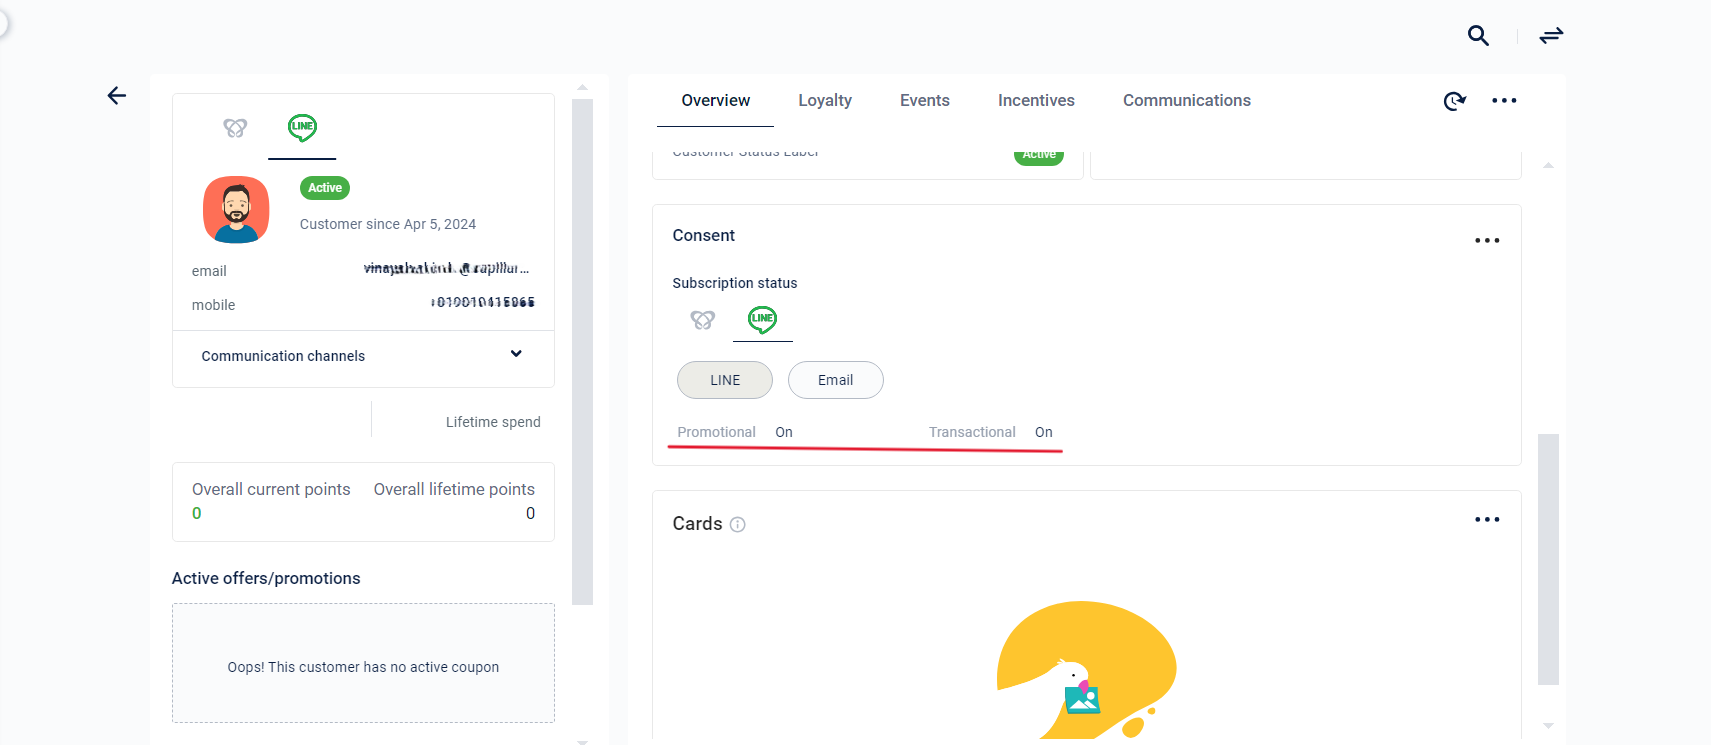
To check the LINE channel subscription status of a member, follow these steps:
- Login to InTouch and click on Member Care.
- In the Customer Search box, type the customer's mobile, email, or external ID. The auto-suggestion list appears after the fourth character.
- Click the desired customer from the list.
- In the customer profile page, locate Subscription Status and navigate to the LINE tab.
- Verify that the customer has Promotional and Transactional turned on.
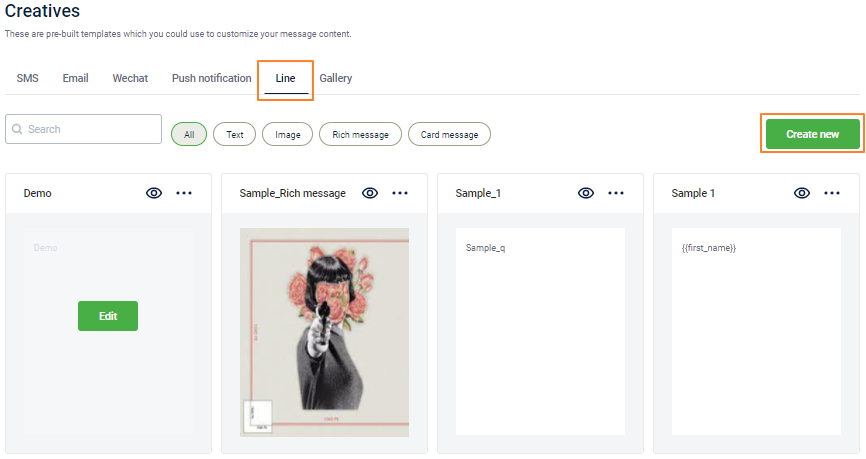
Creating a LINE Message Template
A LINE message template allows you to design and organize templates and use them for your campaigns. By having pre-made templates, you can quickly deploy consistent and effective campaigns on LINE.
For information on creating a LINE message template, refer to the template creation documentation.
Creating a LINE Campaign
To create a LINE campaign, follow these steps:
-
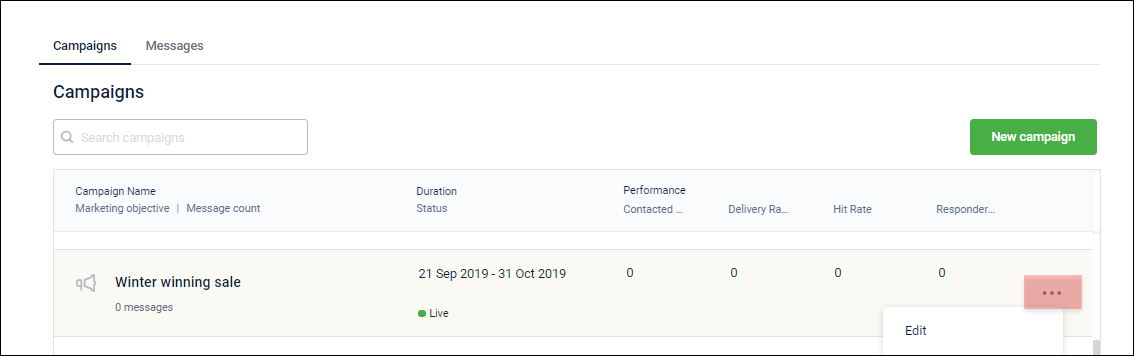
Create a new campaign or edit an existing one.
-
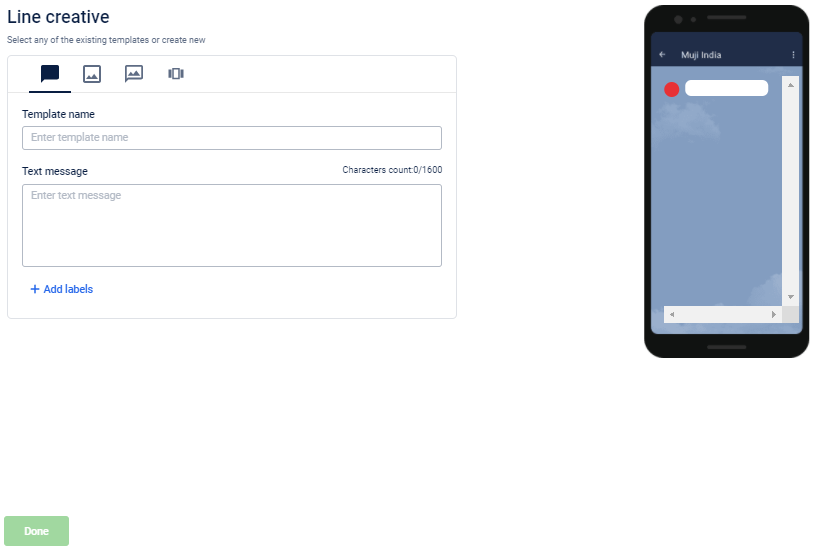
In the Content section of your campaign, click on Add Creative and choose Line from the options.
-
Choose the LINE Account to send the content.
-
Create a new template or choose from existing templates.
-
View the message preview on the right side.
-
Click on Done to save the changes.
Updated 2 days ago