Configuring VisitorSense
The VisitorMetrix and CaptureEdge devices are integrated with each other by default. You need to connect LAN to the CaptureEdge device. VisitorMetrix connects to the CaptureEdge hotspot, which is pre-configured.
You need to do a manual set up to define the capture area of both the devices and to associate a default TILL. All the data that syncs from the specific VisitorSense will be associated with that default TILL.
Prerequisites
- Connect the LAN cable to the CaptureEdge device
- After installing the device, ensure that the device is switched on (red LED is glowing).
Once both VisitorMetrix and CaptureEdge devices are installed, you need to configure it as explained in the following:
The following procedure is for Windows 7 based systems. The process might differ for other operating systems.
To configure the Demographics device:
1.On your Desktop/Laptop, click the WiFi icon

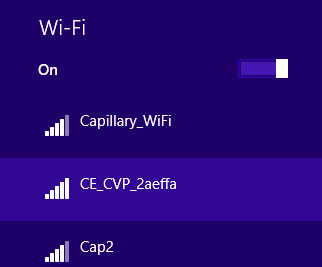
2. If the Demographics device is on, you will see a CaptureEdge hotspot with the name CE_CVP_<device id>
-
Click on the WiFi name and click Connect
-
In Enter the network security key, type the password provided for the device and click Next
-
Click Yes on the connect automatically prompt screen
-
Ensure that the device is connected
-
Open the web browser and type the address 172.24.1.1:8080/api/status and press Enter. Note down the IP address of the VM device that appears (FFC IP Address)
-
Then, open <VM device IP>/tillDetails.html
-
Fill in all the fields that appear and click Submit
-
Then, open a web browser and type the URL http://172.24.1.1:8080 and press Enter
-
Specify the UserID as admin and Password as amin123 and click Login
-
Click on Config Tool
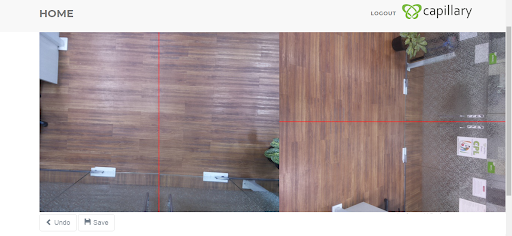
You will see a similar screen. If the devices are on the same axis, the red line of both the devices will point to the same on the floor (centre of the entrance).

- Consider any 8 common points on both the devices and join each point on the VisitorMetrix to the corresponding point of CaptureEdge with straight lines as shown below and click Save (Just click on one point of VM's capture area and drag to the corresponding point of the CE's capture area)
Updated 7 months ago
