VisitorMetrix- Installation
Pre-installation checklist
- External components required for electrician
- Electric Power Socket and Power Plug Point 5v @ 1.5/2 Amp
- Power wire (If required)
- Ladder (If required)
- Drilling Machine
- Lan cable with port RJ45 ( as per store length required)
- Wifi for device connectivity
- POE if applicable( for power and internet to the device)
Installation kit
- Device: FFC device counts the customer’s walk-in/out.
- Adapter: The adapter provides the power required to the device
- Adapter cable: The cable connects the device to the power socket.
- Screws and nuts: Fixes the device to the ceiling wall or hardware.
- Extension: Available size- 5, 10, 15, 17 cm, 1, 2 feet.
- User manual: For details, see the articles.
In some cases, global adapters are used, consisting of adapter pins compatible or specific to the country.
Complete installation procedure
Pre-install the FFC device at the store entrance to analyze how and where to fix the device.
The following are the criteria to be followed while marking the installation spot.
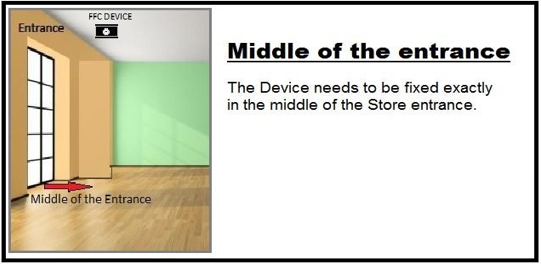
- Mark at the middle of the entrance.
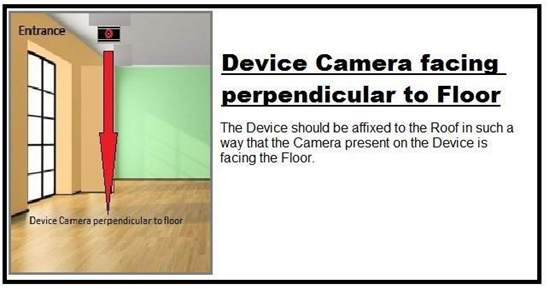
- Look down perpendicularly.
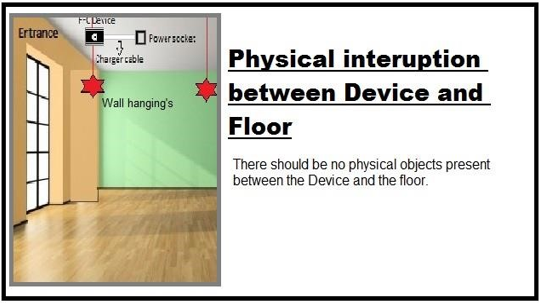
- Avoid physical interruption between device and floor.
-
Avoid inward opening of the door.
-
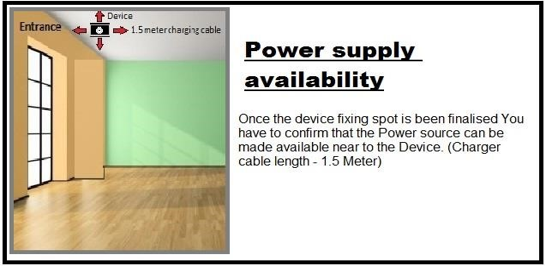
Availability of power supply.
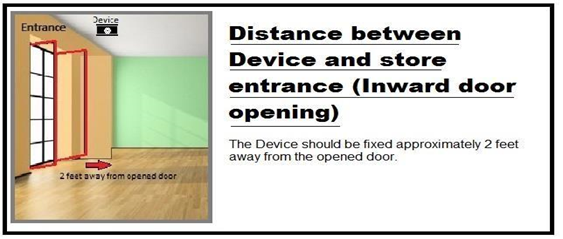
There are two scenarios noticed while measuring the distance between the entrance of the stores and the device fixing spot. The following are the images that can match your store’s door style.
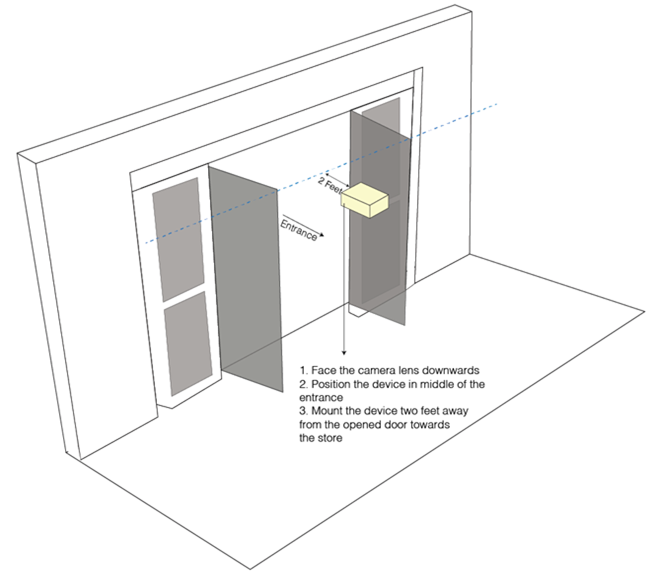
- Inward door opening:
- Fix the device approximately 2 feet away from the open door.
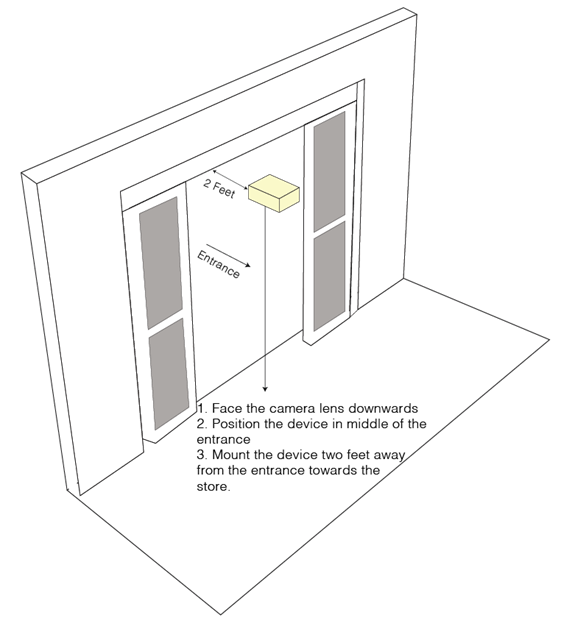
- Absence of door: The following are the steps to execute in this scenario.
- Fix the device approximately 2 feet away from the entrance.
- After finalizing the Device installing spot, mark the area for the further installation procedure.
- Cover the device adapter cable with a suitable casing.
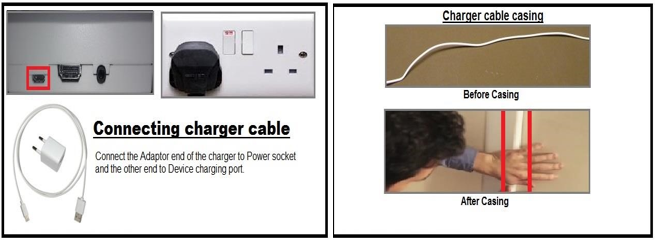
- Turn On the power supply. To confirm the successful device installation, check that the device power indicator is On.
Installation
To install VisitorMetrix in a store, follow these steps.
- Inform the electrician about device installation and the establishment of a power supply.
- Install a power socket near the device. (Adapter Cable Length- 1.5 meter)
- Drill two screw holes at the marked spot as according to the guide.
- Affix the Device to the screws and confirm that the device has been fixed as mentioned in the guide.
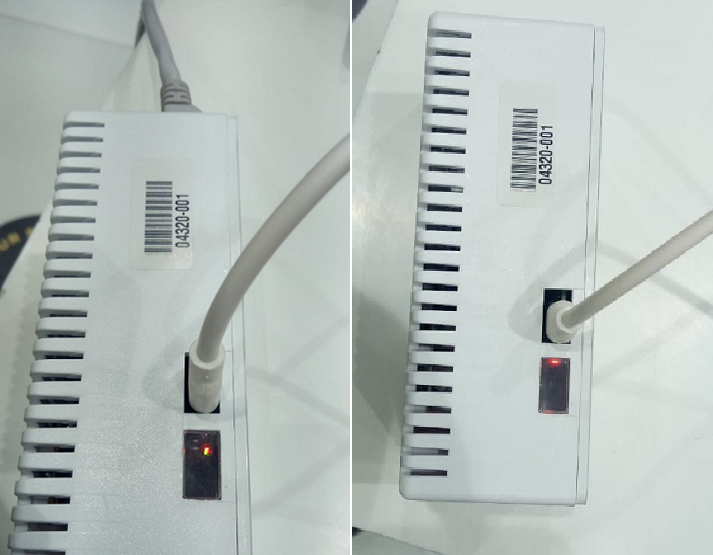
- Connect the device and turn on the power plug. (When powering up, the light status appears: Red)
When installing more than one device, the distance between the devices should be 6 to 8 feet.
Determine the mounting location
Determine the location for mounting the device by choosing the installation spot based on the entrance door style.
The following are the ways to determine the mounting location for different types of entrance doors.
1. Swing entrance door
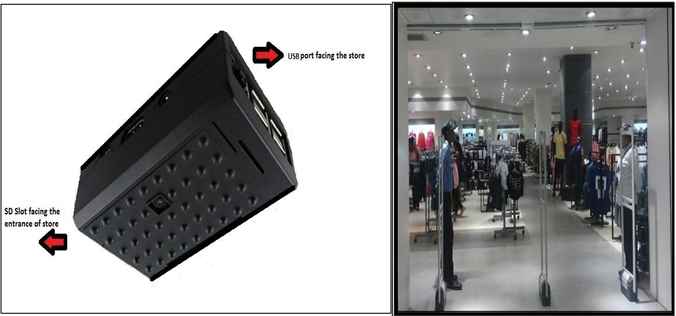
- Face the device as per the sticker instruction (attached on the device).
- Mount the device on the ceiling, positioning 2 feet away (inwards) from the open door and straight to the center of the entrance.
- Position the camera downwards and ensure that the device is parallel to the floor.
2. Sliding or no entrance door
- Face the device as per the sticker instruction (attached to the device).
- Mount the device on the ceiling positioning 2 feet away (inwards) from the center of the entrance.
- Position the camera downwards and ensure that the device is parallel to the floor.
Updated 7 months ago
