VisitorMetrix Configuration for InStore, Bypass and FFCR
InStore
The following are the pre-checks before configuring the VisitorMetrix device in InStore.
- Connect the VisitorMetrix device and the laptop to the same network.
- Login into the router page and note the device’s IP address.
- Navigate to Home > Advance > DHCP Client list. (Device name – ffc-reloaded)
- Note down the device ID by entering IP:8081/deviceid in the browser.
To configure the VisitorMetrix device in Instore, follow these steps.
-
On the desktop, open InStore and log in using valid credentials.
-
Click InStoreAI, wait for 10 seconds for the application to search the device, and then click Stop Search.
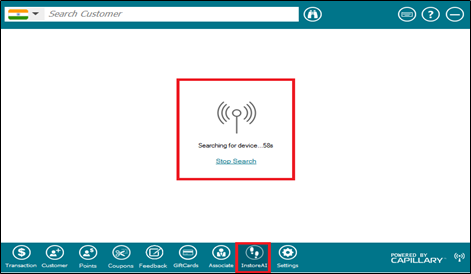
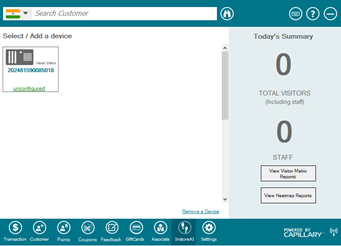
Post search, the device appears on InStore with the device ID as Unconfigured. Click the device icon to proceed further.
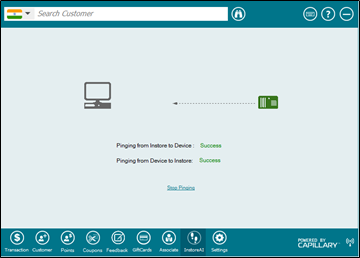
- Click Ping check to reconfirm if the device is connected to the network. (Ping should reflect as successful either way).
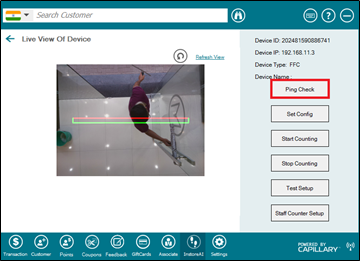
- Click Refresh View to get the device camera view.
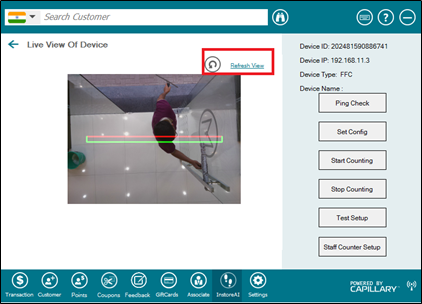
- Click Set Config to set the configuration lines and shoulder-width as per the store layout requirement.
Password: ffc@123
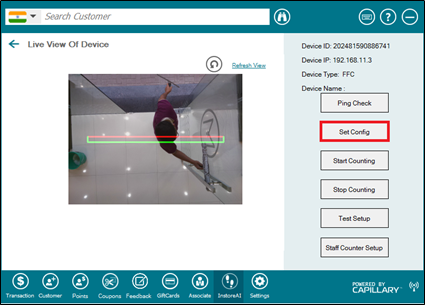
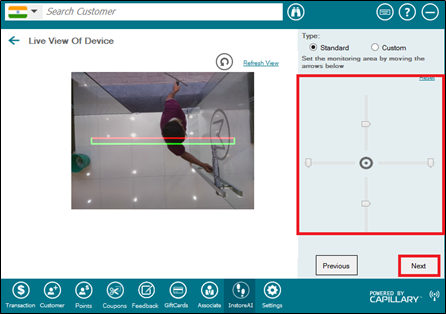
- Move the arrows provided on the right-hand side to set the monitoring area, then click Next.
- Move the arrow to set the shoulder width, and click Save.
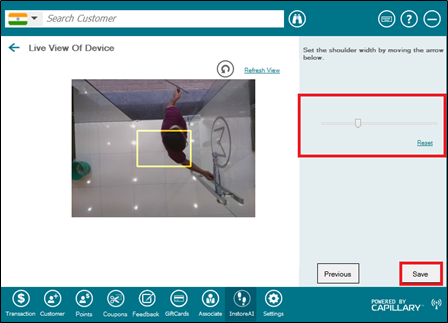
Make a person stand below the device physically for reference.
- Click Start Counting to initiate device counting.
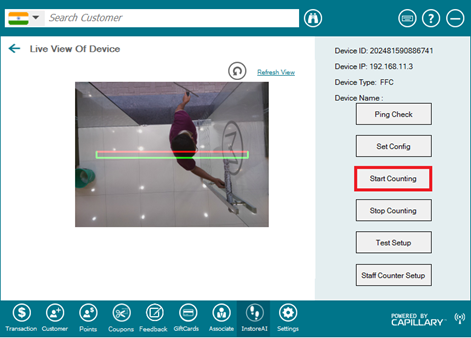
If there is no image and an error occurs, follow these steps.
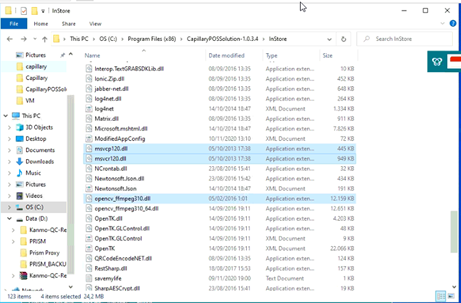
- Go to - C:\Program Files (x86)\CapillaryPOSSolution-1.0.3.4\InStore\x86
- Copy all the .dll files.
- Paste the files in the InStore folder.
Bypass
To configure the Bypass device and QC Check, follow these steps.
- Connect VisitorMetrix by plugging the adapter into the power socket.
Check for the Red-Green blinking light and double click on it.

- Connect the VisitorMetrix device and the computer/laptop to a common router using a LAN cable.
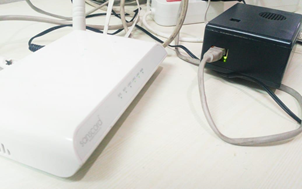
- Create the Wi-Fi SSID on the router page by following these steps.
- Enter the Store Wi-Fi ID in the router.
Wireless > Wireless basic setting > SSID
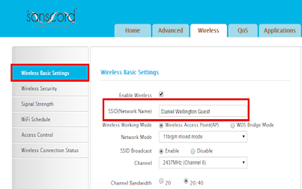
Sanscard is the router used for reference, the image will differ for each router.
- Set the Store Wi-Fi password in the router.
- Wireless > Wireless basic setting > Security key.
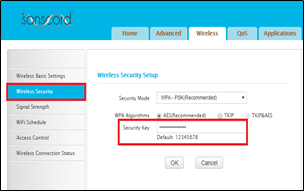
- Identify the VisitorMetrix device
After connecting the device to the router, open the router page and navigate to DHCP Client list and copy the device IP.
Advance > DHCP Client list (Device name – ffc-reloaded).
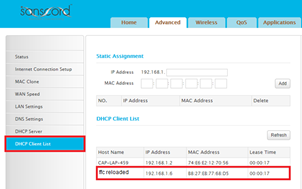
- Set up the Wi-Fi SSID in the VisitorMetrix device by following these steps.
- Open a web browser (Chrome, Firefox, or Safari) and enter the Device IP (192.168.1.6) as the URL, and click Enter.
- Click scan SSID.
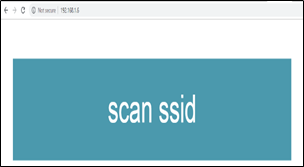
- Select the Wi-Fi SSID, enter the Wi-Fi password, and click connect.

- Update the Till details in the device by following these steps.
- Open a web browser (Chrome, Firefox, or Safari) and enter.
https://Deviceip/tillDetails.html ( https://192.168.1.6/tilldetails.html). - Update the Store till details, Time zone, and Cluster.
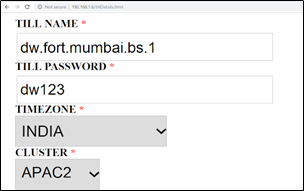
Time zone and Cluster will differ based on region.
- Configure Quality Check for the device ID, RTC time, camera, and MAC IDfor ethernet and WLAN by following these steps.
-
Open a web browser (Chrome, Firefox, or Safari) and enter.
https://Deviceip:8081/qccheck (https://192.168.1.6:8081/qccheck). -
Check the Device camera view by opening a web browser (Chrome, Firefox, or Safari) and entering https://Deviceip:8081/image (https://192.168.1.6:8081/image).
- Expand the SD card to optimize the data storage on the device.
- Open a web browser (Chrome, Firefox, or Safari) and enter
https://Deviceip:8081/expandsdcard
- Enable the services to start the footfall count.
The putty application needs to run/check the below-mentioned steps.
- Login to putty by entering the Device IP (192.168.1.6).
Enter ID: pi (This is the default ID).
Password: FFC@capillary (This is the default password). - After logging in, run the mentioned command to start the services. A message “Device start triggered successfully” will appear.
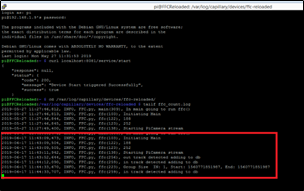
CMD: curl localhost:8081/service/start
- Recheck the till and Wi-Fi credentials in putty to see if it is saved correctly.
- The following are the commands to check the Till details in putty.
- Make someone walk under the device multiple times and confirm in putty if the same is reflecting.
CMD1: cd /var/www/html/
CMD2: ls -l
CMD3: cat tillDetails.json
FFCR
- Switch on the device and check if the default hotspot FFCR_ee56ab12 (last six digits of LAN mac address) appears or not.
- Connect the LAN cable to the laptop.
- Connect the FFCR_ee5612. Password: cap@1234.
After FFCR is connected, it will show no internet.
- Type 172.24.1.1:8081 in any browser, it will redirect the page.
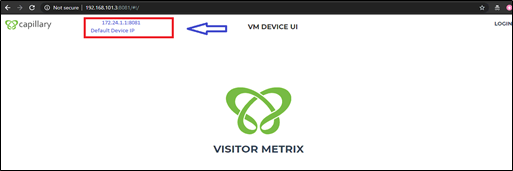
Enter the username and the password, then click Login.

Double Click Network Configuration to redirect the page.
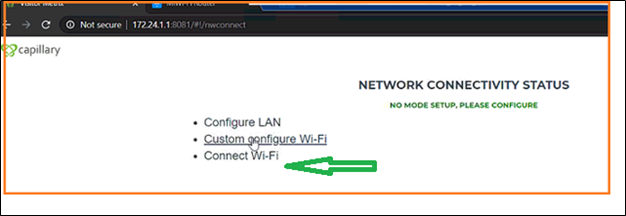

- Click Connect wifi.
- Click SSIDs to get a drop-down list for the Wi-Fi name.
- Select the Wi-Fi name and enter the Wi-Fi password.

- Cross-check if the device is connected to the store network.
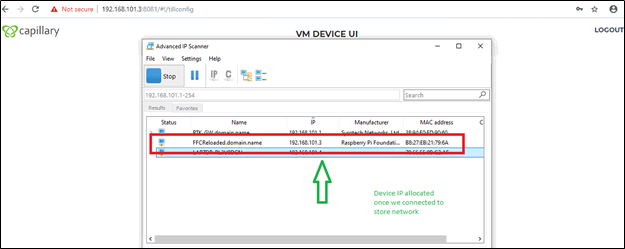
Once the device is connected to the store network, the device allocates IP from the router.
- Click IP scanner or router DHCP client list to view and verify the device IP.
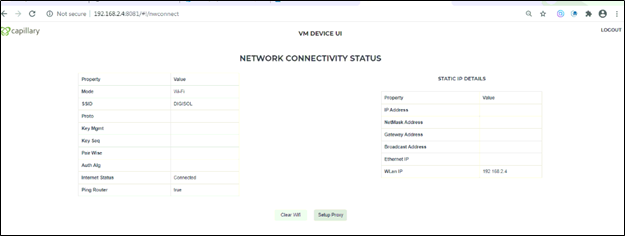
- Enter the Till in the device to go to the Till Login page.
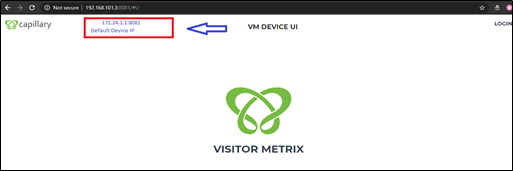
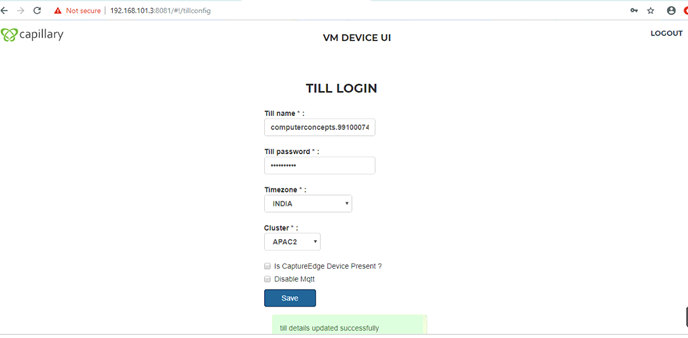
- In TILL LOGIN, enter the till details and click save.
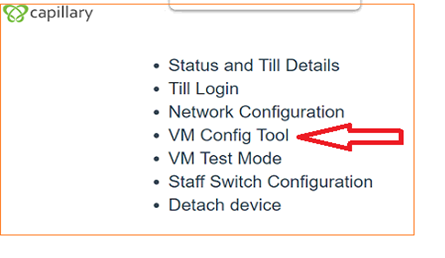
- Click VM Config Tool. (Next to set the device configuration)
- Click refresh to view the current image and adjust the config line.
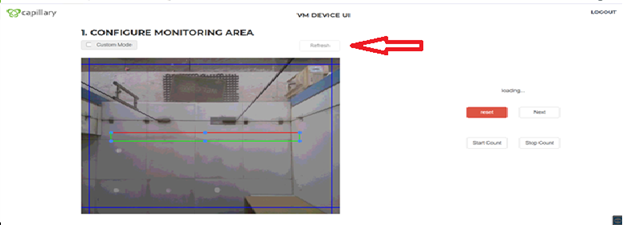
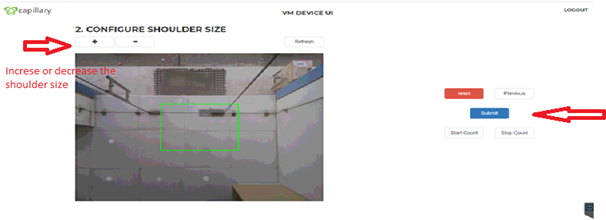
- Click Next and adjust the shoulder size using the plus or minus button and click submit.
- Click start count after configuring.
It will pop the device service that has been triggered successfully.
- Go to CMD (command prompt) and type ssh [email protected](Device IP).
It will only work on Windows 10, for Windows 7 and 8, the user needs to log in to putty and check if all four files are downloaded. Only after the four files are downloaded the device will start the count.
CAPVERIFIED HUBDETAILS.JSON STORESDETAILS.JSON TILLDETAILS,JSON
- Next to Paired the staff switch, click IN or OUT as per the request, and then click connect. Press the switch 3-4 times to pair, a beep sound will be heard once connected. It will be paired switch the same time it needs to press switch 3-4 times once it connects it will beep sound.

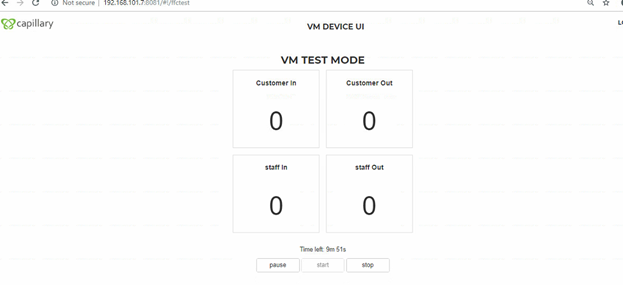
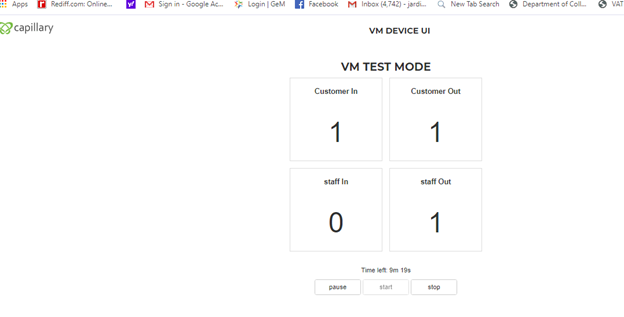
- Click VM Test Mode to start the test count.
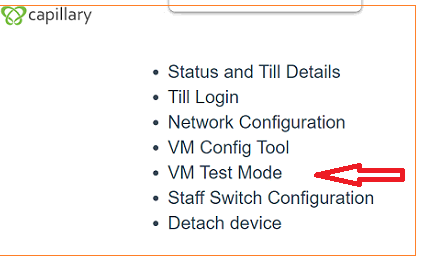
- Configure the start button.
By pressing the staff switch, the store staff can monitor the number of staff that walked out of the store and walked into the store.
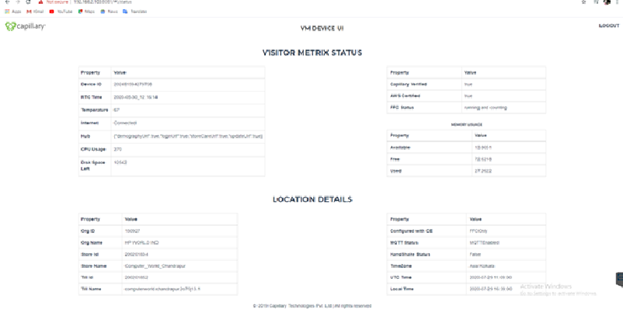
Click Status and Till Details to view the status of the device.
Updated 7 months ago
