
Tracking Campaign Performance based on Conversion Goals
Overview
The Conversion Goal feature in Engage+ helps you understand how well your campaigns are working. It shows whether your messages are encouraging customers to take desired actions such as making a purchase. This helps you understand the effectiveness of a campaign.
This feature tracks the number of customers who took action because of your campaign. You can define a conversion goal for each campaign. Once set, it monitors how many customers completed that goal after receiving your campaign message. This allows you to measure the true impact of your campaign on customer behavior.
What is a Conversion Goal?
A Conversion Goal helps measure the effectiveness of a campaign by tracking the number of customers who complete desired actions, such as making a qualifying purchase, after receiving a campaign message. By setting up conversion goals, you can gain insights into campaign performance, allowing you to improve messaging and targeting for better future outcomes. You can create custom conversion goals and measure campaign success based on real customer behaviour.
Key Features
The feature includes several key capabilities:
- Org-Level Default Conversion Goal Setting: Allows users to set a default conversion goal for all campaigns in the organization to keep tracking consistent. Users with access, should have the ability to view, edit, or remove this default goal.
- Campaign-Level Conversion Goal Setting: Allows users to customize conversion goals for individual campaigns. This can be done if there's no org-level default Conversion Goal is set up. Campaign-level goals are specific to that campaign and do not affect org-level settings or other campaigns.
- Tracking and Reporting: Provides capabilities to analyze campaign performance through detailed metrics and reports.
Notes
- This feature needs to be enabled for your organization by creating a JIRA ticket to the Capillary Product Support team.
- You can edit the conversion goal at any time before the first message in the campaign is approved. Once the first message is approved, the option to edit the conversion goal will no longer be available.
Configuring a Conversion Goal
When configuring a conversion goal, you define several parameters:
- Conversion Events: The events you want to track to measure campaign success.
Note
The supported customer events for the Conversion Goal currently focus on Transactional Events (customer makes a transaction).
-
Conditions: Based on the selected event, you can add conditions to decide which actions should be counted for campaign tracking. Multiple conditions can be added and combined using AND/OR operators.
-
Configuration Parameters: These settings decide how a customer’s action is linked to a campaign message:
- Event Tracking Period: This is the time period in which an event can be counted after a message is sent. You can choose a period like 15, 30, or 45 days, and decide if tracking starts when the message is sent, delivered, opened, or clicked.
- Message Interaction Status: Choose when to start tracking conversions after the message is sent, delivered, opened, or clicked. This helps filter events based on how users interacted with the message.
- Attribution Strategy: This decides which message is counted for the conversion. You can choose First Touch (first user interaction) or Last Touch (most recent interaction).
How to Configure a Default Conversion Goal (Org-Level)You can set a default conversion goal for your organization. This sets a default goal for all campaigns unless you create a custom goal for a specific campaign.
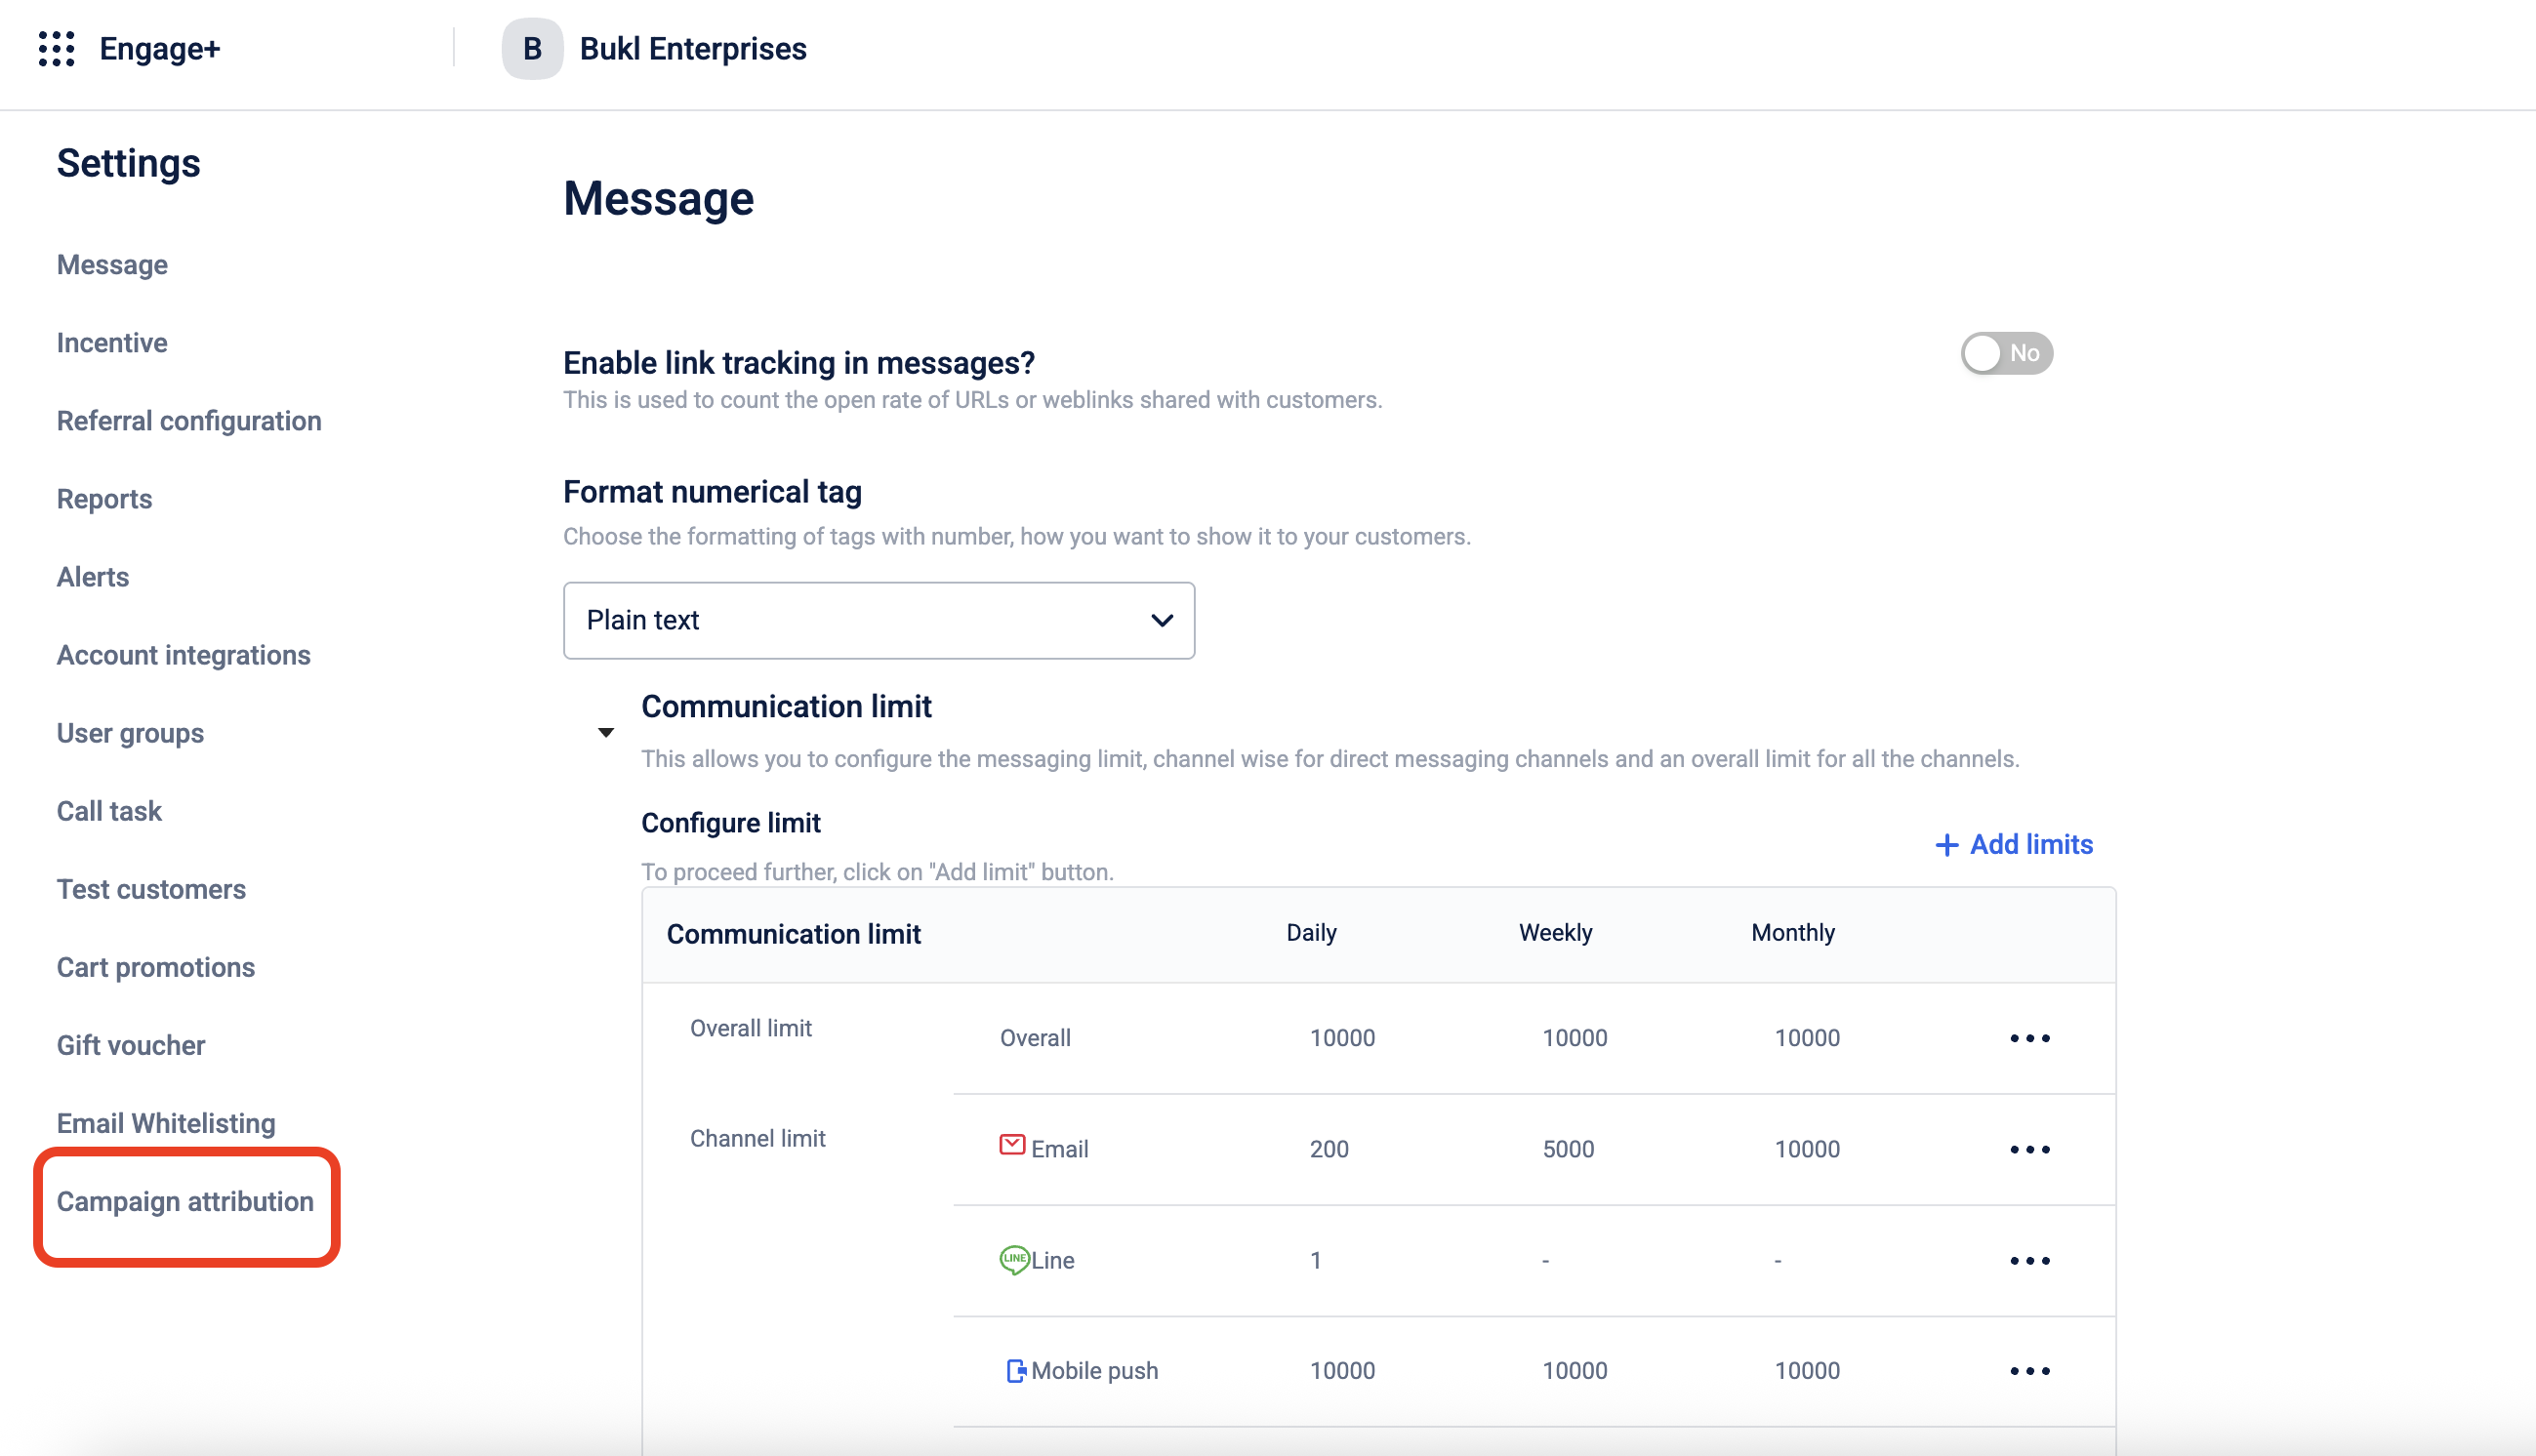
- Navigate to Engage+ and click on the settings icon.
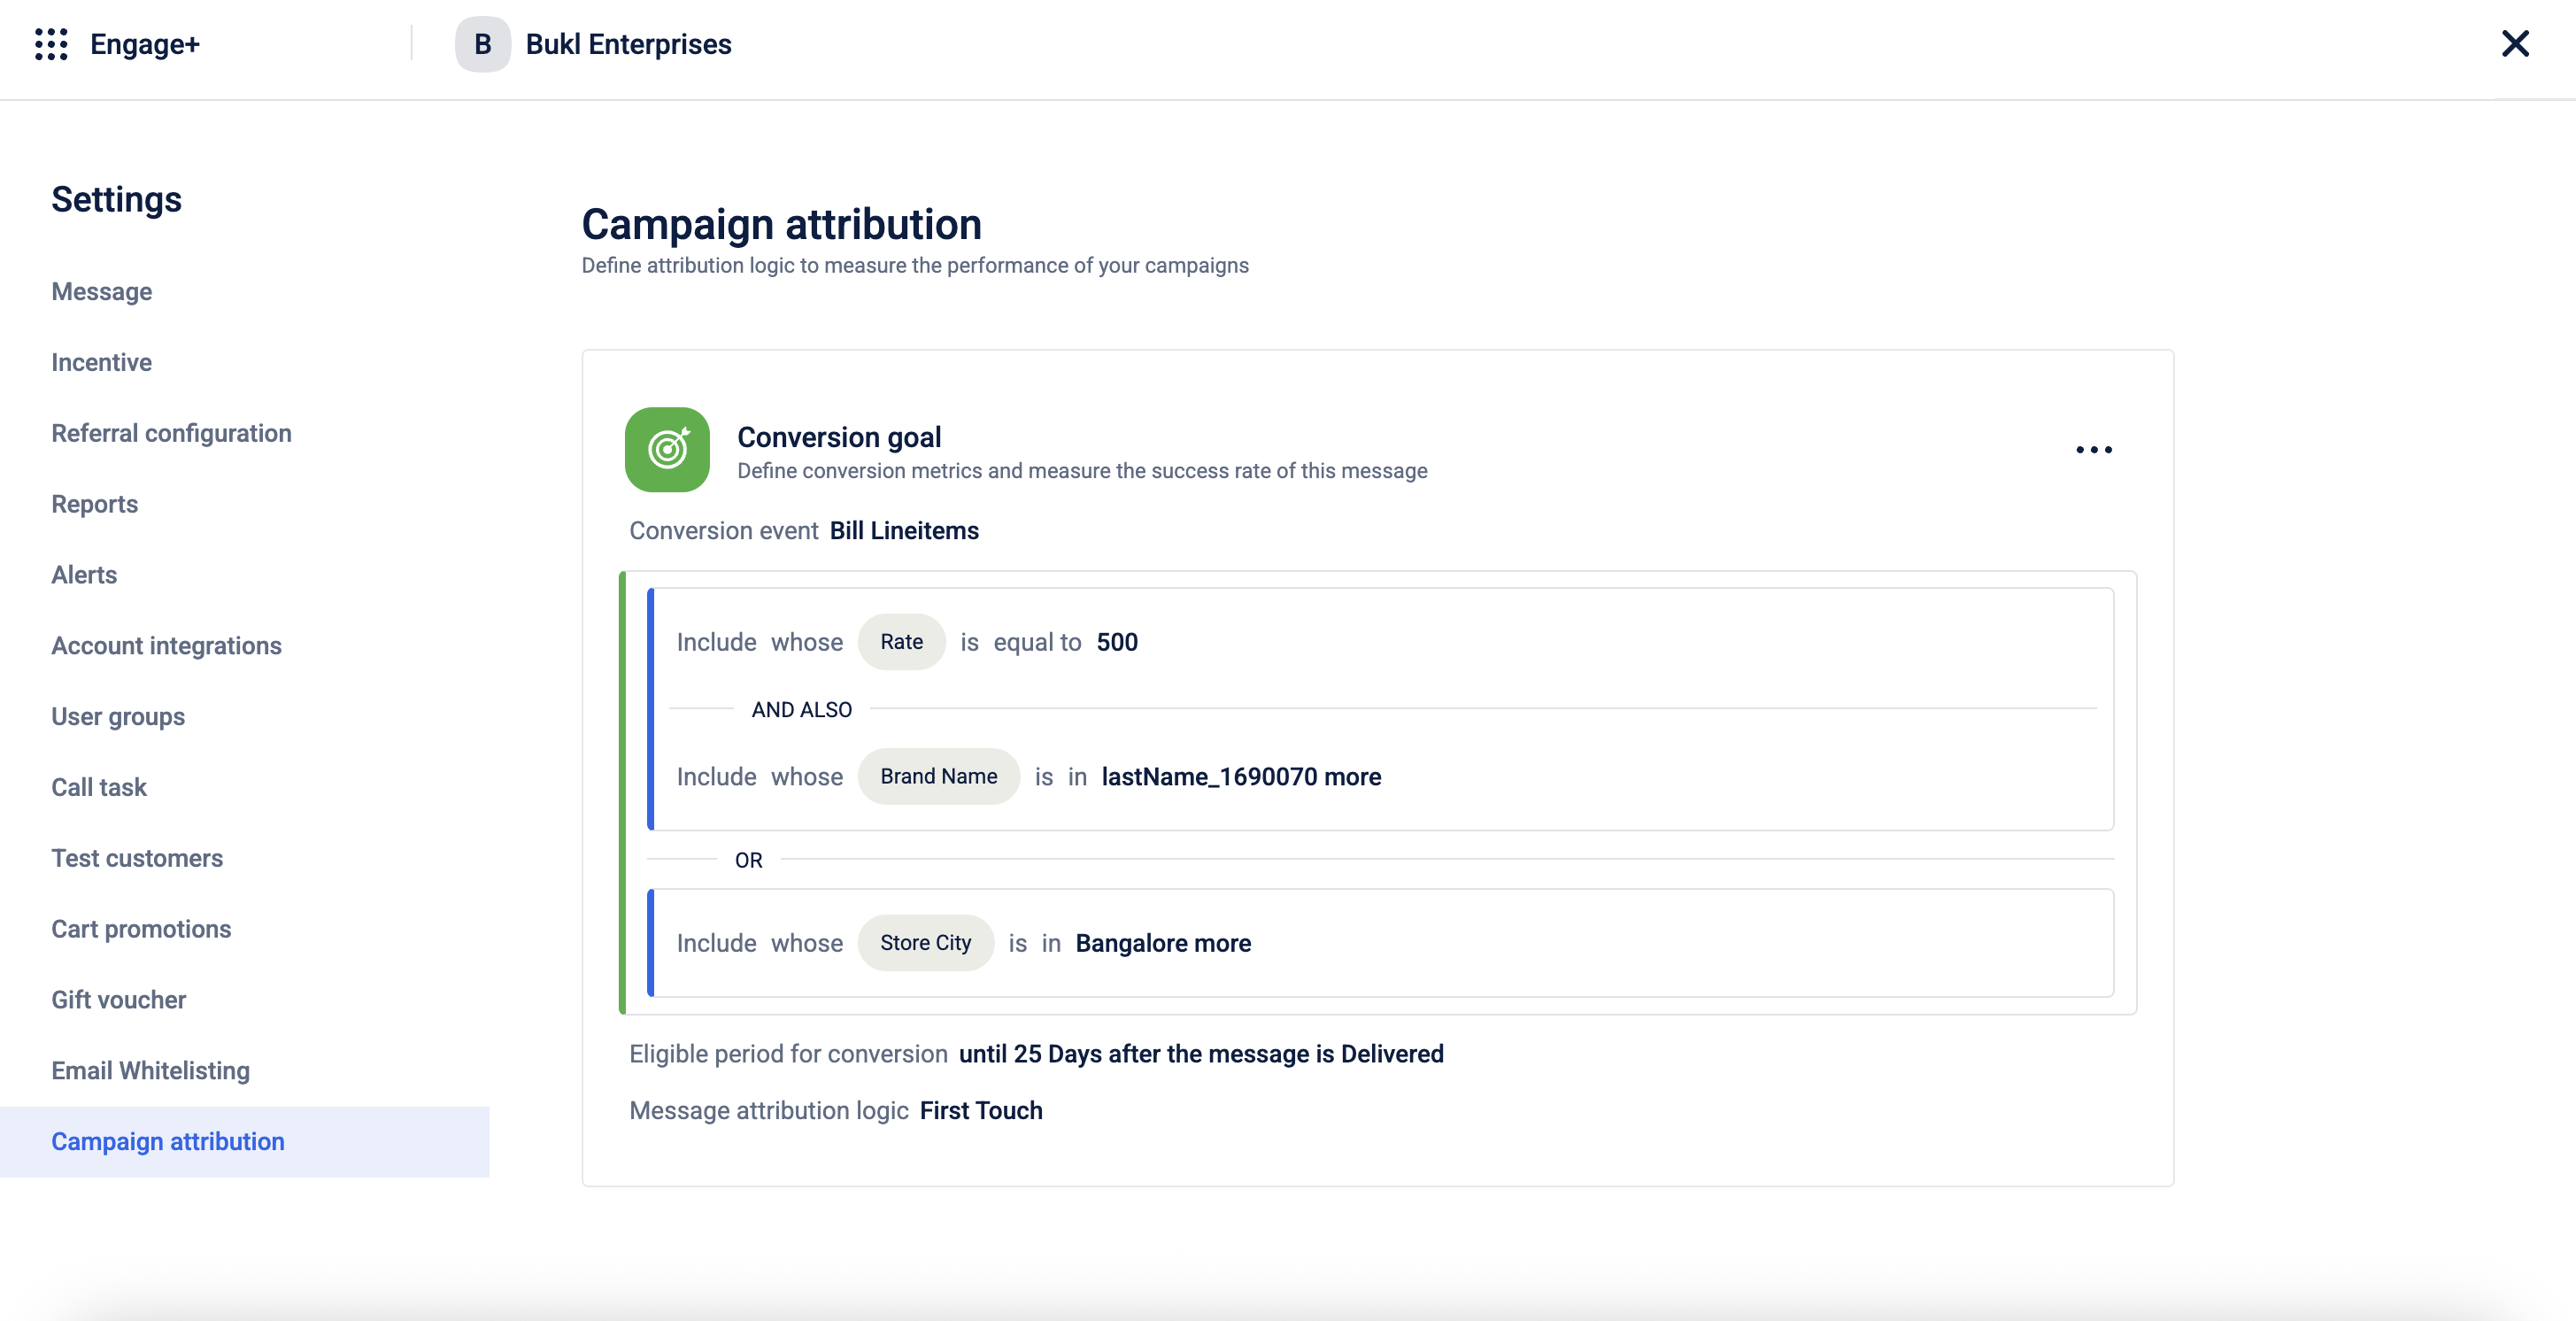
- Click on Campaign Attribution. Only users with org-level access can view this section.
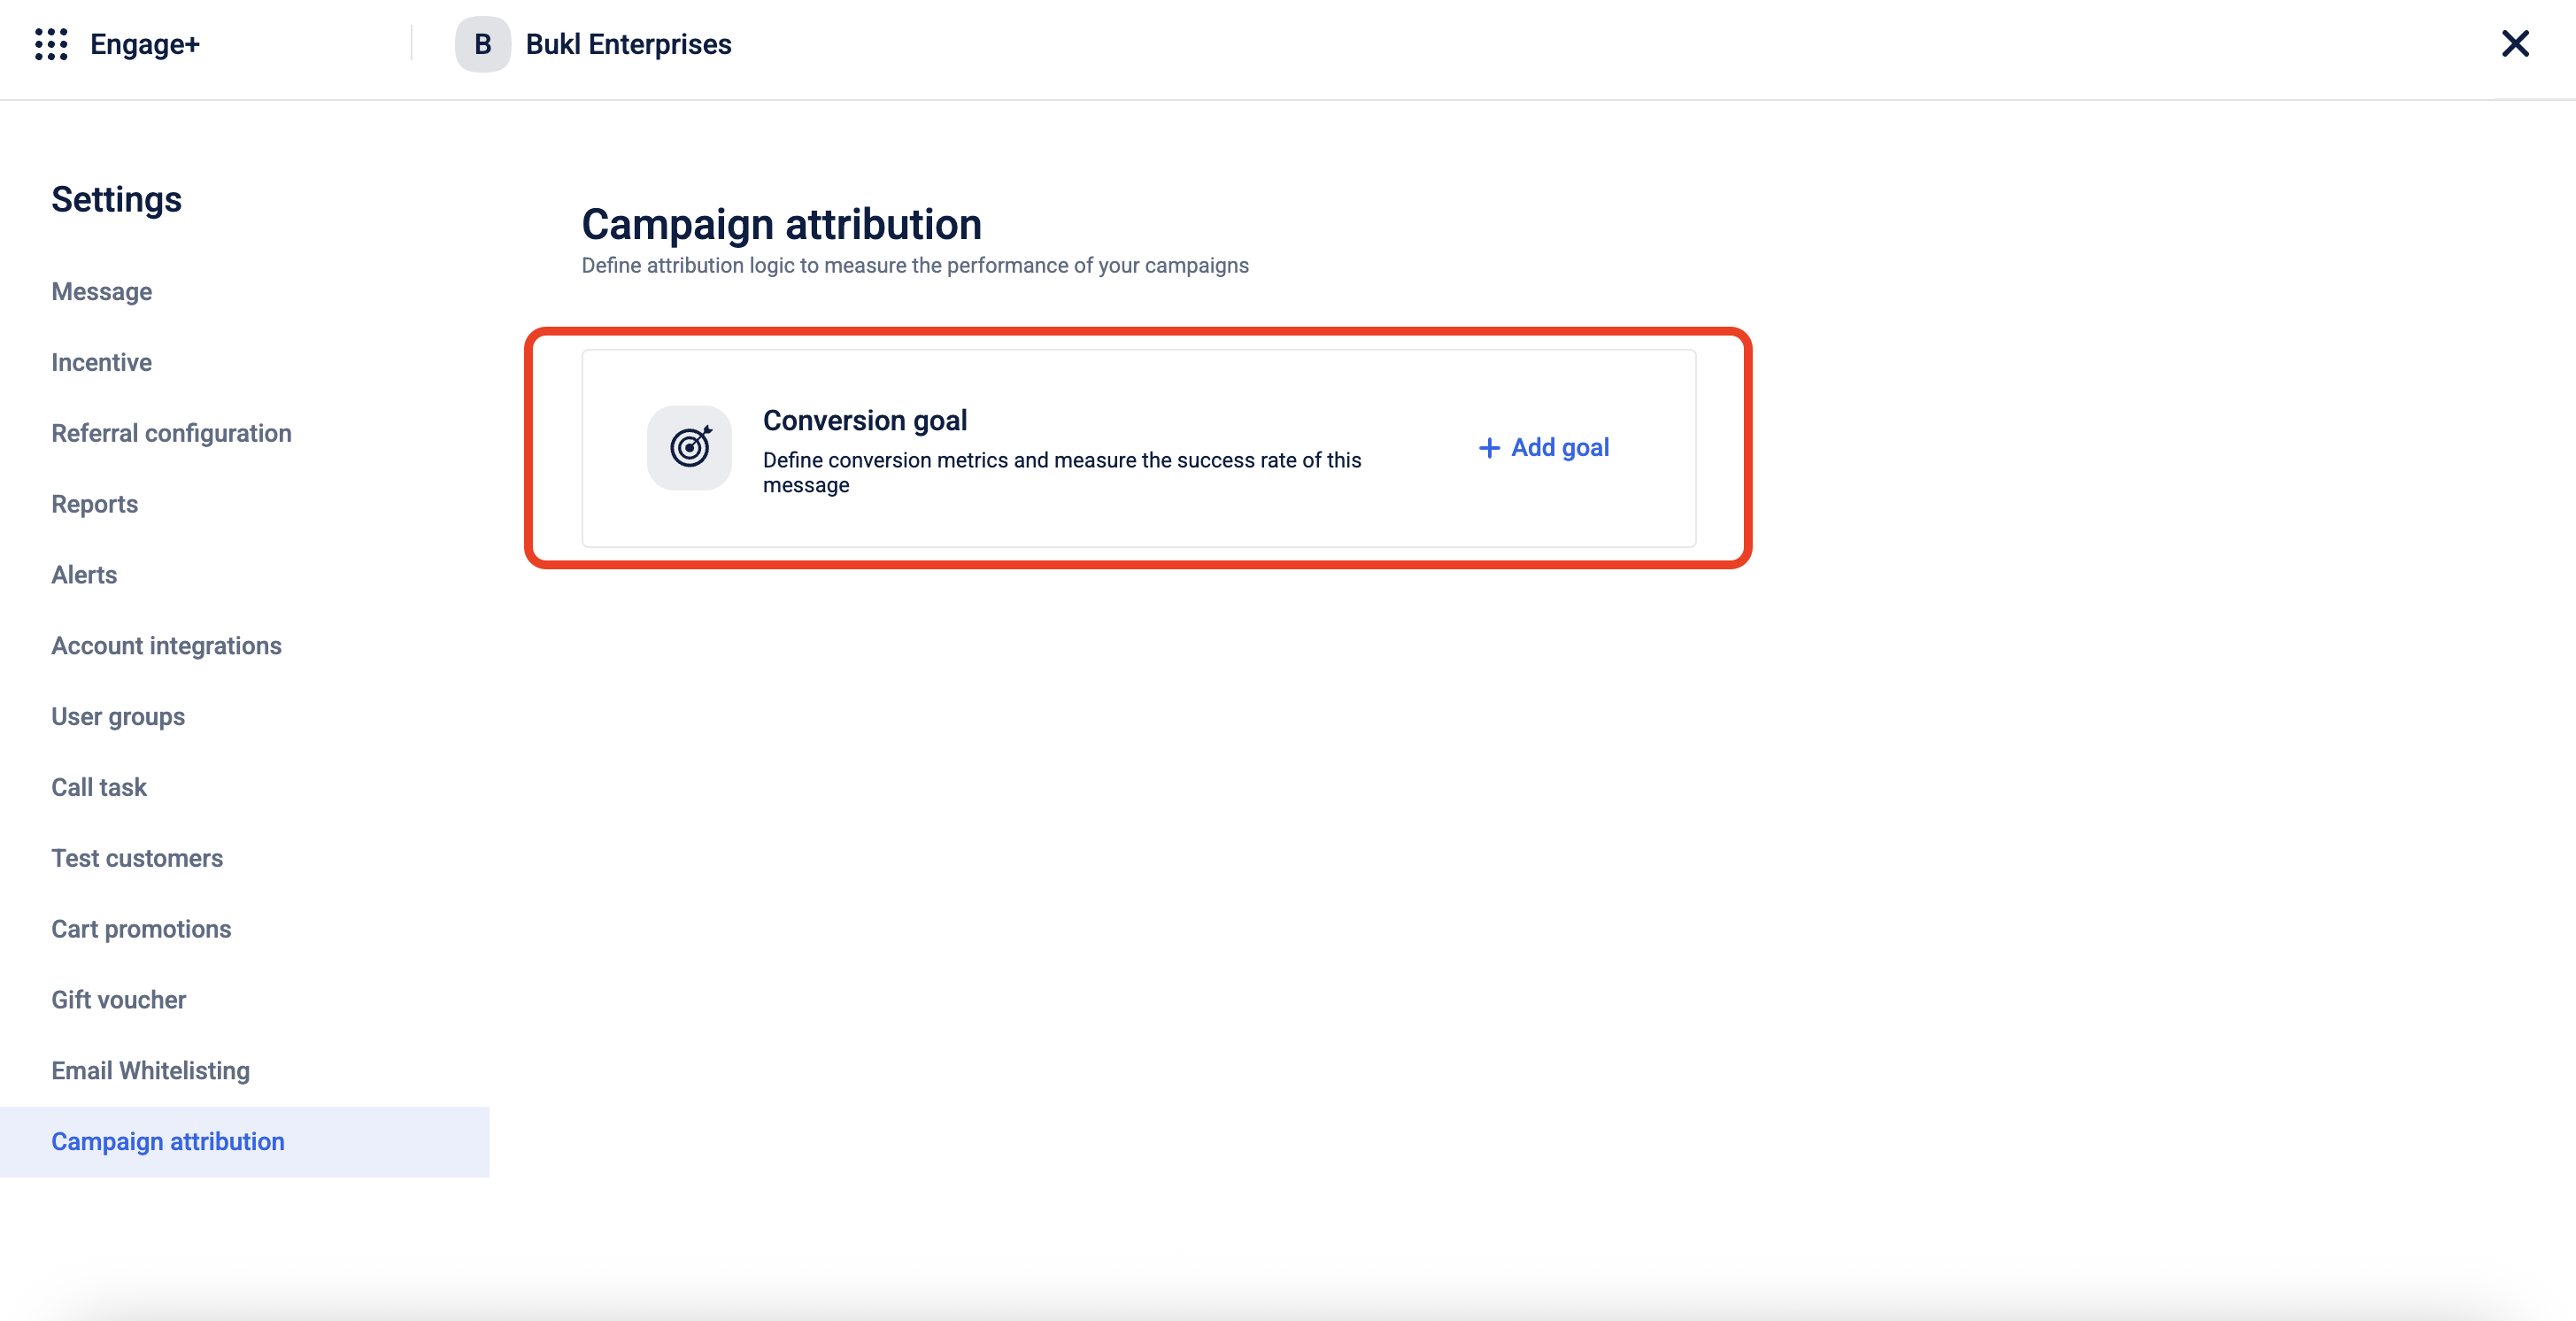
- If no default goal is set, you will be allowed to add a new goal. If a default goal is already set, you will see it.
- Click Add Goal to set up the default conversion goal.
- Set up the Conversion Goal. To set it up , you can refer to the documentation How to Configure a Conversion Goal.
Once a default org-level conversion goal is set, it appears automatically when you create a campaign. You can edit or remove it before the first message is sent. You can either Save your changes or Reset to Default to bring back the original goal. Removing it will show the “Add Goal” option again
Note
You can edit the org-level conversion goal at any time. All campaigns created after the change will reflect the updated goal.
How to Configure a Conversion Goal (Campaign Level)
- Log in to InTouch and navigate to Engage+ from the menu.
- Click on New campaign to start creating a new campaign.
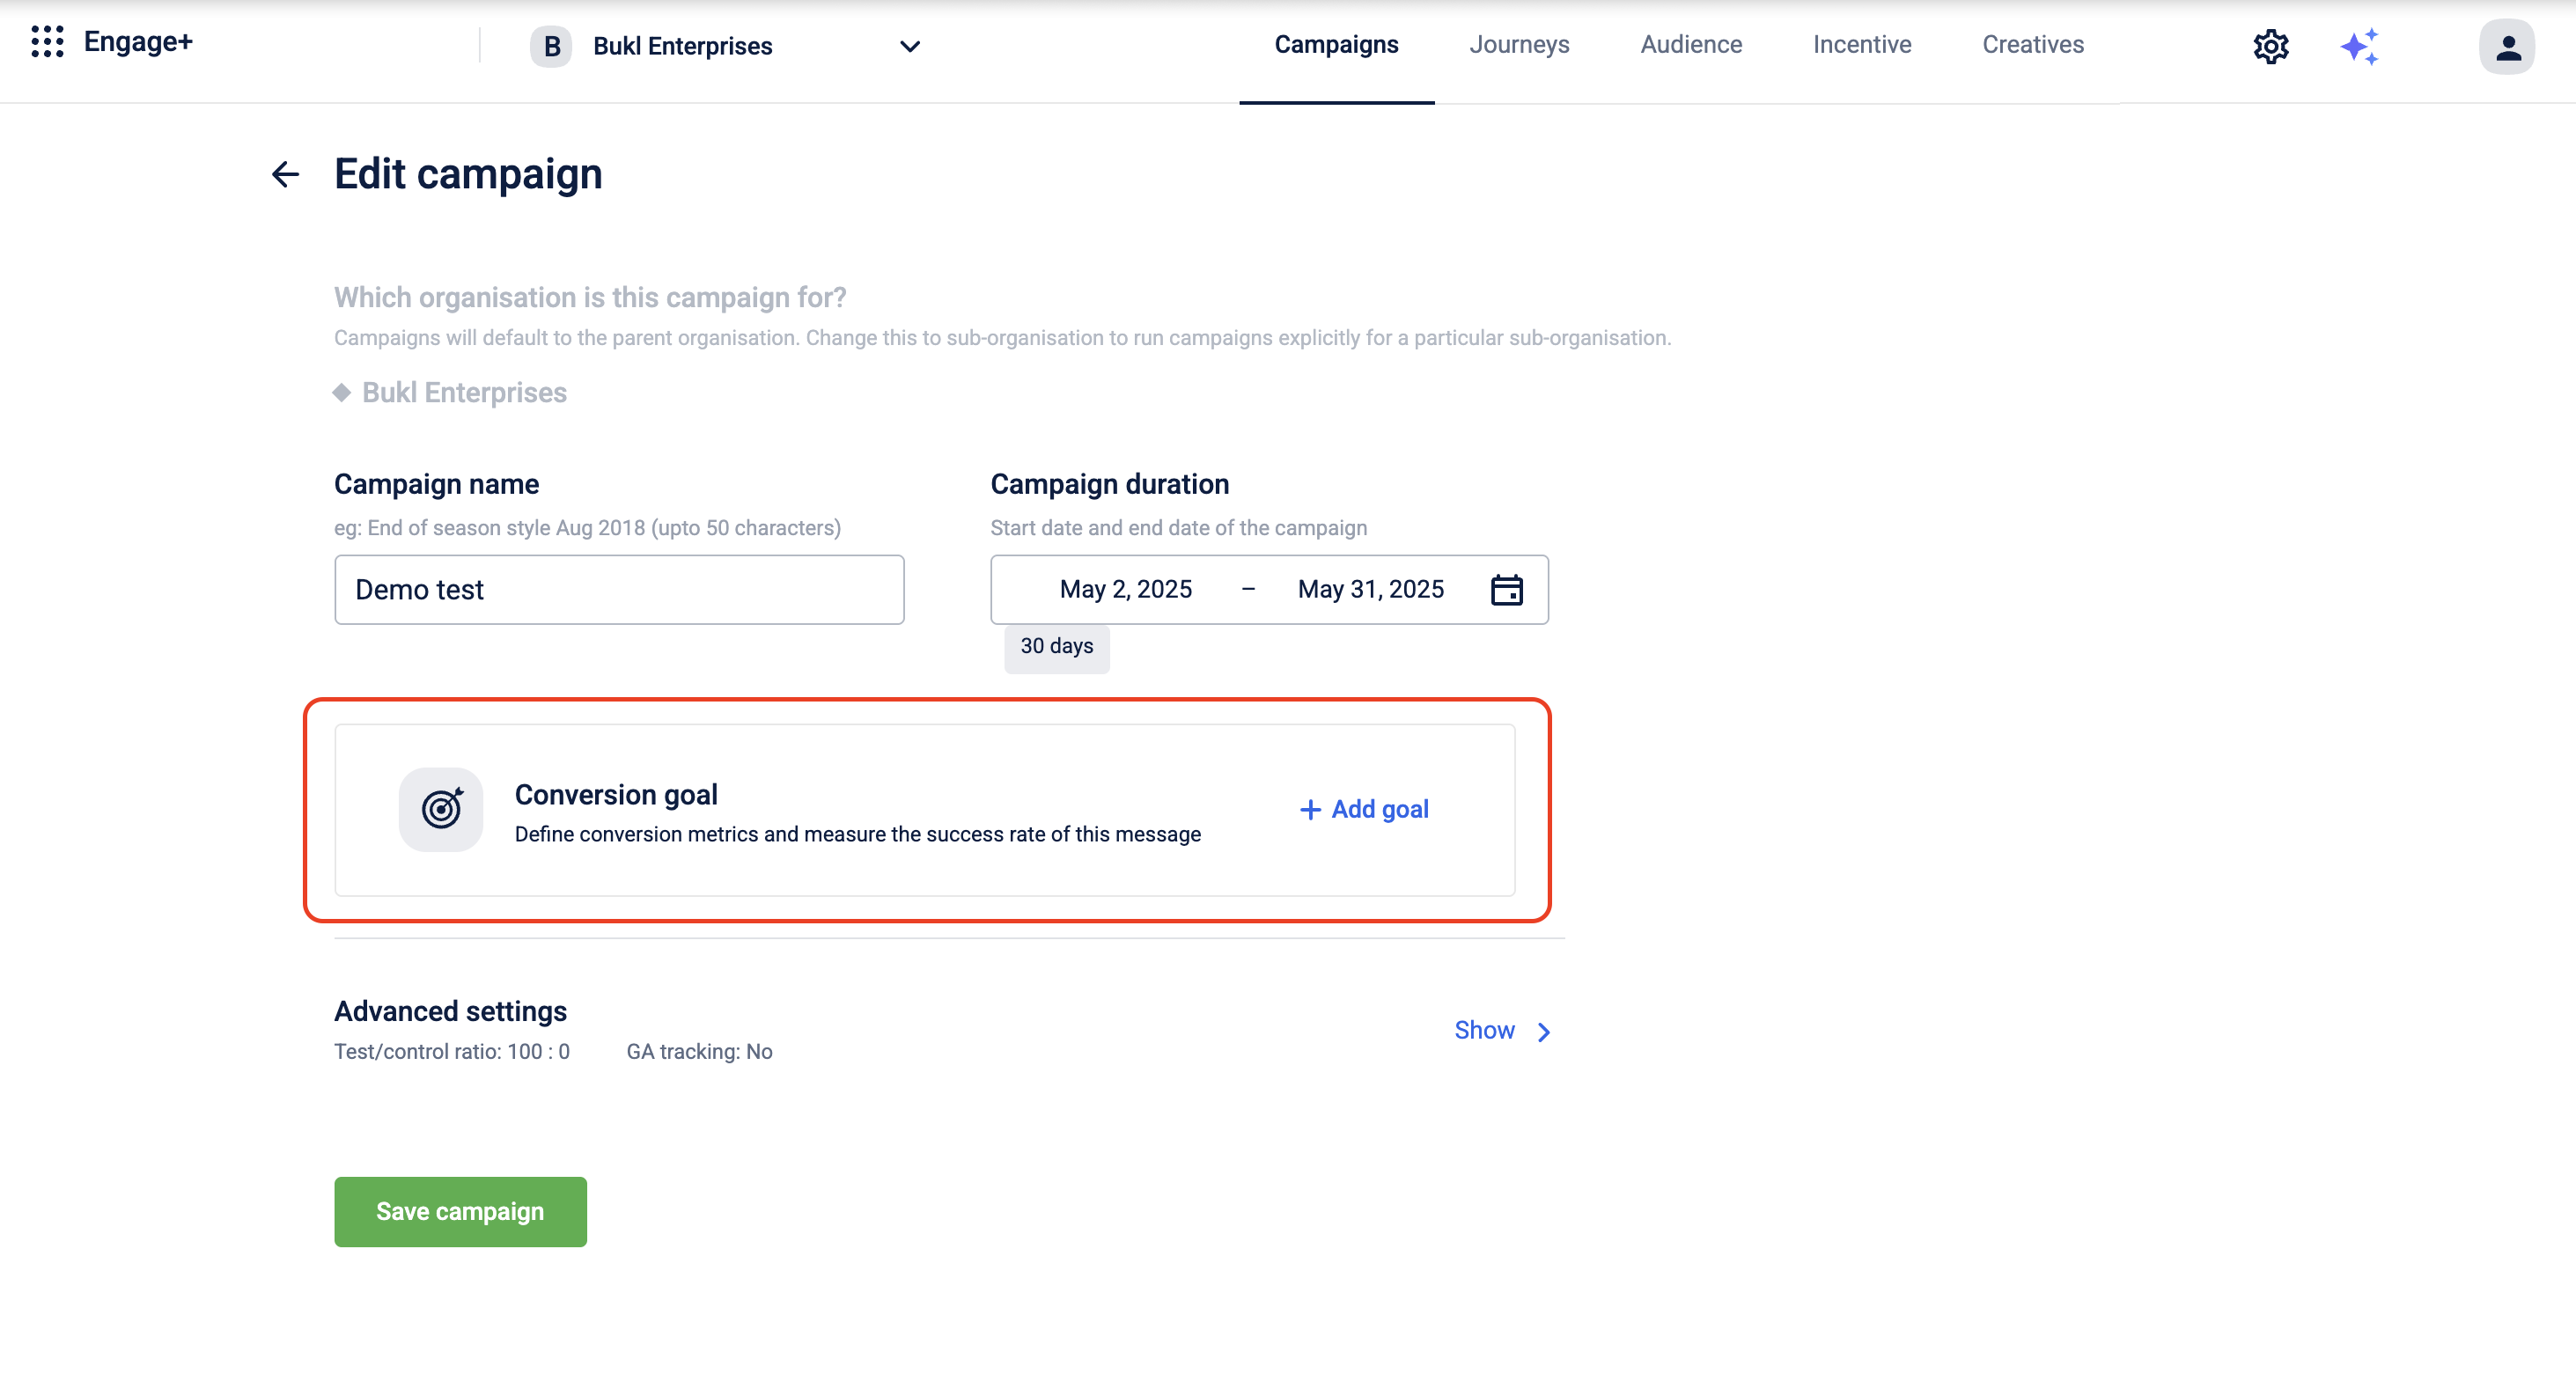
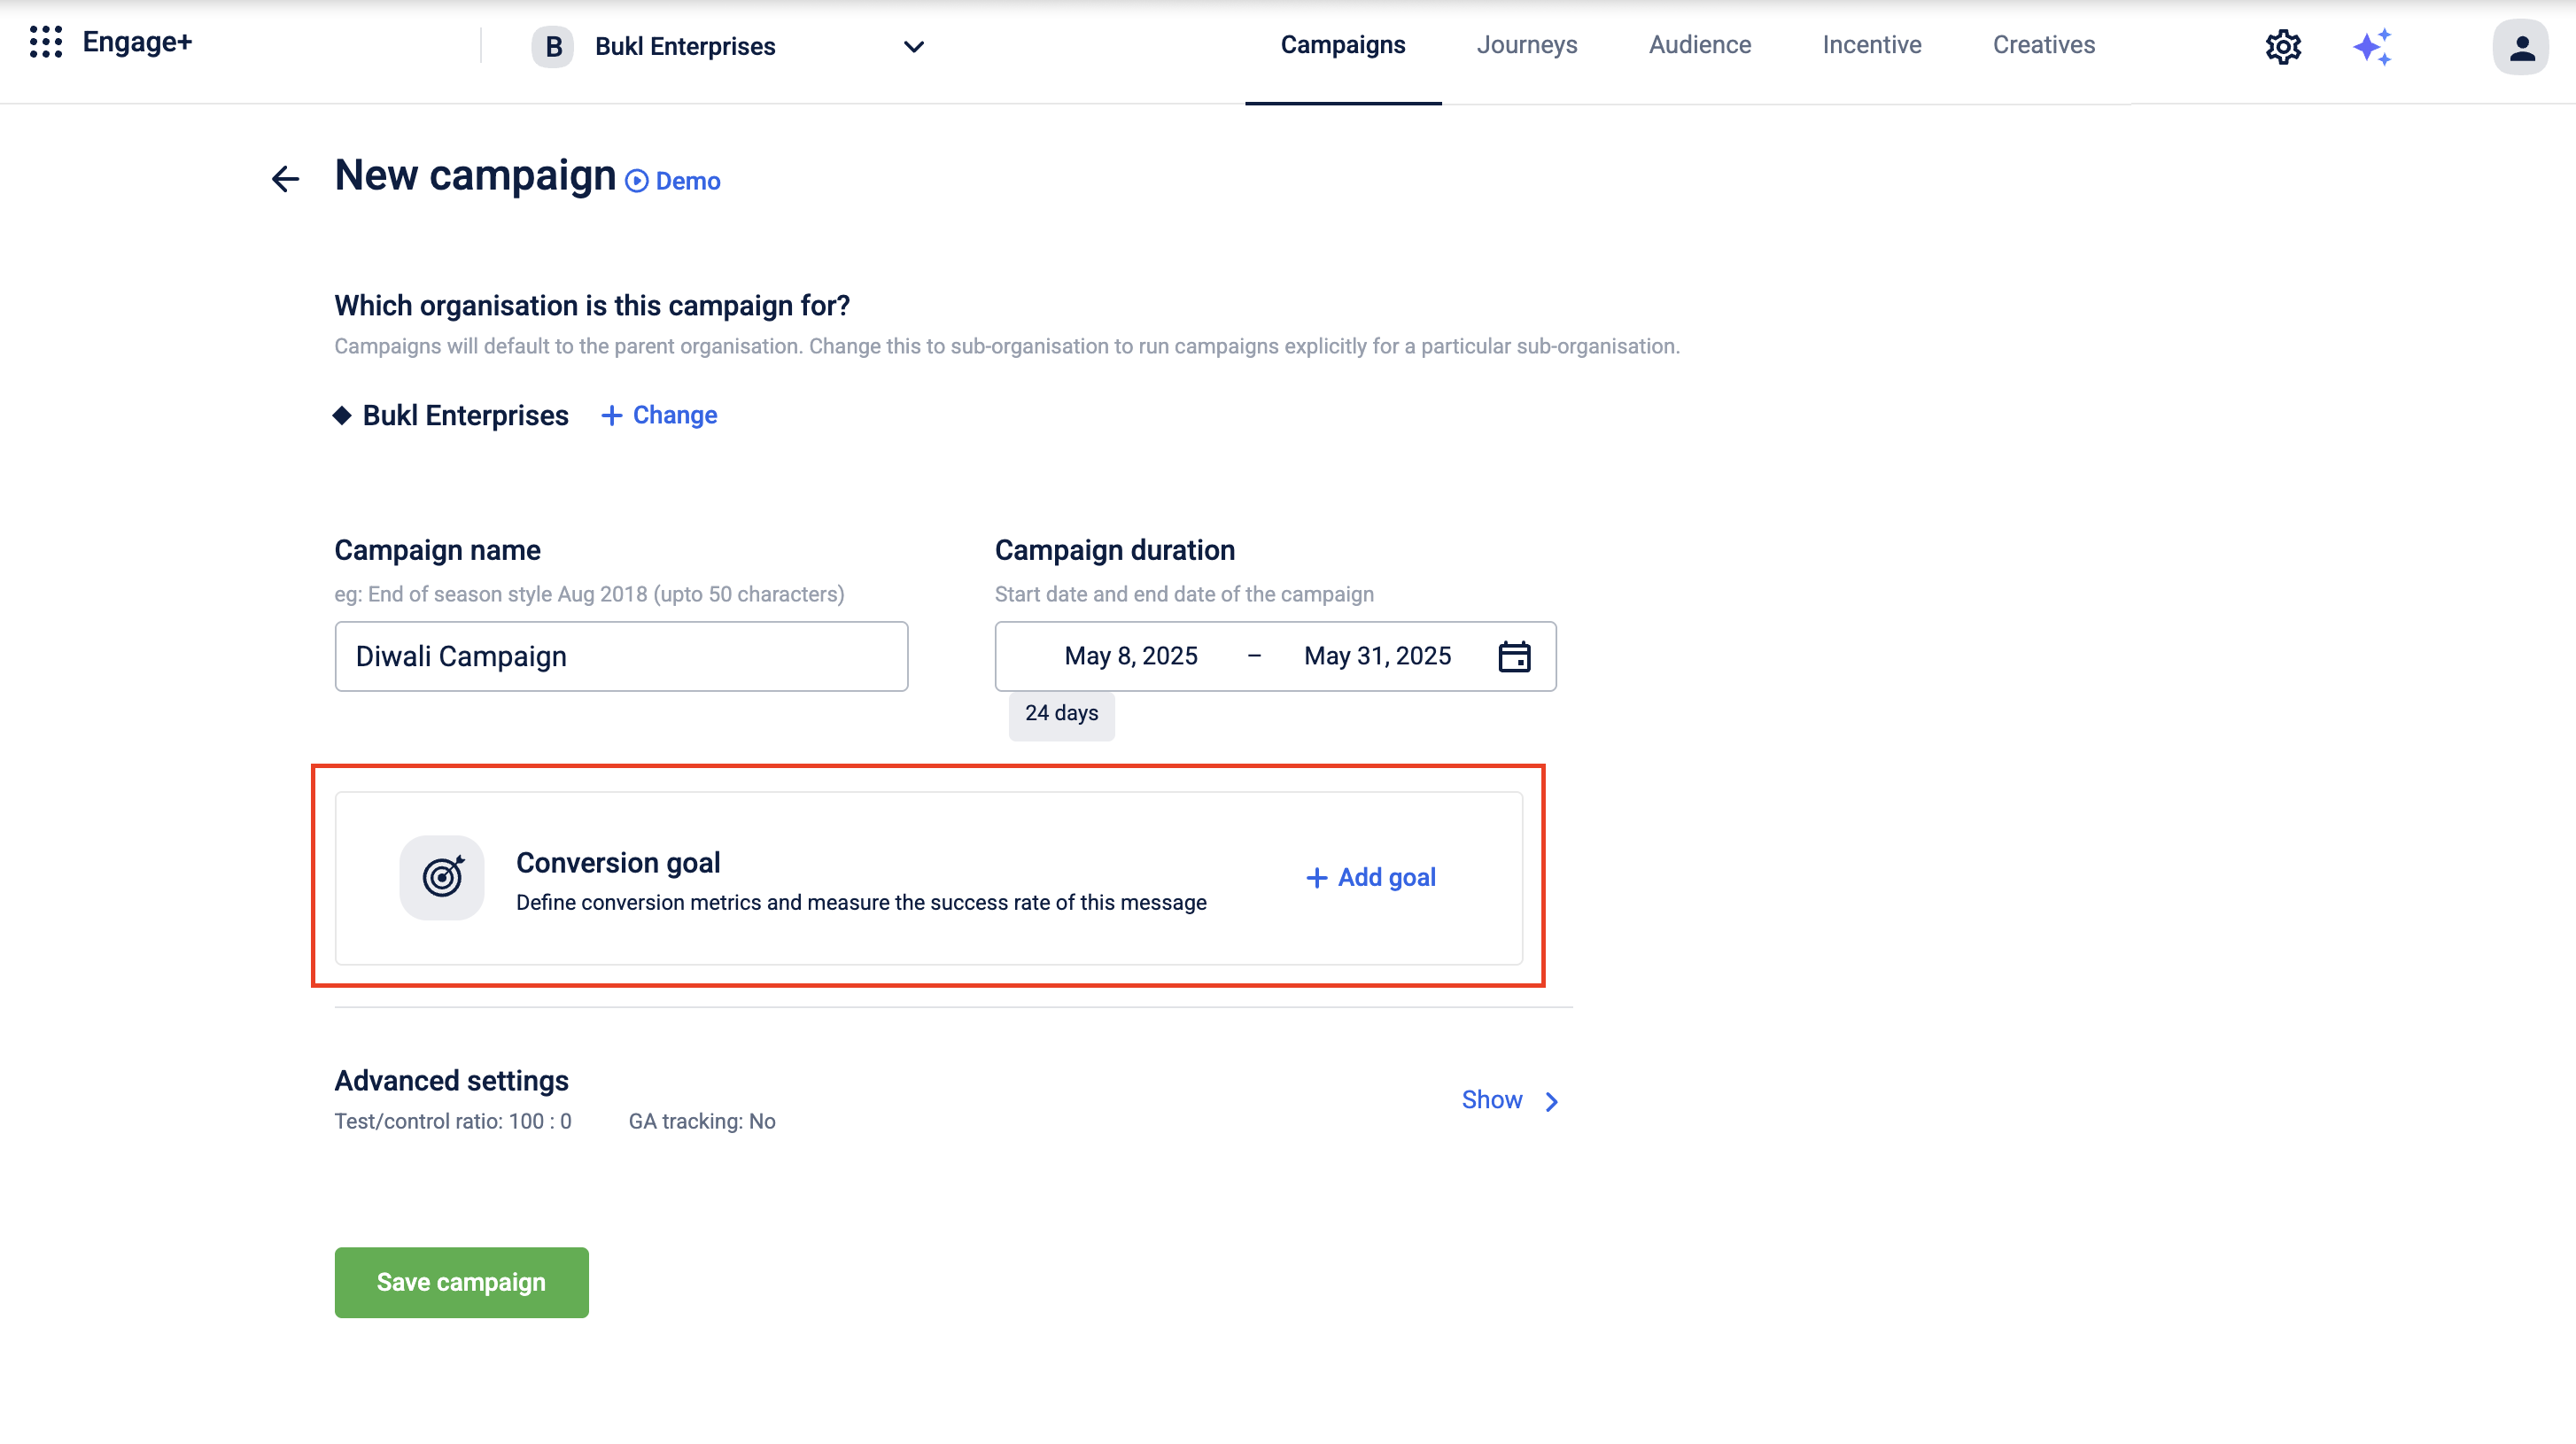
- Enter a Campaign name and select the Campaign duration.
- Click Add goal to set up the conversion goal.
- Choose the conversion event you want to track.
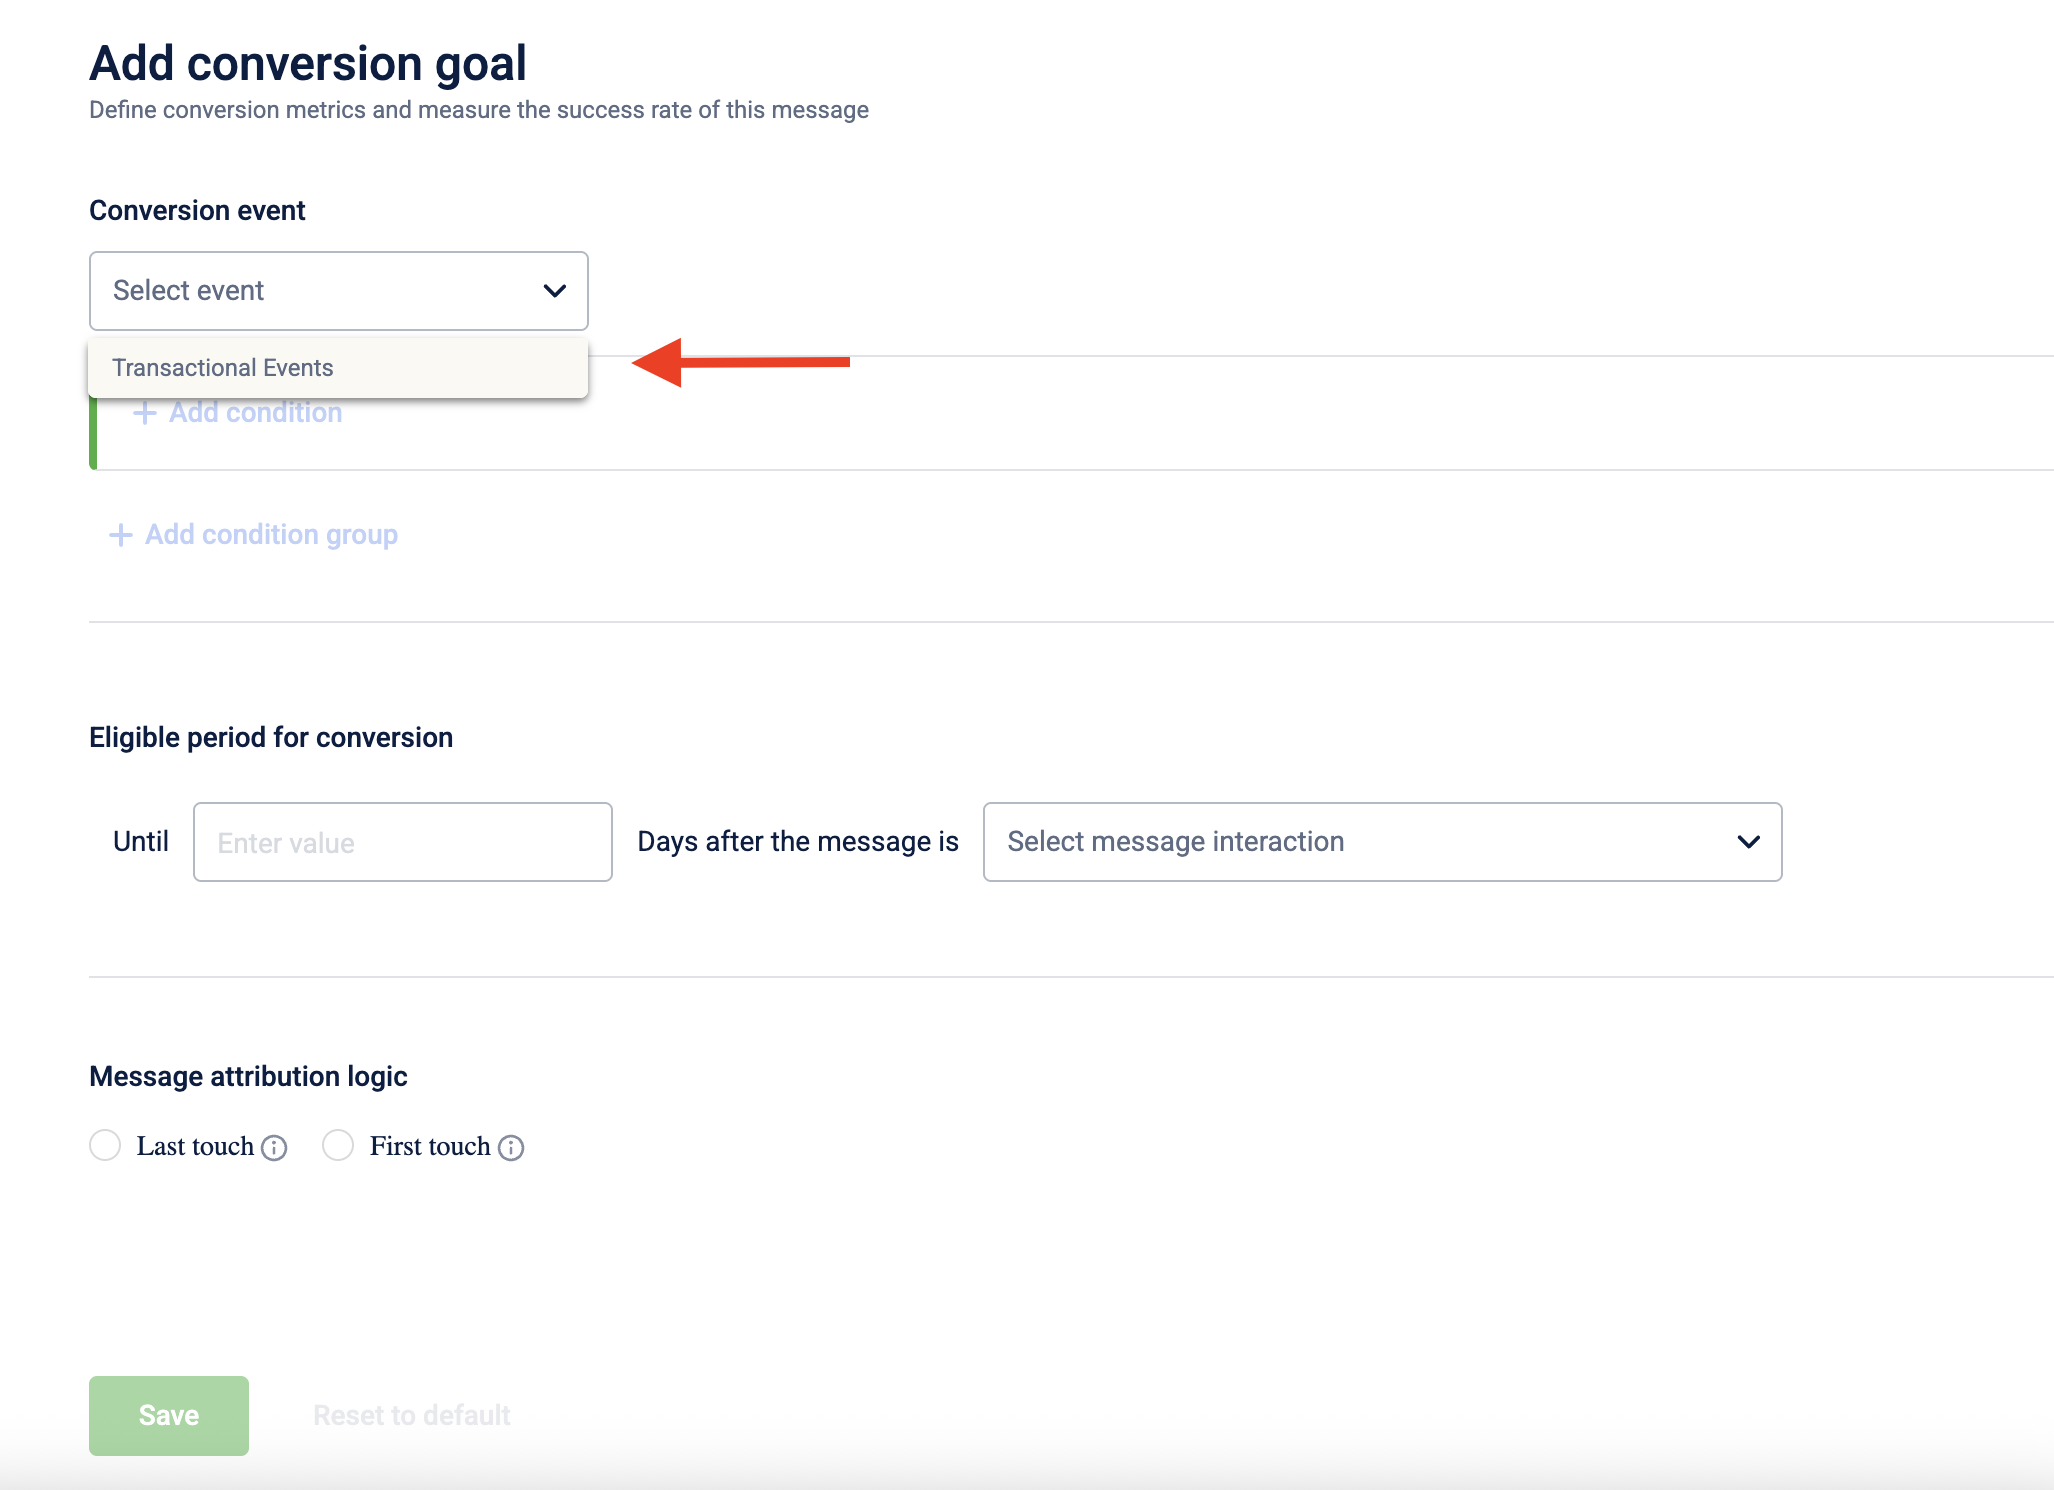
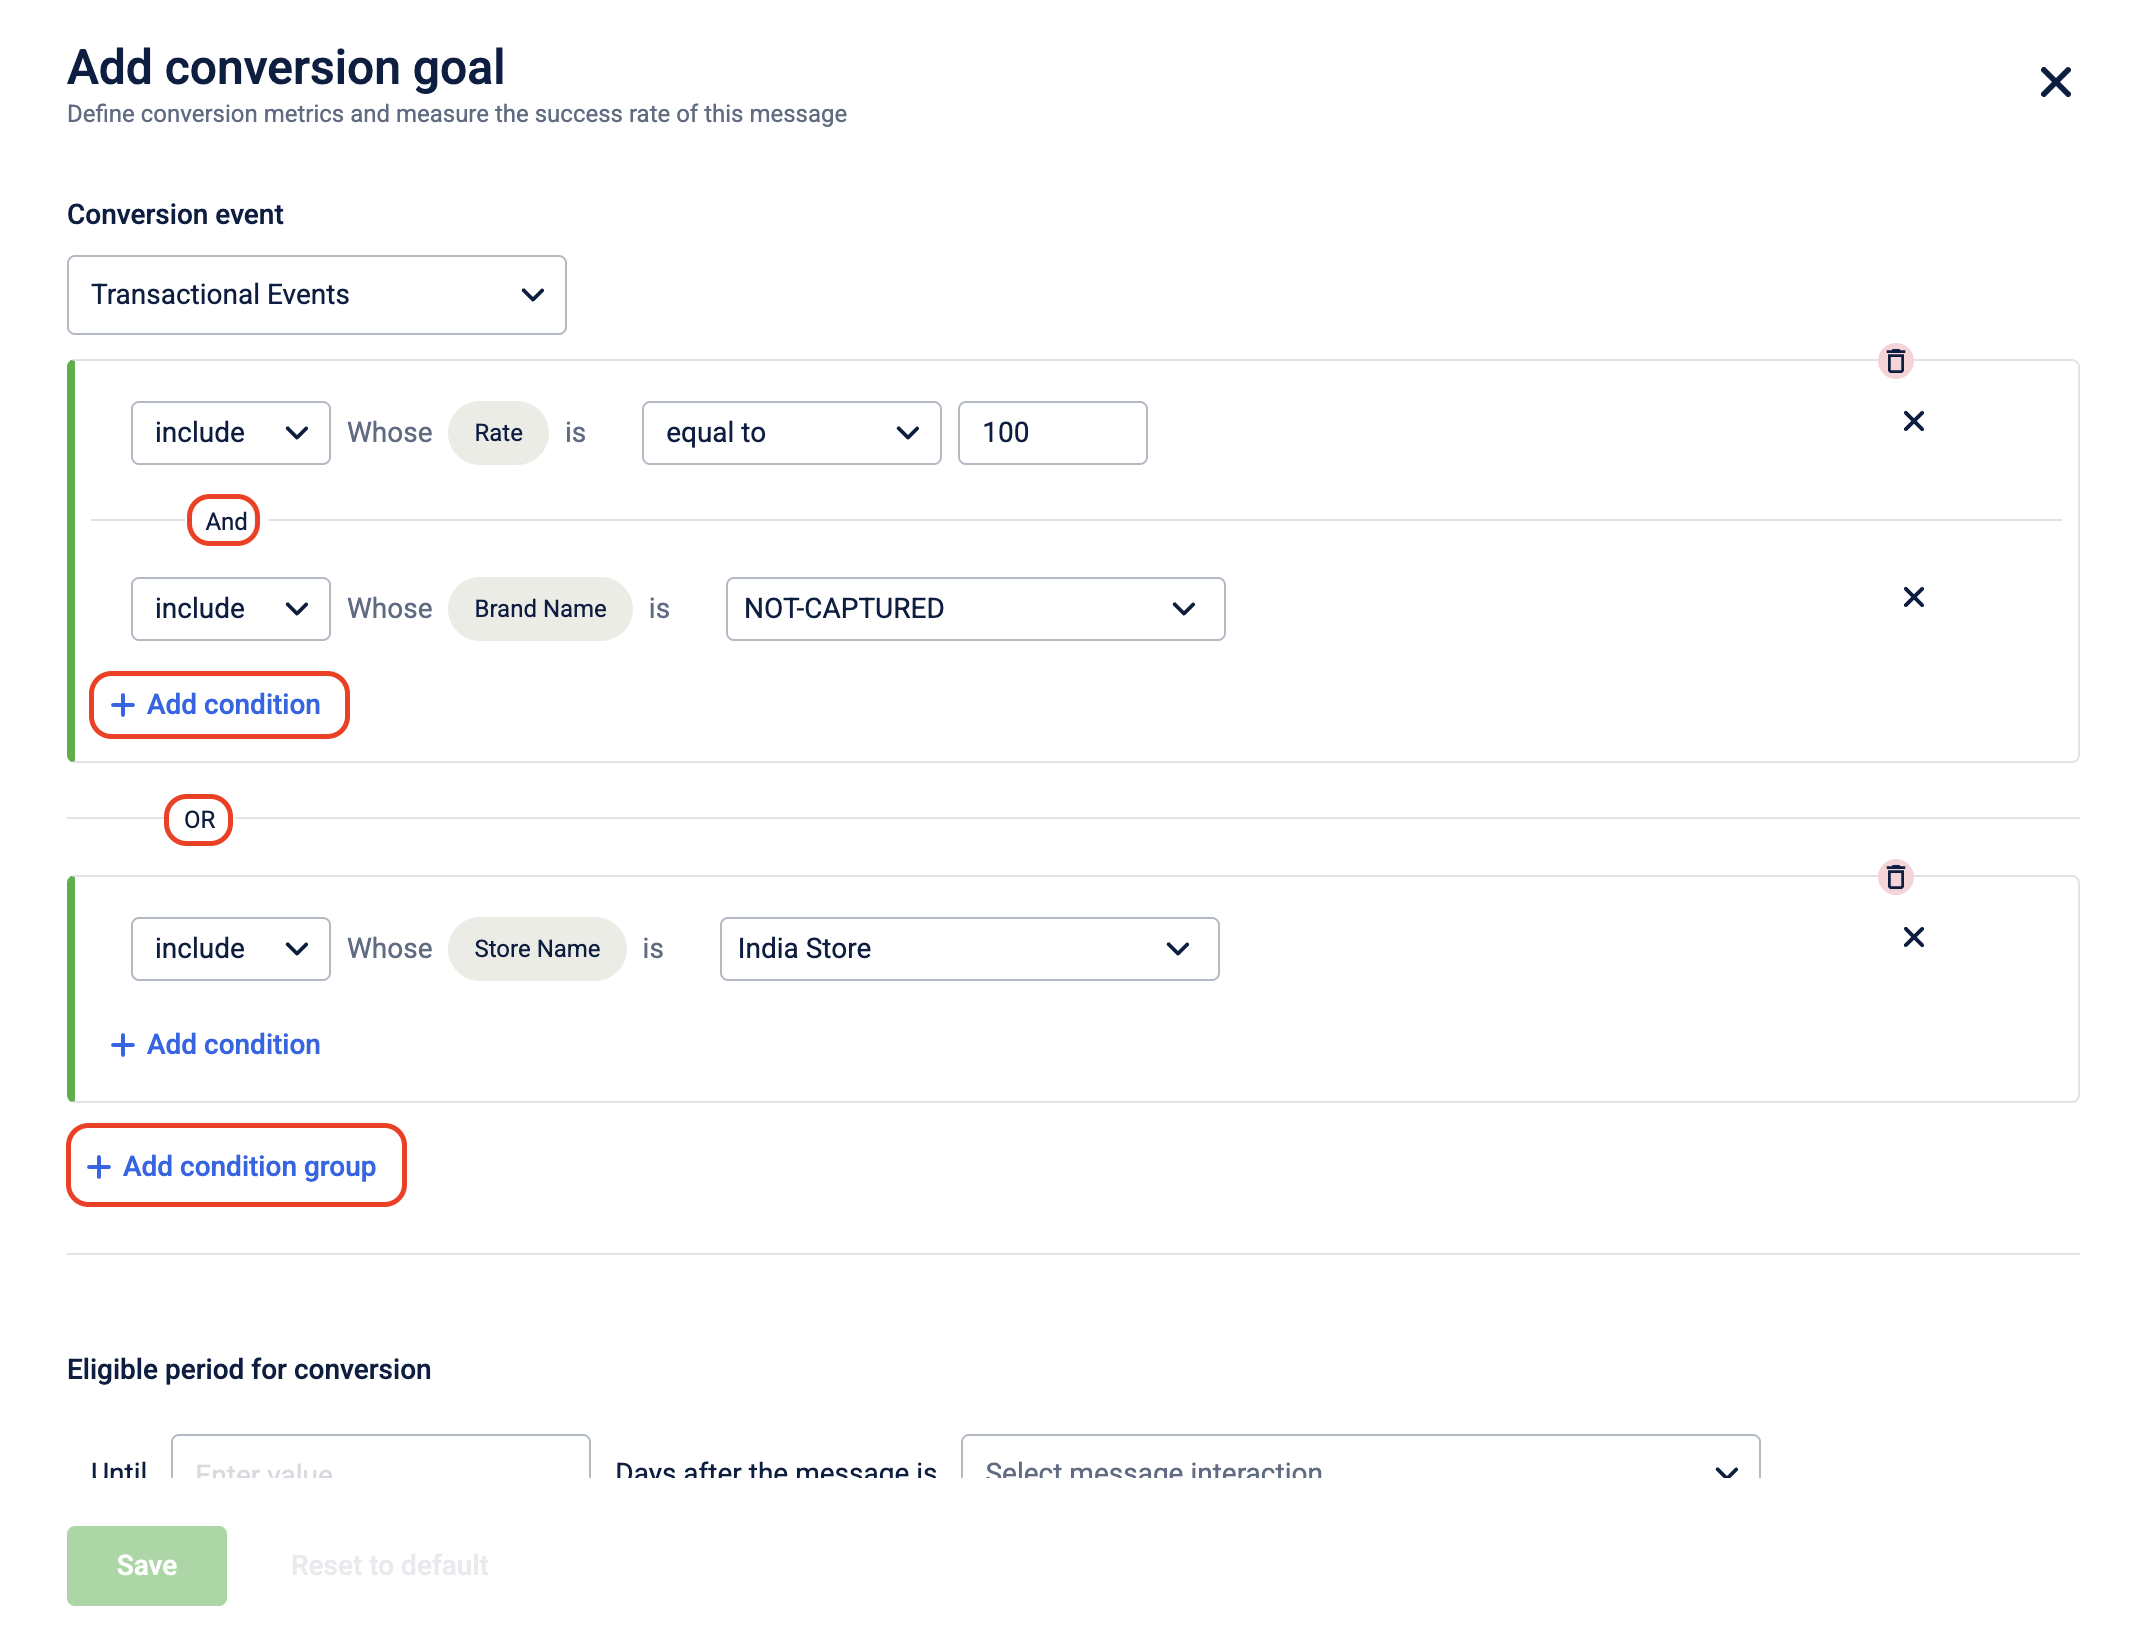
- Click +Add conditions and fill in the required details based on what you want to track. You’ll see relevant fields based on the event you select in the condition section. You can specify whether to include or exclude the condition and add an operator and value.
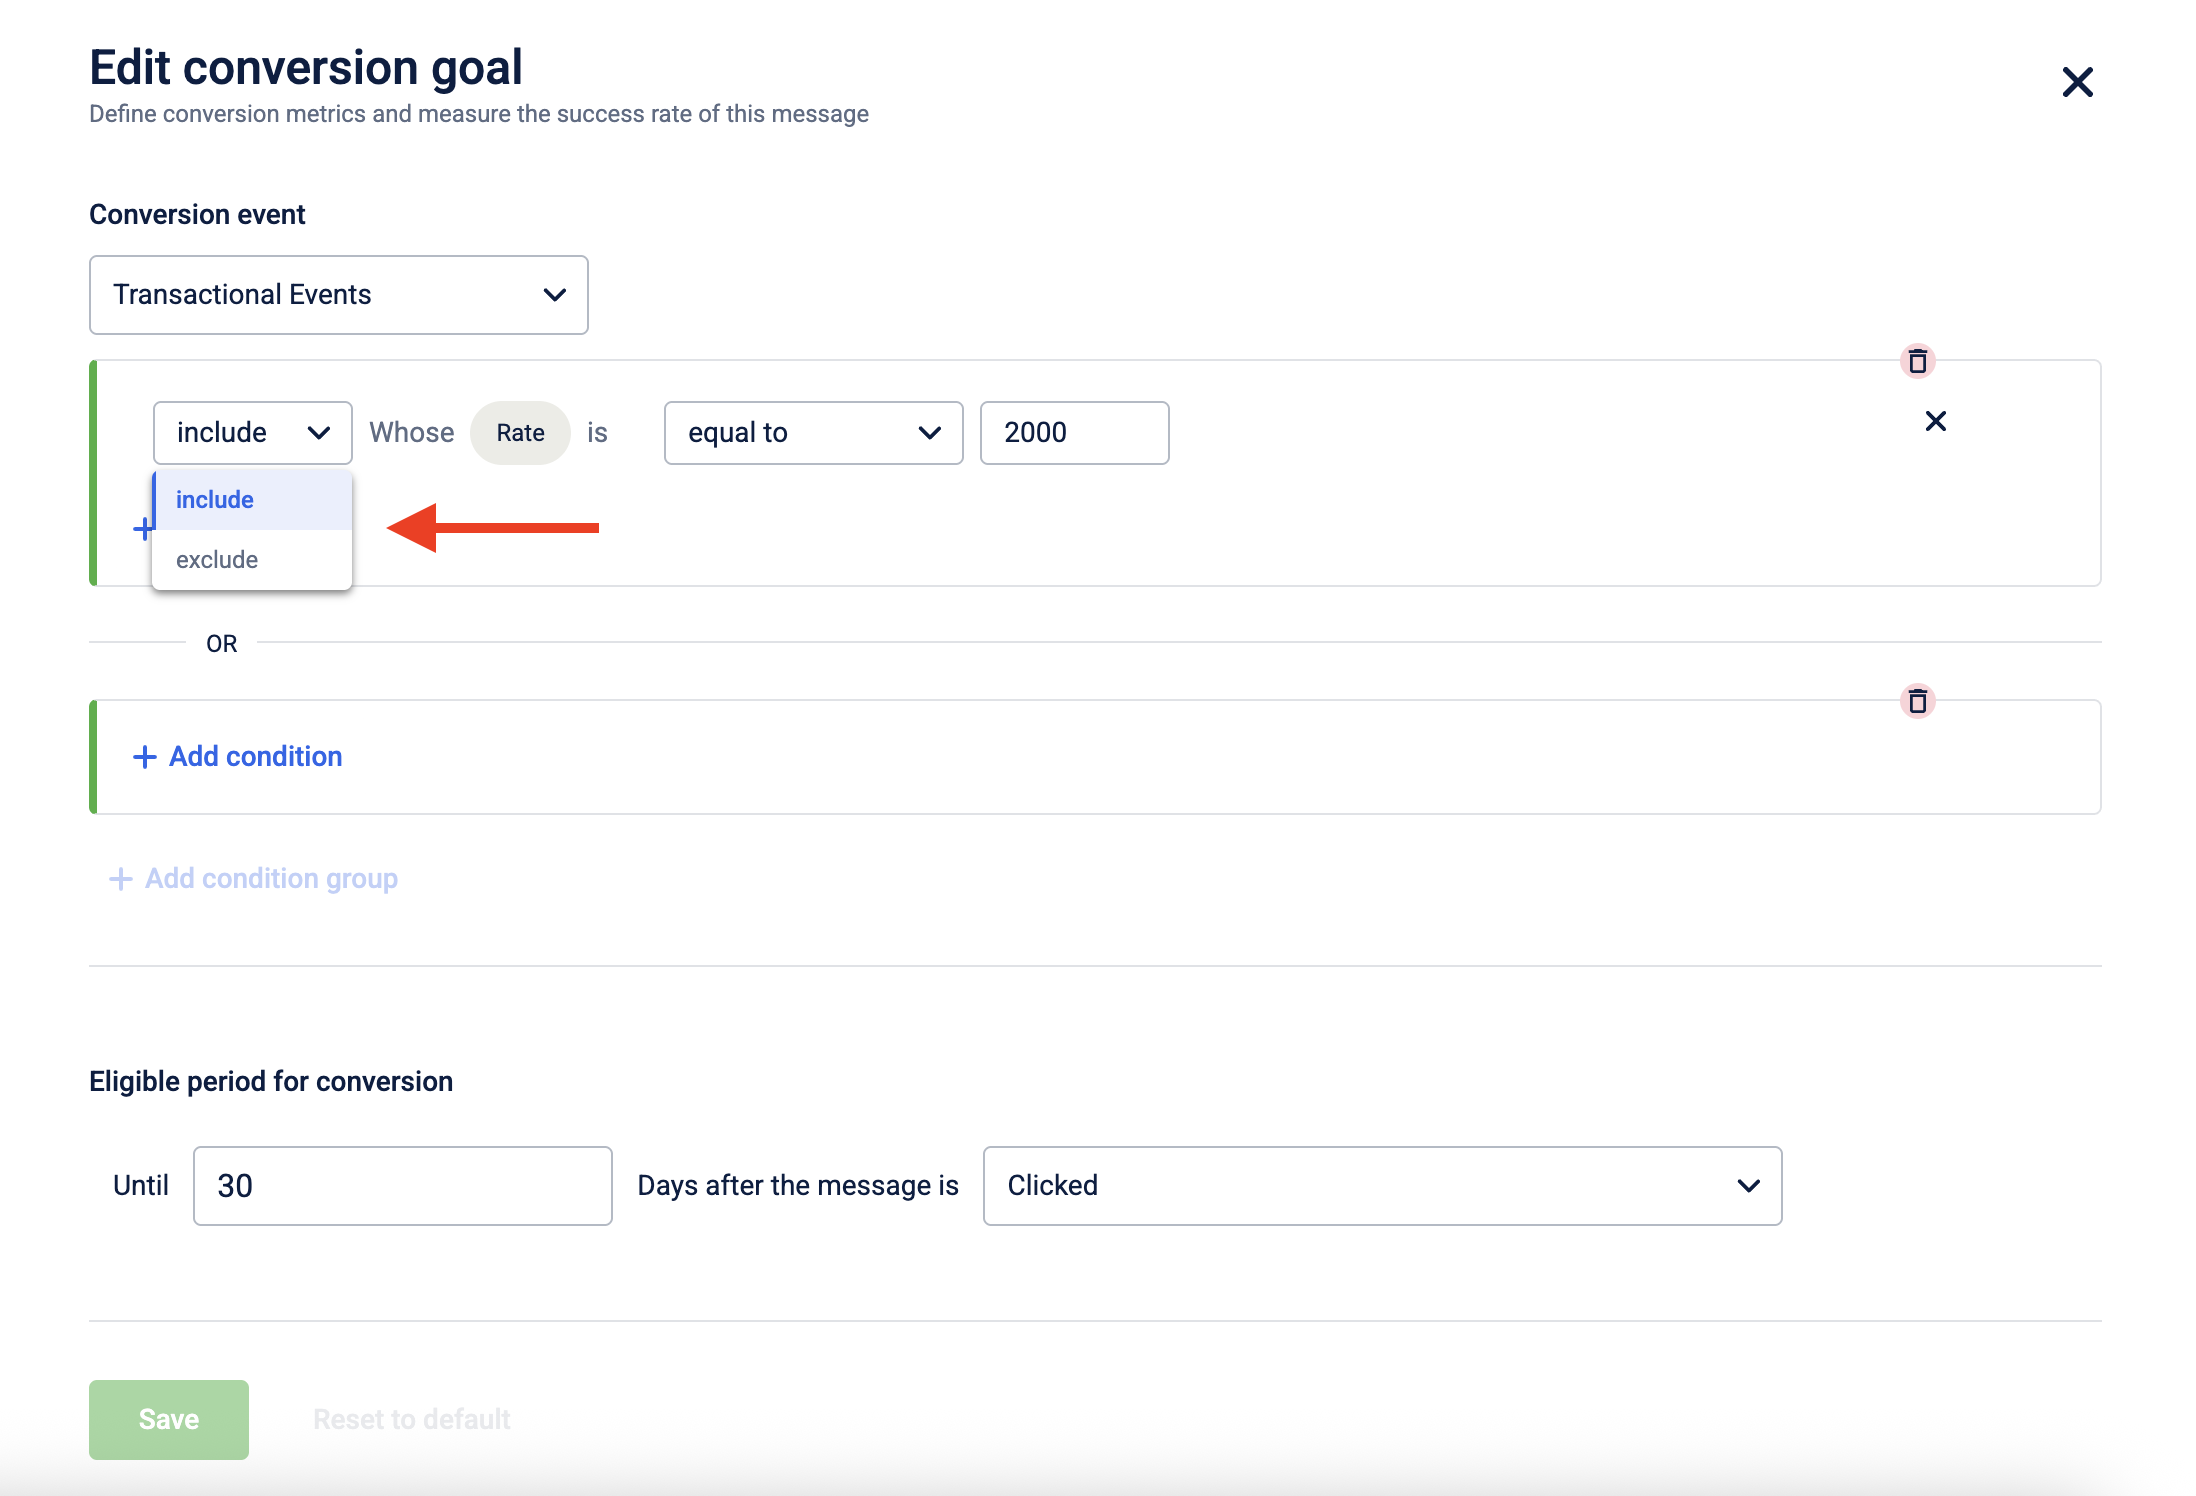
- You can click +Add condition to add further conditions and combine them with the AND operator. Click Add group to add conditions and combine them with the OR operator. Note: The "Add Condition" button may be disabled if all input fields are not completed.
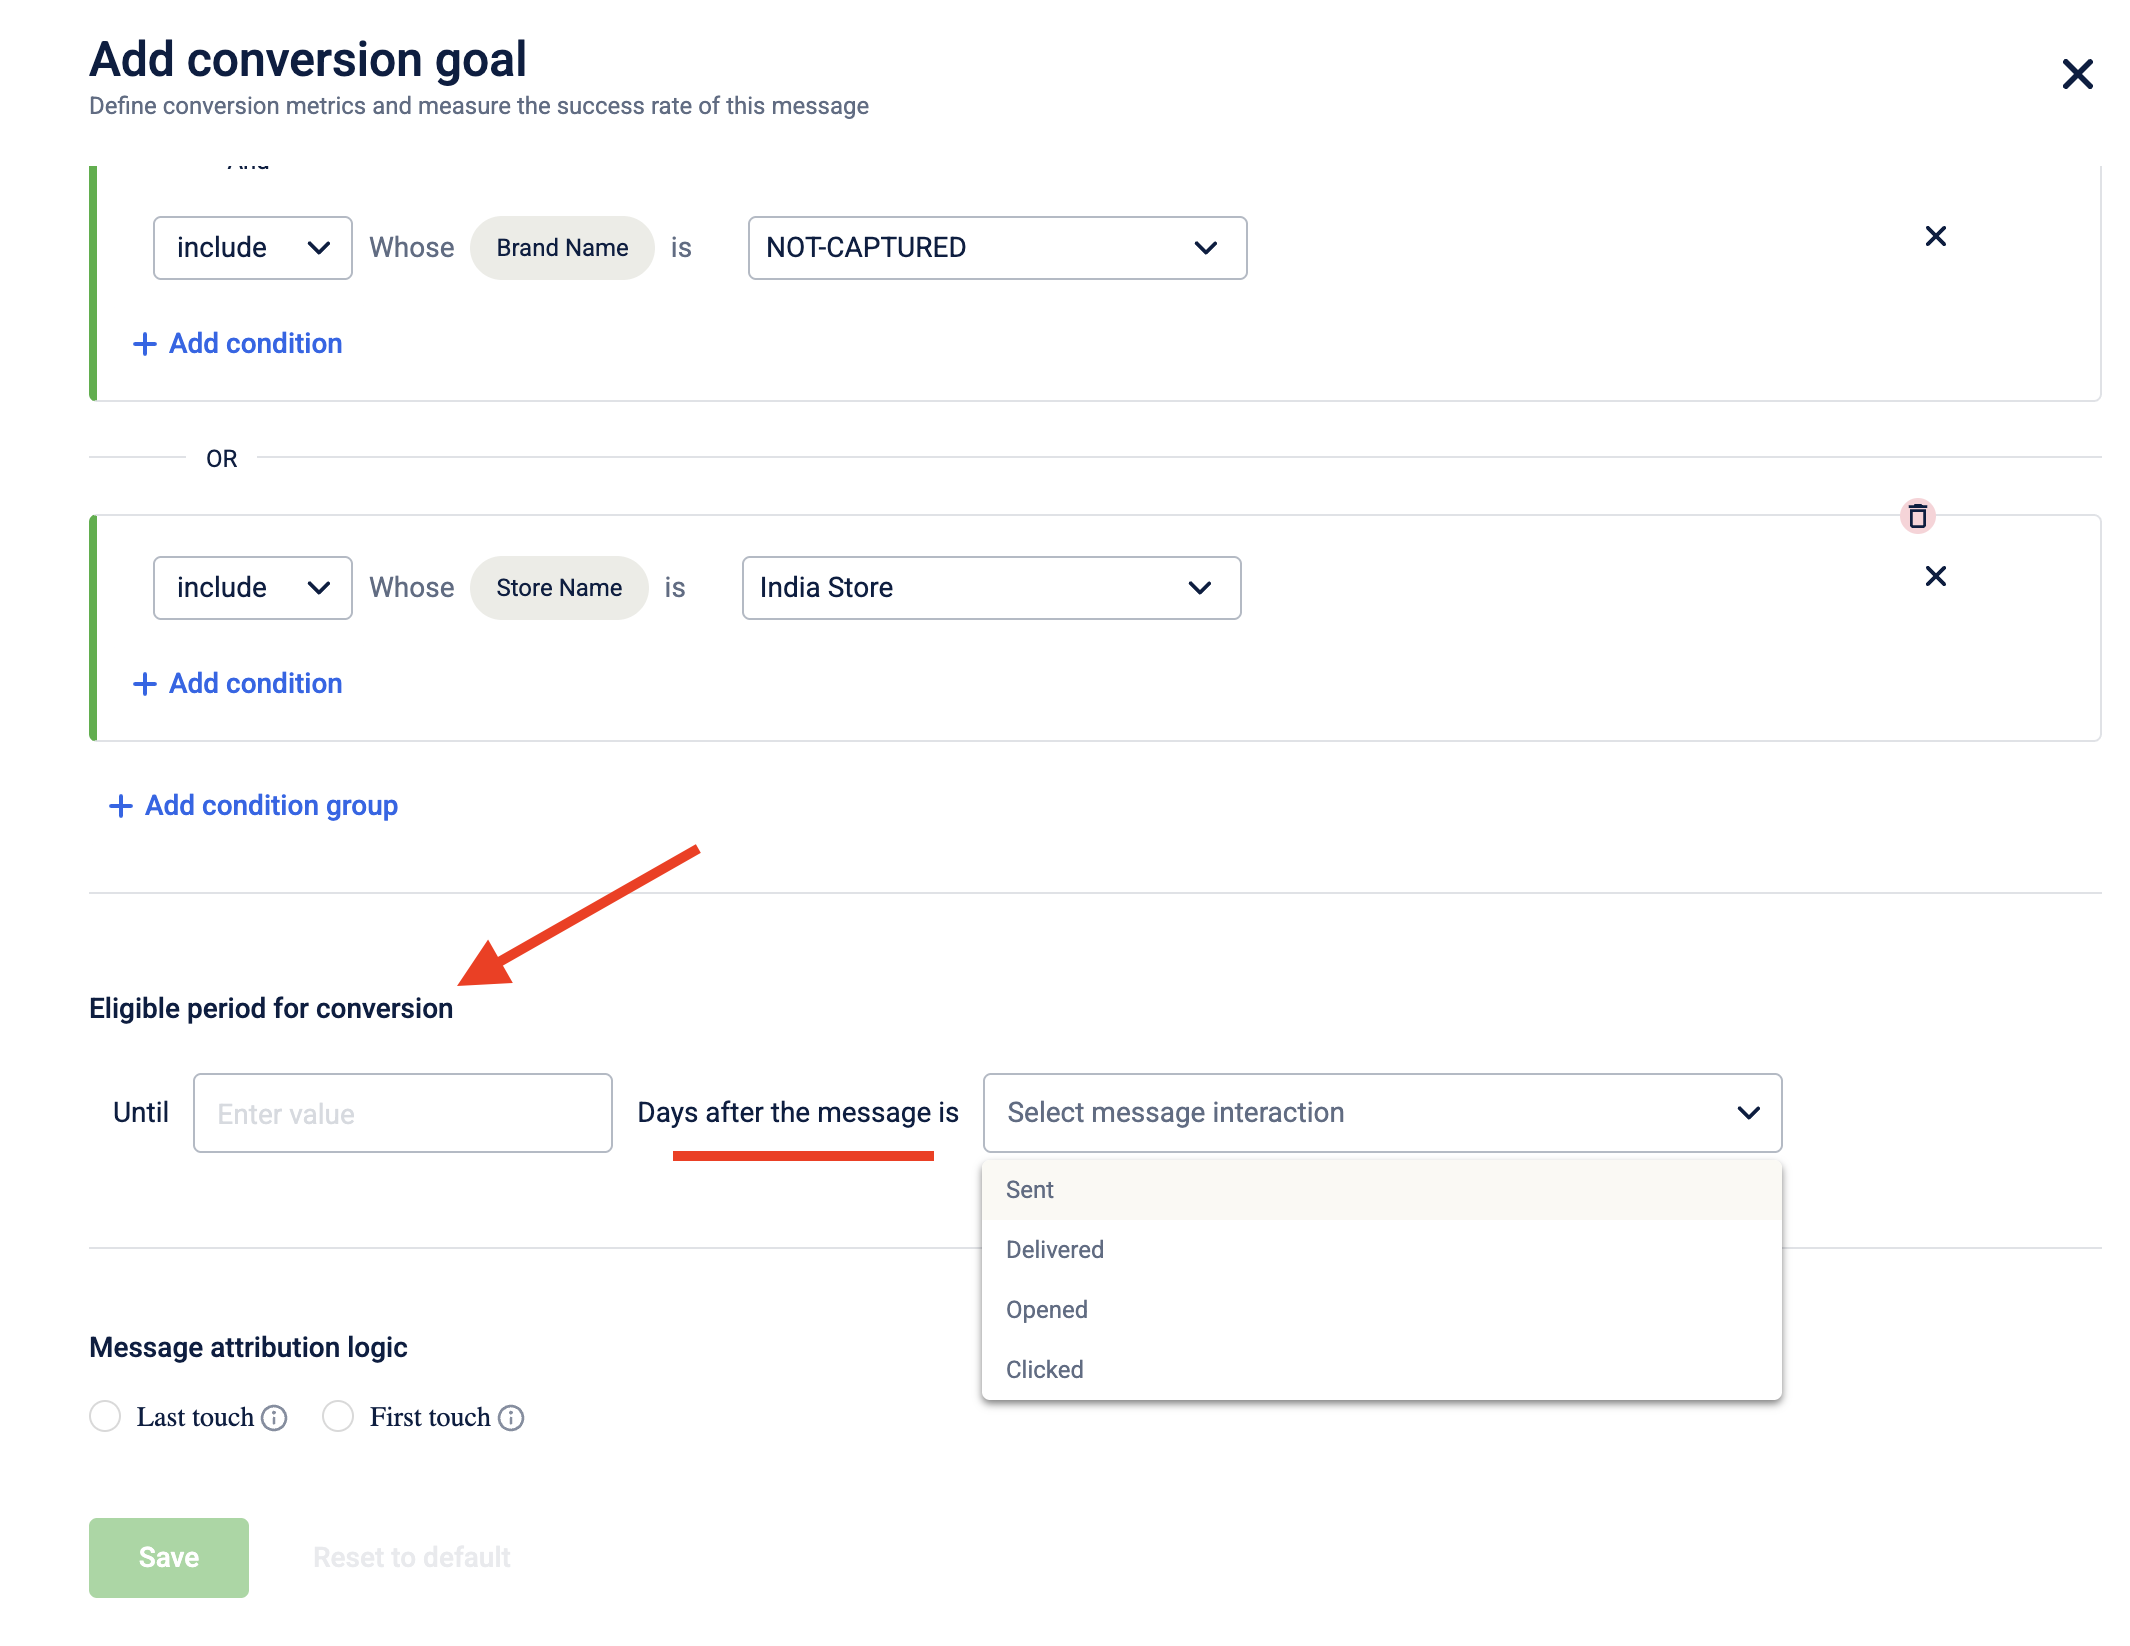
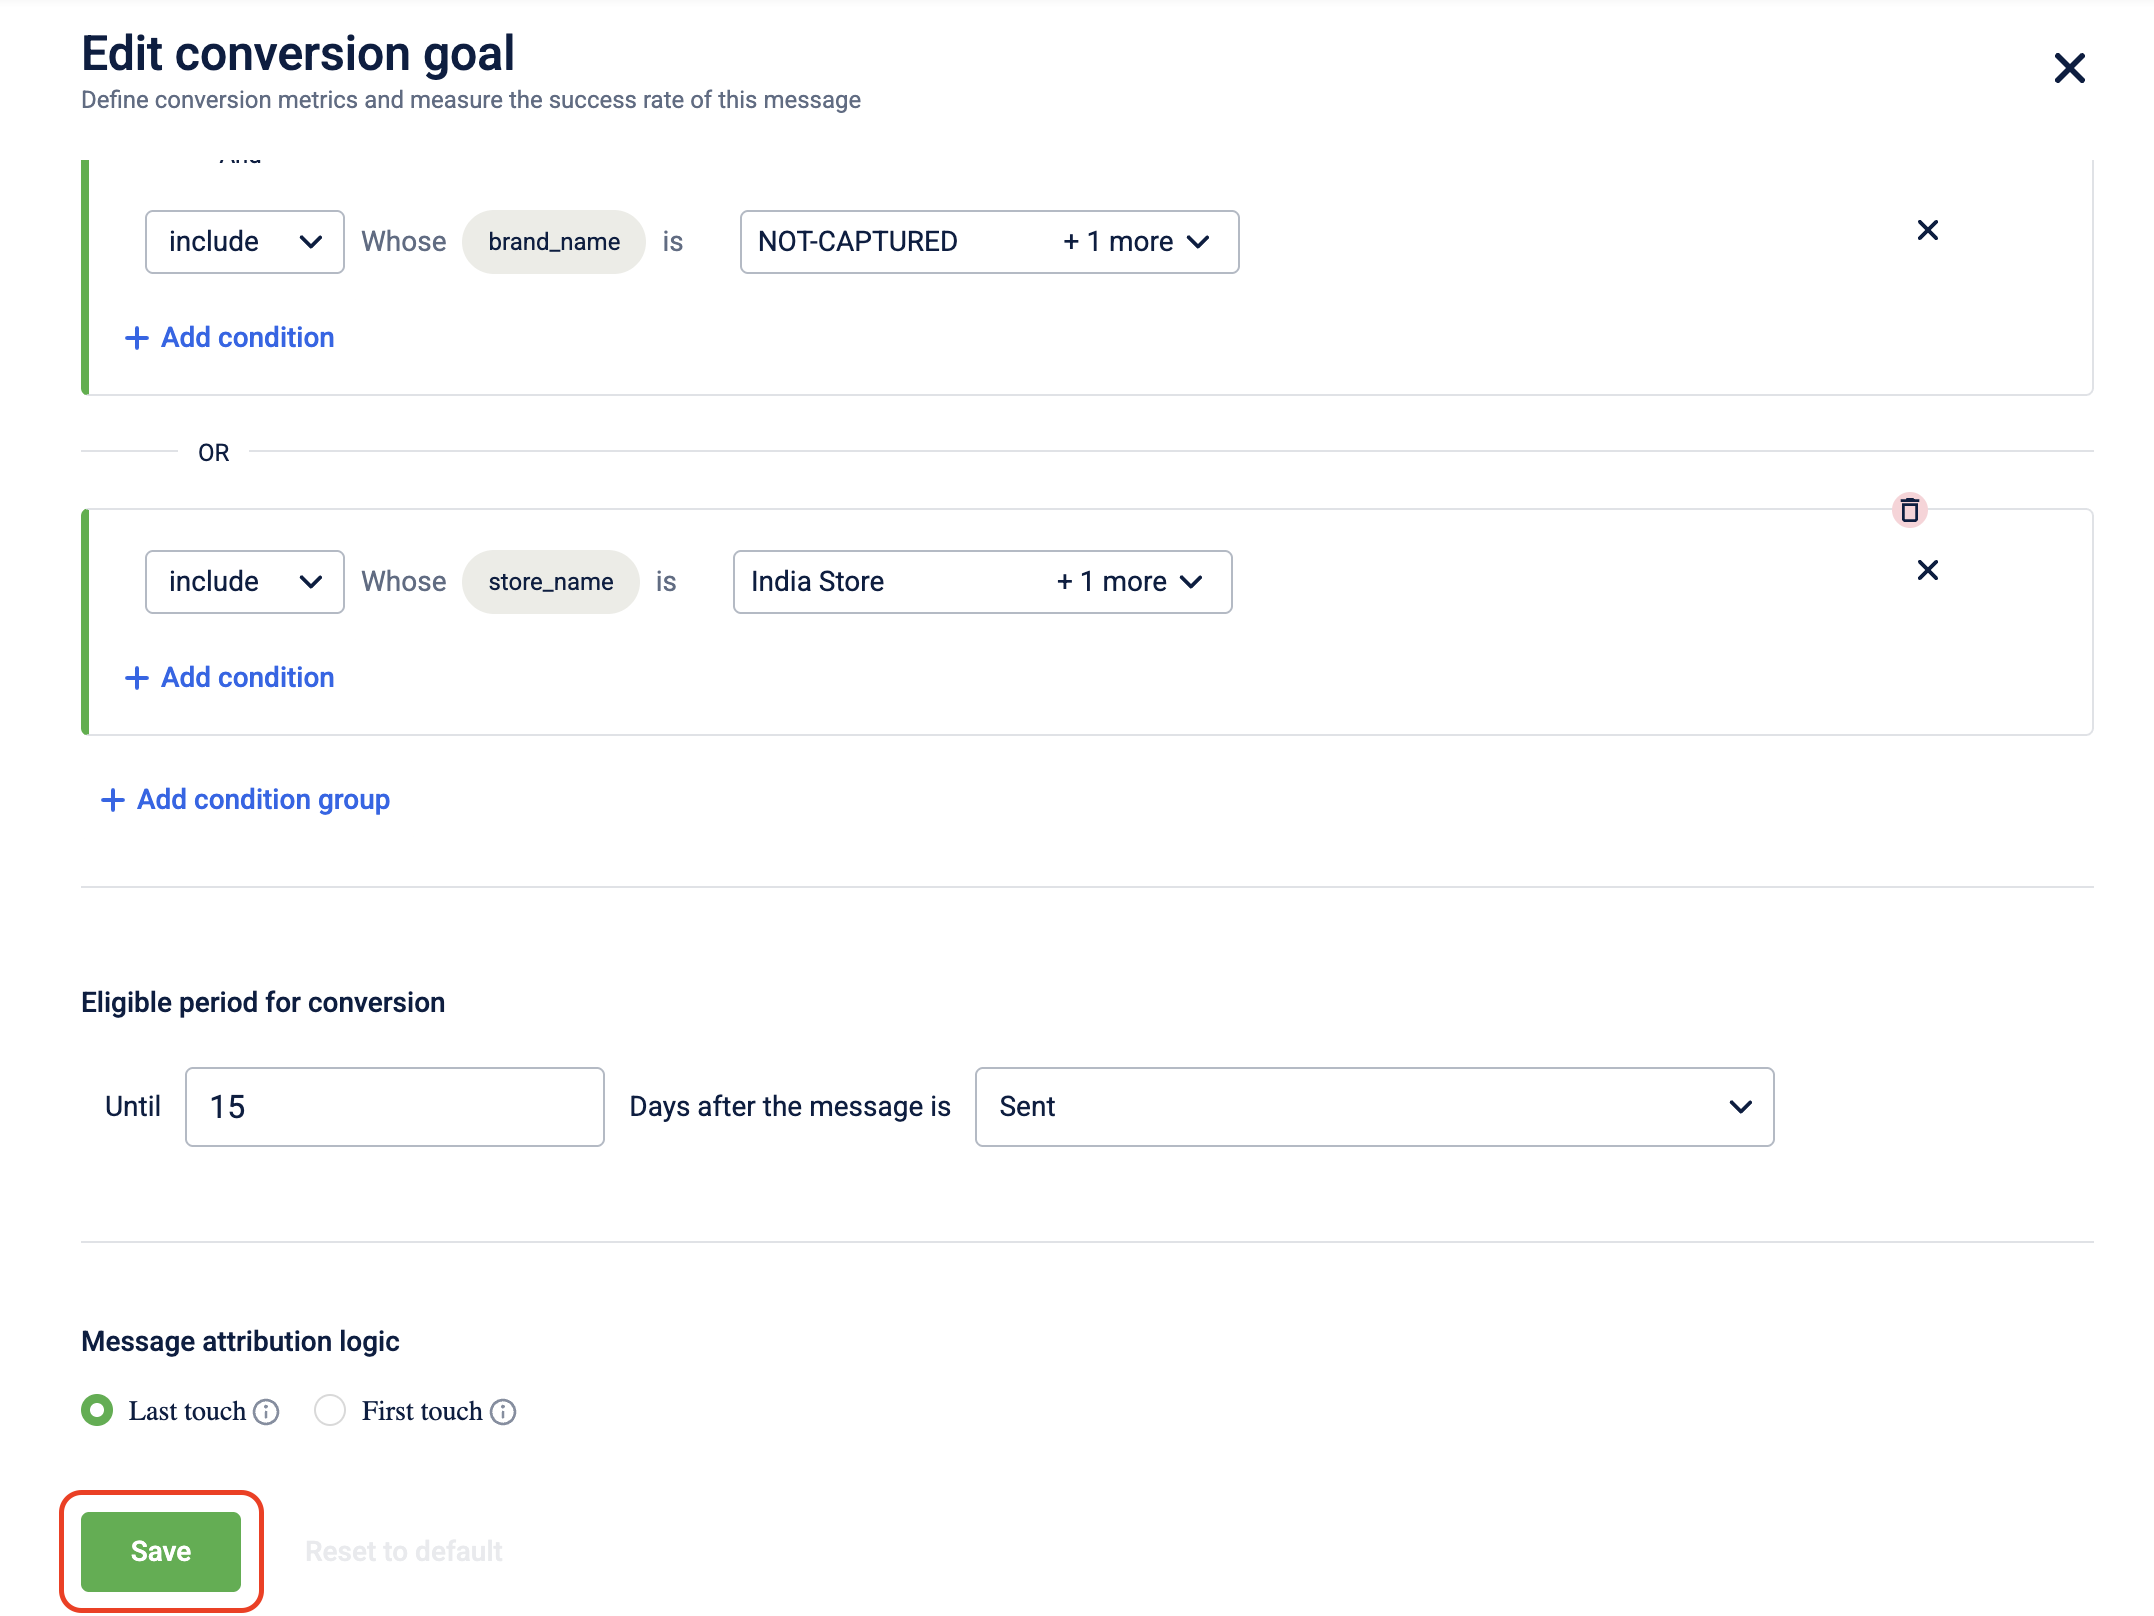
- Under Eligible period for conversion, set the tracking period to track conversions and choose whether tracking should start after the message is sent, delivered, clicked, or opened.
The table below lists available options-
| Status | Description |
|---|---|
| Sent | Tracking for conversion begins after the message is sent. |
| Delivered | Tracking for conversion begins once it is delivered to the customer. |
| Clicked | Tracking starts from the moment the customer clicks on a link or call-to-action within the message. |
| Opened | Tracking for conversion begins when the message is opened by the customer. |
-
Choose the Message attribution logic to decide which message in the campaign should be counted for the customer’s engagement.
- Last touch: The user's last engagement with the campaign will be counted as the conversion.
- First touch: The user's first engagement with the campaign will be counted as the conversion.
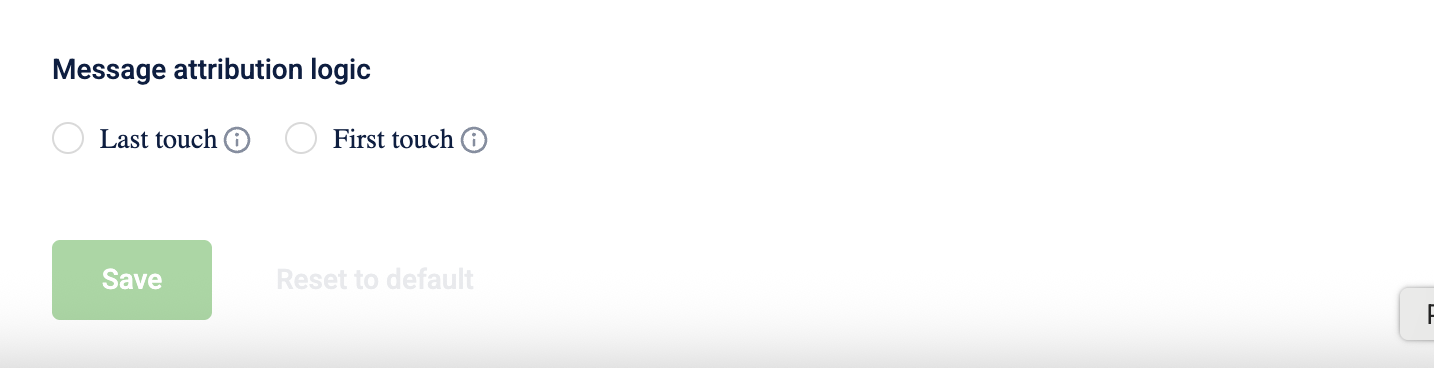
-
Click Save to save the conversion goal configuration.
-
Click Save campaign to save all your campaign changes.
Editing a Conversion Goal
Editing a Conversion Goal (Org-Level)
- Navigate to Engage+ and click on the settings icon.
- Click on Campaign Attribution. A default goal is already set, it will be displayed automatically.
- Click the three-dot menu in the top-right corner, and select Edit Goal.
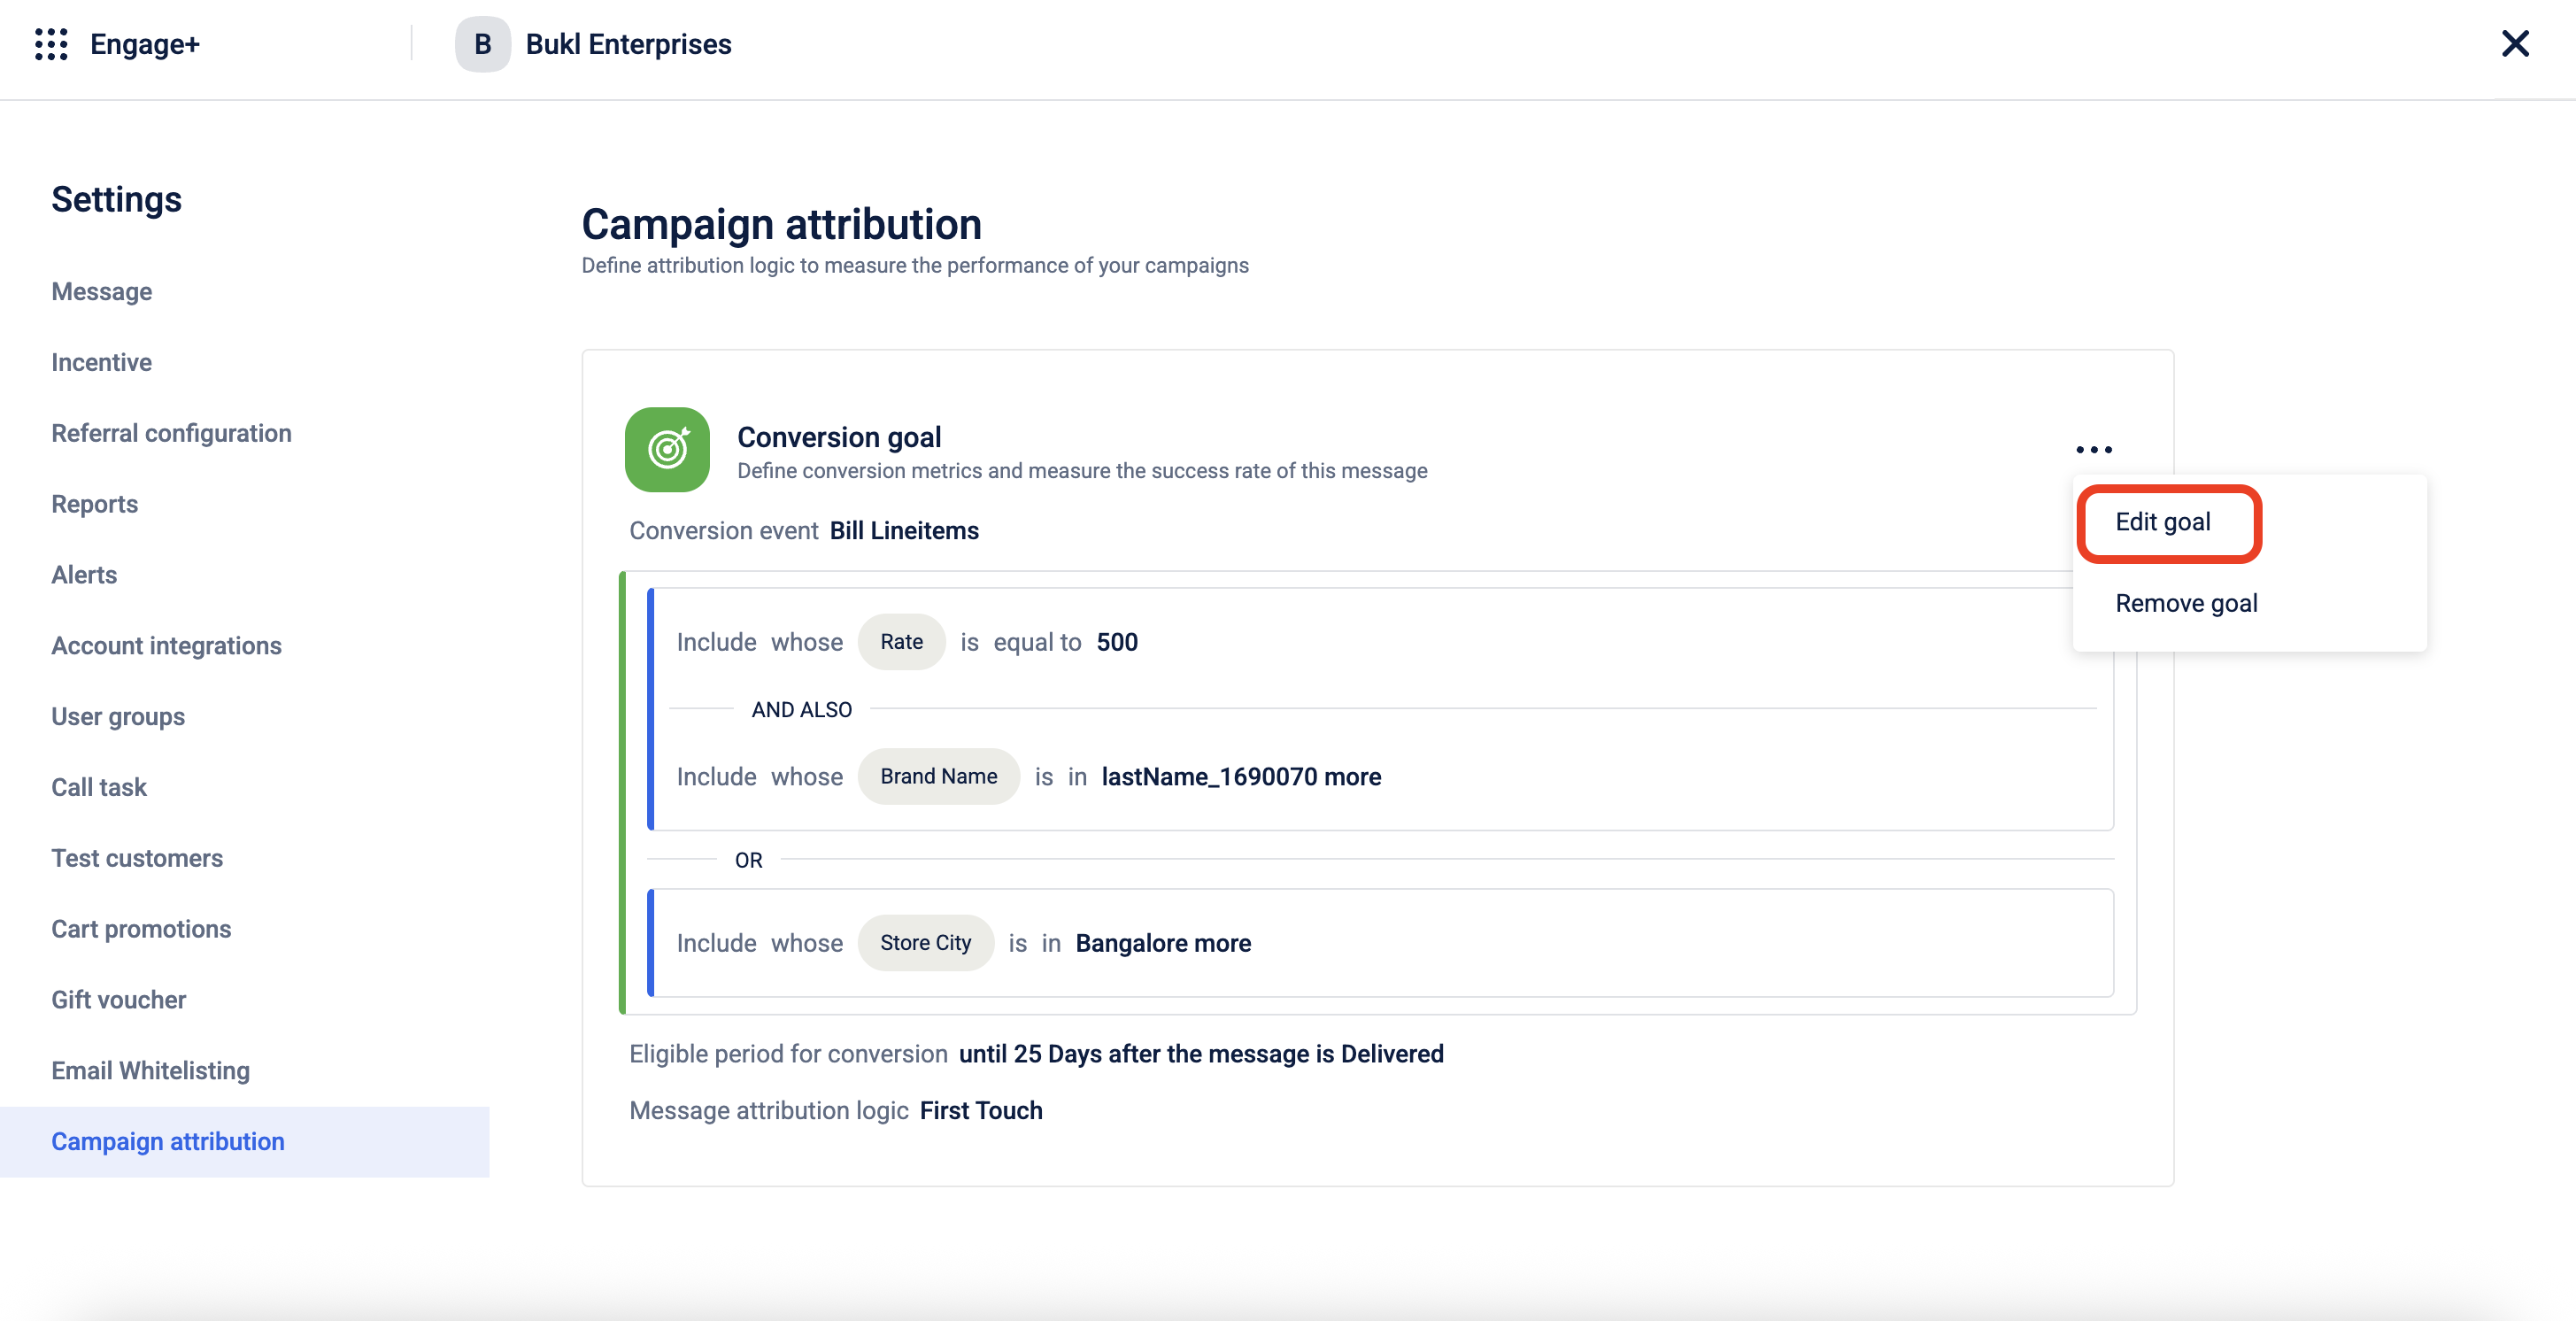
- After making the changes, click Save to update the conversion goal. Saving Changes will replace the existing goal with the new one.
Note
You can edit the org-level conversion goal at any time. All campaigns created after the change will reflect the updated goal.
Editing a Conversion Goal (Campaign Level)
- Log on to InTouch of your cluster and navigate to Engage+ from the menu.
- Select the campaign you want to edit.

- Navigate to the Conversion Goal block, click the three-dot menu in the top-right corner, and select Edit Goal.

- After making the changes, click Save to update the conversion goal.
- Click Save campaign to save all your changes.
Note
You can edit a campaign-level conversion goal anytime before the first message is sent or approved. Once the first message is approved, editing is no longer allowed.
Removing a Conversion Goal
Removing a Conversion Goal (Org-Level)
- Navigate to Engage+ and click on the settings icon.
- Click on Campaign Attribution. A default goal is already set, it will be displayed automatically.
- Click the three-dot menu in the top-right corner, and select Remove Goal.
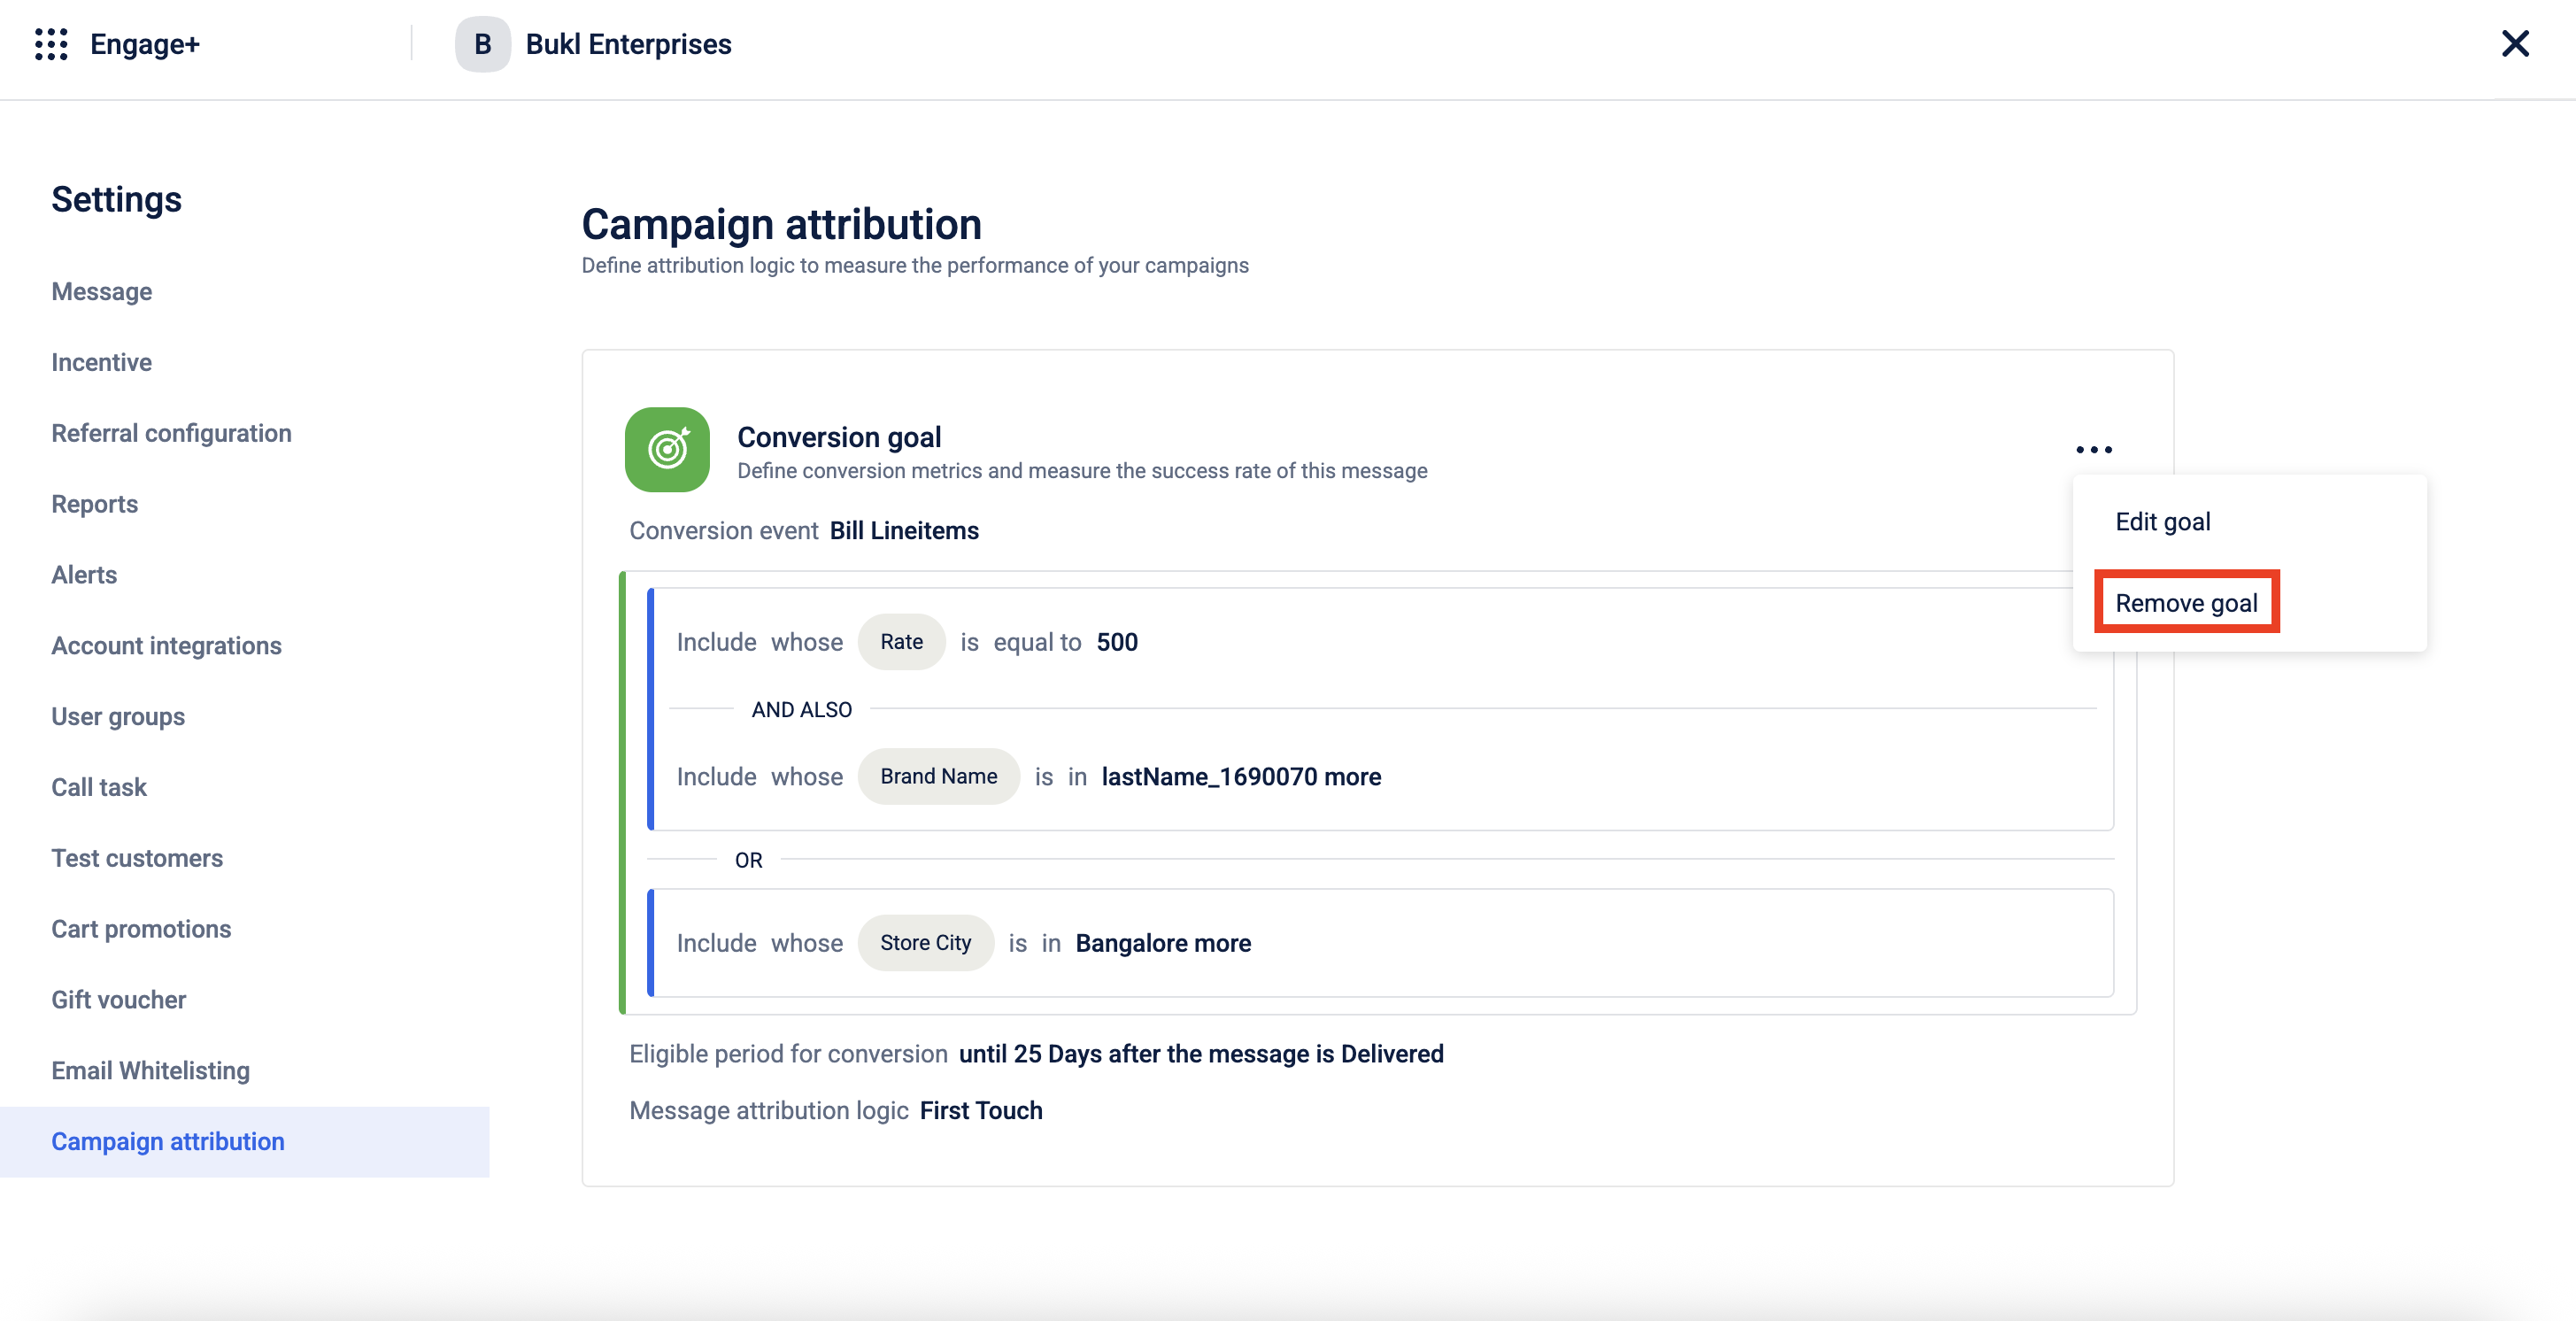
Confirming will remove the goal and take you back to the screen where no goal is set, allowing you to add a new one.
Note
Once the Org Level conversion goal is removed, any campaigns created after the removal of the Org Level conversion goal will not have a conversion goal set by default.
Removing a Conversion Goal (Campaign Level)
- Navigate to Engage+ from the menu.
- Select the campaign you want to edit.
- Navigate to the Conversion Goal block, click the three-dot menu in the top-right corner, and select Remove Goal.
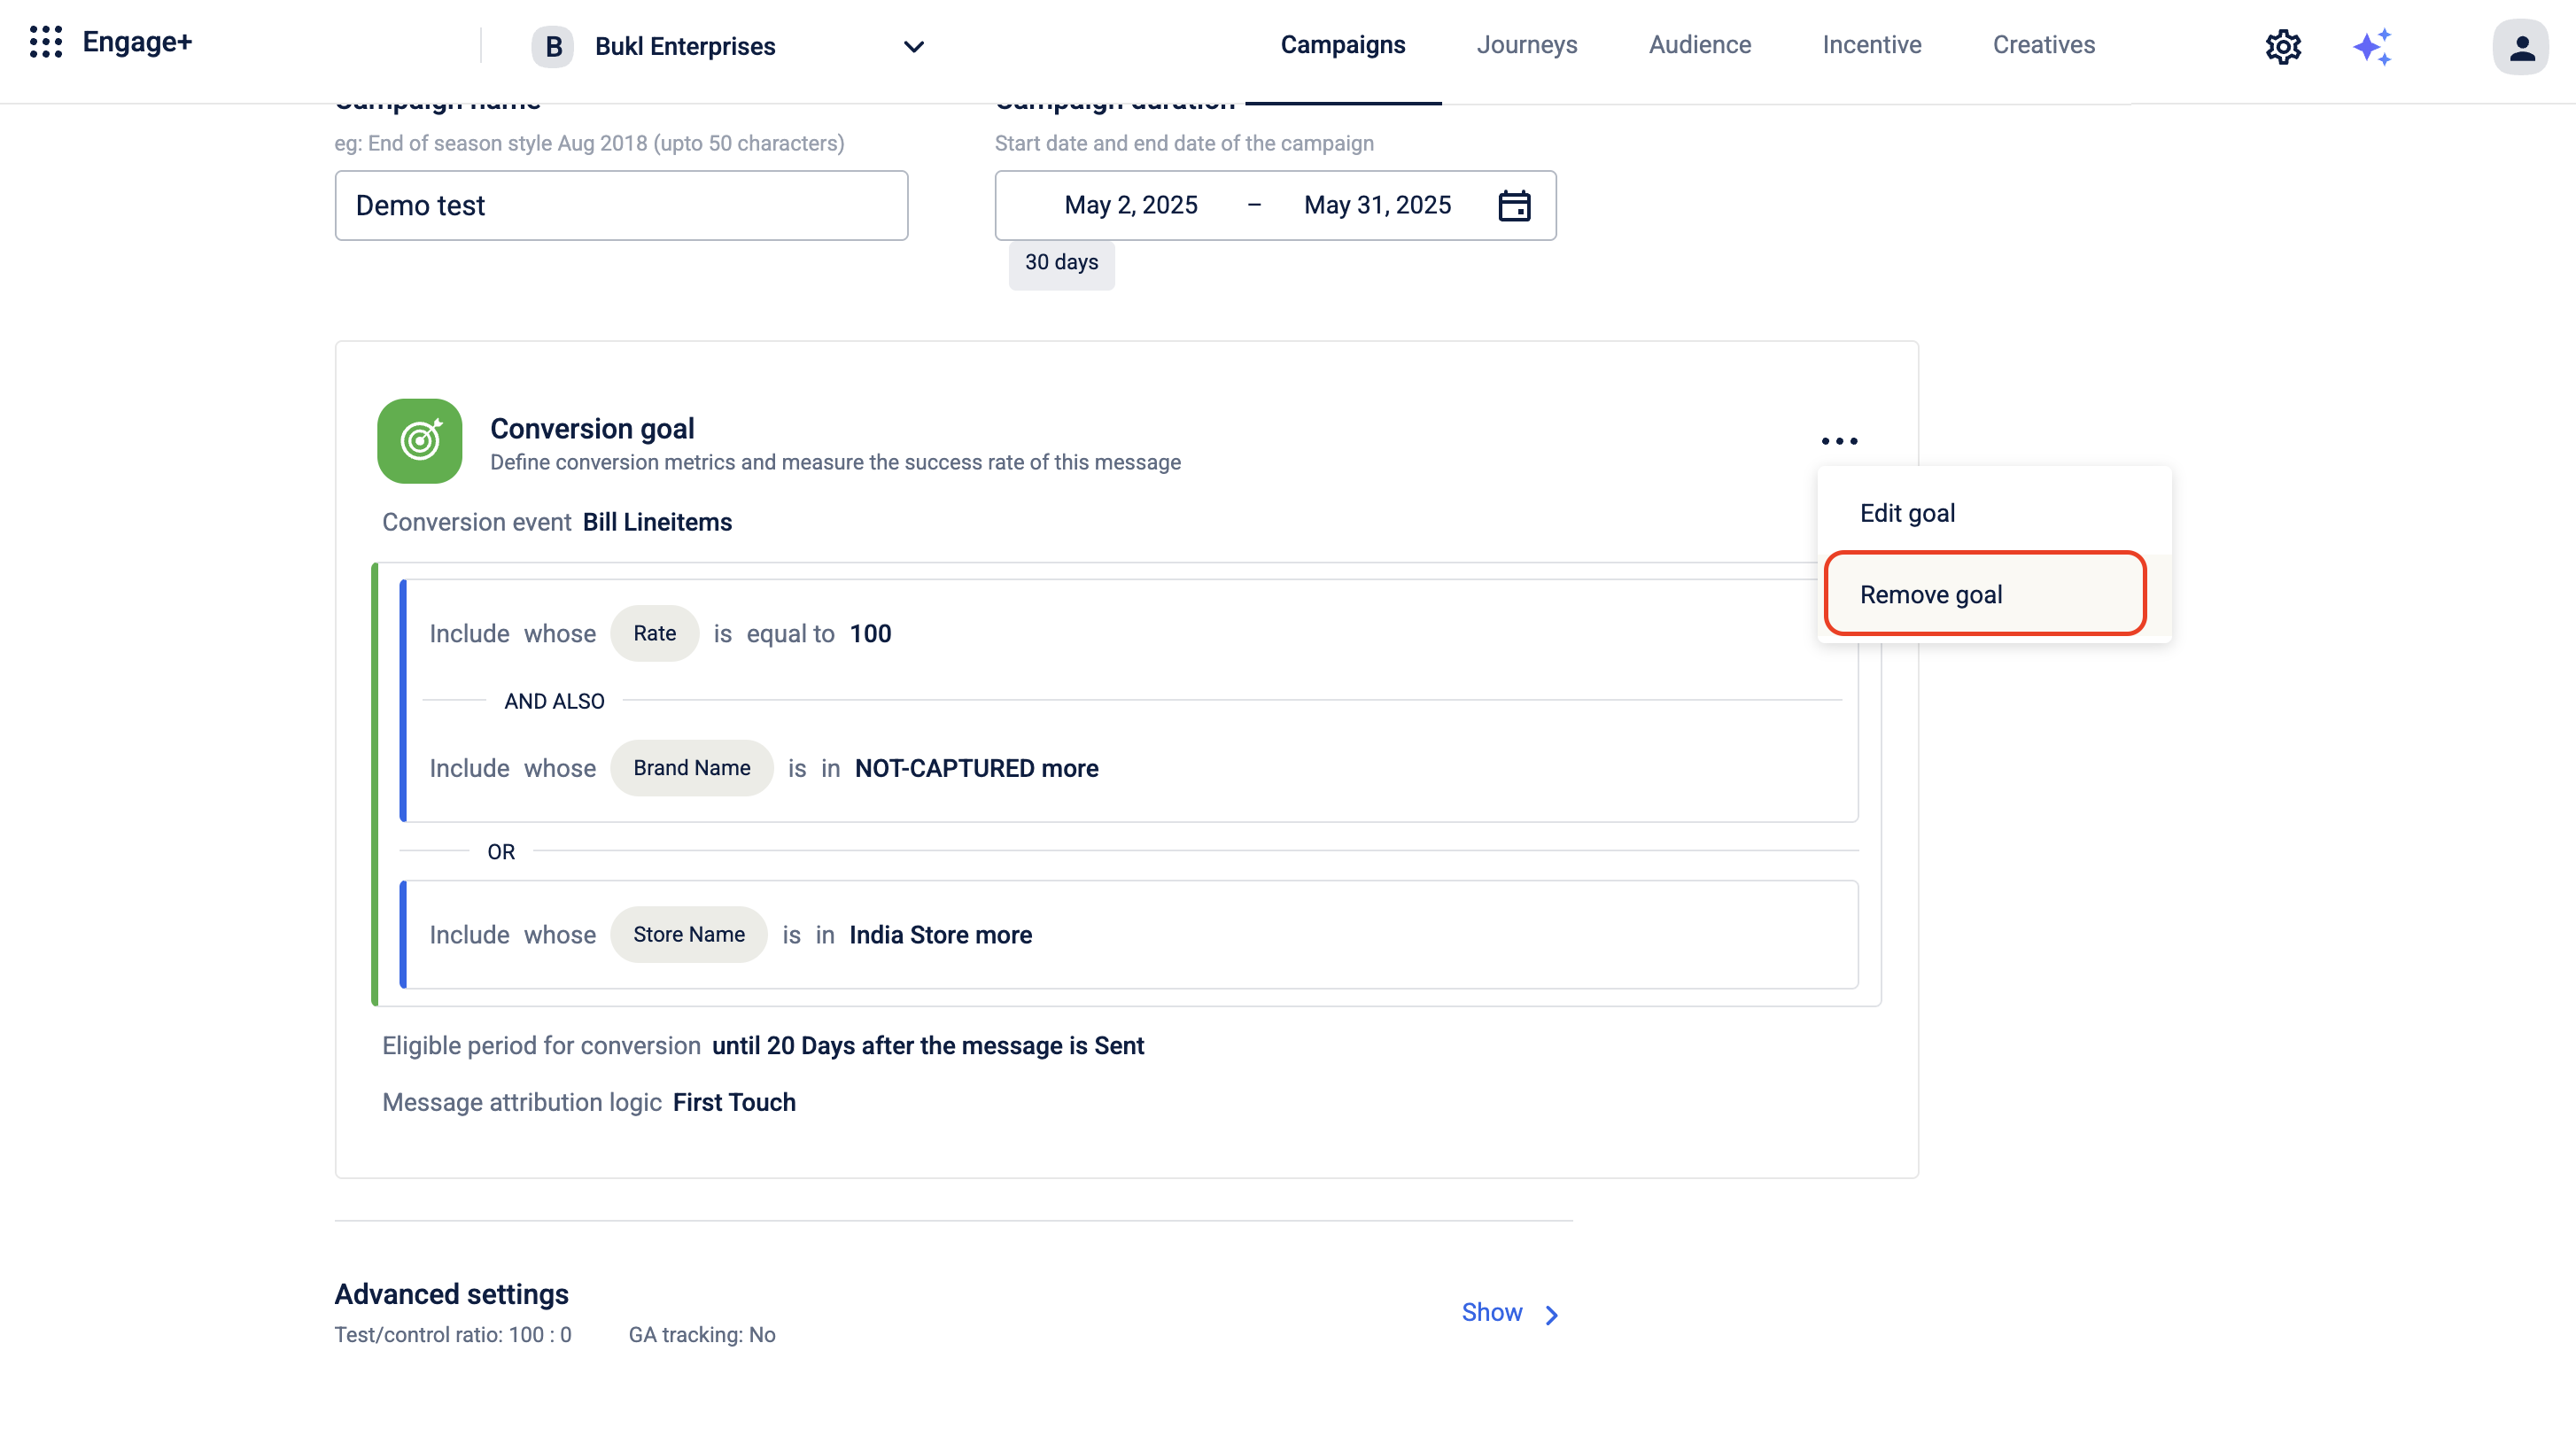
- The conversion goal has been successfully removed from the campaign. Click Save Campaign to save the changes.
Note
Once the first message is sent or approved, the option to remove the conversion goal will no longer be available.
Tracking and Reporting
The Conversion Goal feature helps track and report campaign performance.
Tracking and Reporting (Org Level)
- Navigate to Engage+ from the menu.
- On the campaign listing page, you can see a summary or a overall performance of how all campaigns are performing. It Shows the overall performance of campaigns for the last 7 days, 1 month, 3 months, and 6 months.
For detailed information refer to the documentation view campaign reports.
| Metrics | Description |
|---|---|
| Contacted Customer | The number of customers who were reached out to during the campaign. |
| Delivery Rate | The percentage of sent messages that have been delivered (received by the customers) successfully. |
| Hit Rate | The percentage of customers to whom the communication has been sent out and has transacted in the campaign duration. Hit Rate = 100* (Responding Customers) / (Contacted Customers). |
| Responder Sales | Total sales value generated from customers who engaged with the campaign message. |
| Incremental Sales | Additional generated because of the campaign, above normal sales. Incremental Sales = (Test Hit Rate - Control Hit Rate) Test Contacted Test Responders Spend Per Customer. |
| Credits Remaining | The number of campaign credits left in the billing account. A negative value indicates that the credit limit has been exceeded due to campaign activity. |
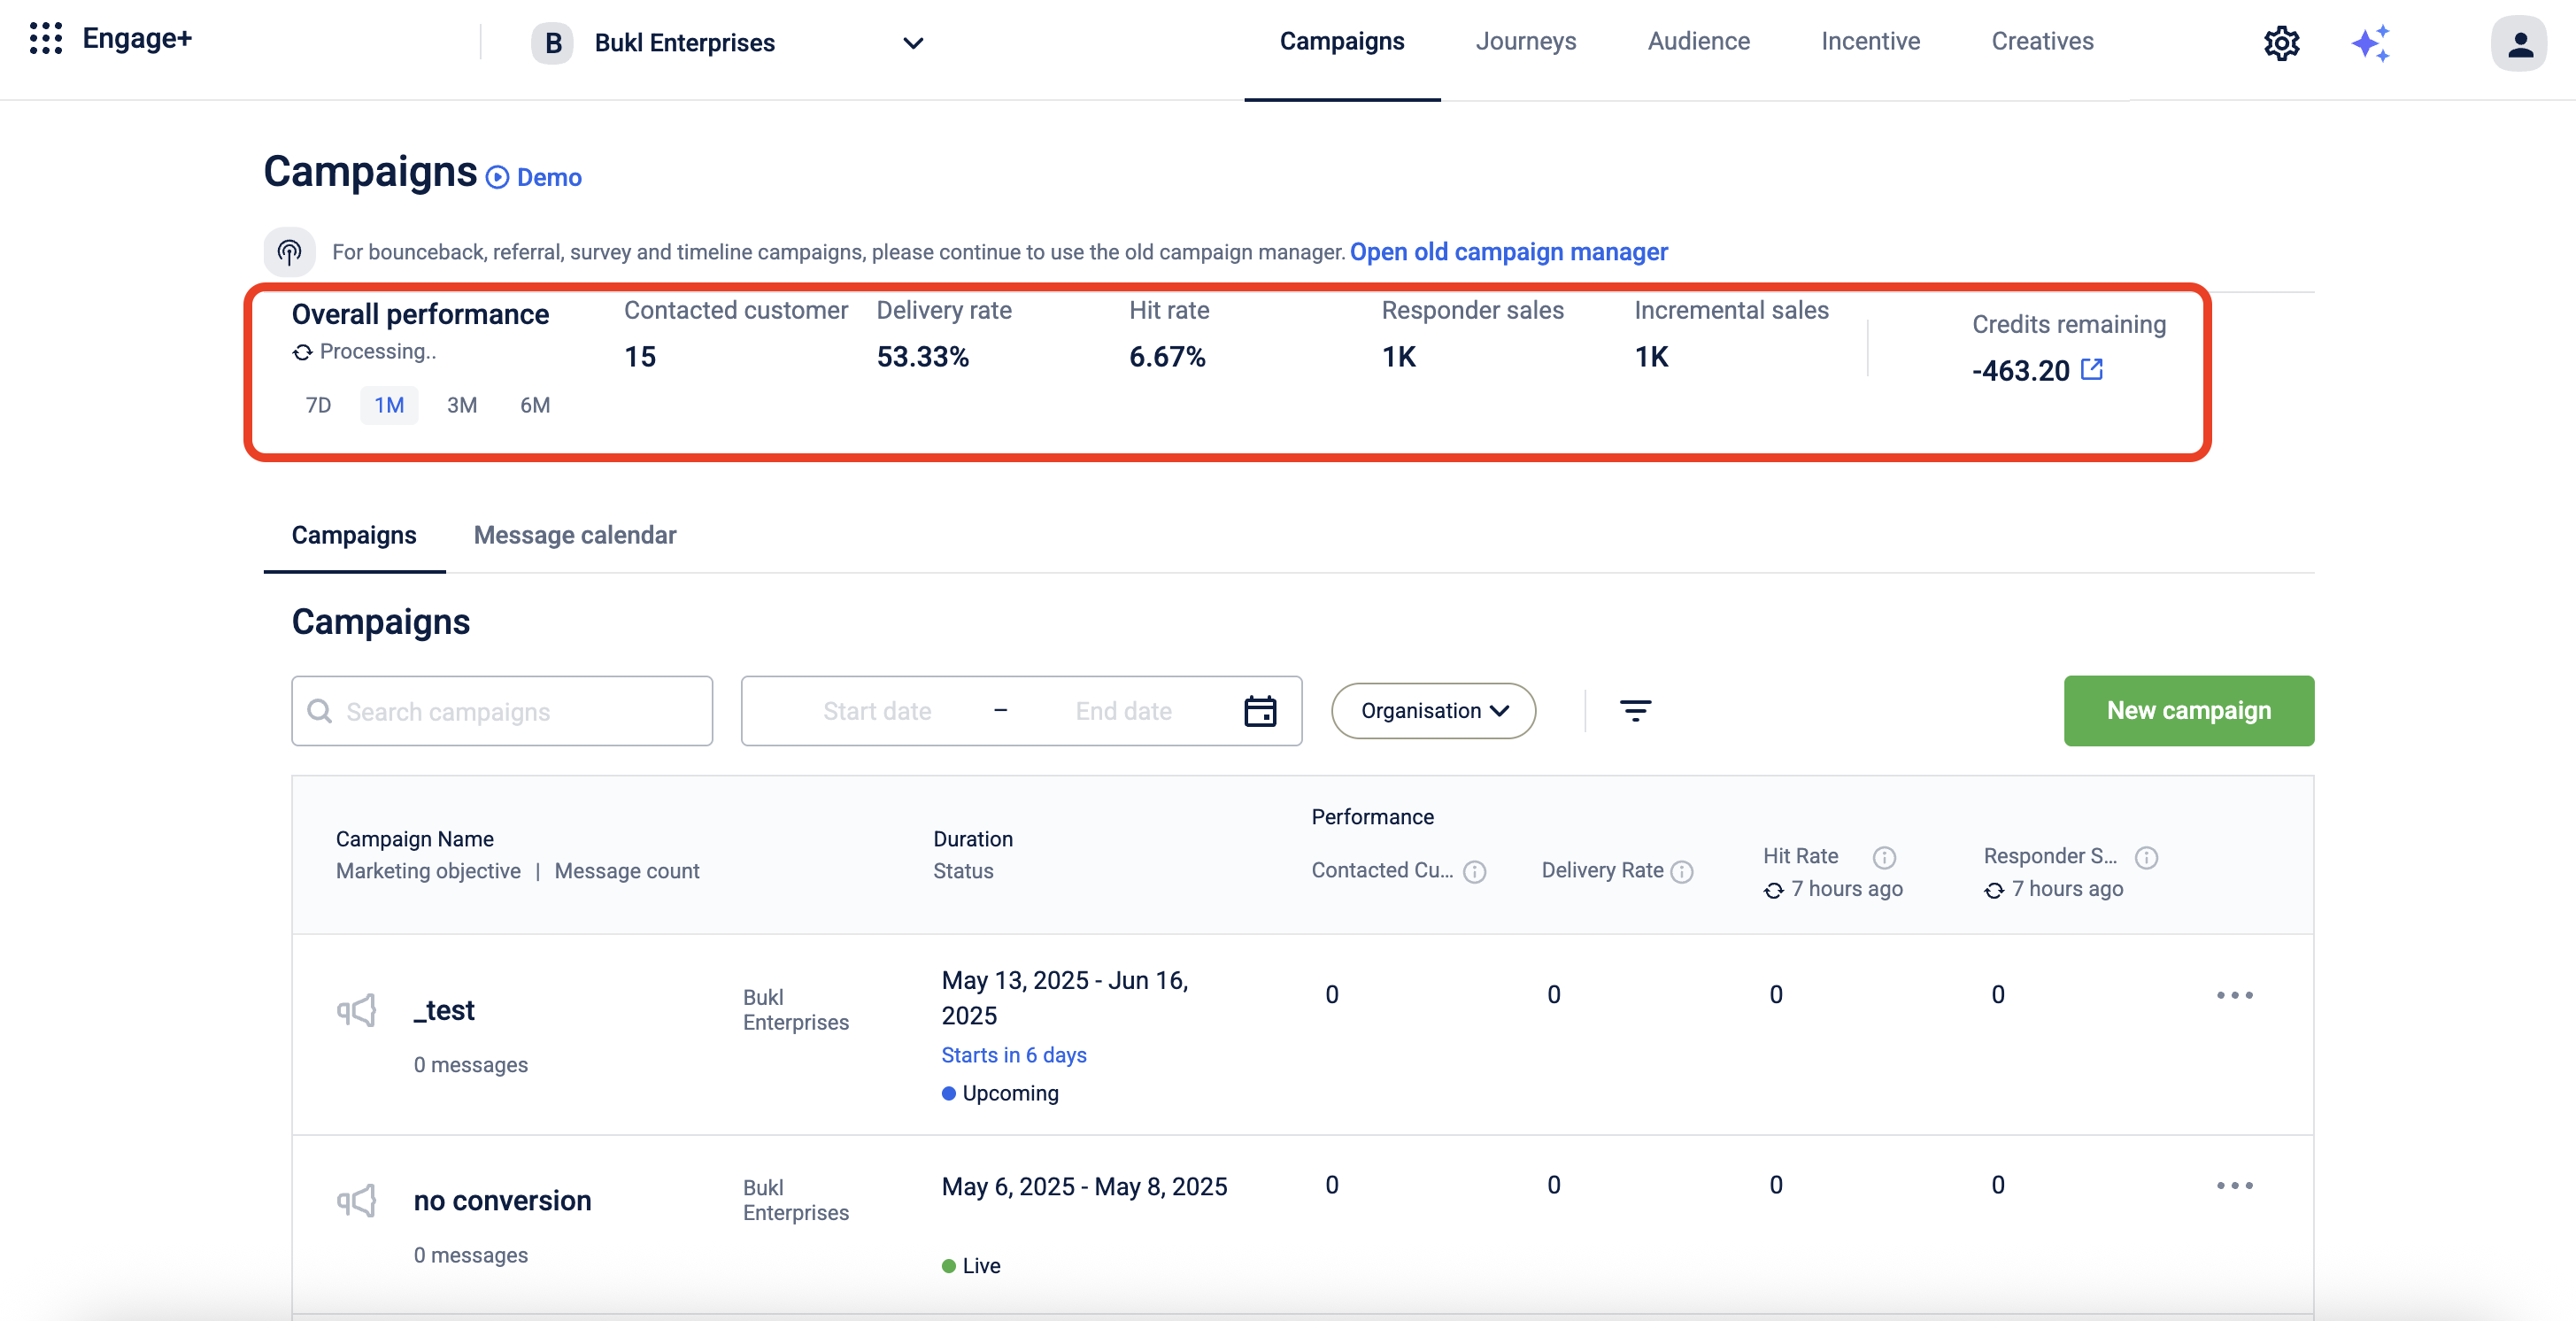
- Select the credits remaining icon to view reports. This will open a new window on Insights+. For more information refer the Insight+documentation.
Note
The data gets reflected with 24hours in the overall performance dashboard.
Tracking and Reporting (Campaign Level)
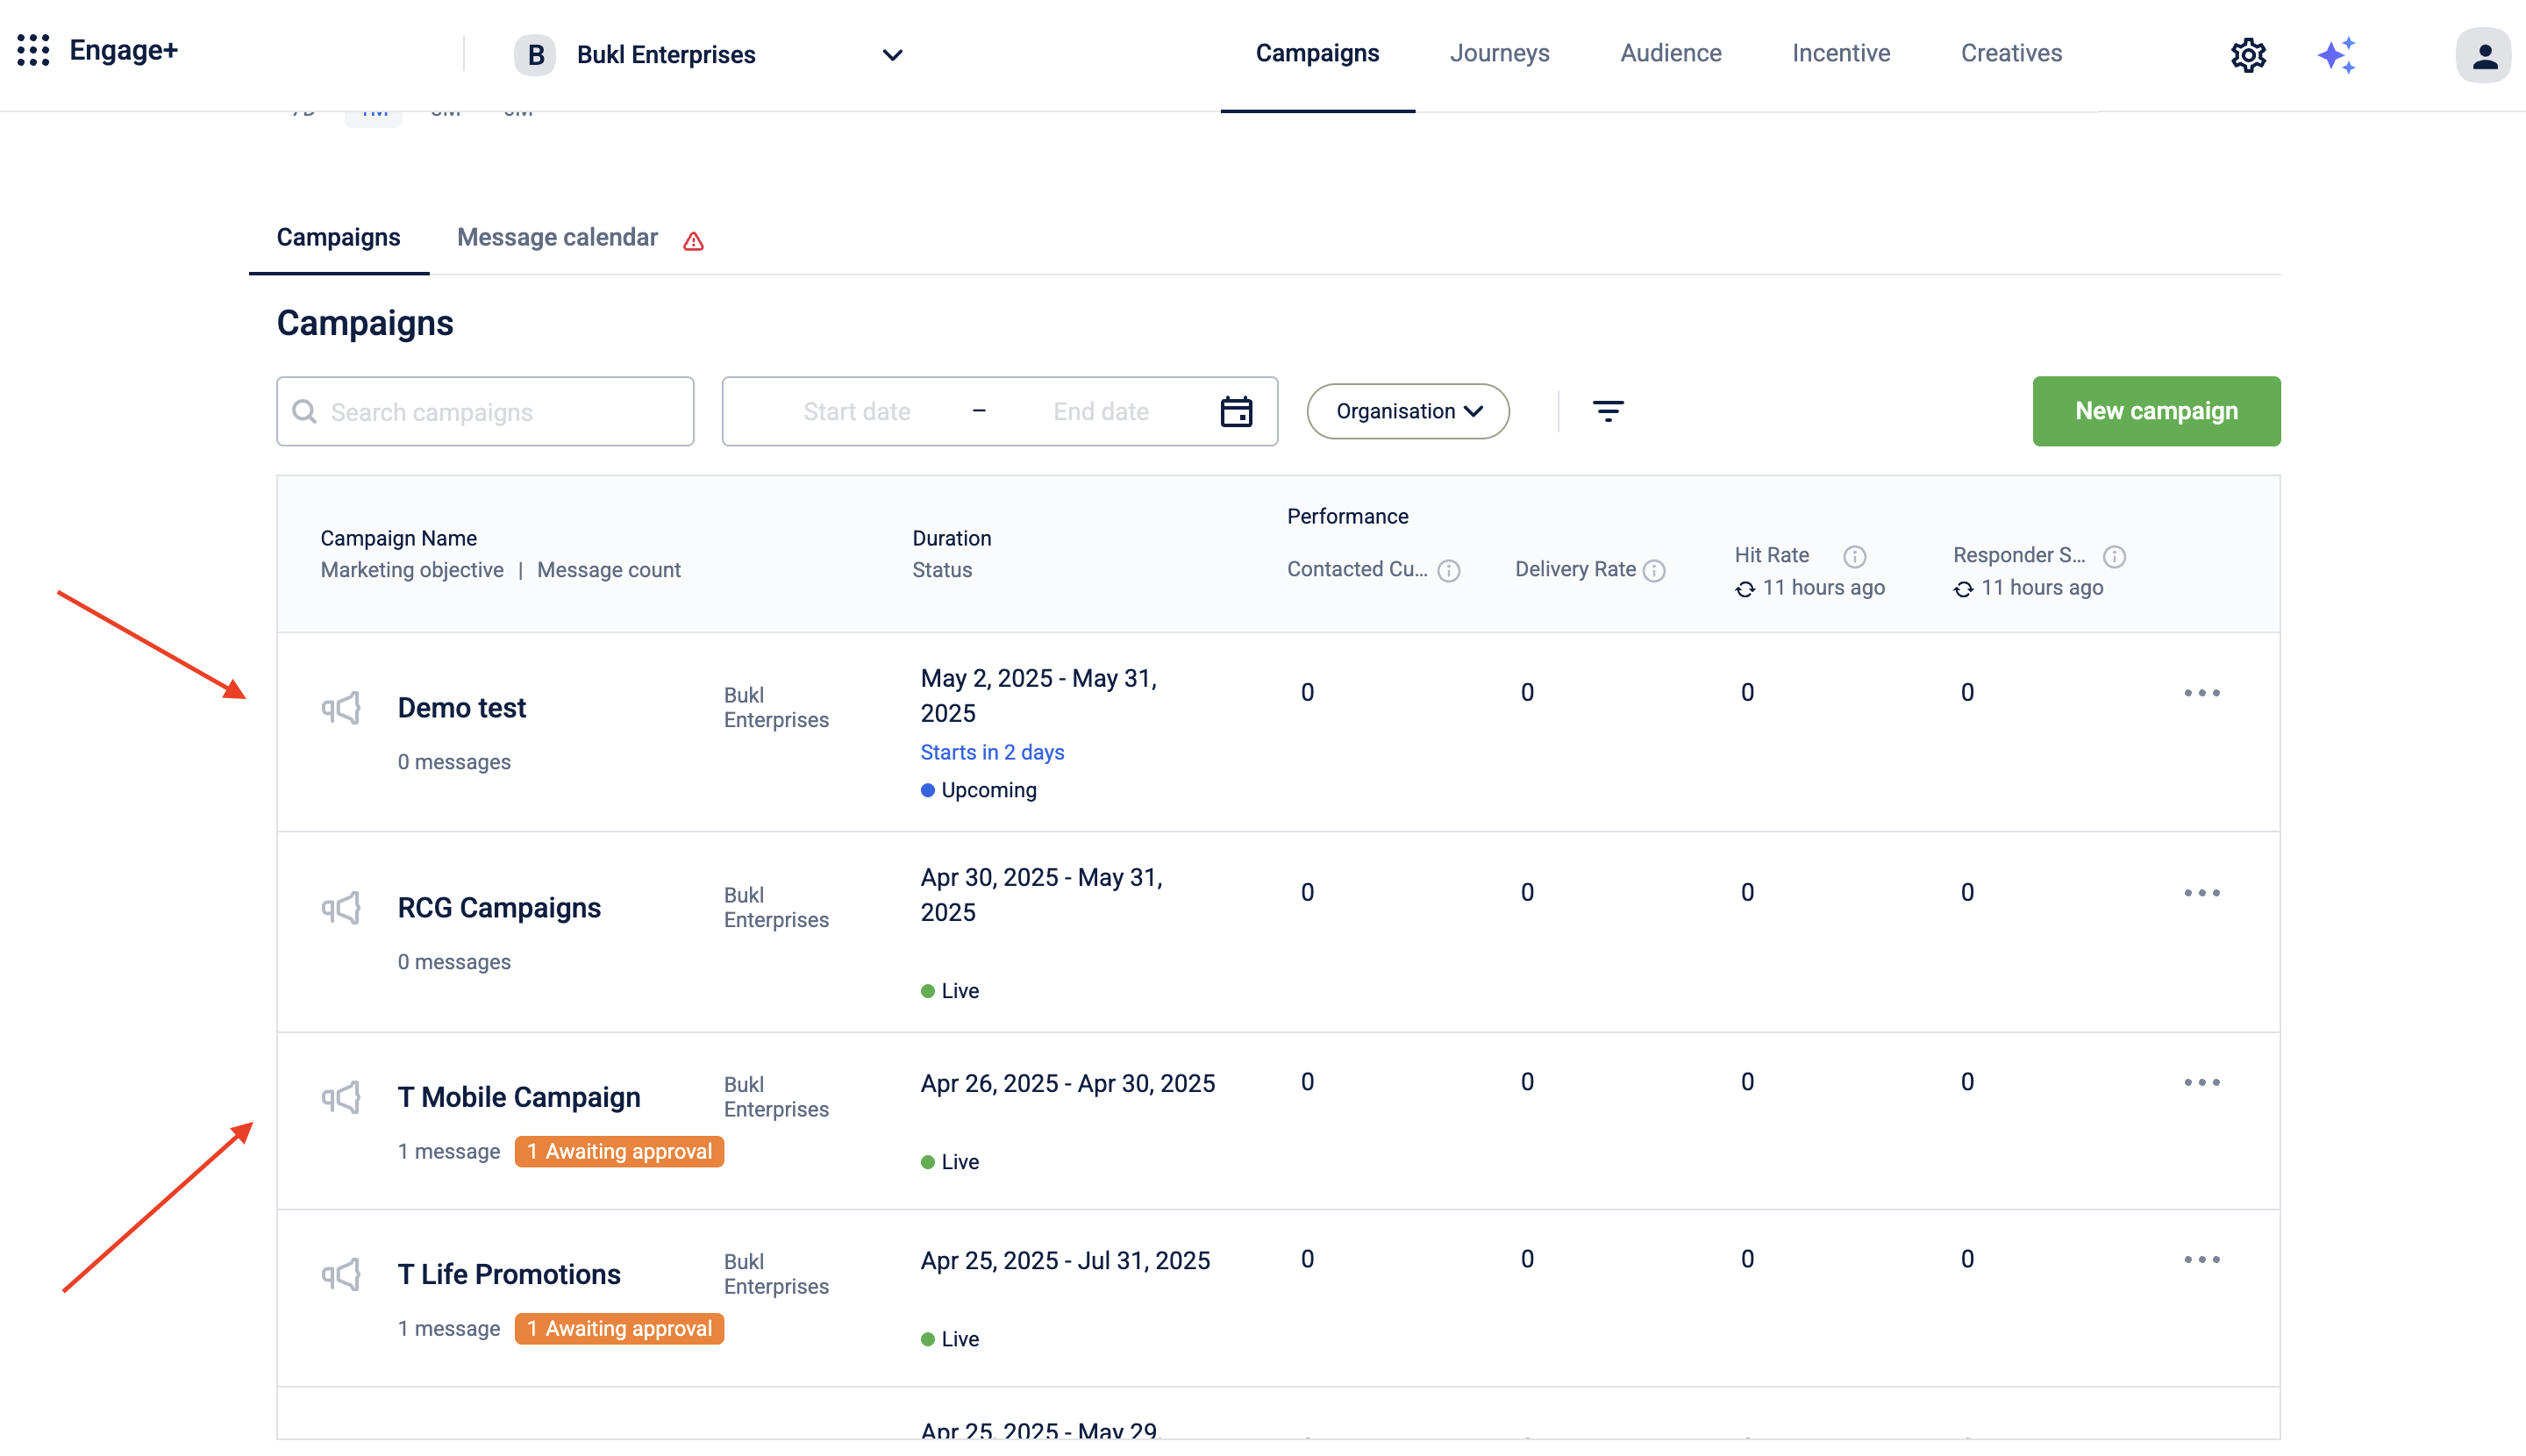
- Navigate to Engage+ from the menu.
- On the campaign listing page select the campaign you want to track.
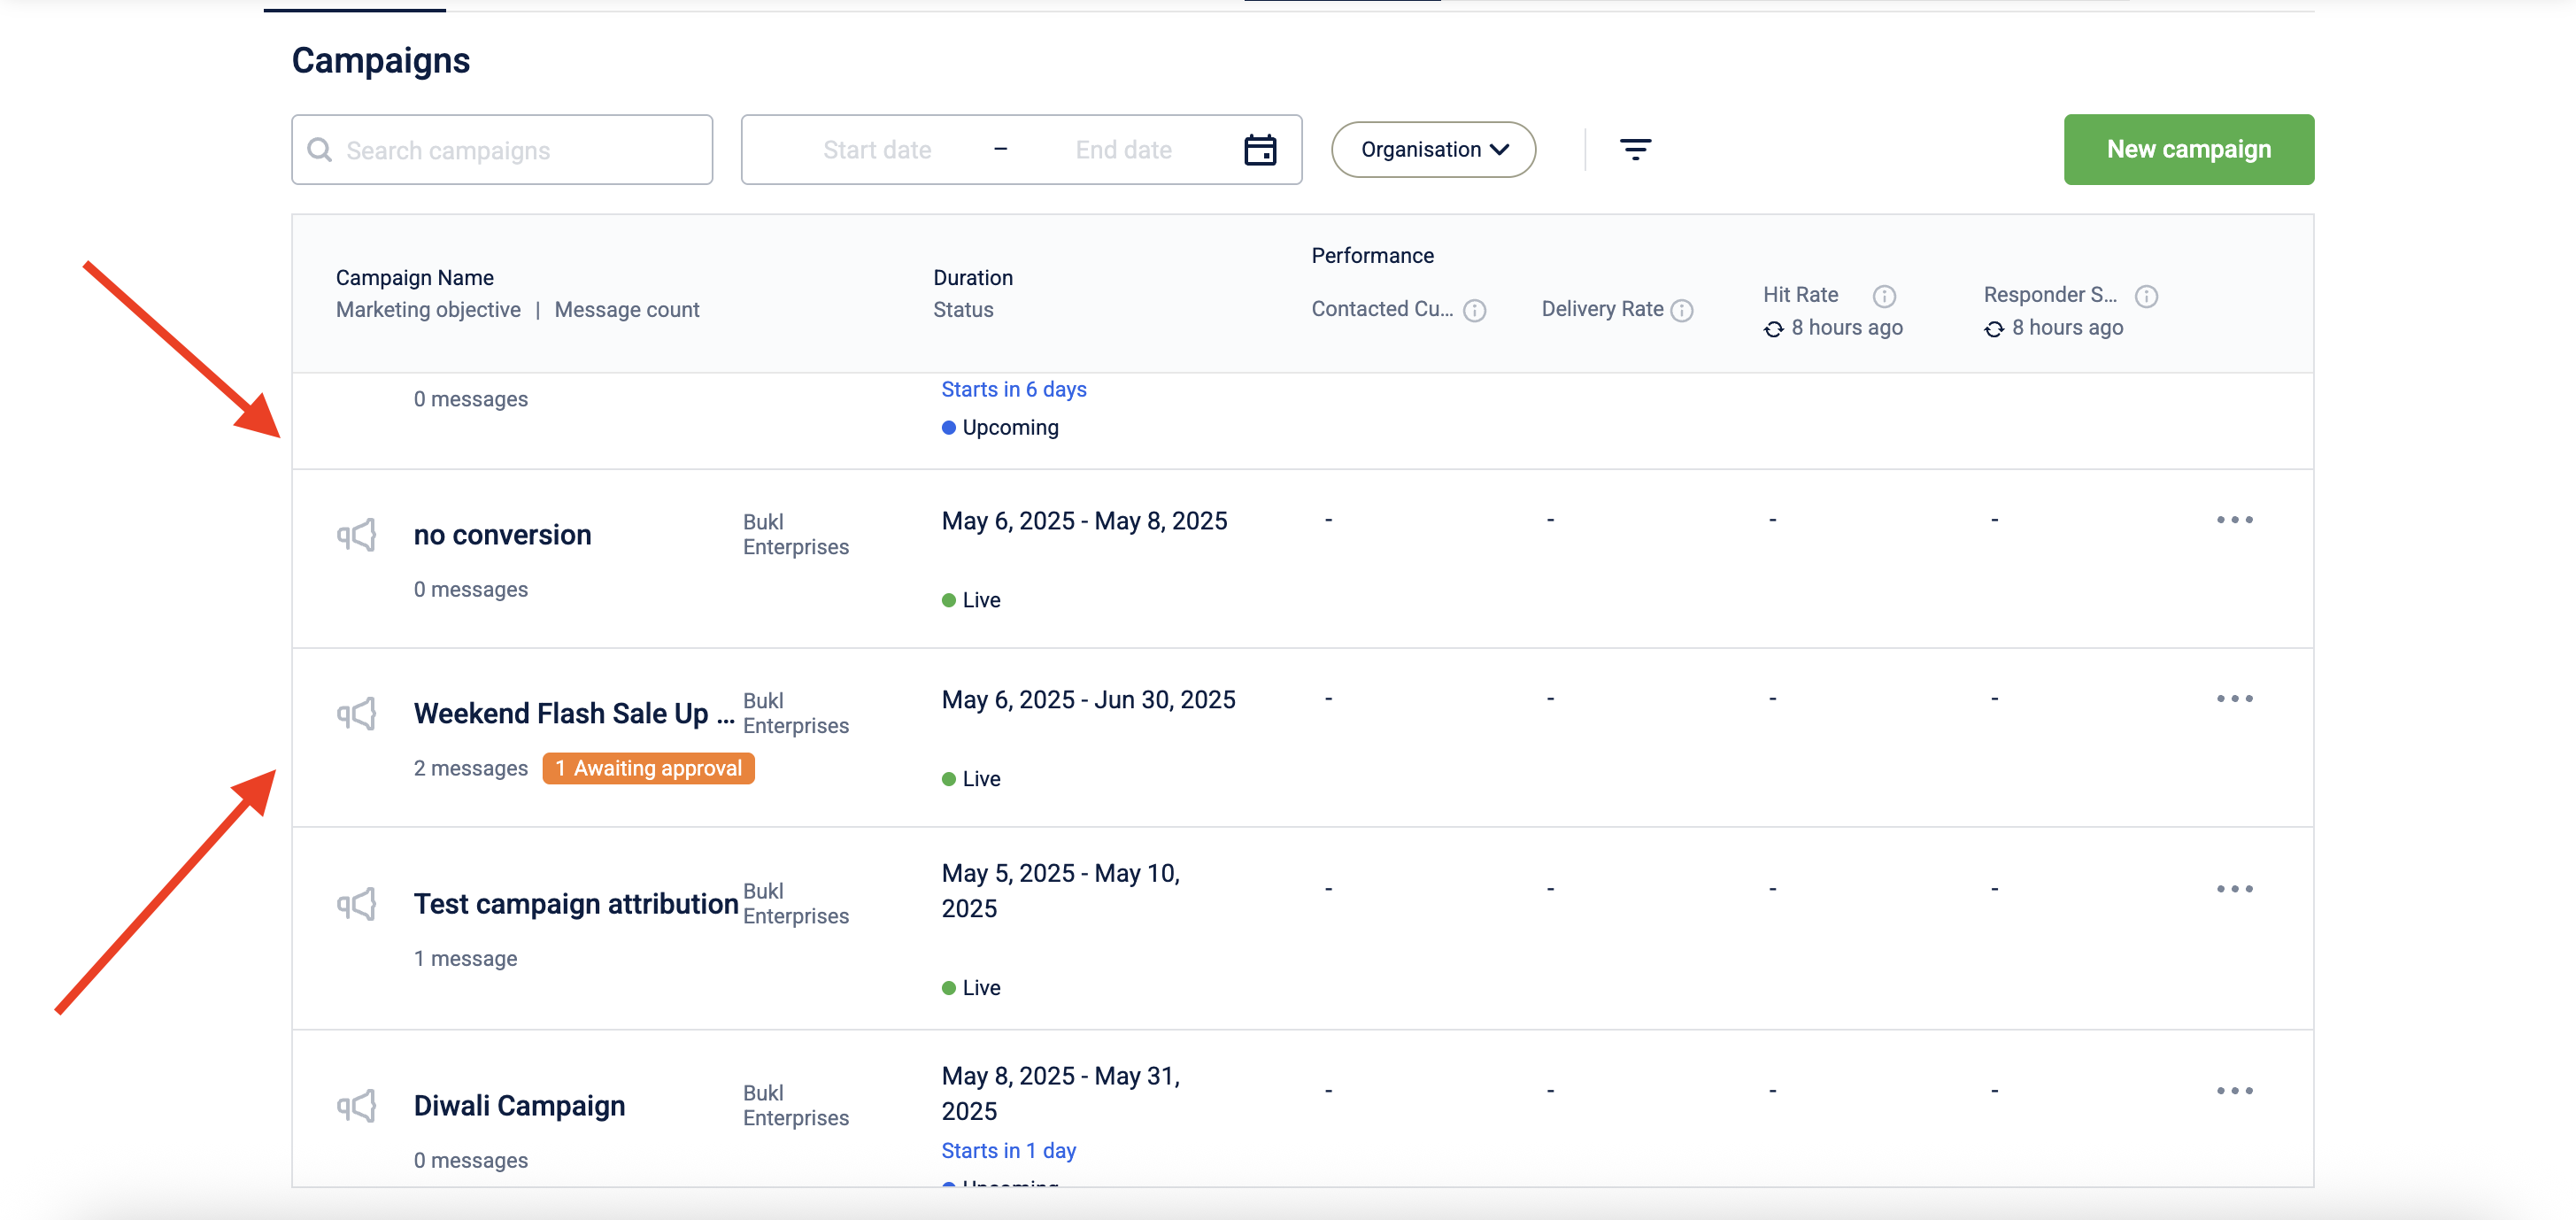
- Select See Reports to view a summary of campaign performance.
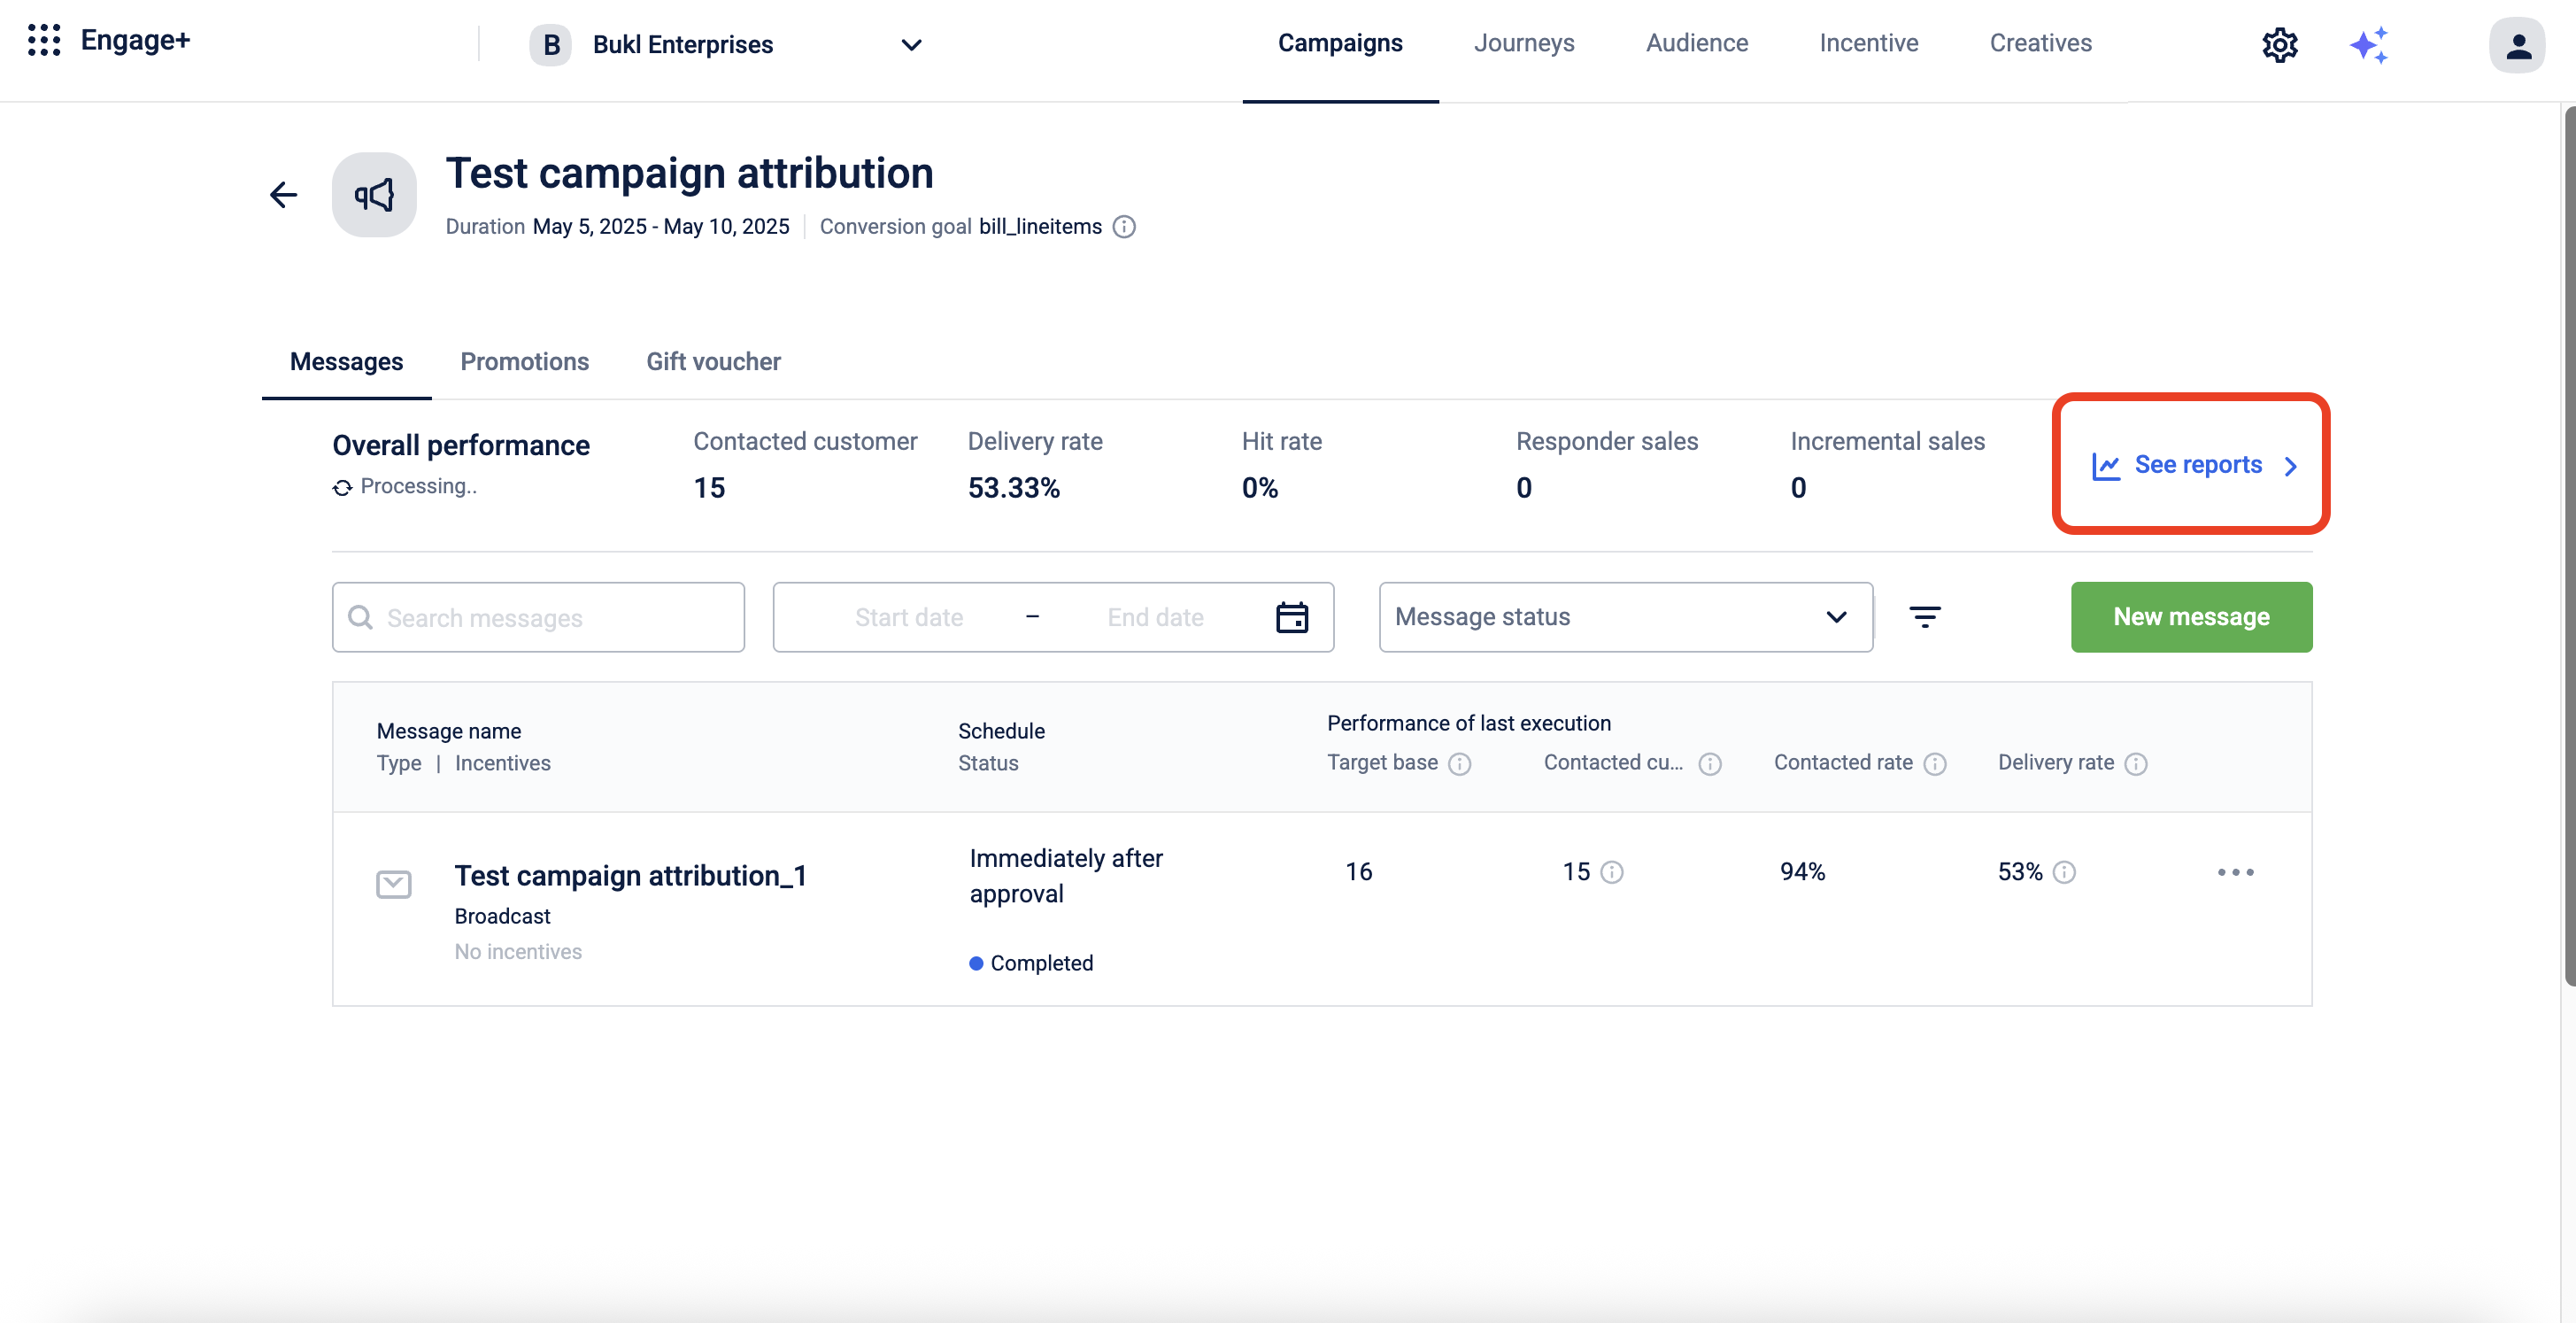
It includes key campaign metrics such as Contacted customer, Message Sent, Message Delivered, Message not Delivered, Unsubscribed.
| Metrics | Description |
|---|---|
| Contacted customer | Total number of customers the campaign message was sent to. |
| Message Sent | Total number of messages sent during the campaign. This count doesn’t include message credits used. |
| Message Delivered | Total number of messages delivered to customers during the campaign. Credit usage is not included. |
| Message not Delivered | Total number of messages that failed to reach customers during the campaign. |
| Unsubscribed | Total number of customers who have unsubscribed from the channel. |
Use Case
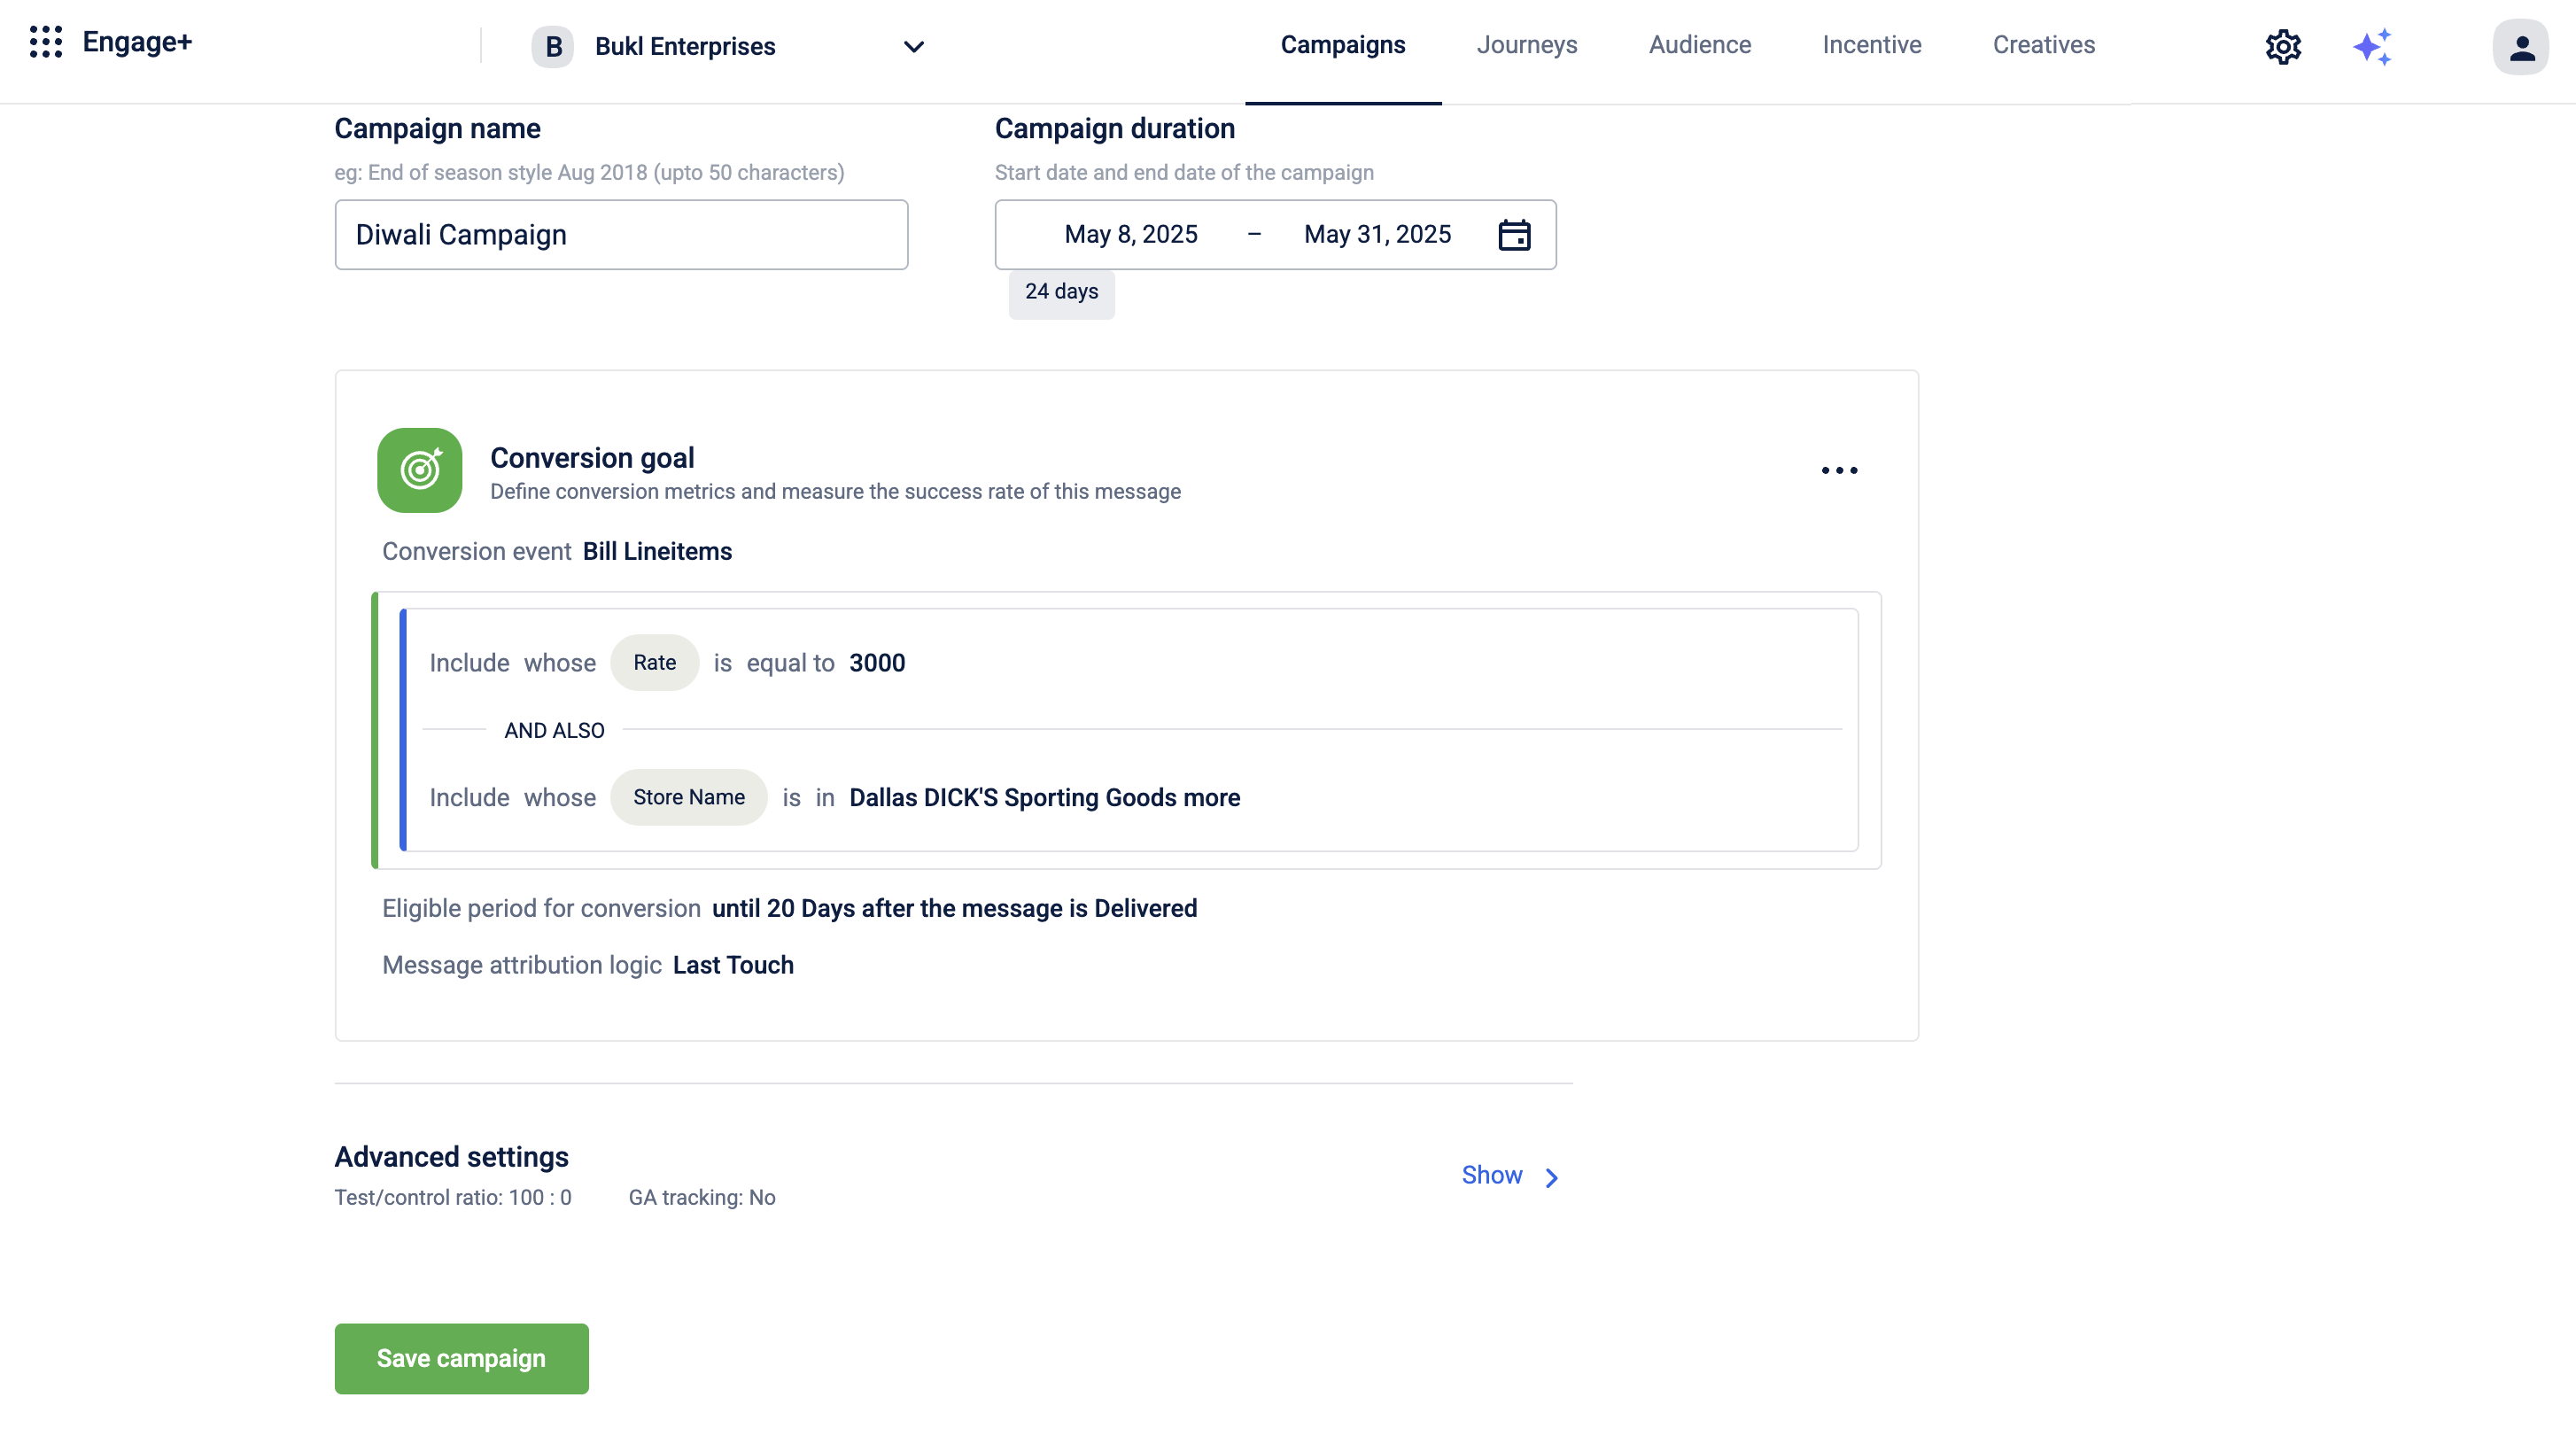
Scenario – Festival Campaign Conversion Tracking
A retail brand launches a Diwali campaign offering 20% off on purchases above ₹3000 at select stores. The goal is to track how well the campaign drives customer purchases using a Conversion Goal.
Requirement
- Track how many customers make a transaction above ₹3000 at participating stores after receiving the campaign message.
- Start tracking conversions up to 20 days after the message is delivered.
- Count the last message interaction as the conversion source.
To set this up, follow the steps below.
- Log on to InTouch of your cluster and navigate to Engage+ from the menu.
- Click on New campaign to start creating a new campaign.
- Enter a Campaign name and select the Campaign duration using the calendar.
- Click Add goal to set up the conversion goal.
- Choose the Conversion Event.
- Click +Add conditions and fill in the required details.

- Click Save to save the conversion goal.
- Click Save campaign to save all your changes.
Updated about 18 hours ago