Create message
Add a message
- Click New Message.
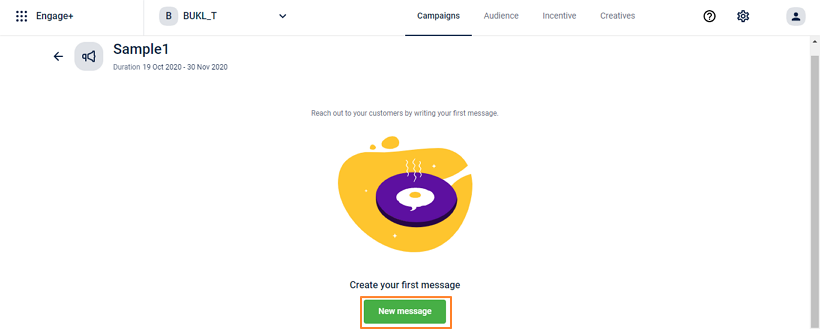
- Enter a message title, select a message type (example: Broadcast), and then click Next.
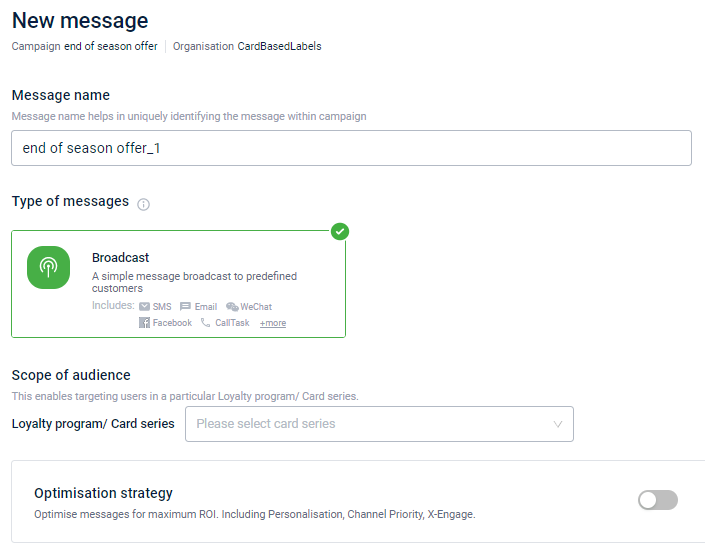
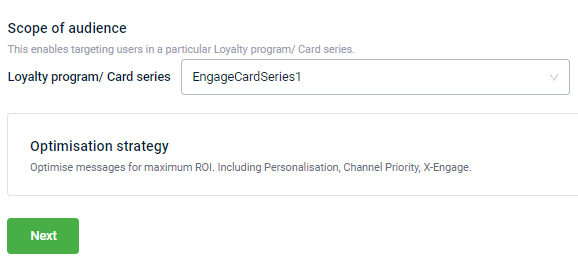
- In the Loyalty program/Card series, choose the loyalty program or card series for which you want to create the message. The selected scope is applied to the audience and content of the message.
Note
- This option is available only for MLP-enabled orgs.
- To enable message personalization, enable the Optimization Strategy toggle button

- Personalization: Select this option to allow personalize your message based on the product, region, and time. A single message can have different content for different audiences based on all the above categories.
- Channel priority: This option allows reaching customers through different channels based on their availability without the need for creating multiple messages or campaigns. This helps in effectively minimizing the cost of communication and maximizing the probability of conversion by prioritizing channels that can give higher ROI.
For example, you can contact the audience on WeChat and SMS. If customers are not reachable on SMS, contact through email, and so on. - X-Engage: X-Engage campaigns enable Orgs to engage with their customers through multiple channels, including all direct channels like SMS, Email, Mobile Push; and ads. channels like Facebook, Instagram, Google, and Youtube. For details, see X-Engage.
Add audience
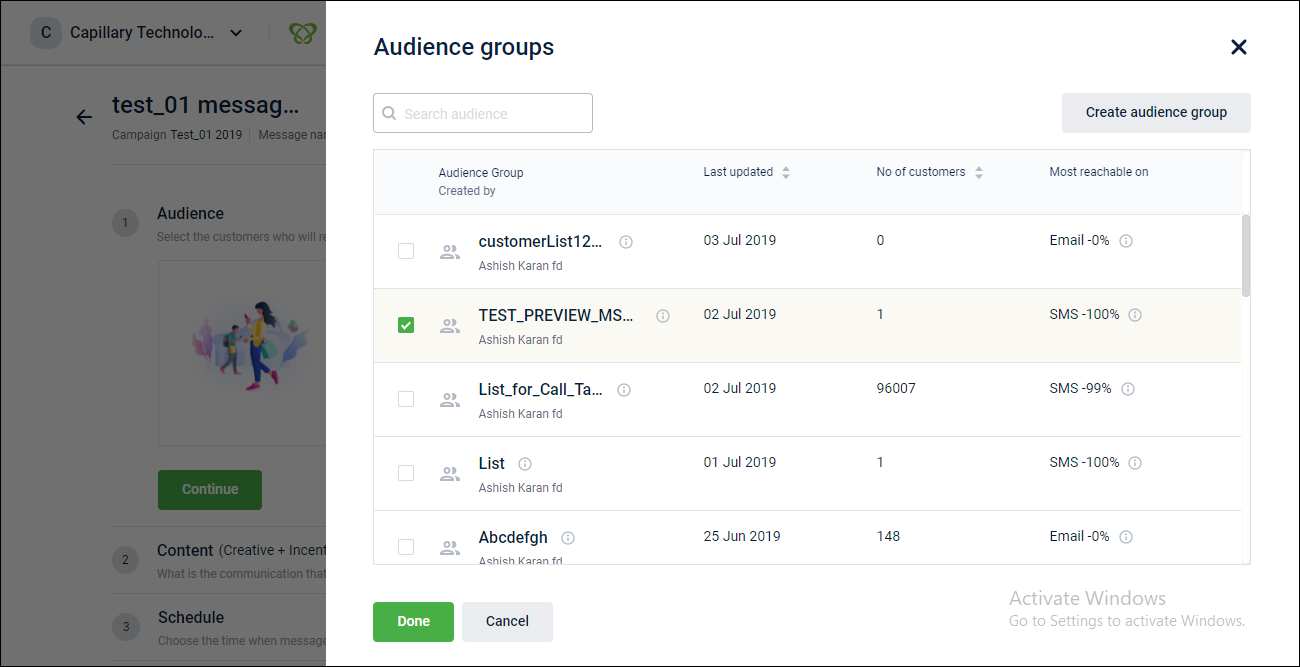
The Audience is the recipient of your campaign message. You can create an audience group either by uploading the audience data or by filtering the parameters. The scope you select while creating the campaign auto-applies to the audience filters.
To add an audience group to a campaign message, follow these steps.
- Click Add audience group > Create audience group.
- In Name, enter the name of the new audience group.
- In the Loyalty program/Card series, choose the scope of the audience from the list of loyalty programs or card series. You will see this option only for MLP-enabled orgs.
Note
- The scope selected while creating a new message is auto-applied to the filters.
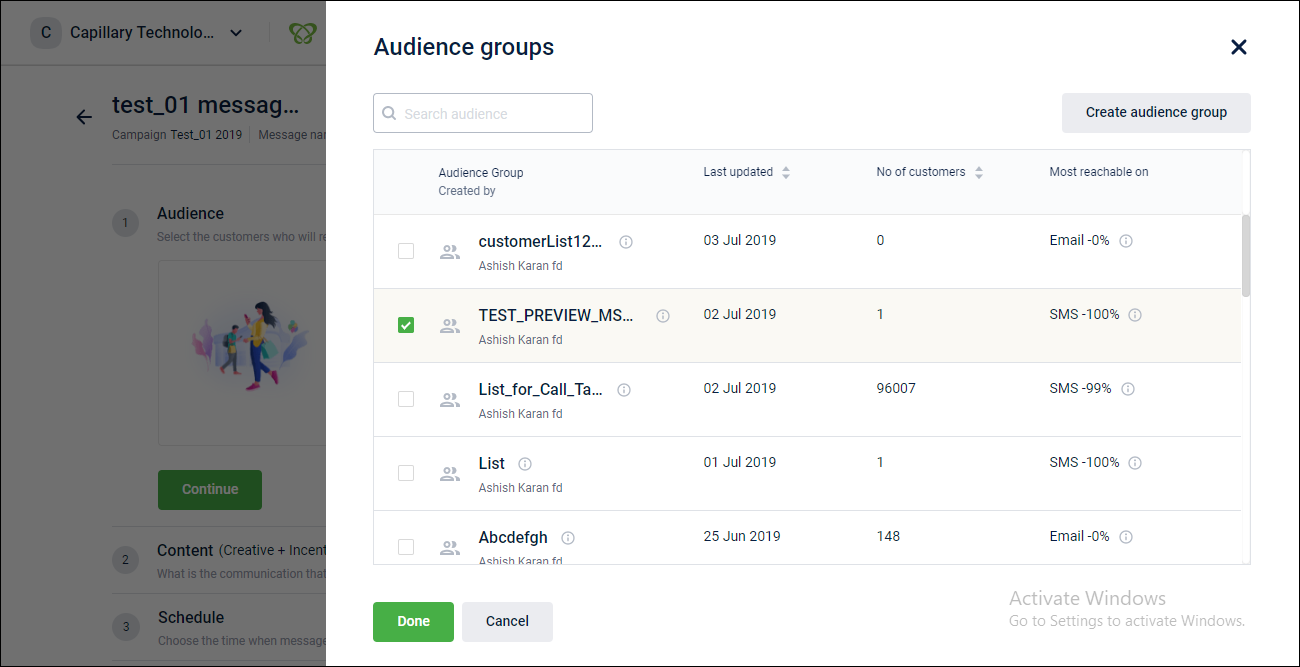
- Click Continue.
Note
- To exclude an audience group from the selected audience, enable the Exclude audiences option using the toggle button. Click +Add audience group and create or select an audience group. The selected audience will be excluded from the campaign.
- To create a new audience group using filters, see Create audience group using filters.
- To create a new audience group by uploading CSV, see Create audience group by uploading CSV.
Add Creative (campaign message)
When the loyalty program or card series is selected while creating a campaign, the labels related to the loyalty program or card series will include values pertaining to the selected program. Creative is the campaign message content. You can create multiple creatives in a campaign.
The scope is applicable for the labels from the categories of customer, card series and points expiry, and slab expiry.
Note
This is not applicable for the MLP- disabled orgs.
- Click Add creative.

- Select a creative type: SMS, Email, Mpush or WhatsApp.

- Under the selected creative type, click Select on an existing message or click Create New to create a new message.
- Review the message content, and the message tags, and then click Done.
Note
Optout tag is compulsory to include in SMS content.
Unsubscribe tag is compulsory to include in the email content.
To create SMS content, see Create SMS content.
To create email content, see Create email content.
To create mobile push content, see Create mobile Push content.
To create line content, see Create line content.
To create Viber content, see Create Viber content.
To create WhatsApp content, see Create WhatsApp content.
Add Incentive (campaign offer/points strategy)
The incentive is the campaign offer or points strategy. This tab lets you add coupons and points to a campaign message. If you have selected, campaign personalization, refer to Content personalization for Creative.
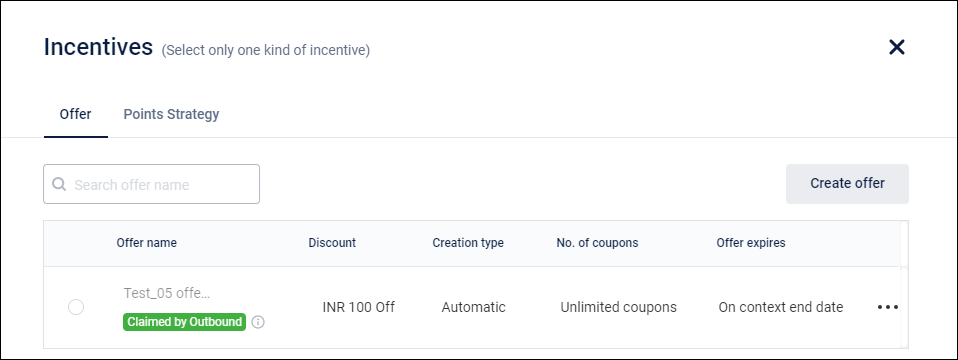
- Click +Add incentive.
- Select an incentive type: Offer, Points Strategy.
- Under the offer tab, select an existing offer or create a new offer, and then click Claim.
- Under the points strategy tab, select a points allocation method and expiry, and then click Done.
Note
- To create a new offer, see Create new offer section.
- To know more about the Points strategy, see Points strategy.
Schedule date and time
The schedule is a message delivery time frame. The schedule also includes repetitive and periodic delivery of campaign messages.

- Delivery schedule: The message will be delivered based on the selected schedule.
- Delivery Settings: The delivery setting allows you to set sender id, enable POC, and use a tiny URL.
Note
- To know more about each delivery schedule, see the Message delivery schedule.
- To know more about delivery settings, see Delivery settings.
Send for approval
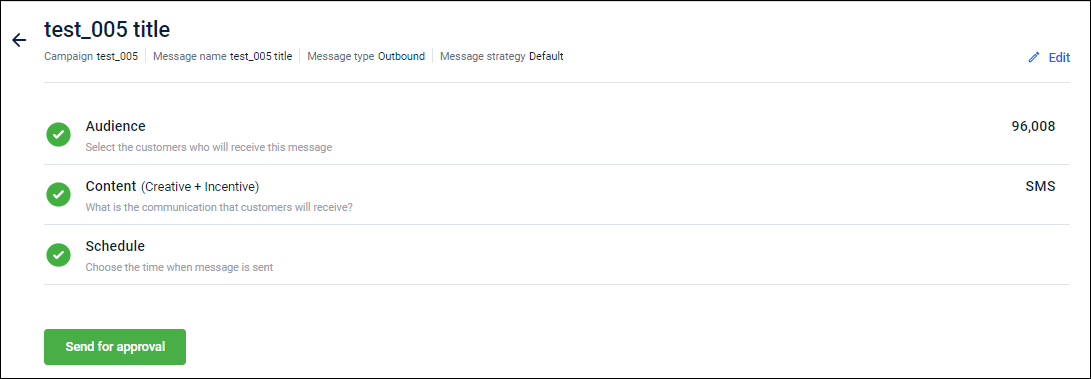
Review all the message information, and then click Send for approval. The created message will be displayed under the campaign on the campaign dashboard page, with Awaiting approval status.
Note
- To approve a campaign, see Approve message section.
- To reject a campaign, see the Reject message section.
Updated 7 days ago
