
Configure Email Settings
Configure domain gateway and sender details
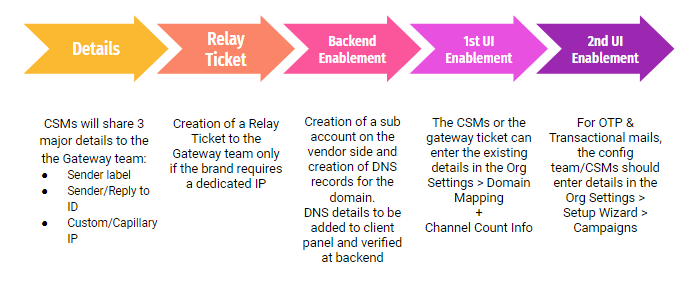
To configure the domain gateway and sender details, create a ticket to the Capillary Gateway team. Provide the following information:
- Custom/Capillary IP: The IP address used for sending emails can be either a Custom IP (dedicated to the brand) or Capillary's IP.
- Well-established brands generally use a custom IP address.
- Brands new in their journey typically use the Capillary IP address to avoid sending emails to the Spam mail section.
- This choice is based on IP ranking, which is determined by email providers such as Gmail and Yahoo based on authenticity.
- If a client opts for a Custom IP, a relay ticket is generated to the gateways team. The Gateway team follows a specific convention for naming these domains, typically involving Intouch (our system) and Send Grid(vendor).
- A sub-account needs to be created on the vendor side.
- DNS records for the domains must be created.
- DNS details are to be added to the client panel and verified at the backend.
- The CSMs or the gateway team can enter the existing domain details in Org Settings > Domain Mapping+Channel Count Info.

Configure sender details
Define the following details in the JIRA ticket to proceed with the onboarding process:
- Sender label/sender name: This represents the name by which clients wish to send emails to their customers. For example, "Capillary tech." might use "Capillary academy programs" as their sender label when communicating about those programs.
- Sender/Reply to ID: The Sender ID refers to the email ID that the organization wants to use to send the email (e.g., "[email protected]").
The organization has two options for replies:
- They can either choose the sender ID itself to receive reply mail.
- They can use a separate "Reply to" Email ID for receiving replies.
- For OTP (One-Time Password) & Transactional mails, enter details in Org Settings > Setup Wizard > Campaigns.
Whitelist Emails
In scenarios where emails experience soft or hard bounces, impacting delivery, it is necessary to whitelist such emails. These are emails that are unable to receive messages triggered from Capillary.
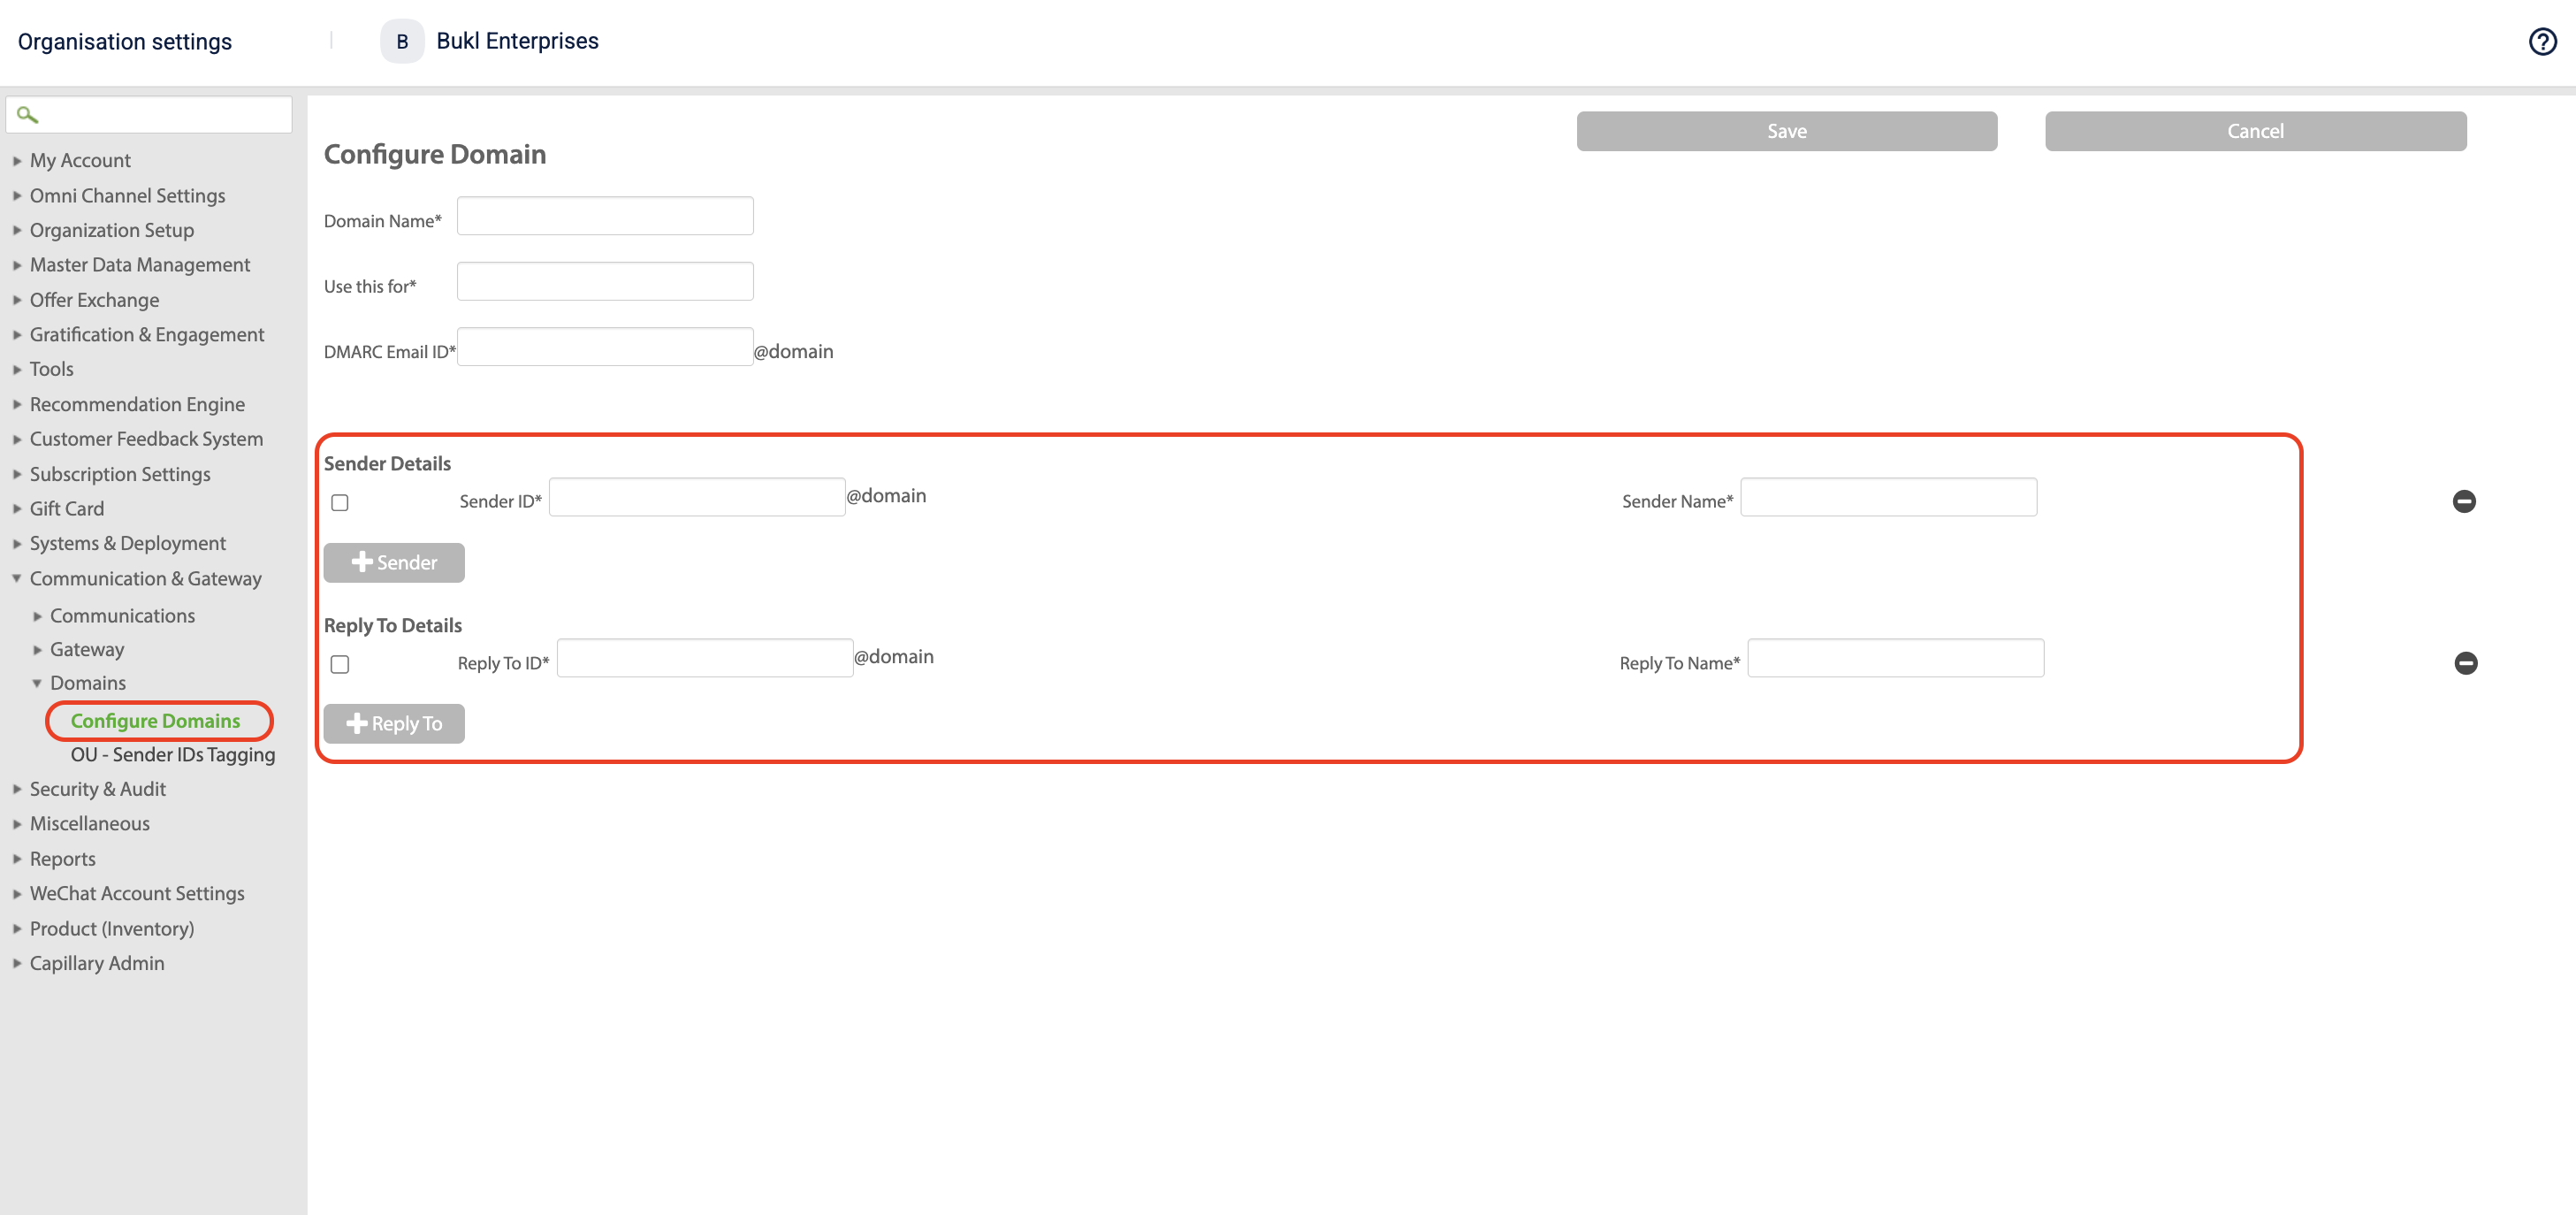
The process for whitelisting emails on the Capillary Engage+ setting is as follows:
- On Engage+ select settings.

- Navigate to Email whitelisting.
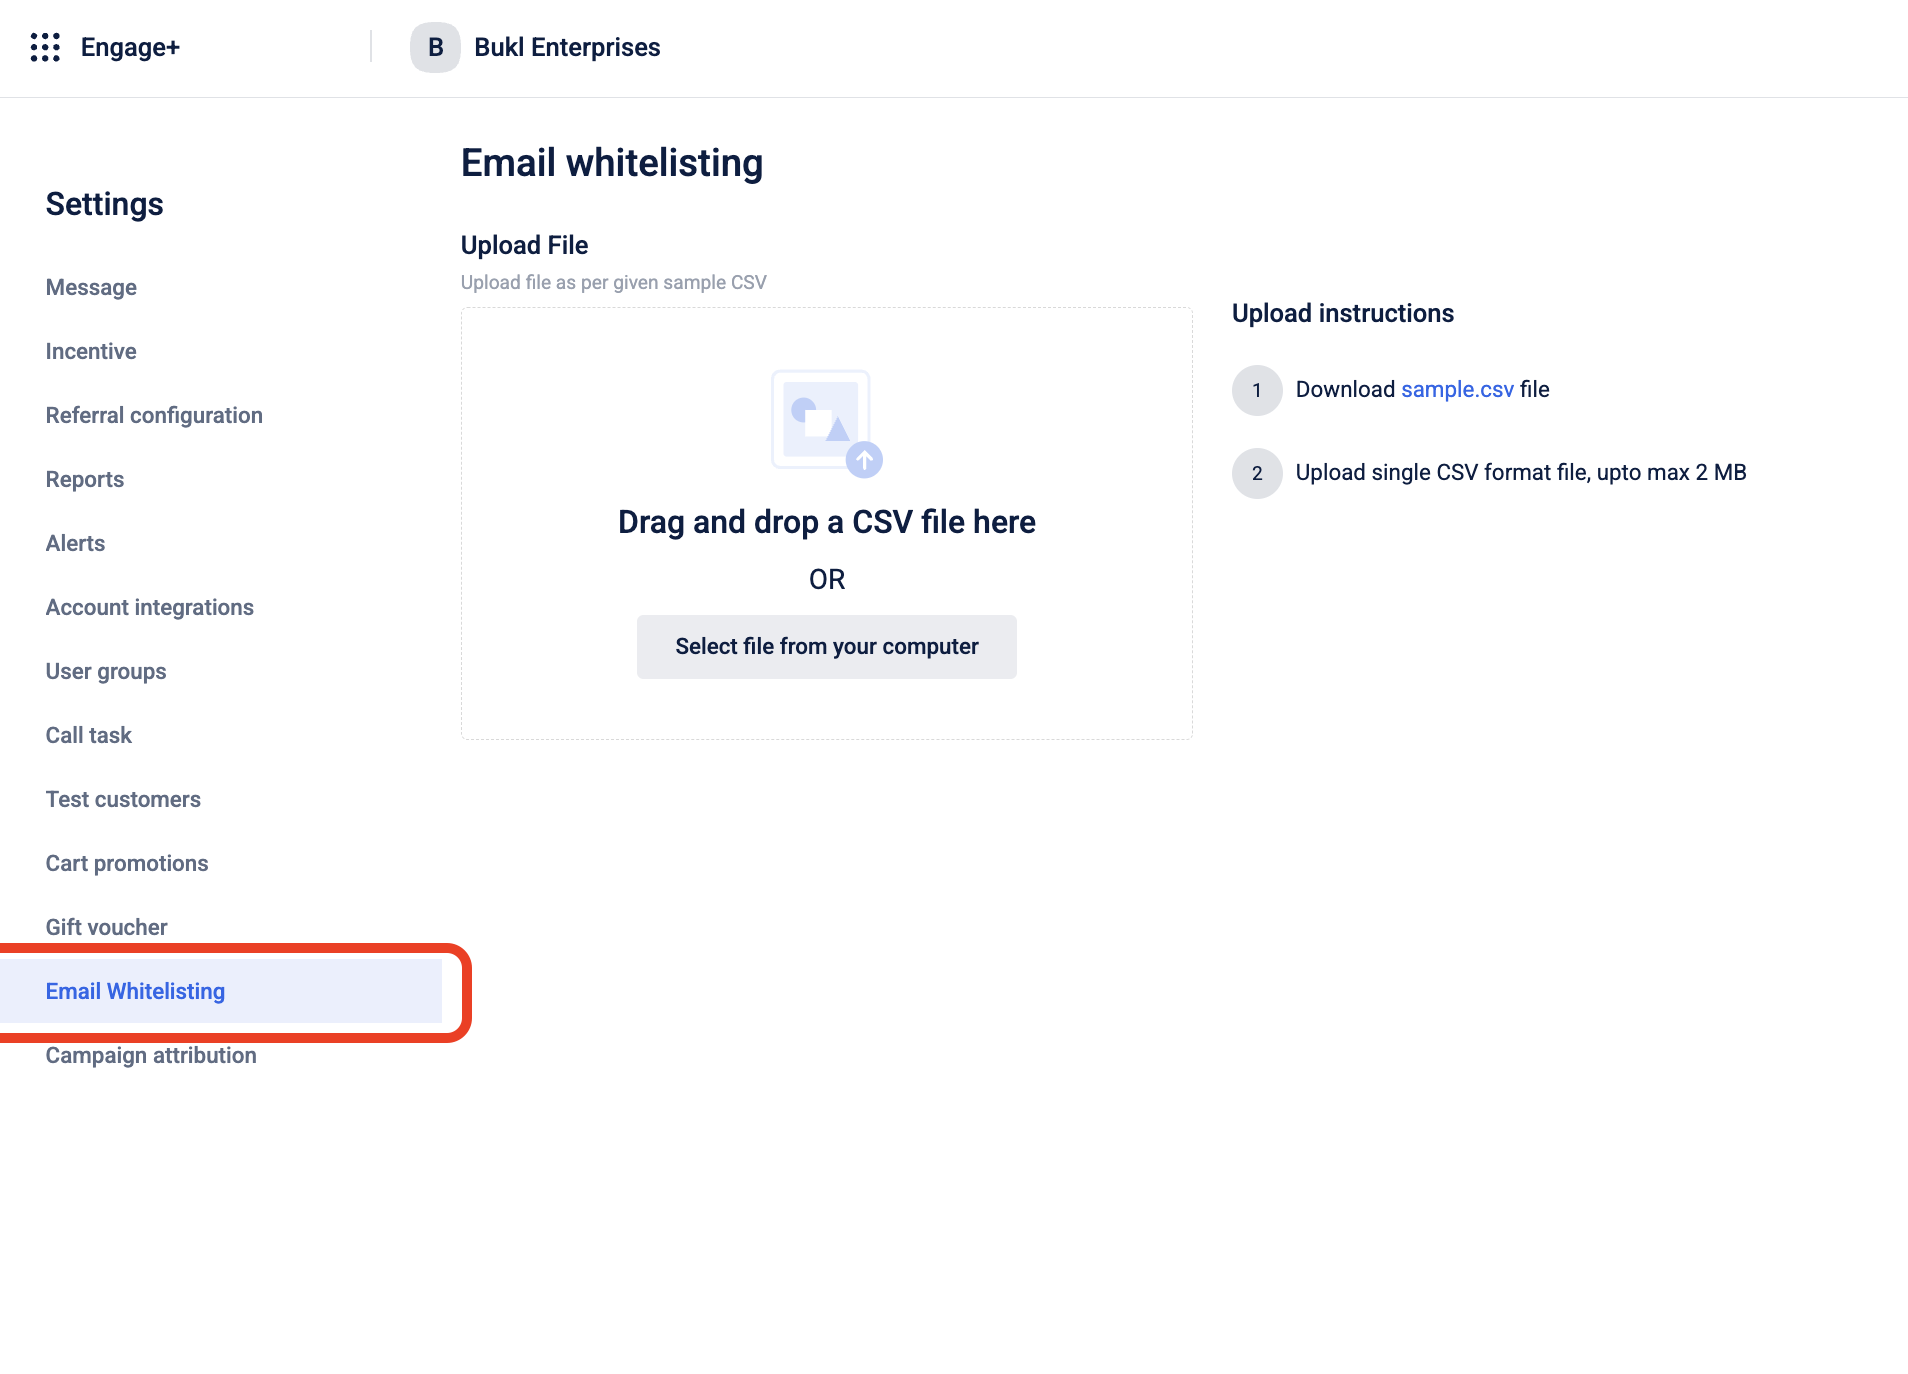
- Upload the CSV file containing the emails to be whitelisted.
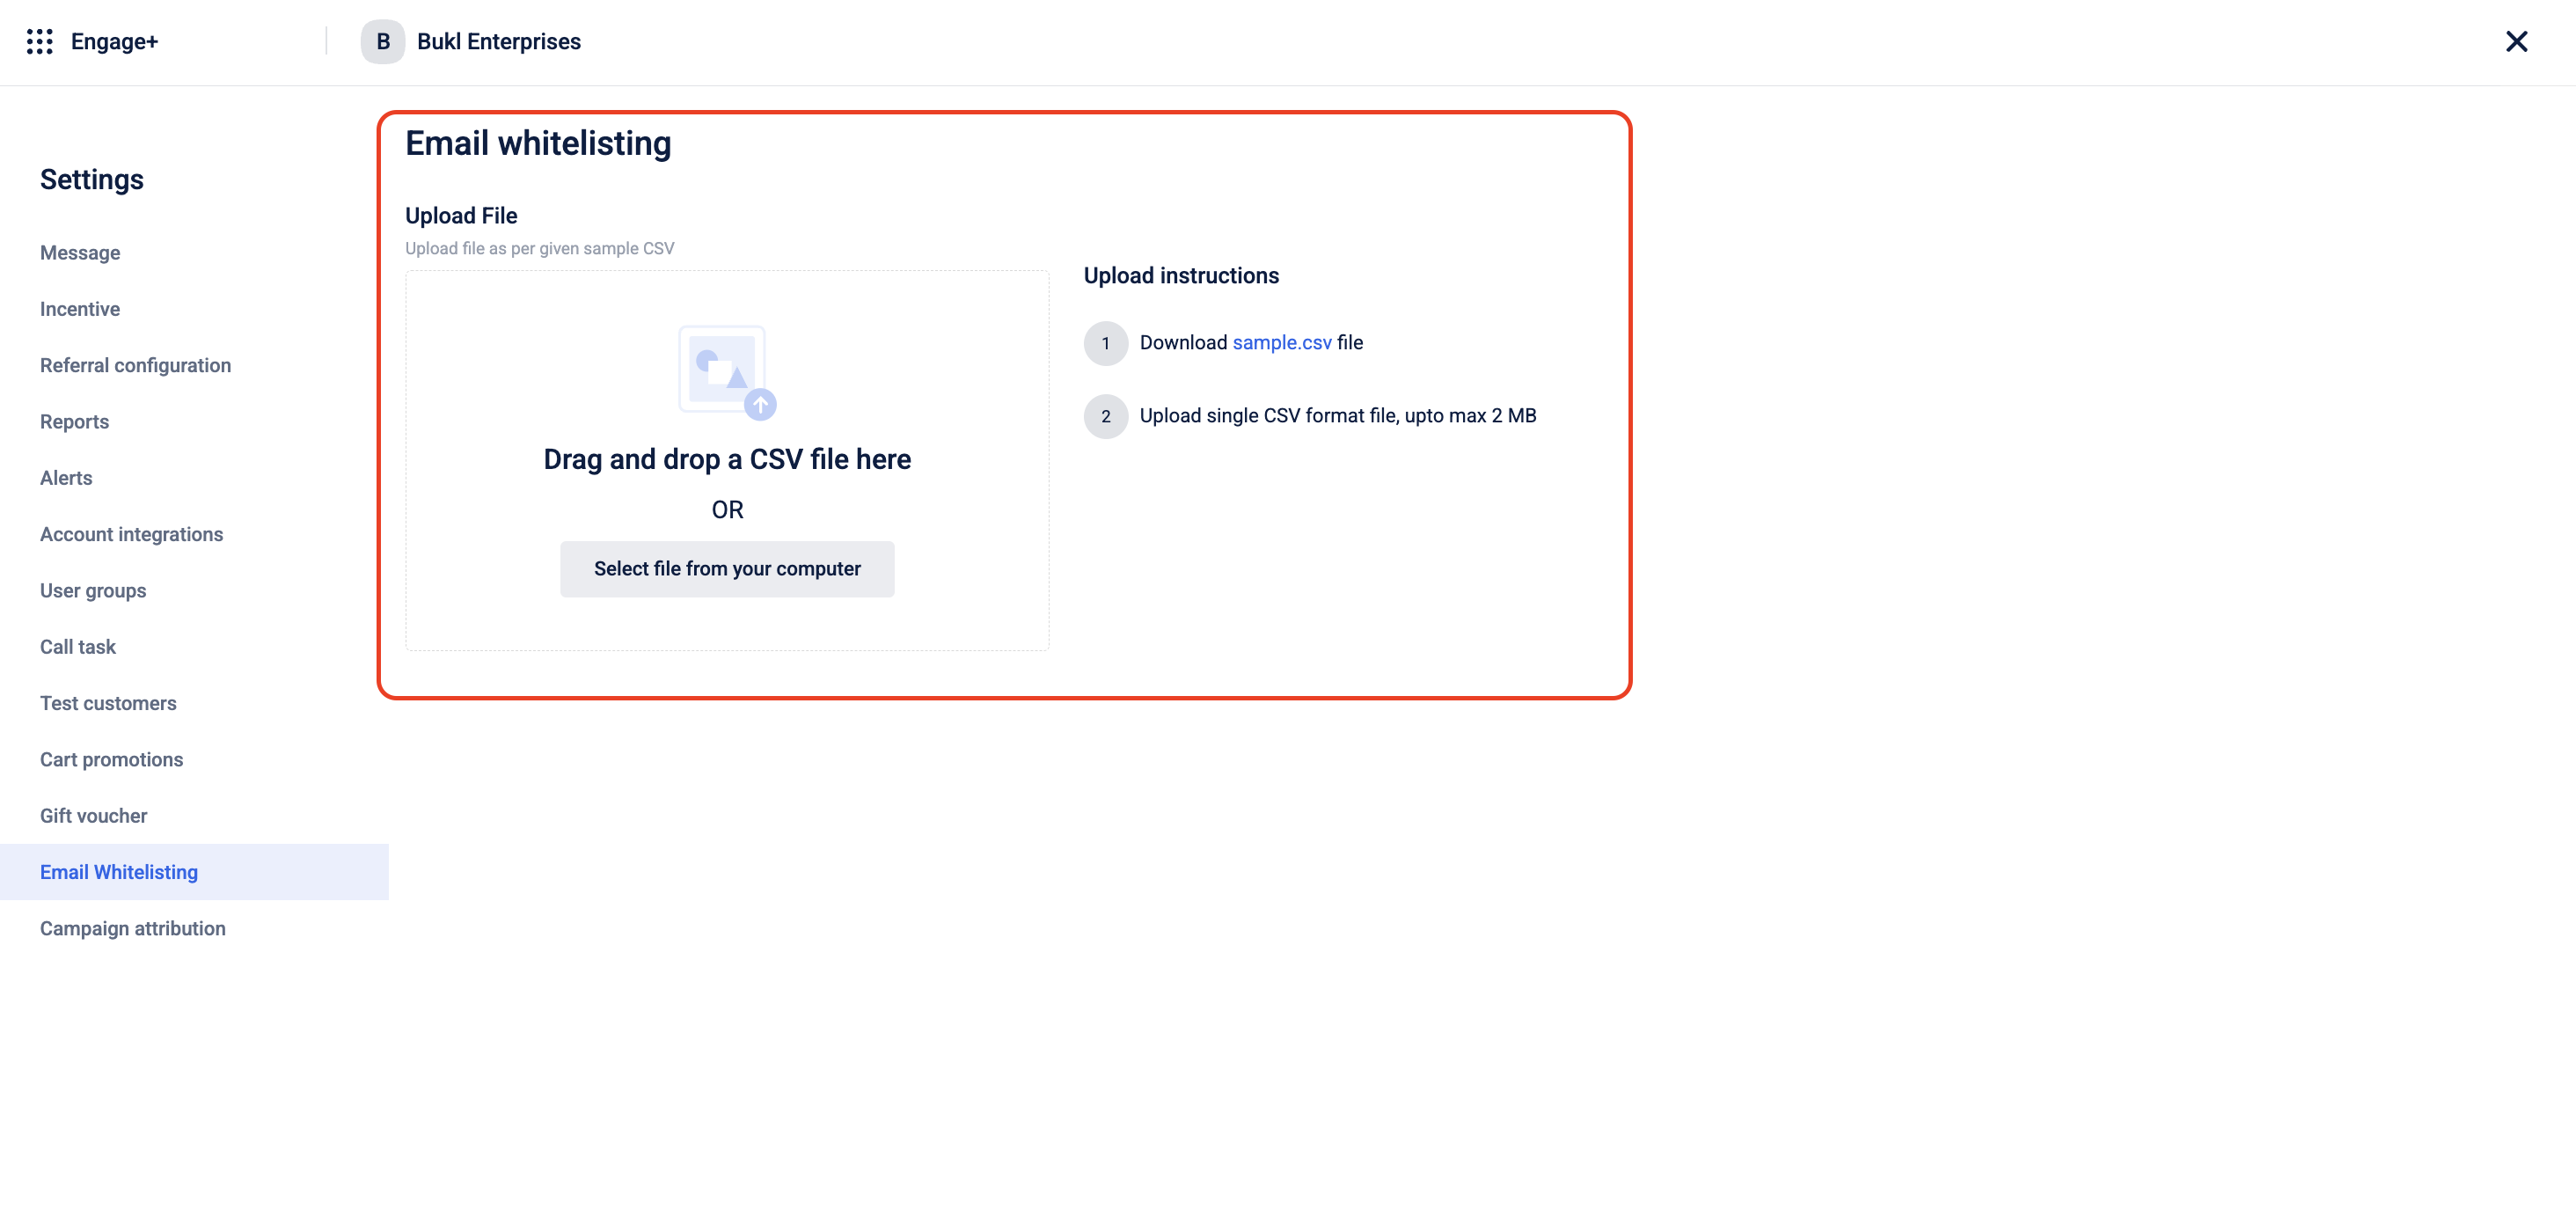
- Click Done.
The system now provides the option to upload and whitelist a larger quantity of emails at once.
Email Notifications to POCs
- Send to POCs: POCs (Point of Contacts) are the brand user group. Enable this option to send messages to the POCs as well. The messages will be sent based on the delivery schedule
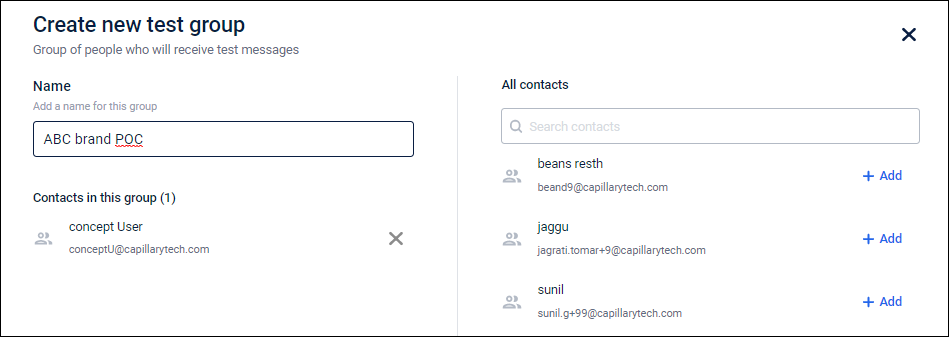
To create a POCs group, follow these steps.
- On the dashboard, click the settings icon.
- Click Users groups, and then click Create user group.
- In Name, enter a group name for POCs users.
- In the All contacts tab, select users by clicking +Add next to it, and then click Done.
Subscription Update Language
You can control the language of the success or failure messages sent when a user clicks the Subscribe or Unsubscribe link in an email by using the CONF_ORG_SUBSCRIPTION_UPDATE_MSG config. For details, refer to Subscription Message Language Configuration
Updated about 5 hours ago