
Application Development Process
After installing the necessary dependencies, navigate to your project directory and begin the React application development process. You can use a code editor like Visual Studio Code (VS Code) for writing and managing code.
The development process also includes the following steps:
- Generating a React Container
- State Transitions with React Router
- Setting Up Internationalization
- Pushing Data to Google Tag Manager
- Starting and Building your Application
- Hosting a Vulcan Application
Note:All Vulcan components are based on Ant Design. Refer to the Ant Design component library when developing react components using the Vulcan component library.
Generating a React Container
This process sets up a container and generates the entire component with index, messages, styles, reducer, saga, actions and constants files, allowing you to develop and add UI elements easily. This eliminates the need to refer to or copy other boilerplate components.
To generate a react component, follow these steps:
- Navigate to your project directory and open a terminal interface.
- Run the following command:
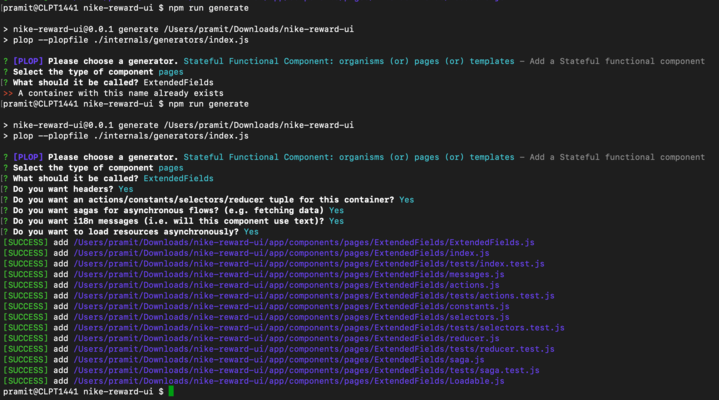
npm run generate - Choose the generator type from the options.
Note:The types of generators available are:
Generator Description Example Organisms Larger UI components composed of smaller components. A header with a search bar and navigation links Pages Containers that include various elements and other components to form a complete page. A dashboard page containing charts, tables, and other widgets. Templates Predefined layouts or structures with placeholders for content. An analytics dashboard template with sections for graphs, user metrics, and recent activities.
- Provide a name for the container.
- Follow the setup procedure to complete the generation process.
State Transitions with React Router
Page containers created while generating a react container have a history property that uses React Router to do state transitions.
Sample:history.push('/state/route');
Note:Only use the part of the path that defines the state. For example, just /contact, and not the full URL like https://example.com/contact.
Refer to routes.js for the state route paths.
Setting Up Internationalization During Development
The setup and files required for internationalization are created while generating a React container. To manually set up internationalization in the development process, follow these steps:
- Import
injectIntlfrom thereact-intlpackage using the following:import { injectIntl } from 'react-intl';
- Use injectIntl to wrap the component while exporting it, using the following:
(withRouter(injectIntl(clearDataOnUnmount(Listing))));
- Create the
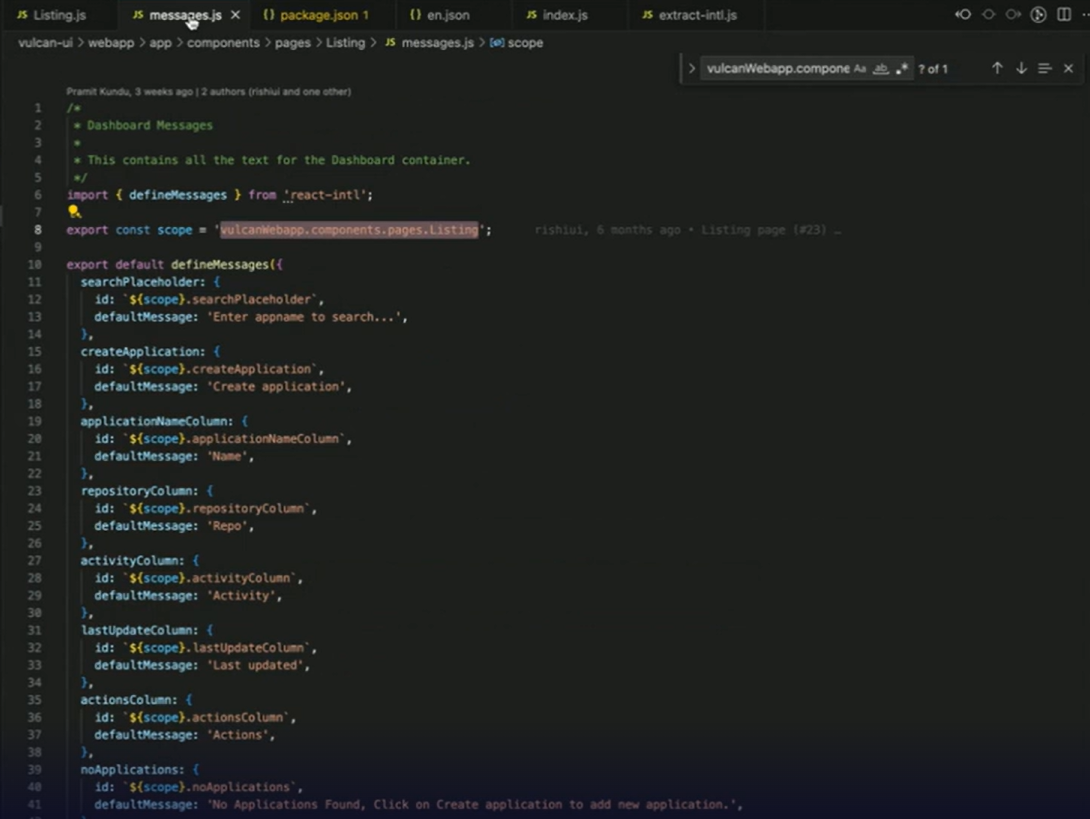
messages.jsfile in your project folder for defining the messages.
Sample:
import { defineMessages } from 'react-intl';
export const scope = 'vulcanWebapp.components.pages.Listing';
export default defineMessages({
       searchPlaceholder: {
         id: `${scope}.searchPlaceholder`,
         defaultMessage: 'Enter appname to search...',
        },
     });
Note:Once the messages.js file has been created, you can use these in your component by using:
<p>{formatMessage(messages.searchPlaceholder)}</p>
- Extract
formatMessageusing the following lines:
const { intl } = props;
const { formatMessage } = intl;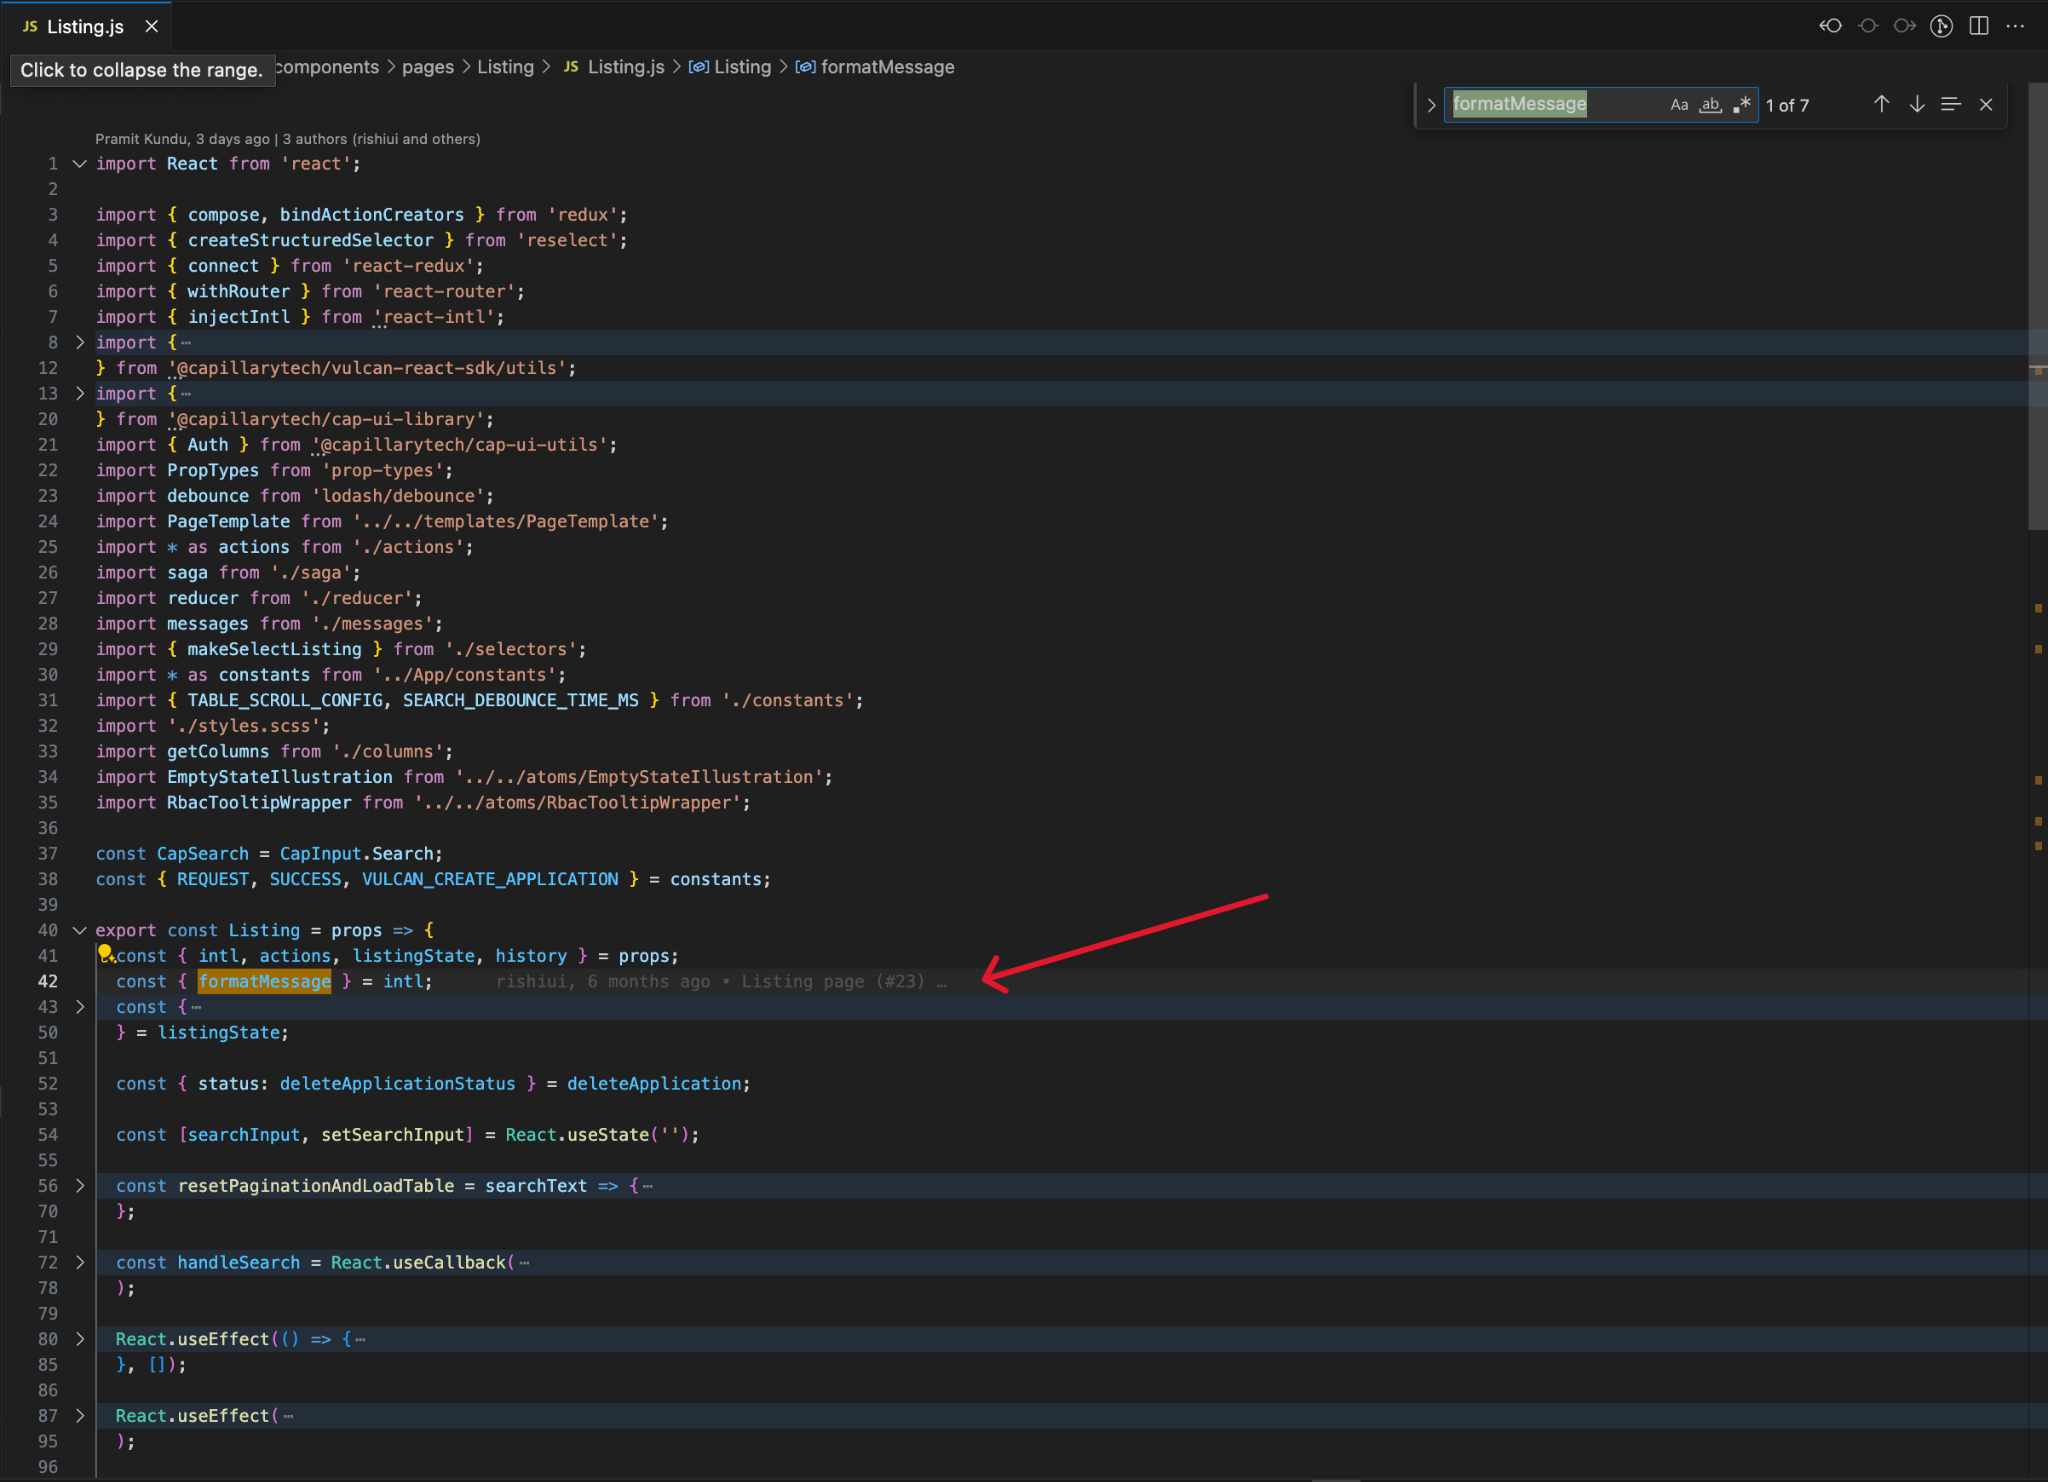
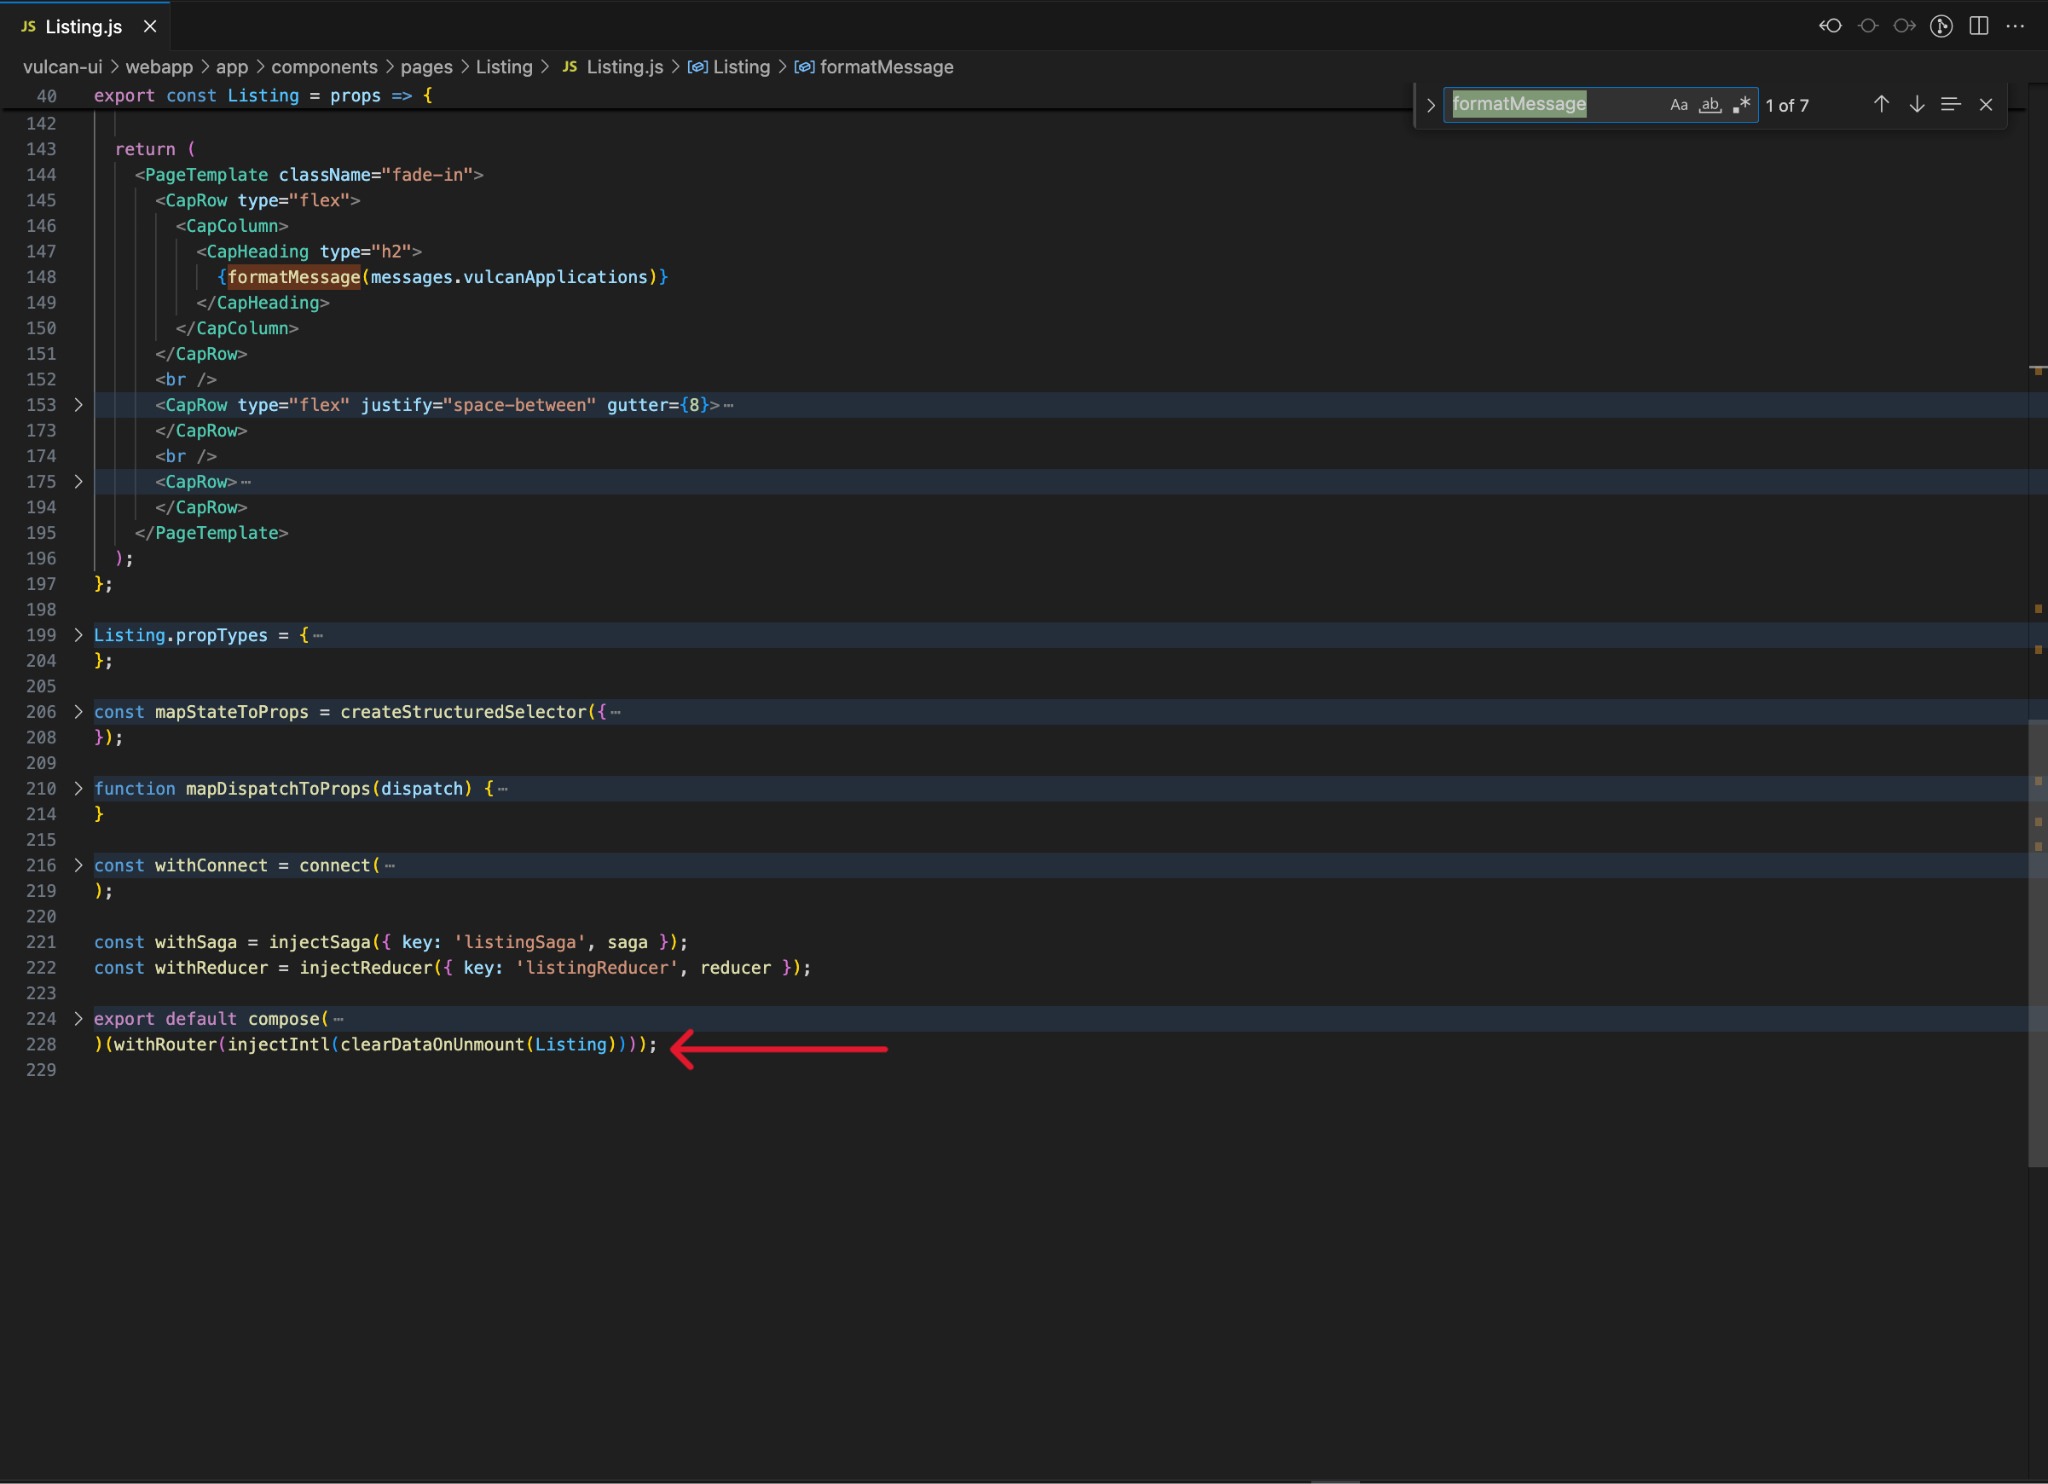
- From the
intlprops use theformatMessagemethod that includes the ID and default message of the object.
For example:
{formatMessage(messages.vulcanApplications)}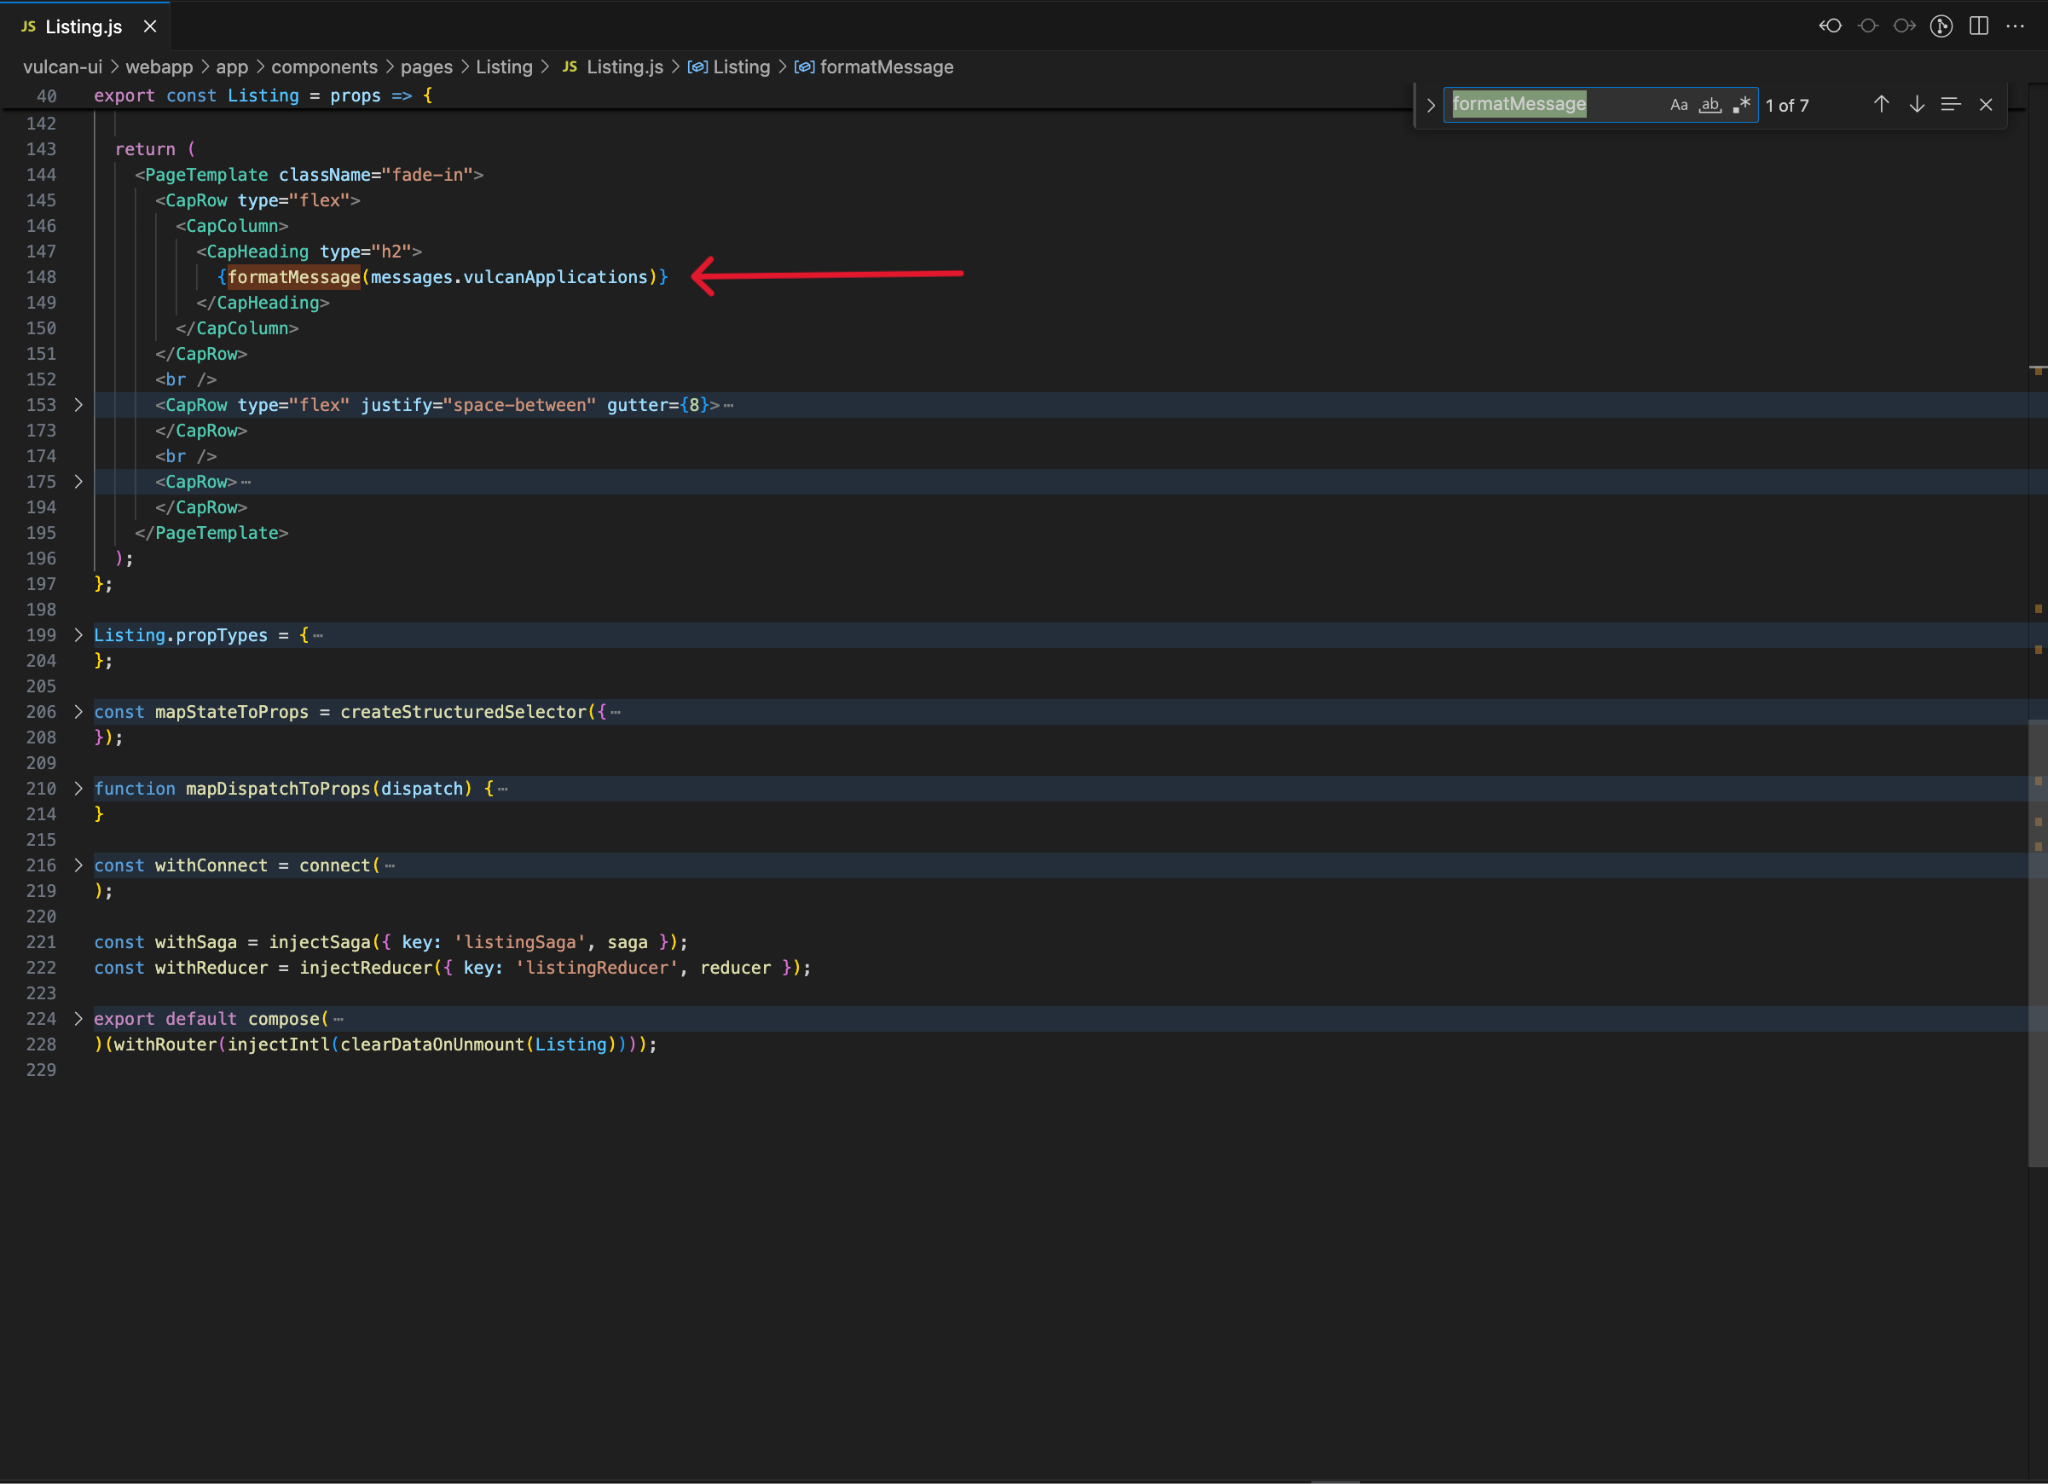
- Once the development process is completed, run the following command:
npm run extract-int
Note:This will scan all the files named
messages.jsand extract all strings, pasting them in theen.jsonfile.
Sample:
{
	'vulcanWebapp.components.pages.Listing.searchPlaceholder': 'Enter appname to search.'
}
Importing to Locize
Once you have generated the language .json file, you will need to import it to Locize.
Refer to the Locize documentation to import the file into your project.
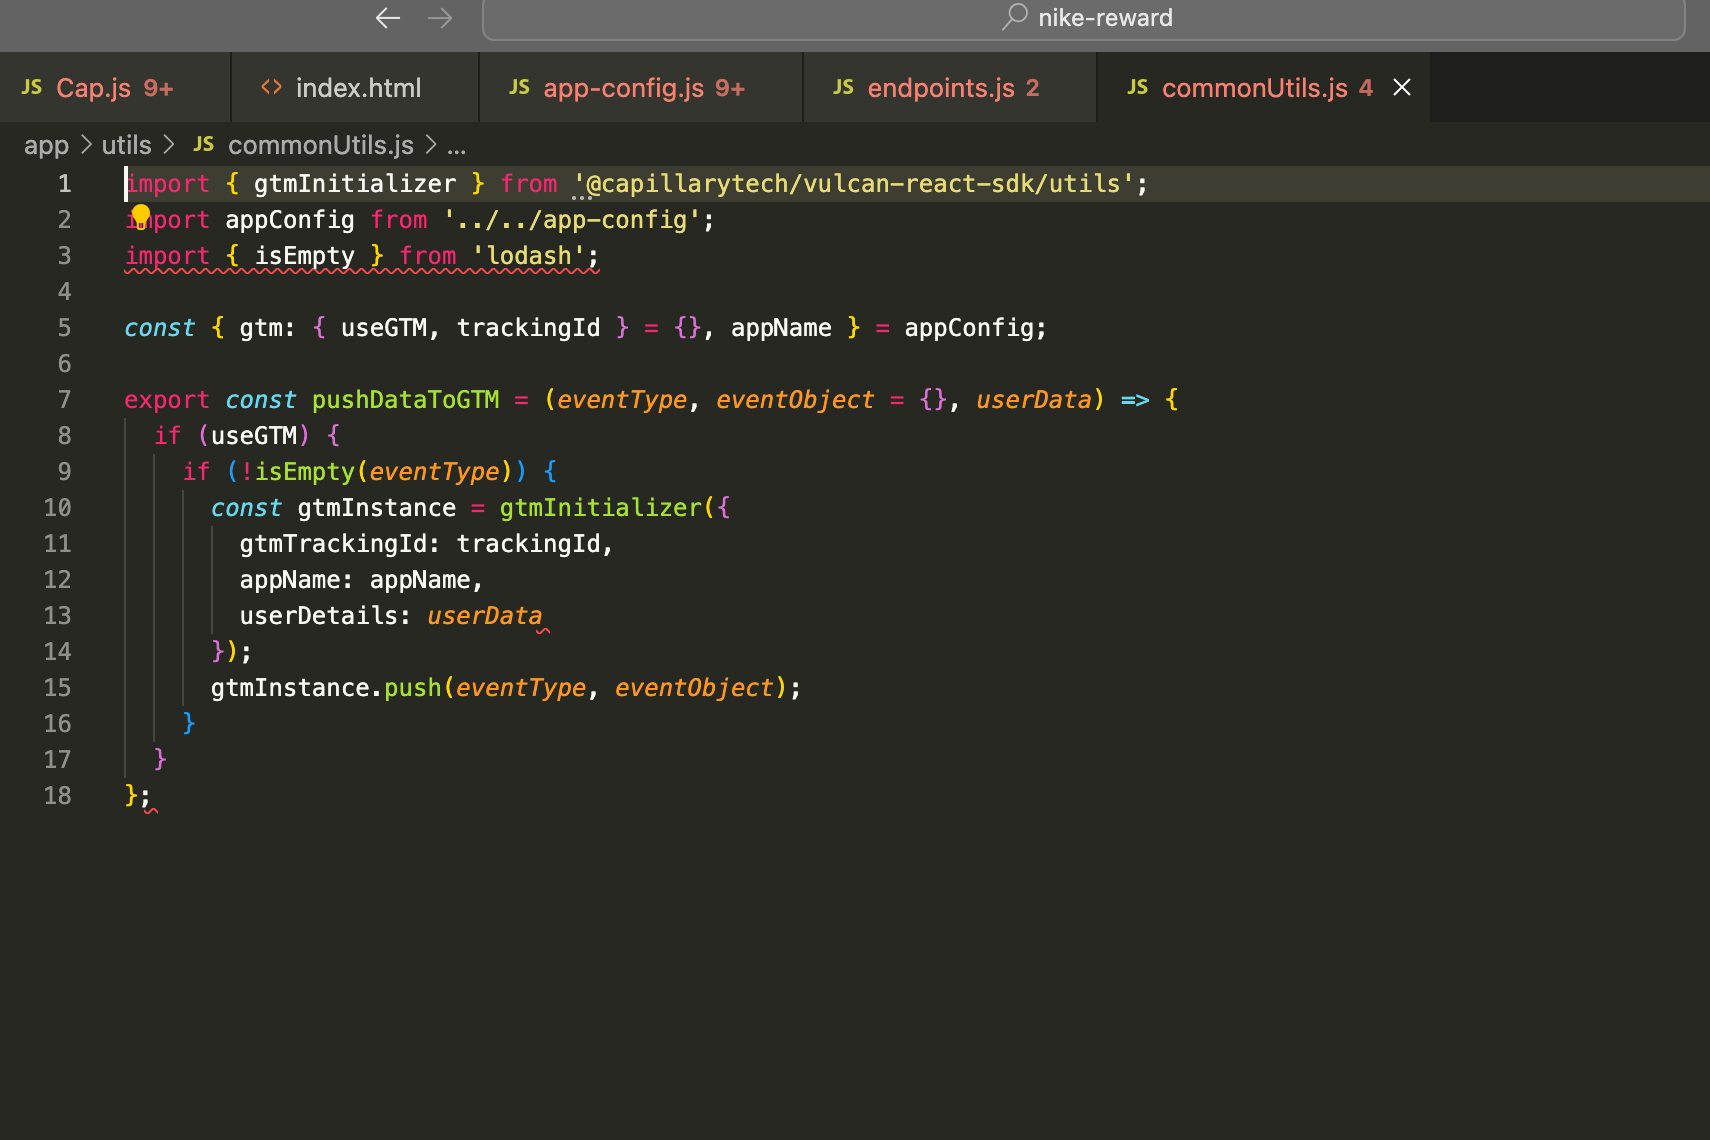
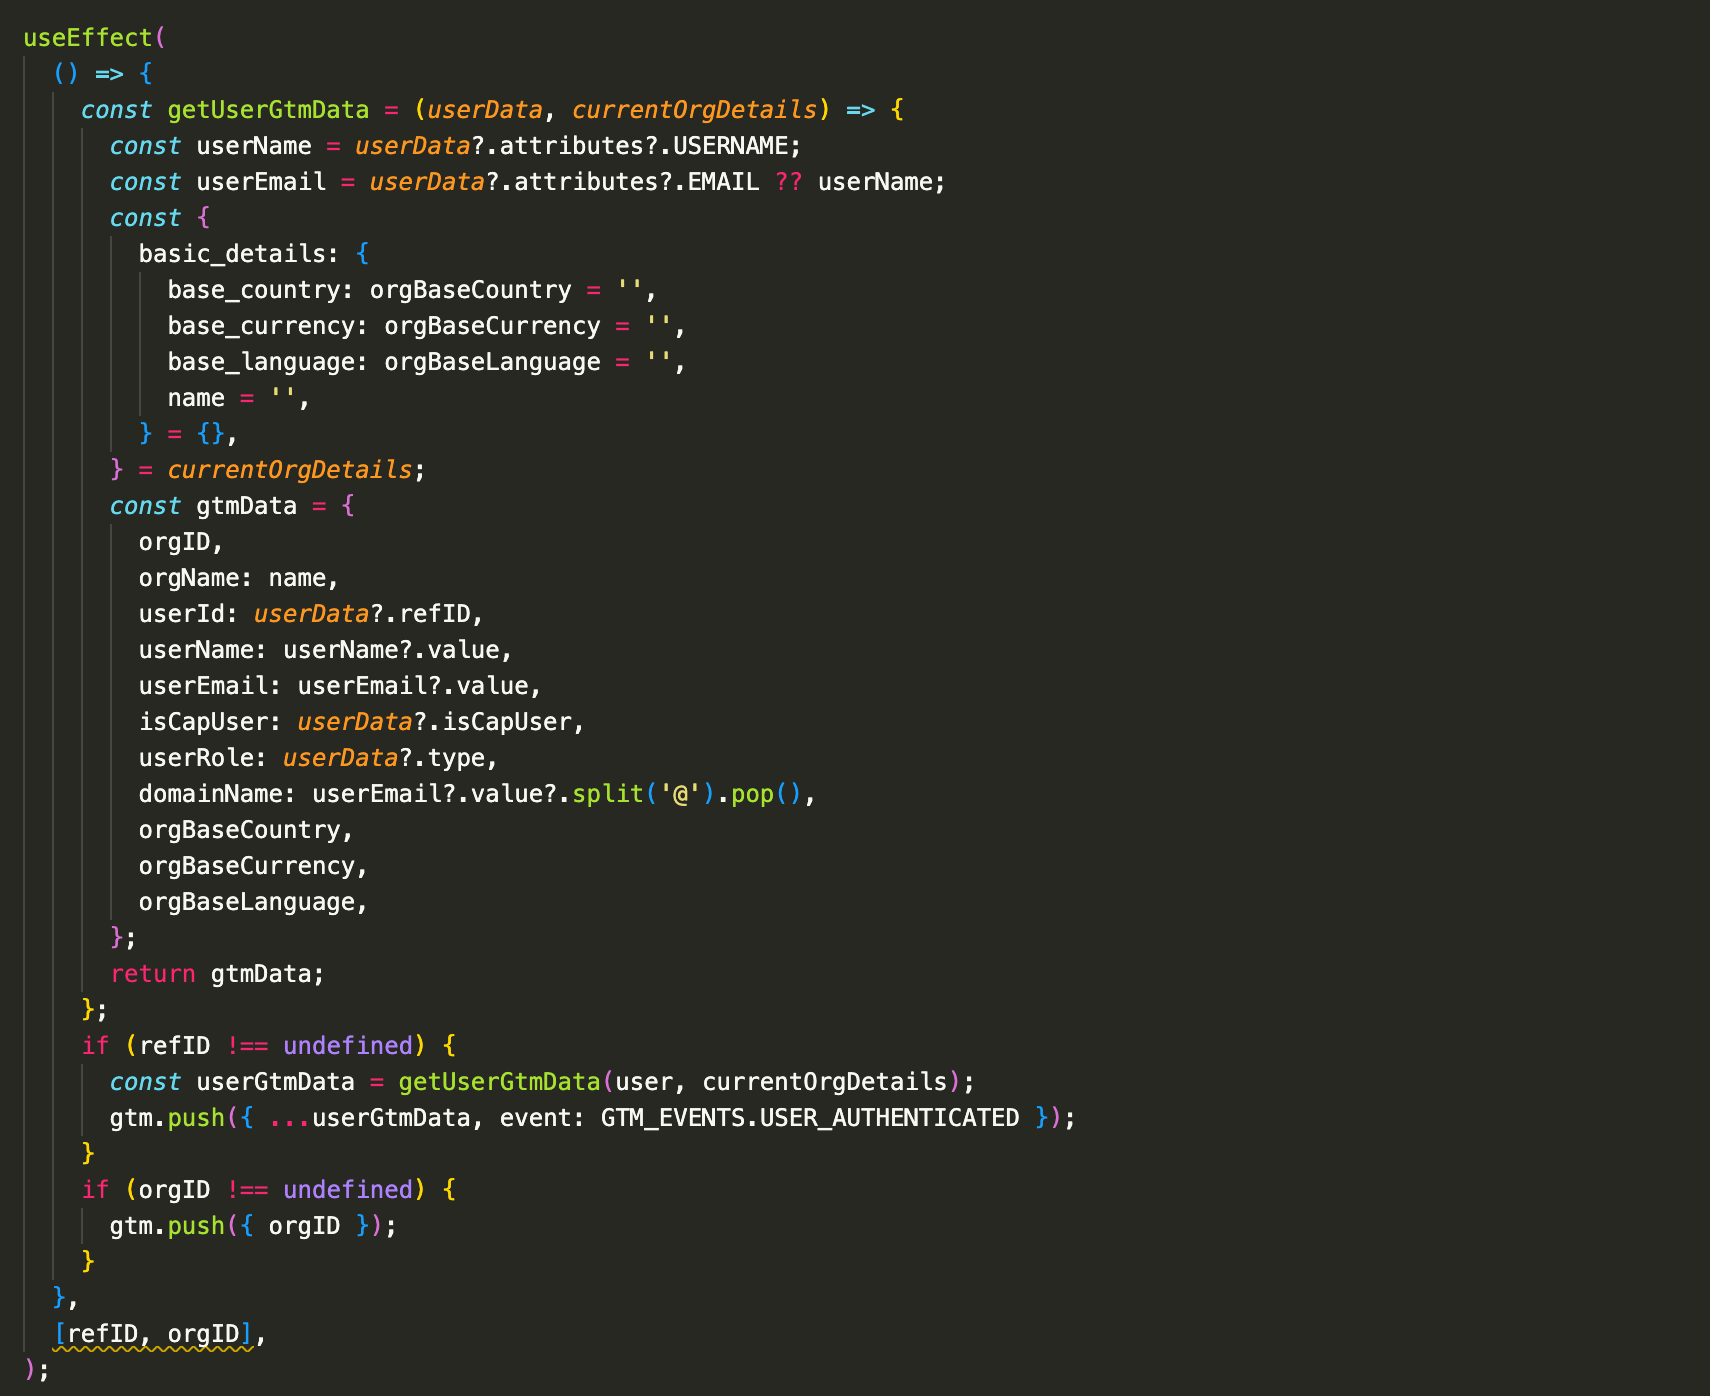
Pushing Data to Google Tag Manager
To facilitate FullStory integration, you can push data to Google Tag Manager (GTM).
- During the project setup, specify the Google Analytics (GA) and GTM tracking IDs when prompted by the CLI tool. This will configure the tracking IDs in the code.
- Use the pushDataToGTM utility or window.dataLayer.push (Ex. Cap.js) to push events with data to GTM.
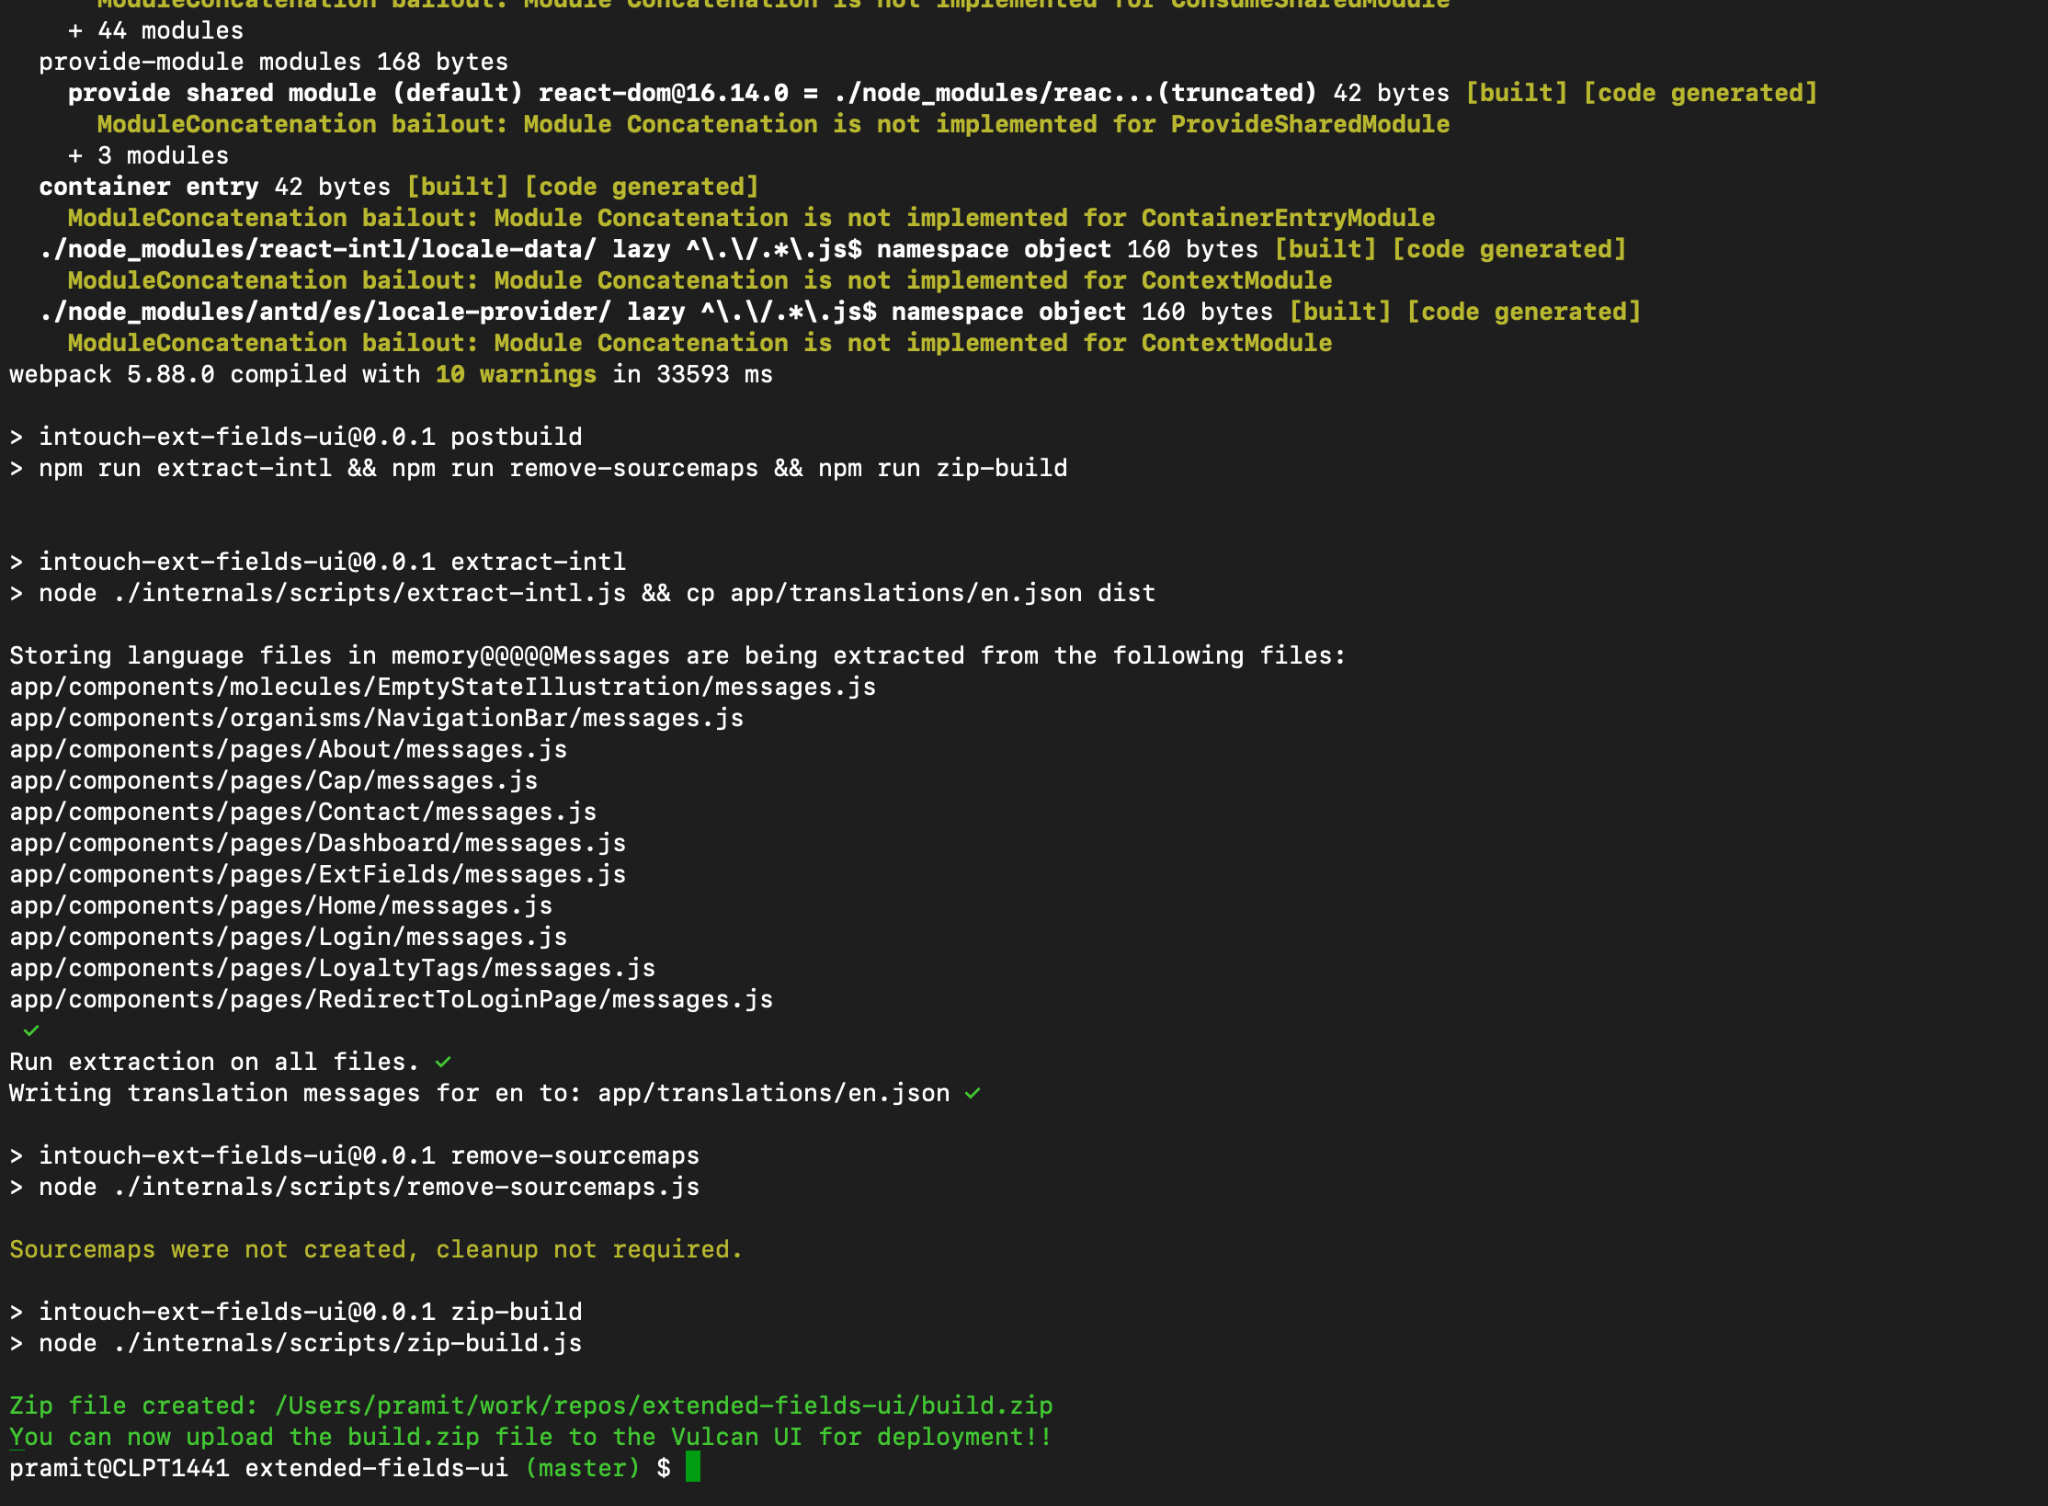
Starting and Building your Application
Once you have built the application you can test your application on localhost and build the application to be hosted on Vulcan.
To start or build the application, follow these steps:
- Navigate to your project directory and open a terminal interface.
- Run the following command to start the application on localhost:
npm run start 
- Run the following command to build the application for deployment and hosting:
npm run build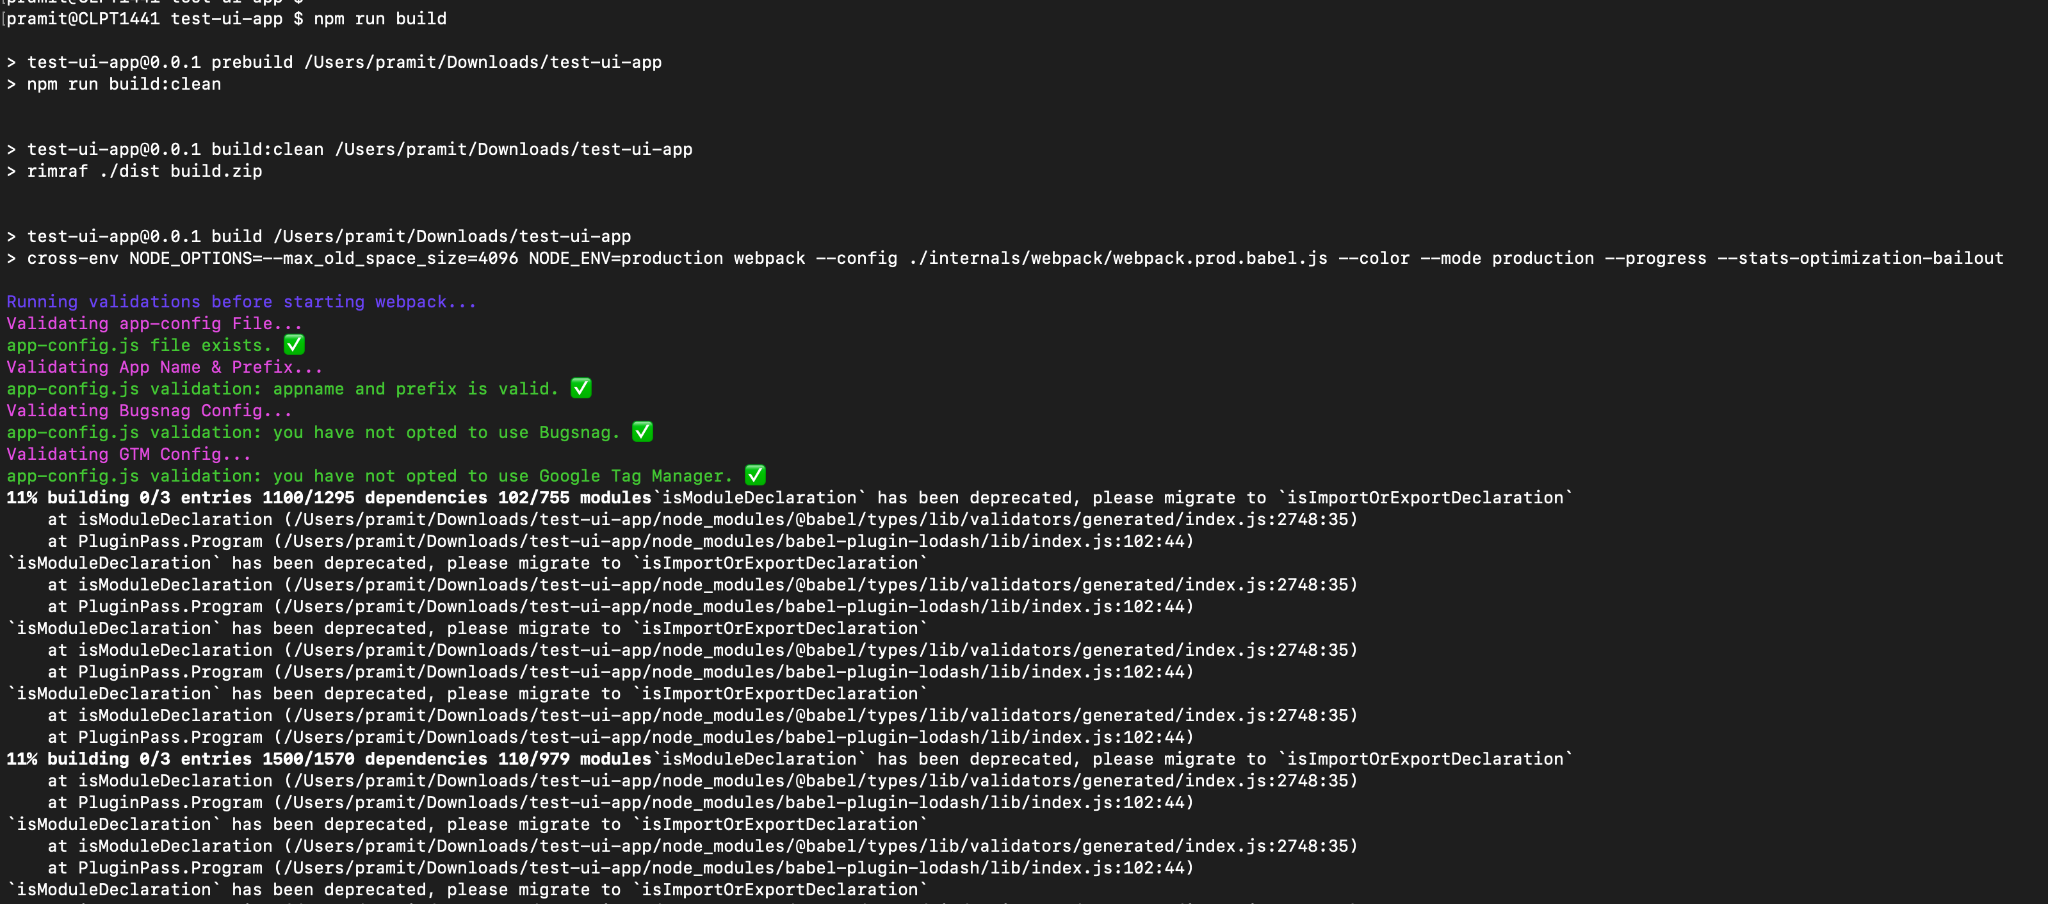
Note:Ensure the Vulcan app is created on the Vulcan UI platform first. The app ID is needed to validate:
- Authentication (vulcan_endpoint)
- Translation messages (if enabled during setup) (vulcan_endpoint)
- Intouch API calls (vulcan_endpoint)
- XAJA API calls (vulcan_endpoint)
- API extension calls (vulcan_endpoint)
- CRM node API calls (arya_endpoint)
Note:The
endpoints.jsfile is used to manage all API calls from the UI. Configure the local UI to point to any production environment for local testing (absoluteURLs).Third-party APIs can be called by defining them as endpoints. These need to be defined as full URLs in absoulteURLs and partialURLs. All endpoints are referenced in the
api.jsfile, where functions are defined to handle API calls for sagas.Export components via the
mfe-exposed-components.jsfile for embedding in other UIs, such as Member Care.
Hosting a Vulcan App
After completing application development and the build, the next steps involve uploading the build file to the Vulcan UI.
To upload and host your app, follow these steps:
- Access the Vulcan UI.
- Click the application to open the page.
- Click Deployments and then Upload Build.
- Enter the build description for your application.
- Click Select zip and choose the
build.zipfile from your device.
- Click Confirm upload to upload the build and save changes.
- After the upload is complete, enable UAT by clicking on the three dots under the Actions tab.
- Identify the UAT URL generated and displayed in the Application Details section. This URL can be used for testing.
Note:Refer to the tutorial video for more information.
- After testing the application, enable Prod by clicking on the three dots under the Actions tab.
- Identify the Prod URL generated and displayed in the Application Details section. This URL can be used to access your application after testing.
Embedding Vulcan Application to Member Care UI
Embedding a Vulcan application into the native Member Care UI is currently unsupported and requires assistance from the Capillary UI team.
Developers can integrate Vulcan applications on the new Member Care, built on the Vulcan Framework, and embed the Vulcan Application within it.
Refer to the documentation on Customizing the Member Care UI.
Note:For reference on embedding the application into Member Care, watch the demo video.
To embed a Vulcan app natively on Member Care, raise a JIRA request to the Capillary UI team.
Updating the Vulcan SDK
Updating the Vulcan SDK is essential to ensure that your project benefits from the latest features, performance enhancements, and bug fixes.
To update the Vulcan SDK follow these steps:
- Open the project folder on your local machine and navigate to the
package.jsonfile in the root folder. - Update the version number under the
@capillarytech/vulcan-react-sdkpackage. - Open a terminal in your project directory and run the following command:
npm install
The Vulcan SDK is now updated to the specified version.
Updated 13 days ago