
Configure blocks
This page provides you with information on configuring blocks in Connect+.
Connect+ has various blocks that are used to create a dataflow. The blocks in a dataflow is based on the selected templates and can differ from template to template.
Connect to source
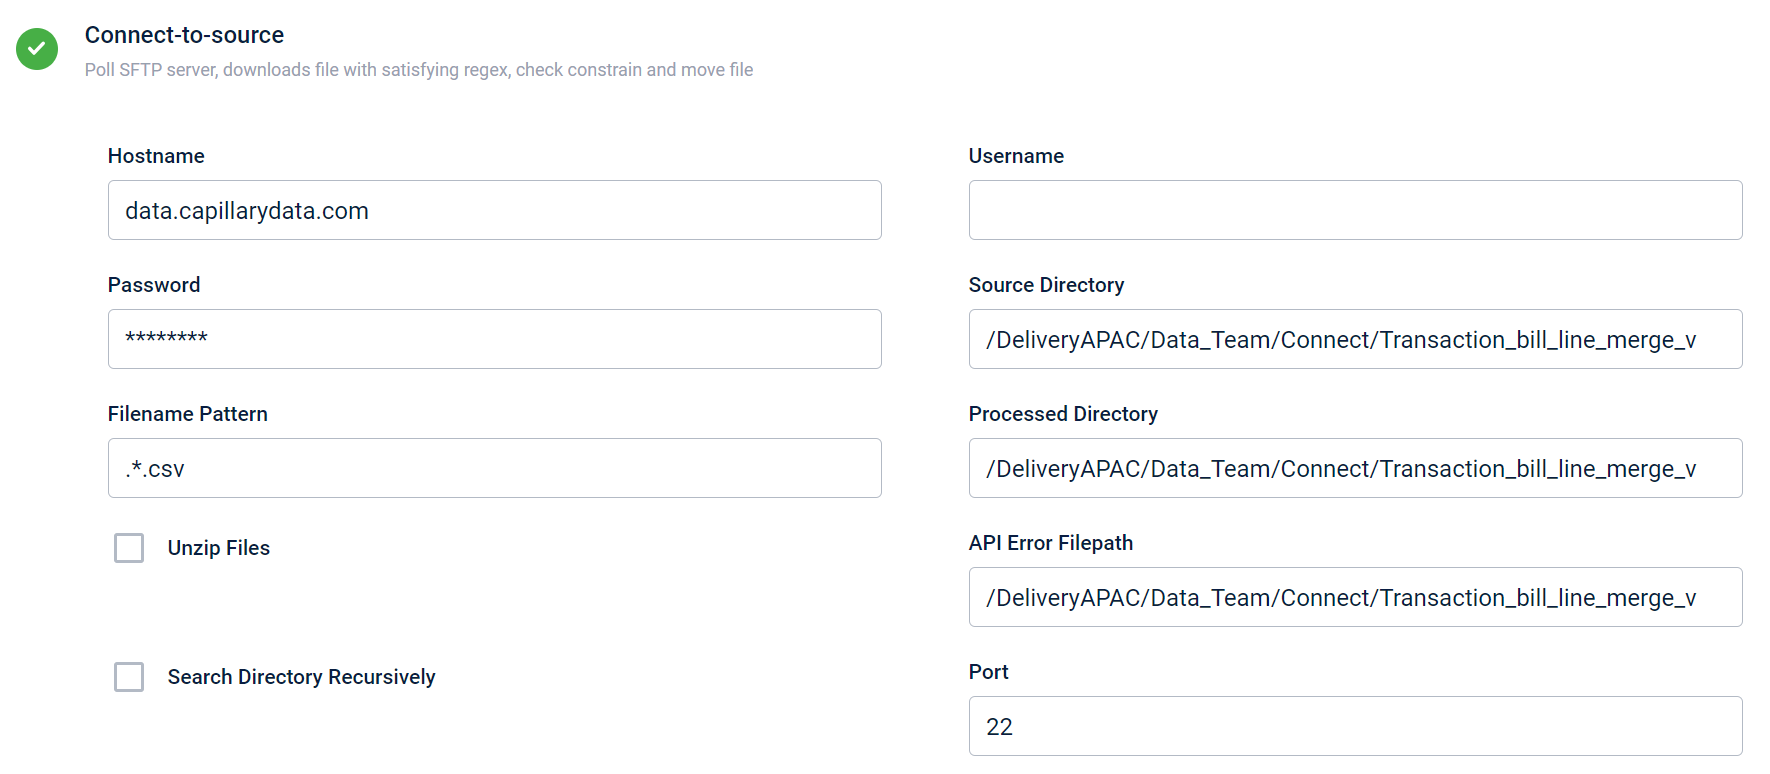
This block enables you to define the source location of the data that needs to be ingested. The connect to source block has the following fields:
| Field name | Description |
|---|---|
| Hostname | URL (address) of the SFTP/FTP server from where the source file is available. For example, data.capillarydata.com. |
| Username and Password | Credentials to access this SFTP/FTP server. This provides read/write access to the files on the server. |
| Source Directory | The directory path where the source file is available. For example, /APAC2Cluster/A_Connect Connect+ usually supports any text-based files with a delimiter, irrespective of extensions such as .txt, .csv, or .dat etc. In addition, _.ok _file format is also supported. |
| Filename Pattern | File names in the regex pattern. If you give a filename pattern file.*.csv _, the application takes any file that starts with the file name file. |
| Processed Directory | The path to save the file to be processed. The data to process is captured from the processed file. Processing is the operation of formatting and transforming a given set of data to extract the required information in the appropriate format. For example, /APAC2Cluster/Process. |
| Unzip Files | If the files are compressed, you can select this option to unzip the file and then select the original file. |
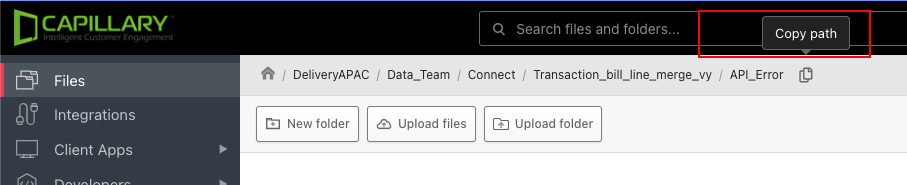
| API Error Filepath | The SFTP/FTP path where you want to save the API error file. This file includes the error details that occurred during the API calls. This field is applicable only where API endpoints are required (data ingestion). |
| Search Directory Recursively | Select the checkbox, if you want to search for the defined file anywhere in the root folder of the server. For example, if there are multiple folders inside /APAC2-Cluster/A_Connect, it looks for files matching the pattern inside each folder under /APAC2-Cluster/A_Connect. |
| Port | The source SFTP/FTP port number. Generally, 22 for SFTP and 21 for FTP. |
Defining column header for transform block
Adding the source file header information using a CSV file with the column headers
You can upload a CSV file with the column headers of the input source file or define the header data manually. This makes mapping fields in the transformation block easier. Once you define the headings, they are automatically retrieved in the transformation blocks and you can map corresponding API fields against them.
The maximum supported size of a CSV file is 5 MB. After attaching the file, you can delete it by clicking the delete icon. The system allows you to switch to the manual option after uploading the CSV file. The values should be separated by a comma only. Watch the video below for more information on uploading the CSV file and mapping the API fields.
Adding the header information manually
If you do not have a CSV file for mapping, you can select the Add manually option and define the headings manually in the transformation block. Watch the video below for more information.
If you do not have a CSV file for mapping and the source file is headerless you can select the Add manually option and choose the Is file headerless option to define the headings separated by a comma. These headings are retrieved in the Transformation block, and you can also add additional headings in the transformation block itself. Watch the video below for more information.
Decrypt data
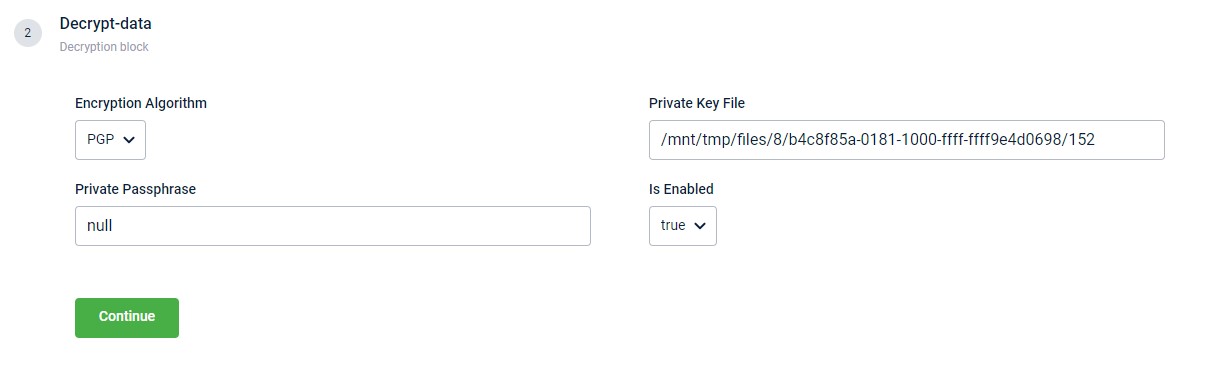
This block enables the descryption of an encrypted source file. It is an optional feature that can be enabled if the source file is encrypted. All the fields within this block become mandatory once you enable the Decrypt data action block. You can use the Is Enabled drop-down to control the activation of this block.
| Field name | Description |
|---|---|
| Encryption Algorithm | The algorithm that was used to encrypt the file. At present, only files encrypted using the PGP algorithm can be decrypted. Hence, by default, PGP encryption is always selected. |
| Private Key File | Private Key in the base64 encoded format. |
| Private Passphrase | The password that is required to unlock the private key. |
| Is Enabled | Enable or disable the decrypt function. |
Connect to destination
This block enables you to define the details of the v2 API that will be used for running the dataflow. The API details are auto-filled. You must enter the API client key and secret key to initiate the API.
The table contains the fields and their descriptions.
| Field name | Description |
|---|---|
| Client Key | Enter the API client key. For information on creating an API client key, refer to Creating API client key and secret. |
| Client Secret | Enter the API client secret. For information on creating an API client key, refer to Creating API client key and secret. |
| API EndPoint | API endpoint. For example, /v2/customers. This field is auto-filled. |
| API Base Url | API cluster URL of the org. For more information on cluster URLs, refer to documentation on host URLs. This field is auto-filled. |
| OAuth Base Url | Enter the URL entered for the API Base URL. This field is auto-filled. |
| API Method | API method. For example, POST. This field is auto-filled. |
| Bulk Support | Use the default value. |
| Request Split Path | Use the default value. |
| Response Split Path | Use the default value. |
| Recoverable Error Codes | Use the default value. |
| Parse Path Map | Use the default value. |
| Yielding Error Codes | Use the default value. |
| Max Retries | Use the default value. |
| Additional headers | Applicable only for certain templates. This enables the auto-approval for the request. For example, for issuing goodwill points or for tagging customers to an old transaction templates, this enables auto-approval for those requests. |
Error Handling
In case of any errors connecting to the destination URL, refer Troubleshooting guide.
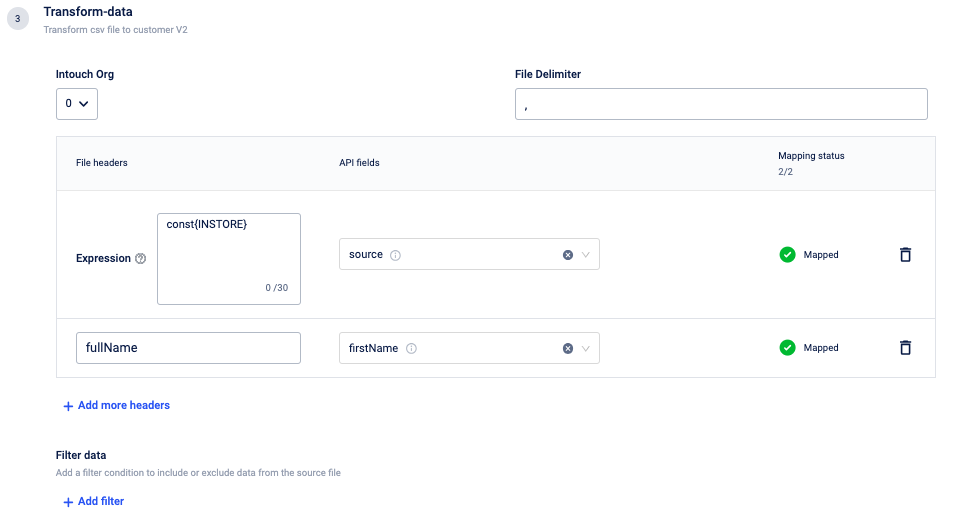
Transform data
Data transformation in Connect+ is the process of converting the ingested data to JSON format. To achieve this, you need to map the fields in the source files to the appropriate API fields in this block. This helps connect+ to convert the data to JSON, call the APIs successfully and upload the data. These fields in this Connect+ block are parameters of the JSON payload of the API associated with the template that you have selected for the dataflow.
Perform the following to map the fields:
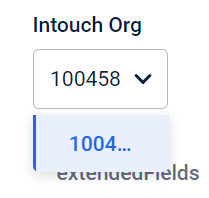
- If the workspace is linked to multiple orgs, select the org ID from the Intouch Org drop-down.
-
In the File Delimiter text box, enter the delimiter used to separate the headings in the source file. By default, the delimiter is set as a comma.
-
Map the API fields with the appropriate columns in the source file. To map, perform the following:
-
If the column header fields were not uploaded or defined, enter the column header name in the File header text box. This is the name of the column header in the source file that will have information for an API field. For example, a column named source can have values for the API field called source. You can also click on Add more headers and can add more headers or add headers using expression.
-
Select the API field name from the API fields drop-down that corresponds to the column header specified in the File header text box. The number of mandatory fields that need to be mapped is displayed next to the parent API field.
-
If required, in the Filter data text box, use expression language and add a filter condition to include or exclude data from the source file. Example: Consider a transaction dataflow that includes a Financial status header with values such as paid, refunded, or not paid. To exclusively process dataflow for transactions that are either paid or not paid, you can use the filter expression
${{header_value:equals('paid'):or(${{header_value:equals('not paid')}})}}.
-
Watch the videos in the Defining column headers section to learn how to map the API fields.
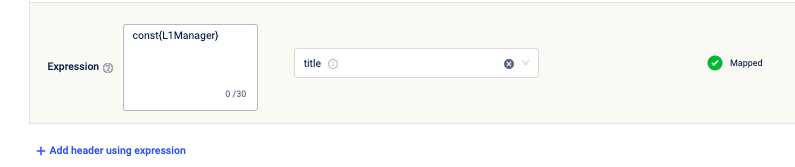
Adding a header using the expression
If the value of an API Field is the same for all the customers, you can use const{{value}}. For example, to categorize loyaltyType as loyalty for all customers, you can enter const{{loyalty}} against the API field loyaltyType. For more information, refer to the documentation on using expression.
To add a header using an expression,
- Click Add header using expression.
- Enter the expression in the text box.
- From the API field drop-down, select the API field you want to map to the header.
Adding additional header
If you selected Add manually as the Column headers input method (with or without header names) for transforming data in the Connect to source block, you will have the option to add additional headers. You can add the additional header while mapping the fields or editing.
WarningNote
If you added the header information through the CSV file method, you cannot add additional headers.
Join data
This block enables the merging of two or more files and adds the merged file to the platform. You need to enter the details of files that need to be identified, compared and merged. Enter the below details:
| Field | Description |
|---|---|
| Files 1-2 Join Types | Enables you to select the type of SQL join command. 1. Inner join- An Inner Join returns only the rows that have matching values in both tables being joined. For example, suppose you have two tables: "Line item table" and "Bill level table," and you want to determine which items were purchased in each bill and calculate the total cost of each item in every bill. When you use the Inner Join option, the merged table will include only the records that have matching BillNumbers in both data sources. 2. Left outer join- A Left Outer Join returns all the rows from the left table and the matching rows from the right table. For example, consider two tables: "Customers" and "Orders." When you use a Left Outer Join, you retrieve all customer records along with any matching order records. If a customer has no orders, the customer record is still included with NULL values in the order-related columns. 3. Right outer join- A Right Outer Join returns all the rows from the right table and the matching rows from the left table. For example, consider two tables: "Orders" and "Customers." When you perform a Right Outer Join, you retrieve all order records along with any matching customer records. If an order has no associated customer, the order record is still included with NULL values in the customer-related columns. 4. Outer join - An Outer Join, also known as a Full Outer Join, returns all rows from both tables, including matching rows and those with no matches. |
| All Files Delimiter | Enter the file delimiter (comma or tab) to separate fields in the .csv file. By default, the delimiter is a comma (,). |
| File 1 Regex | Enter the name of your first file here in the format filename_.*.fileformat. The asterisk represents the wildcard. For example, for the system to search for files that begin with the name "BILL_LEVEL_MERGE" followed by any sequence of characters you can enter the file name as "BILL_LEVEL_MERGE.*.csv". This will enable the system to locate files that match this pattern. NOTE: The file works in an FCFS manner. The files that are uploaded first and second are merged first. |
| File 2 Regex | Enter the name of your second file in the format: filename.*.fileformat. The asterisk represents the wildcard. For example, for the system to search for files that begin with the name "BILL_LEVEL_MERGE" followed by any sequence of characters you can enter the file name as "BILL_LEVEL_MERGE.*.csv". This will enable the system to locate files that match this pattern. NOTE: The file works in an FCFS manner. The files that are uploaded first and second are merged first. |
| File 1 Headers | Enter the column header name of File 1 that needs to be compared. This is compared with the column headers in the File 2. To match columns based on multiple headers, enter the header names separated by a comma. |
| File 2 Headers | Enter the column header name of File 2 that needs to be compared. This is compared with the column headers in the File 1. To match columns based on multiple headers, enter the header names separated by a comma. |
| File Join Use Case | From the dropdown, select TRANSACTION_LINE_ITEM. This is an inner join operation where one row in the bill maps to multiple line items. NOTE: The option None is not applicable. |
| Output Filename | Enter the output filename. By default, the filename format is merge_yyy-mm-dd, where merge is the file name, yyyy-mm-dd is the year month, and date on which the file is created. |
| Alphabetical Sort | Select this check box to ensure accurate sorting of the files in alphanumerical order. By default, this is always enabled. NOTE: It is recommended to always select the checkbox before proceeding further. |
| Merge based on common Name | Make sure that this check box is always selected. This makes sure that the system identifies the correct files to be merged. |
| Merge based on common name Template File One | Enter the filename using the tag. For example, if there are files with names TktABC.dat and TktDocument_ABC.dat, and if you enter the value as TktDocument*.dat, the system looks for the file and selects TktDocument_ABC.dat for merging. ABC is the common tag among the files. |
| Merge based on common Name Template File Two | Enter the filename using the tag. For example, if there are files with names TktABC.dat and TktDocument_ABC.dat, and if you enter the value as TktDocument*.dat, the system looks for the file and selects TktDocument_ABC.dat for merging. ABC is the common tag among the files. |
| File One is Headerless | Select the check box if the columns in file one do not have a header. |
| File Two is Headerless | Select the check box if the columns in file two do not have a header. |
| File One Mention Header names | Define the heading order of the columns in fIle one separated by commas. |
| File Two Mention Header names | Define the heading order of the columns in fIle two separated by commas. |
| Match All Regex | Select True from the dropdown to keep only the matching files in the server and delete the files that are not matched. By default, the value is set as False. |
| All Unique Match | Select True to identify and delete duplicate files. |
FTP file upload instructions
When uploading files to the FTP path:
- Ensure that all files that need to be merged are added simultaneously.
- If you are adding different sets of files that need to be merged, maintain a minimum gap of at least 10 minutes between each upload. For example, if you want to merge files A and B, and also C and D, do not add files A, B, C, and D together. Add files A and B first, and then add files C and D only after a minimum of 10 minutes.
If you need to re-add any files:
- Remove the existing file from the process folder first.
- Then, add the new files to the input folder for proper handling.
CSV-To-XML-Converter
Enter the following details.
| Field | Description |
|---|---|
| XML Top | Header declaration of the XML file. This includes the XML version, character encoding, and so forth. |
| XML file name | The name of the XML file. |
| XML Repeating Component | The repeating elements of the XML file. This is the section of the XML file where the data is present. |
| Input File Delimiter | The file delimiter. This template supports commas (,) and pipes (%>%) |
| XML Bottom | The closing tags of the XML file. |
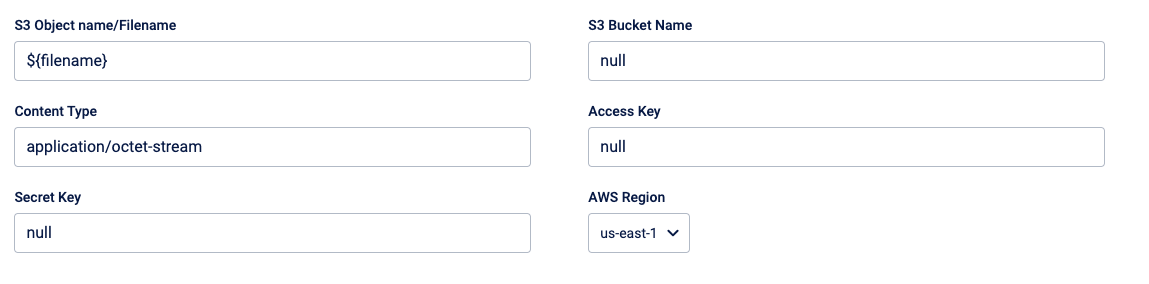
Push to S3
Enter the following details:
-
S3 Object name/Filename - Defines the name that will be given to the file(s) uploaded to S3. Use the default value. You can also use the expression language and define the file name. For the "Audience reload from FTP template", enter the object name in the format
/${{filename}}, where audience_Group_Name is the audience name used in the Engage+. -
S3 Bucket Name - Enter the S3 bucket name.

-
Content Type - Use the default value
application/octet-stream. This enables the copying of all file types. -
Access Key & Secret Key - Enter the S3 access key and secret key.
-
AWS region - Enter the AWS region to which you are transferring the files.
- US East 1 - For the bucket in the India region
- EU West 1 - For the bucket in the EU region
- AP Southeast 1 - For the bucket in the Singapore region
- US East 2 - For the bucket in the US regions
Note: If you do not have information on the Access key, secret and AWS region, create a ticket to the Sustenance team.
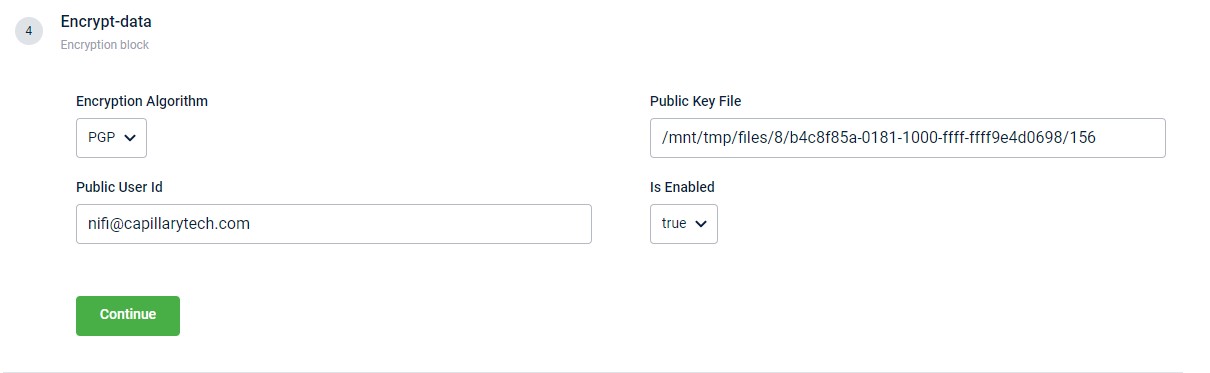
Encrypt data
This block enables the encryption of an output file generated, using the PGP algorithm. All the fields within this block become mandatory once you enable the Decrypt data action block. You can use the Is Enabled drop-down to control the activation of this block.
| Field name | Description |
|---|---|
| Encryption Algorithm | The algorithm to encrypt the file. At present, only the PGP algorithm is supported. Hence, by default, PGP encryption is always selected. |
| Public User Id | Publick user ID. |
| Public Key File | Server location of the public key file. |
| Is Enabled | Enable or disable the encrypt function. |
Schedule trigger
This block enables you to schedule the time at which the dataflow should be triggered.
You can configure the dataflow activity to execute daily, hourly, or on a minute basis.
WarningThe minimum triggering interval for the dataflow is set at 5 minutes, meaning that even if a value less than that, such as 1 minute, is entered, the dataflow will still trigger at 5-minute intervals.
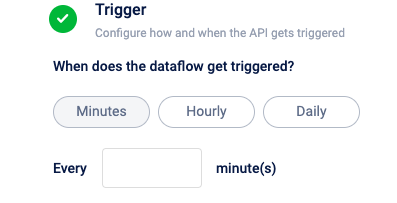
Schedule trigger at specified minutes
Select Minutes to schedule a trigger at specific minute intervals The minimum duration allowed is 5 minutes.
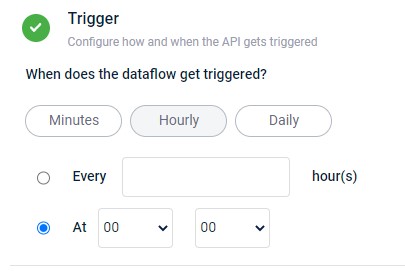
Schedule hourly trigger
- Select Every hour(s) to schedule the dataflow trigger at regular intervals, such as every 2 hours. Specify the frequency in the "Every ___ hour(s)" field.
- Select At to set a specific time for dataflow execution, such as 13:00. Configure the time using the provided hour and minute drop-down menus.
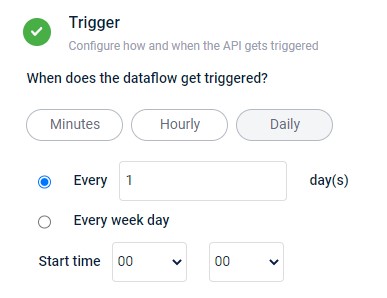
Schedule daily trigger
- Select Every day(s) to schedule the dataflow trigger at regular intervals, such as every 2 days. Specify the frequency in the "Every ___ day(s)" field.
- Select Every week day to set a specific time in a week day for dataflow execution, such as 13:00. Configure the time using the provided hour and minute drop-down menus.
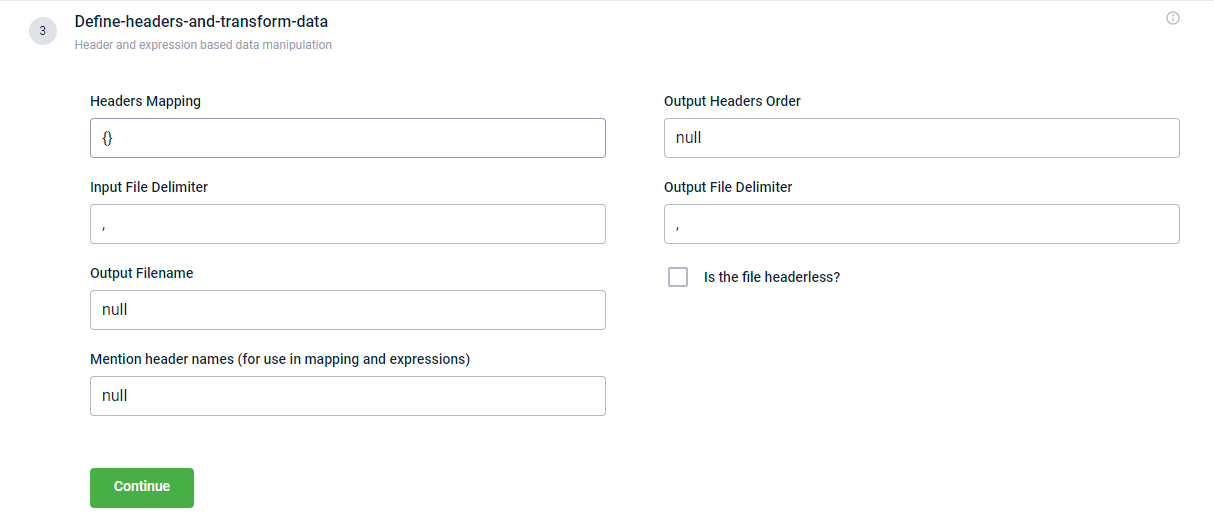
Rebuild headers / Define headers and transform data
This block enables you to map and manipulate the data in the input file during file transfer. Below is the screenshot of the block.
The table contains the fields and their descriptions.
| Field | Description |
|---|---|
| Headers Mapping | Map the column headers or headings according to the input file. Syntax: {"heading1 of output file":"heading1 of input file", "heading2 of output file":"heading2 of input file"}Example: {"TAmount":"t_amount", "BillID":"Bill_Number"}Here, t_amount and Bill_Number in the input file are stored as TAmount and BillID respectively in the output file. The information in the input and output files is identical.You can manipulate or change the information in the output during file transfer. This is done by using expressions. Example: {"TAmount":exp{{hdr"t_amount"+1}}}Here, t_amount in the input file is stored as TAmount in the output file. Each value under TAmount in the output file is the value from t_amount in the input file increased by 1.See [Example use case](https://docs.capillarytech.com/docs |
Updated 7 months ago