Create and Manage Connect+ Dataflows
How to create and manage dataflow
You can create a dataflow in Connect+ to define how data is ingested, transformed, and routed from a source to a destination.
Connect+ provides three ways to create a dataflow:
- A visual drag-and-drop canvas for manual configuration
- aiRA Coder, the built-in AI assistant, using natural language prompts
- Global dataflow templates copied into your organization using aiRA Coder
For full details on aiRA Coder and how to use it, see aiRA Coder.
When you create a new dataflow, it is assigned the Draft state by default. You must complete all structural changes and block configurations in this state.
Method 1: Create a dataflow manually
To compose a dataflow using the drag-and-drop canvas:
- Navigate to the Connect+ extension portal and select the organization where you want to create the dataflow.
- Click Create new dataflow.
- Enter a unique name in the Name field.
- Optionally, assign tags to categorize the dataflow.
- Click Done.
The dataflow appears on the Dataflows page under the My Dataflows tab. - On the Dataflows page, click your dataflow.
The version listing page opens, showing the dataflow as version v1 in Draft status. - Click version v1.
The canvas opens with the Trigger block. - Add blocks by clicking a node. Blocks do not follow a fixed sequence. Arrange them based on your data flow requirements.
- Click a block to open its properties panel and configure the required fields.
For source and destination blocks, select all connection values from the dropdown rather than entering them directly. This includes non-sensitive values such as hostnames and directory paths, and sensitive values such as usernames, passwords, and API keys. These values are stored in Extension Configurations. - Click Save.
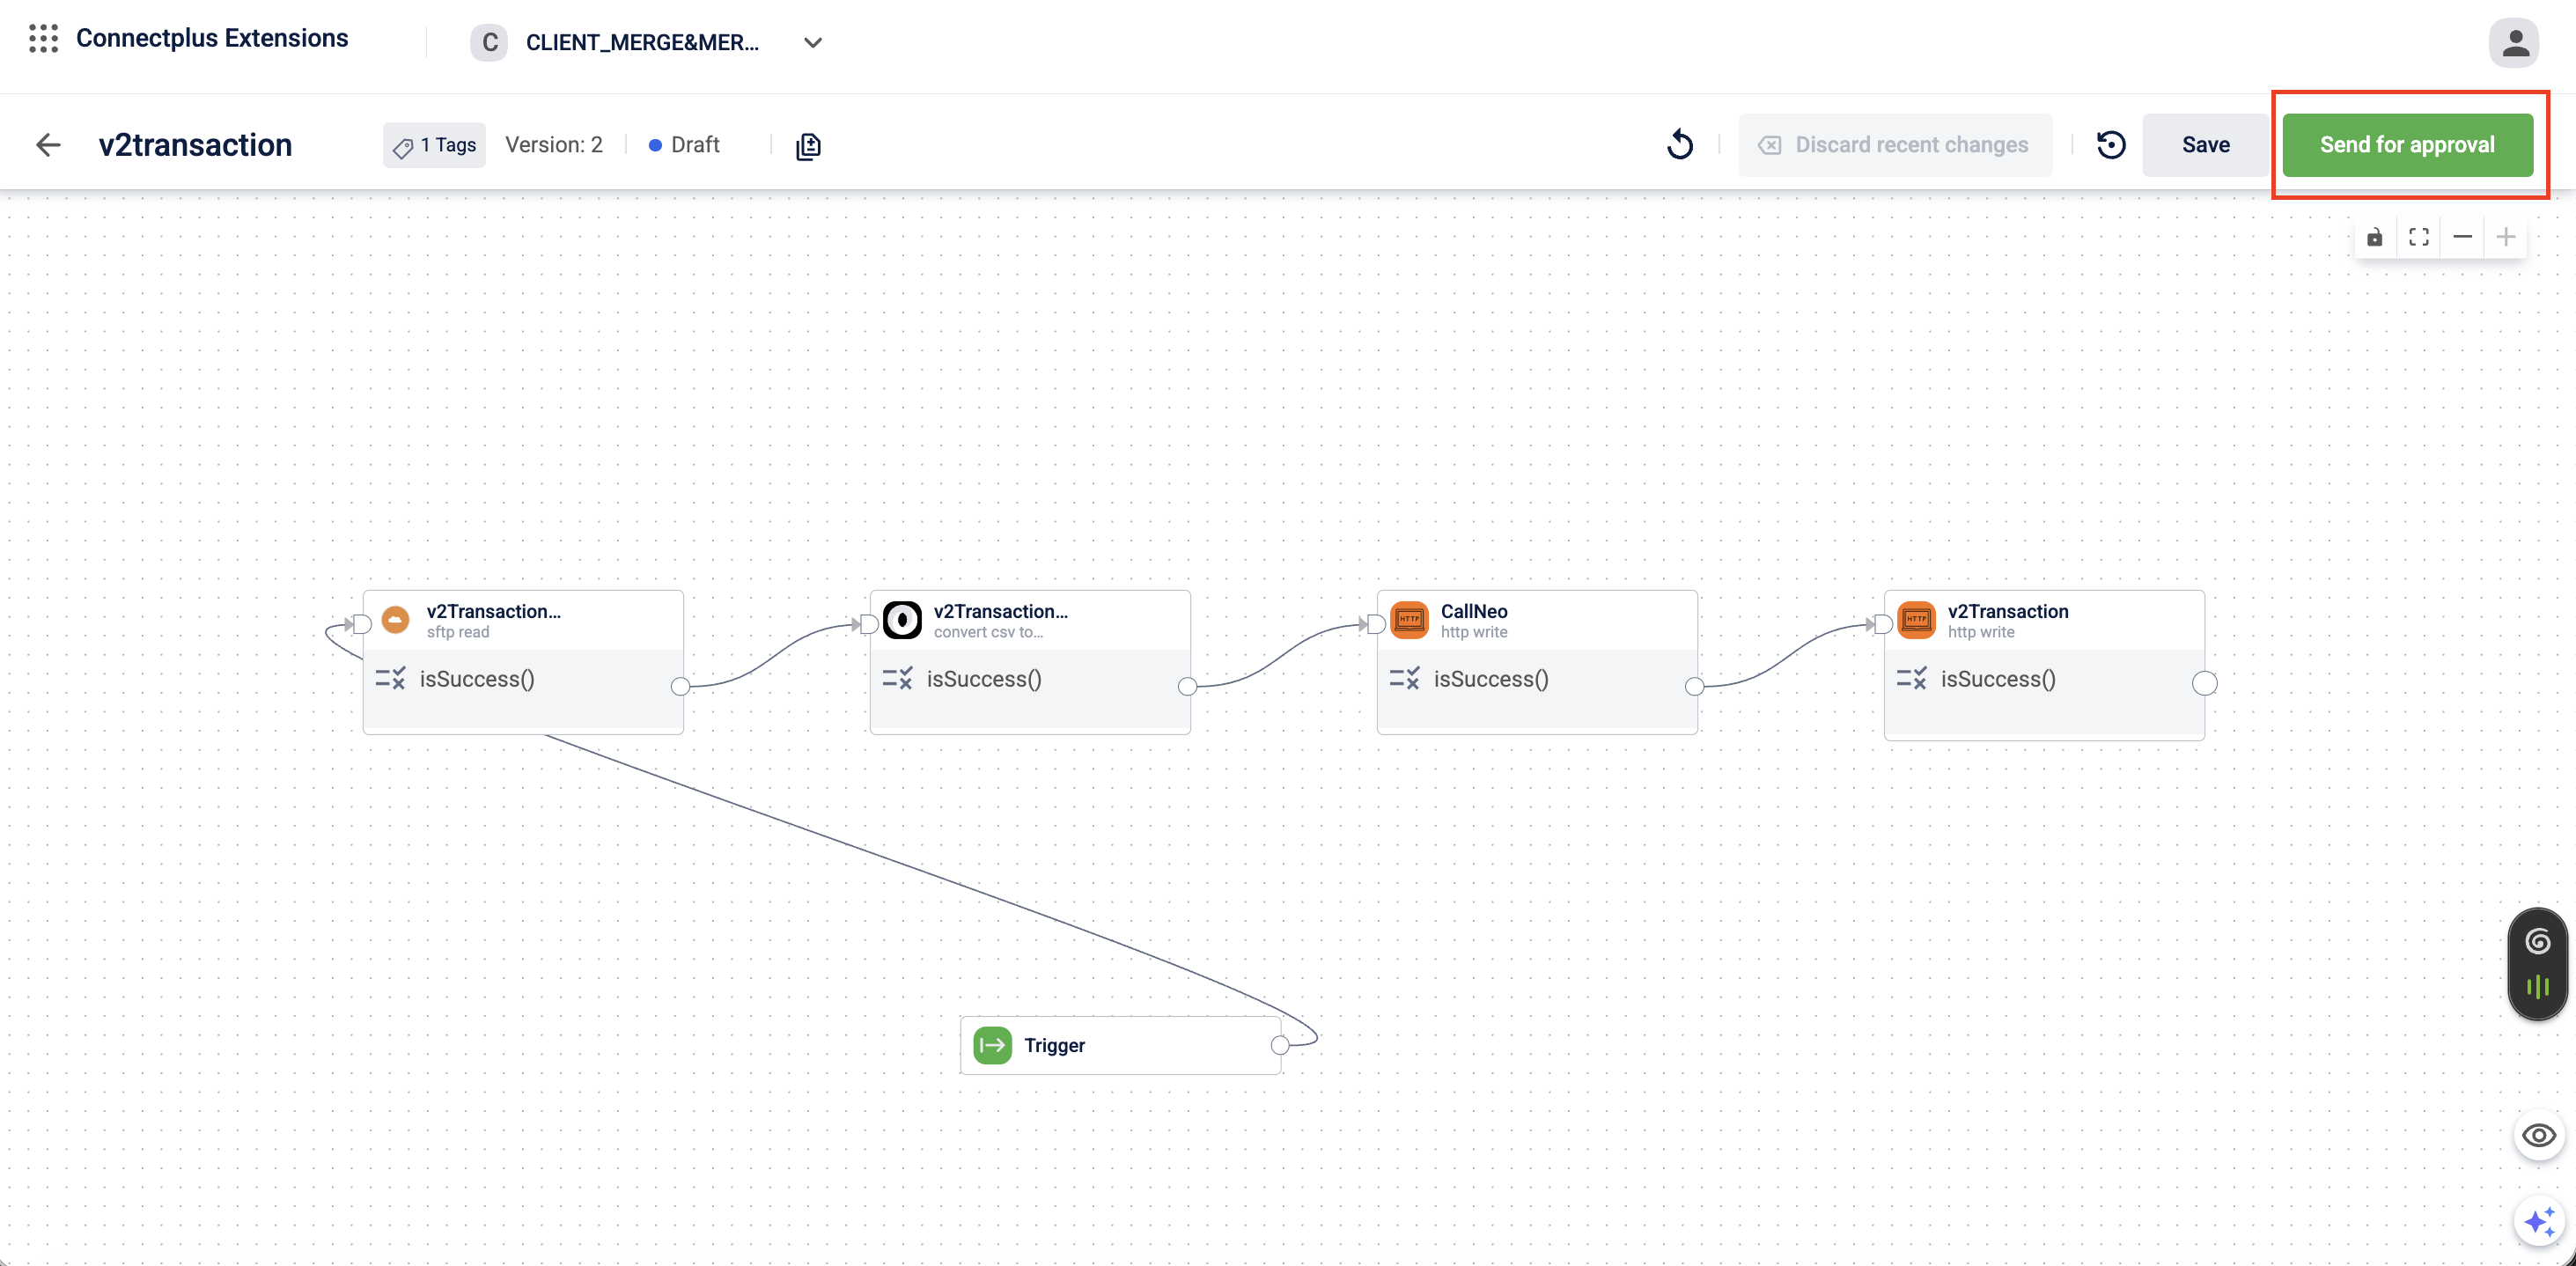
- Click Send for Approval to submit the dataflow for review.
Method 2: Create a dataflow using aiRA Coder
You can describe your requirement in plain language, and aiRA Coder generates the full block sequence, including transformation scripts. This is the fastest way to start a new dataflow when building from scratch.
For step-by-step instructions and example prompts, see the Create a dataflow section in aiRA Coder.
Method 3: Copy from global templates
You can use aiRA Coder to copy a global template from another organization or cluster directly into your dataflow store. The copied dataflow is saved in Draft state and is associated with your account. This removes the need to recreate common integration patterns from scratch.
For step-by-step instructions, see the Copy and paste a dataflow section in aiRA Coder.
Review and approve a dataflow
After saving a dataflow, it must go through an approval process before it can be used. Before sending it for review, you can view the code differences between the current and previous versions.
Only users with Admin access can review, approve, or reject a dataflow.
Send a dataflow for approval
-
Navigate to the Connect+ UI and open the main listing page.
-
Select the dataflow you want to send for approval.
-
Click Send for approval.
-
Click Yes on the confirmation modal.
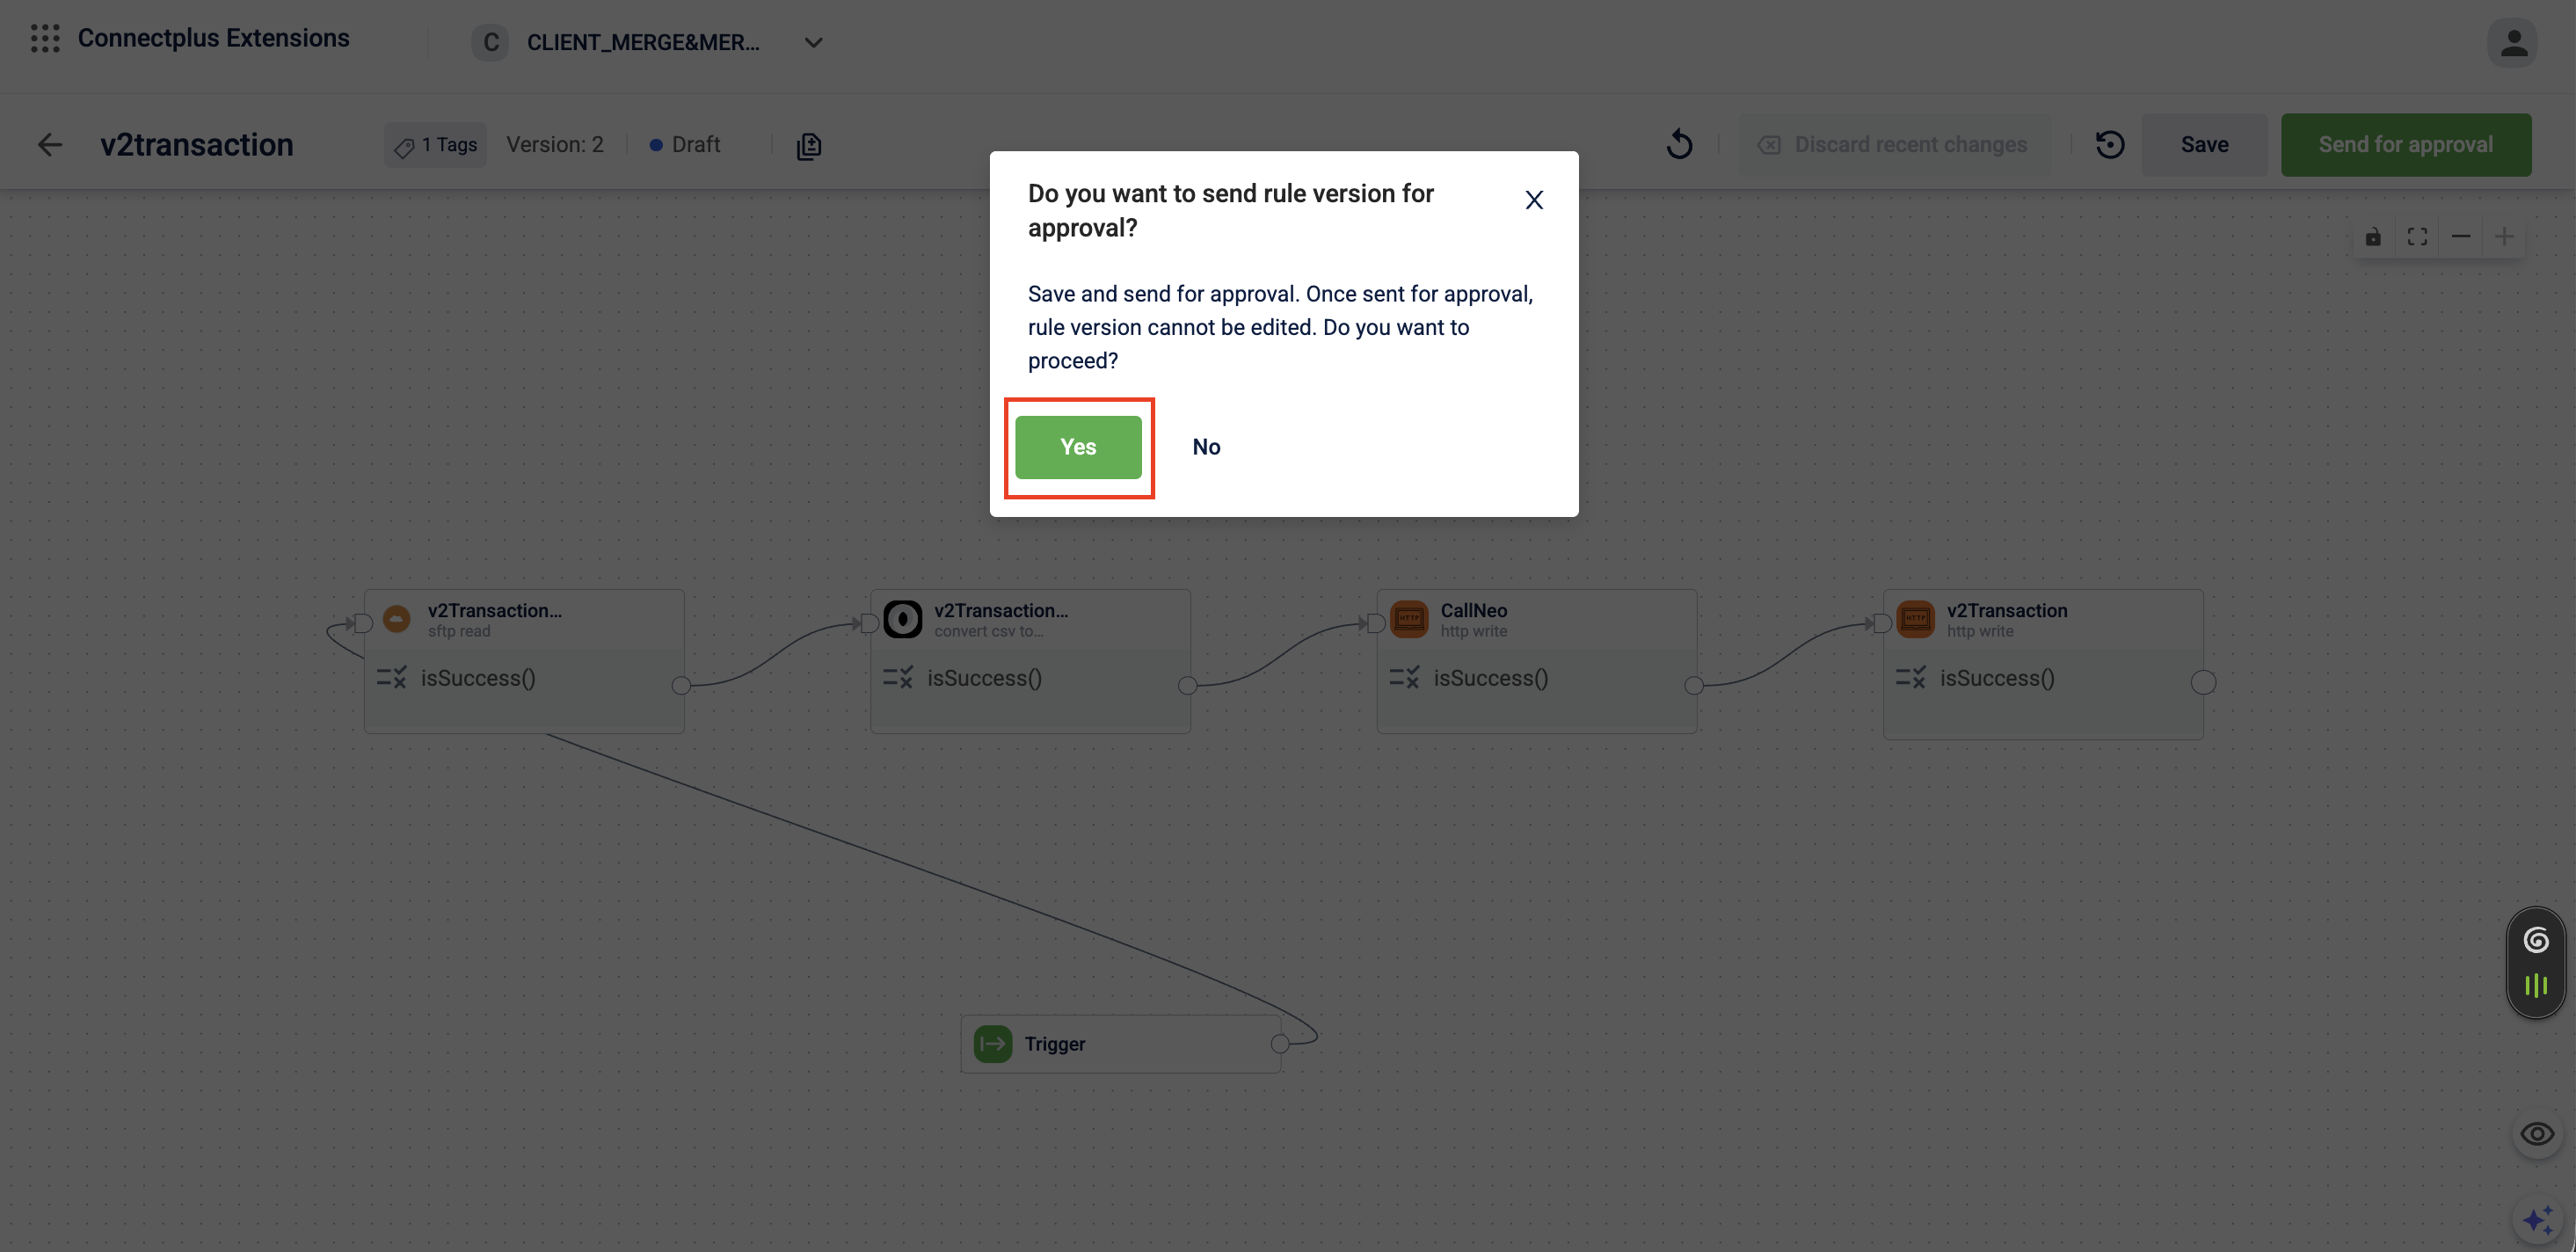
The dataflow moves to the Awaiting Approval state.
Review a dataflow
When a dataflow is submitted for approval, the reviewer can compare the new version with previous versions before approving.
-
Navigate to the Connect+ UI and open the main listing page.
-
Select the dataflow in the Awaiting Approval state.
-
On the dataflow canvas, click Send for approval.
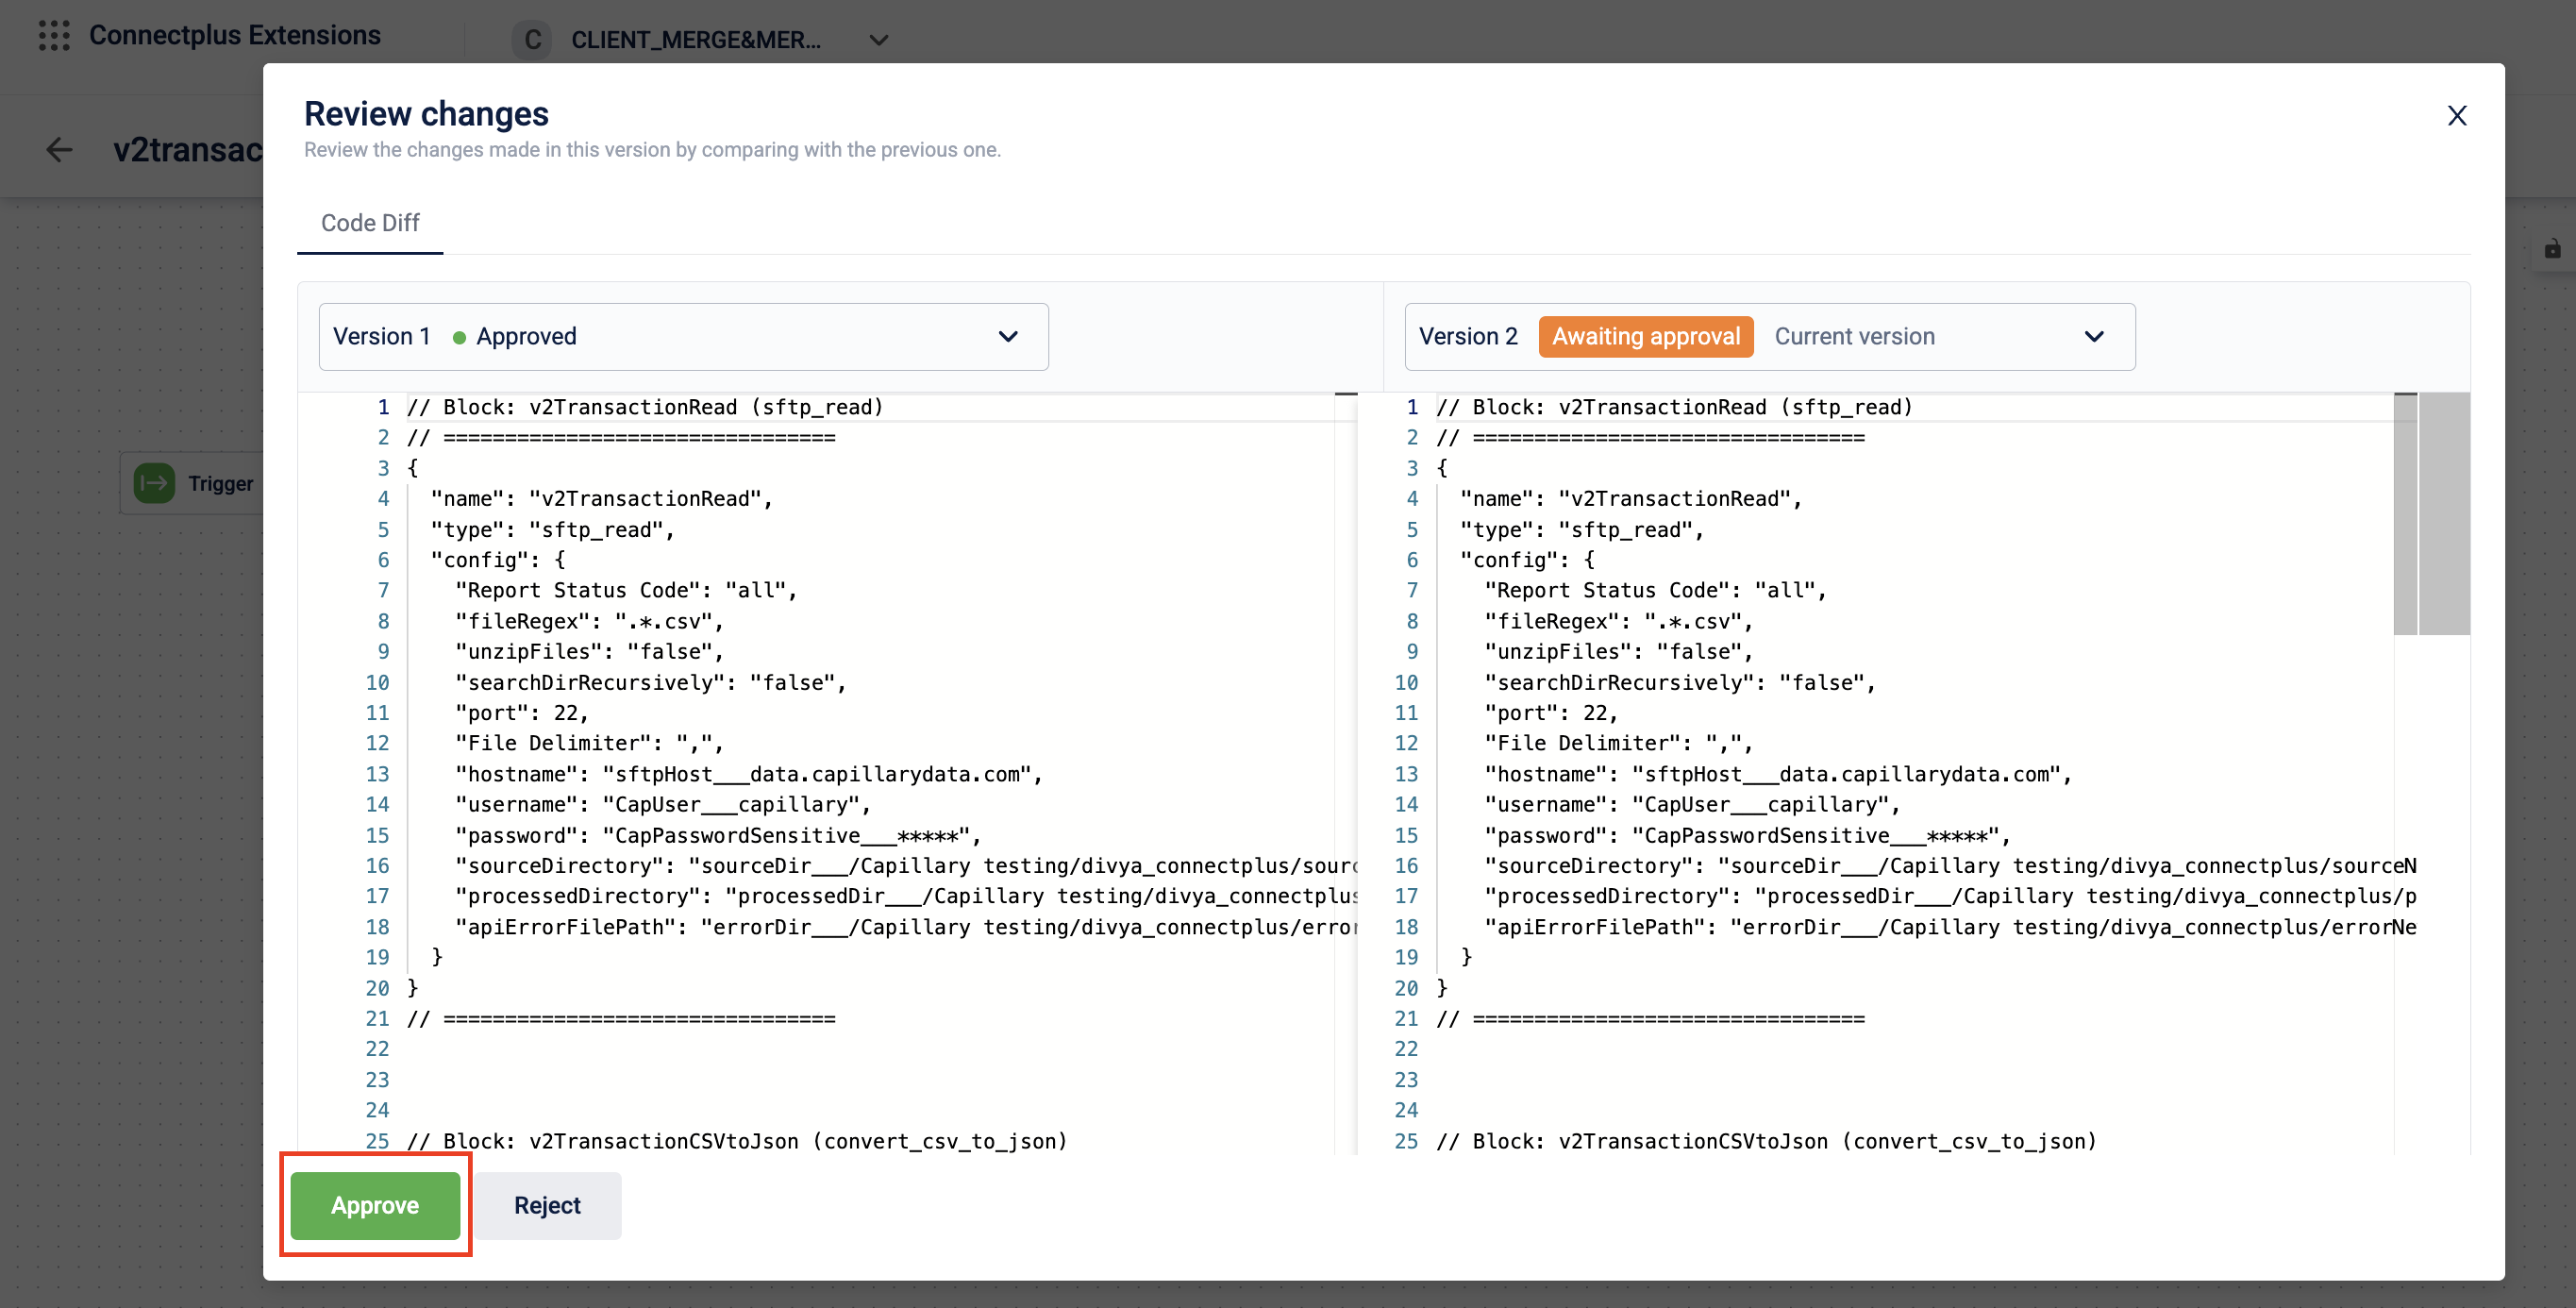
The Review changes modal appears.
-
Select the two versions you want to compare.
-
After reviewing the changes, click Accept or Reject.
-
Click Yes on the confirmation modal.
If approved, the dataflow moves to the Approved state. The system automatically creates the next version in Draft state for future updates.
If rejected, the dataflow moves to the Rejected state. You can edit it after reverting it to Draft state.
Note
If you approve a new version while a previous version is
Liveand actively processing files, the system does not interrupt ongoing processing. Connect+ registers an Async Update. Active files complete processing on the current version. The system then automatically switches to the newly approvedLiveversion.
Edit a dataflow
You can edit a dataflow only when it is in the Draft state. This ensures that active production dataflows are not disrupted.
If the dataflow is Live
When a version is made Live, the system automatically generates the next version in Draft state. Apply all updates to this newly generated draft. The Live version continues processing without interruption.
If the dataflow is Rejected
- Open the dataflow.
- Click Edit on the canvas.
- Confirm the action.
The dataflow transitions back to Draft state, allowing you to apply the required changes.
Edit a dataflow manually
- Navigate to the Connect+ UI and select your organization.
- Locate the required dataflow from the listing page and open it.
- On the version listing page, select the version in
Draftstate. - Perform edits on the canvas. You can:
- Modify a block: Select a block to open its properties panel. Update configurations such as API endpoints, file delimiters, or expression logic.
- Add a block: Select the output node of an existing block and choose a new block from the drop-down list.
- Delete a block: Hover over the block, select the delete icon, and confirm the action.
- Modify connections: Drag connector lines between blocks to change the execution sequence.
- Click Save to store your changes.
- Click Send for Approval to submit the updated version for review.
Edit a dataflow using aiRA Coder
You can also use aiRA Coder to modify a dataflow in Draft state using a natural language prompt. Supported changes include adding or removing blocks, updating script logic, changing validation conditions, and reconfiguring block properties.
For step-by-step instructions and example prompts, see the Modify a dataflow section in Modify a dataflow section in aiRA Coder.
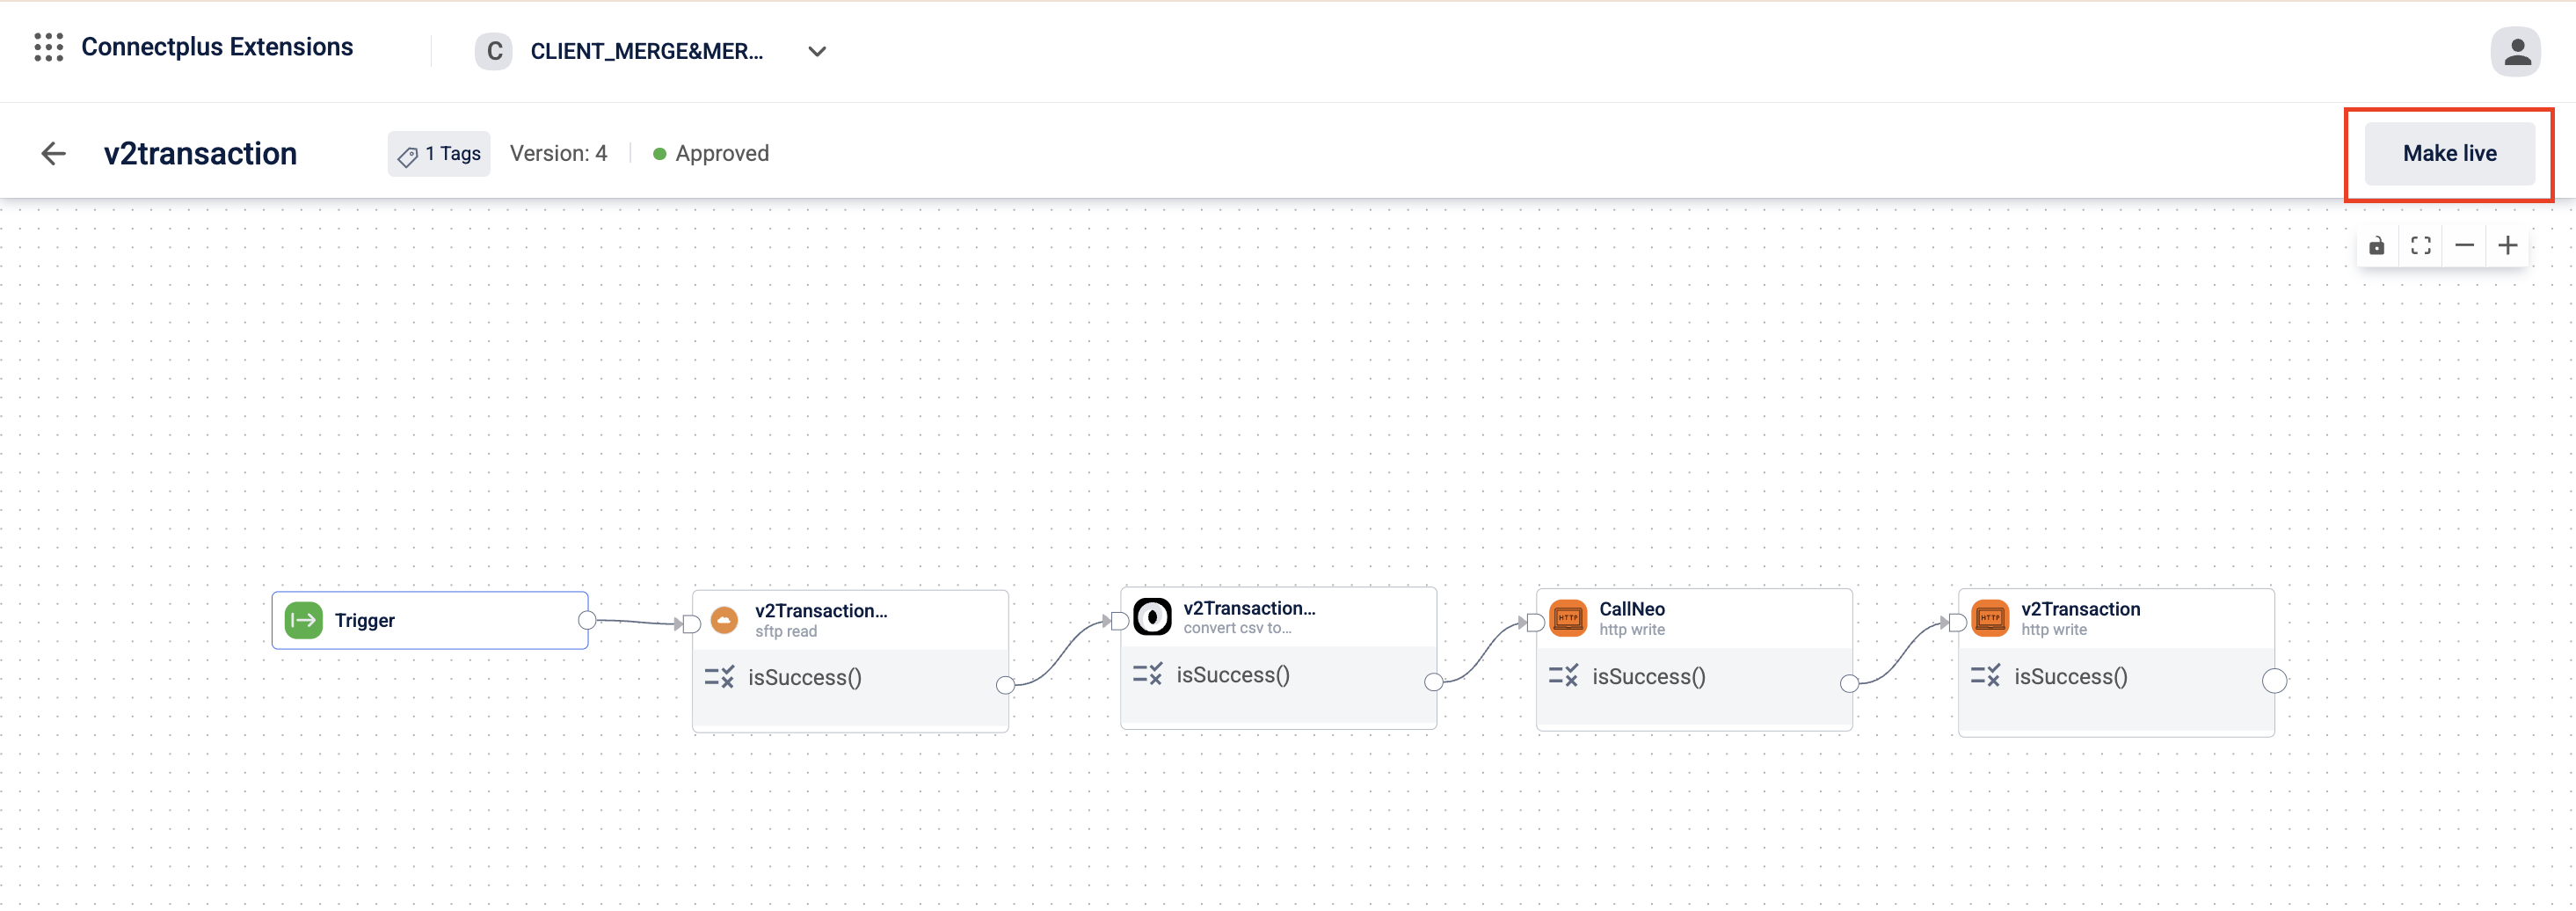
Making a version live
An approved version of a dataflow can be made Live.
To make a dataflow version Live,
-
Open the Dataflow page and select the dataflow you want to make
Live. -
On the Version Listing page, click the approved version you want to make Live.
The dataflow composing page opens. -
Click Make Live.
A confirmation message appears. -
Click Yes on the confirmation message.
Note:
- It takes around 10 minutes for a version to become
Live. - Only one approved version of a dataflow can be Live at any time.
- You can roll back one version and make another version Live.
Pause and stop a dataflow
Use these controls to temporarily or permanently halt a live dataflow without deleting it.
Pause a dataflow
Pausing stops the dataflow from picking up new files. Files already in processing complete before the dataflow stops. Use this for temporary or safe deactivation.
To pause a dataflow,
-
Navigate to the Connect+ UI and select your organization.
-
Open the live dataflow that you want to pause, click Pause dataflow.
A confirmation modal appears.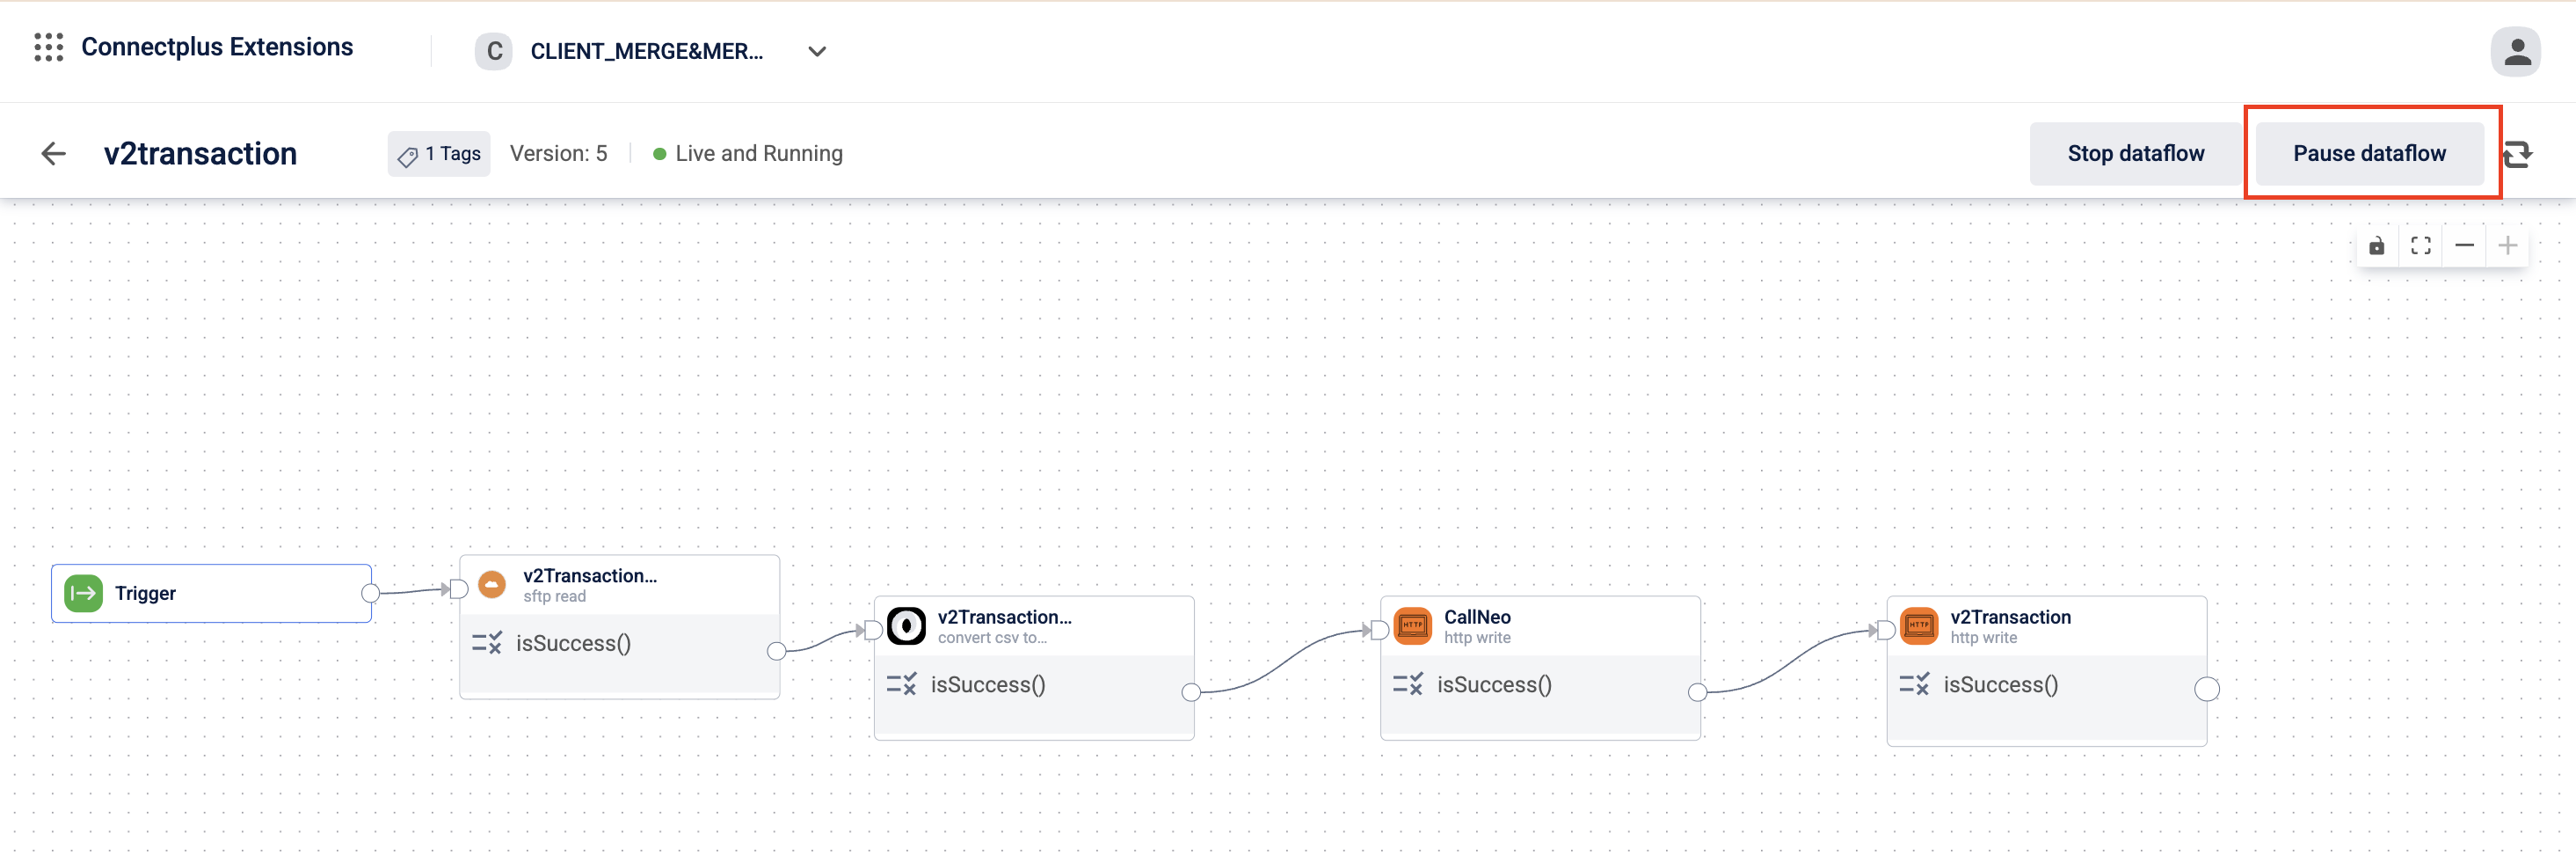
-
Click Pause.
The dataflow is paused.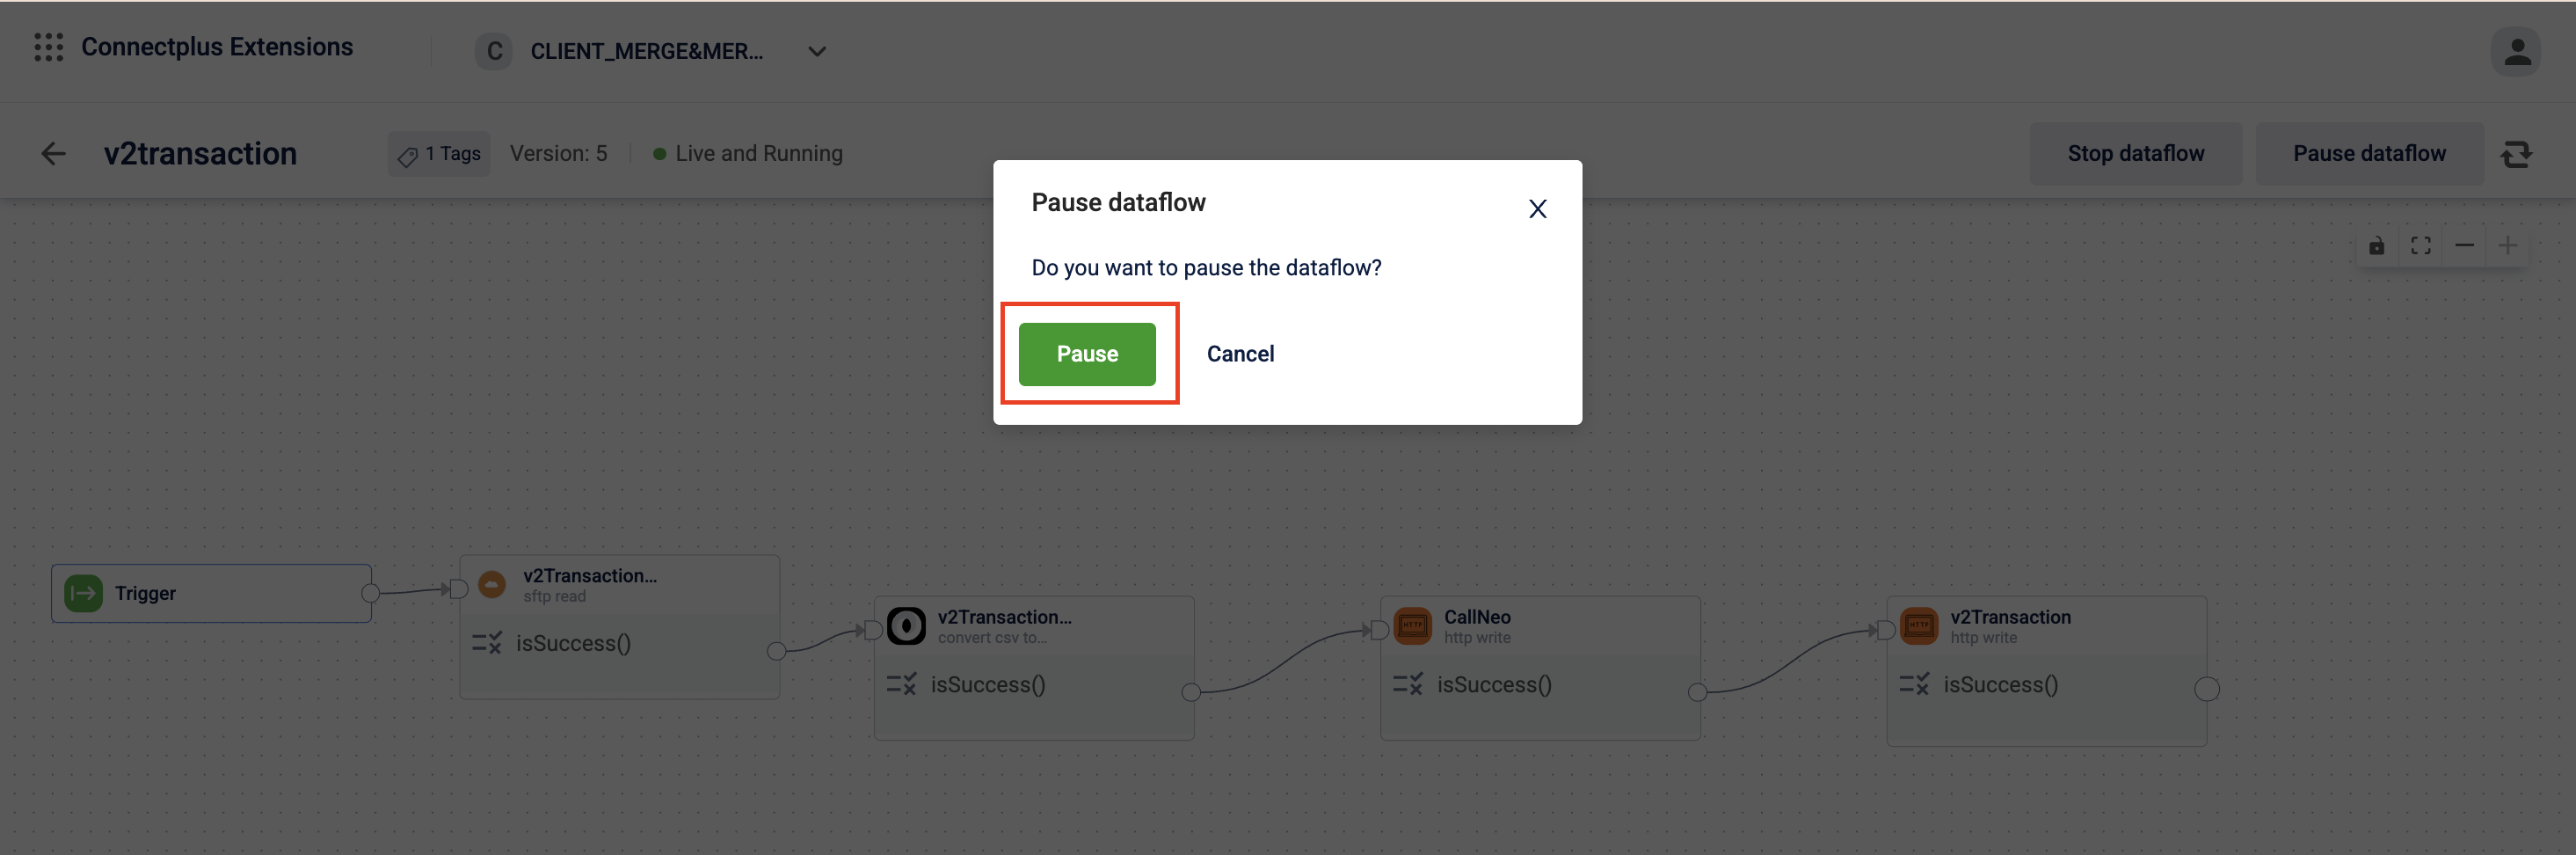
Stop a dataflow
Stopping immediately halts all processing. No new files are picked up, and any file currently being processed is terminated.
To stop a dataflow,
-
Navigate to the Connect+ UI and select your organization.
-
Open the live dataflow that you want to stop, click Stop dataflow.
A confirmation modal appears.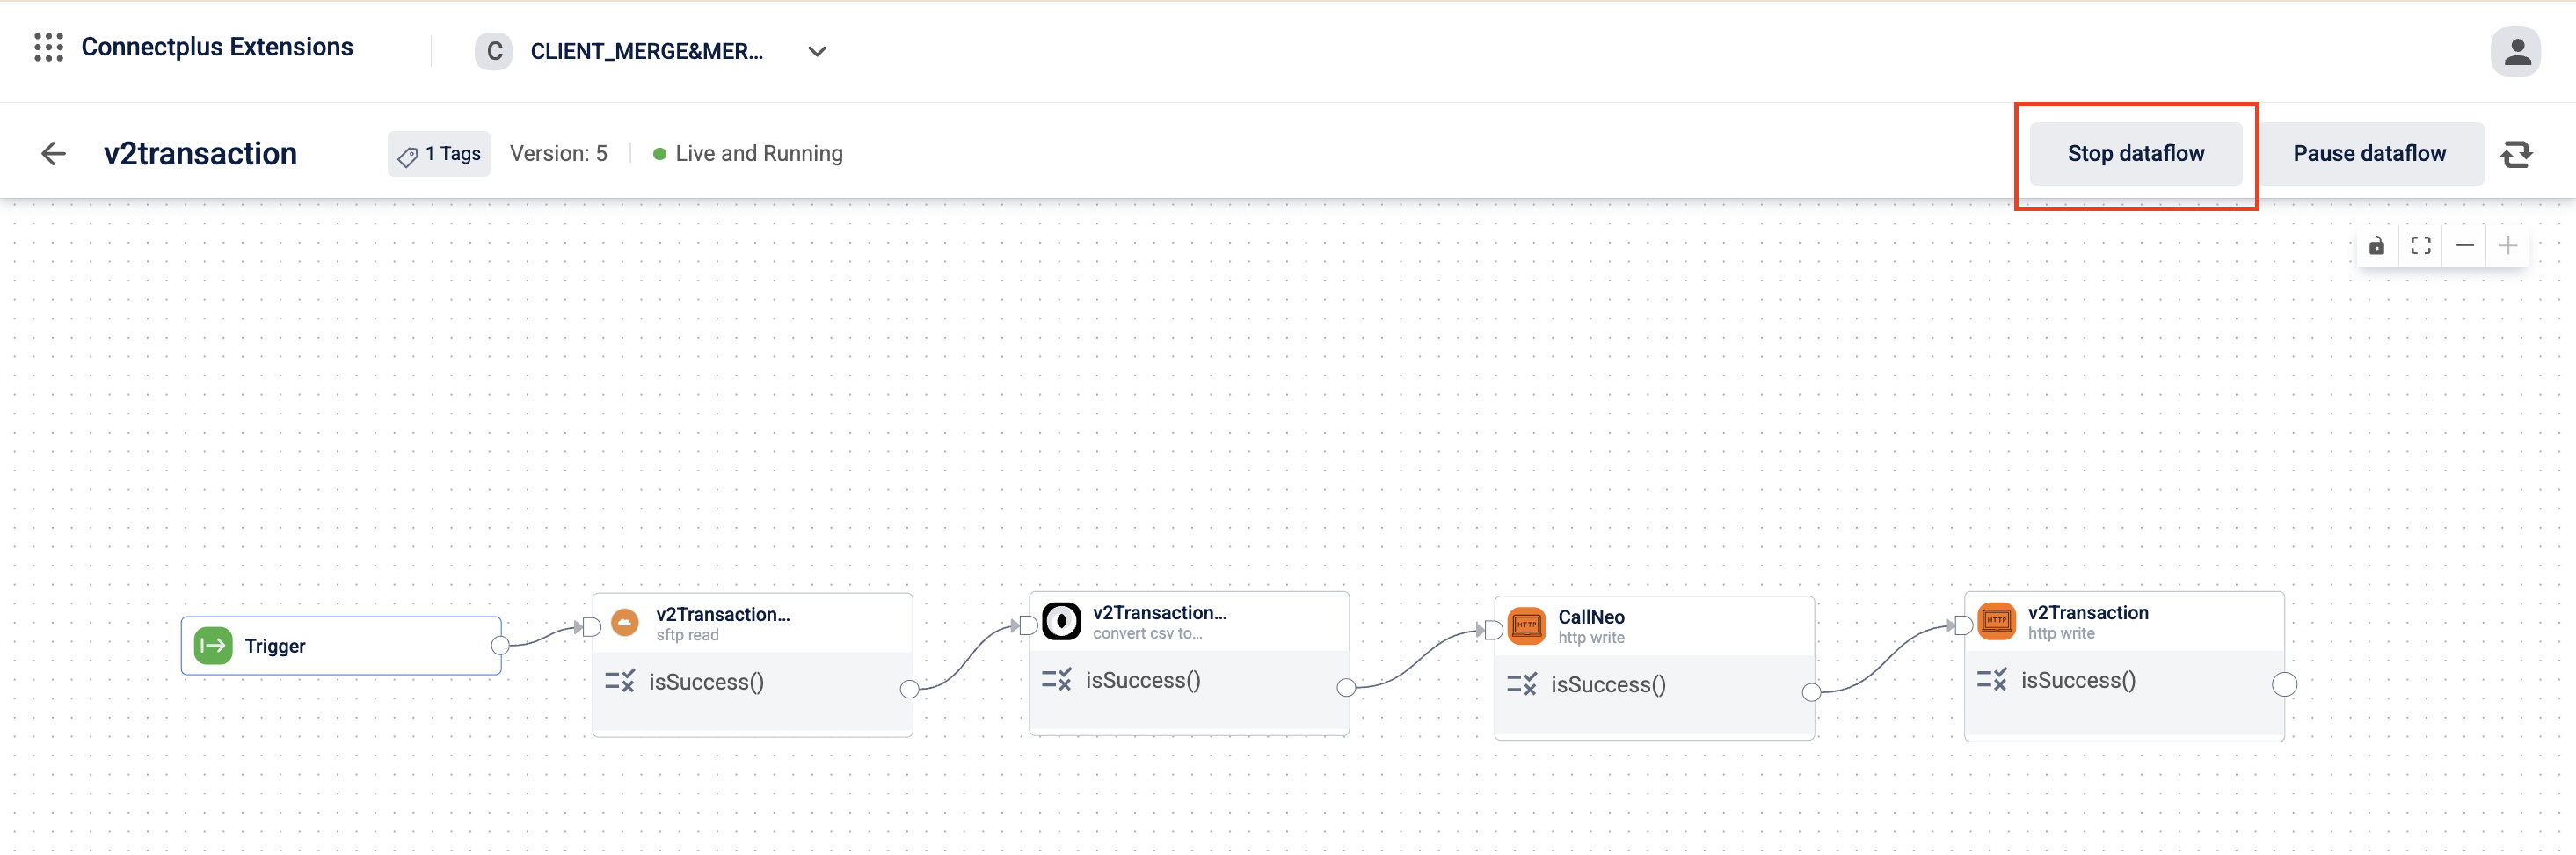
-
Click Stop.
The dataflow is stopped.
Start a dataflow
Use Start to resume a dataflow that was paused or stopped.
-
Navigate to the Connect+ UI and select your organization.
-
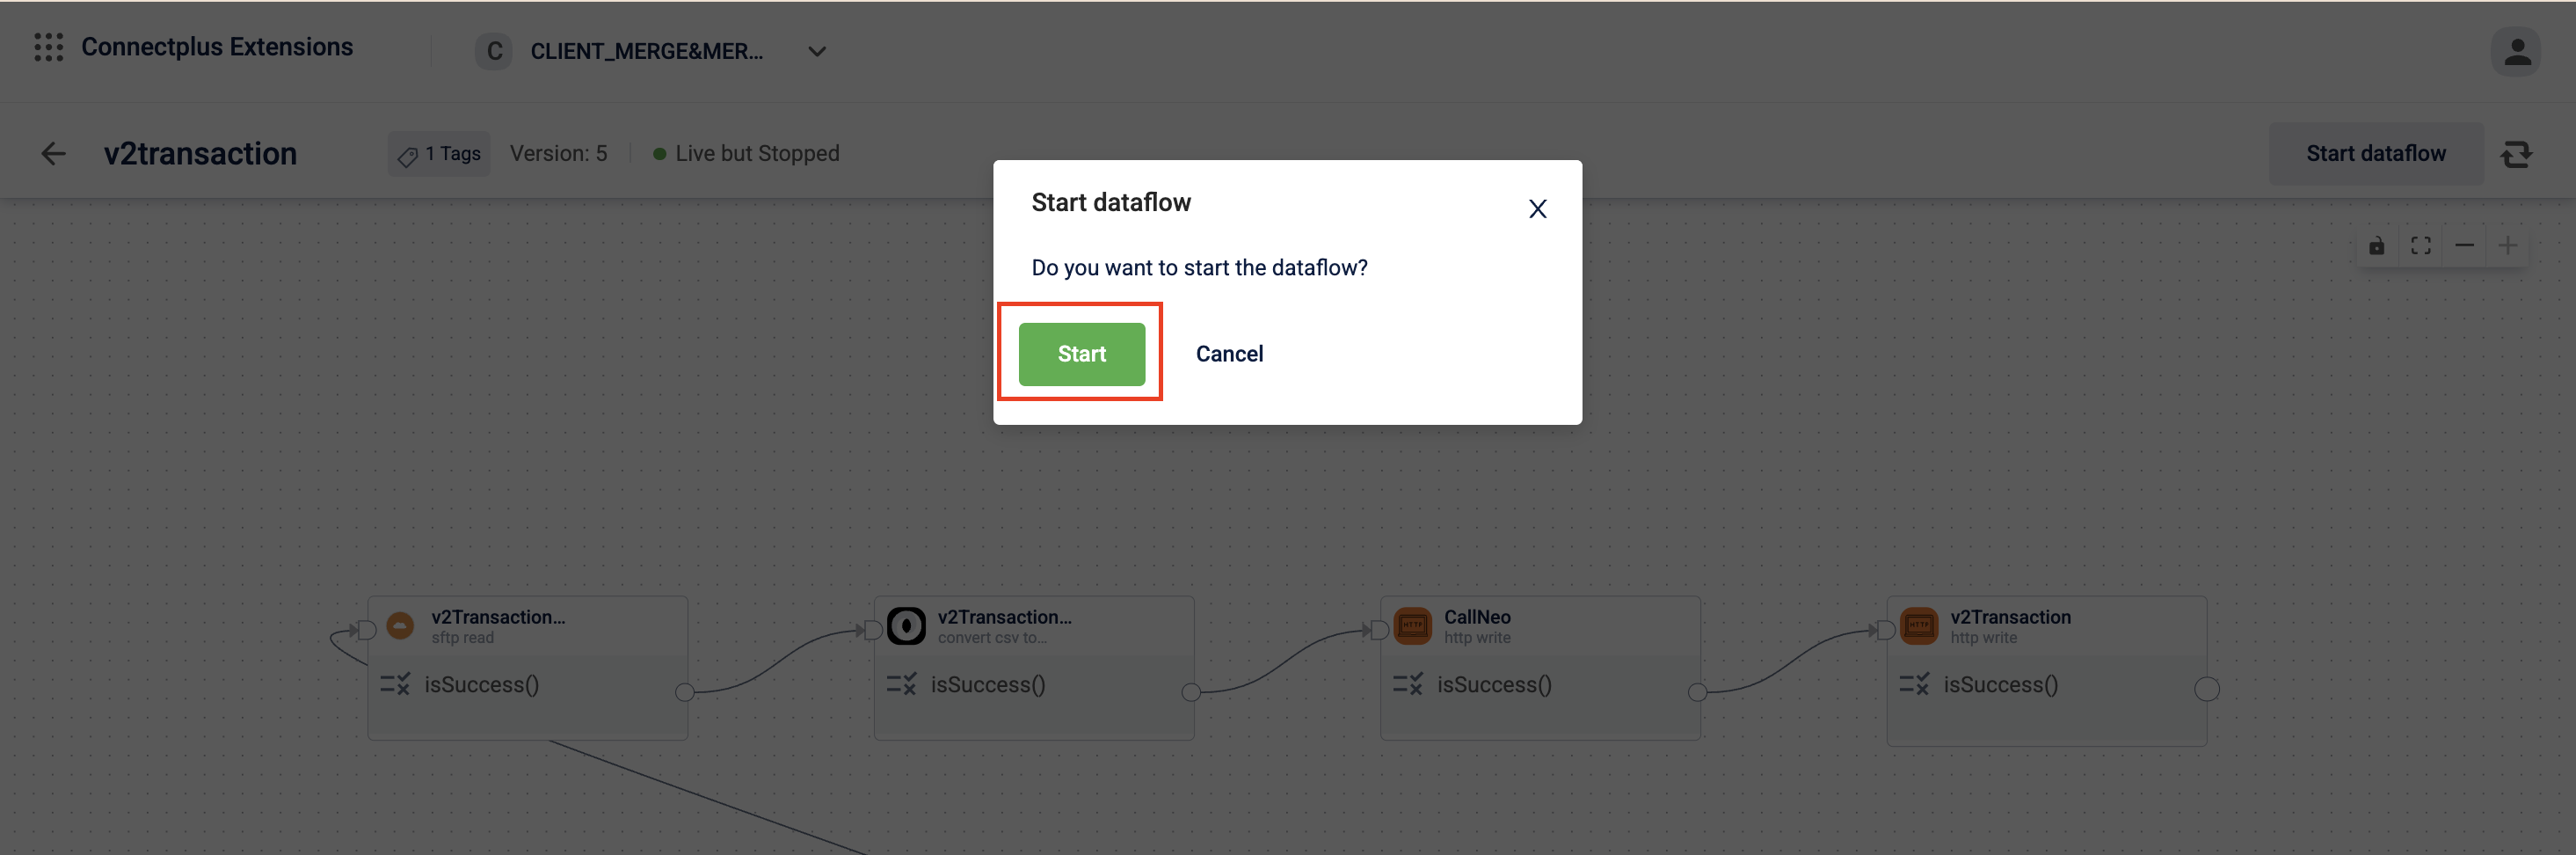
Open the live dataflow that you want to start, and click Start dataflow.
A confirmation modal appears.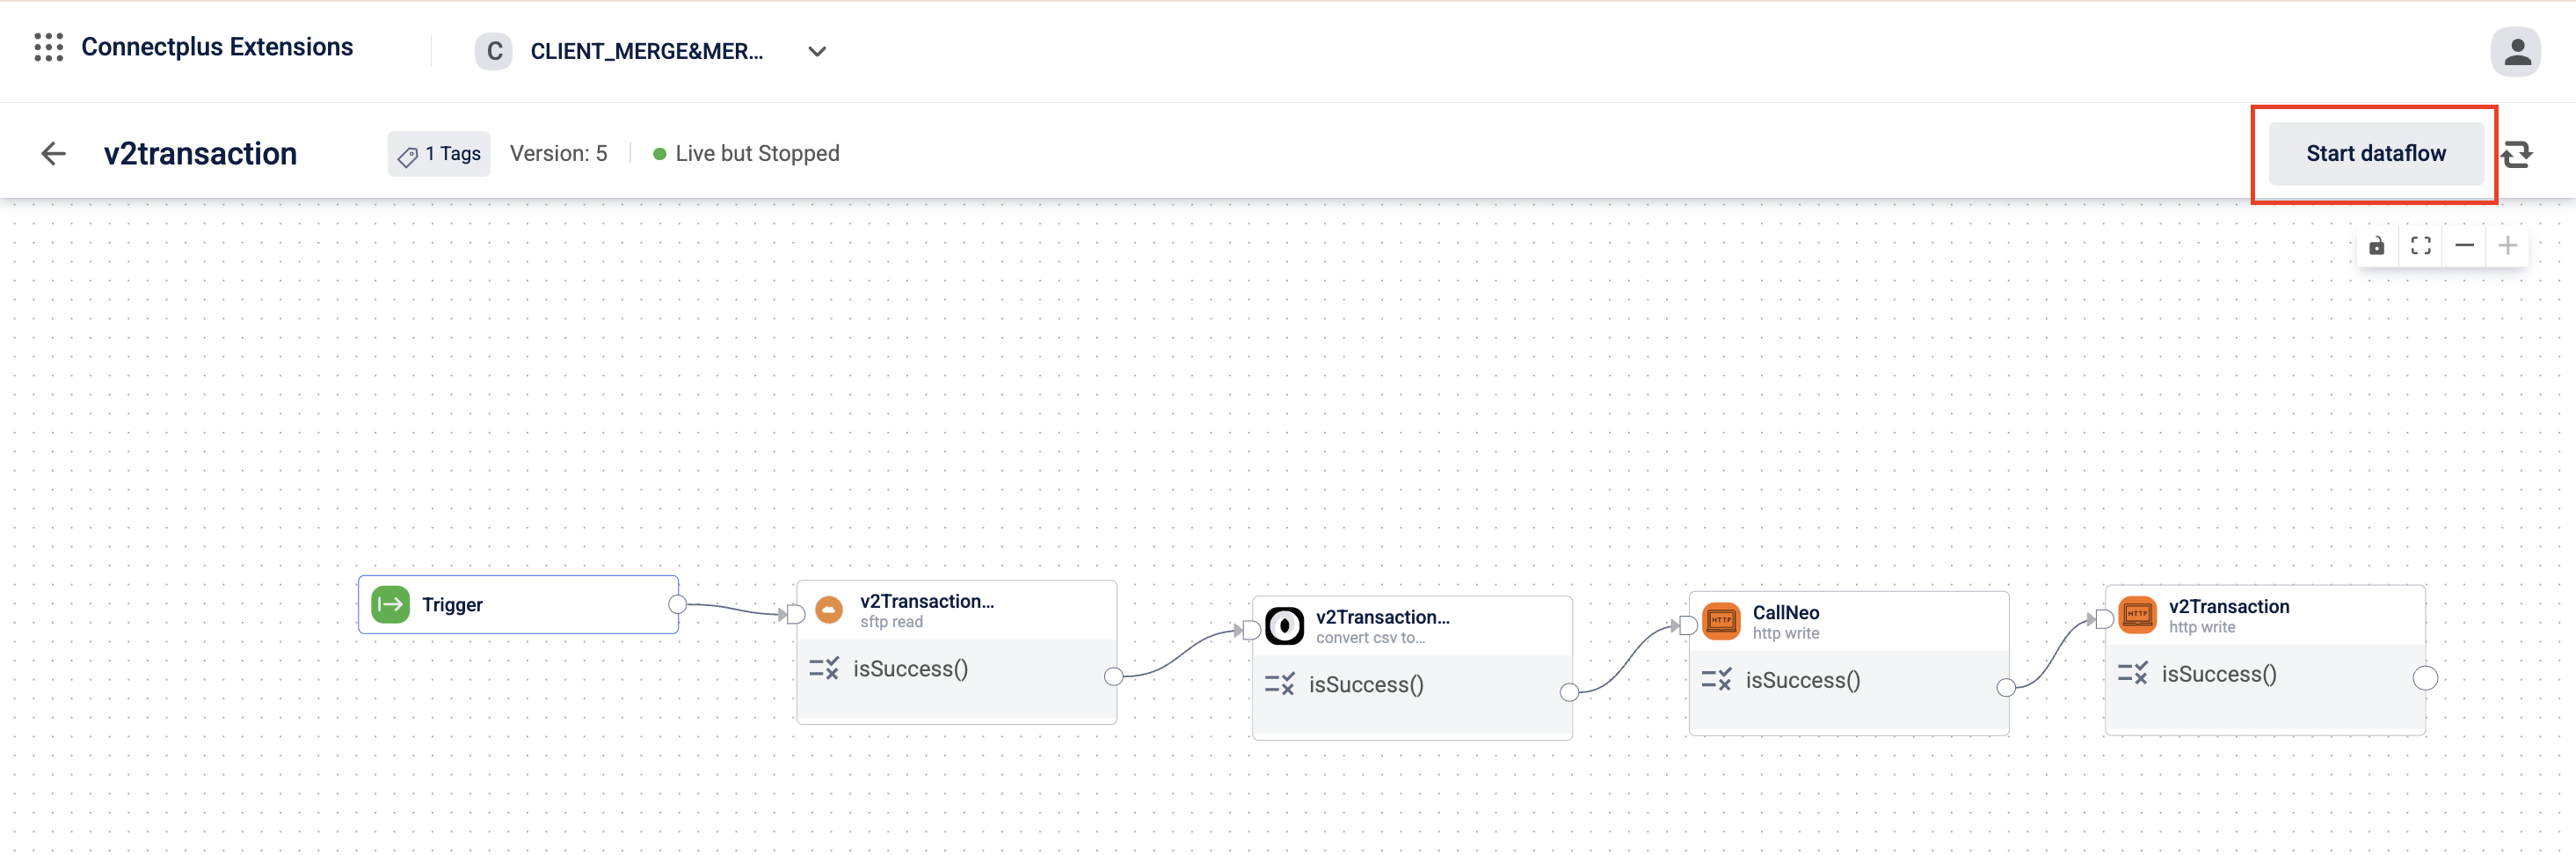
-
Click Start.
The dataflow resumes polling the configured source for new files.
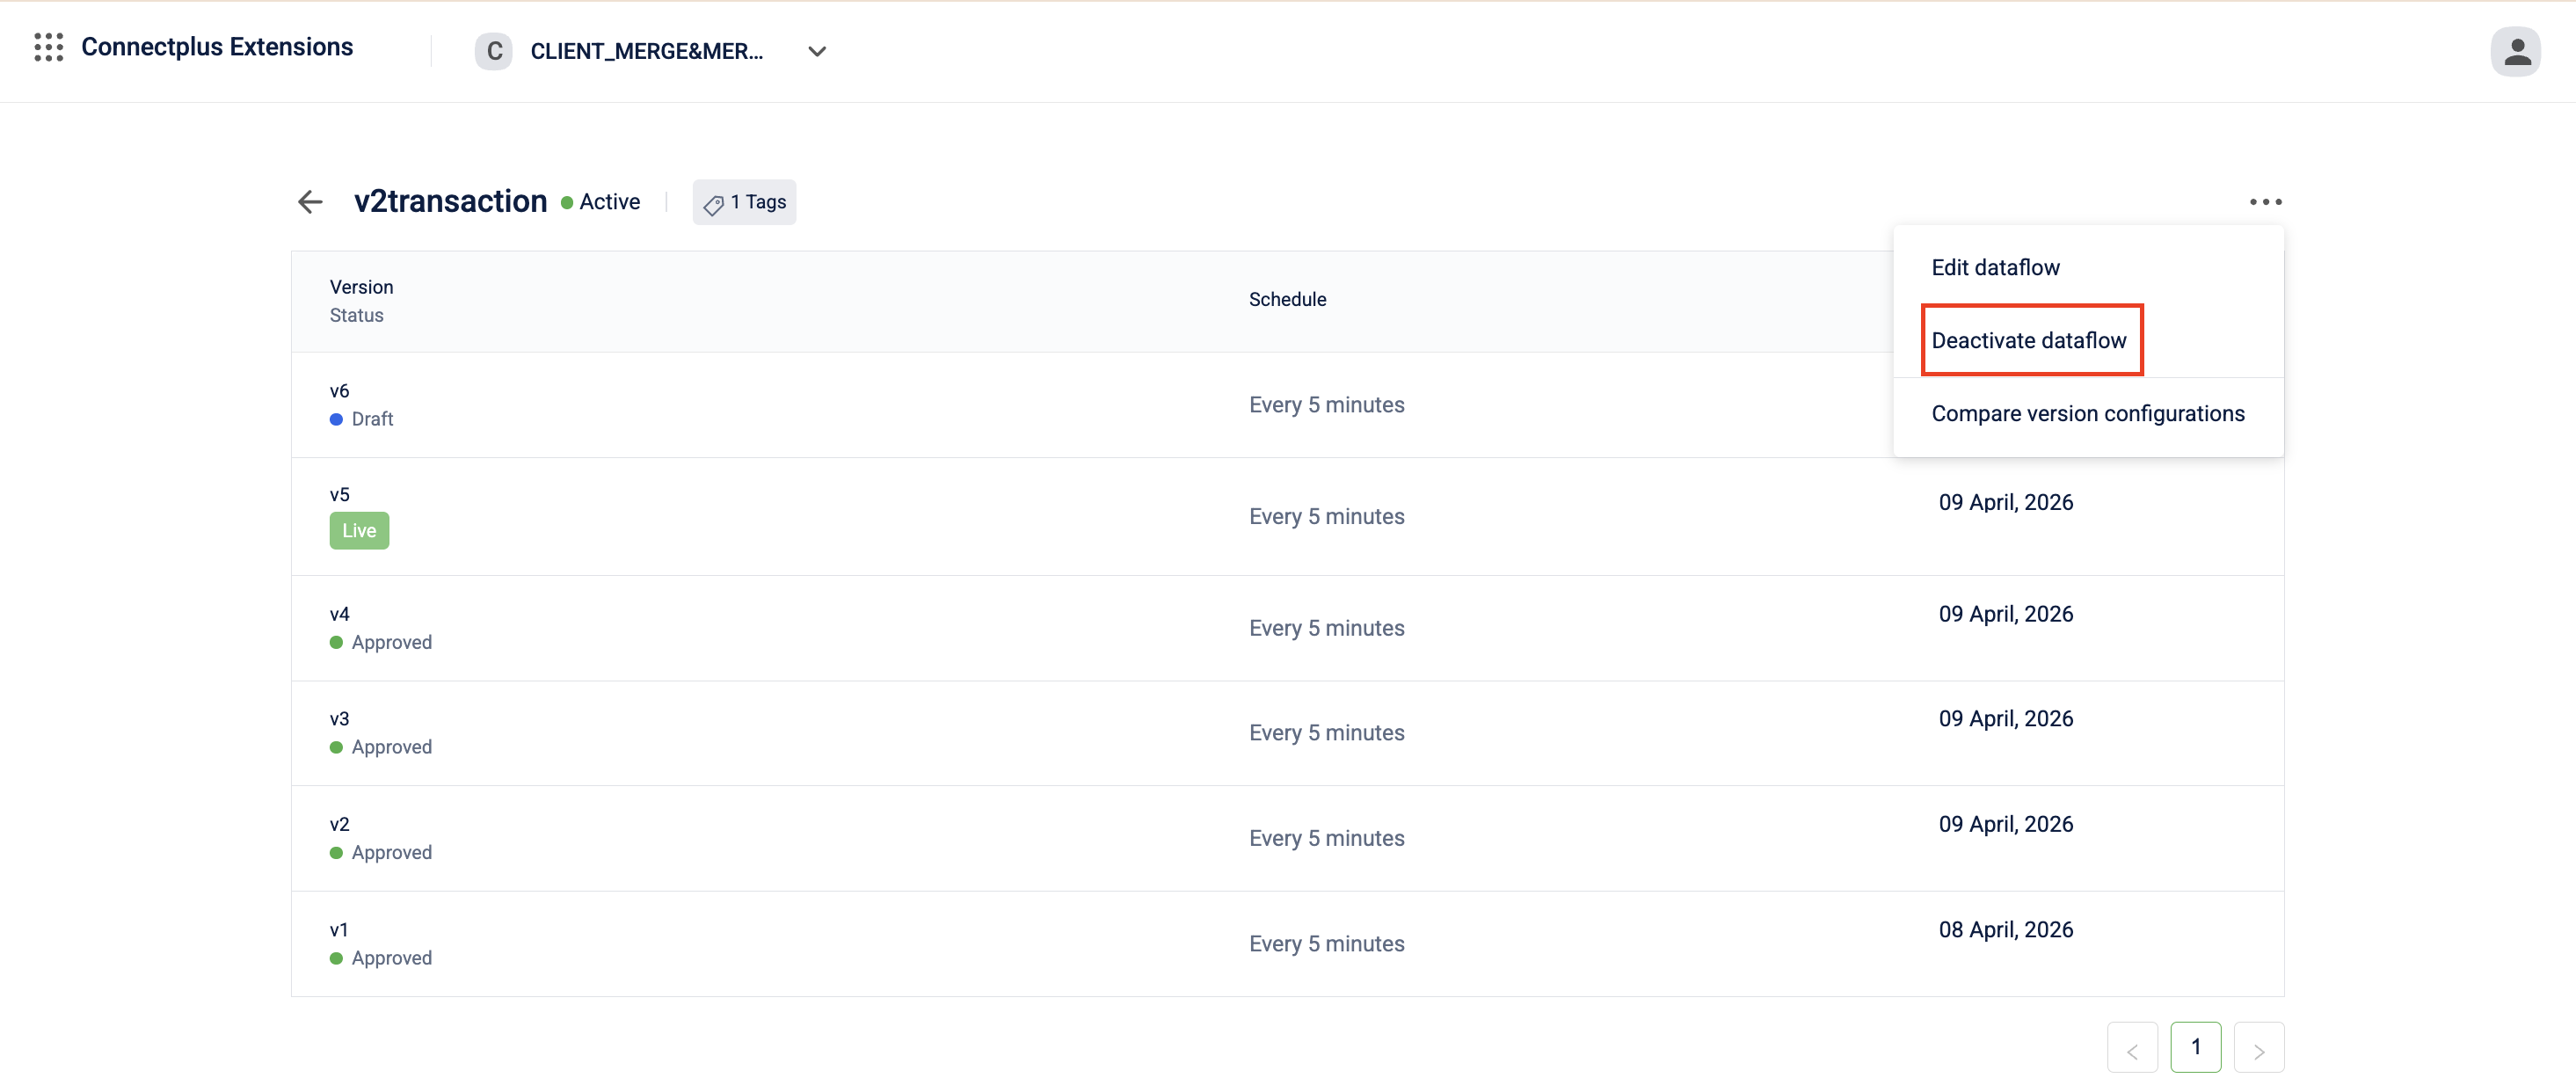
Deactivating a dataflow
A Connect+ dataflow can't be deleted. However, ypou can deactivate the dataflow.
Note: A dataflow is active by default when created.
The following are the steps to deactivate a dataflow.
- Navigate to the Connect+ UI and select your organization.
- In the My Dataflows tab, use the search bar to find the dataflow you want to deactivate.
- Click on the dataflow.
The dataflow version page opens. - In the dataflow version page, click the ellipsis menu.
- Click Deactivate dataflow.
A confirmation modal appears. - Click Yes.
The dataflow is deactivated.
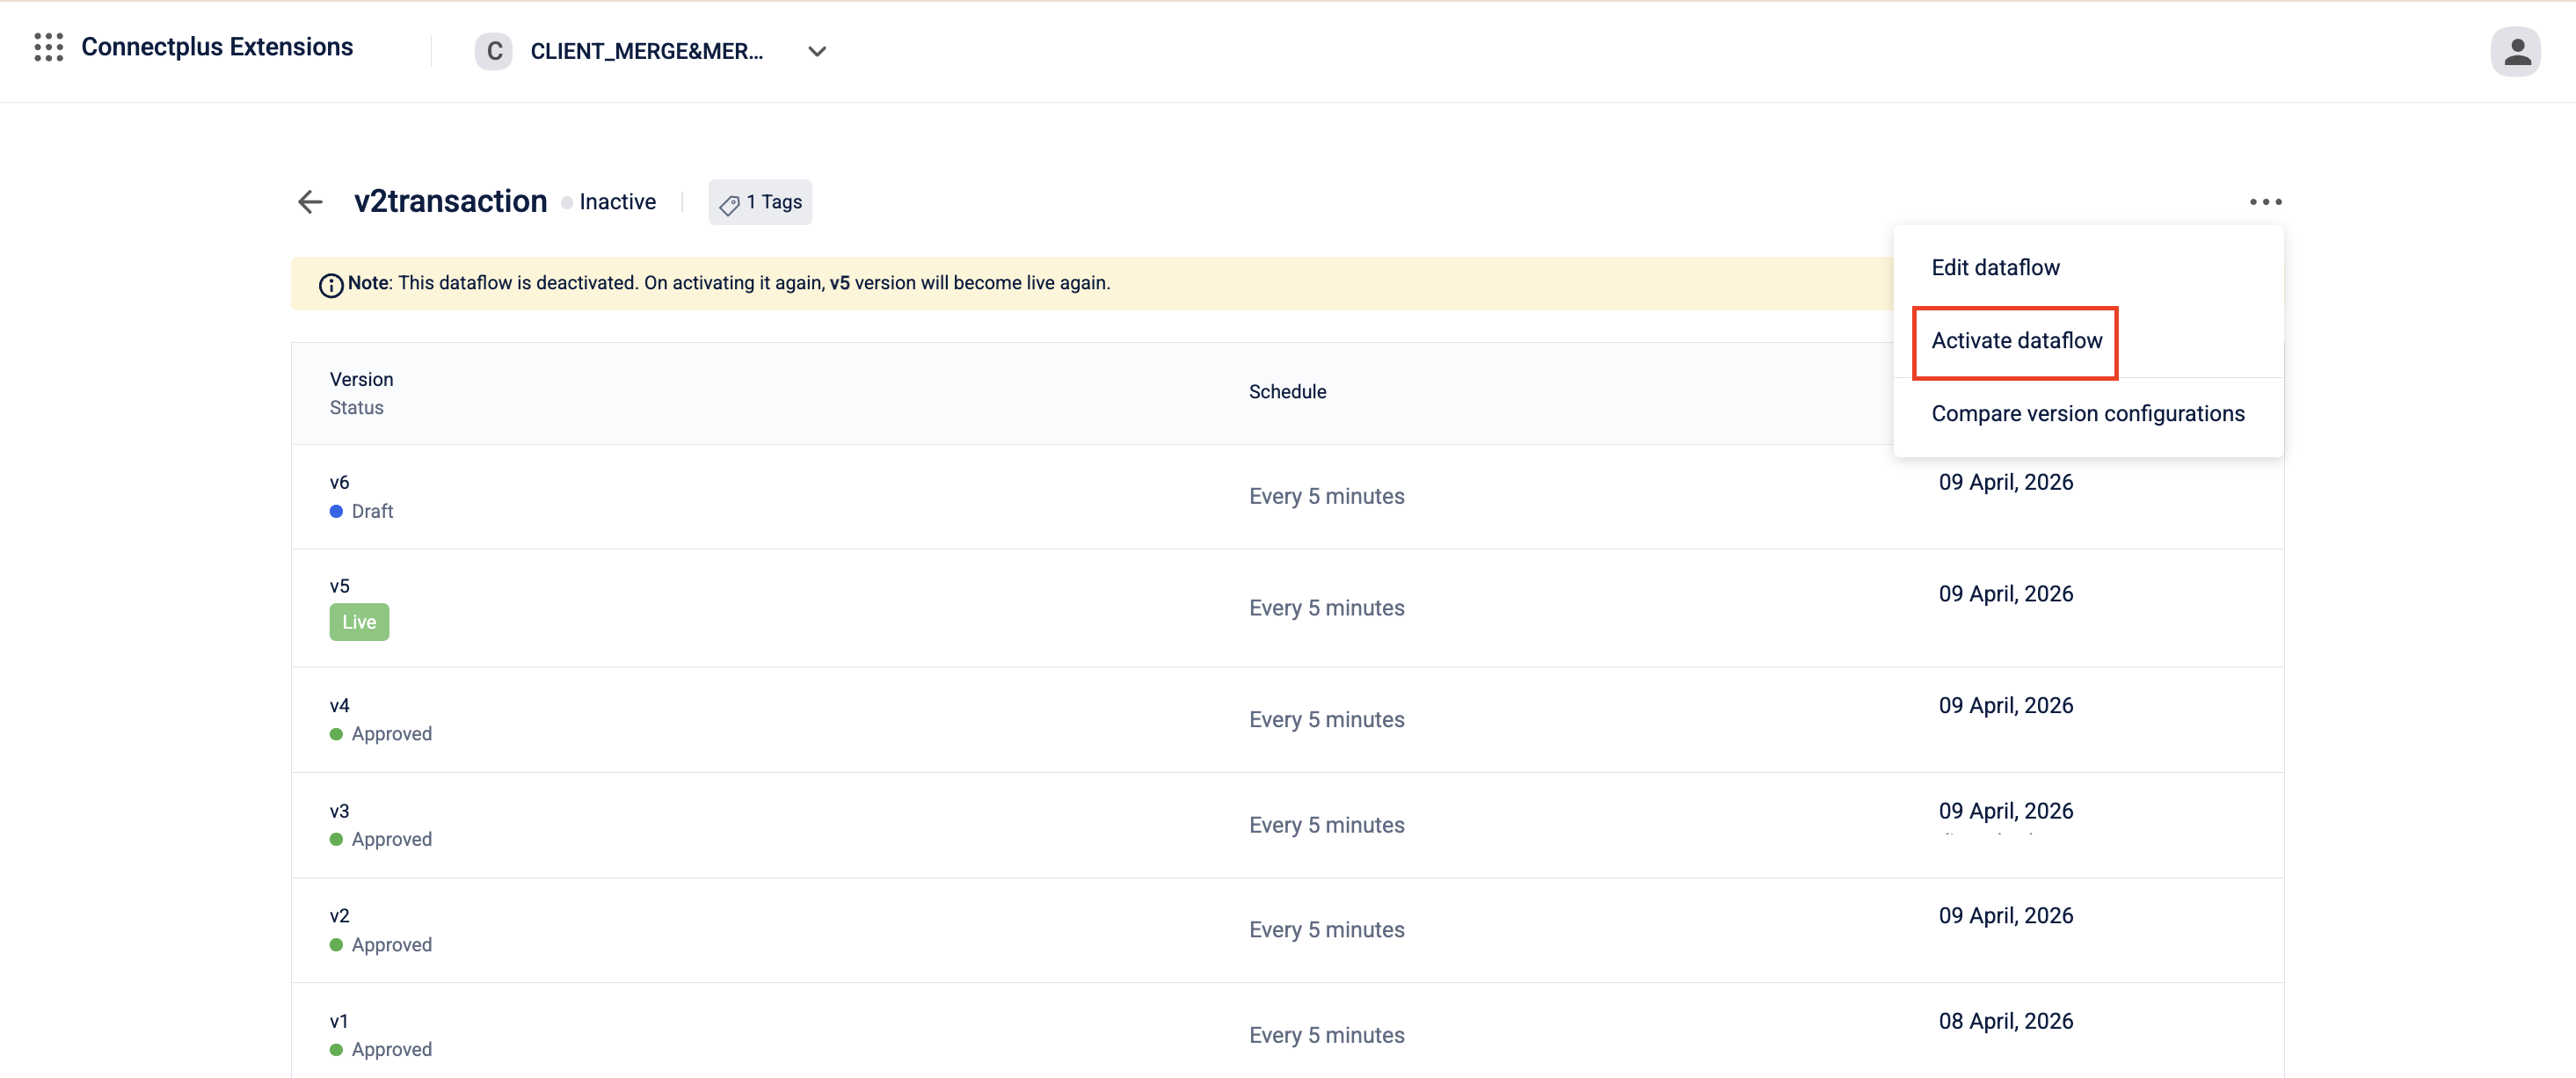
Activating a dataflow
You can activate a deactivated dataflow.
To activate,
-
Navigate to the Connect+ UI and select your organization.
-
In the My Dataflows tab, use the search bar to find the dataflow you want to activate.
-
Click on the dataflow.
The dataflow version page opens. -
In the dataflow version page, click the ellipsis menu.
-
Click Activate dataflow.
A confirmation modal appears. -
Click Yes.
The dataflow is activated.