
Payment mode import profile
The payment mode import profile lets you bulk-import payment mode data, also called tenders, such as cash, card, and UPI payments, against existing transaction bills for your loyalty members. Use it when you have offline payment data that wasn't captured through InStore and needs to be added to the Capillary database.
Each row you import represents one payment mode entry for a specific bill. A single import job can contain multiple payment mode types, for example, Cash and Card rows together. Each row can also include attribute values for that payment mode type, such as card number or card type.
Note: This profile supports Insert only. Updating or deleting existing payment mode records isn't supported.
Prerequisites
- The bills you're importing payment-mode data for must already exist in the Capillary database.
- Payment mode types, for example, Cash, Card, UPI must be enabled for your organization. Rows with a payment mode type that isn't enabled are rejected.
- If a payment mode entry already exists for a bill, all rows for that bill are rejected, including rows for a different payment mode type.
- All rows for a bill are validated together. If any row for a bill fails, all rows for that bill are rejected.
Source data format
Your Databricks source table must include the following fields. Standard fields come first, followed by any payment mode attribute columns.
Standard fields
| Field | Display name | Required | Description |
|---|---|---|---|
bill_number | Bill number | When using Bill Number as the identifier | The bill number for the transaction. |
bill_id | Bill ID | When using Bill ID as the identifier | The system-generated ID for the transaction bill. |
bill_datetime | Bill datetime | Conditional | The date and time of the transaction, in yyyy-MM-dd HH:mm:ss format. Date and time are both required. Required when using Bill Number as the identifier. |
user_id | User ID | Optional | The loyalty member's internal user ID. Used as a secondary disambiguator when the bill number matches more than one bill. |
ref_type | Bill type | Yes | Whether the bill is a regular or not-interested transaction. Accepted values: REGULAR, NOT_INTERESTED. |
payment_mode | Payment mode | Yes | The payment mode type for this row. Must match a payment mode type enabled for your organization (for example, CASH, CARD, UPI). |
amount | Payment amount | Yes | The payment amount for this row. Must be a valid number. |
Attribute columns
Add a separate column for each payment mode attribute your organization has configured, such as card_number or card_type.
- Add attribute values only for the payment mode type in that row. If you add a
card_numbervalue to a CASH row, the system rejects the row. - Leave the attribute column empty for rows where the attribute does not apply.
Create an import job
Creating a payment mode import job takes five steps in the New import job wizard.
Step 1: Job settings
-
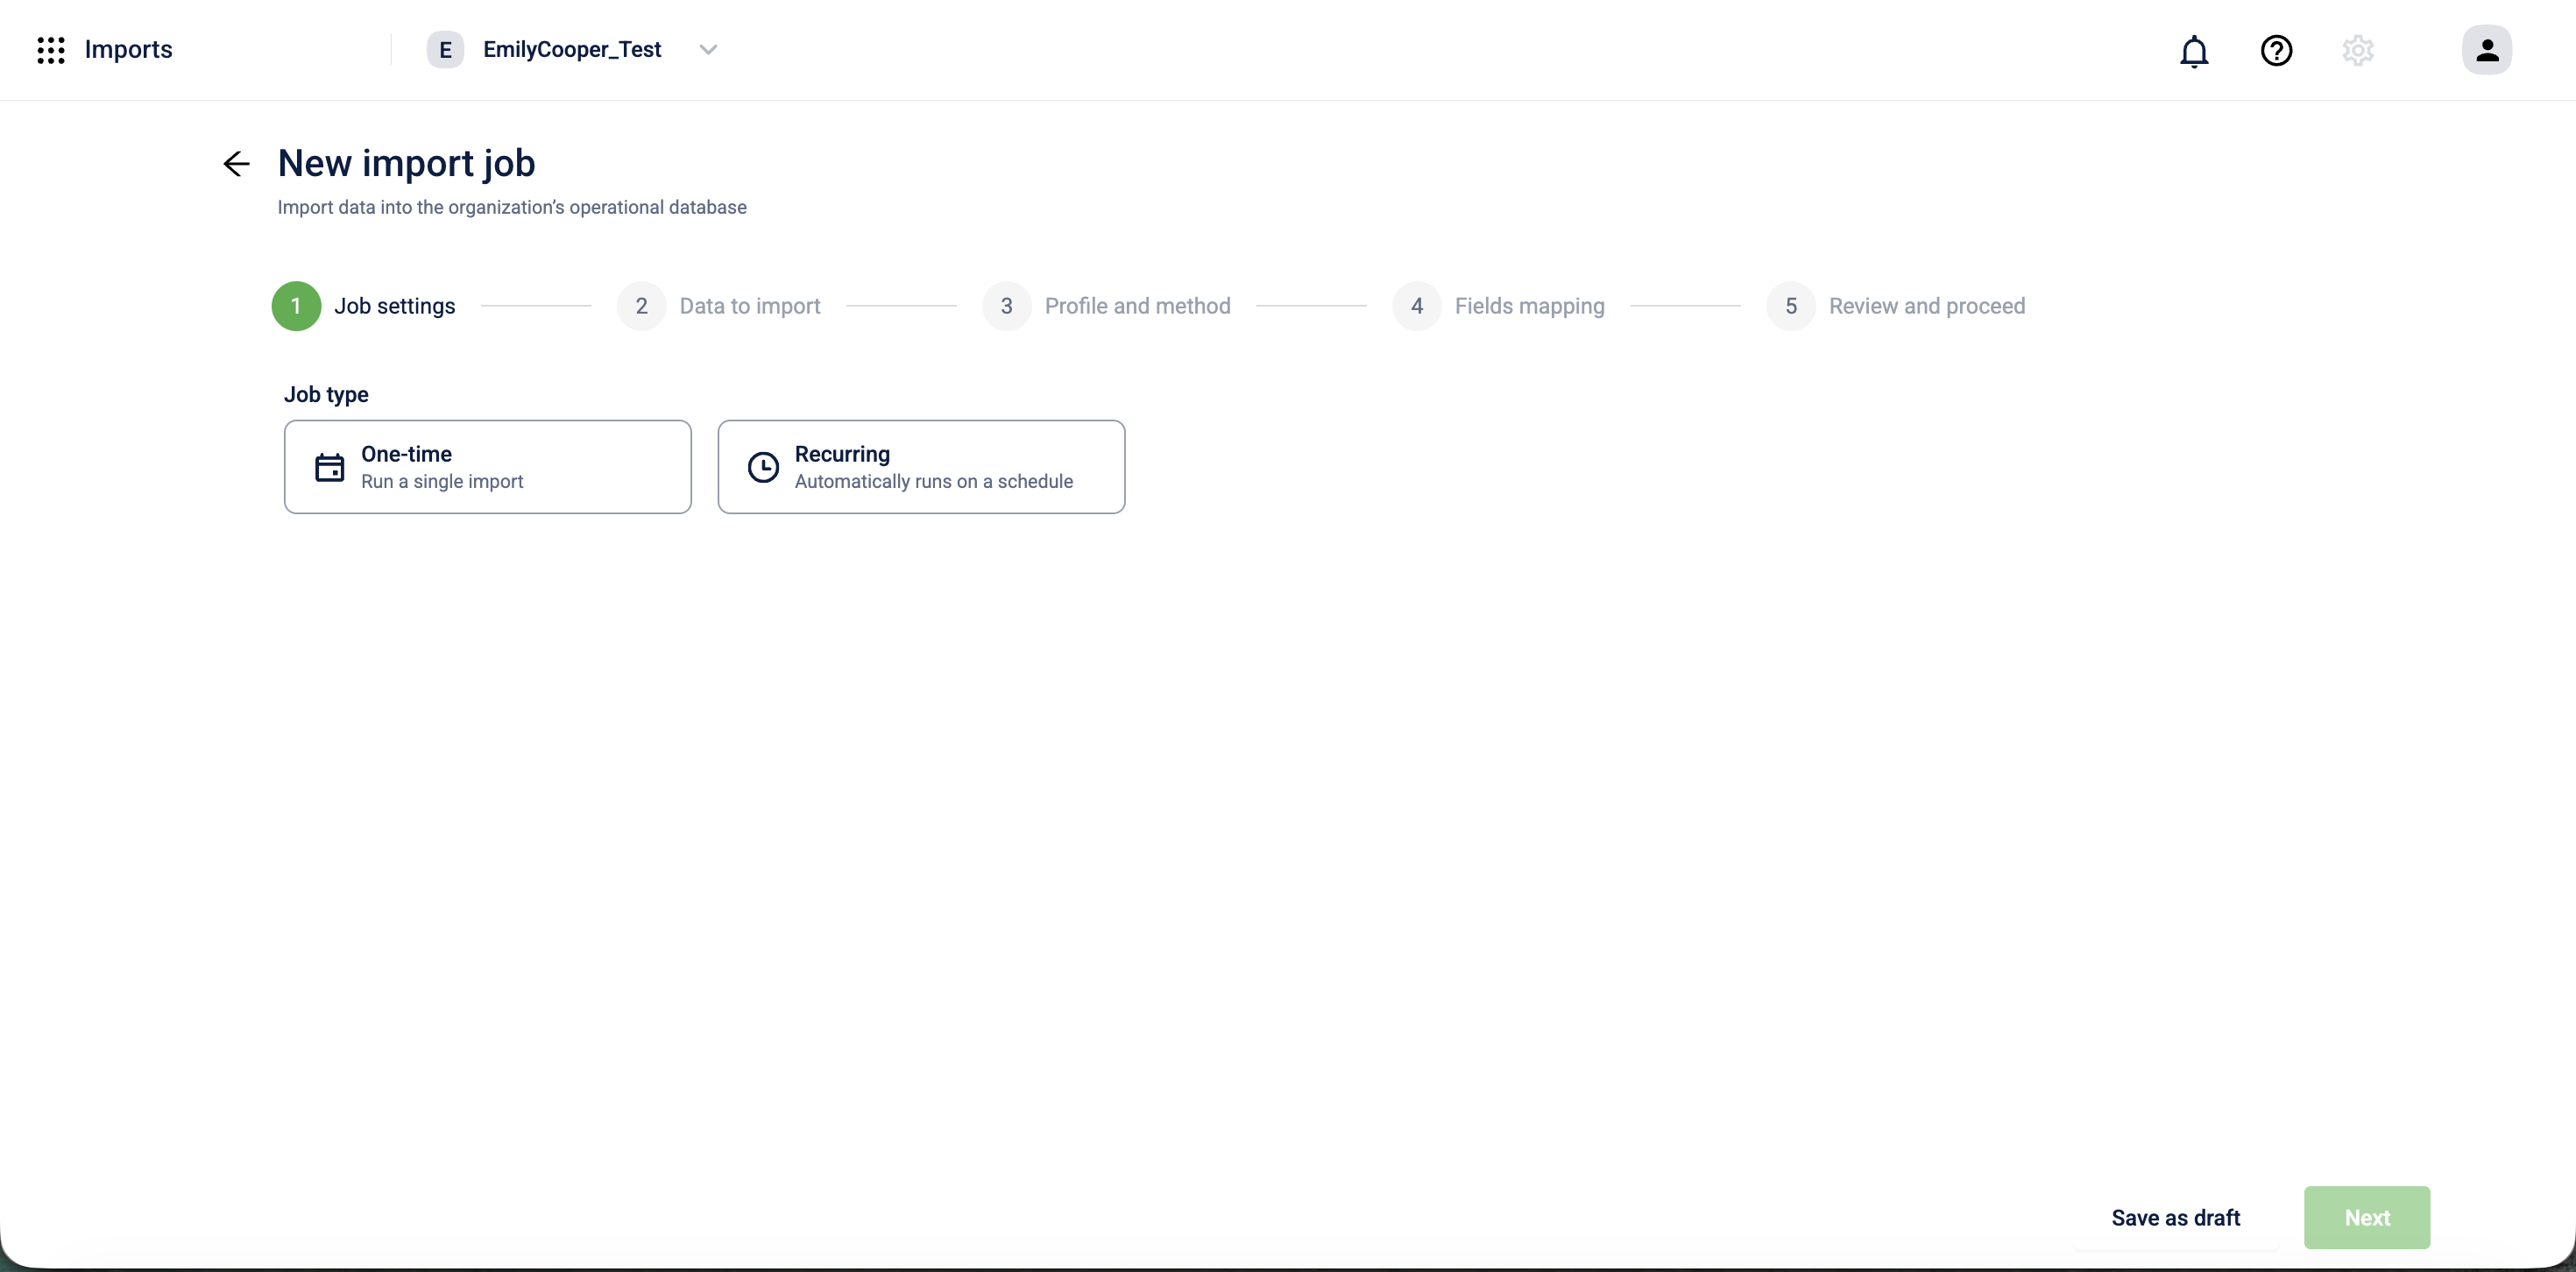
Select the job type:
-
One-time: runs a single import and stops.
-
Recurring: automatically runs on a schedule you define.
-
-
If you selected Recurring, set the frequency:
Frequency Additional fields Every 15 mins None Hourly None Daily At: select a time Weekly On: select a day of the week; At: select a time Monthly On: select First day of the month, 15th day of the month, or Last day of the month; At: select a time Custom (cron expression) Cron expression: enter a valid cron expression 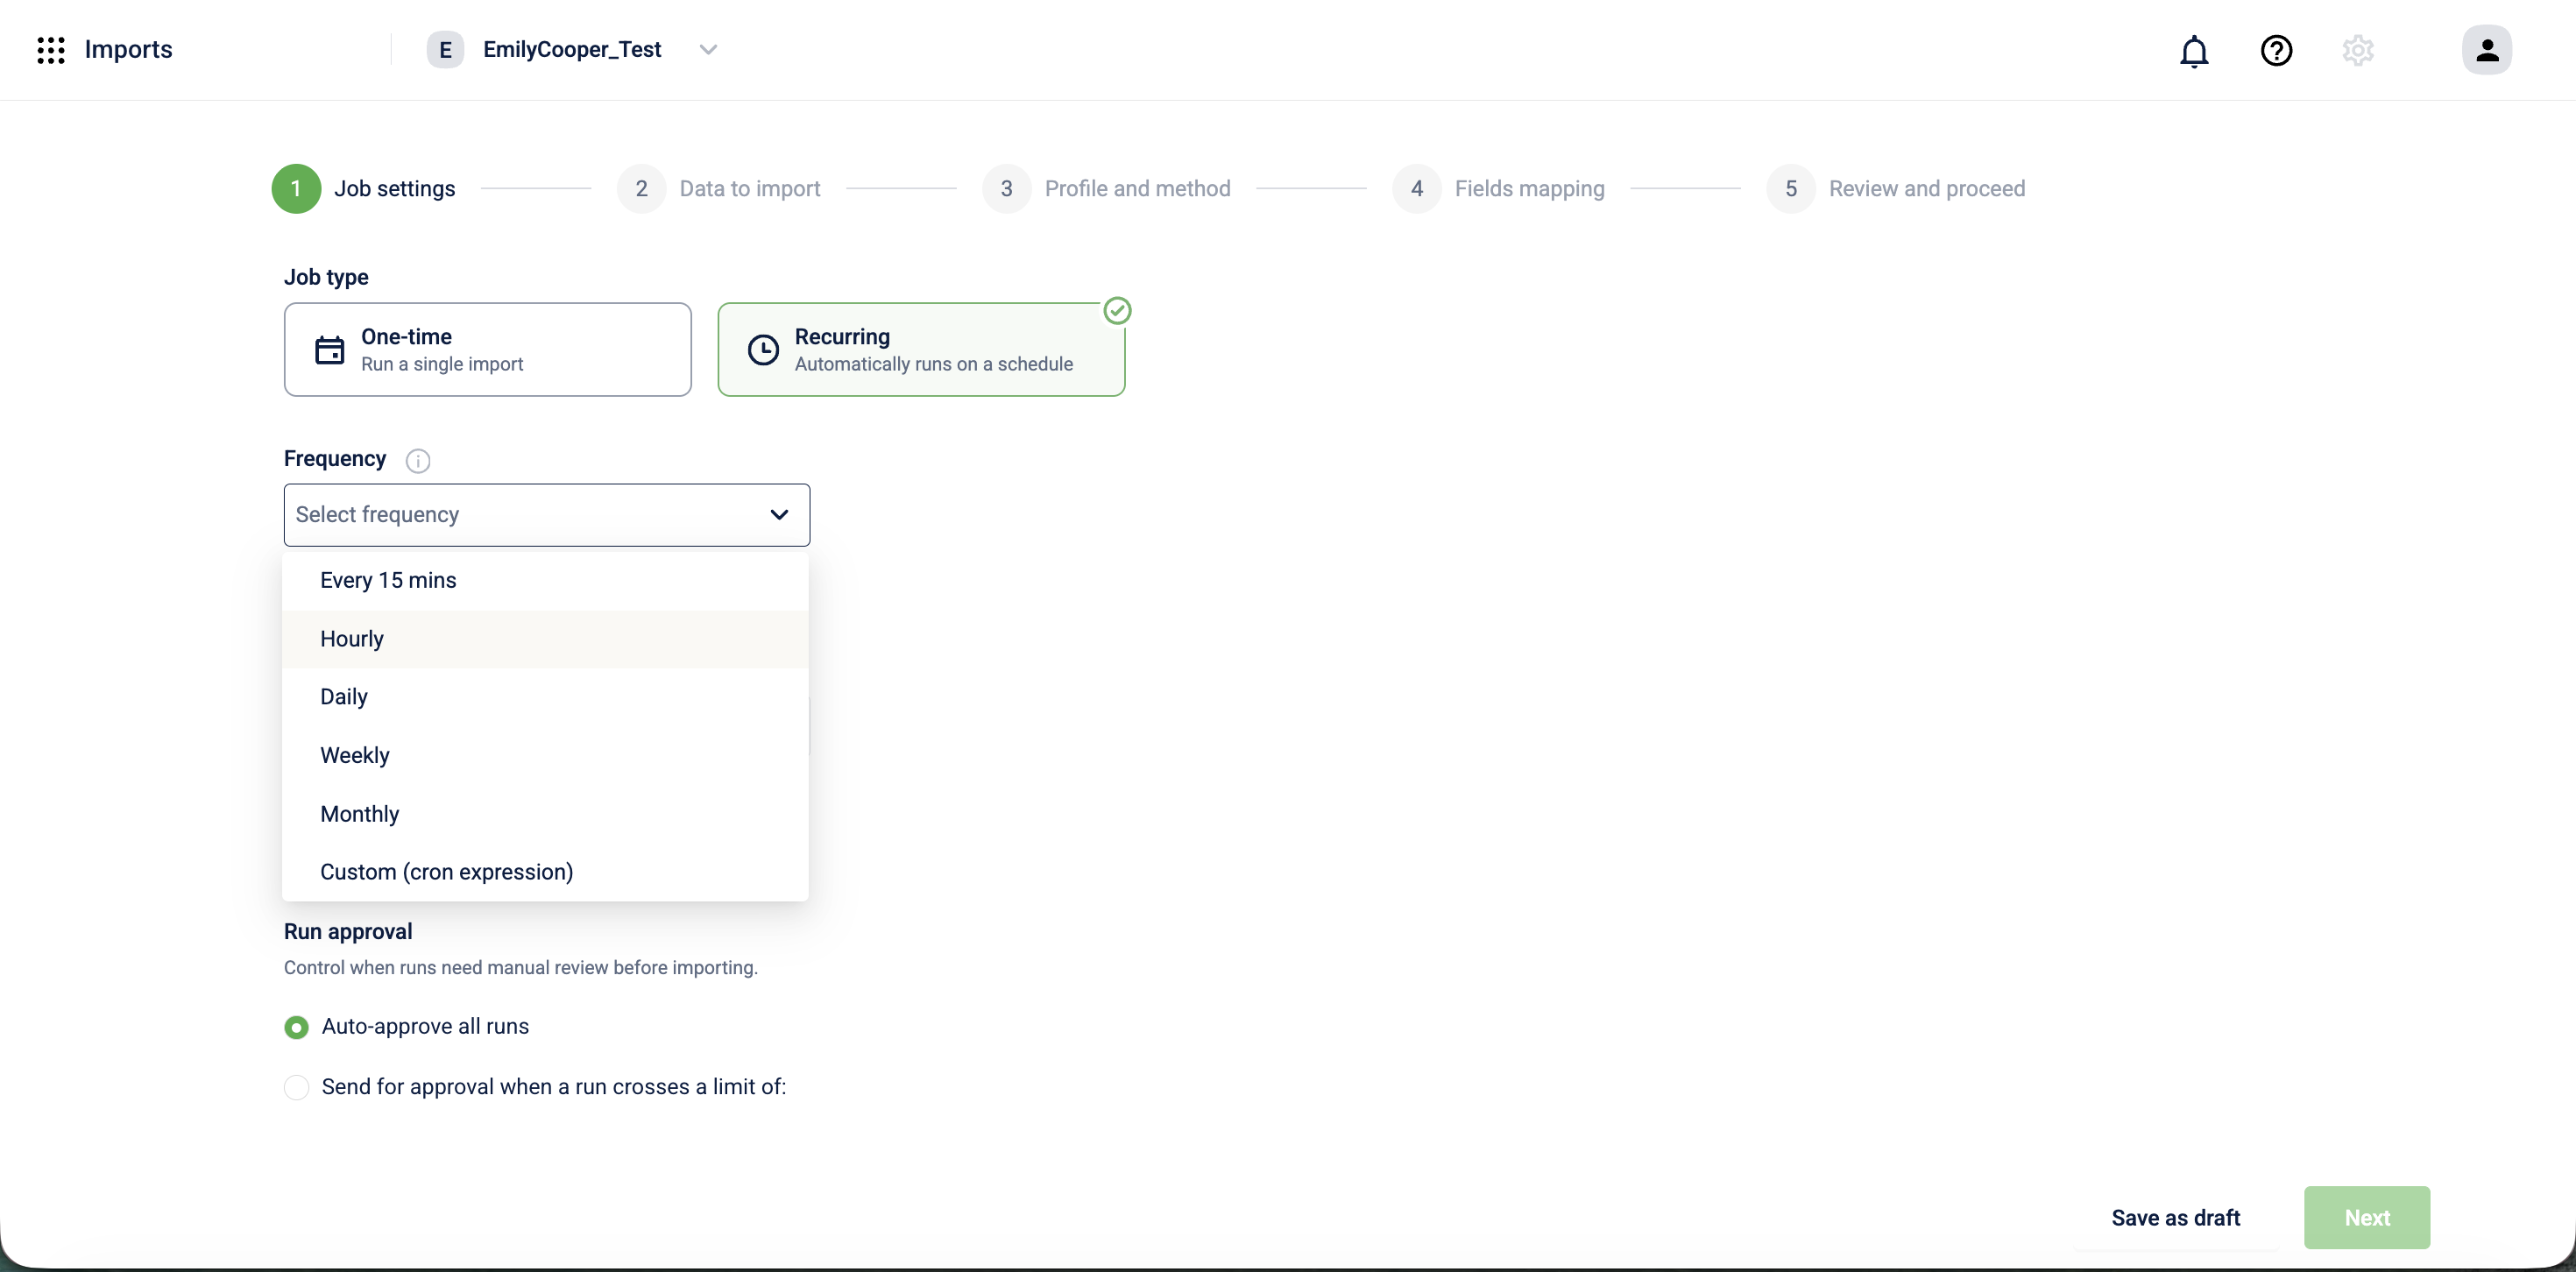
-
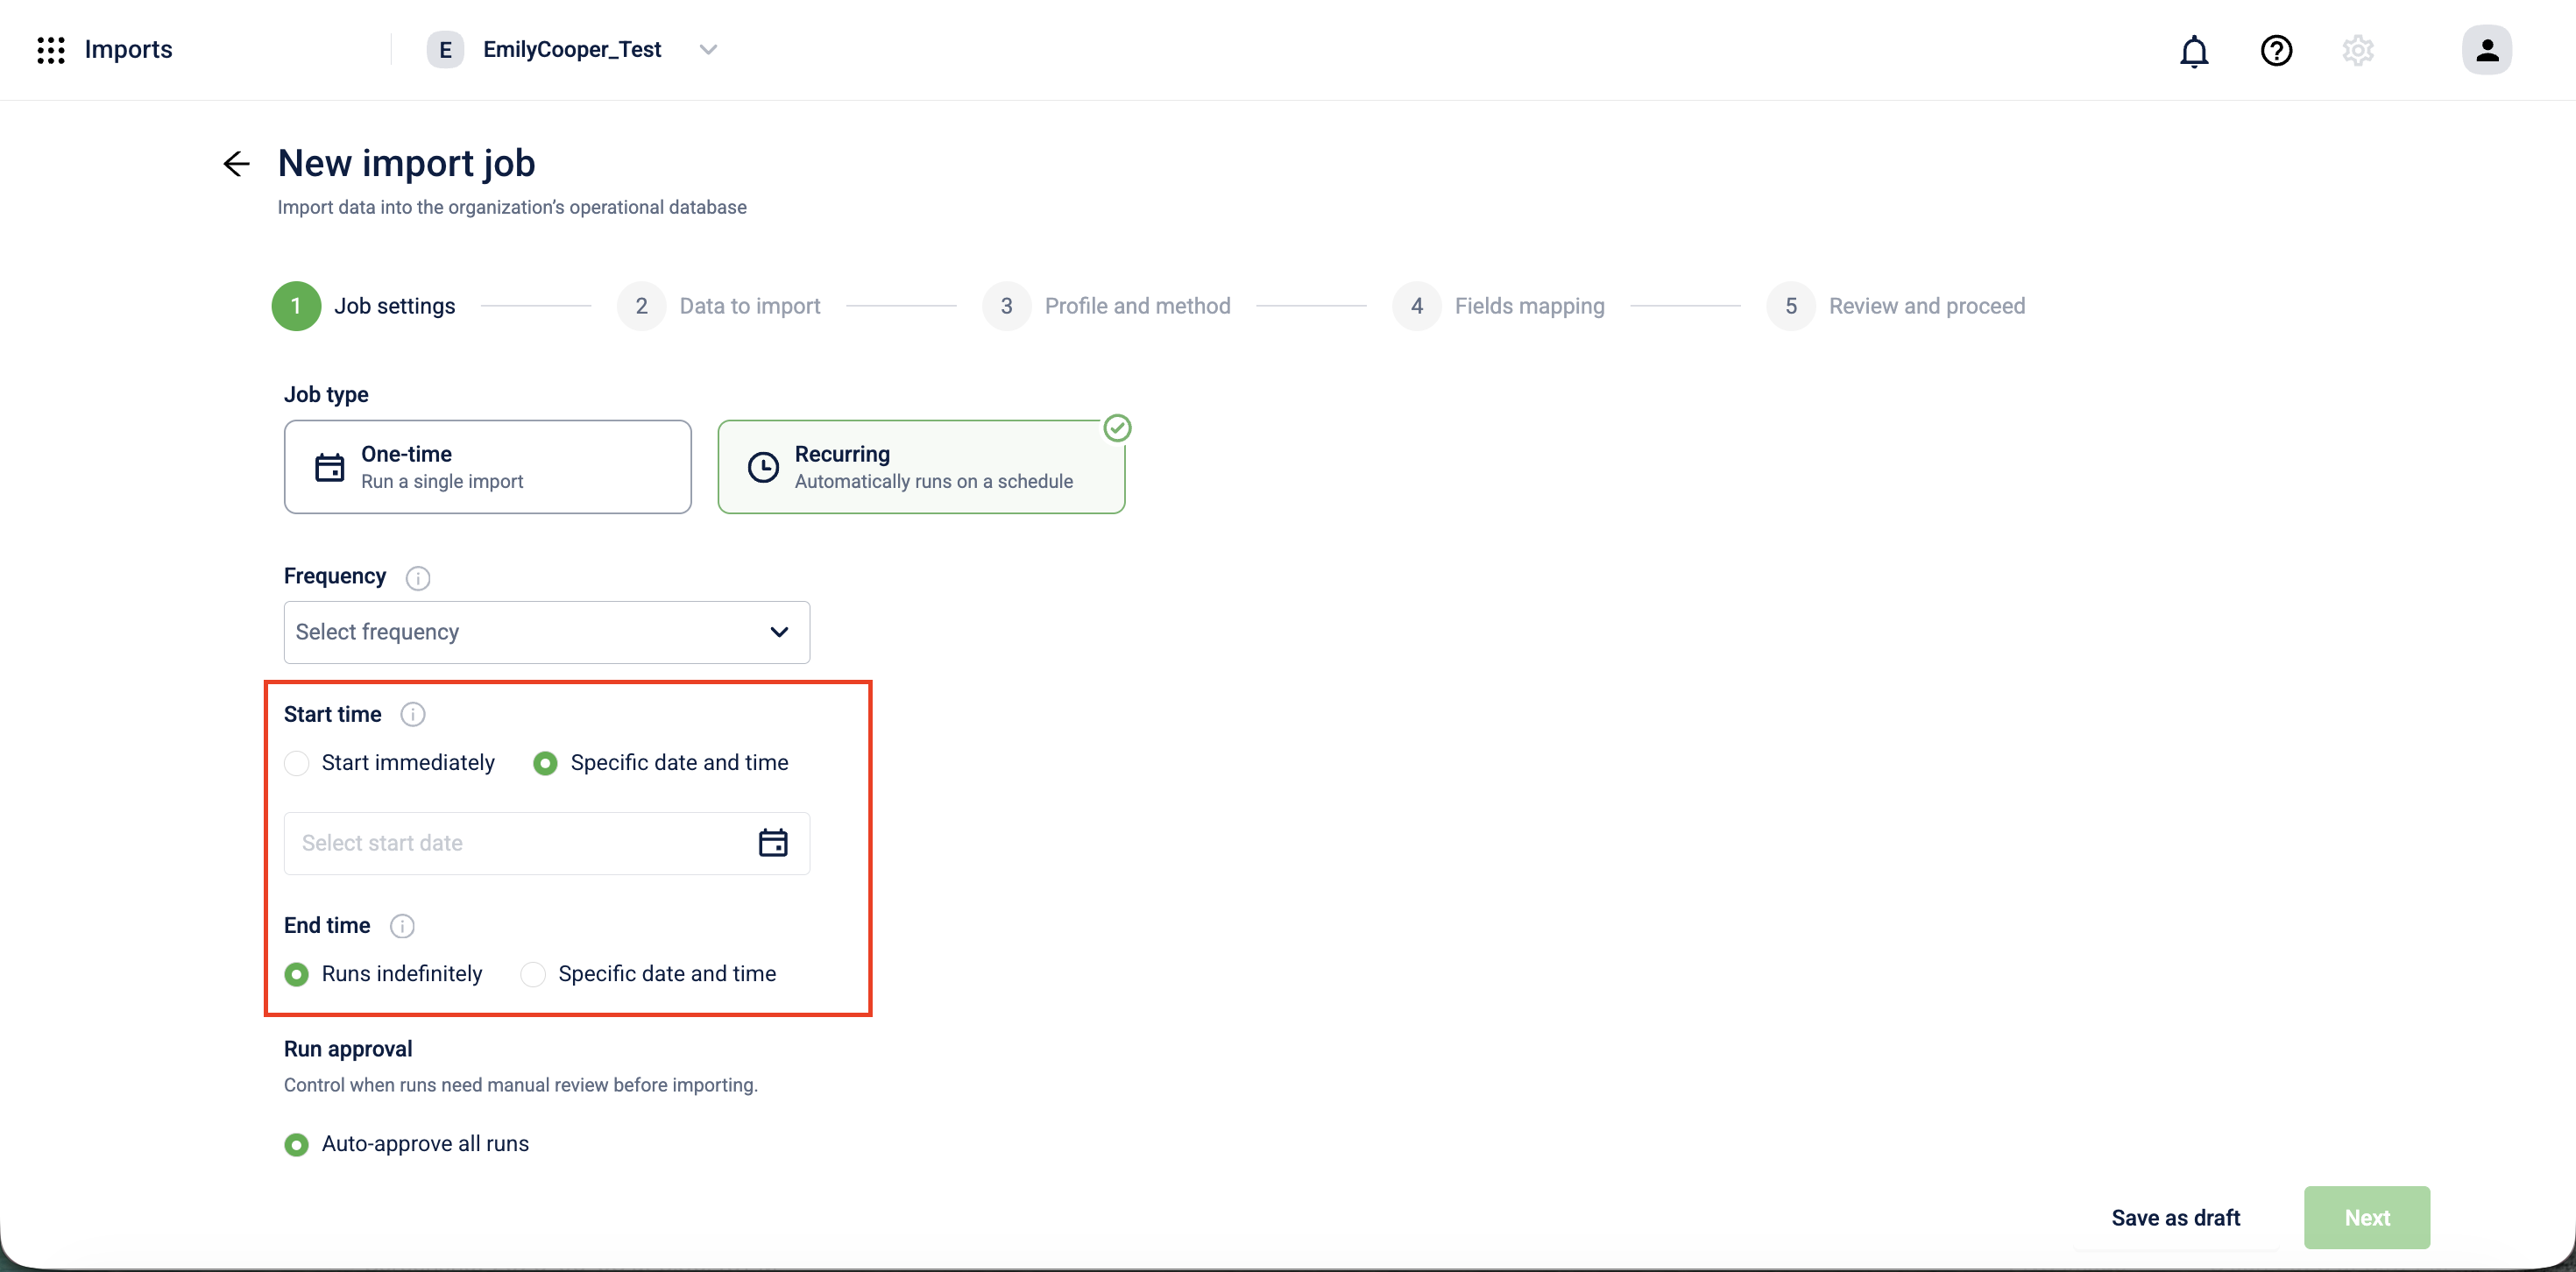
If you selected Recurring, set the start and end time for the schedule:
-
Start time: select Start immediately to begin on the next scheduled occurrence, or select Specific date and time to set a date and time.
-
End time: select Runs indefinitely to keep the schedule running until you stop it manually, or select Specific date and time to set when the schedule stops.
-
-
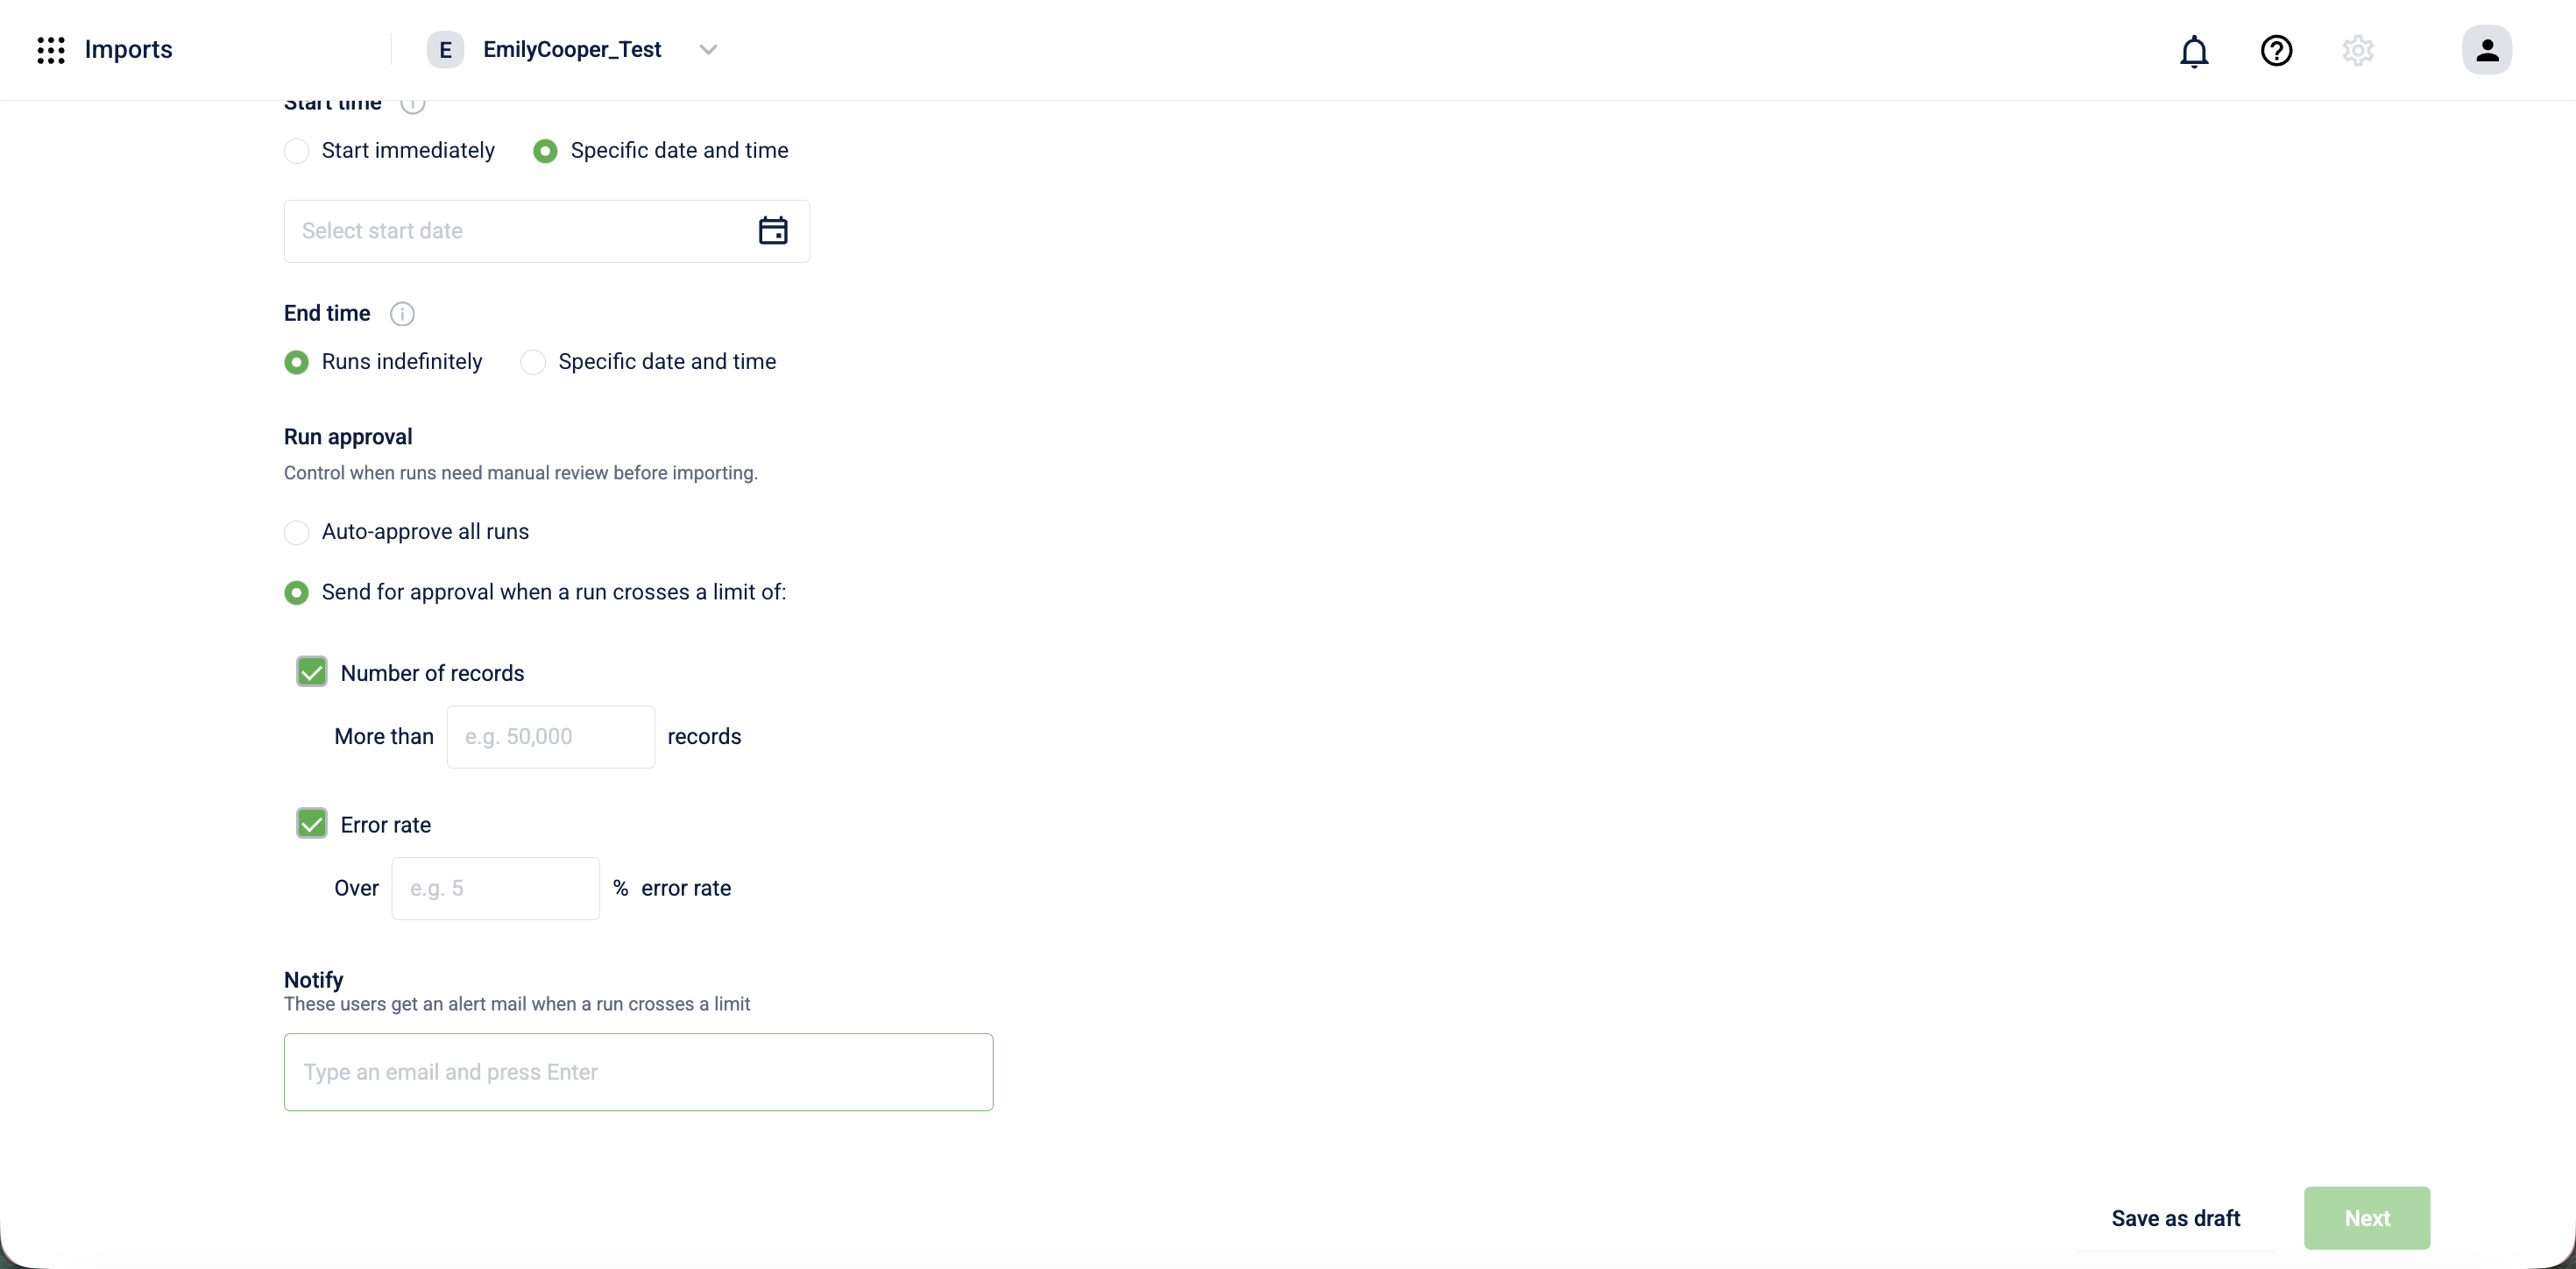
Under Run approval, select how the job is approved before importing:
- Auto-approve this import (default): the job runs without manual review.
- Send for approval when the import crosses a limit of: the system holds the job for manual approval when the import meets either condition below. Select one or both:
-
Number of records: enter a threshold. The system sends the job for approval when the import contains more than the specified number of records.
-
Error rate: enter a percentage. The system sends the job for approval when the error rate exceeds the specified percentage.
-
-
In the Notify field, enter the email addresses of users who should receive a notification when a run crosses a limit. Select Enter after each address.
Note: Select Save as draft at any step to save your progress and return to the job later.
Select Next.
Step 2: Data to import
-
Under Data source, select Databricks.
-
In the Table pattern field, enter the name of your source table. The name must exactly match the table name in Databricks.
-
When the system finds a match, a confirmation appears: "1 tables matched".
In the Select table dropdown, select your table.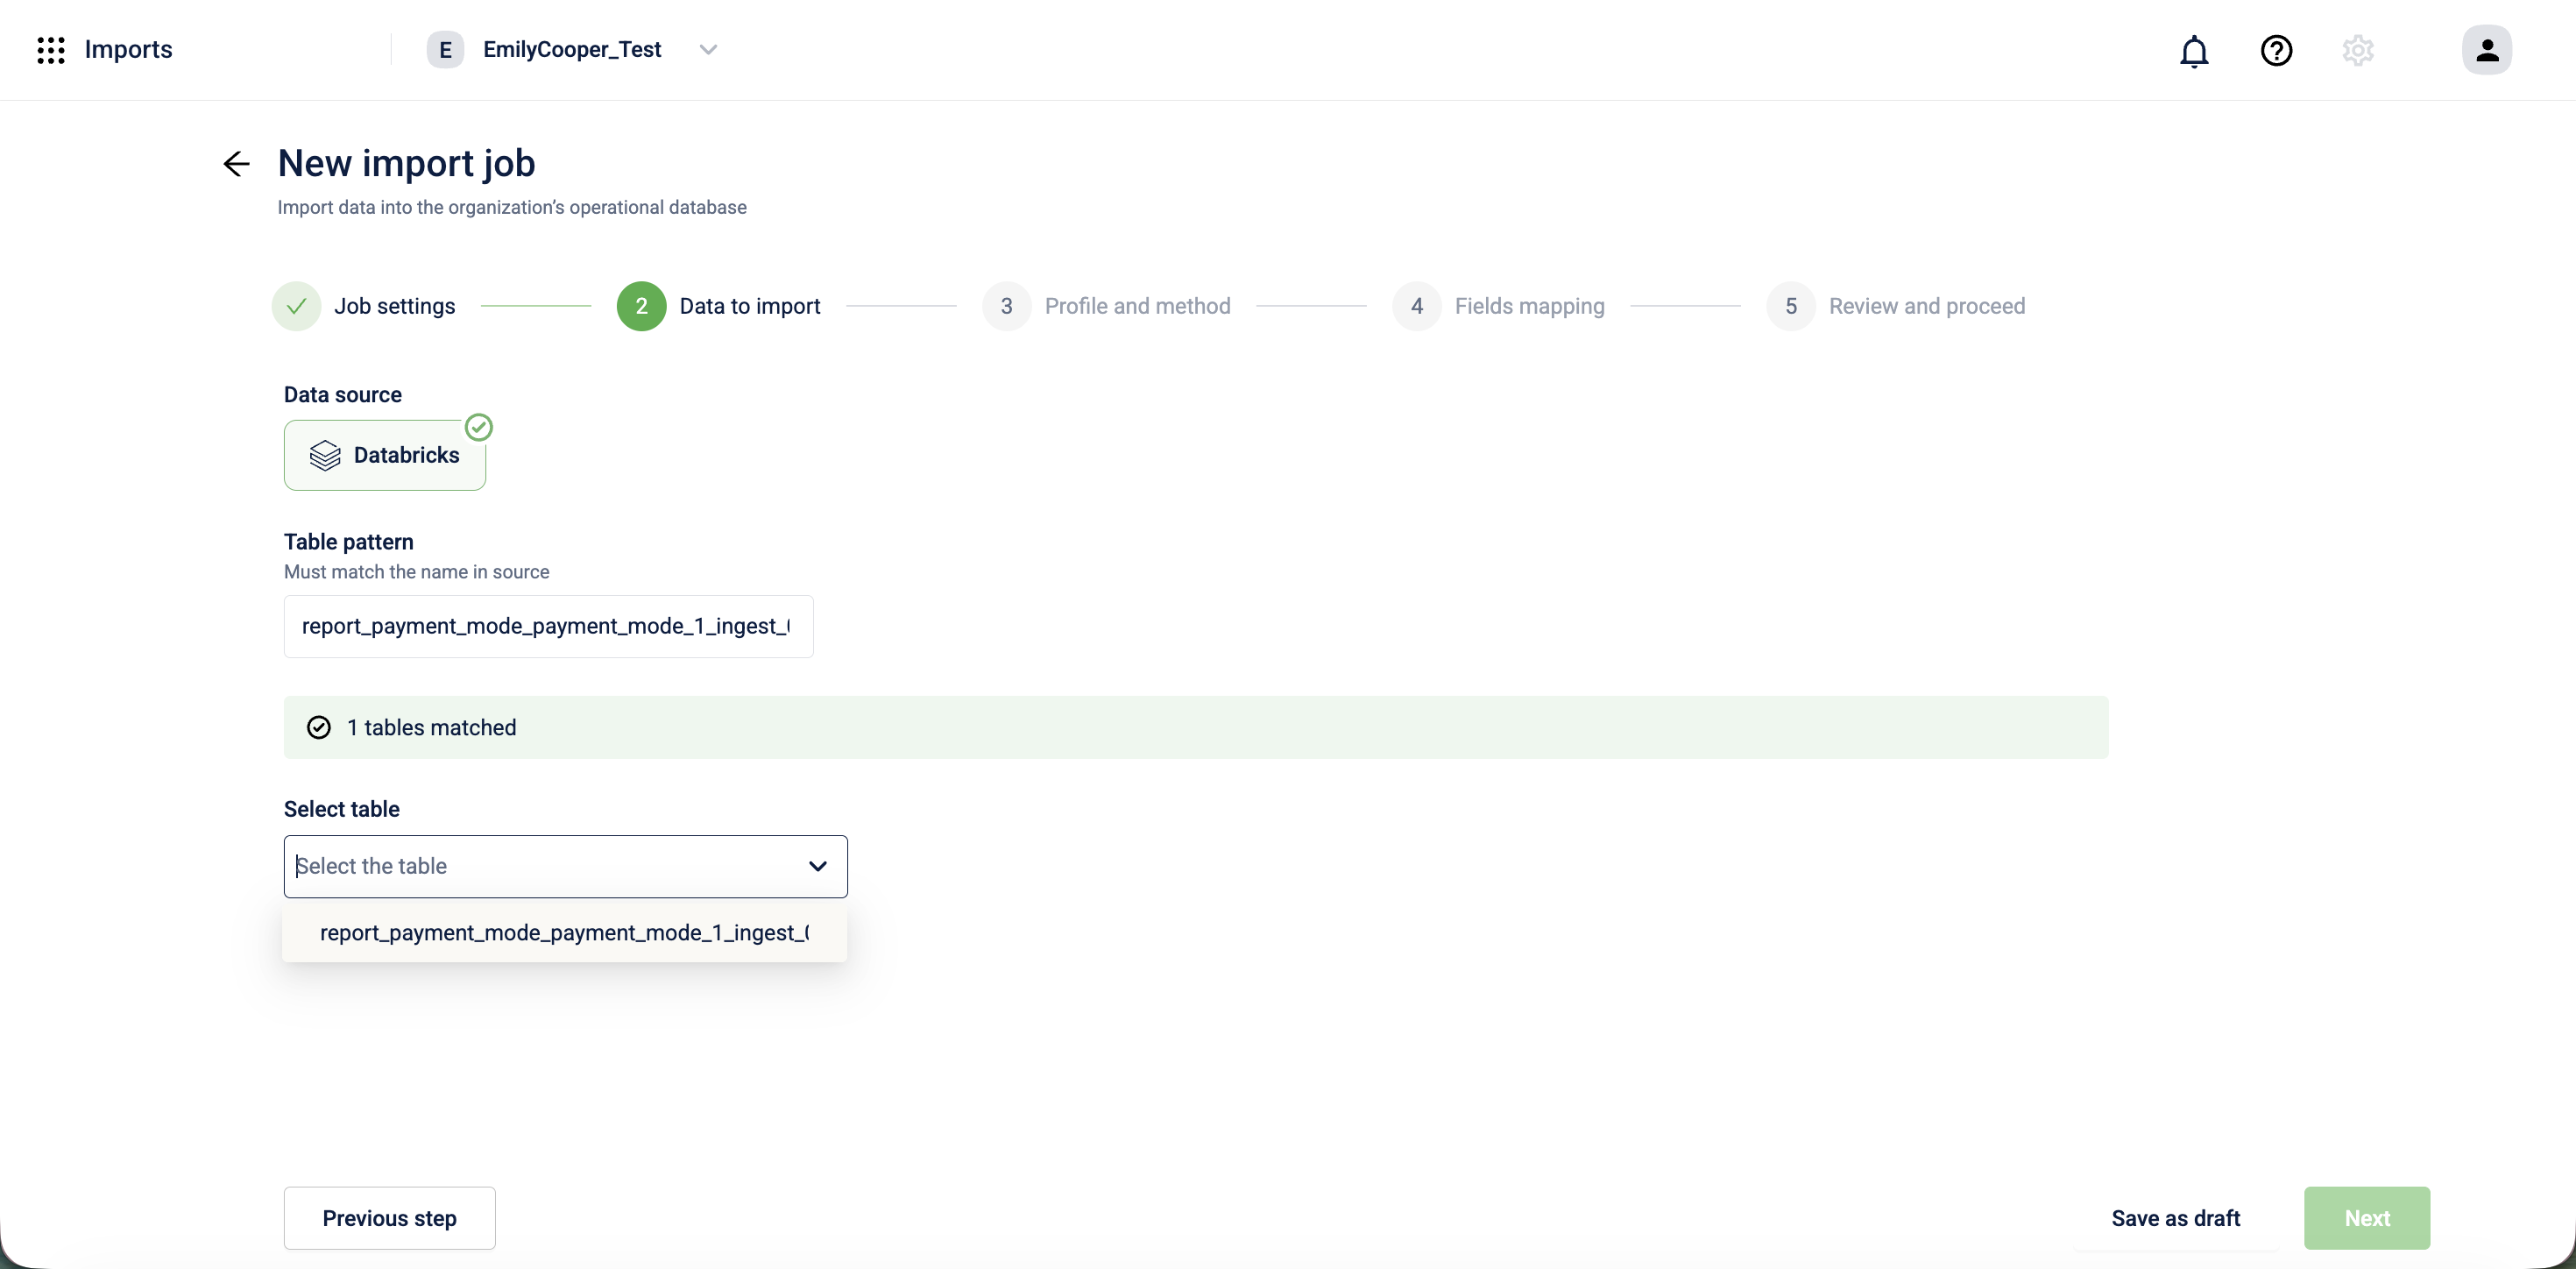
-
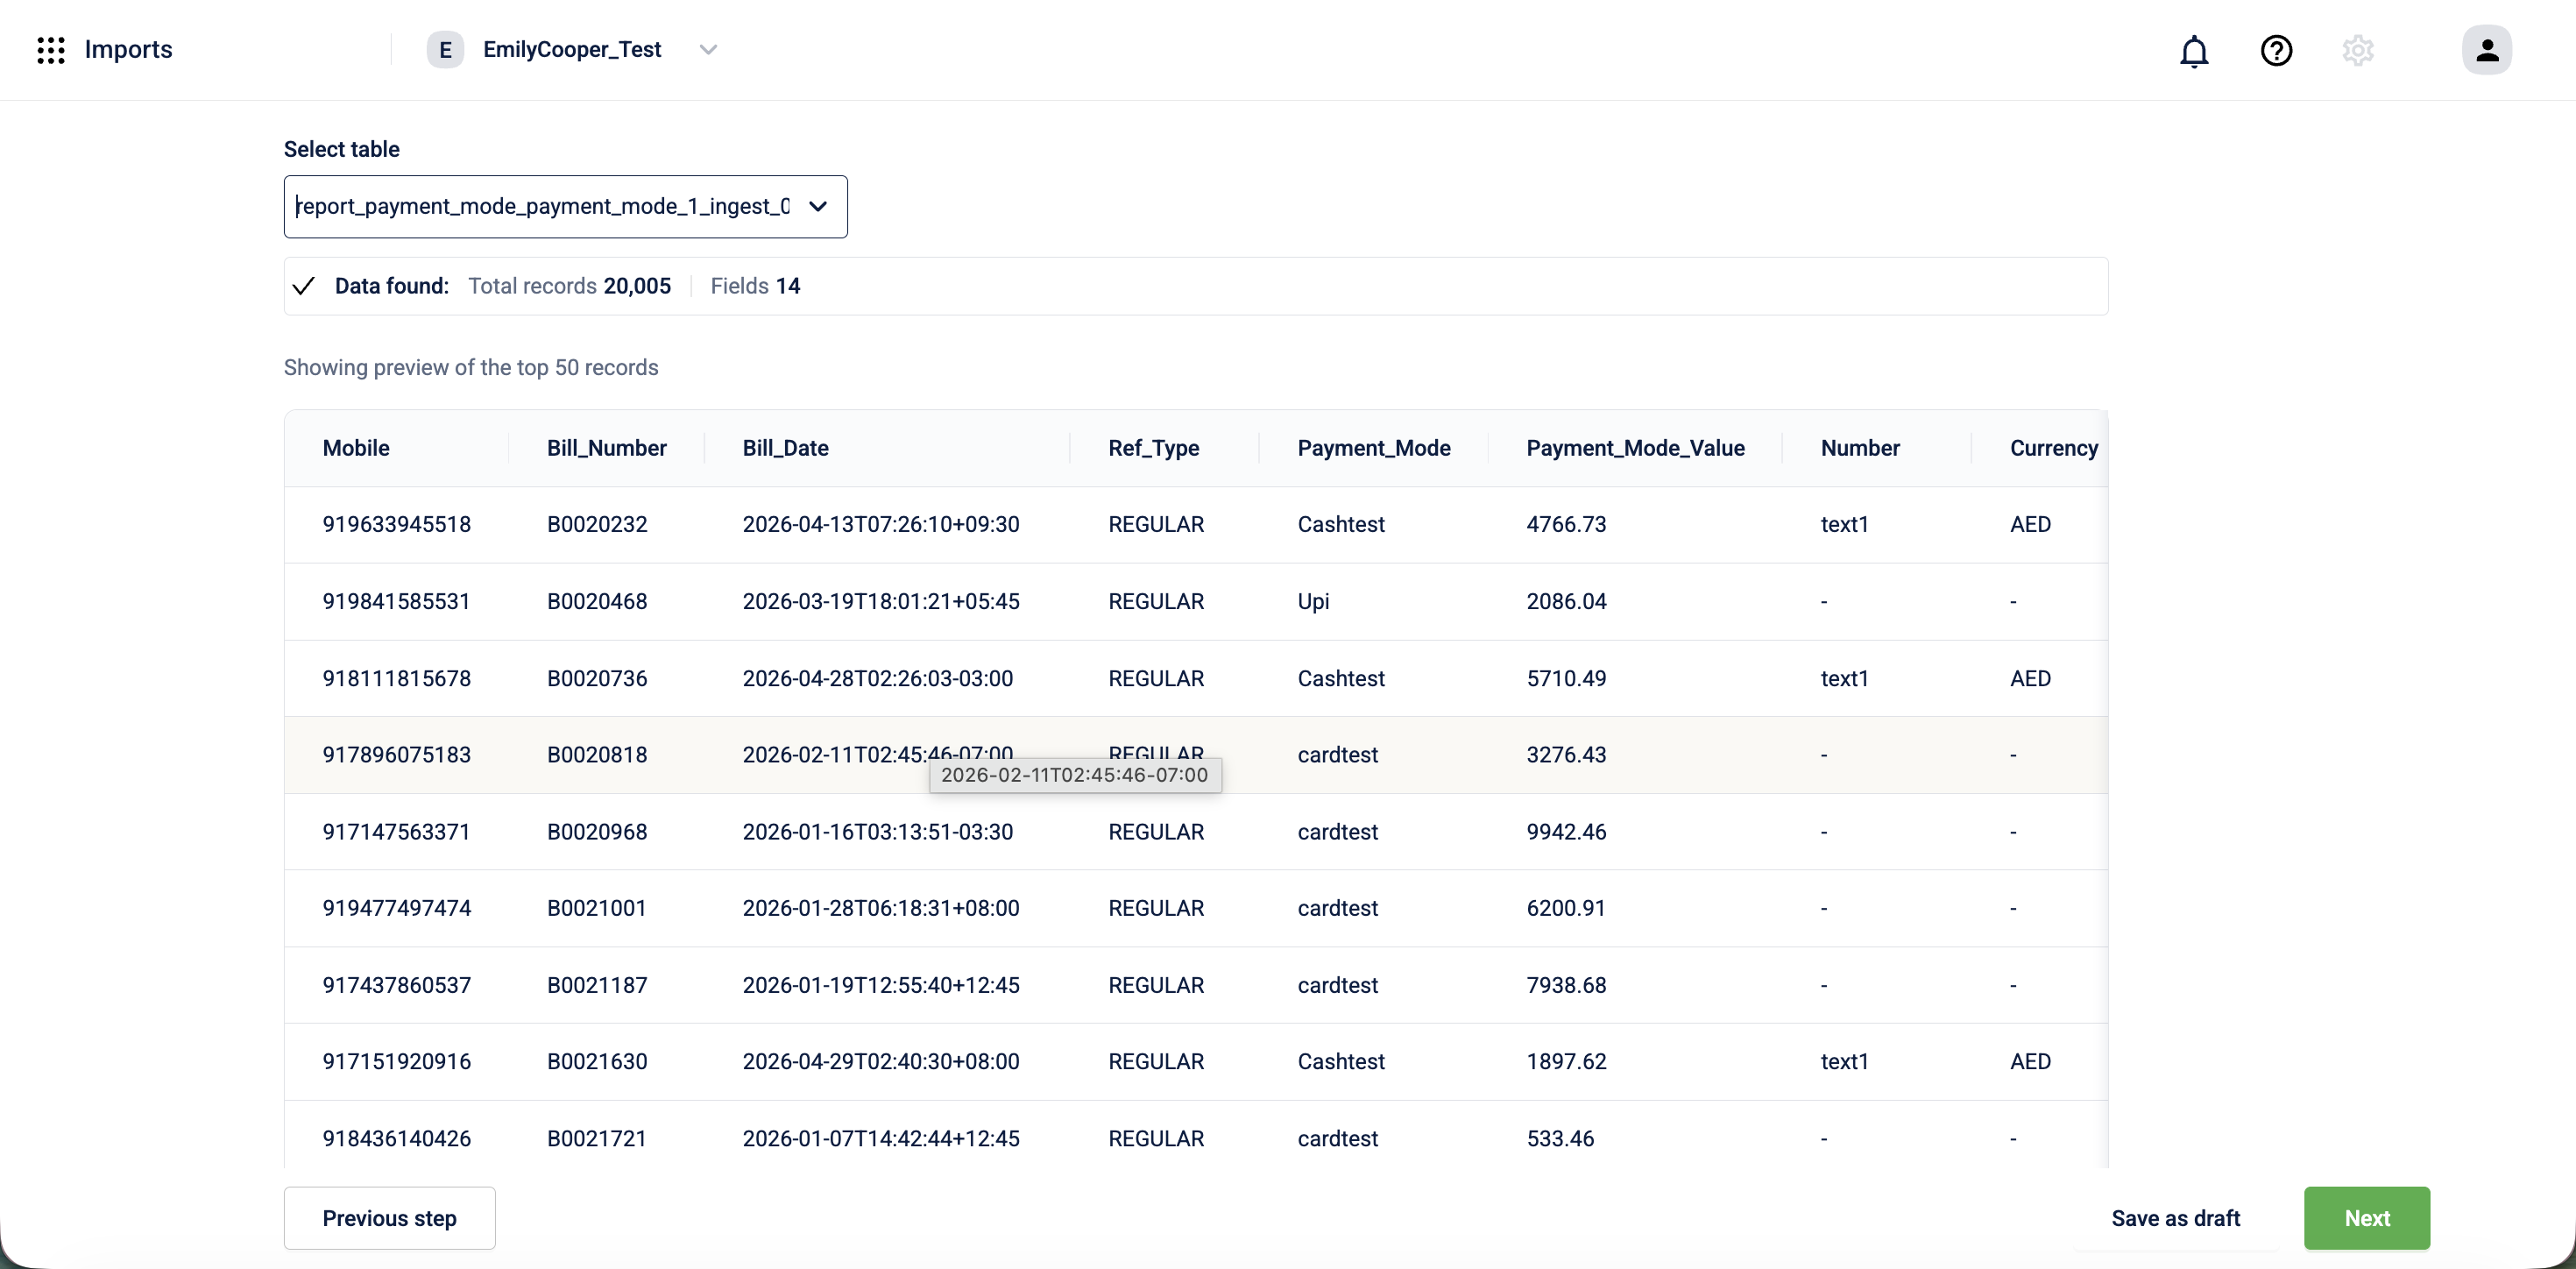
A preview of the top 50 records appears along with the total record count. Review the preview to confirm you've selected the correct table.
-
Select Next.
Step 3: Profile and method
-
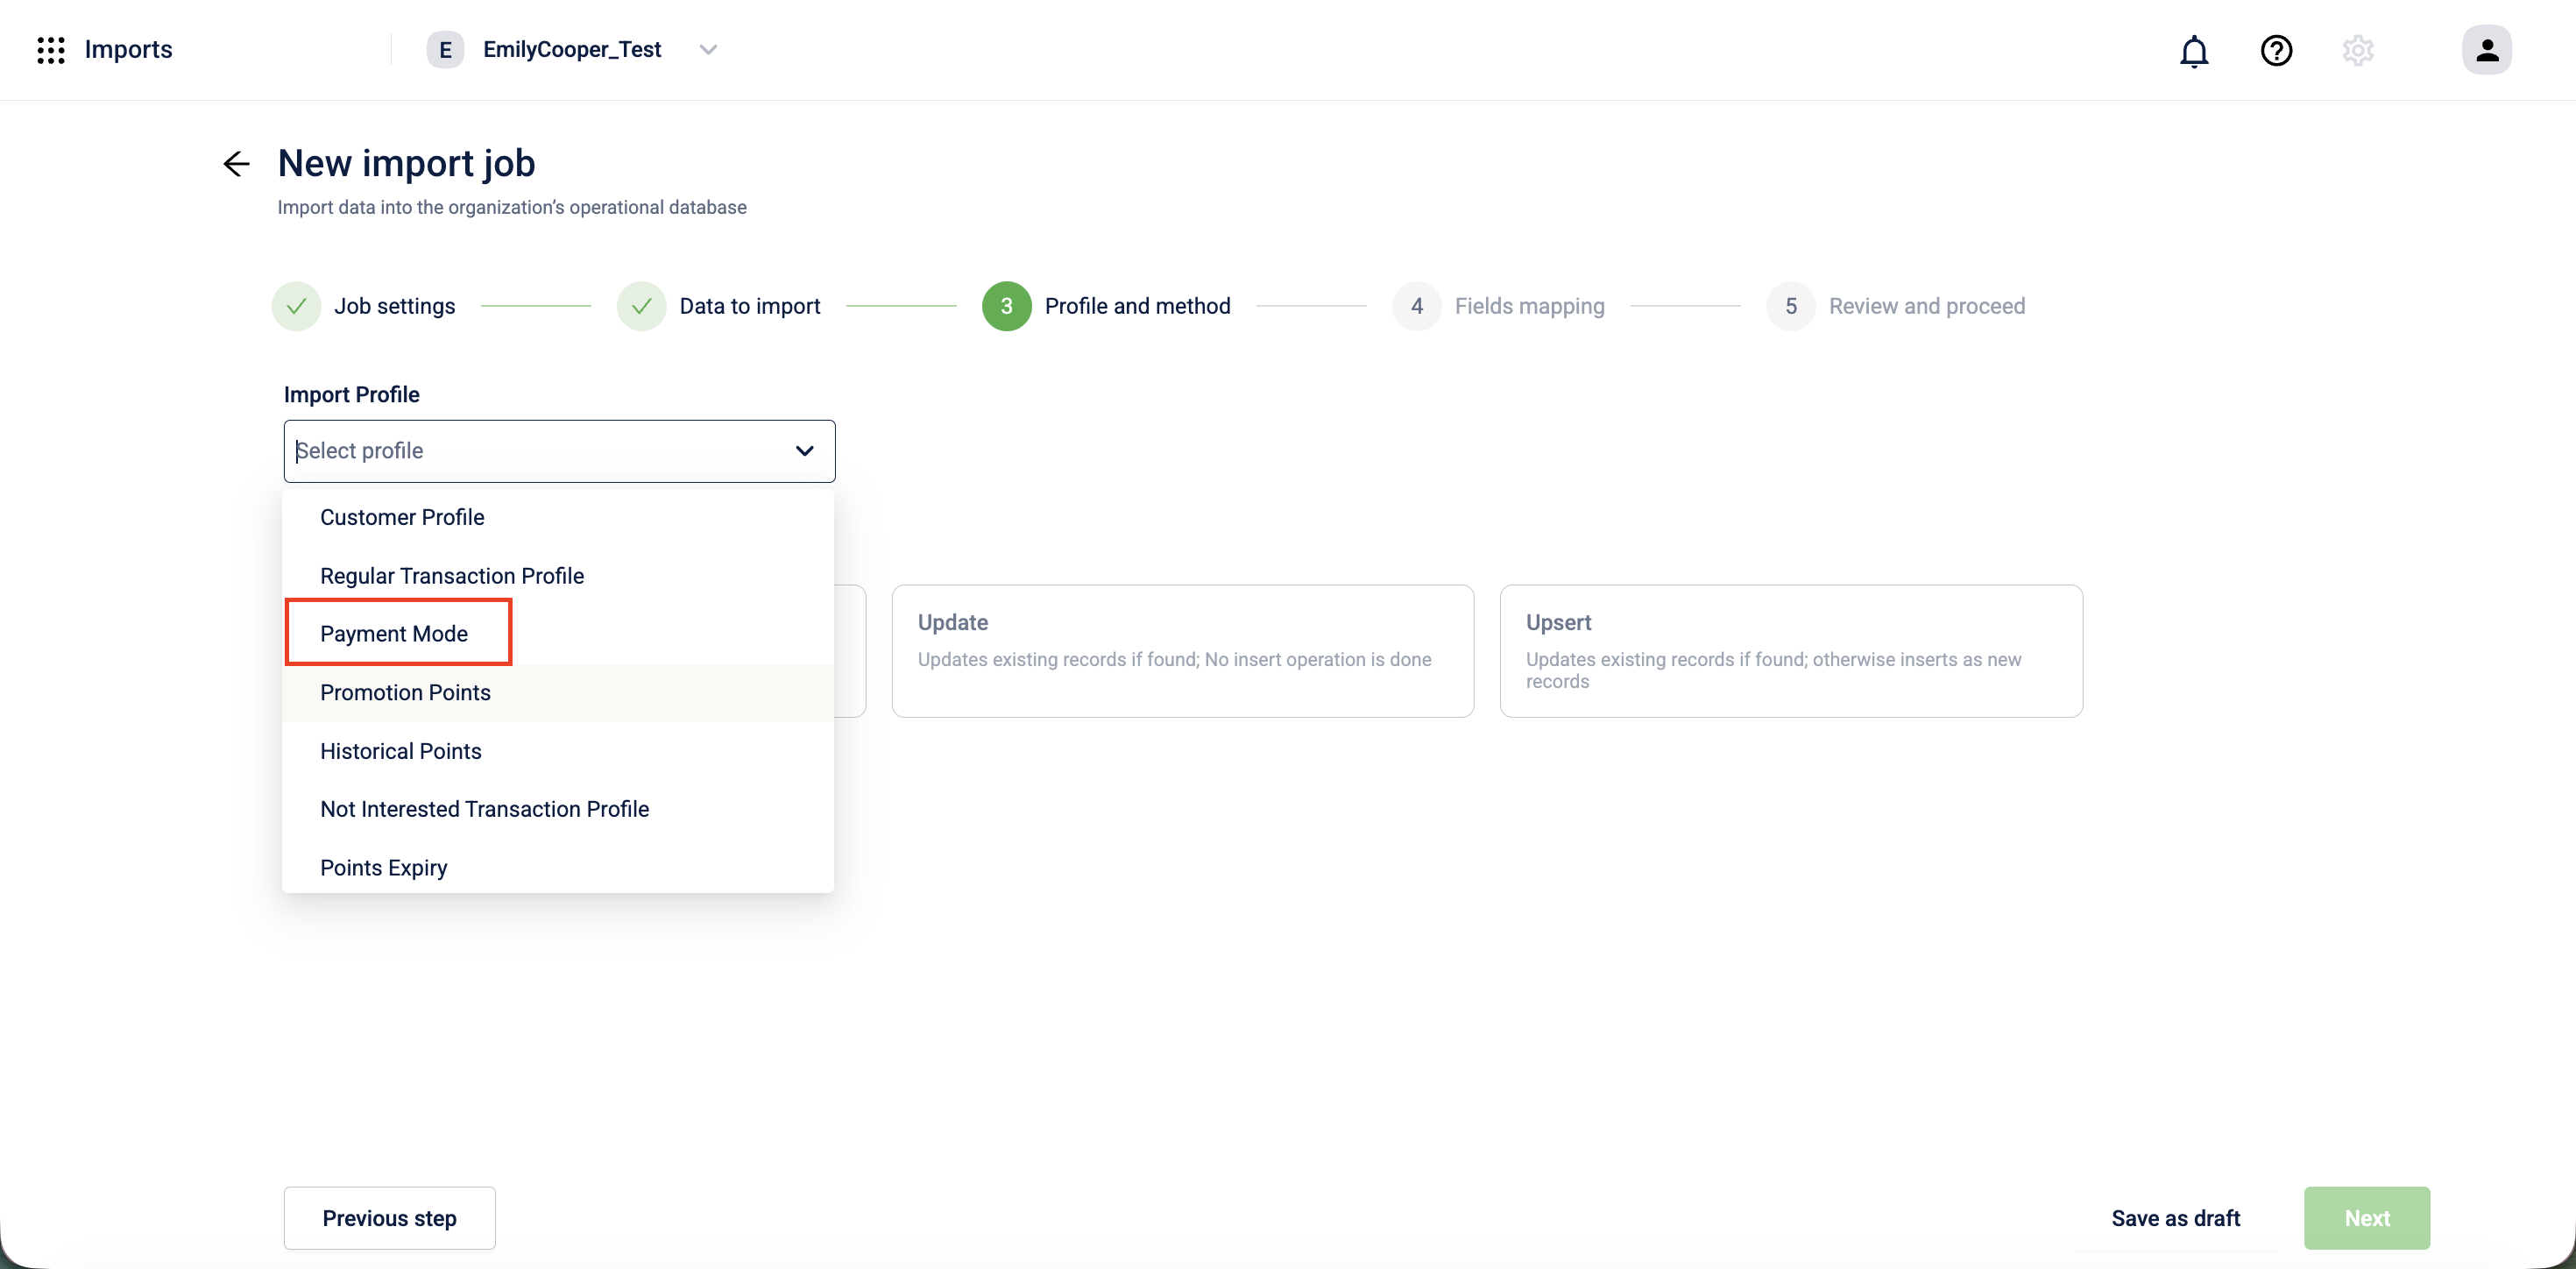
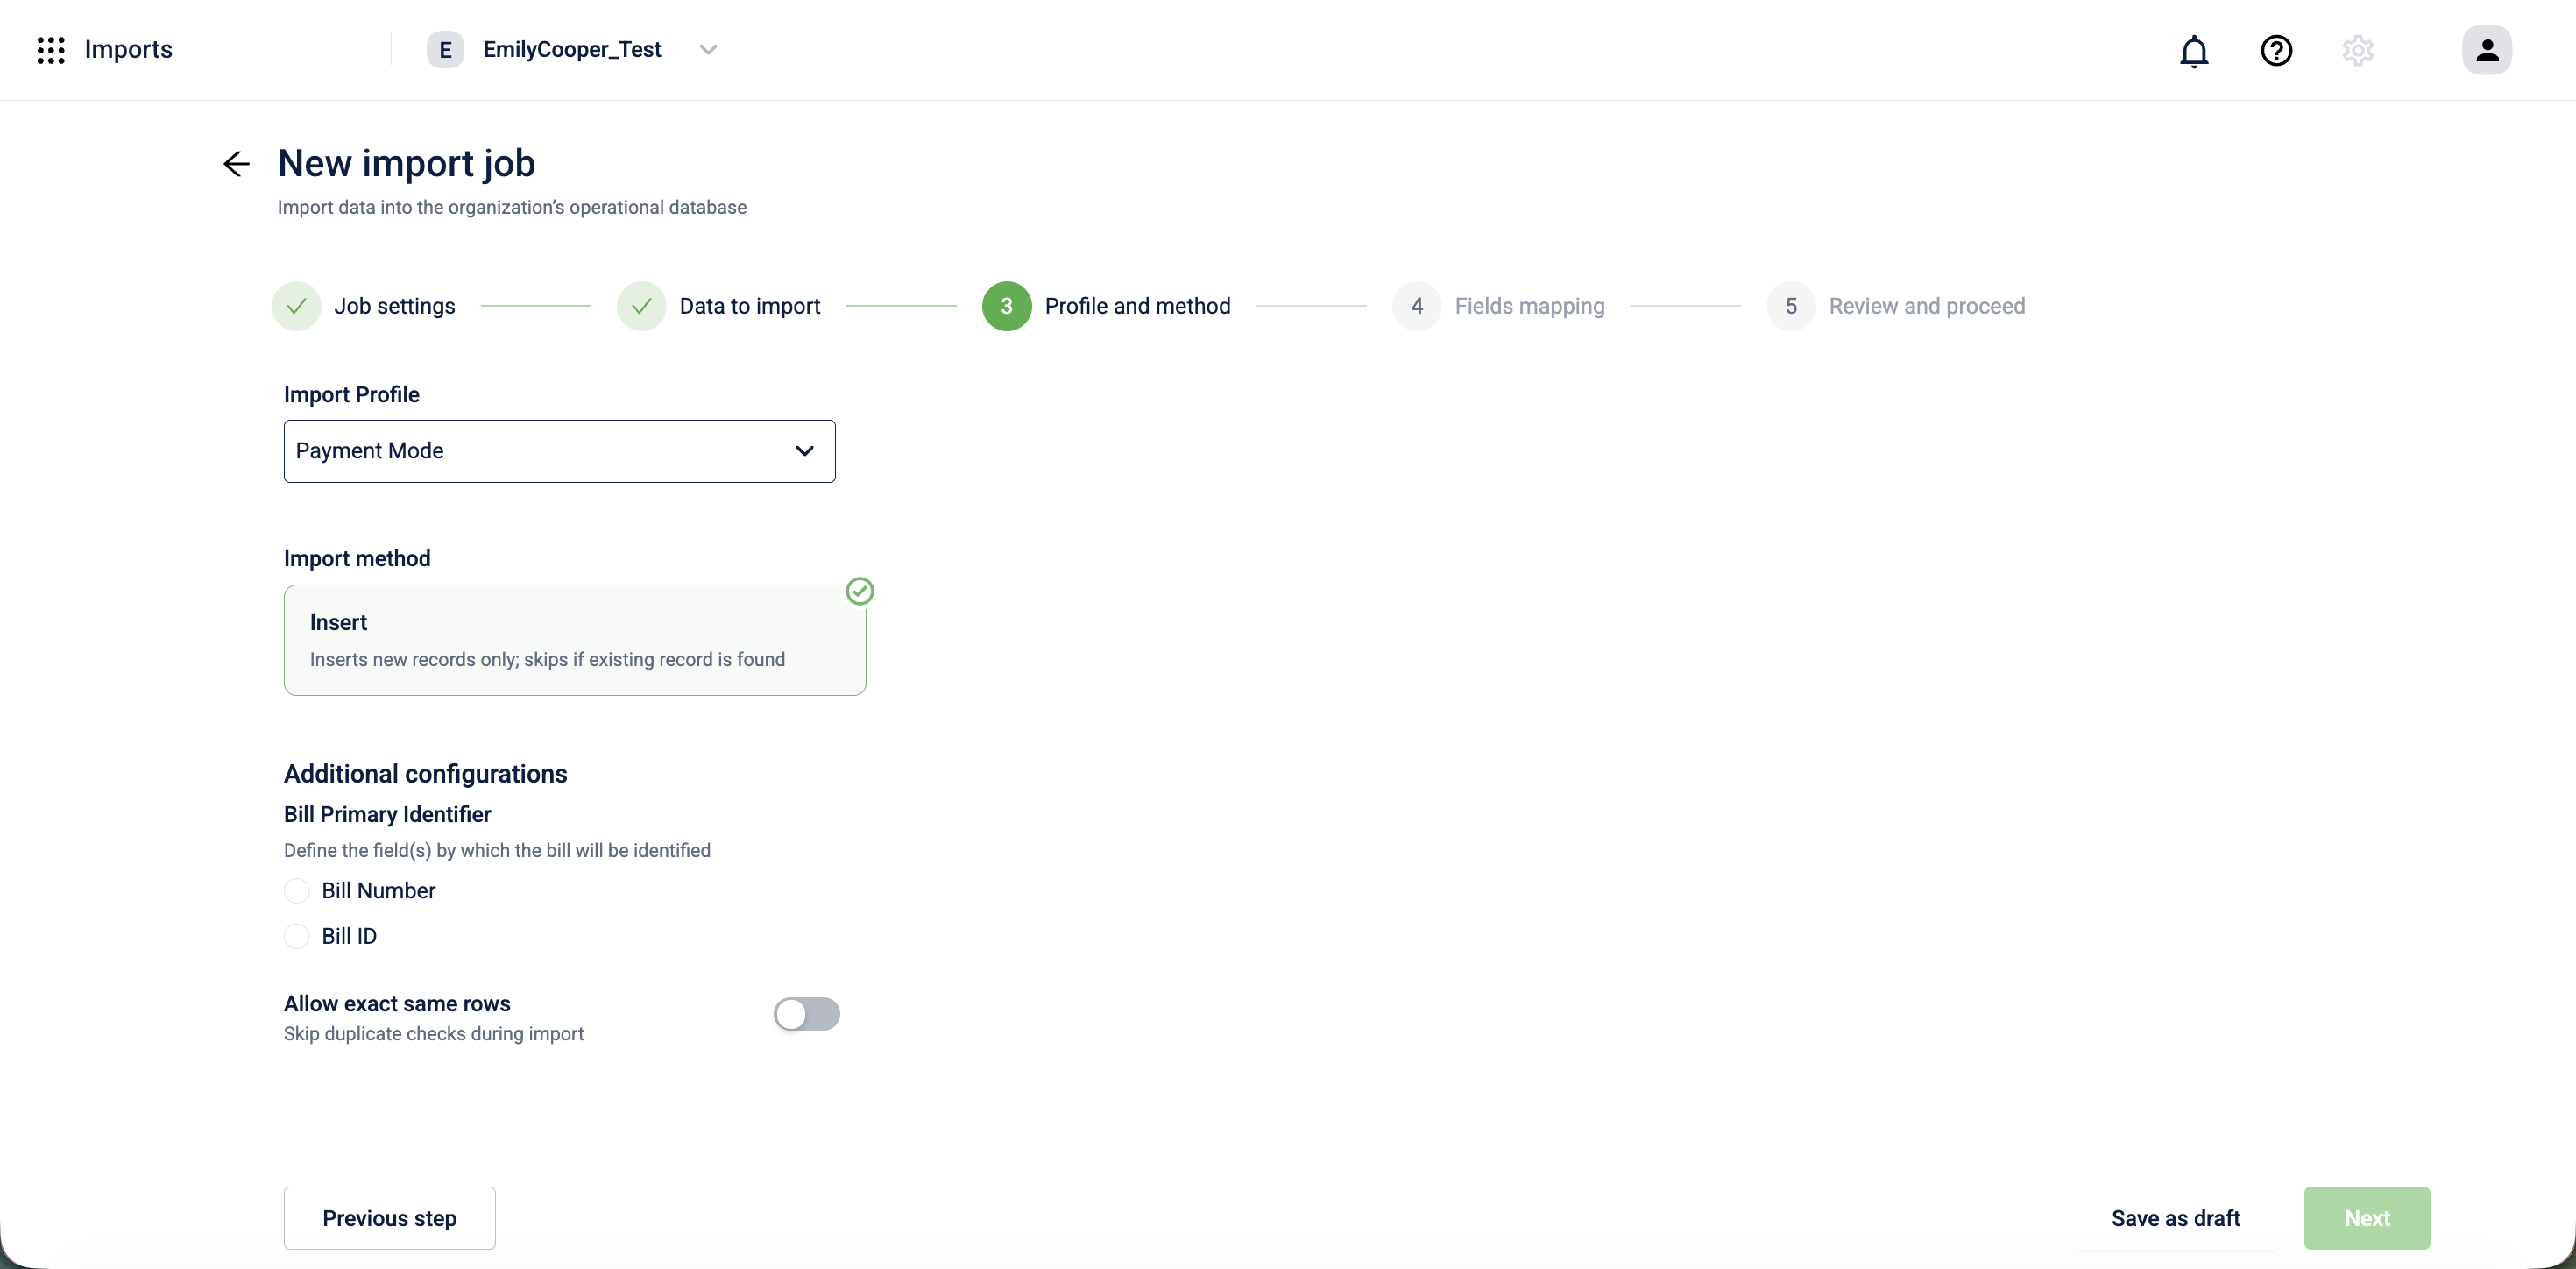
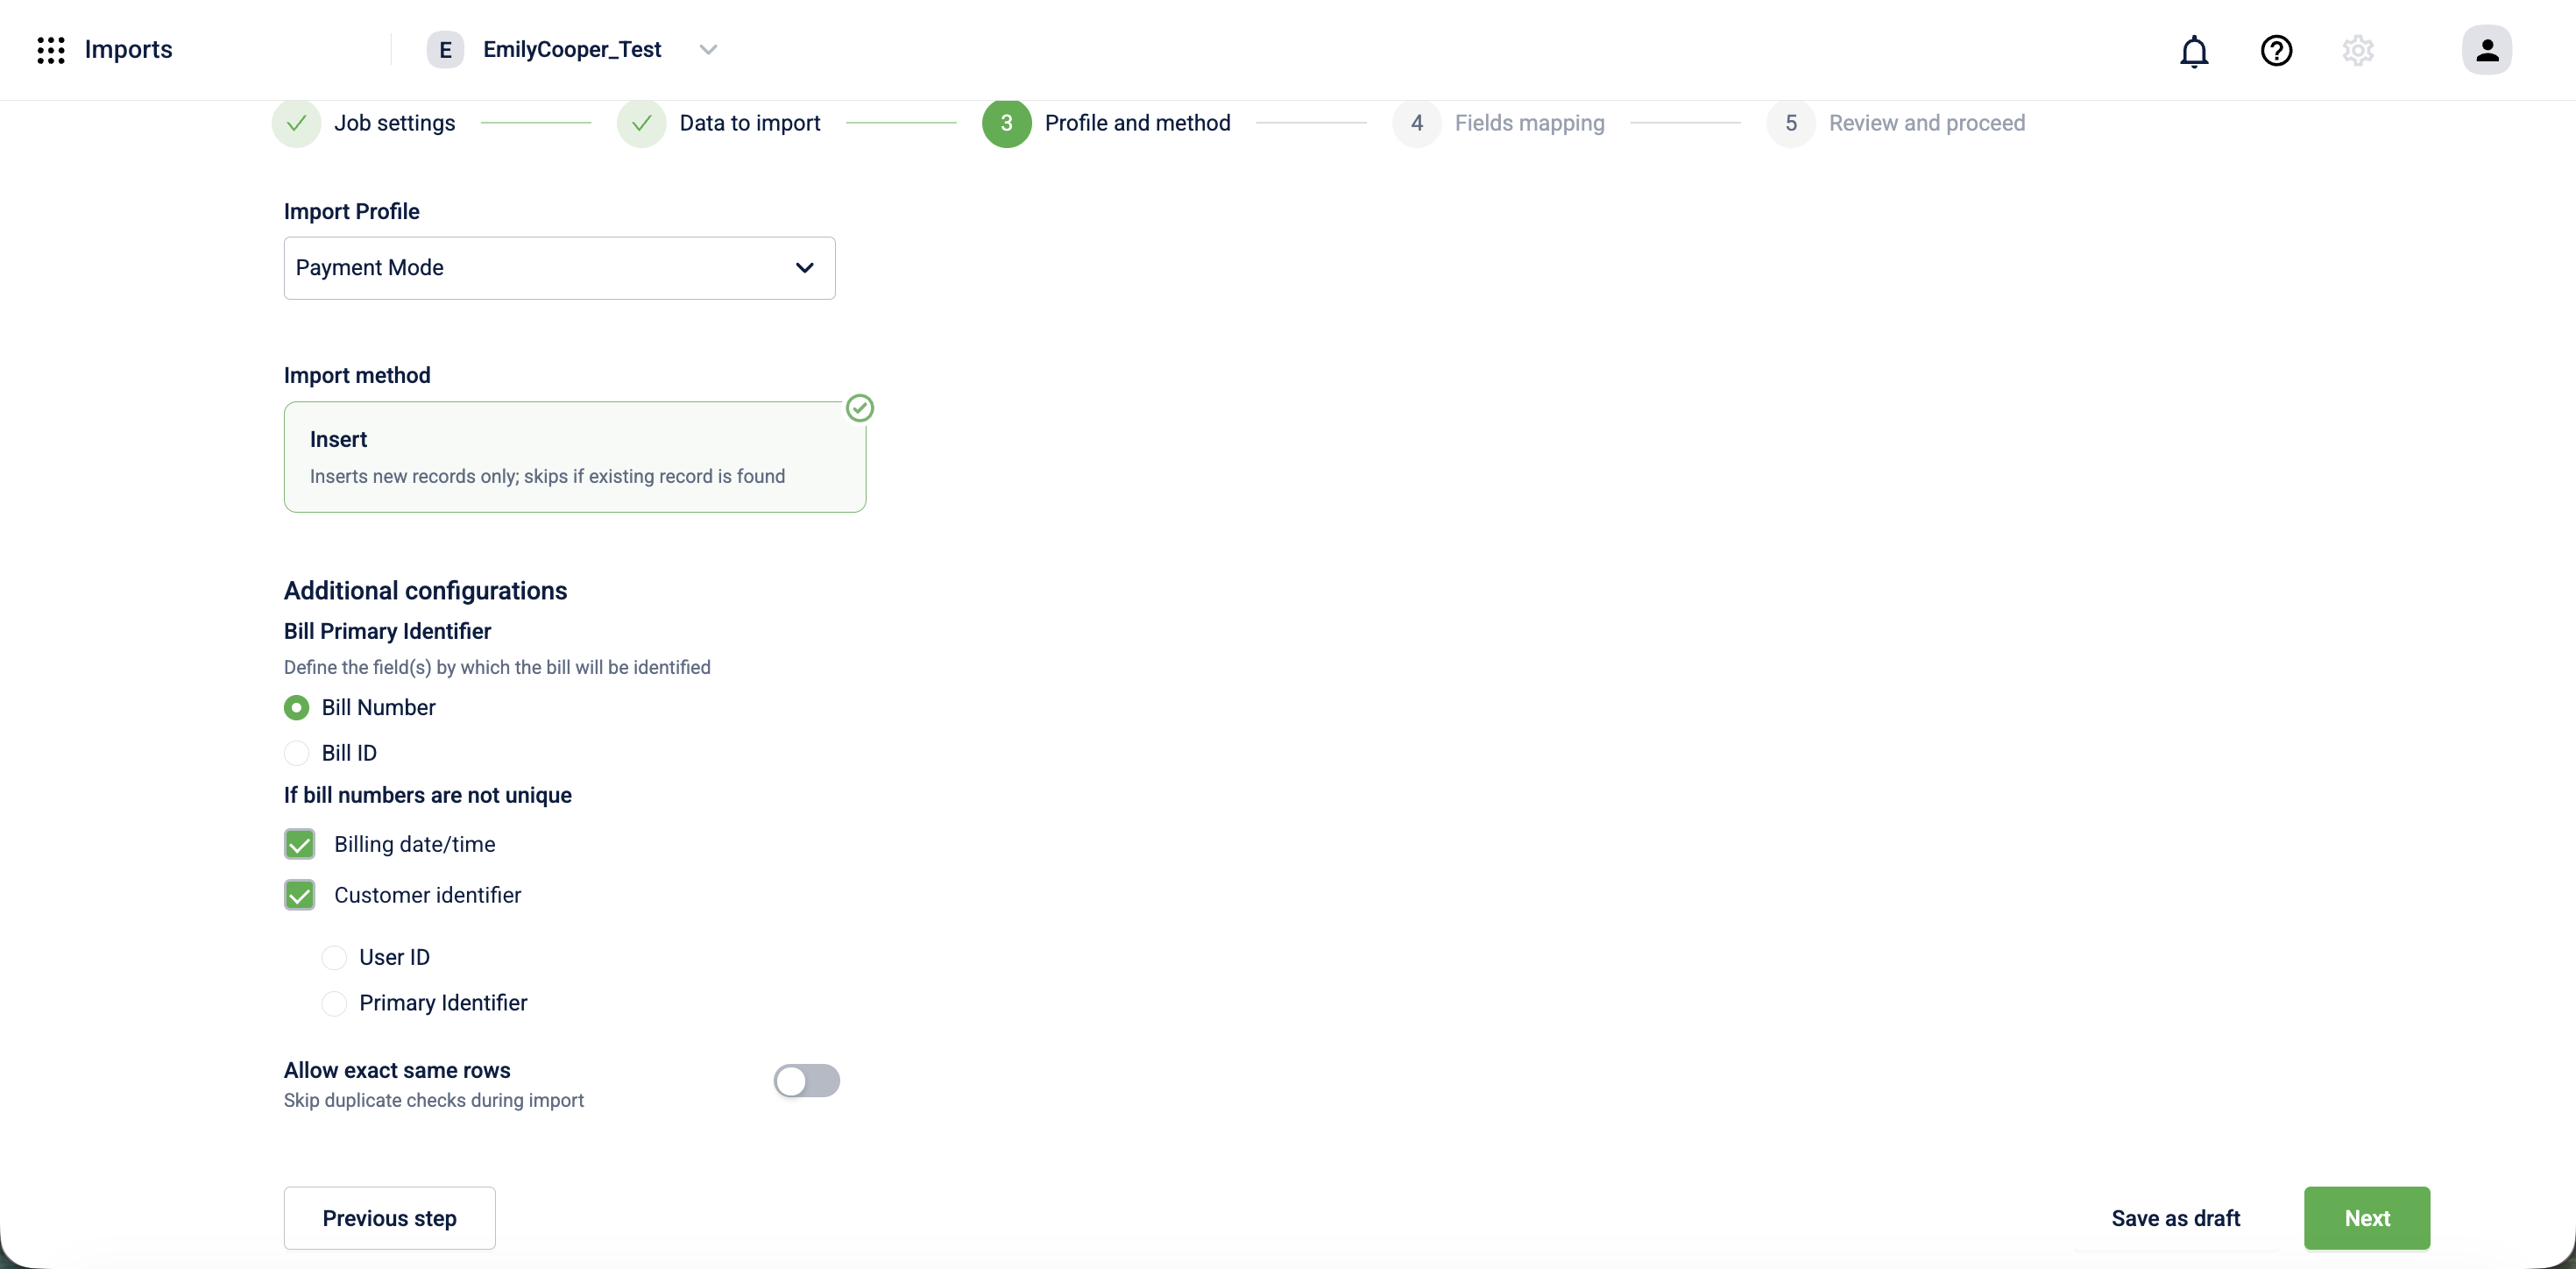
In the Import profile dropdown, select Payment Mode. The Import method is automatically set to Insert.
Note: The Import method cannot be changed. Insert adds new records and skips rows where a payment mode entry already exists for that bill.
-
Under Bill Primary Identifier, select how the system identifies each bill in your source table:
- Bill Number: select when your source table has a bill number column and you do not have system-generated bill IDs.
- Bill ID: select when your source table has the system-generated internal bill ID. This uniquely identifies the bill without additional fields.
-
If you selected Bill Number, the If bill numbers are not unique section appears. Select one or both options to help the system identify the correct bill when the same bill number appears more than once in your data:
- Billing date/time (recommended): enter a value that includes both date and time. The system does not accept a date-only value.
- Customer identifier: select one of the following:
- User ID: the loyalty member's internal user ID.
- Primary Identifier: your organization's configured primary identifier, such as mobile number or email.
Note: If the combination of bill number and your selected options still matches more than one bill, the system rejects the row with an ambiguous bill error.
-
Under Allow exact same rows, select whether to import exact duplicate rows in the same job:
Setting Behavior Off (default) The system deduplicates rows. Only the first row is imported; duplicates are rejected. On All rows are imported, including duplicates. Use this when a bill was genuinely paid with the same payment mode more than once, for example, two card payments of $50 each on the same bill. -
Select Next.
Note: If you return to this step after completing field mapping, your mappings are cleared and must be re-entered.
Step 4: Fields mapping
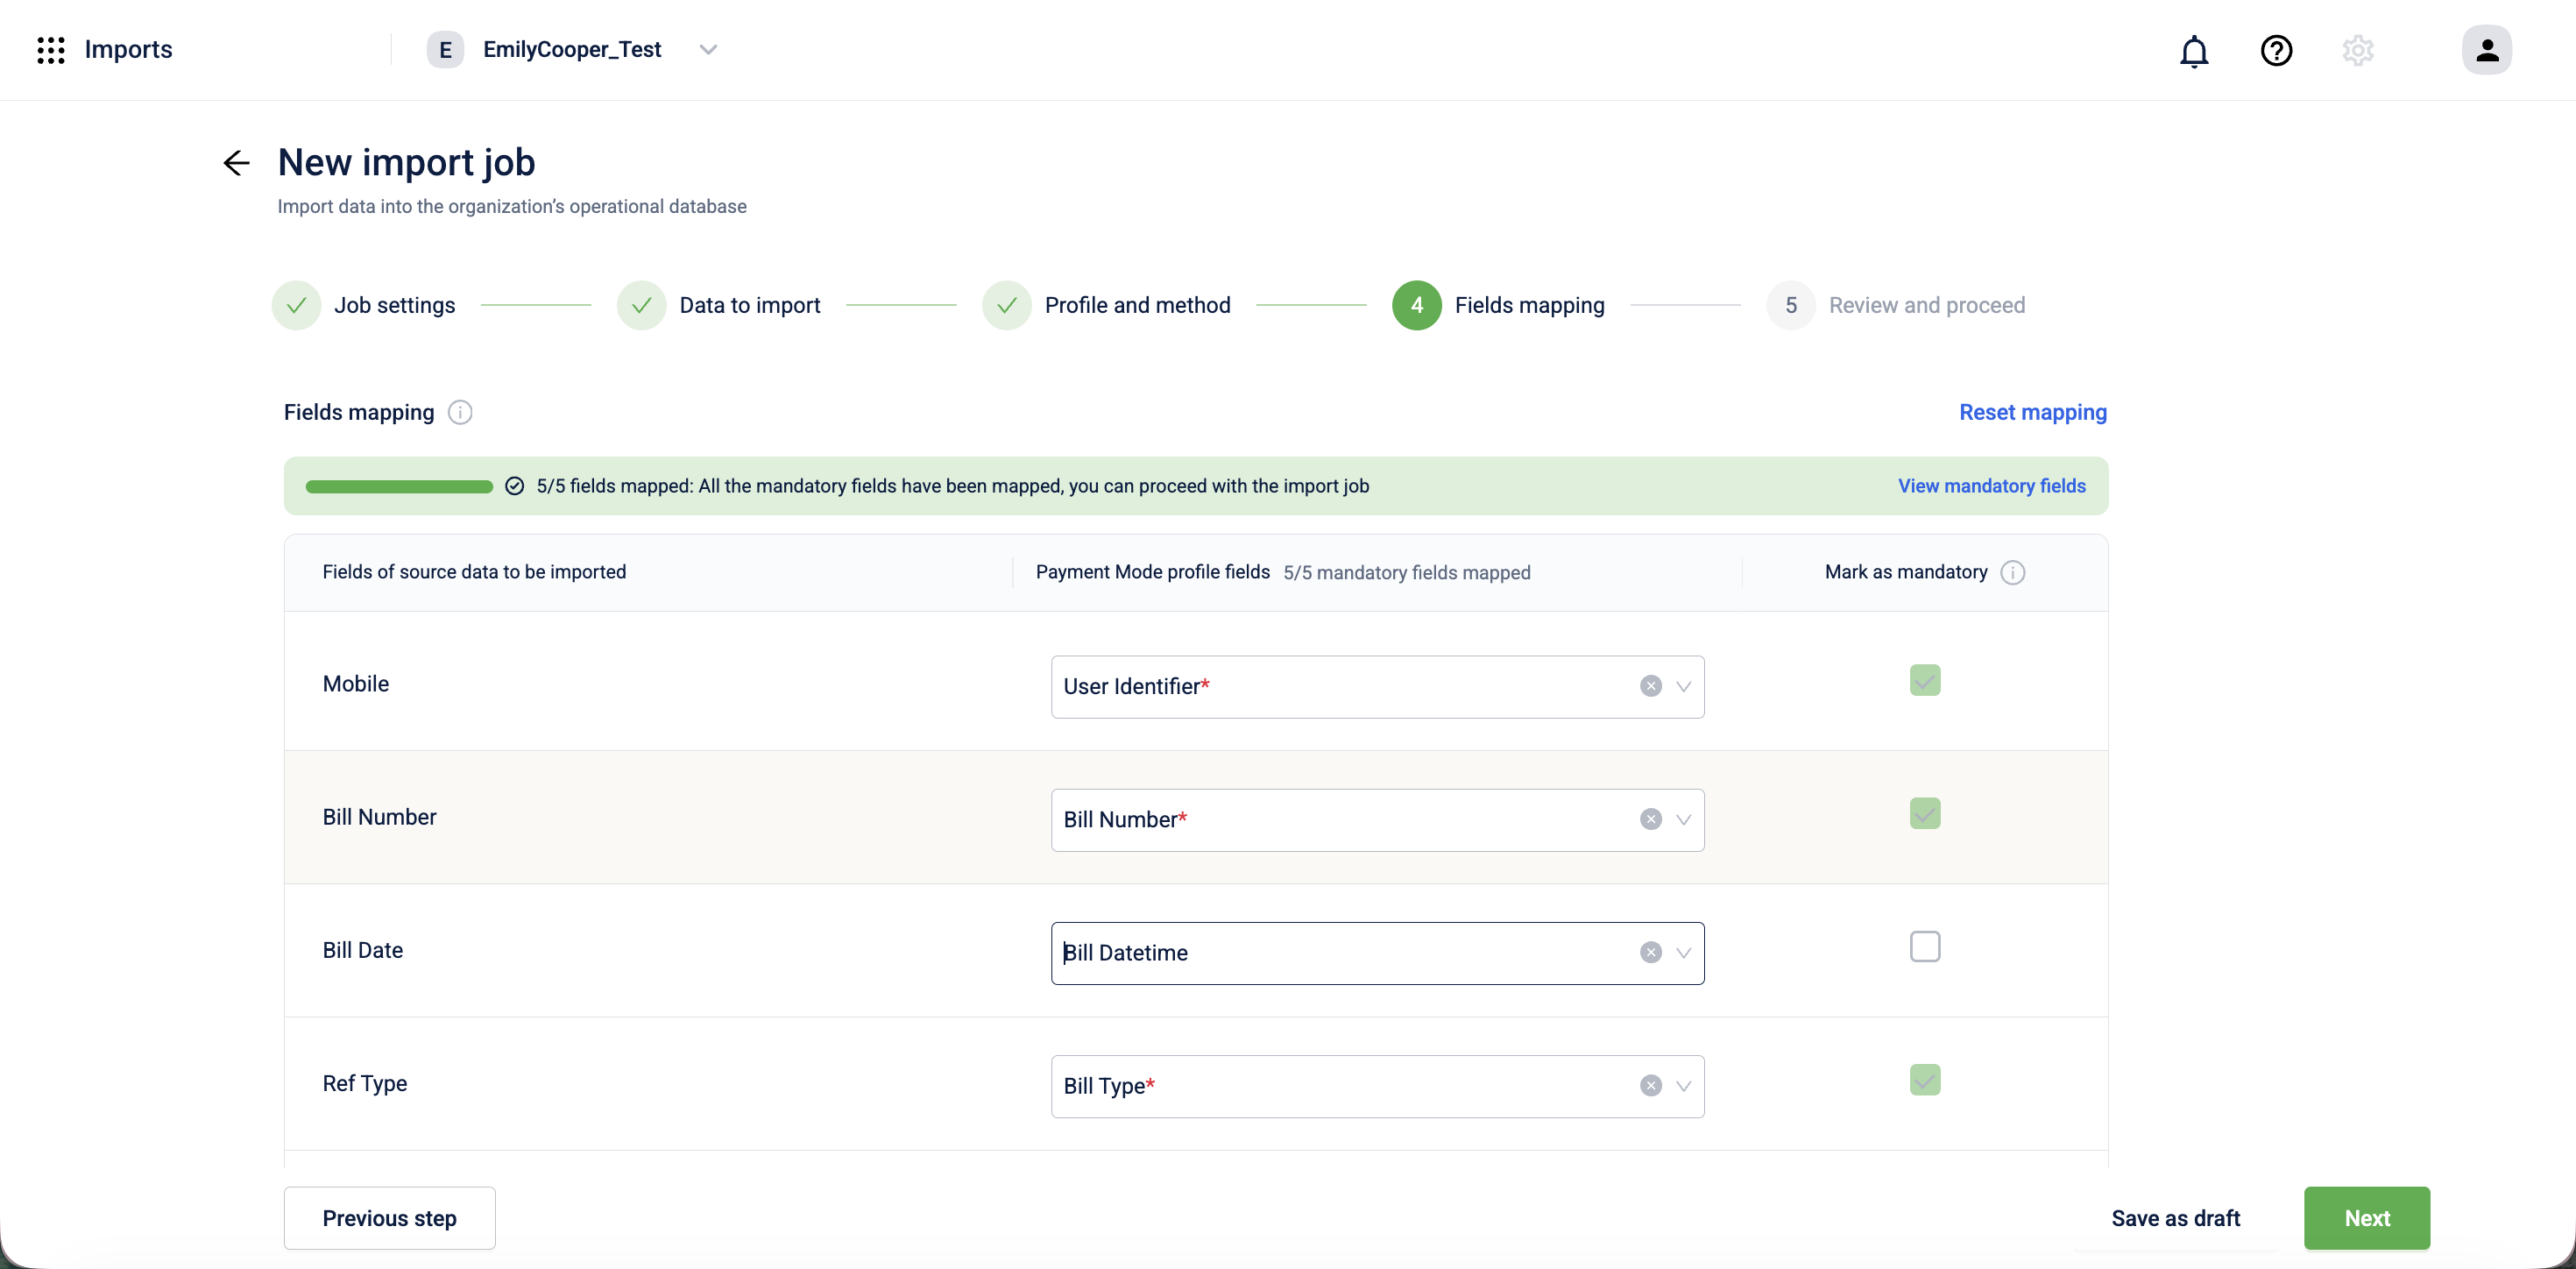
Map each column in your source table to the corresponding payment mode profile field.
-
For each row in the Fields of source data to be imported column, open the dropdown in the Payment Mode profile fields column and select the matching profile field.
-
The progress bar shows how many mandatory fields have been mapped. All mandatory fields must be mapped before you can proceed.
-
Select View mandatory fields to see the required fields. The mandatory fields for this profile are:
Mandatory profile field Description Bill Number* The bill number or bill ID from your source table. Payment Mode* The payment mode type for the row. Bill Type* The transaction type, REGULARorNOT_INTERESTED.User Identifier* The customer identifier. Shown when Customer identifier is selected as a disambiguator. Payment Amount* The payment amount for the row. 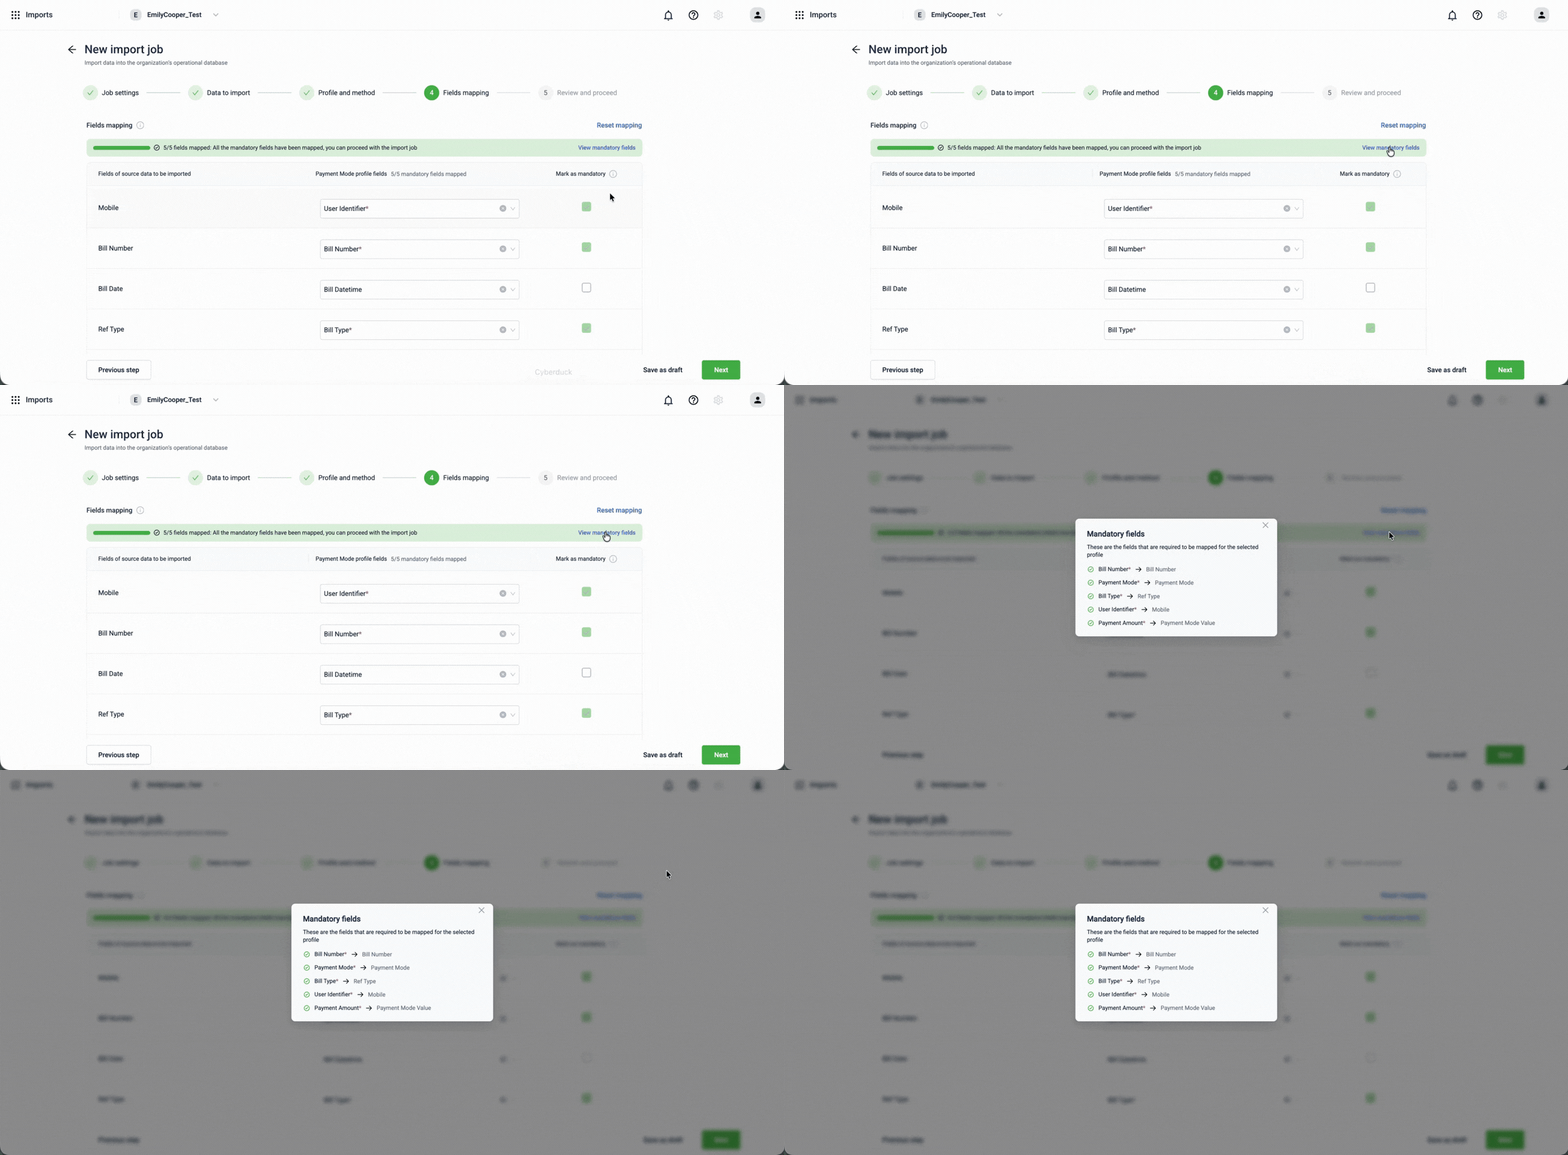
-
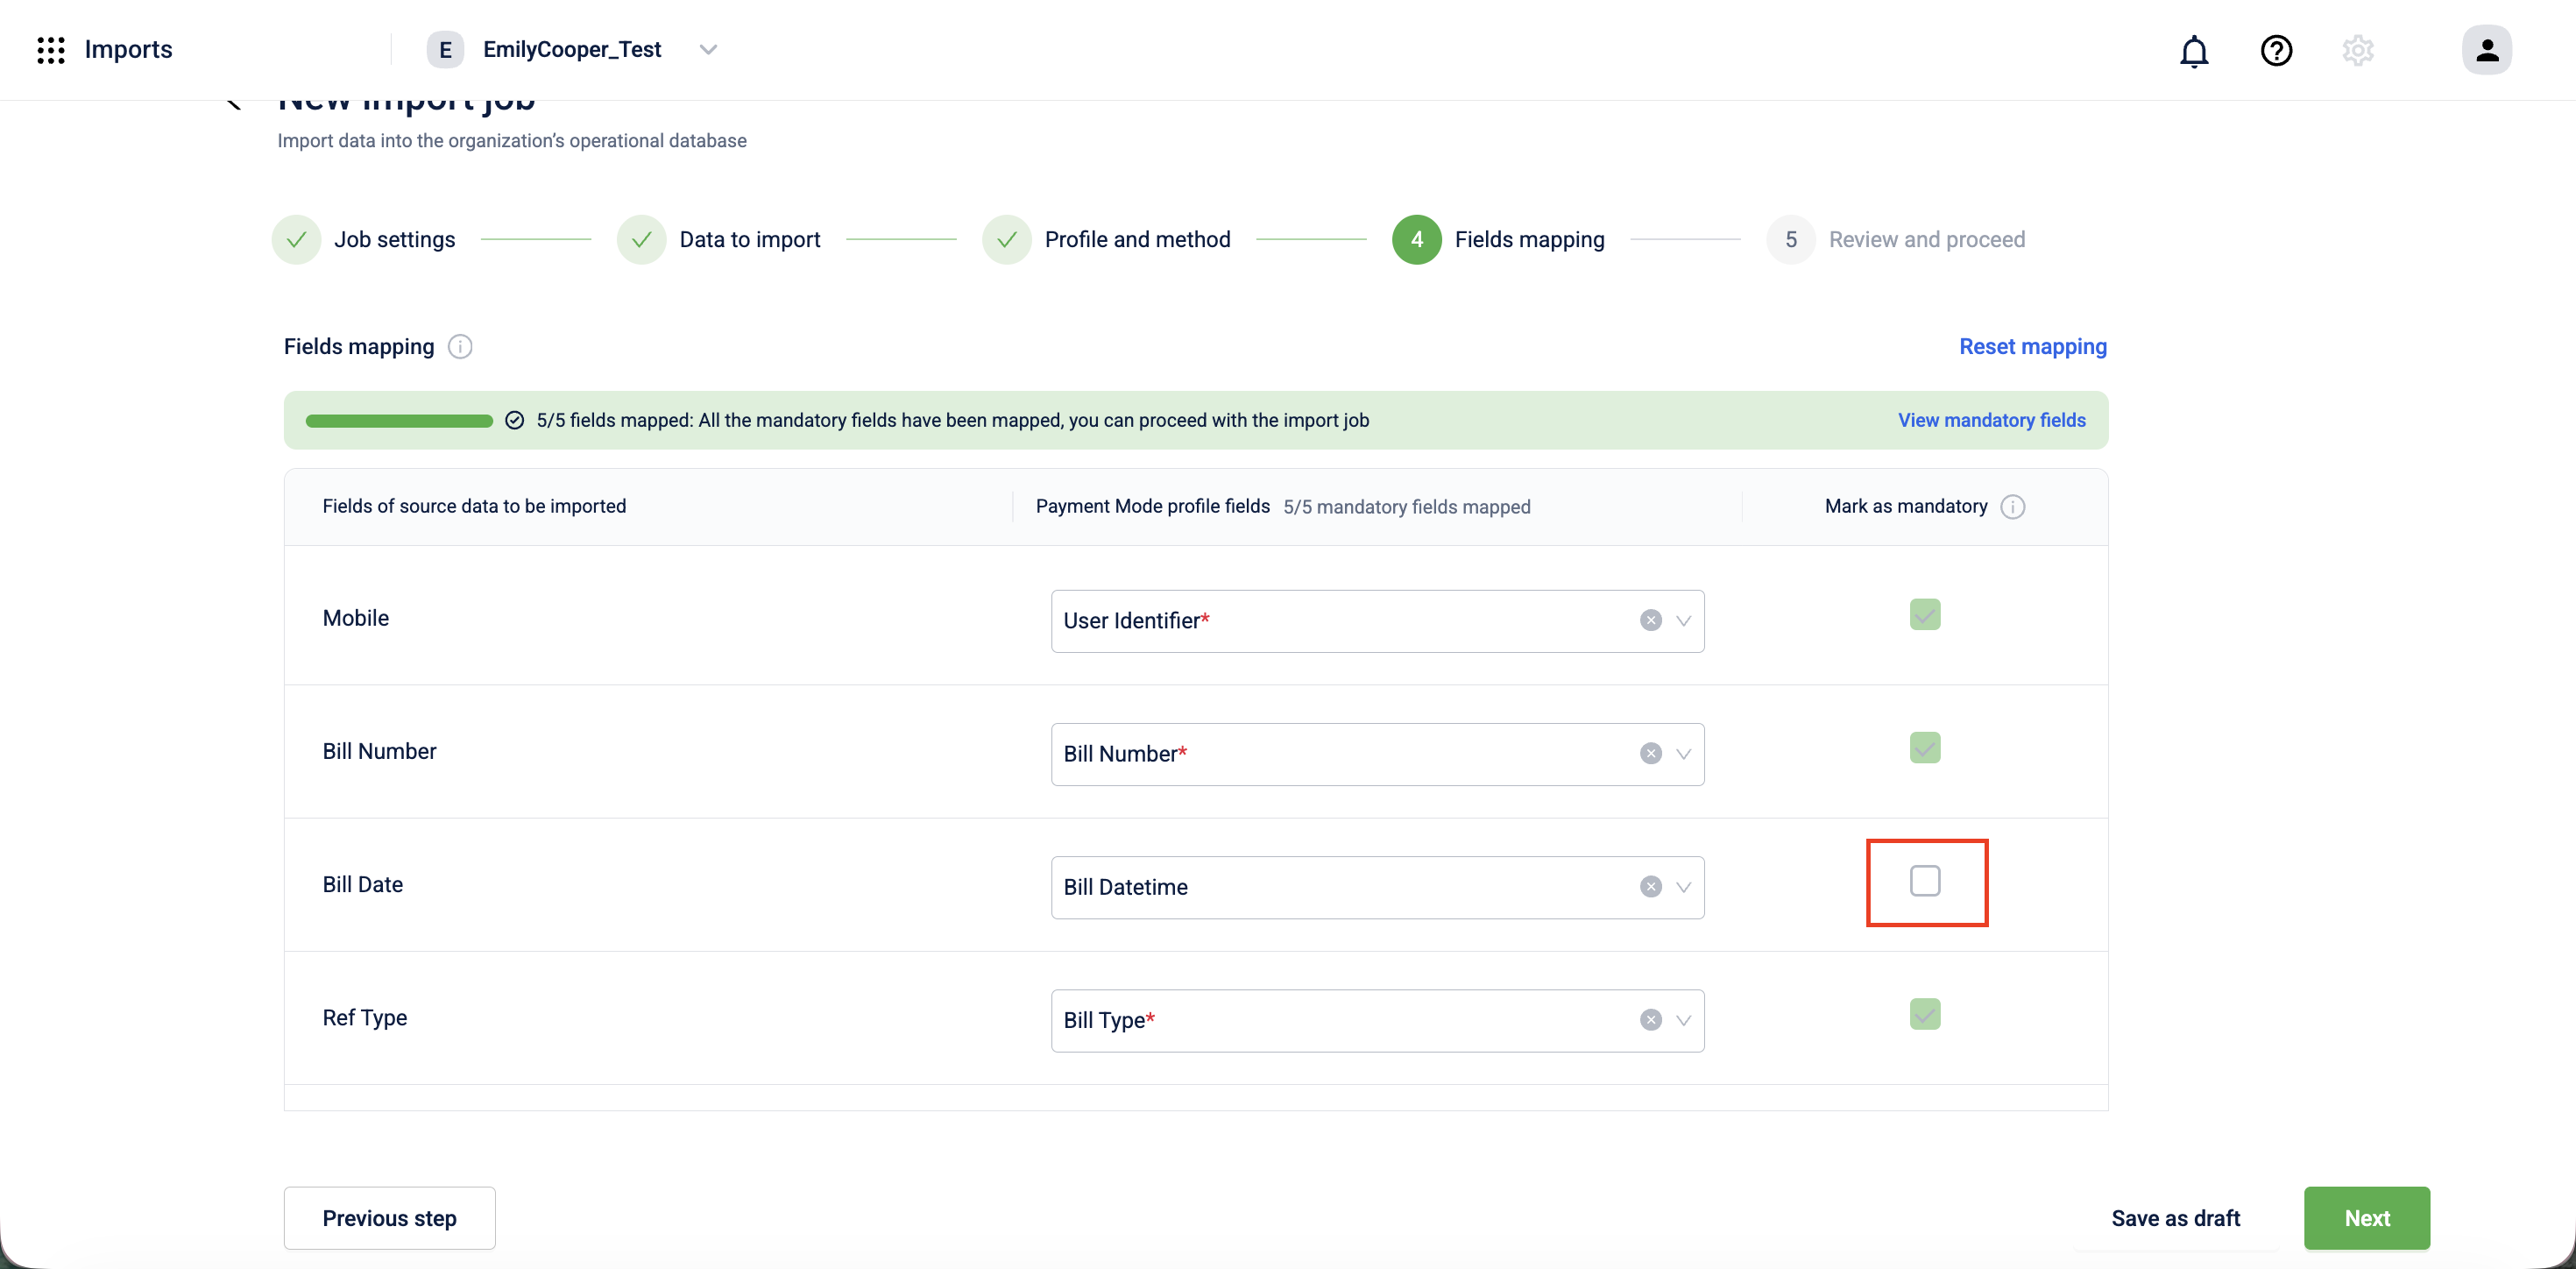
Optionally, turn on Mark as mandatory for any additional field. Rows with an empty value in a field marked as mandatory are rejected.
-
Select Next.
Step 5: Review and proceed
-
In the Job name field, enter a name for this import job. The Job ID is auto-generated from the name. You can edit it if needed.
-
Optionally, enter a Description.
-
Review the Configuration summary to confirm all settings are correct:
- Job setup: job type (One-time or Recurring)
- Data to import: data source, Databricks table name, and total record count
- Profile and method: Payment Mode, Insert
-
Select Proceed to validate.
-
In the Validate and run job dialog, select Yes, validate.
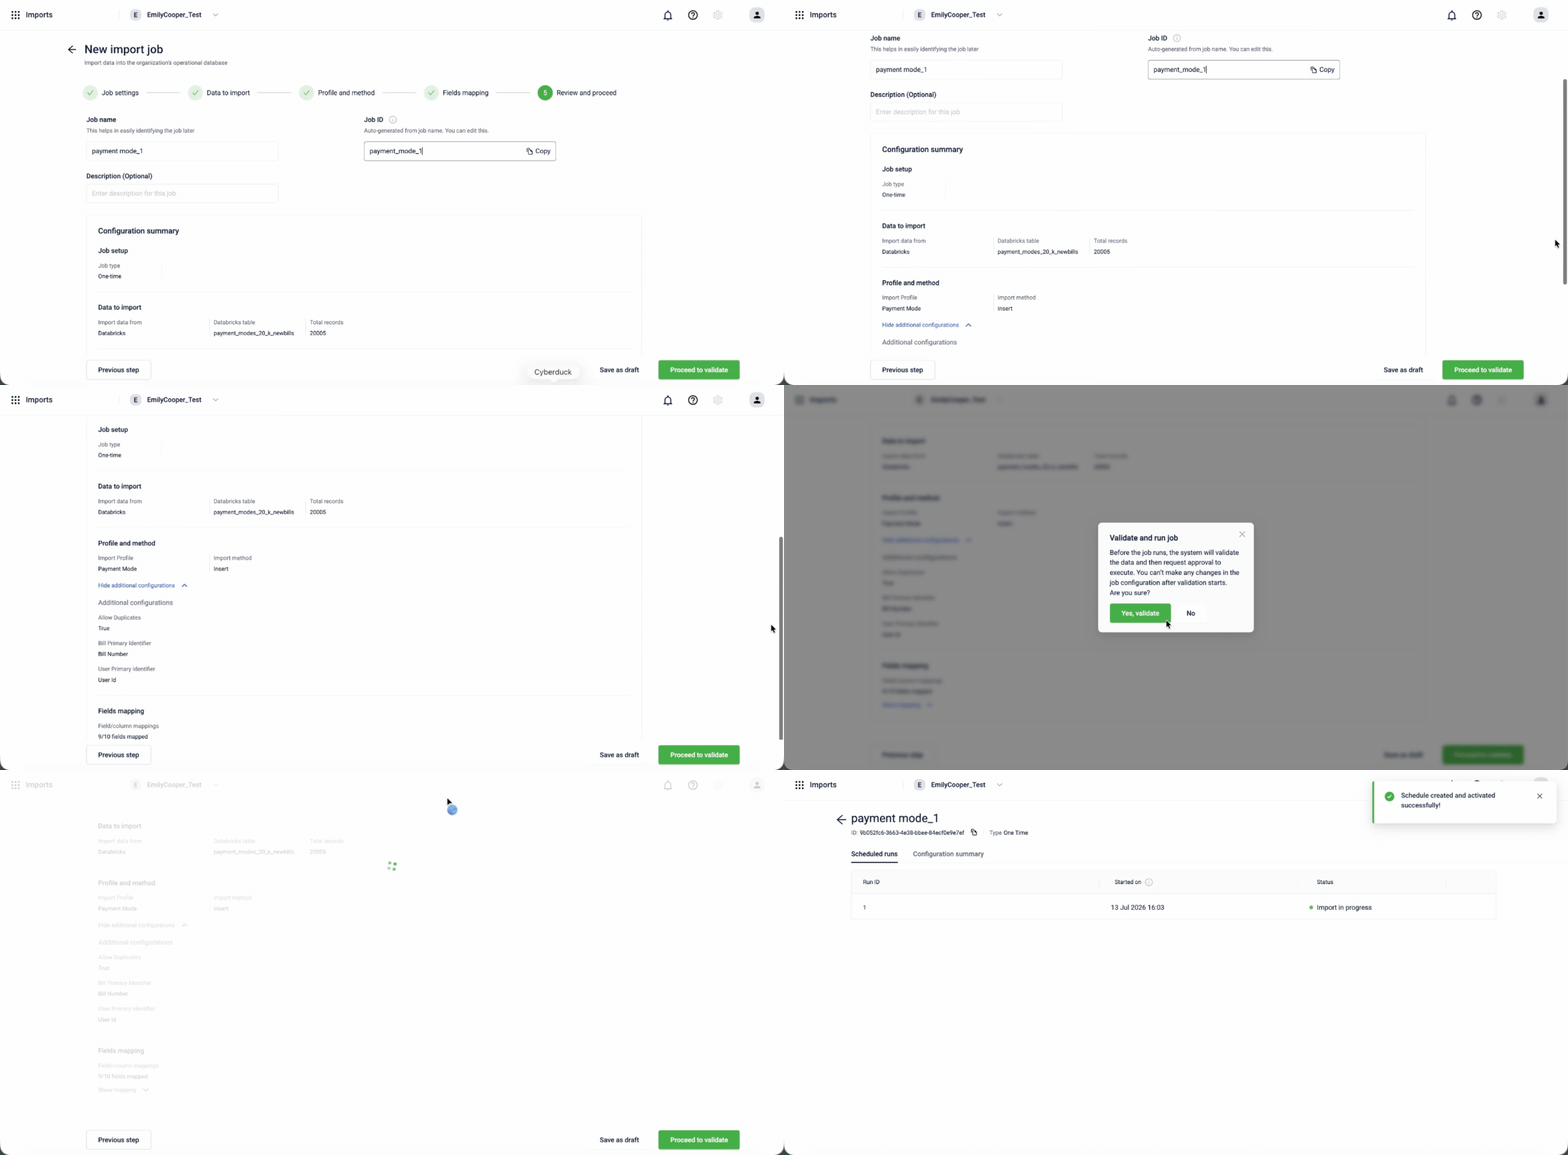
Note: You can't change the job configuration after validation starts. After validation completes, the job moves to an approval stage before data is written to the database.
Validation errors
The system validates each row before writing to the database. The following errors appear in your import report.
| Error message | Cause | How to fix |
|---|---|---|
bill_number is required | The bill_number column is empty and Bill Number is the chosen identifier. | Add the bill number for every row. |
bill_id is required | The bill_id column is empty and Bill ID is the chosen identifier. | Add the bill ID for every row. |
ref_type is mandatory | The ref_type column is empty. | Set ref_type to REGULAR or NOT_INTERESTED for every row. |
ref_type must be REGULAR or NOT_INTERESTED | The ref_type value isn't one of the two accepted values. | Correct the value to REGULAR or NOT_INTERESTED. |
payment_mode is mandatory | The payment_mode column is empty. | Add the payment mode type for every row. |
payment_mode {X} is not enabled for org | The payment mode type in the row isn't configured for your organization. | Check which payment modes are enabled and correct the value. |
amount is mandatory | The amount column is empty. | Add a numeric amount for every row. |
amount is not a number | The amount value isn't a valid number. | Correct the value. |
bill_datetime is not a valid timestamp | The bill_datetime value doesn't match yyyy-MM-dd HH:mm:ss. | Correct the format. Include both date and time. |
bill_id is not an integer | The bill_id value isn't a valid integer. | Correct the value. |
No matching bill found | The system couldn't find a bill matching the identifier in the row. | Confirm the bill exists and that ref_type matches the bill type. |
Bill ambiguous - could not resolve to a single record | Multiple bills match the bill number and any disambiguators provided. | Add bill_datetime as a disambiguator. If the ambiguity remains, also add a customer identifier, or switch to Bill ID as the identifier. |
payment mode entry already exists for this bill | A payment mode entry already exists for this bill. | Remove the affected rows. To correct existing data, raise a ticket with the Capillary support team. |
Attribute {X} does not belong to payment mode {Y} | An attribute column has a value in a row whose payment mode doesn't support that attribute. | Leave the attribute column empty for rows where the payment mode doesn't use that attribute. |
{attr_name} is invalid | An attribute value failed the type or format check for that attribute. | Correct the value to match the required format for that attribute. |
Note: If any row for a bill fails validation, all rows for that bill are rejected, including rows that are individually valid.
FAQs
Can I import multiple payment mode types in one job?
Yes. A single job can include rows for CASH, CARD, UPI, and other types. Each row specifies its own payment_mode value.
What happens if a bill already has a payment mode entry?
All rows for that bill are rejected. The import doesn't update or append to existing payment mode data. To correct existing records, raise a ticket with the Capillary support team.
My bill number matches multiple bills. What should I do?
Turn on Billing date/time as a disambiguator. Including the date and time alongside the bill number is usually enough to identify the correct bill. If ambiguity persists, also turn on Customer identifier. Alternatively, switch to Bill ID as the identifier to avoid ambiguity entirely.
When should I turn on Allow exact same rows?
Turn it on when a bill was genuinely paid with the same payment mode more than once, for example, two people each paid $50 by card on a shared bill. Leave it off to avoid importing accidental duplicate rows.
What payment mode attributes does my organization support?
Attributes are set up in your organization's tenders configuration. Contact your Capillary account team to get the full list of enabled attributes for each payment mode type.
Updated 8 days ago