
Customer Import Profile
Overview
With Customer Import Profile, you can bring customer data into Capillary from a connected Databricks workspace without manual file uploads. You select a source table, choose how records are added or updated, map the fields to Capillary's customer profile, and validate everything before the import runs.
Use this feature to register new customers in bulk, refresh existing profiles, or do both in a single import. The four-step flow guides you through the process, and you can save a draft at any step to finish later.
Import methods
The following are the import methods that are supported by the profile:
- Insert adds new records only
- Update changes existing records only
- Upsert adds new records and updates existing ones
Create an import job
Select the data source and the table you want to import from your Databricks workspace.
Step 1: Job settings
-
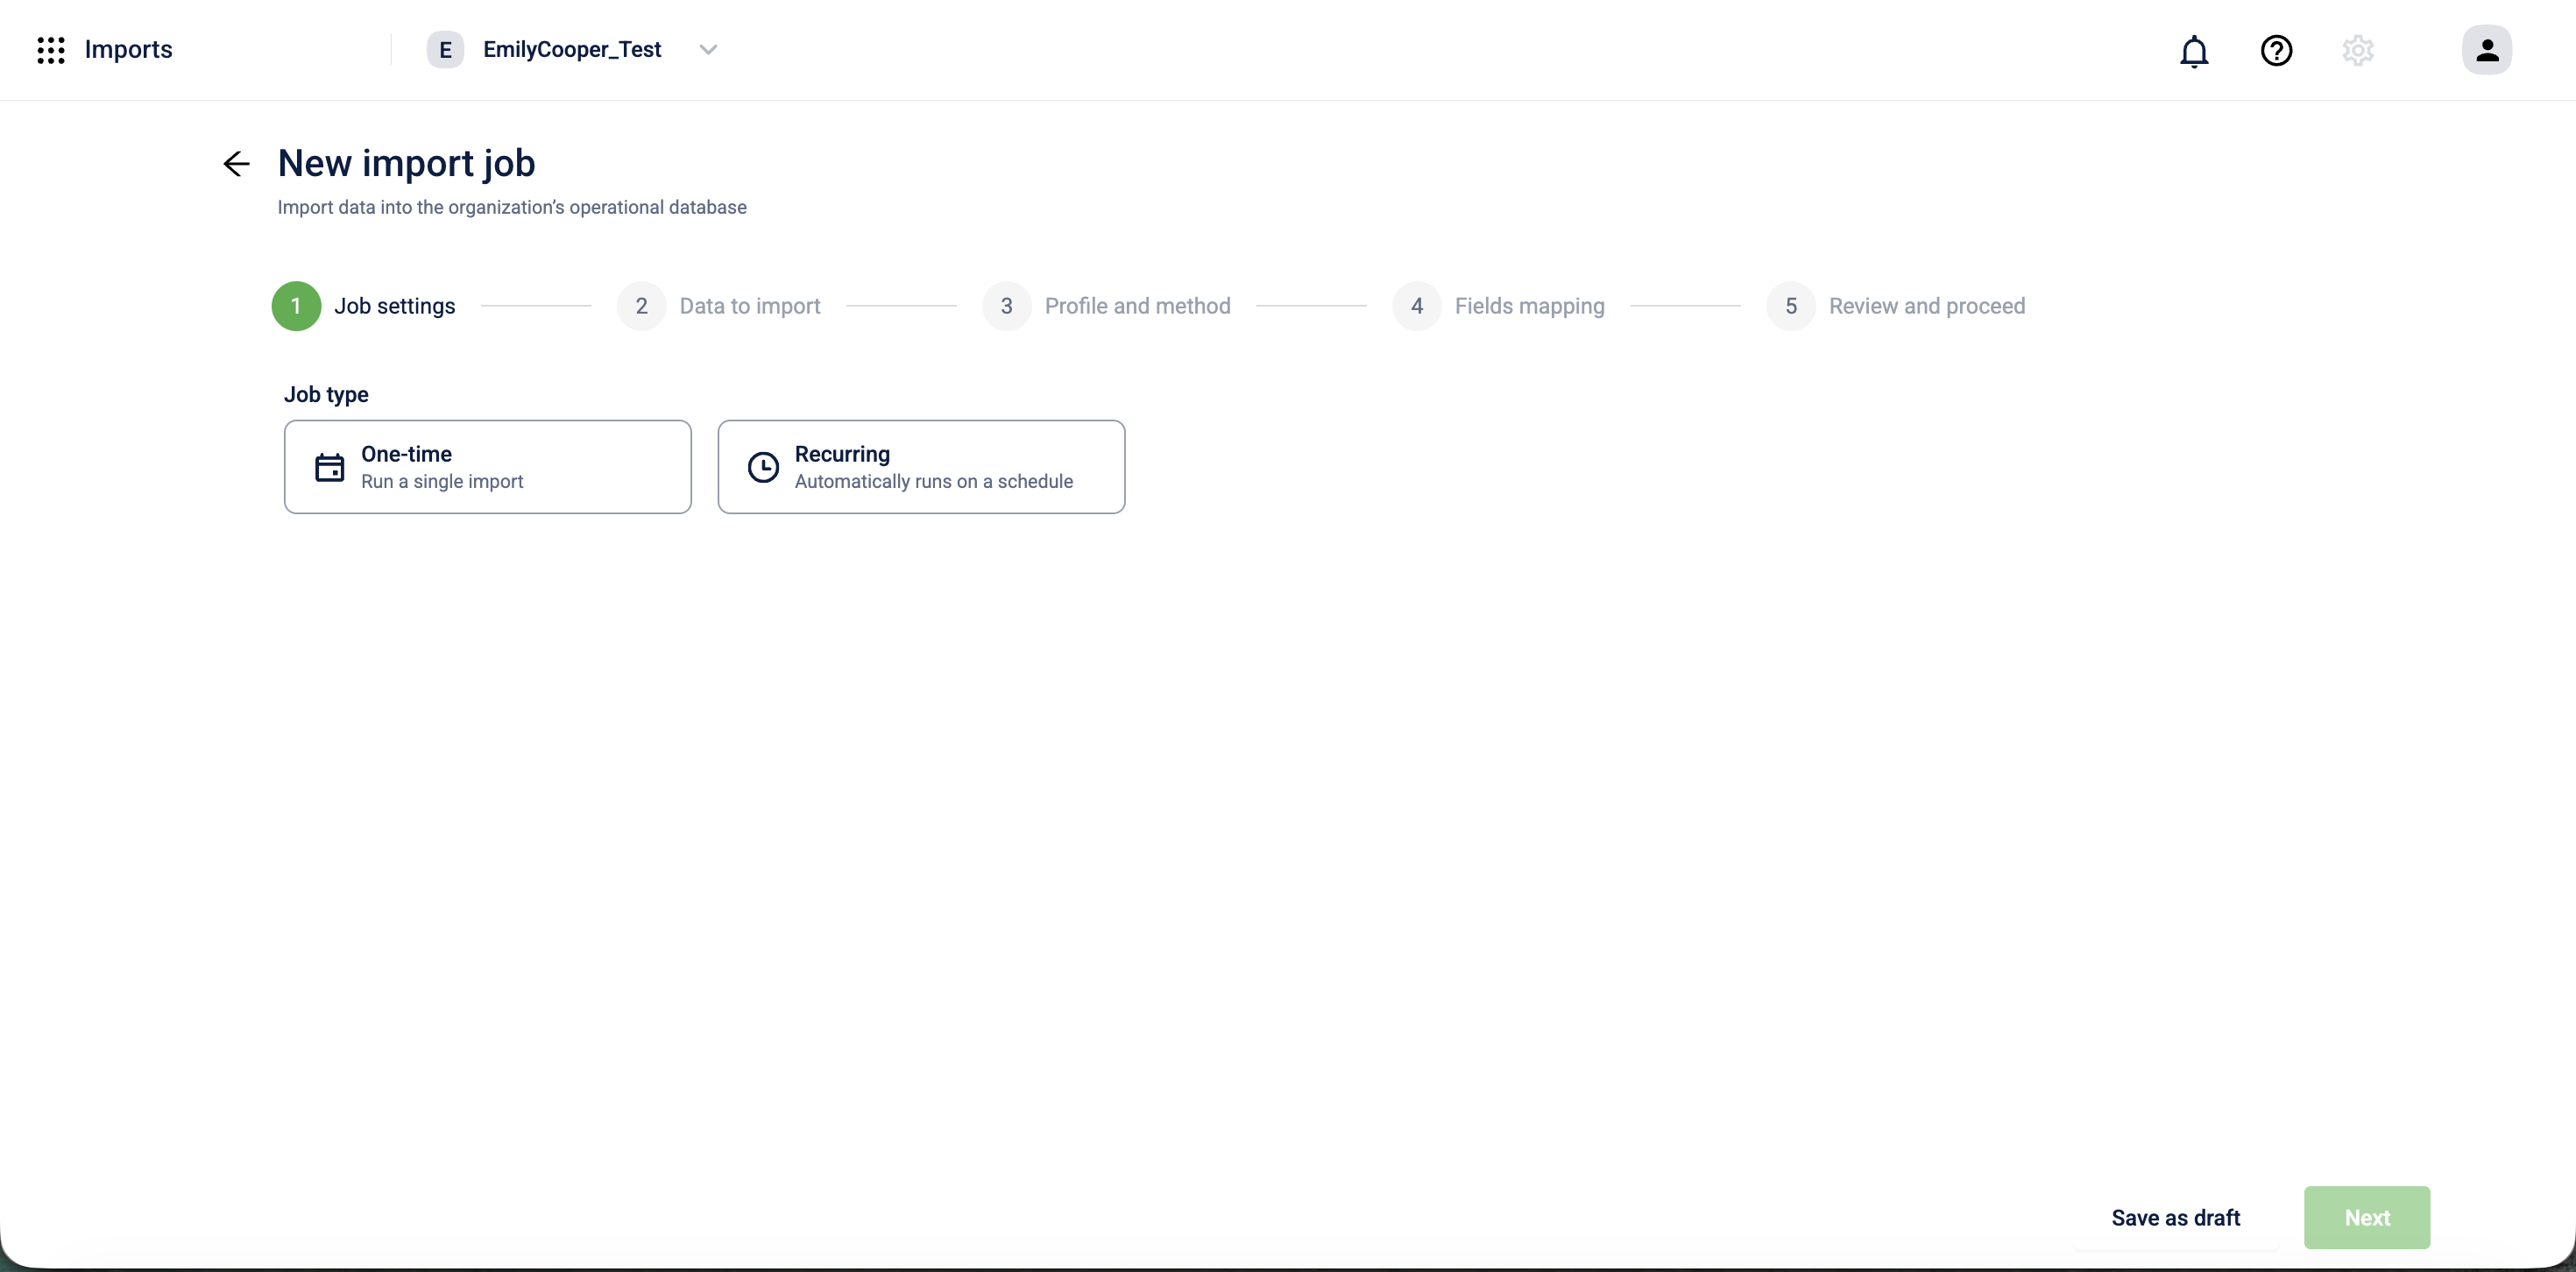
Select the job type:
-
One-time: runs a single import and stops.
-
Recurring: automatically runs on a schedule you define.
-
-
If you selected Recurring, set the frequency:
Frequency Additional fields Every 15 mins None Hourly None Daily At: select a time Weekly On: select a day of the week; At: select a time Monthly On: select First day of the month, 15th day of the month, or Last day of the month; At: select a time Custom (cron expression) Cron expression: enter a valid cron expression 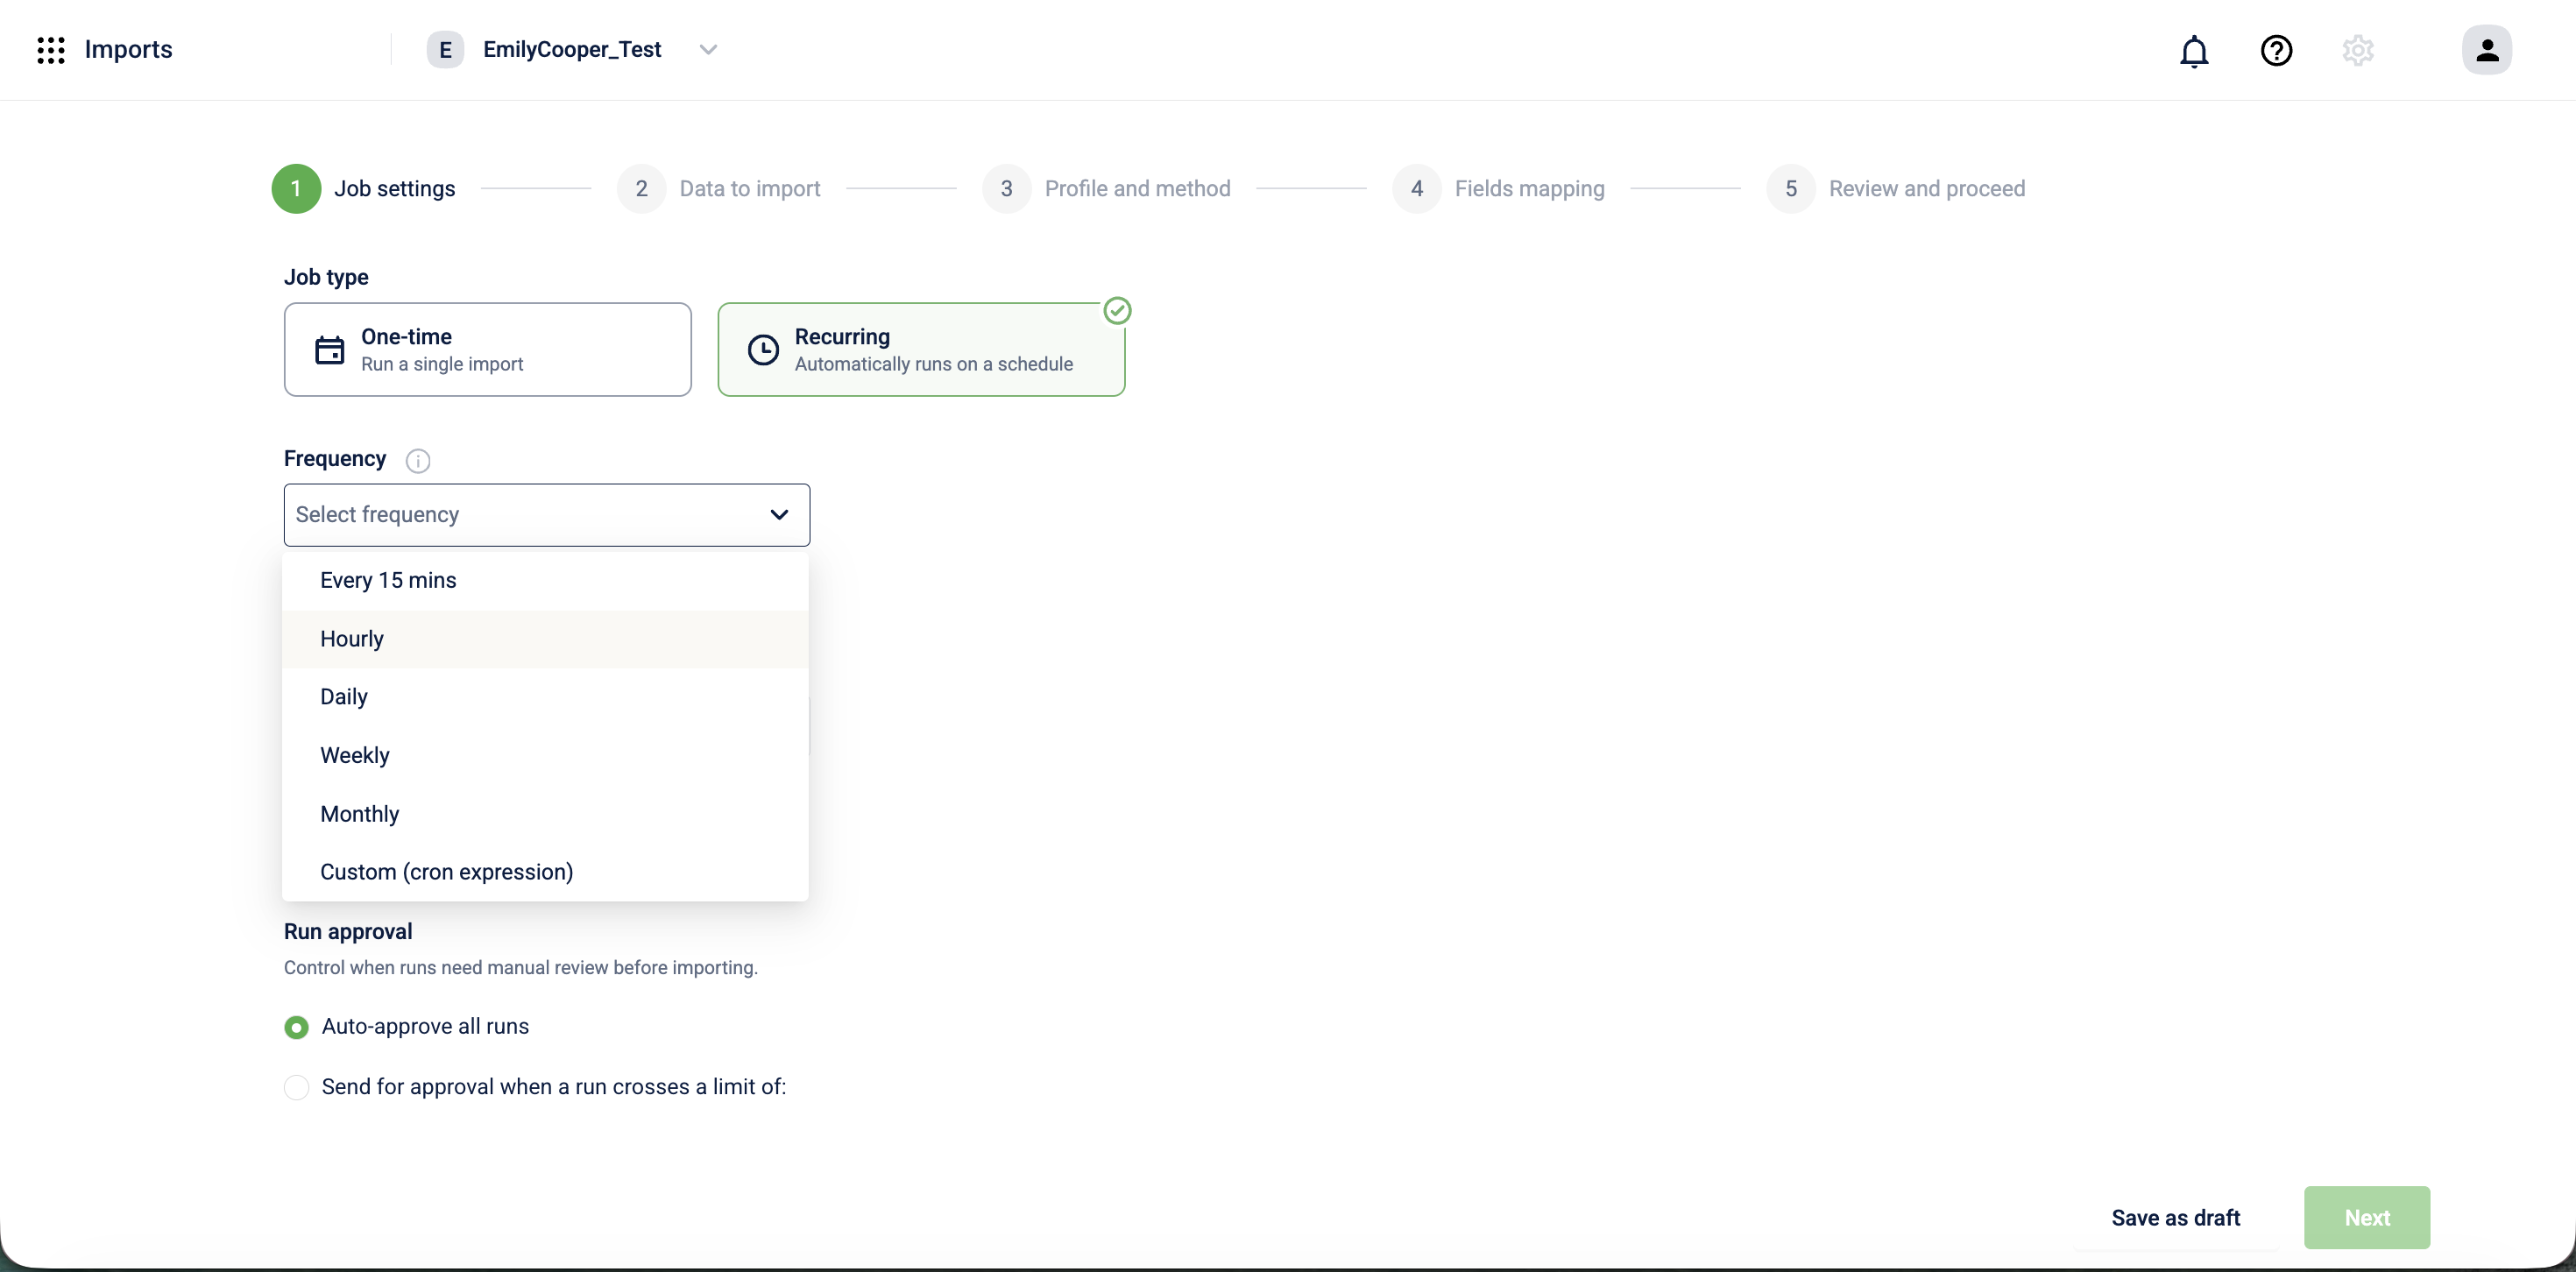
-
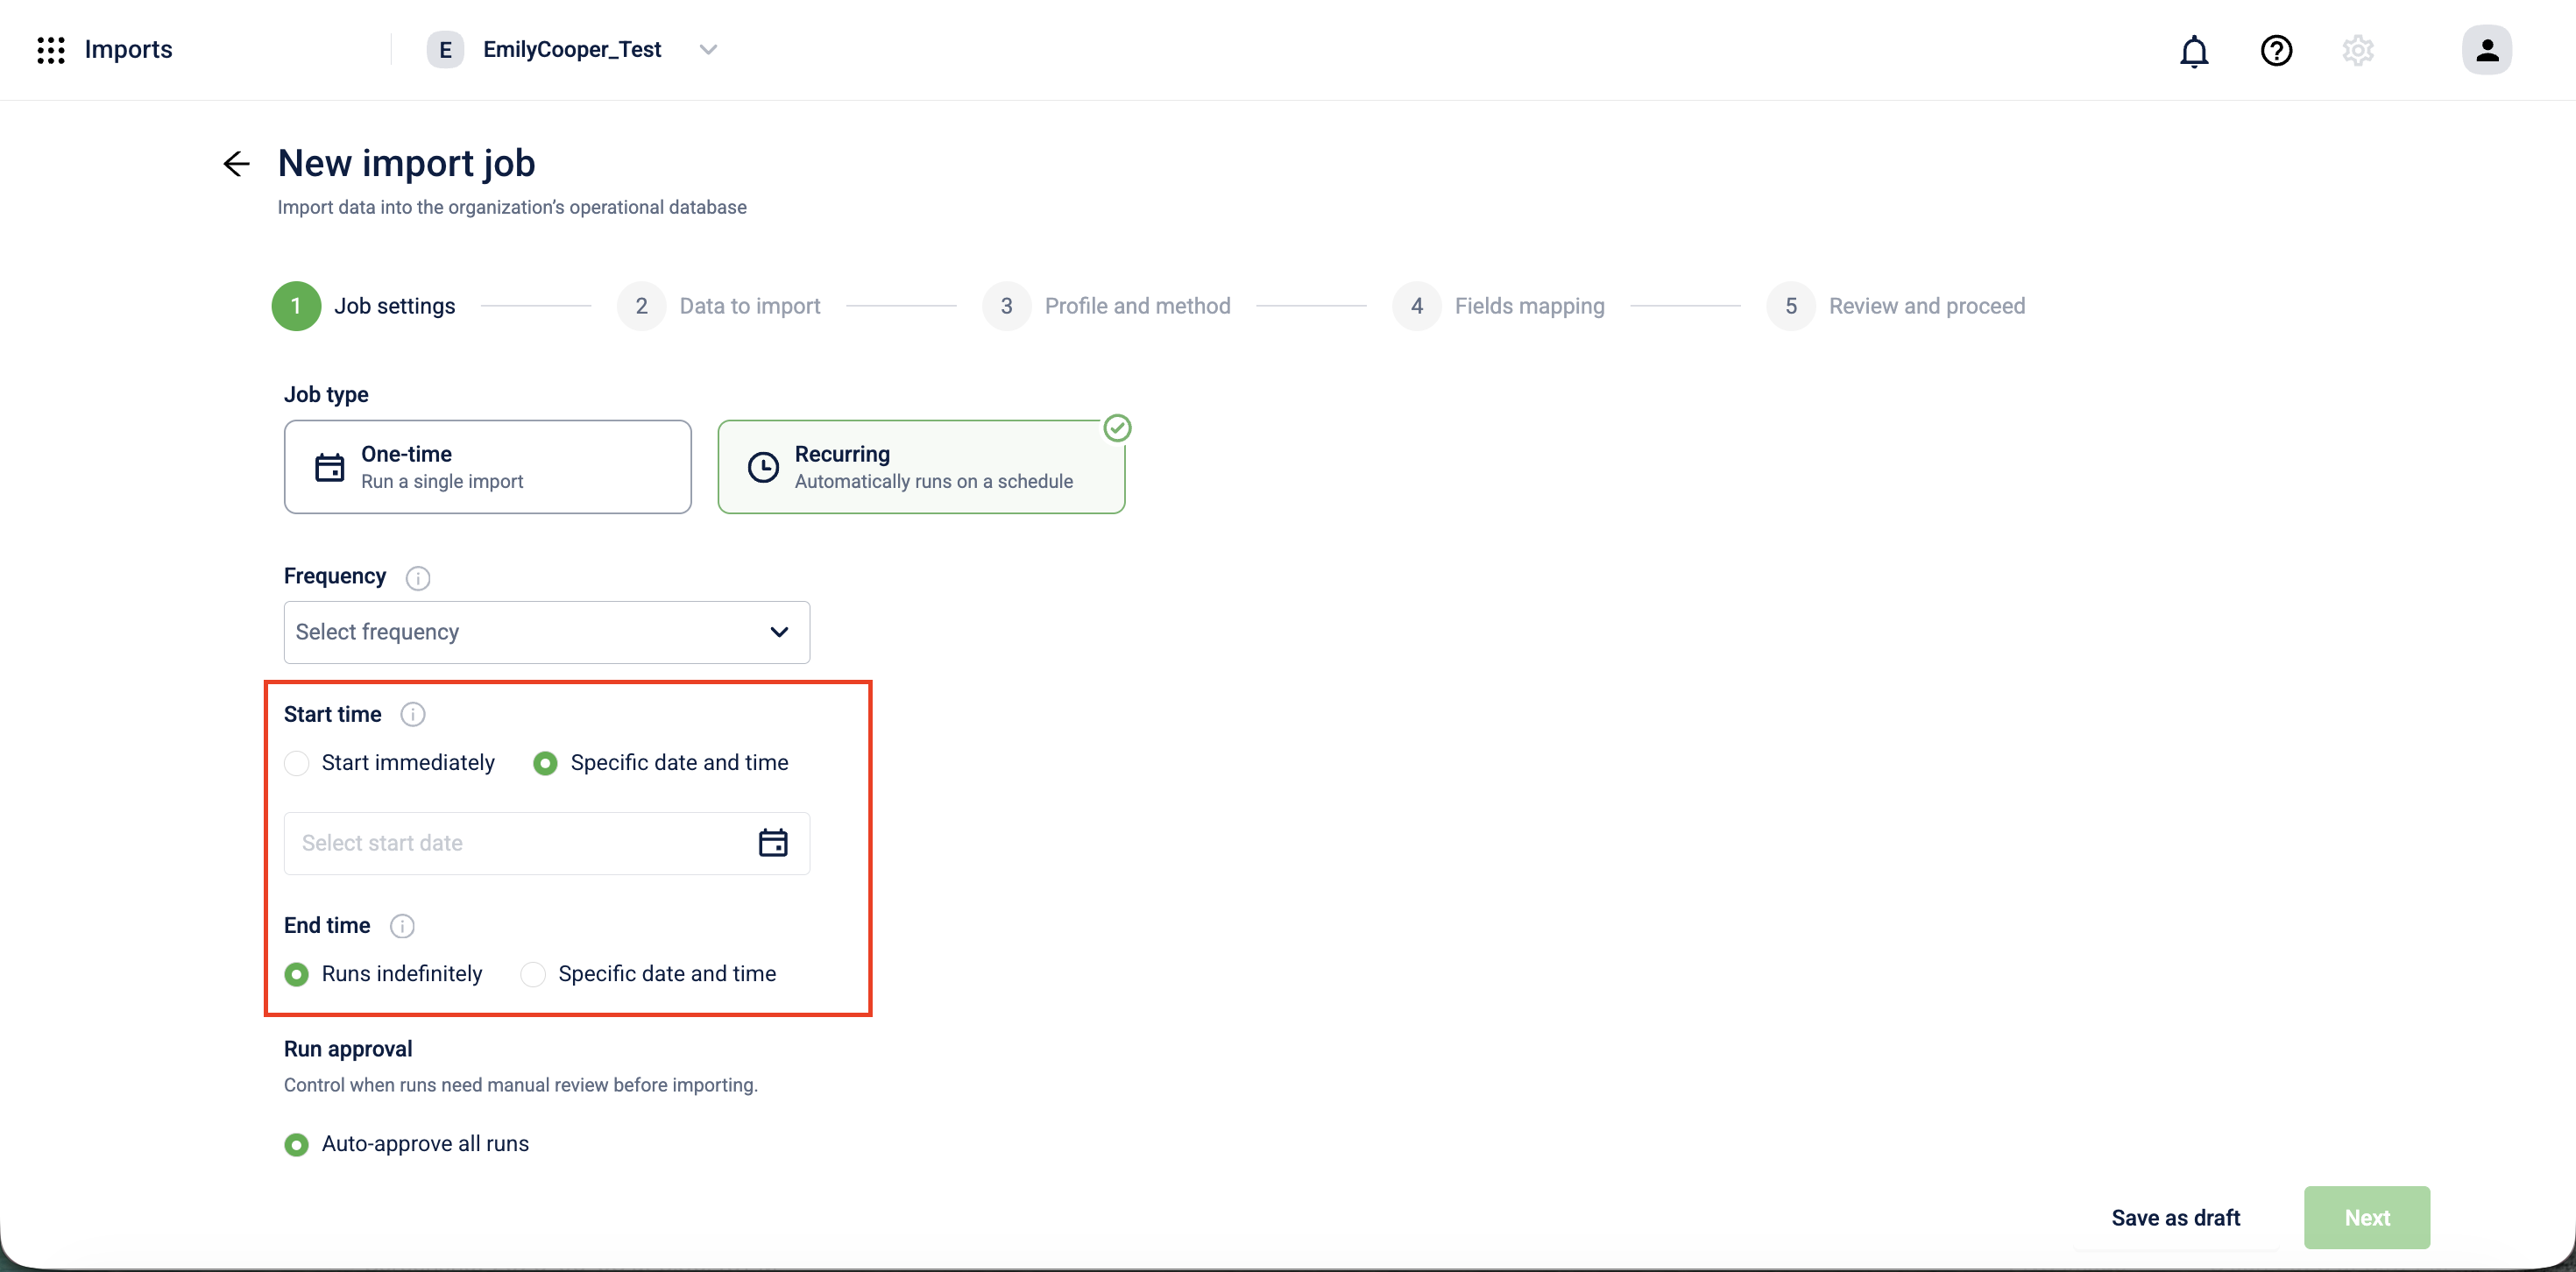
If you selected Recurring, set the start and end time for the schedule:
-
Start time: select Start immediately to begin on the next scheduled occurrence, or select Specific date and time to set a date and time.
-
End time: select Runs indefinitely to keep the schedule running until you stop it manually, or select Specific date and time to set when the schedule stops.
-
-
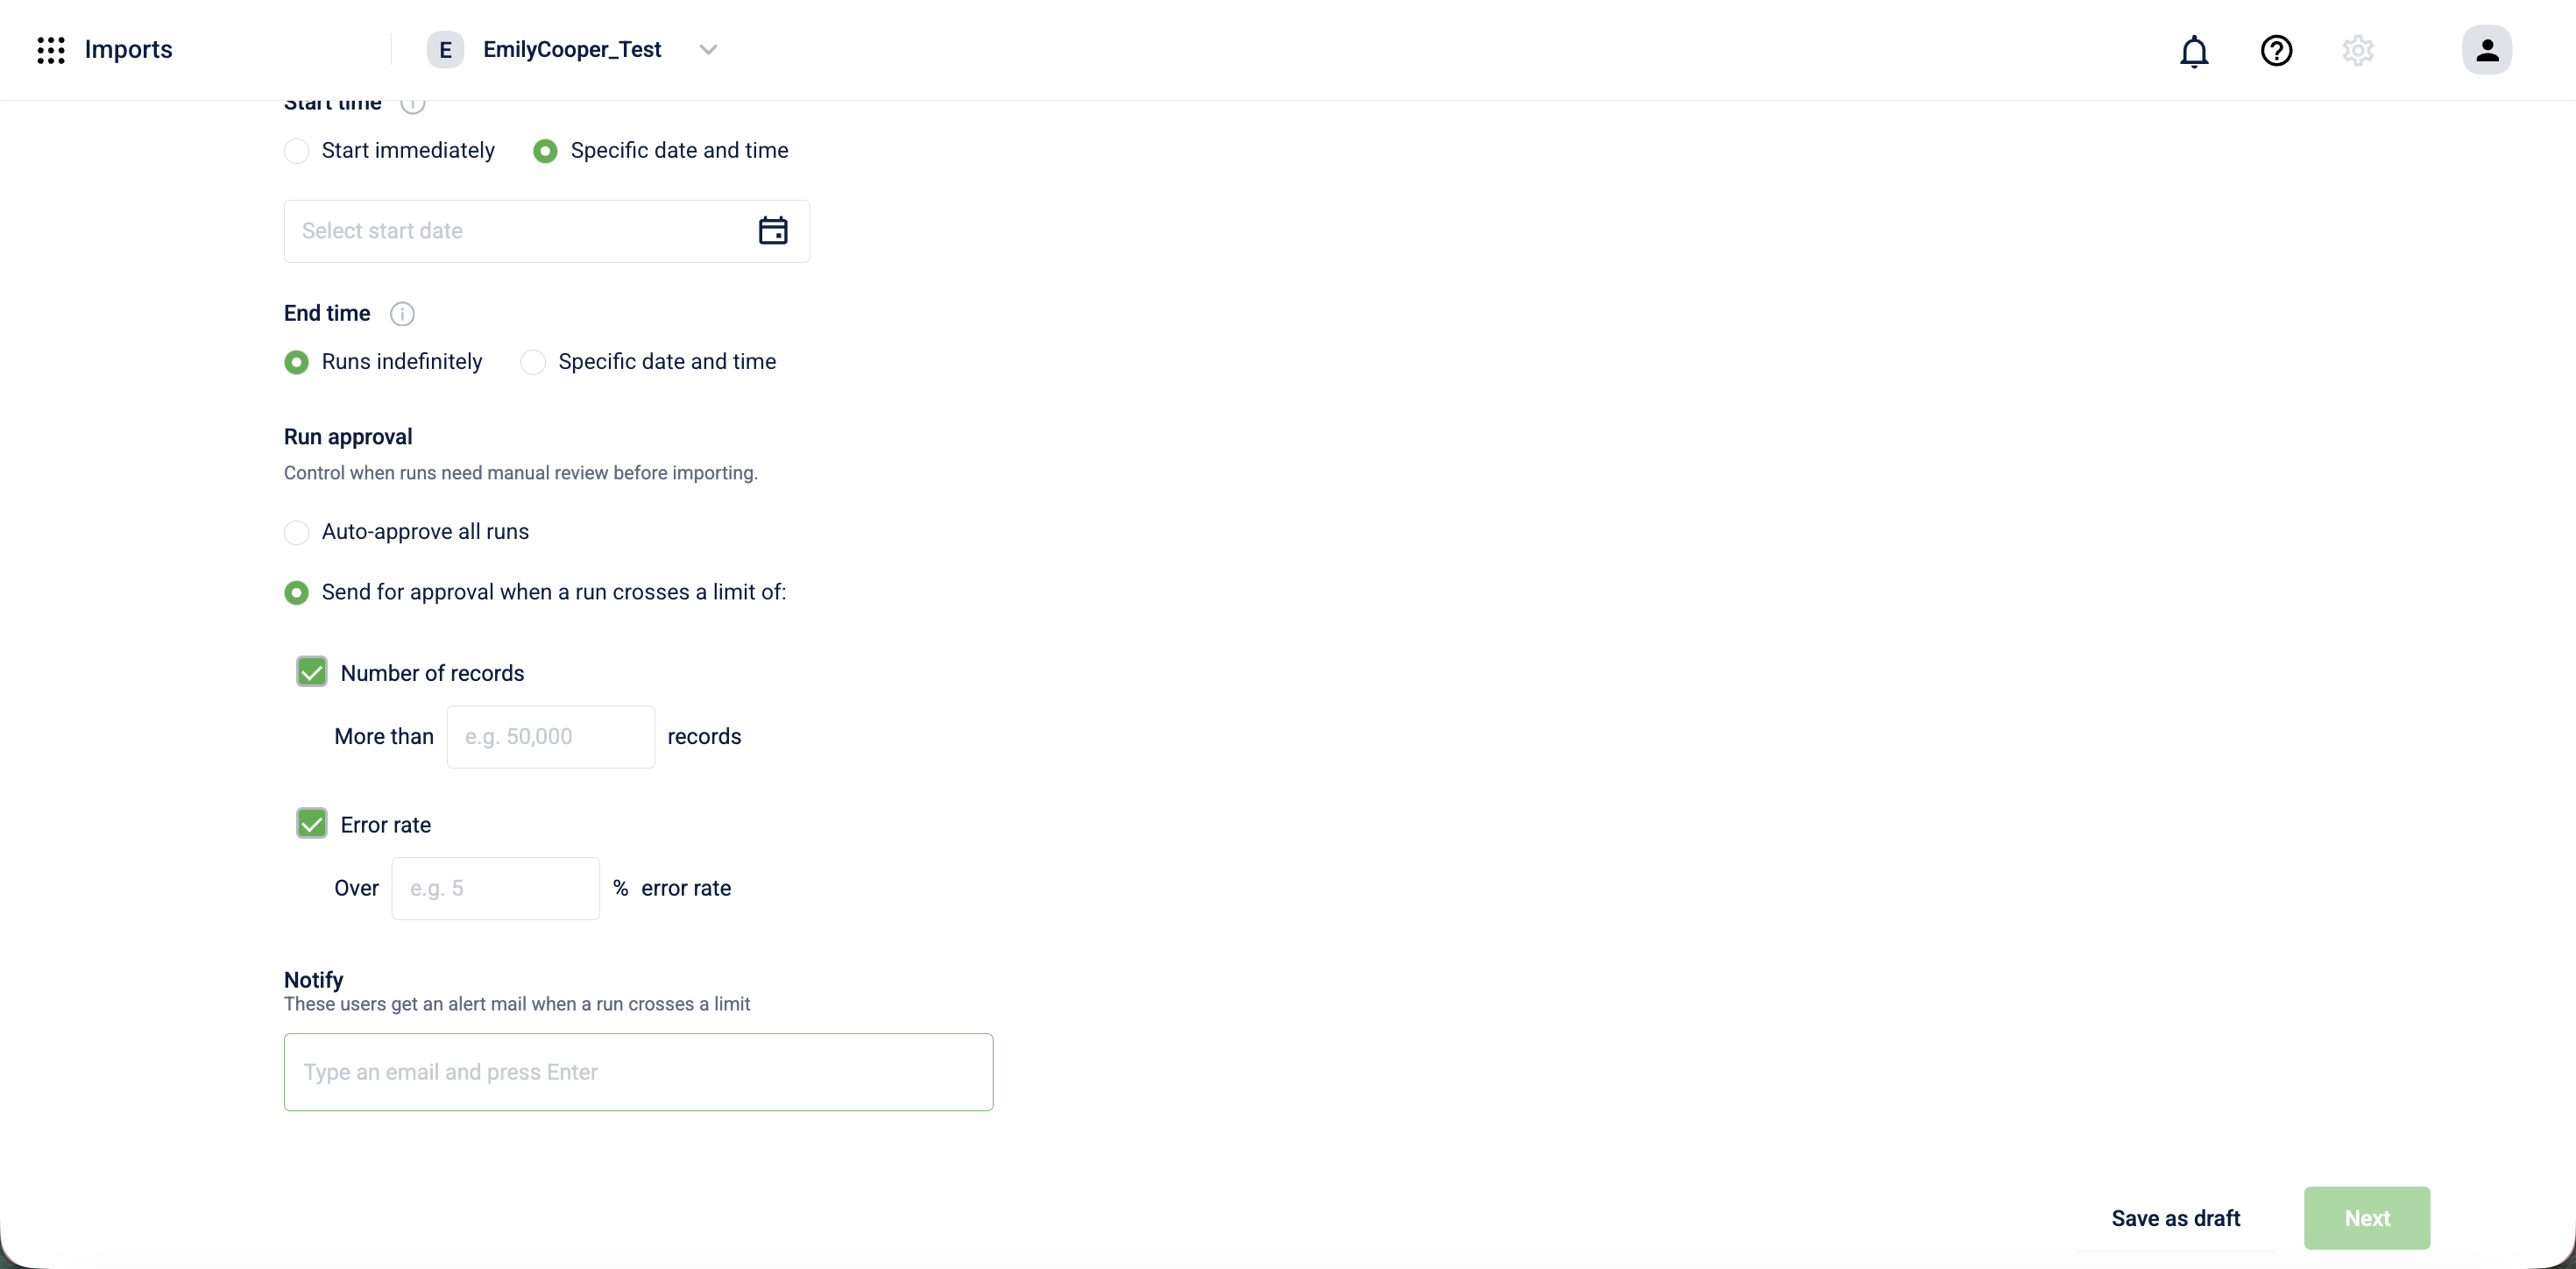
Under Run approval, select how the job is approved before importing:
- Auto-approve this import (default): the job runs without manual review.
- Send for approval when the import crosses a limit of: the system holds the job for manual approval when the import meets either condition below. Select one or both:
-
Number of records: enter a threshold. The system sends the job for approval when the import contains more than the specified number of records.
-
Error rate: enter a percentage. The system sends the job for approval when the error rate exceeds the specified percentage.
-
-
In the Notify field, enter the email addresses of users who should receive a notification when a run crosses a limit. Select Enter after each address.
Note: Select Save as draft at any step to save your progress and return to the job later.
- Select Next.
Step 2: Data to import
-
Under Data source, select Databricks.
-
In the Table pattern field, enter the name of your source table. The name must exactly match the table name in Databricks.
-
When the system finds a match, a confirmation appears: "1 tables matched".
In the Select table dropdown, select your table.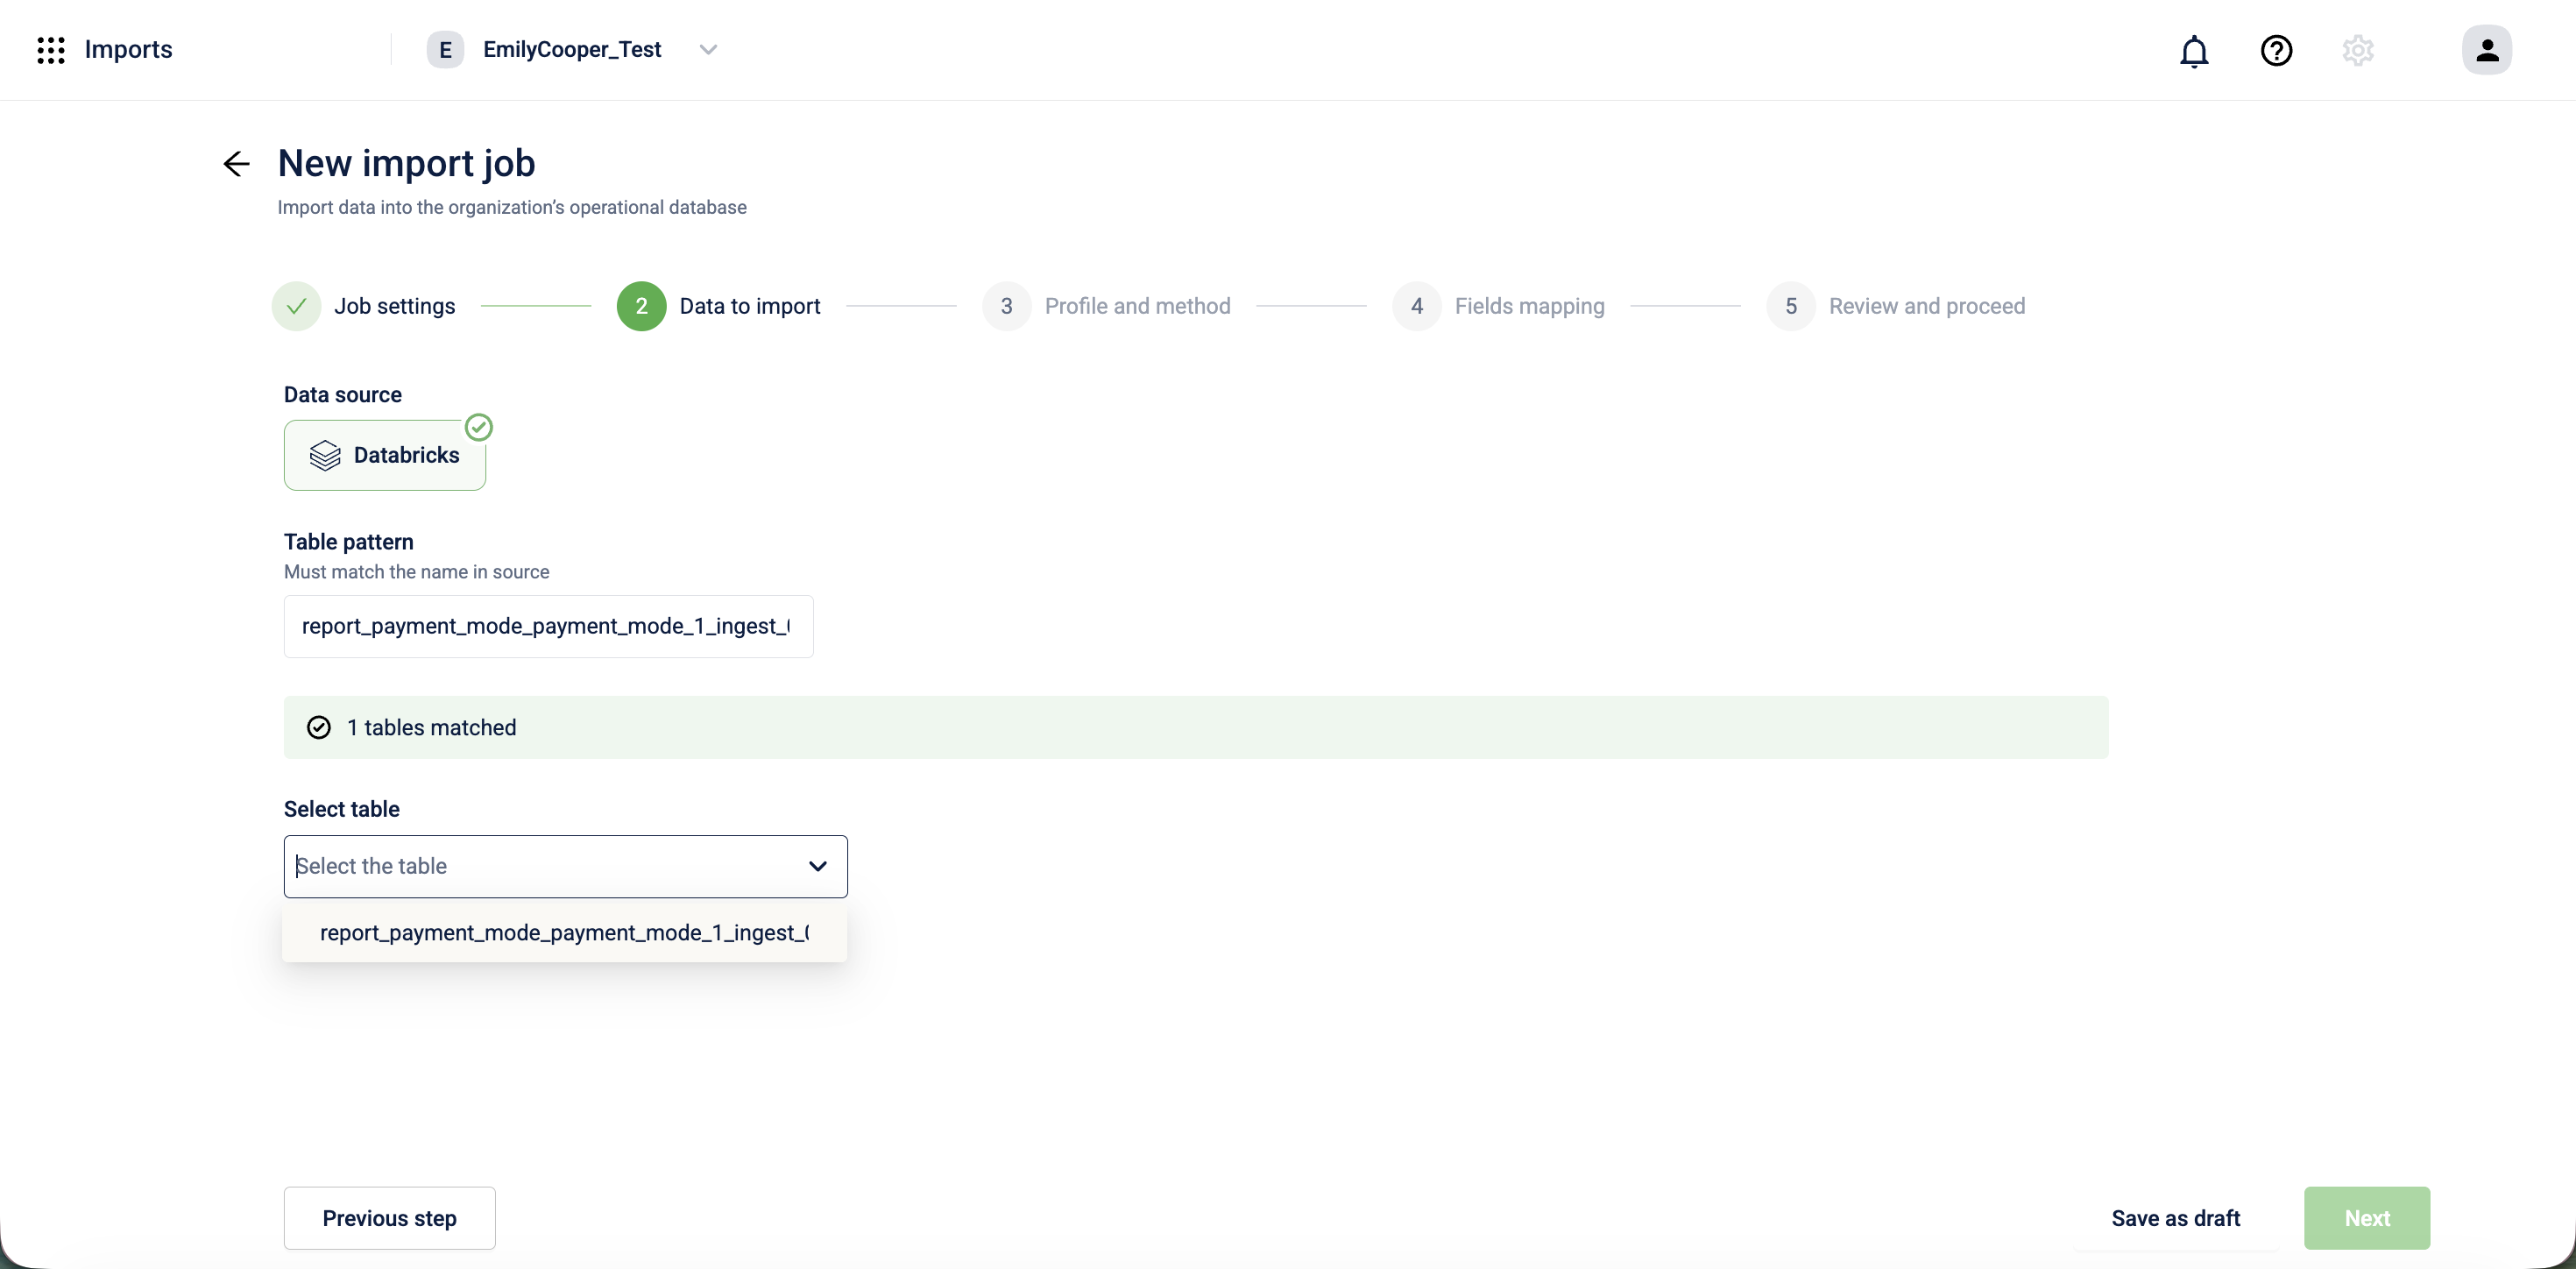
-
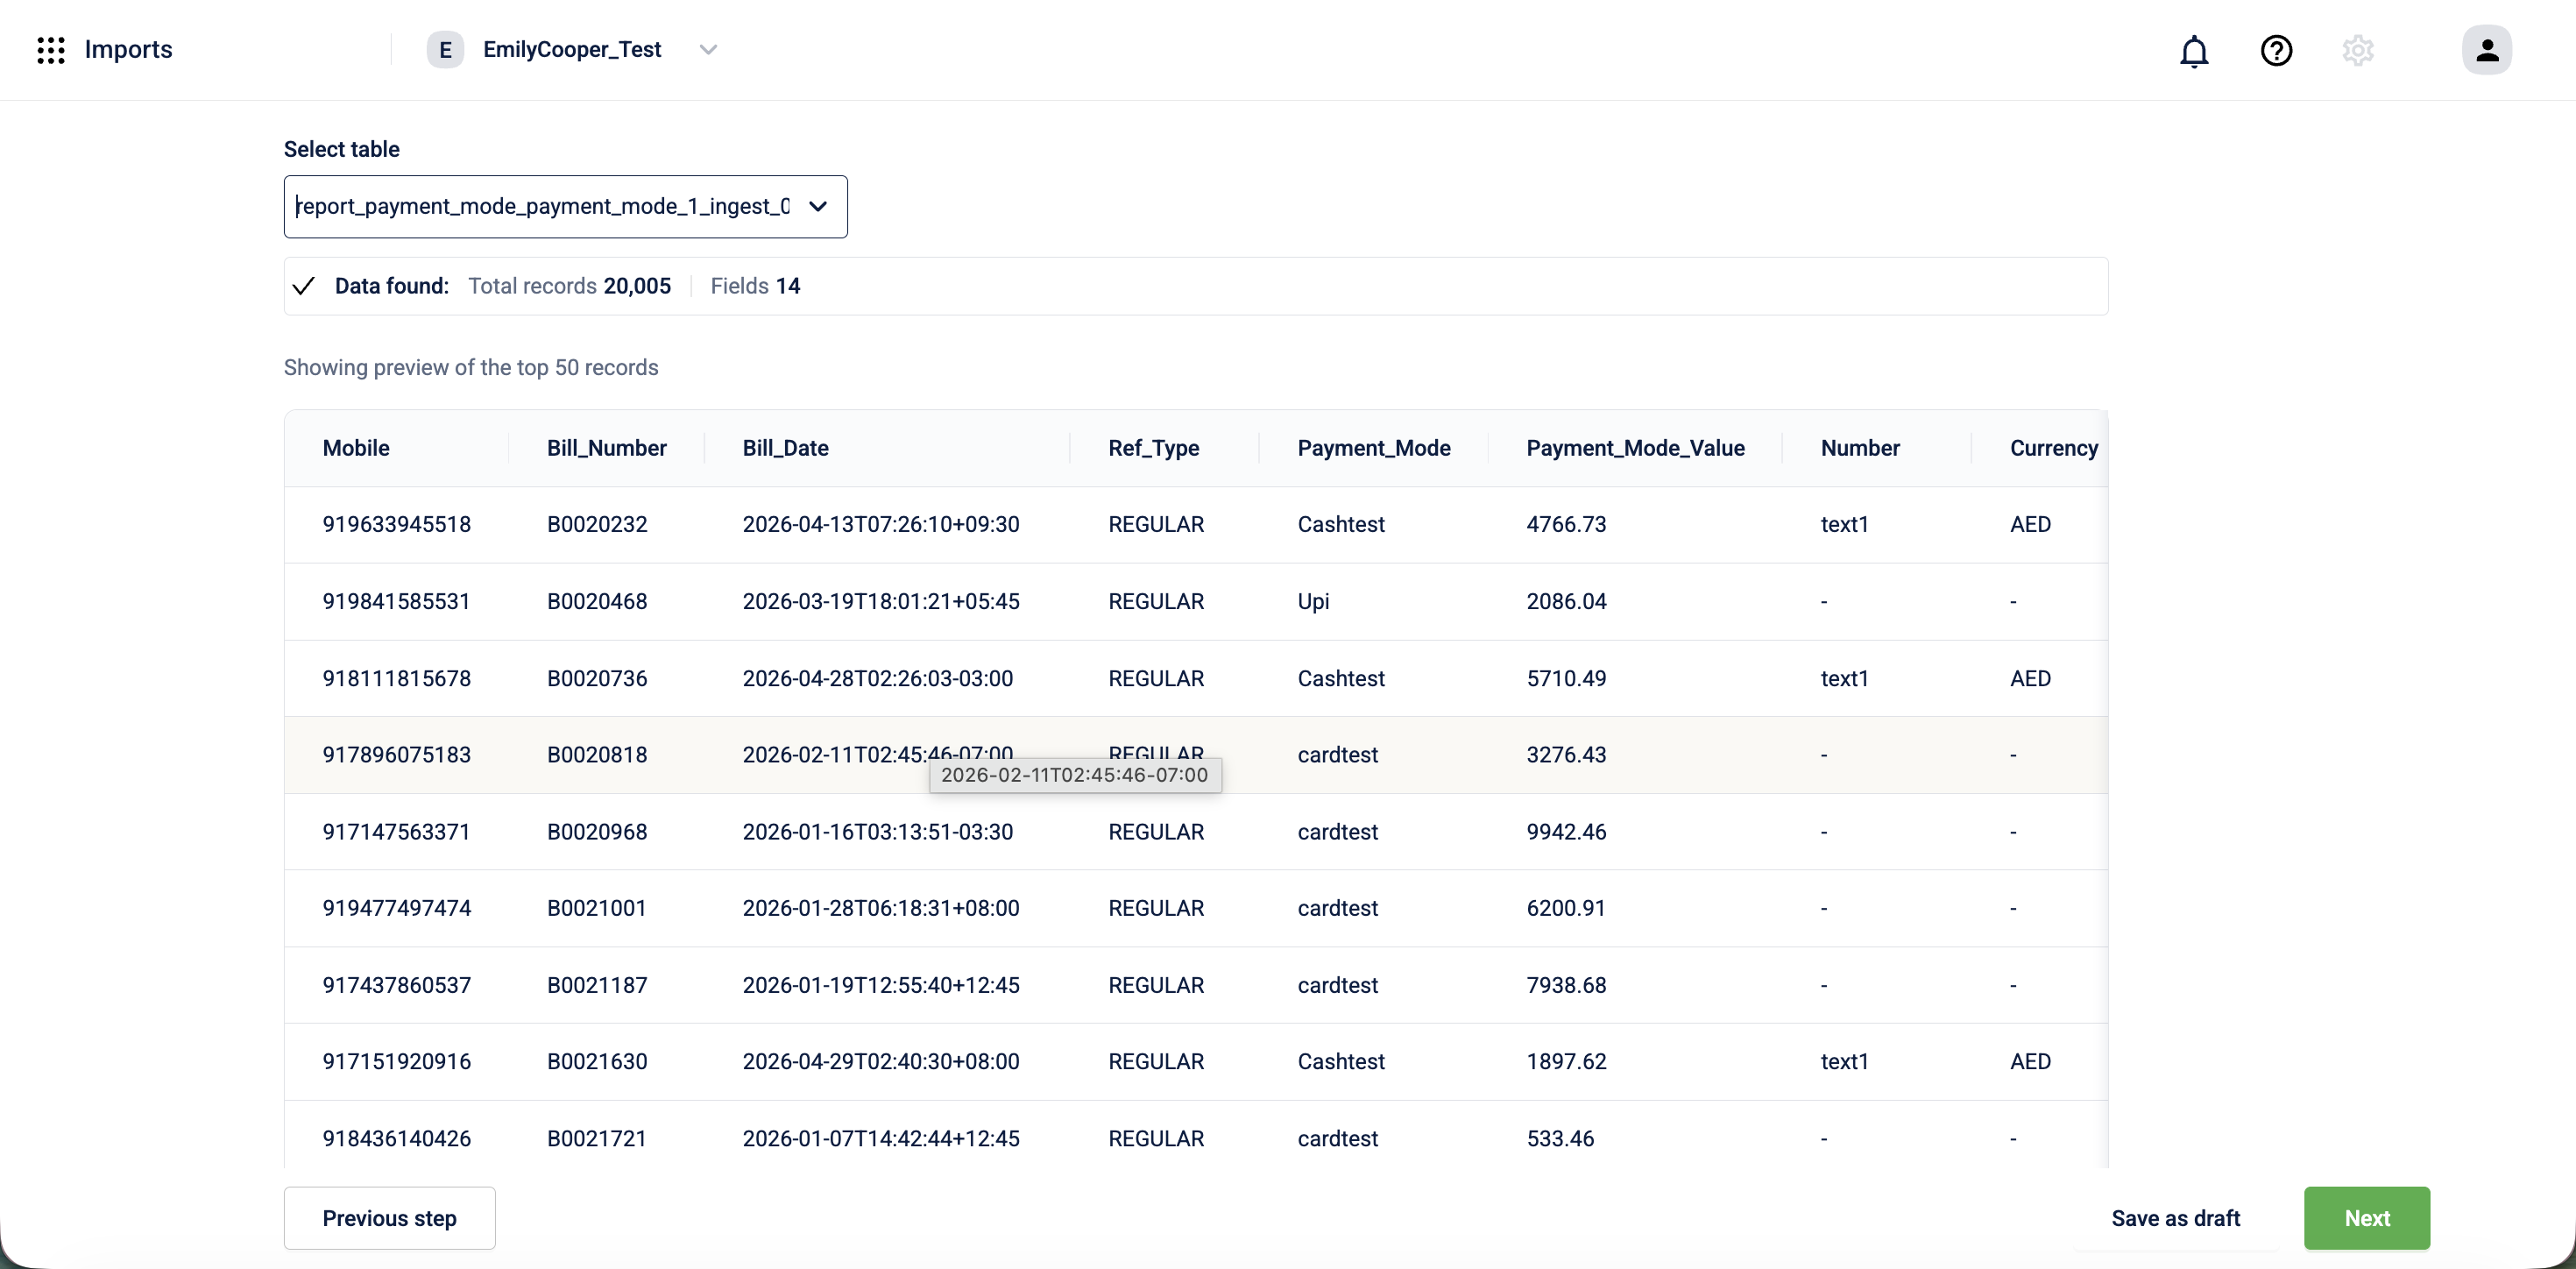
A preview of the top 50 records appears along with the total record count. Review the preview to confirm you've selected the correct table.
-
Select Next.
Step 3: Profile and method
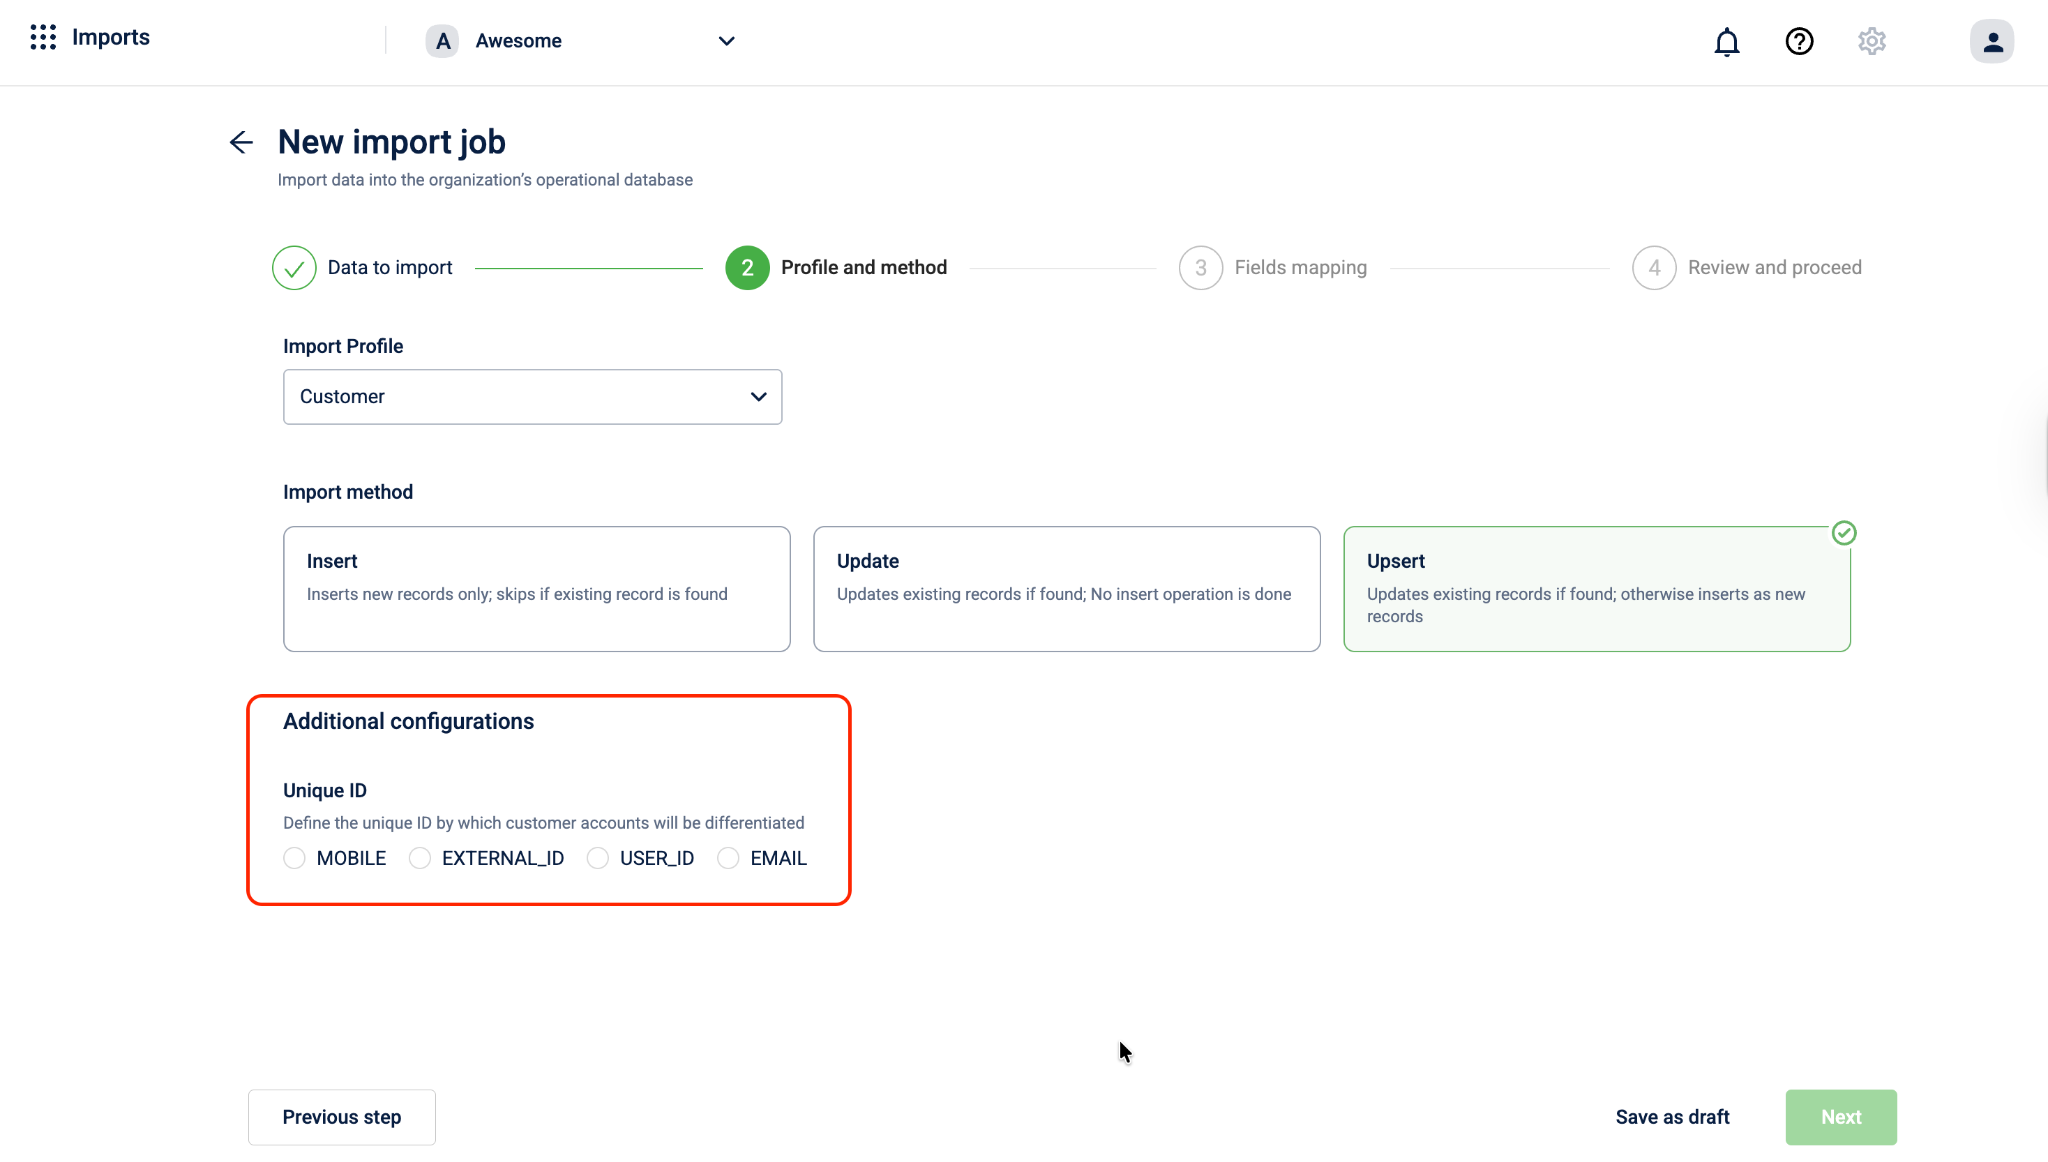
Define the import profile that matches your data type and select how the records should be written to the Capillary database.
-
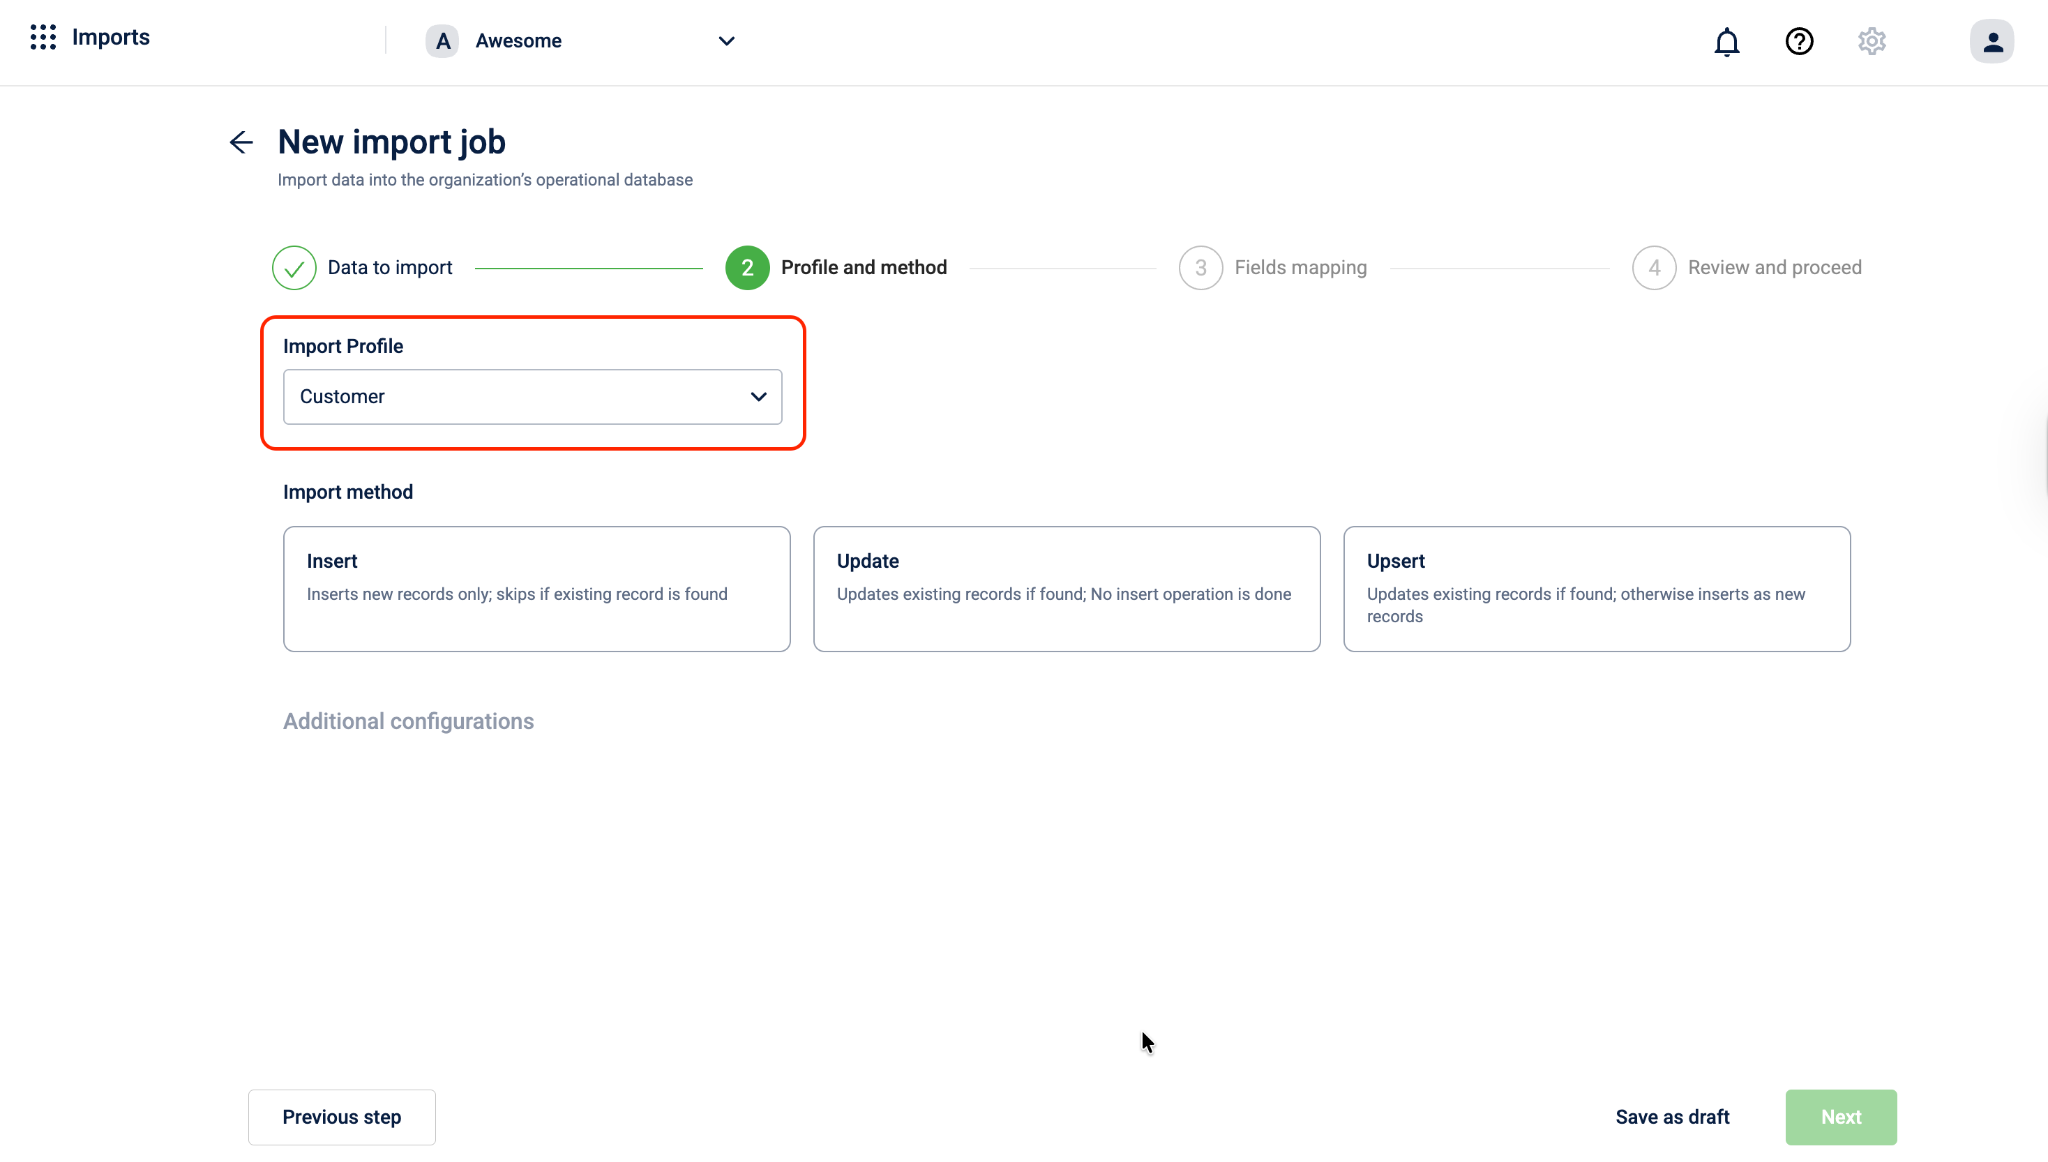
Under Import profile, select the dropdown and select the profile that matches the type of data you are importing. The profile tells the system what entity the data belongs to and how it should be validated and processed.
The following profiles are available:
- Customer: For importing customer registration or profile data.
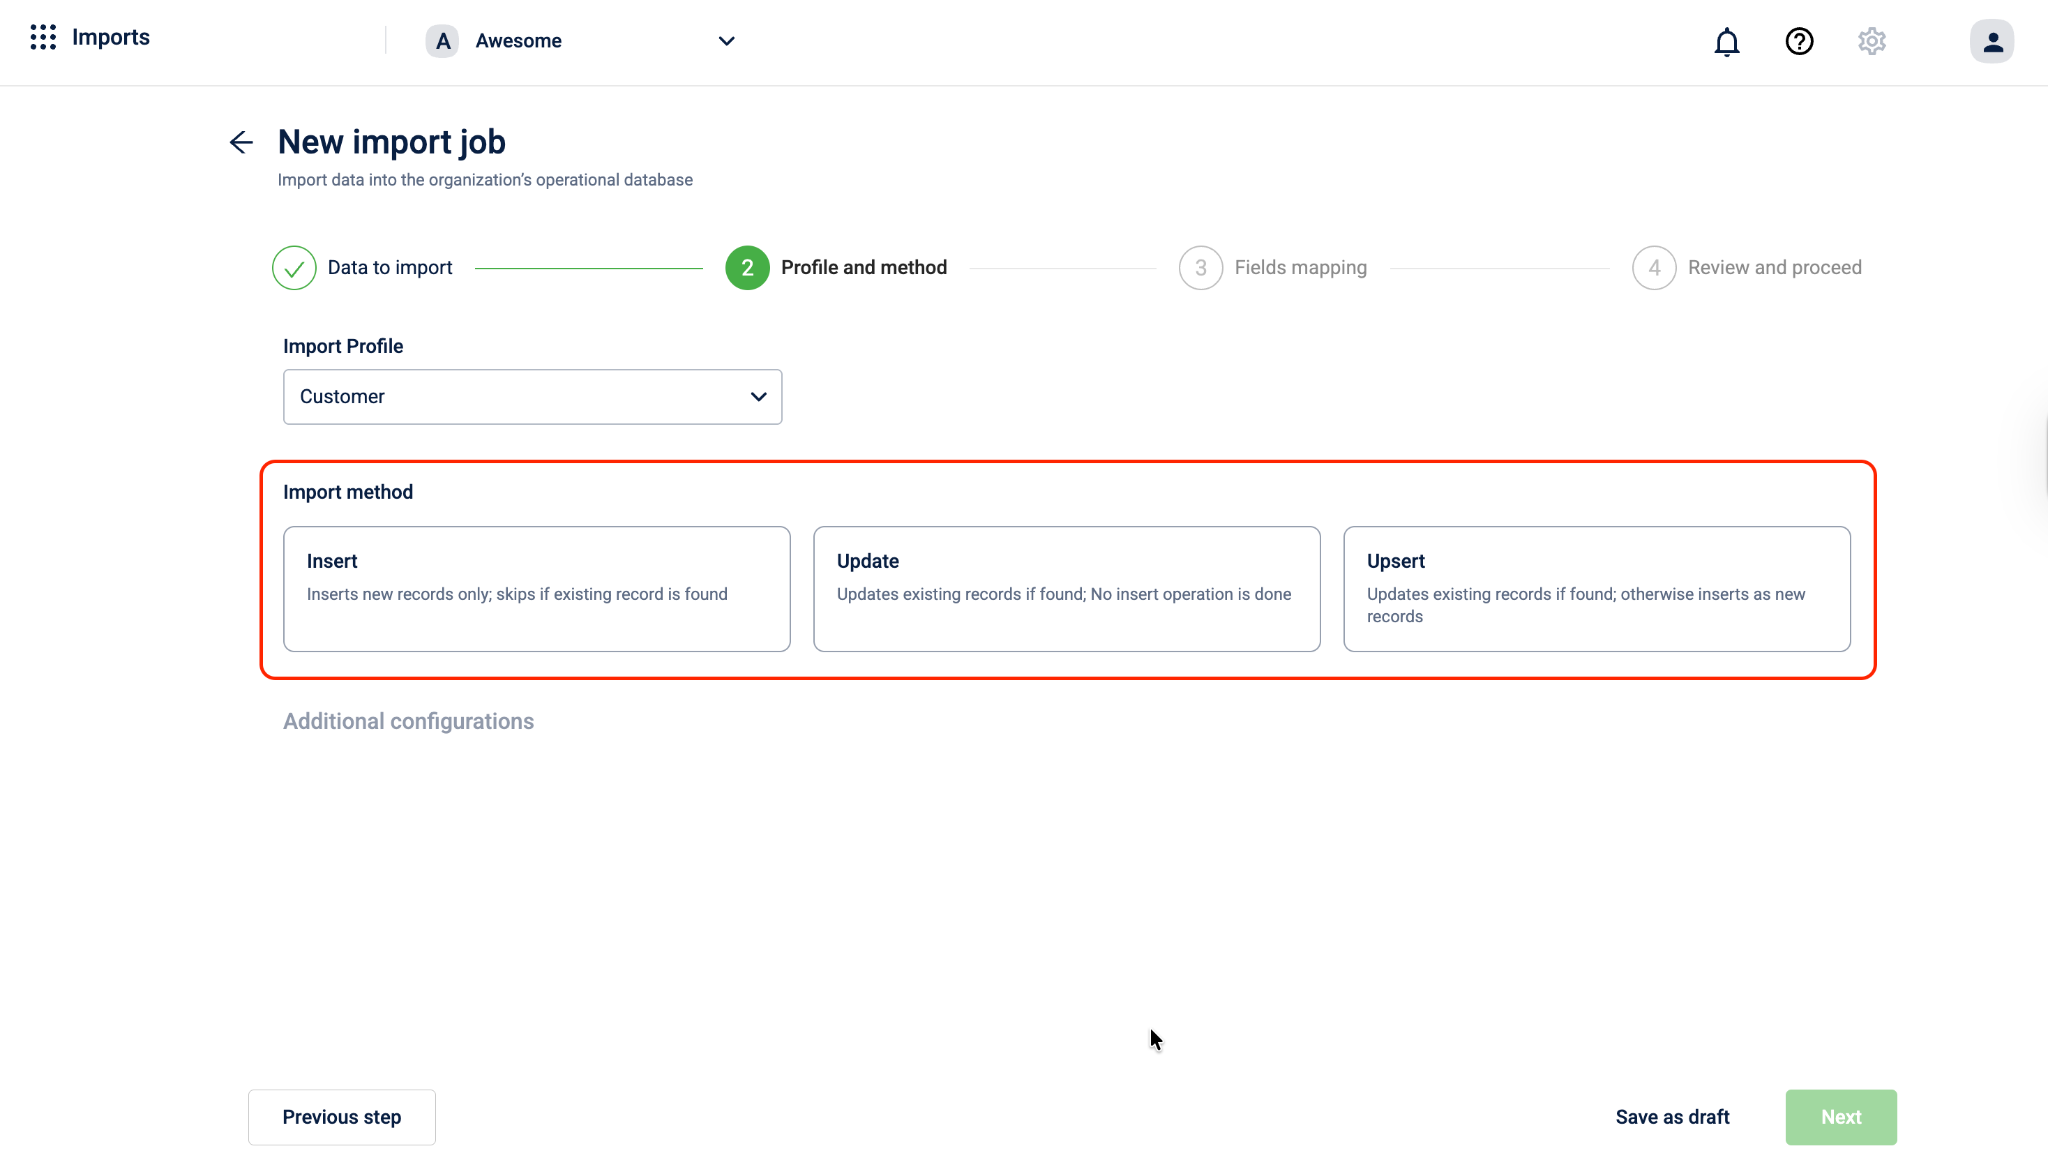
- Under Import method, select how the records from your table should be written to the Capillary database. Three methods are available:
| Method | Description |
|---|---|
| Insert | Inserts new records only; skips if an existing record is found |
| Update | Updates existing records if found; does not insert new records |
| Upsert | Updates existing records if found; otherwise inserts as new records |
Note: The Upsert method is supported even when CONF_ALLOW_REGISTRATION_FROM_ANY_IDENTIFIERS is enabled for the organization.
-
Under Additional configurations, set the Unique ID. This defines the identifier the system uses to distinguish between customer accounts during the import.
Select one of the following:
-
MOBILE
-
EXTERNAL_ID
-
USER_ID
-
EMAIL
-
-
Once you have configured the profile, method, and Unique ID, do one of the following:
- Select Previous step to go back to Step 1: Data to import.
- Select Save as draft to save the current configuration and continue later. A modal appears prompting you to enter a Job name and an optional Description. Select Save to store the draft. The job appears on the imports listing page, where you can return to edit and complete it later.
- Select Next to proceed to Step 3: Fields mapping.
Step 4: Fields mapping
Map the fields from your source data to the corresponding customer profile fields to ensure accurate data import.
- In the Fields mapping section, review the list of source fields displayed under Fields of source data to be imported. The banner at the top shows how many mandatory profile fields still need to be mapped, for example: 0/4 mandatory profile fields mapped.
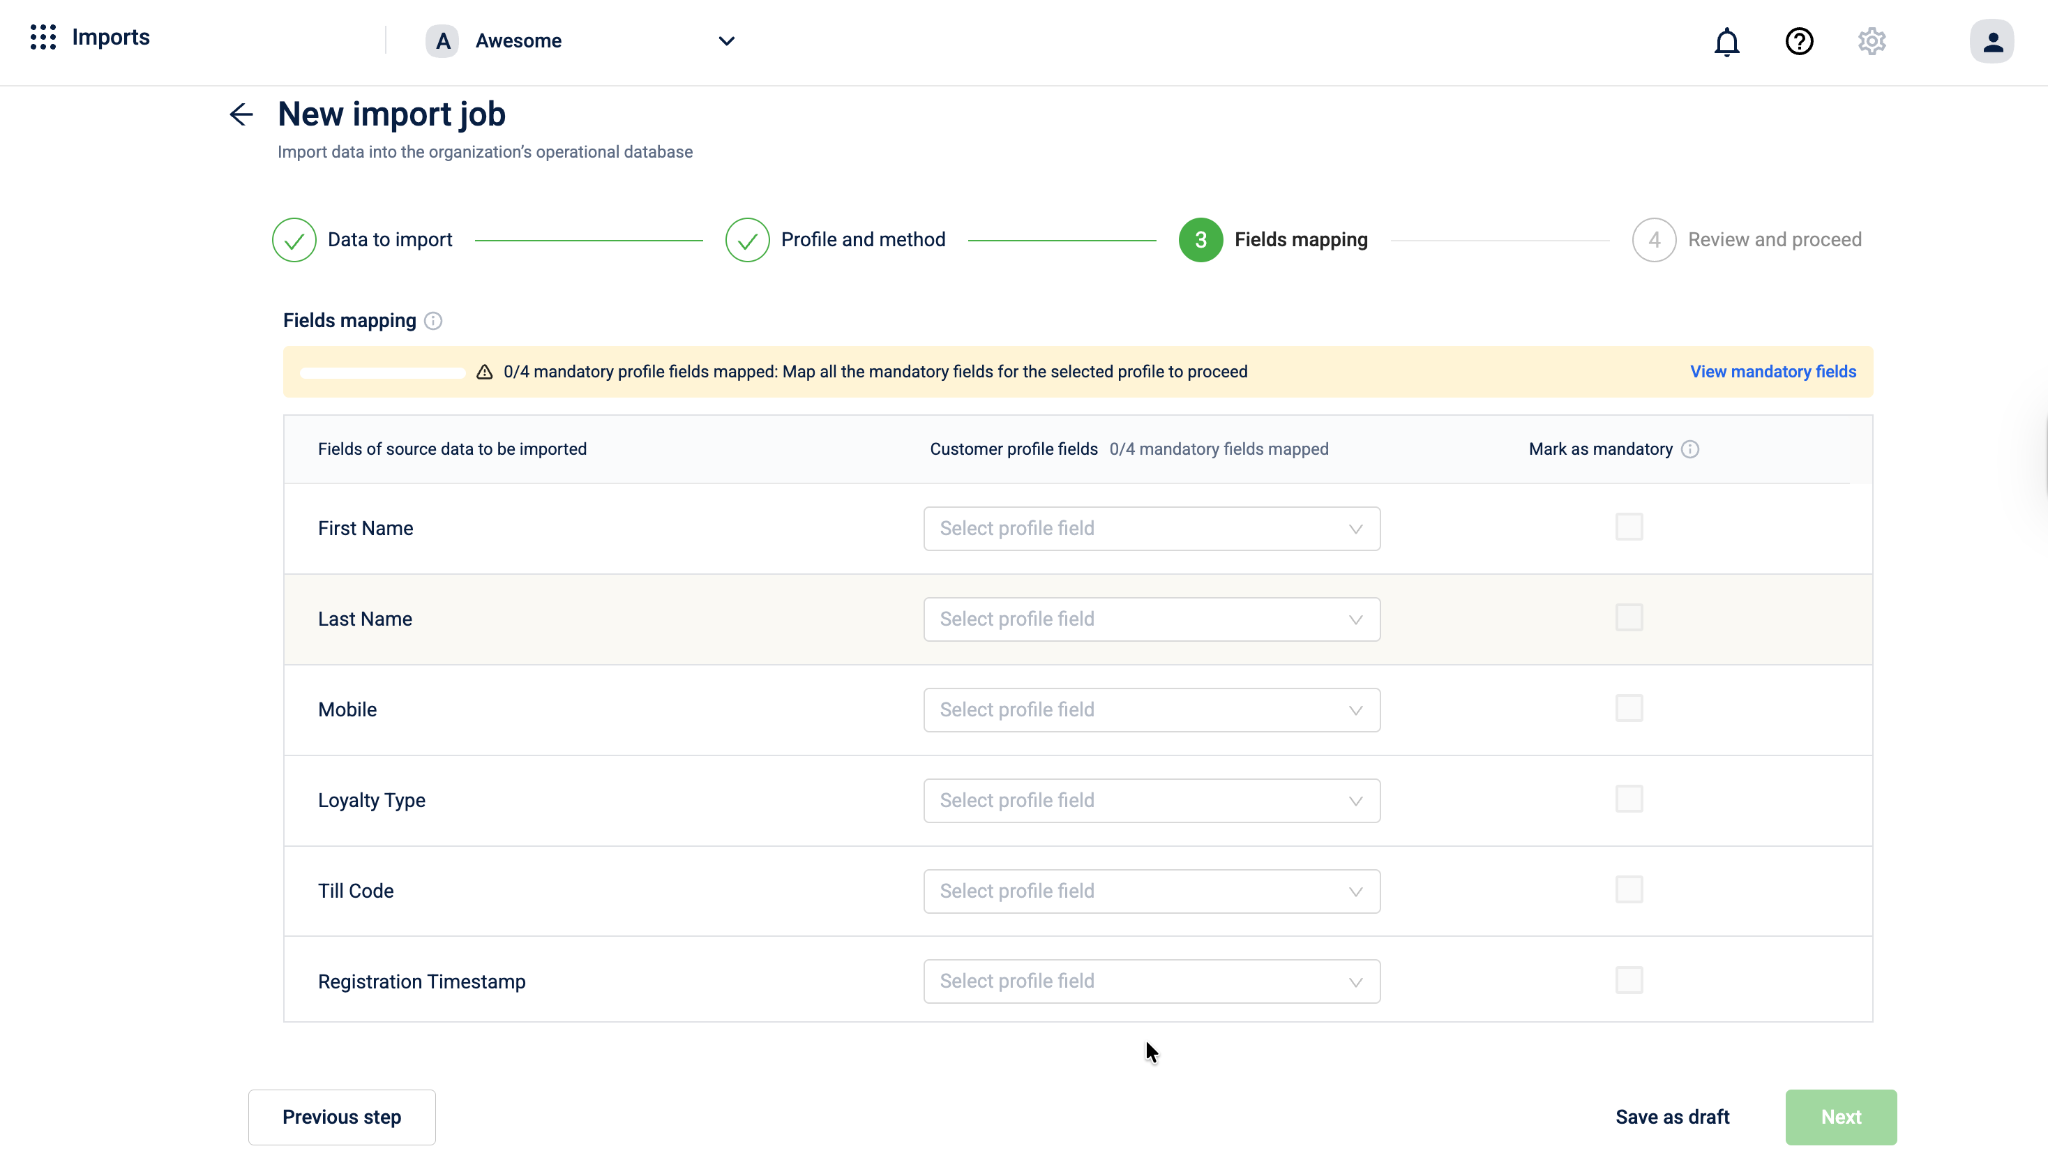
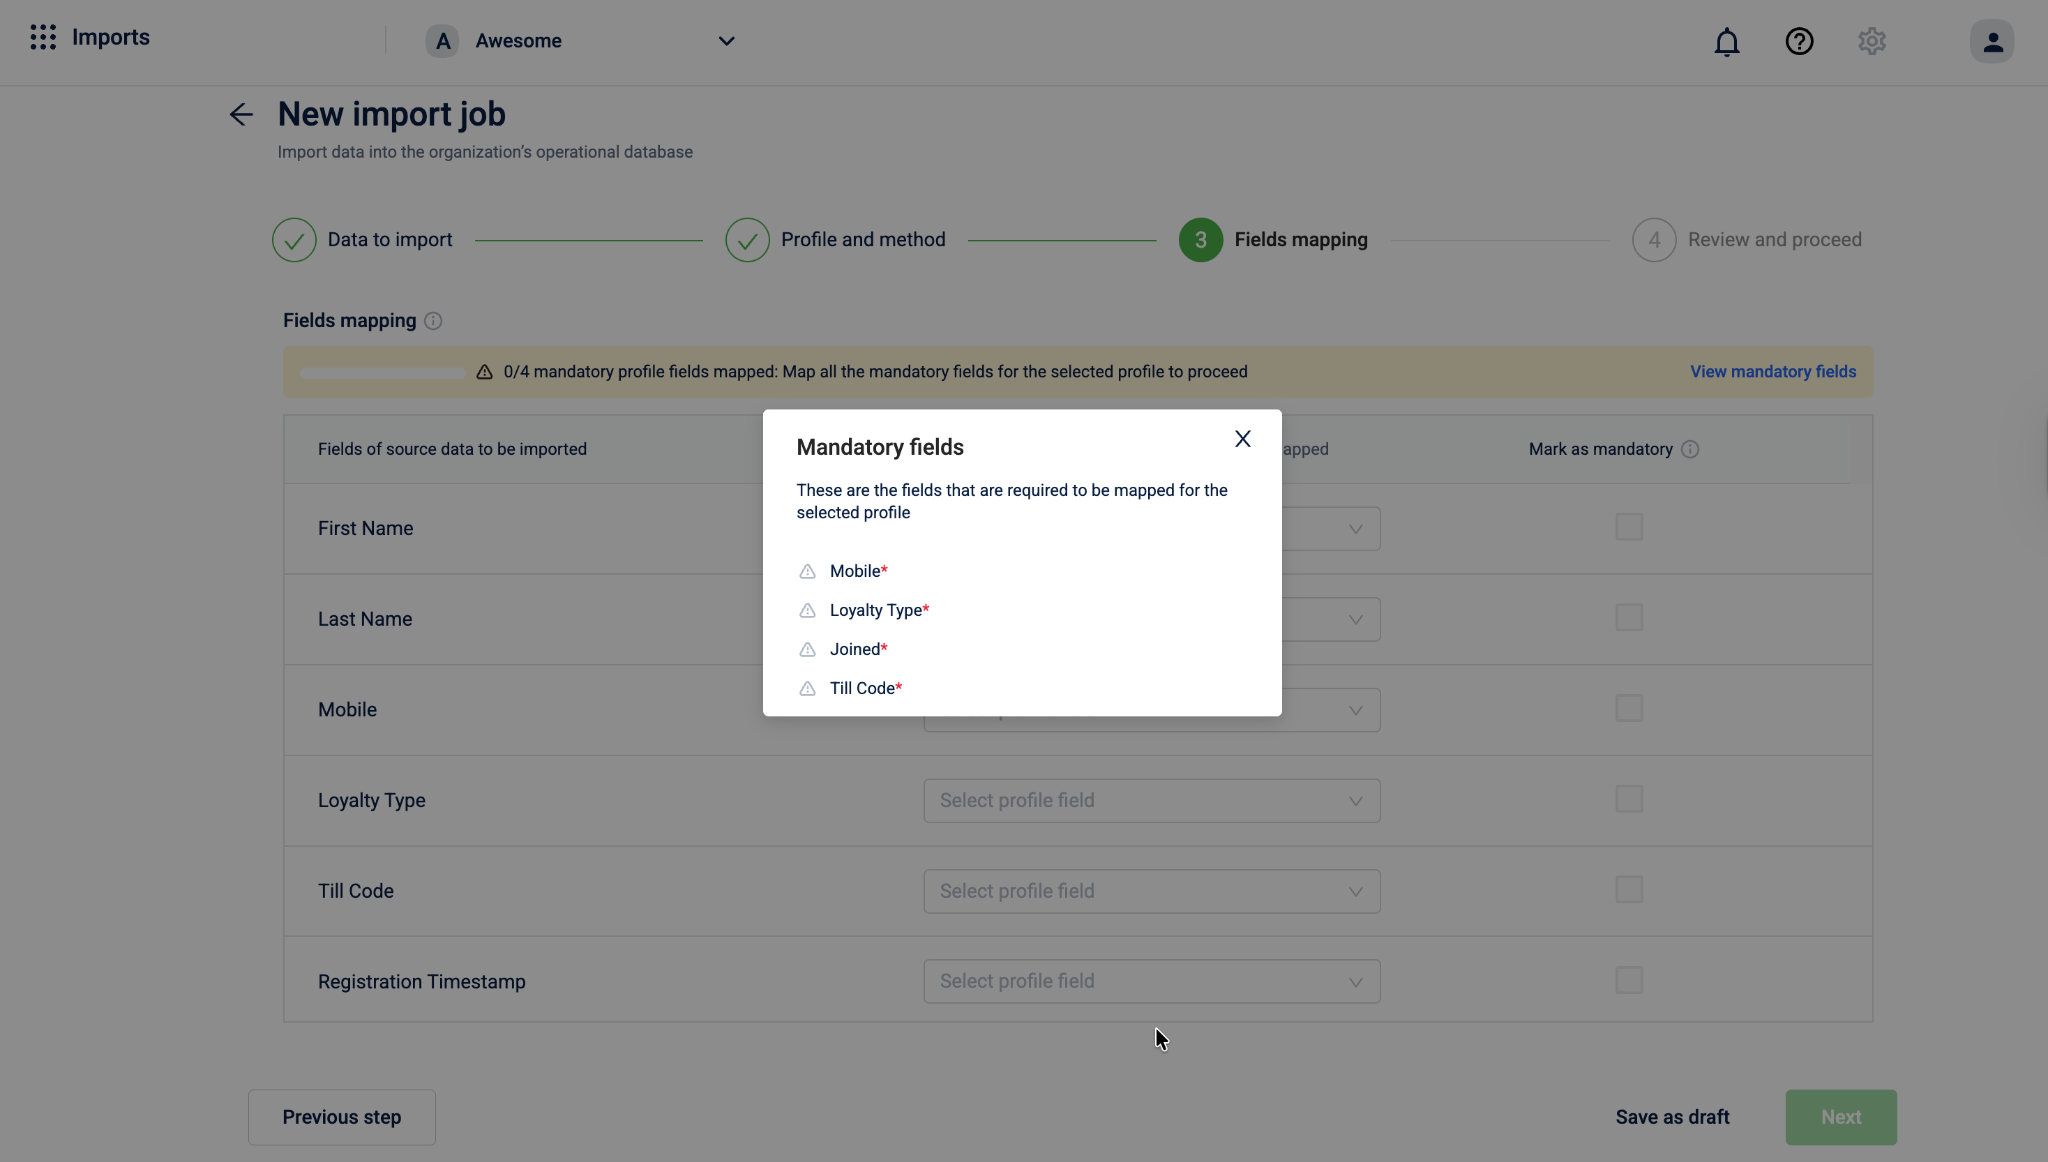
- Select View mandatory fields to see which fields are required for the selected profile. The modal lists all mandatory fields marked with
*.
- For each source field, select Select profile field under Customer profile fields and select the appropriate field. Fields are organised into the following categories:
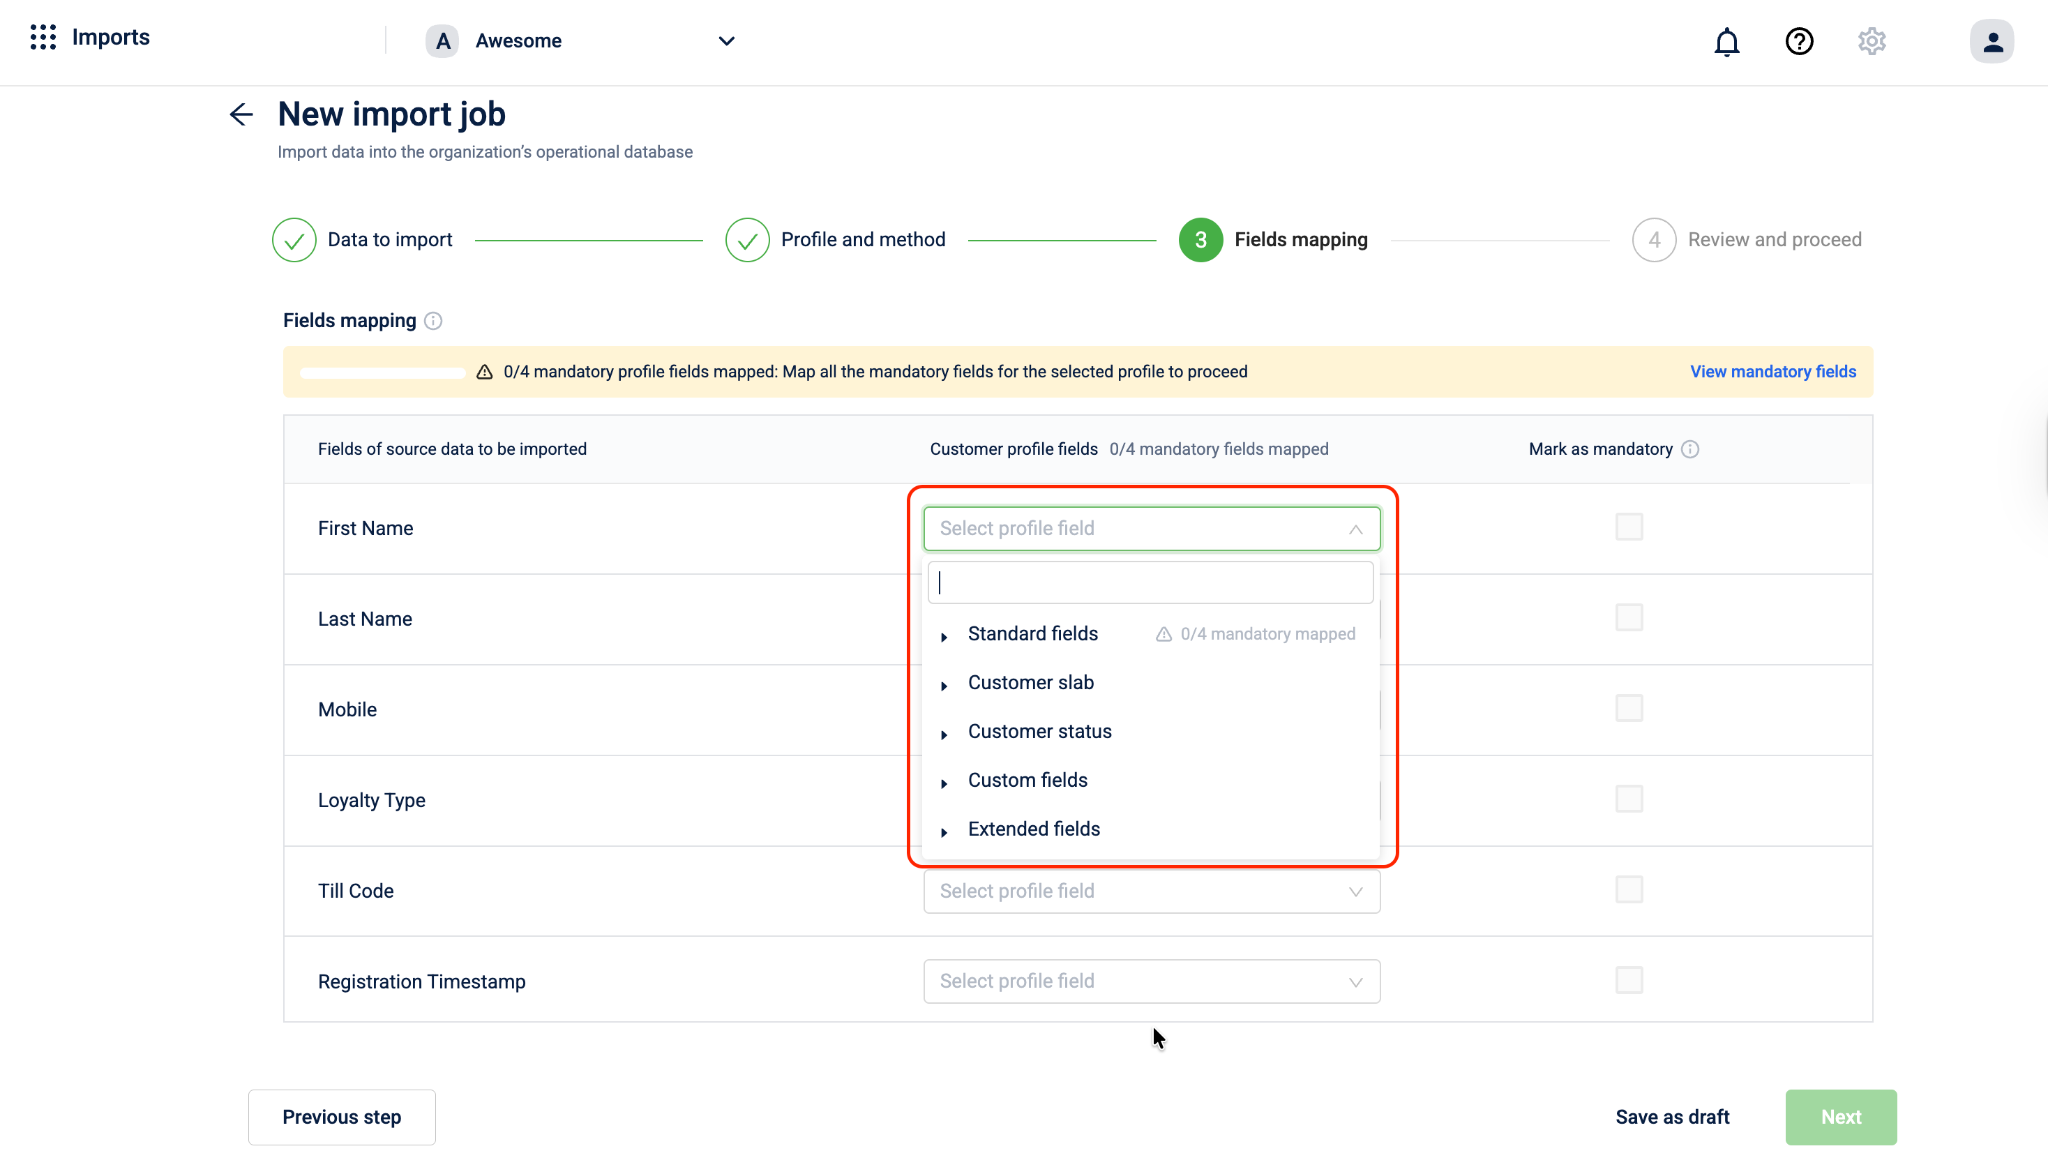
Note: When you map a field that is mandatory for the selected profile, the Mark as mandatory checkbox is automatically selected.
-
Track your mapping progress using the banner at the top, for example: 3/4 mandatory profile fields mapped. The Customer profile fields column header also shows a running count.
-
Optionally, select the Mark as mandatory checkbox next to any additional field to enforce it as mandatory for this import. Fields marked as mandatory must have valid values; otherwise, the record is marked as invalid during import.
Note - If you selected the Update import method, identifier fields such as mobile, email, and external ID cannot be updated. Mapping these fields has no effect. Only non-identifier fields are updated.
-
Once mapping is complete, do one of the following:
- Select Next to proceed to Step 4: Review and proceed.
- Select Save as draft to save the current configuration and continue later. A modal appears prompting you to enter a Job name and an optional Description. Select Save to store the draft. The job appears on the imports listing page, where you can return to edit and complete it later.
- Select Previous step to go back to Step 2: Profile and method.
Step 5: Review and proceed
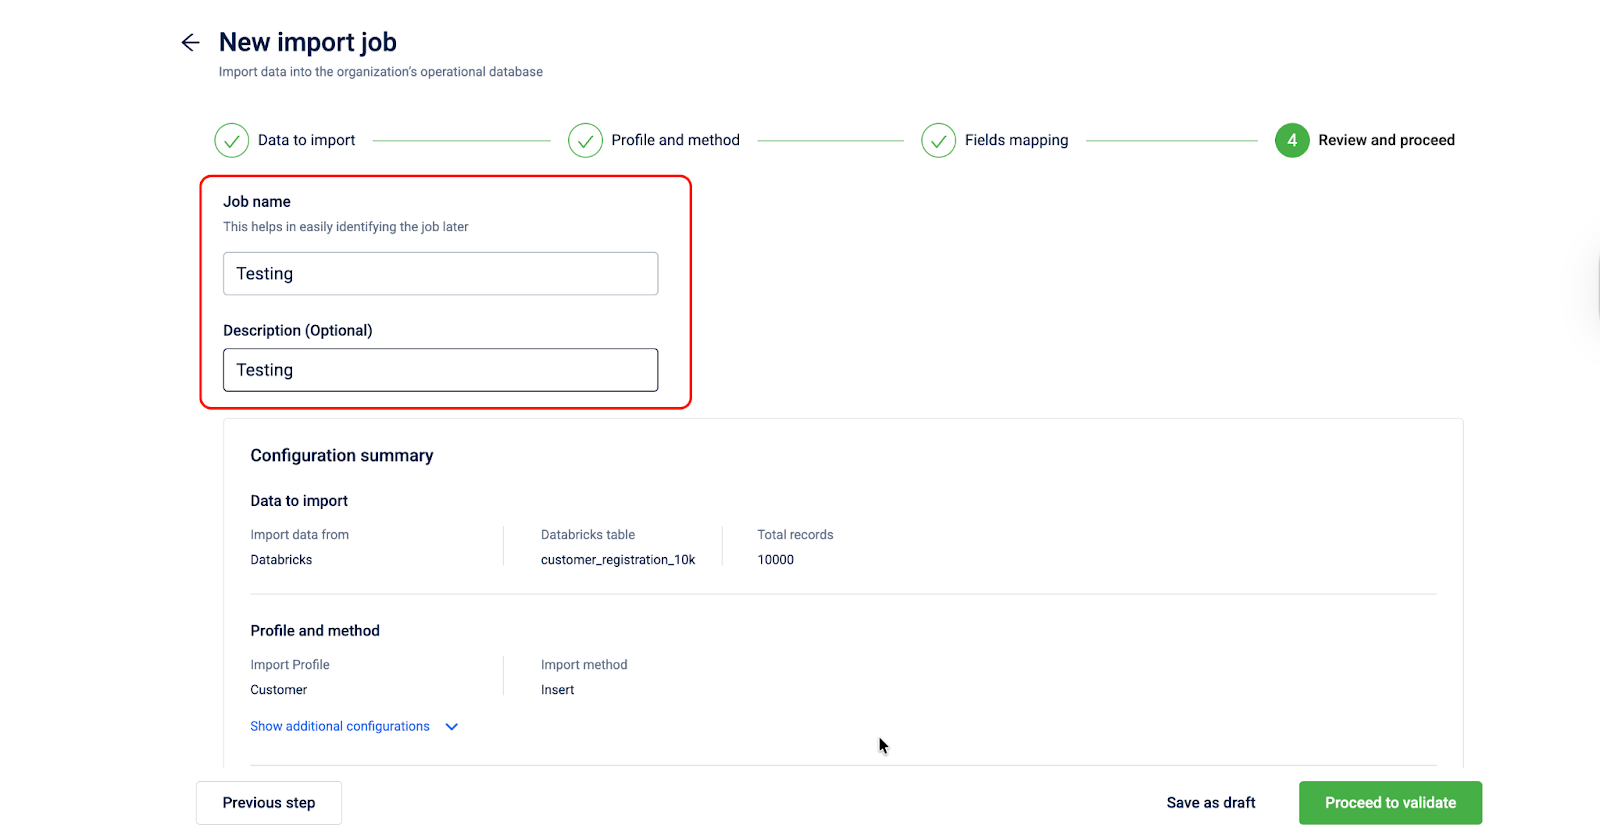
Review the complete configuration of your import job and submit it for validation.
To review and proceed, follow the steps given below.
-
Enter a Job name to help identify the job later.
-
Optionally, enter a Description for this job.
-
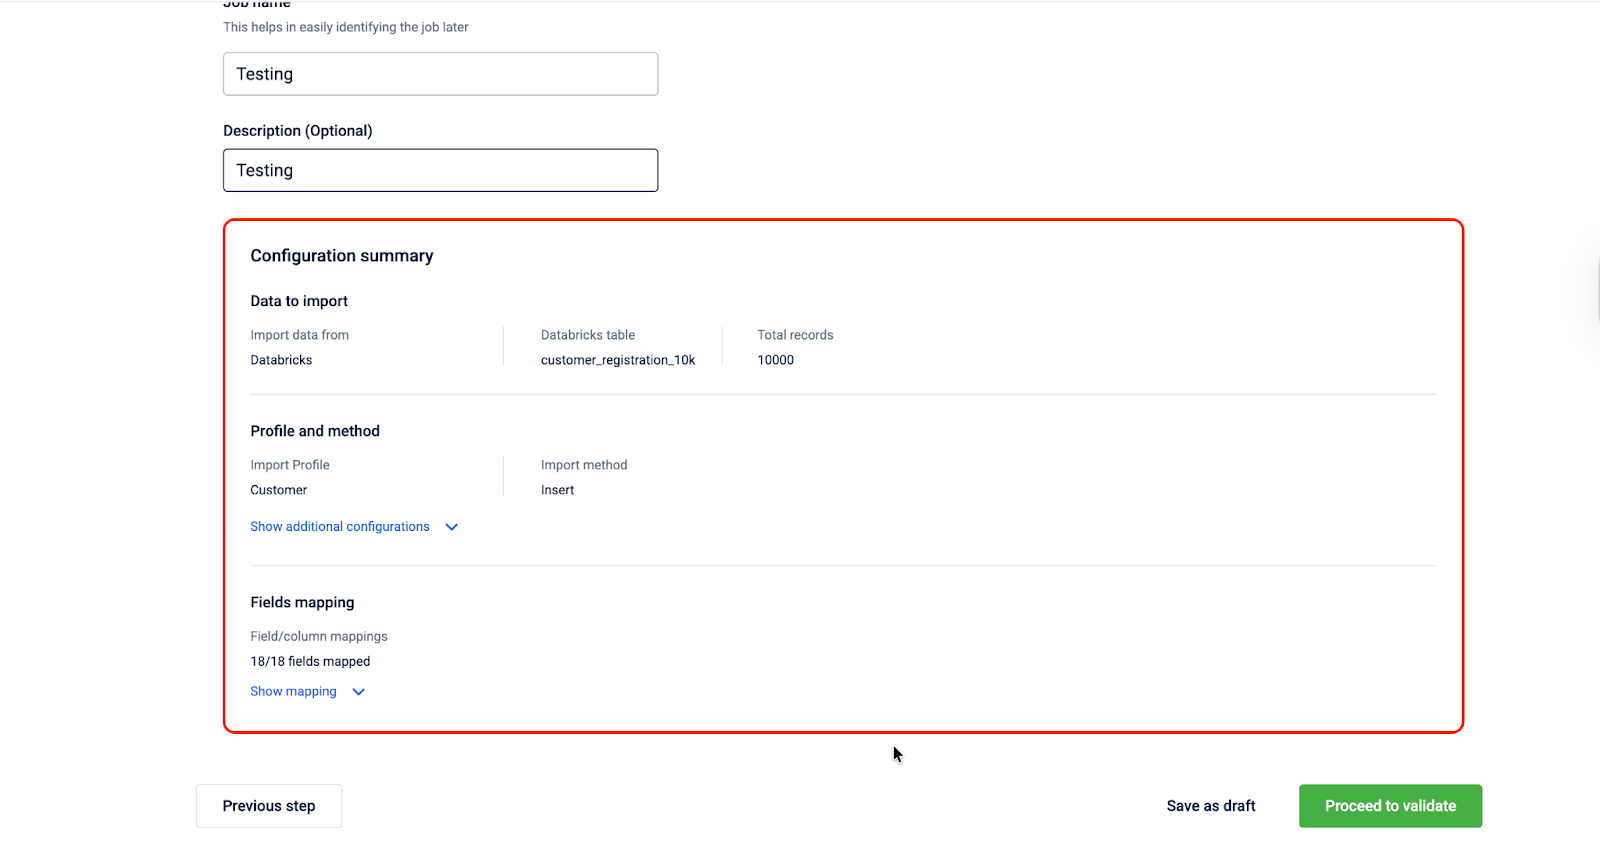
Review the Configuration summary. This section provides an overview of all settings configured across the previous steps. Verify each section before proceeding.
-
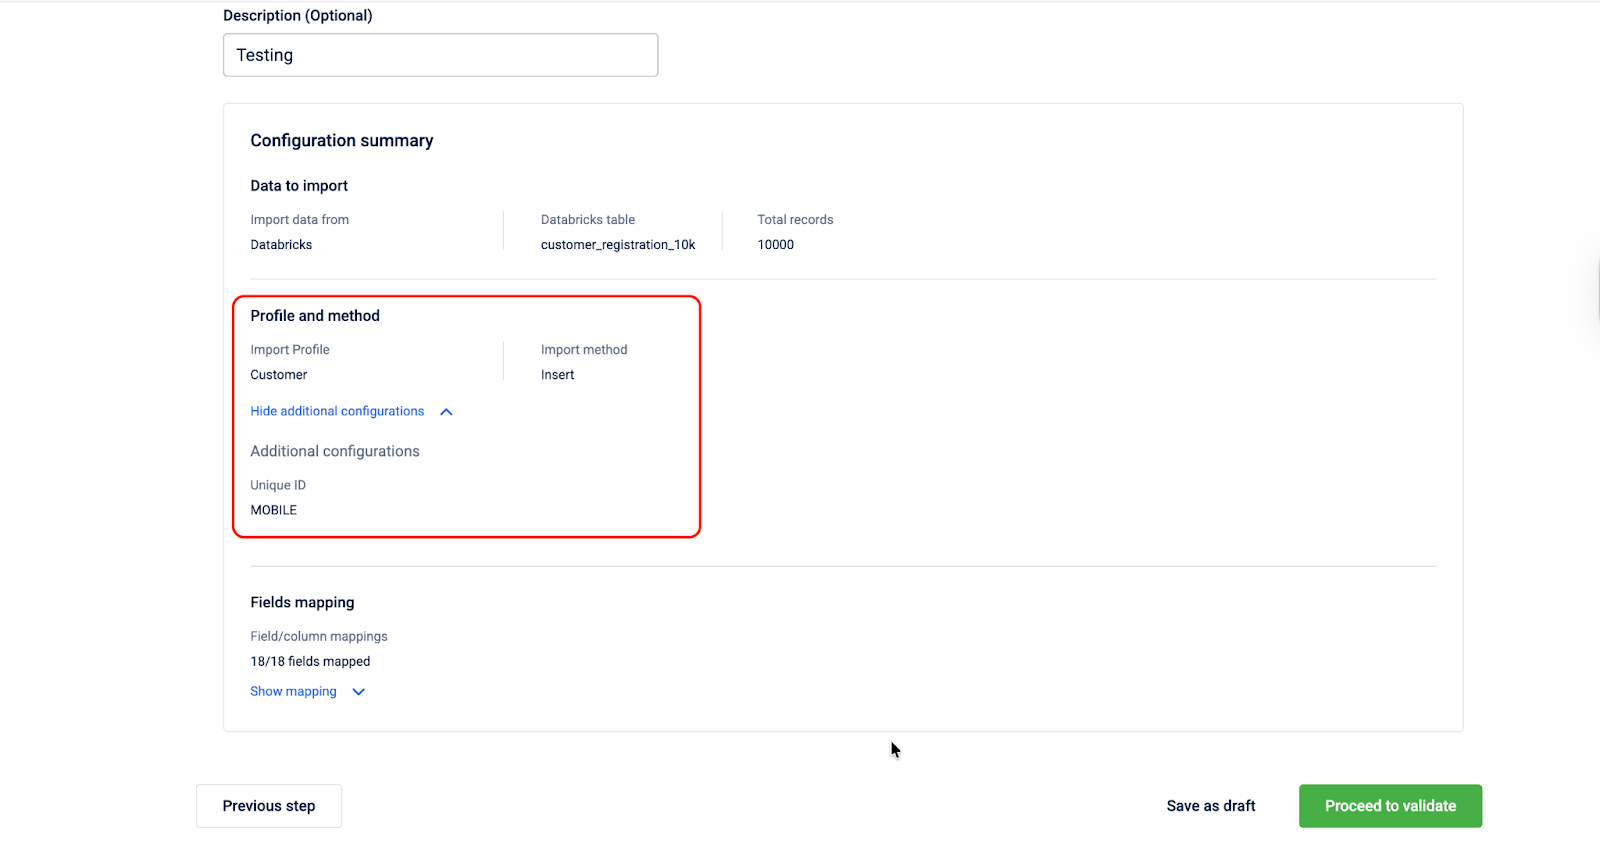
Navigate to the Profile and method section and select Show additional configurations to expand and view the additional settings configured in Step 2. Select Hide additional configurations to collapse the section.
-
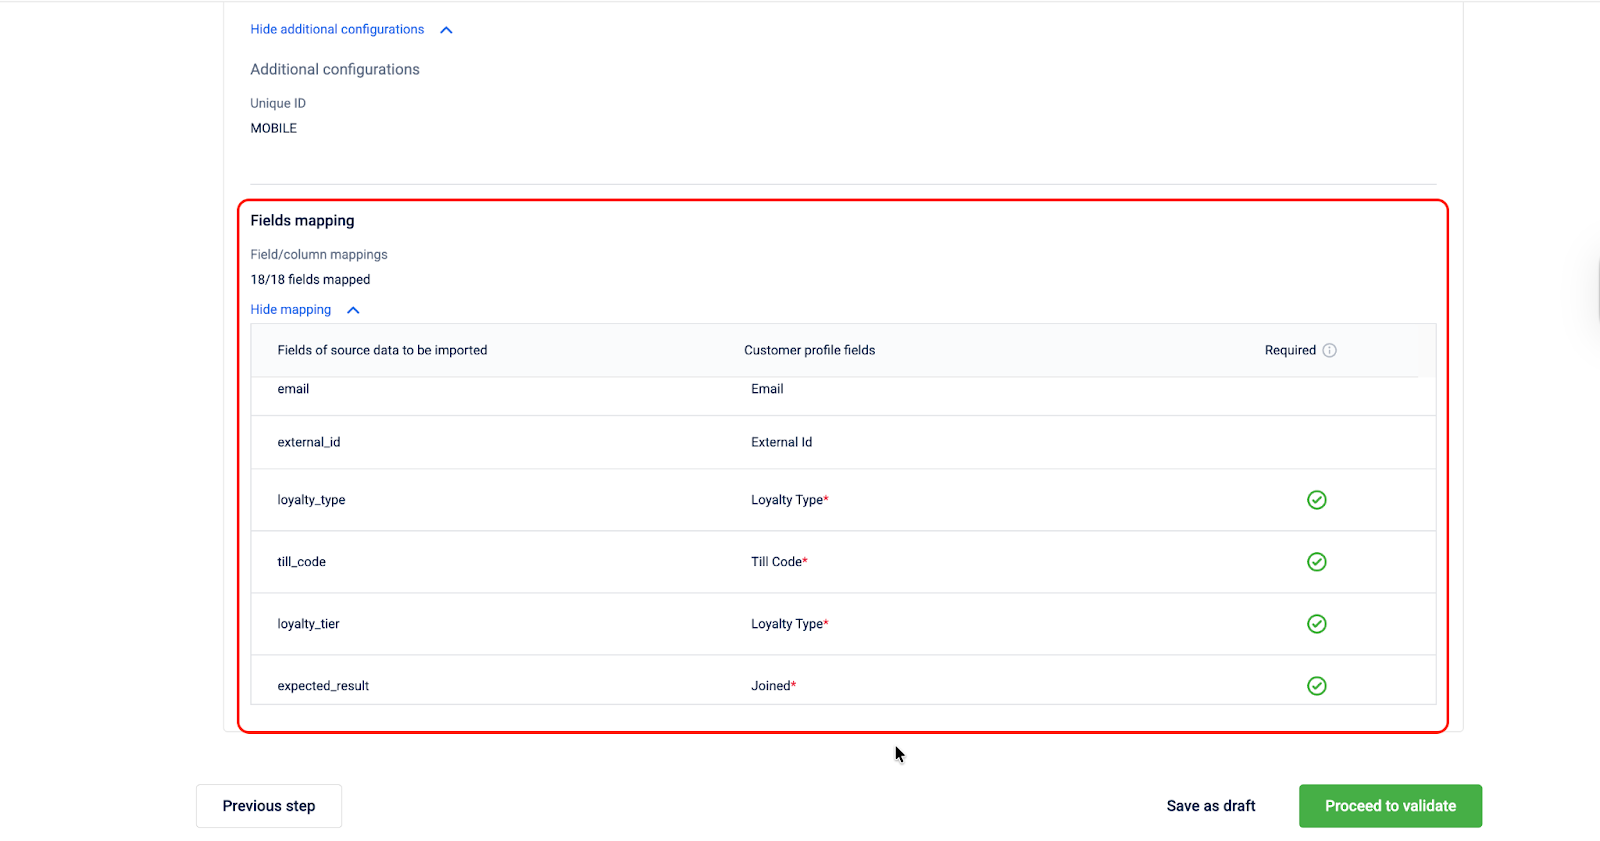
Navigate to the Fields mapping section and select Show mapping to expand and view the complete field mapping. Fields marked with
*and a green checkmark under Required indicate mandatory fields that have been mapped. Select Hide mapping to collapse the mapping table.
-
Once you have reviewed the configuration, do one of the following:
-
Select Previous step to go back to Step 3: Fields mapping.
-
Select Save as draft to save the current configuration and continue later. A modal appears prompting you to enter a Job name and an optional Description. Select Save to store the draft. The job appears on the imports listing page, where you can return to edit and complete it later.
-
Select Proceed to validate to submit the import job for validation. A confirmation modal appears. Select Yes, validate to confirm.
-
Updated about 5 hours ago